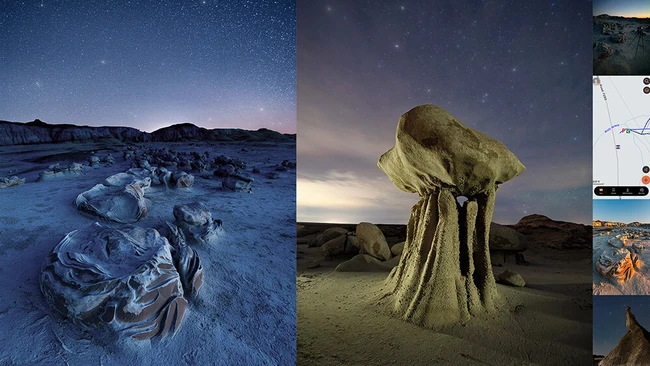
Speeding down Highway 371, I received a call. The two photographers who knew the way around Bisti Badlands weren't going to show tonight. This was a problem. I had never been there, and it was basically Mother Nature's escape room.
Bisti has no trails, no signs, no landmarks, and no cell signal. Just thousands of hoodoos and winding canyons. I'd have to find my way to some of the features, then find my way back to my car in the dark in a place I'd never been before. It would just be me and my navigation app. Here's how it went.
One of the arguments I hear most often against street photography has very little to do with photography itself.
"If you're going to photograph someone, why not just talk to them?"
Sometimes it comes from photographers who have never been interested in candid work. Sometimes it comes from people who are uncomfortable with the idea of photographing strangers in public at all. Sometimes the conversation drifts toward privacy, ethics, or consent, as if every photograph made in a public space begins with the assumption that someone has been wronged.
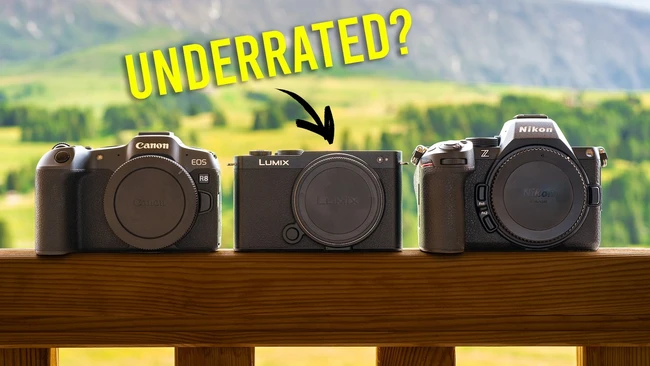
Picking one full frame camera for travel means weighing color, size, stabilization, and price against each other, and the differences rarely show up on a spec sheet. Three cameras in the same price range can feel like completely different tools once you actually carry them through a city all day.
For years, telephoto performance on smartphones has felt like a compromise, often forcing photographers to choose between reach and image quality. With the global launch of the Huawei Pura 90s Pro Max, Huawei is looking to shift that narrative and establish a new standard for mobile photography by bringing some of the latest imaging tech to the smartphone.
Impostor syndrome hits almost every creative person at some point, and if you shoot photos, you know the feeling: you look at work you admire and wonder why you even bother picking up a camera. Jesse Senko has a surprisingly practical answer to that spiral, and it comes from an unlikely source.
For years, Nikon's f/1.8 S-line lenses stood almost alone: premium optics at a maximum aperture where you rarely find premium anything. That comfortable spot is now under real pressure, and a head-to-head test shows exactly how much.
If you follow my camera coverage at TechRadar, you'll need no introduction to Viltrox, a Chinese lens manufacturer who's rapidly becoming a major player by delivering high-quality and particularly affordable optics.
Viltrox's most recent efforts are the 75mm f/1.8 and 90mm f/2.2: a twin-like pair of lightweight primes for APS-C cameras from its mid-range 'EVO' series, available in Sony E, Nikon Z and Fujifilm X-mount versions.
Viltrox offered to send me a lens to test, and I strategically asked for the Fujifilm X-mount version of the 90mm f/2.2, because it was the only option with a proprietary alternative for me to pit it against: Fujifilm's XF 90mm f/2 R LM WR. A 'character rich' XF 90mm f/2 APD was also listed in a public poll earlier this year among lenses that Fujifilm would love to make — but we don't know if it will be made.
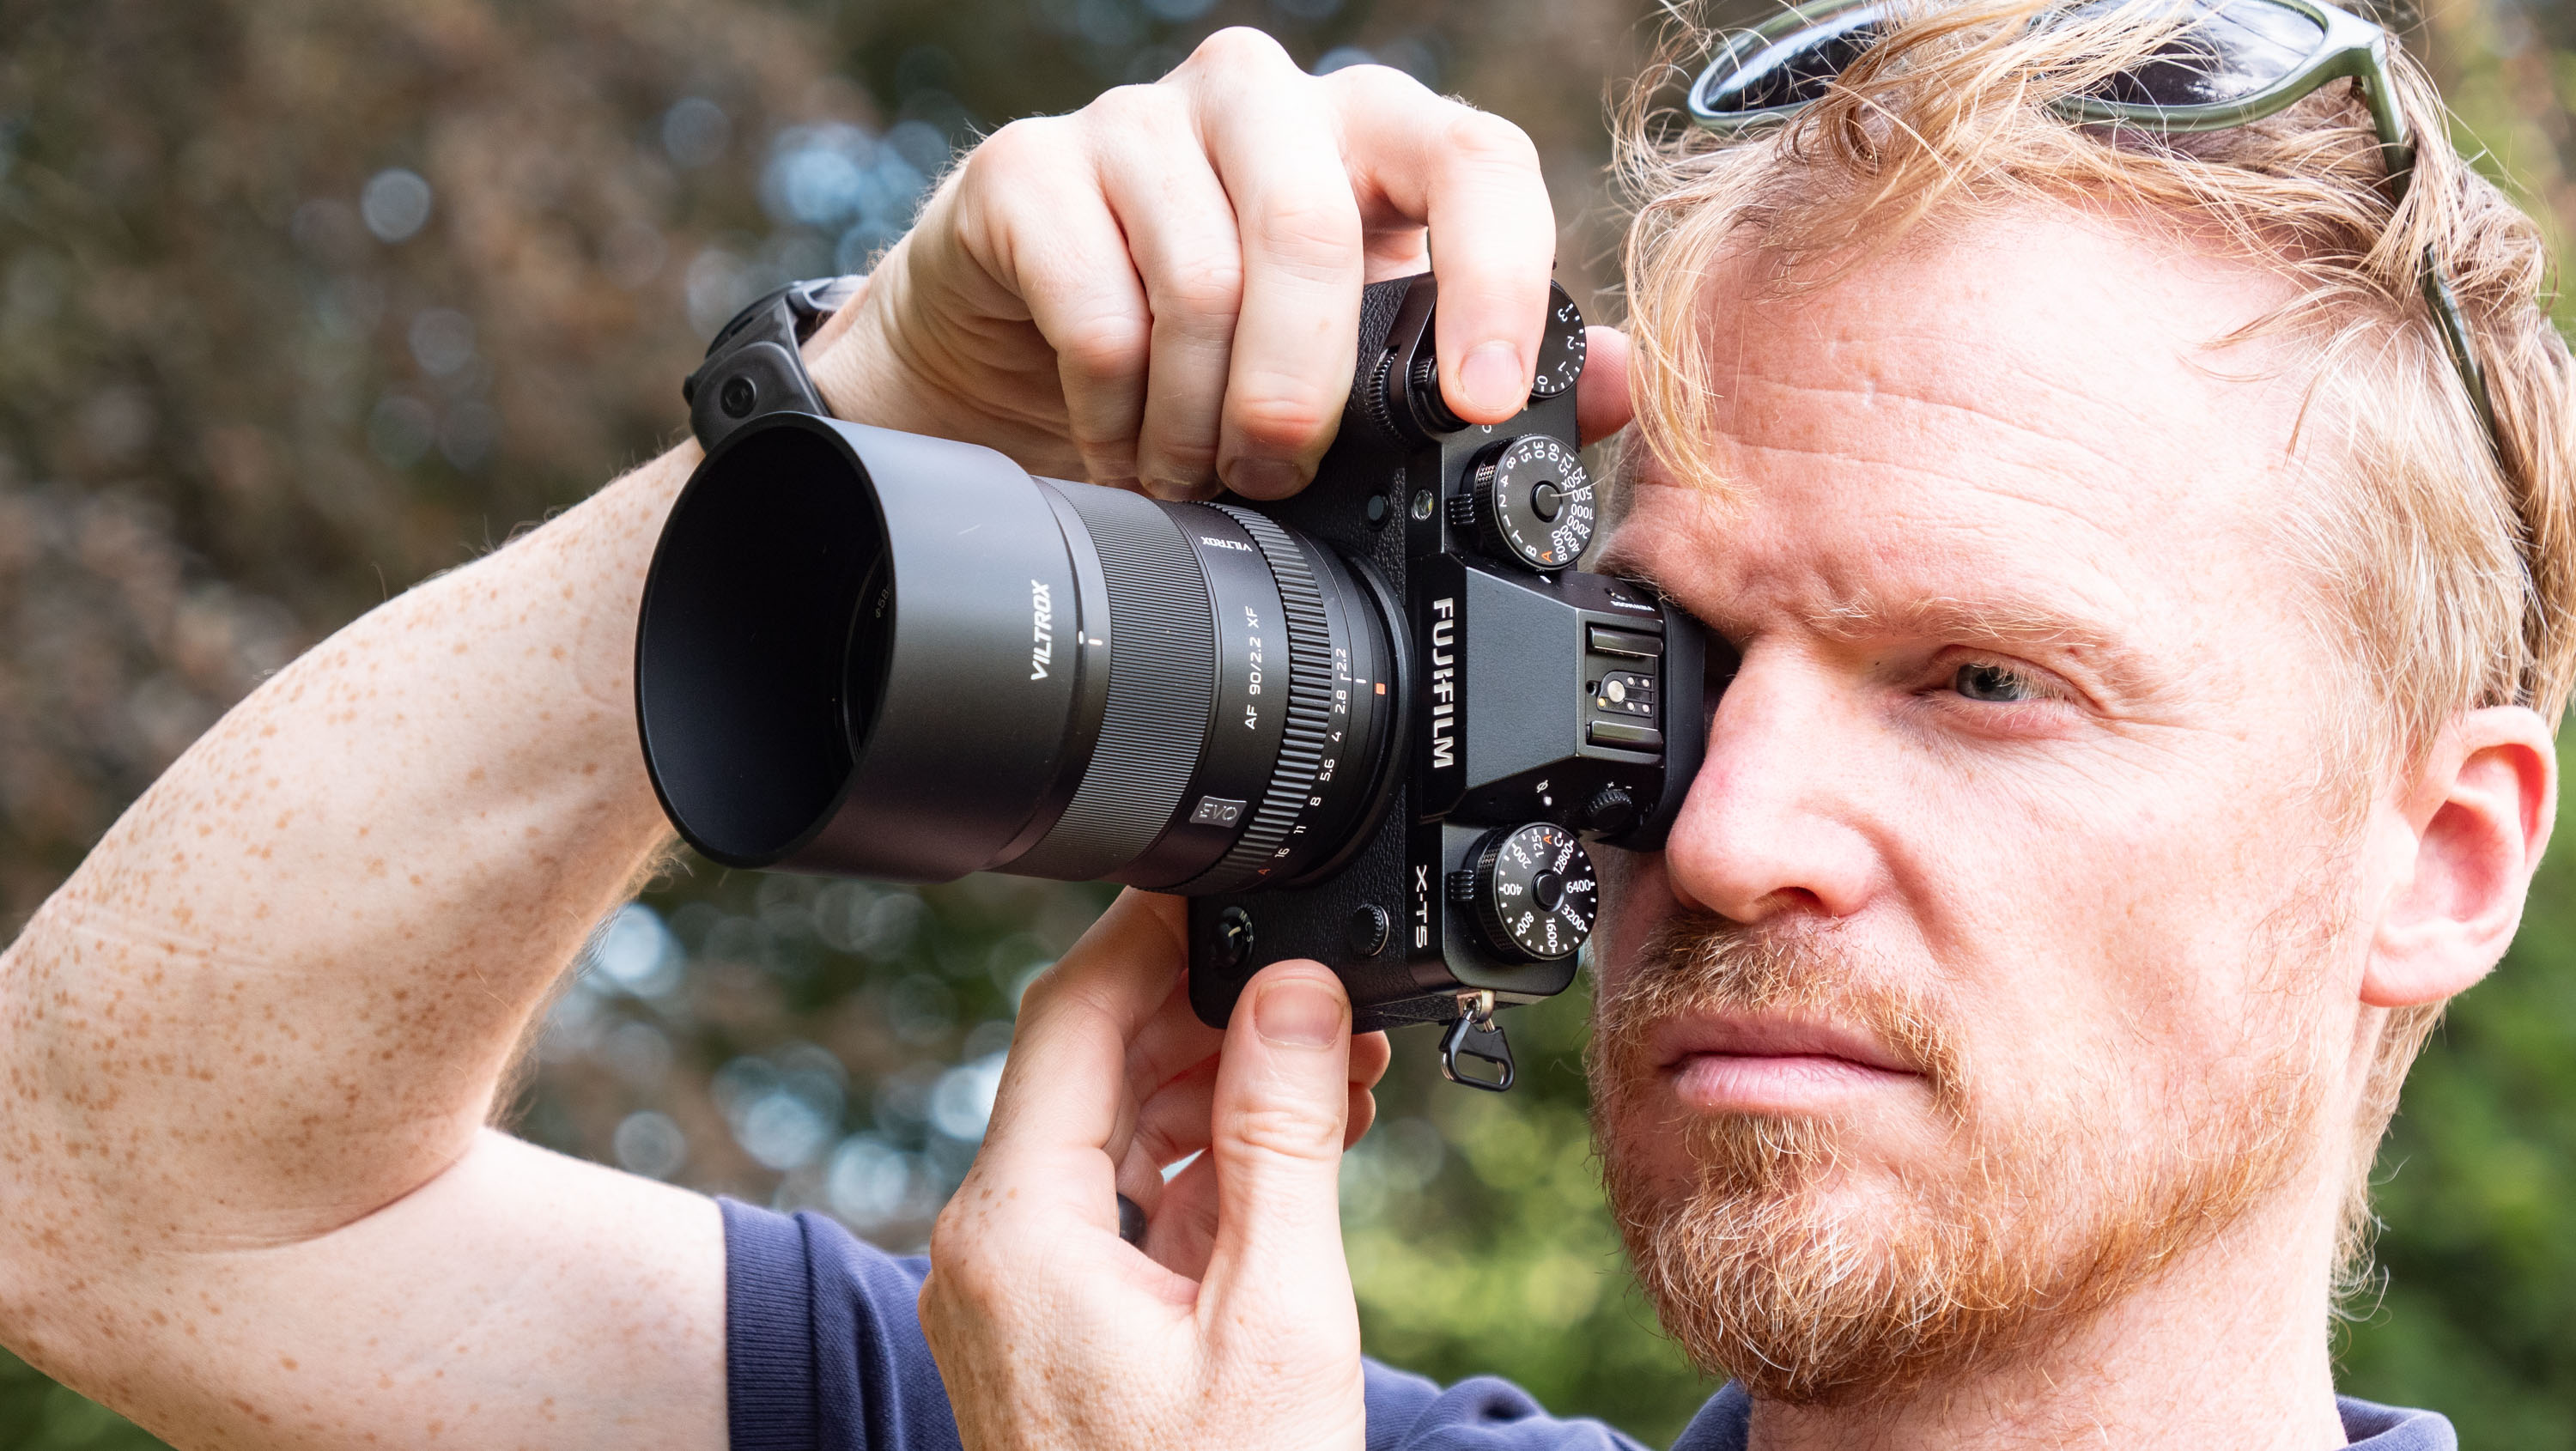
Could the Viltrox 90mm do the unthinkable — beat Fujifilm's legendary portraiture lens? I called in the Fujifilm lens, and tested the pair using a Fujifilm X-T5, and much of my test focuses on how viable an alternative the Viltrox lens is.
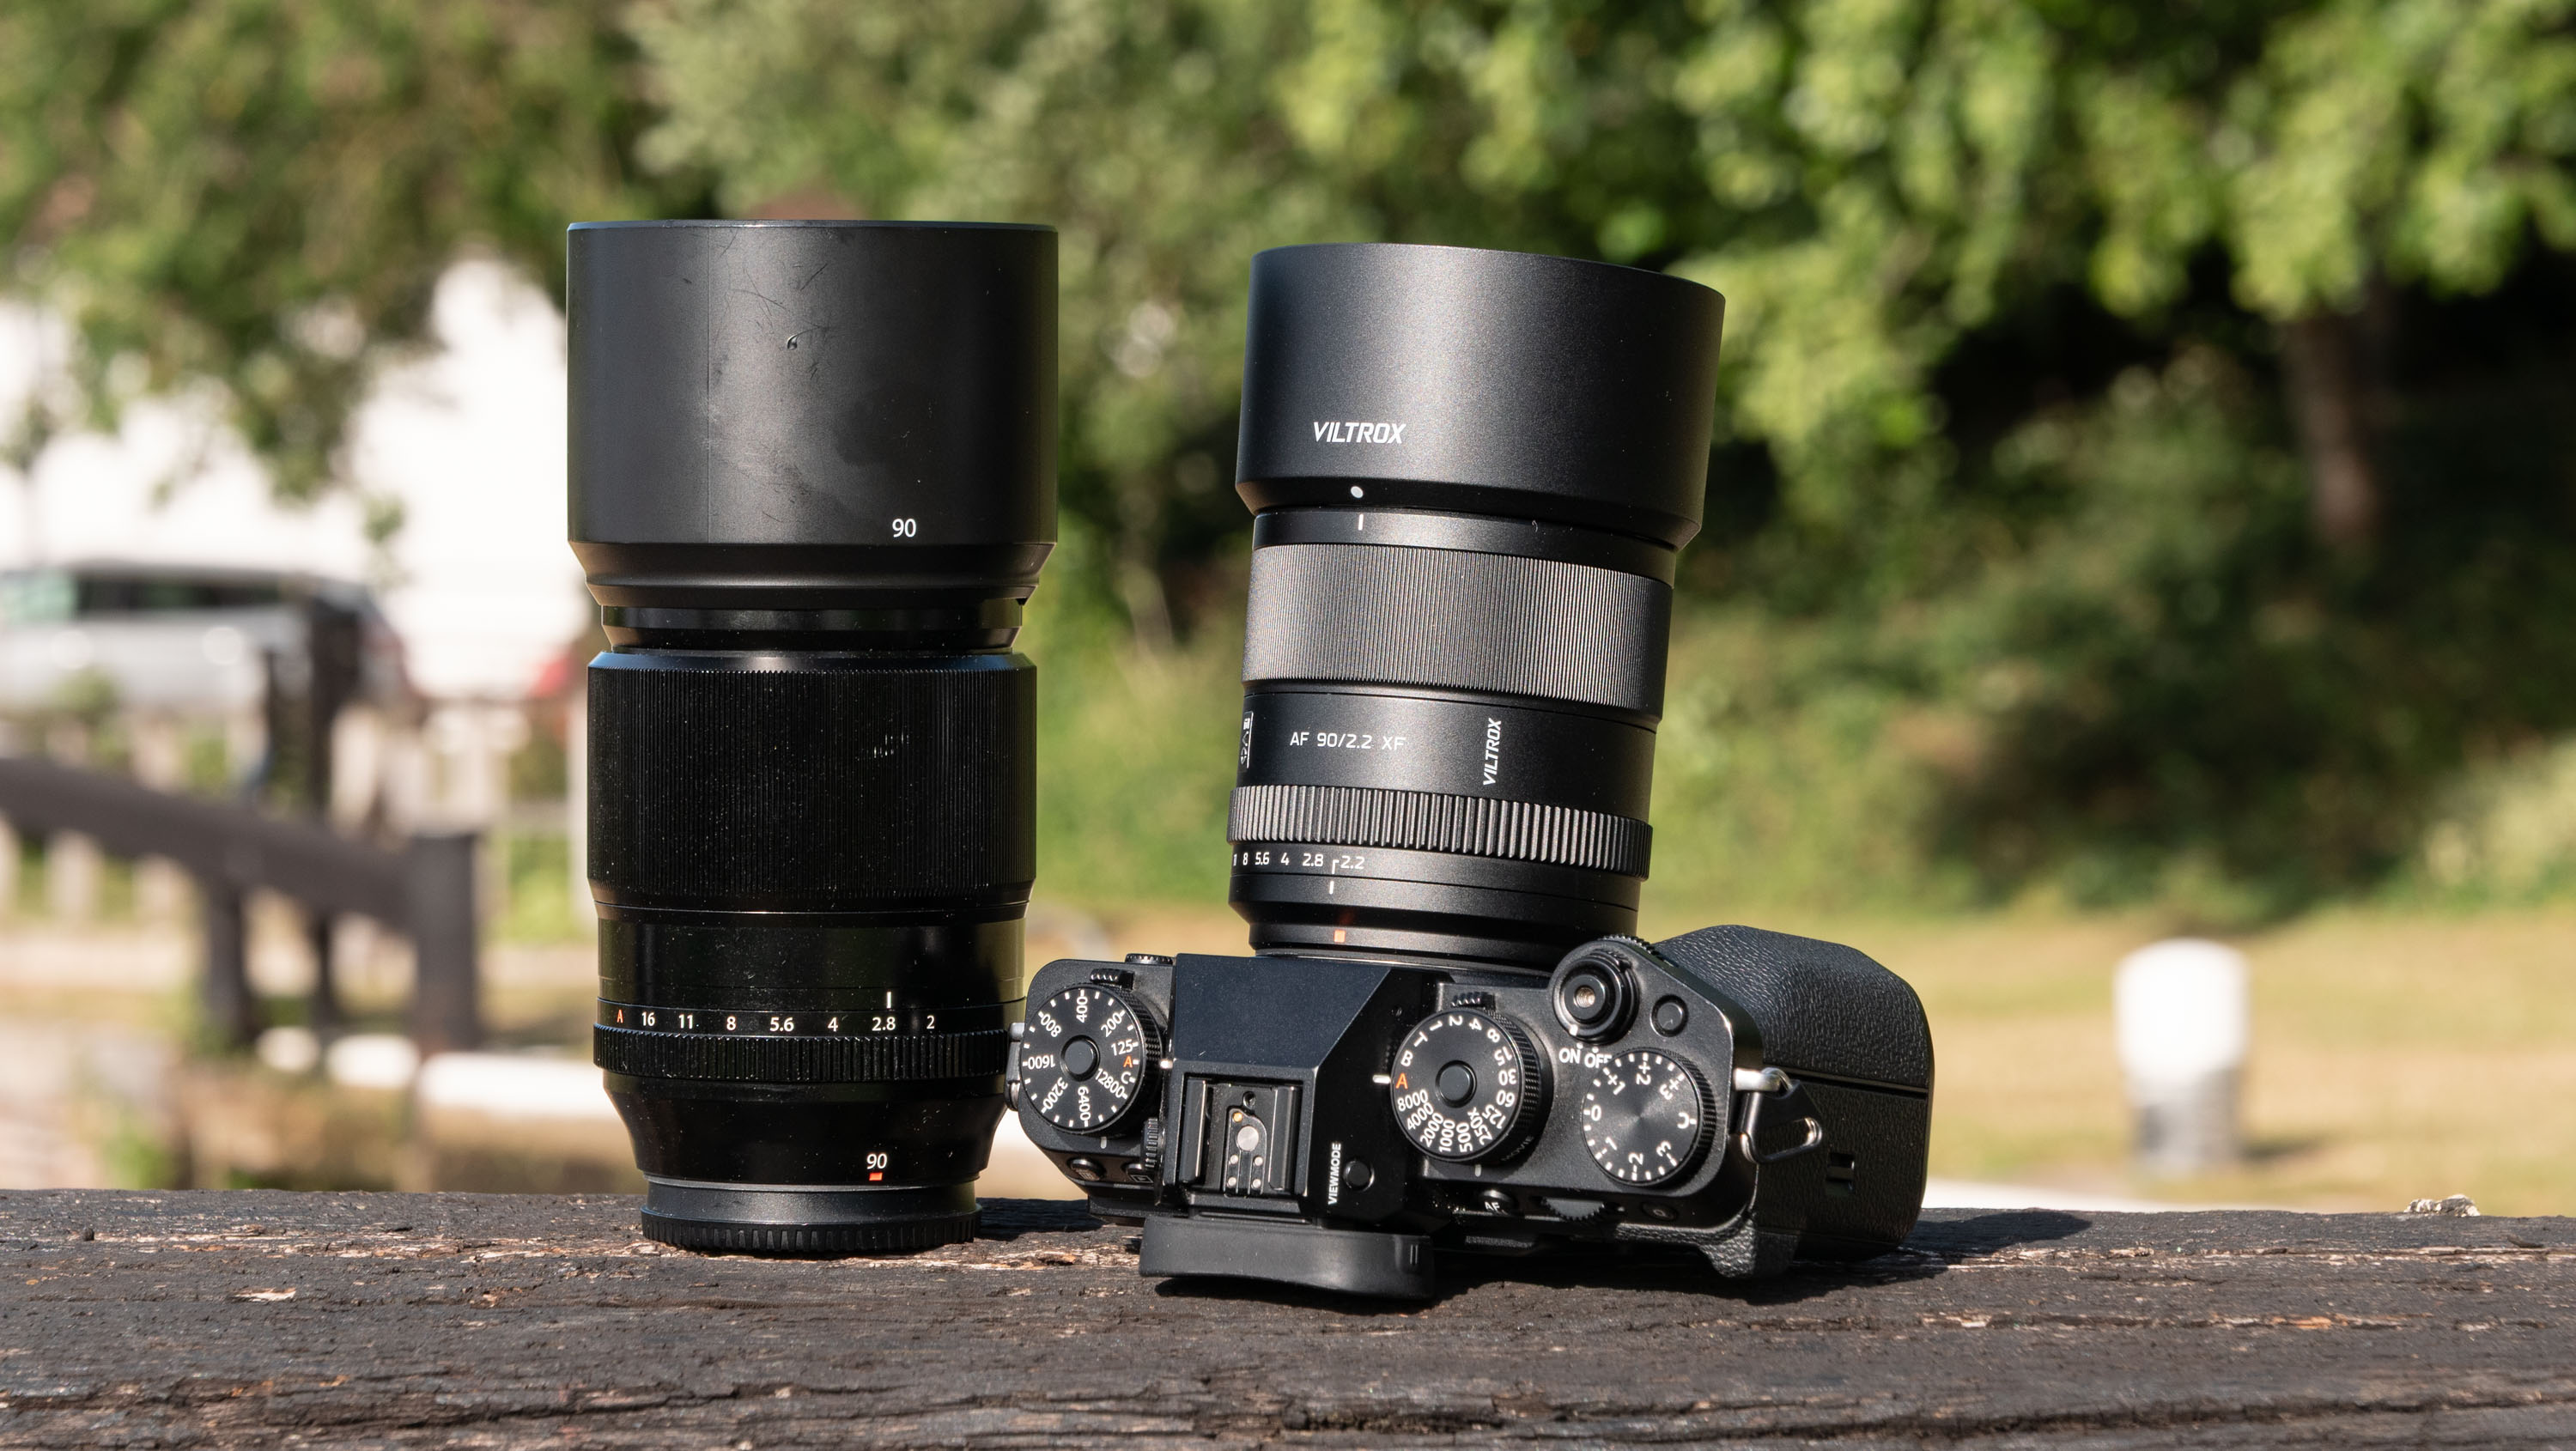
The Fujifilm XF 90mm f/2 R LM WR lens (left), alongside the Viltrox AF 90mm f/2.2 EVO lens attached to a Fujifilm X-T5 camera (Image credit: Tim Coleman)
For context, a fast aperture 90mm lens for APS-C has a 135mm equivalent focal length in full-frame terms, meaning it's a mid-telephoto focal length, delivering a highly compressed background and dreamy bokeh — the hallmarks of high-end portraits. At this focal length, you'll need the freedom of moving a decent distance away from your subject, so it's not necessarily one for tight studio spaces.
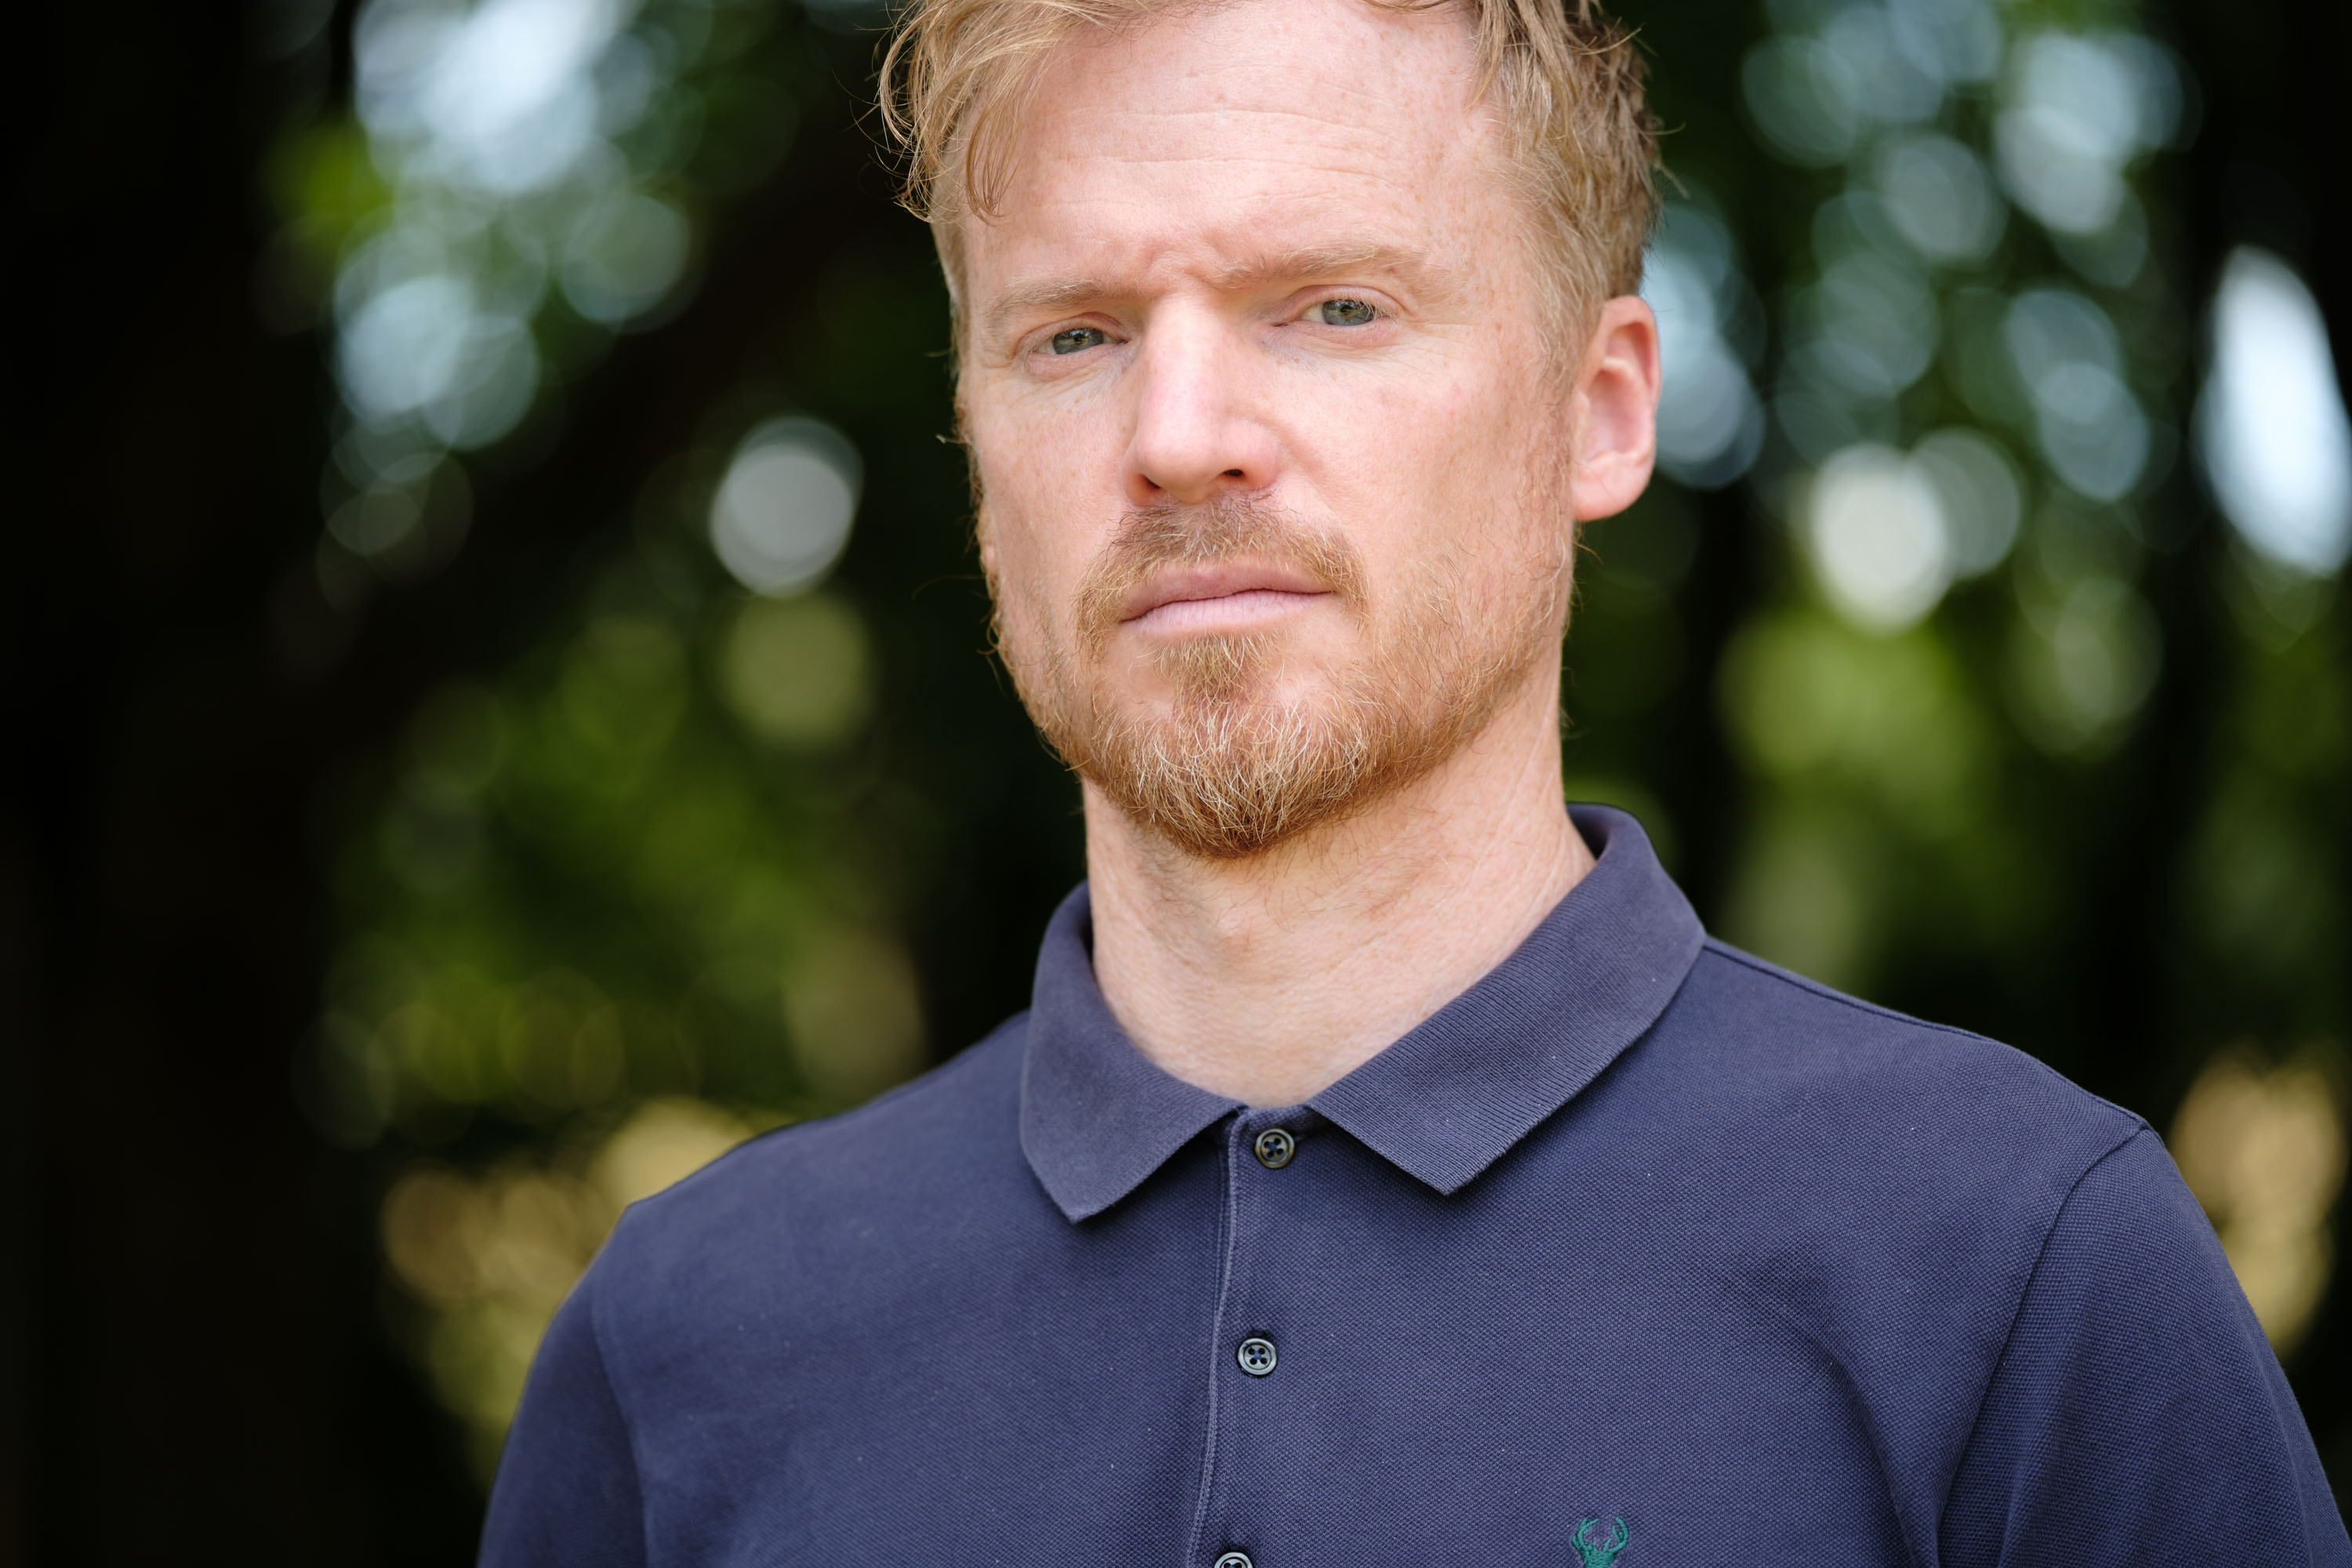
I shot self portraits controlling the camera remotely from my phone using the Fujifilm X app, and various closeups with low-lying sunlight involved, plus a range of other shots just with the Viltrox lens. Overall, I've come away majorly impressed, especially when you consider just how small, lightweight and affordable the Viltrox 90mm f/2.2 is.
The bulkier Fujifilm lens wins for the dreamiest bokeh and will be worth the extra outlay for portrait specialists. If I had the choice, I'd probably still go for this lens. However, for most people, the Viltrox is a stellar alternative, and furthermore the only one of its kind for Sony and Nikon crop-sensor mirrorless cameras, and I highly recommend it for both — after all, Nikon especially has so few options for its crop-sensor cameras such as the Z50 II.
Once again, Viltrox has delivered an excellent value autofocus prime lens.
Viltrox AF 90mm f/2.2 EVO: Price and availability
Costs $369 / £359 / Australia price TBC
Available in Sony E, Fujifilm X and Nikon Z-mount versions
The Viltrox AF 90mm f/2.2 EVO is available in Sony E, Fujifilm X and Nikon Z-mount versions, and I tested the Fujifilm version, not least of which because Fujifilm has its own legendary 90mm lens and I was keen to see how the two compared. Sony and Nikon have no such lens for APS-C — and the closest alternative would be a full-frame optic.
Viltrox's EVO lenses are almost always way more affordable when compared to the closest proprietary alternatives. Costing $369 / £359, that's certainly the case with the Viltrox AF 90mm f/2.2 EVO, when you consider how the Fujifilm 90mm lens costs between 2-3x the price. It's the small, light, and affordable choice.
Viltrox AF 90mm f/2.2 EVO: specs
Viltrox AF 90mm f/2.2 EVO specs
Type:
Mid-telephoto prime
Mount:
Sony E, Fujifilm X, Nikon Z
Sensor:
APS-C
Focal length:
90mm (135mm effective)
Max aperture:
f/2.2
Minimum focus:
0.74m
Max reproduction
0.14x
Filter size:
58mm
Dimensions:
2.7 x 3.0in / 69 x 76mm
Weight:
11.3oz / 320g (bare lens without hood)
Viltrox AF 90mm f/2.2 EVO: Design
Just 11.3oz / 320g — lightweight and compact for a lens of this type
Modest 0.74m minimum focus distance — not one for closeup photography
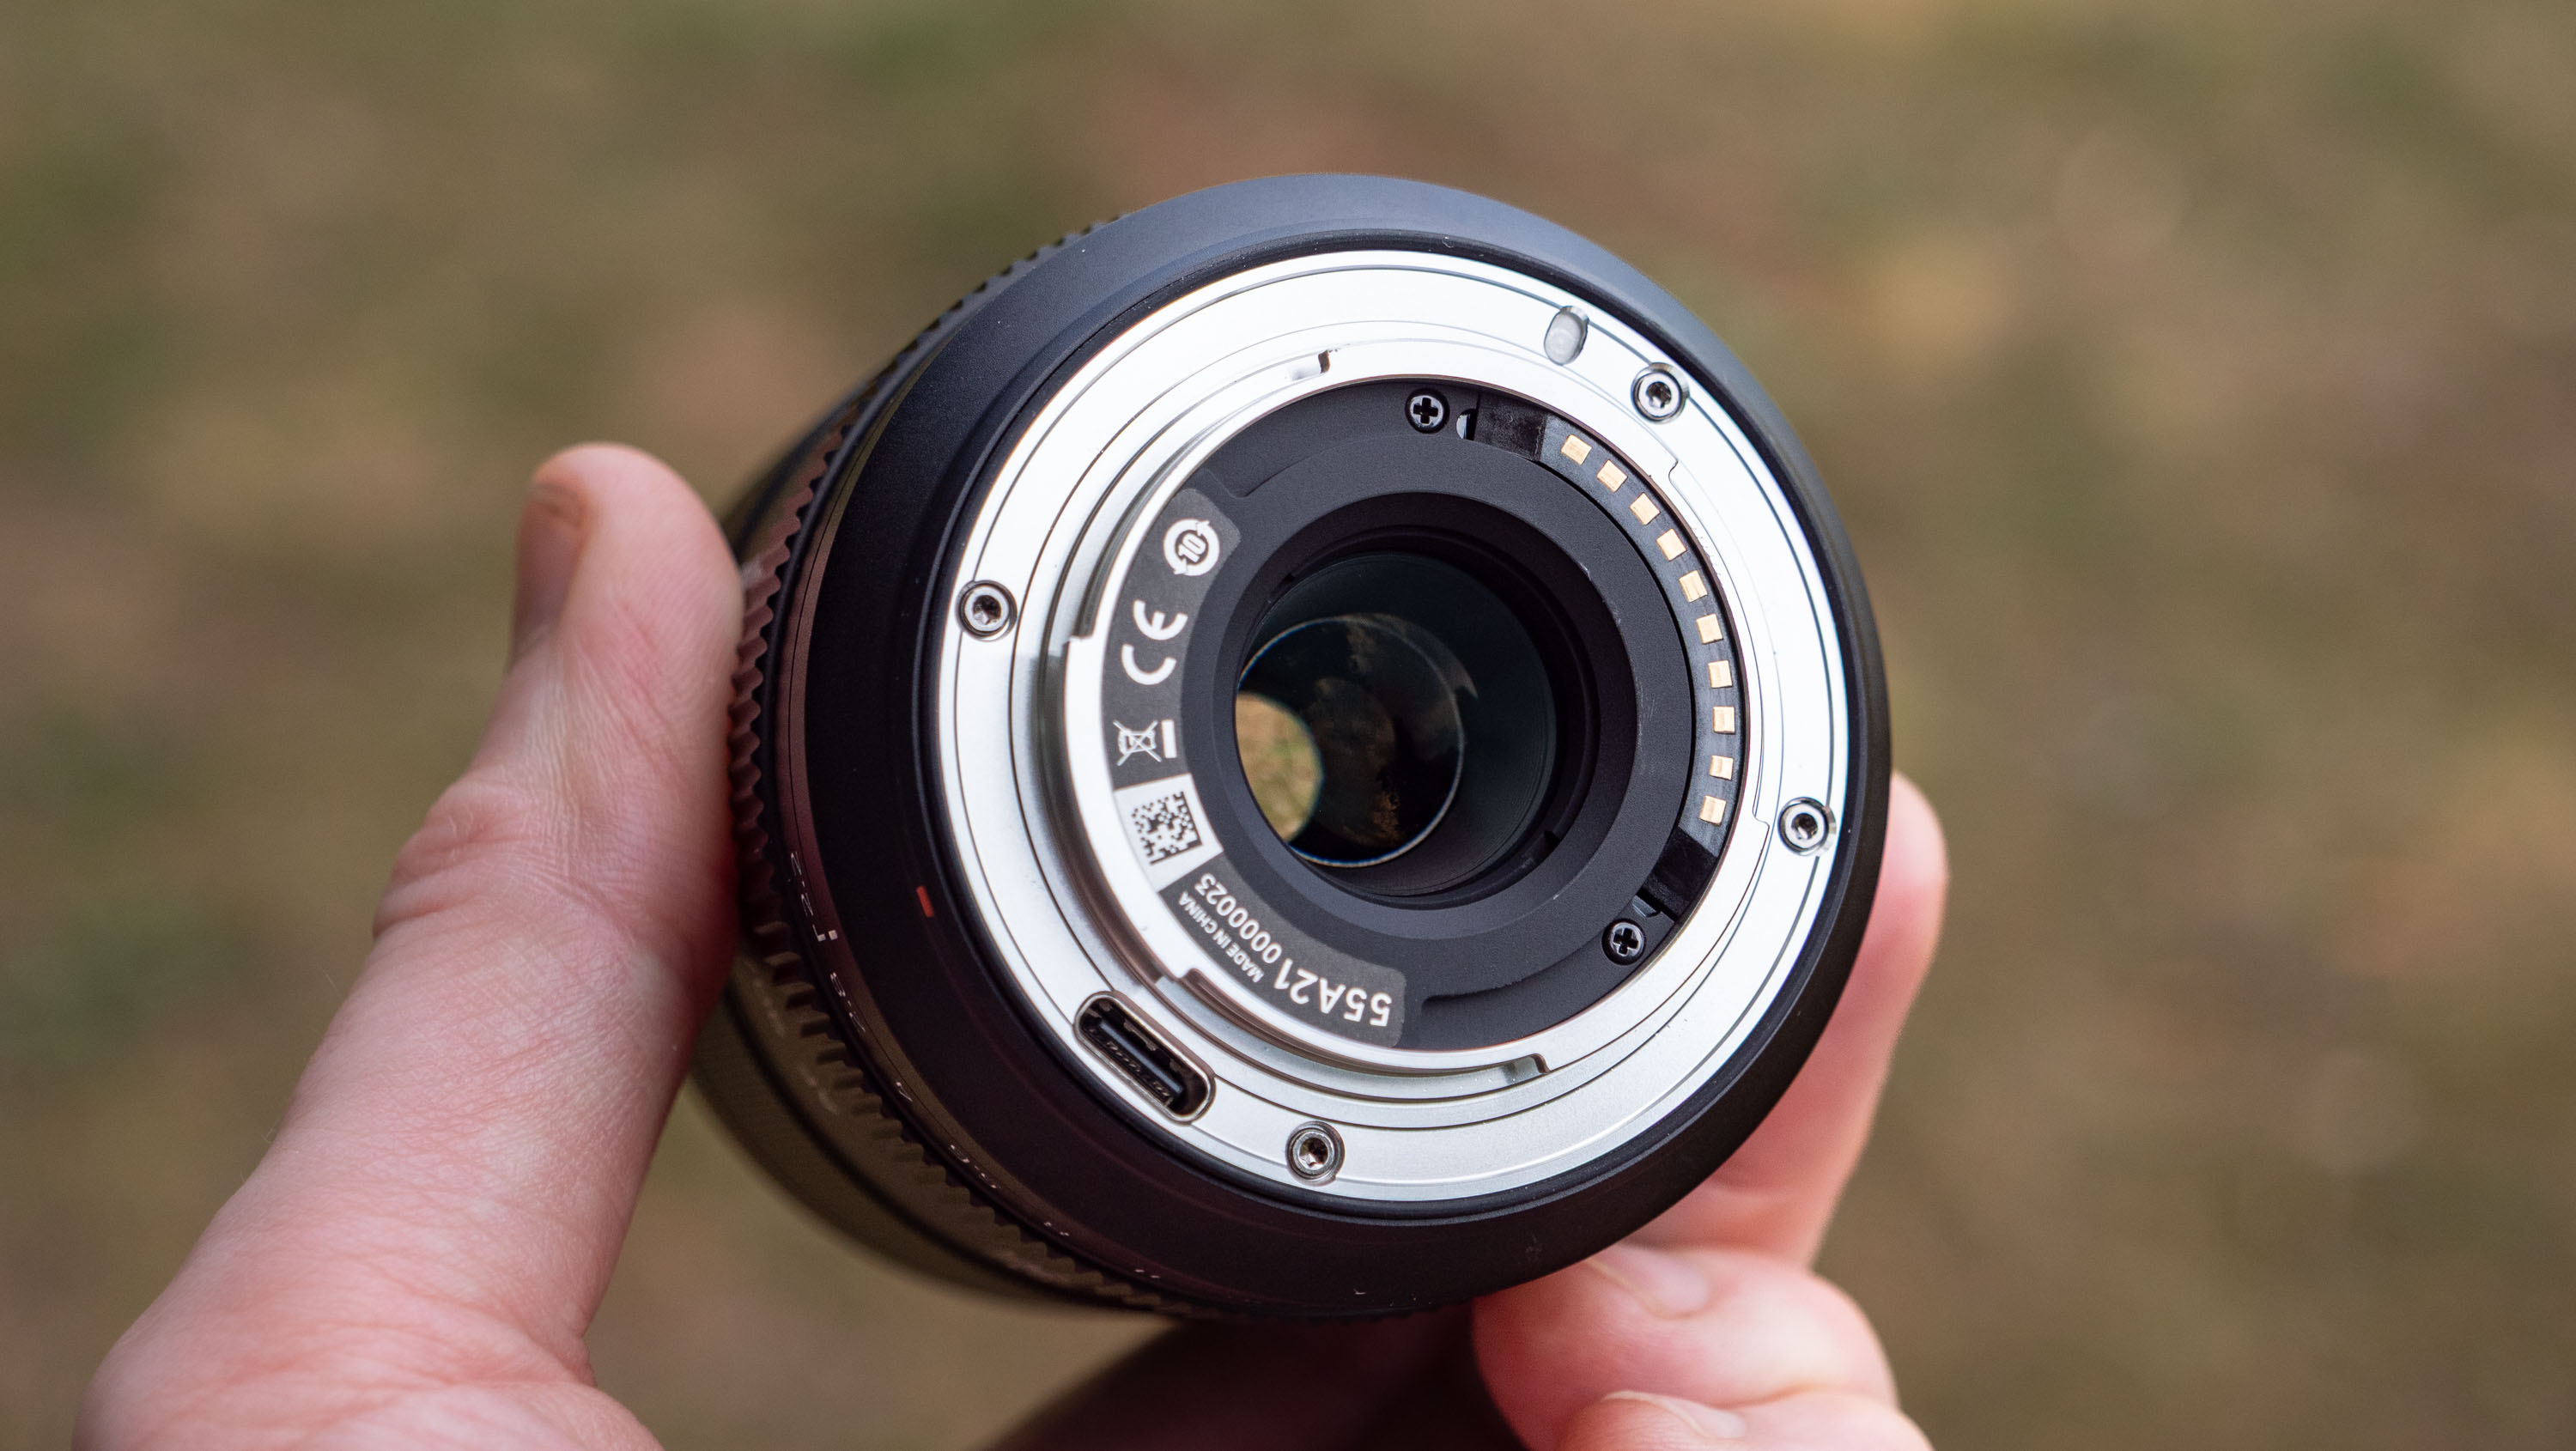
Very well-made, with rubber sealed mount
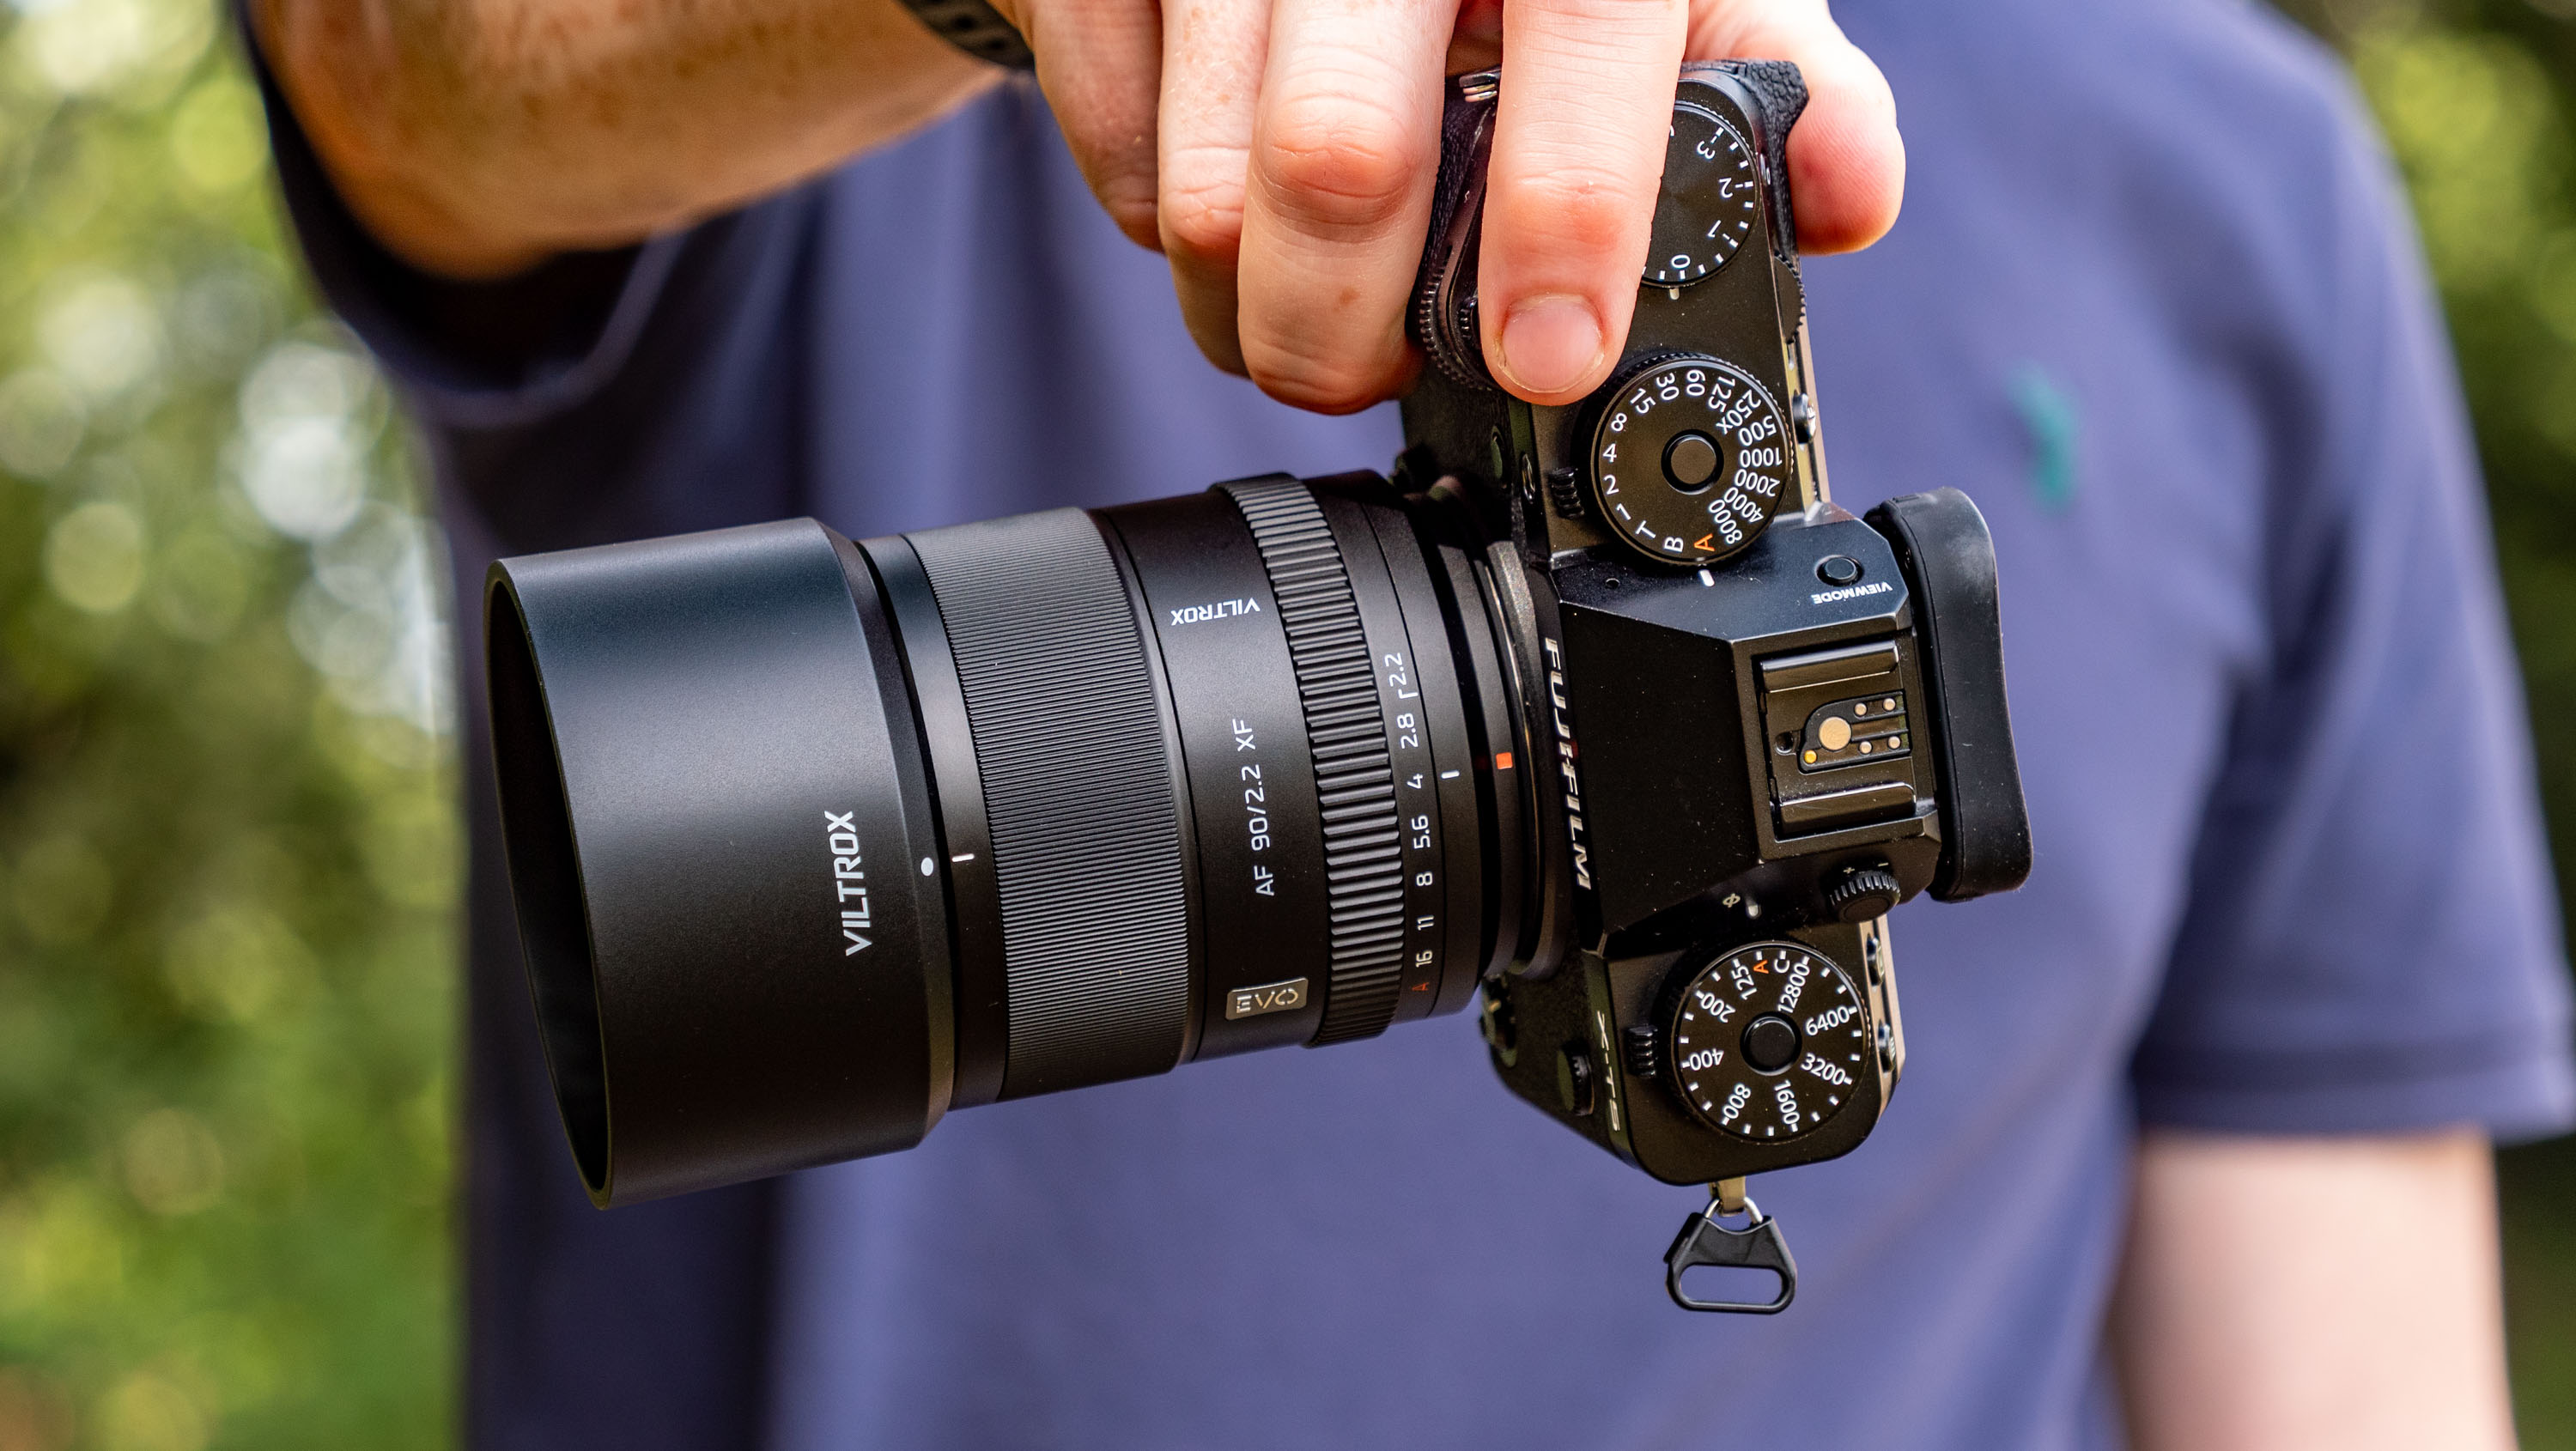
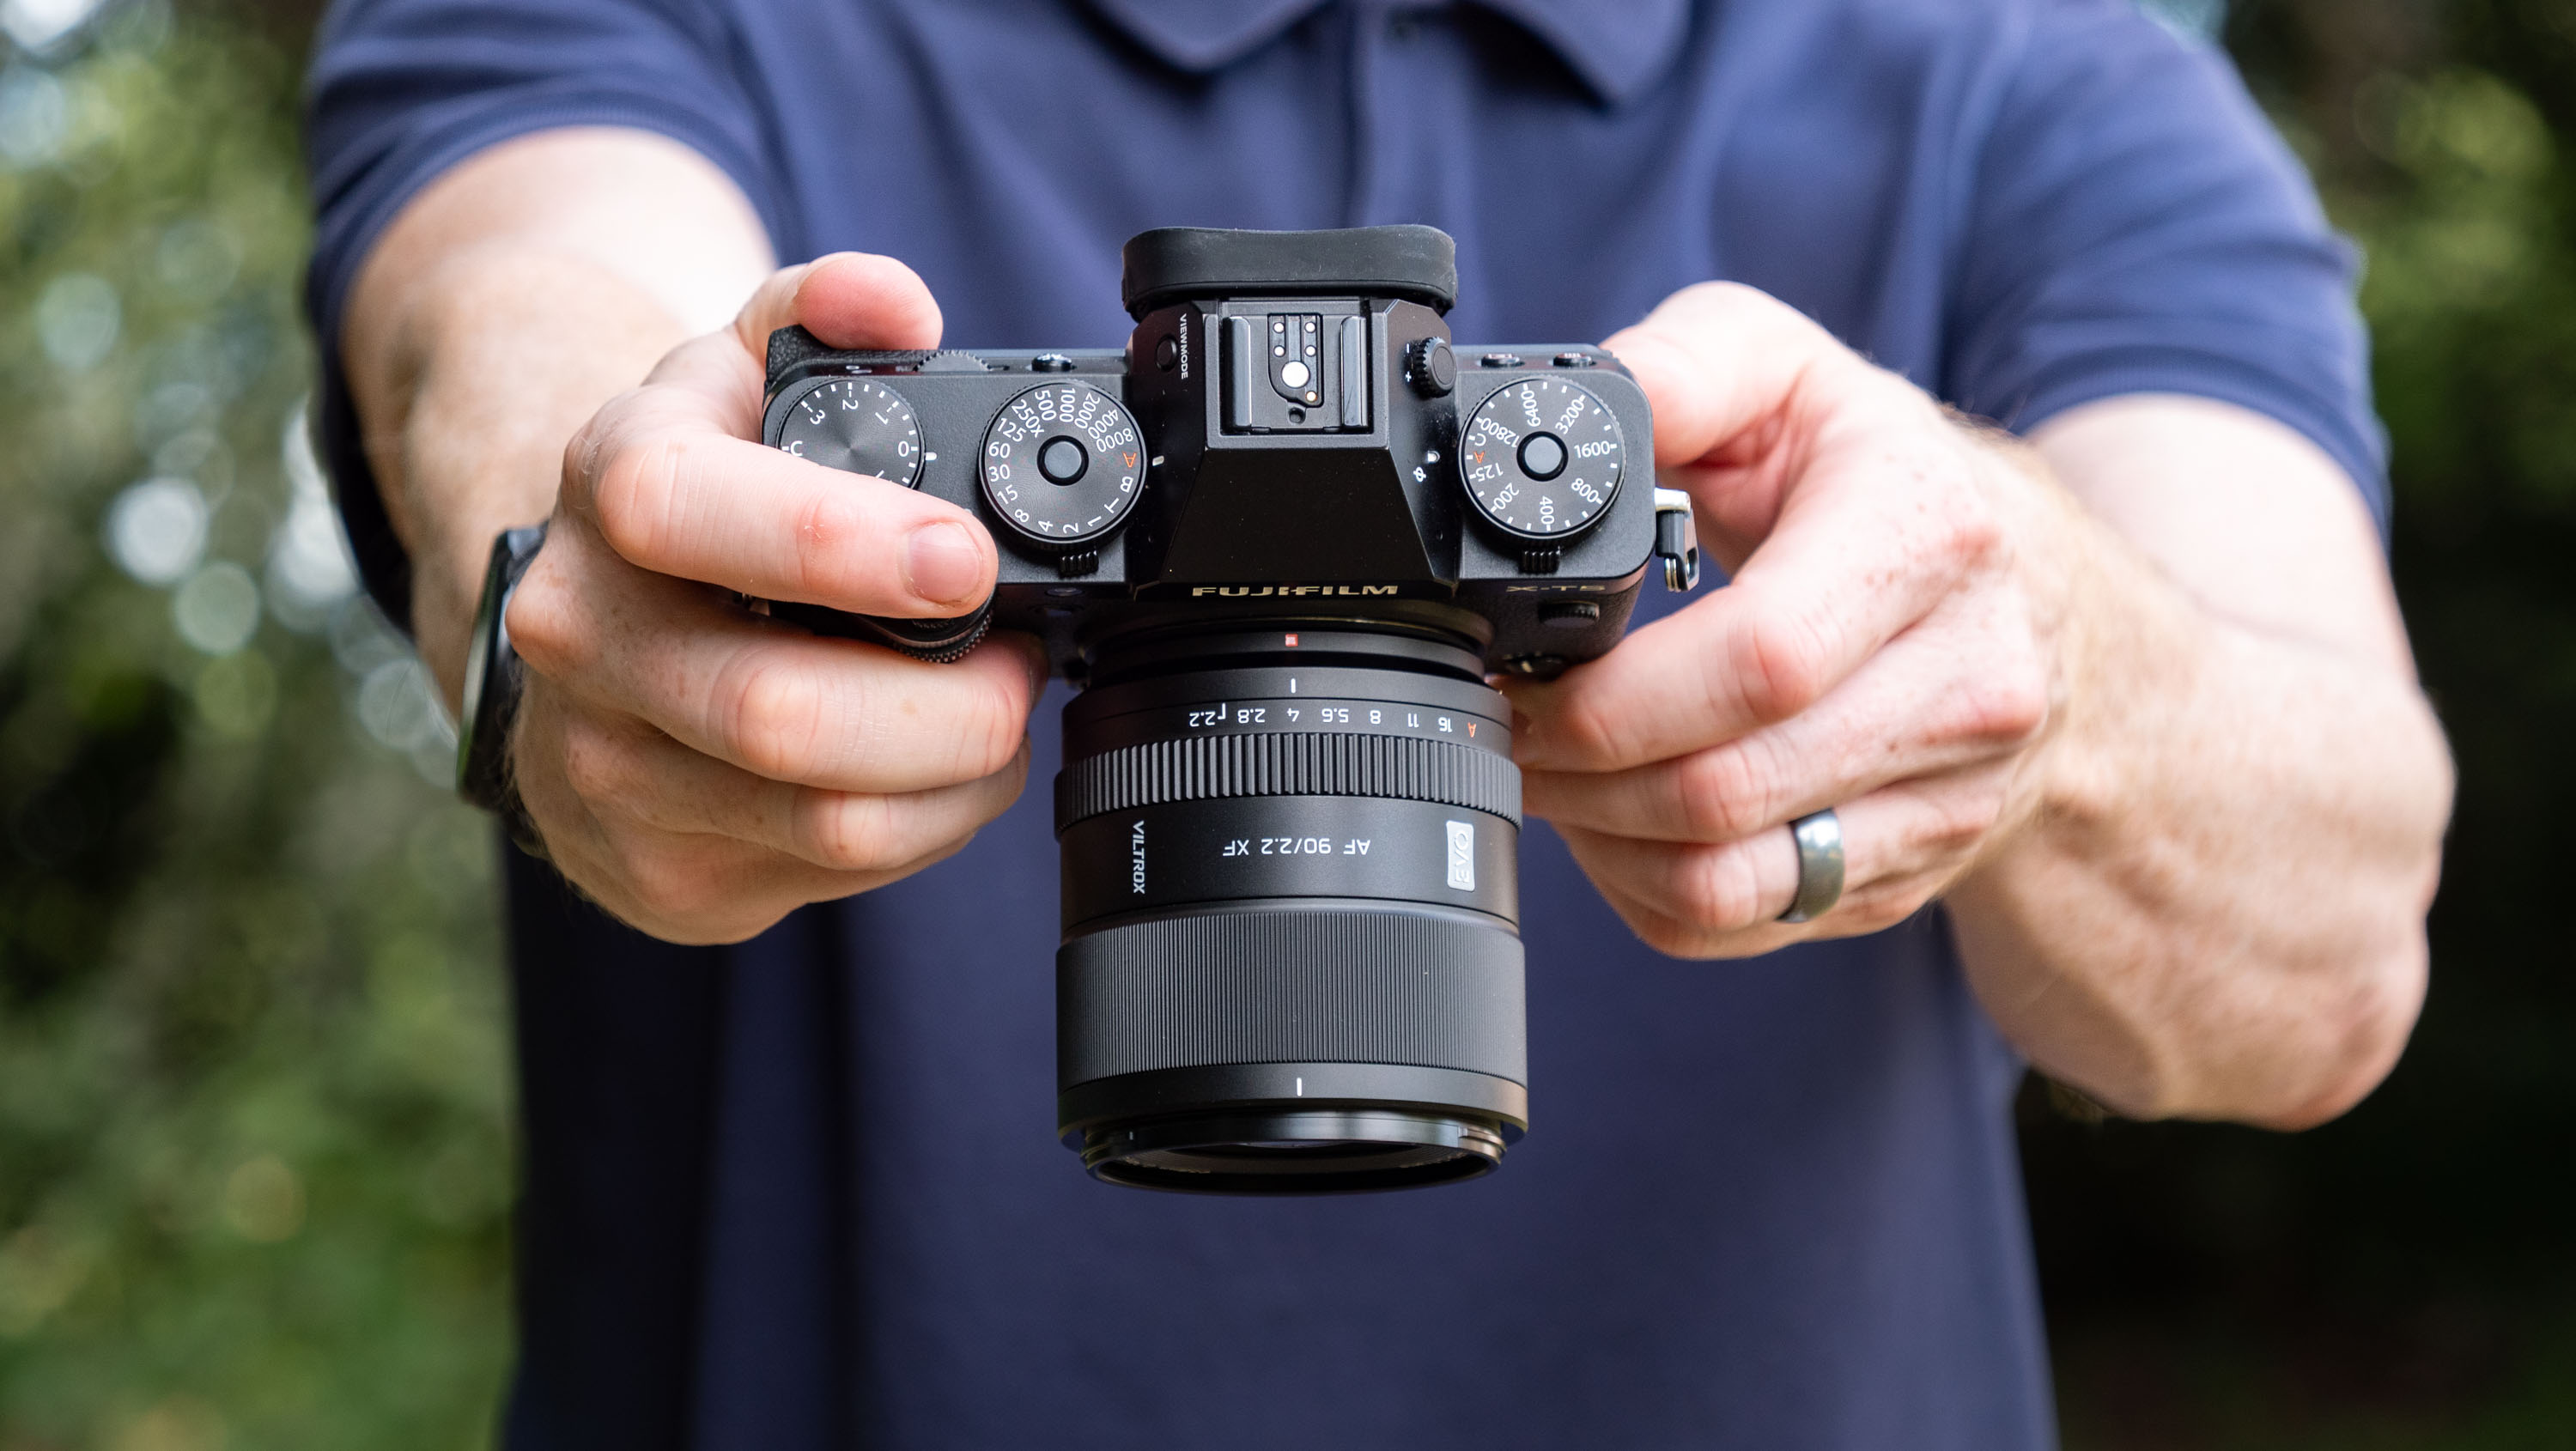
The lens comes with a lens hood, and Viltrox has improved on the fiddly design of previous efforts. This one attaches easily. Tim ColemanA really decent balance with the X-T5Tim ColemanTim ColemanTim Coleman
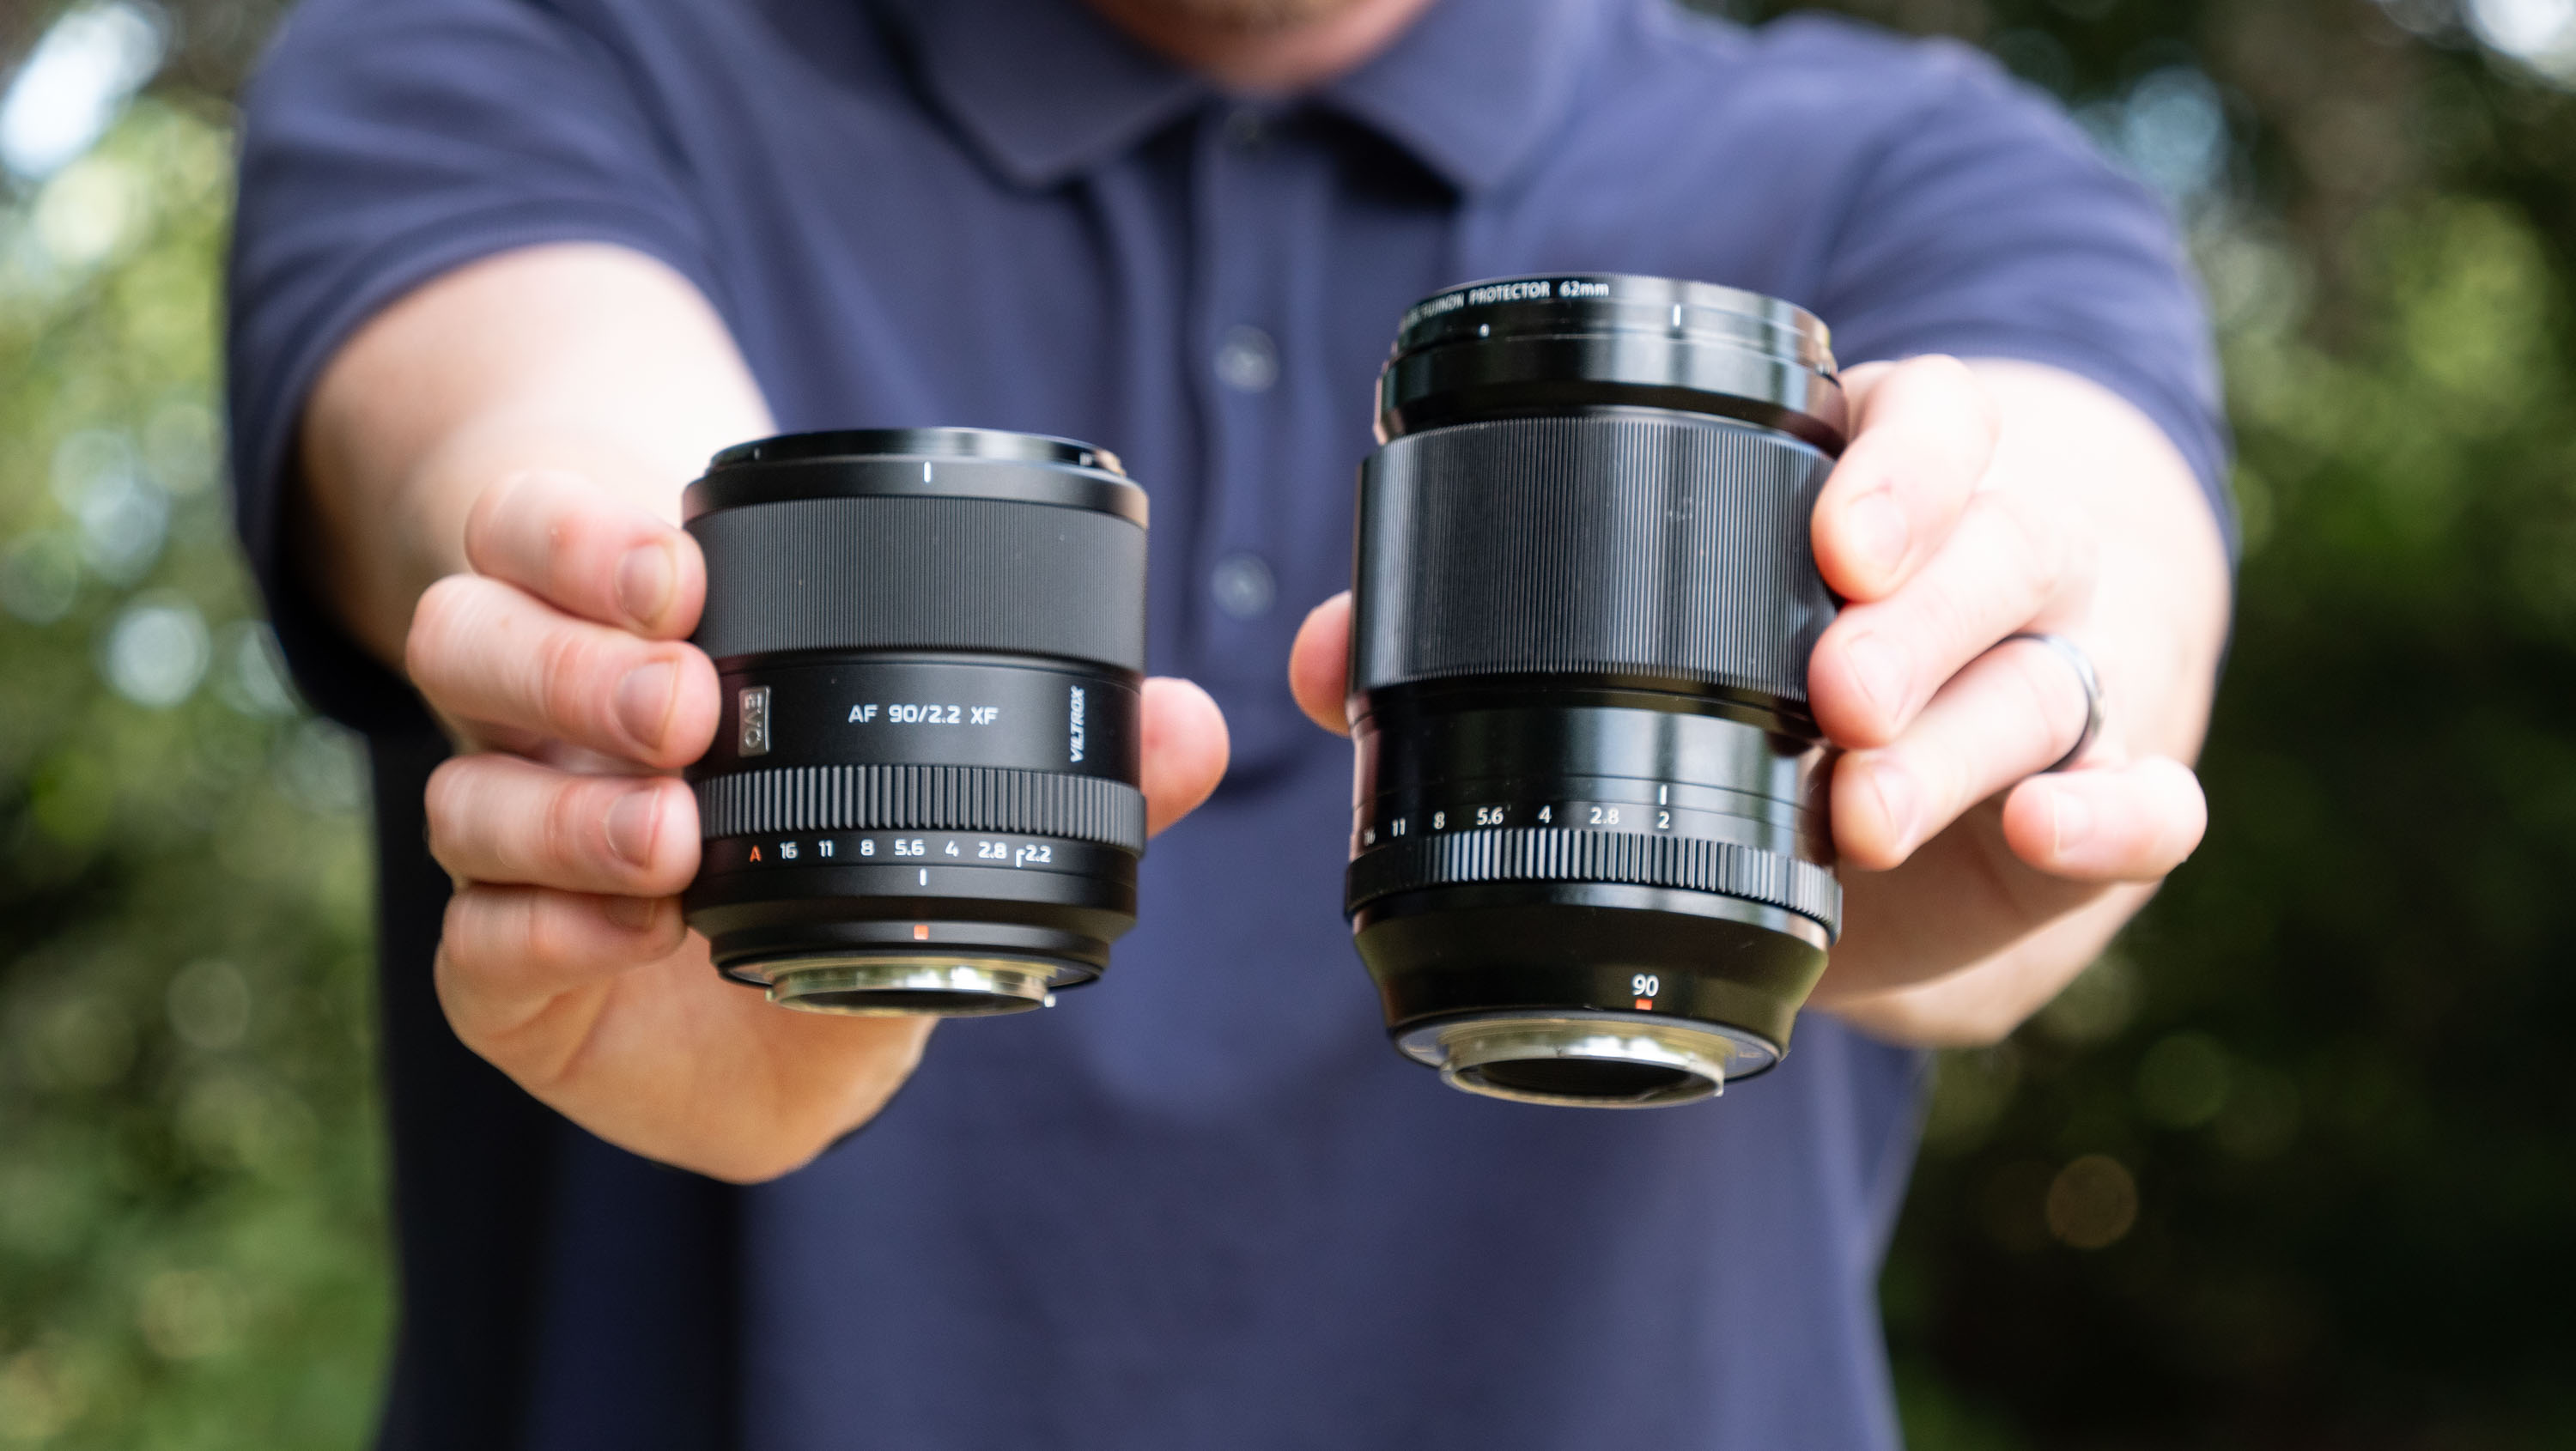
As an APS-C lens, the 90mm focal length is equivalent to 135mm in full-frame terms, which is a classic portraiture lens. I've tested my fair share of full-frame 135mm lenses, including Viltrox's own 135mm F1.8 LAB and indeed Fujifilm's own 90mm f/2 for APS-C, and the Viltrox AF 90mm f/2.2 EVO is the smallest and lightest of the lot by some margin.
I've shared some comparison photos below alongside the Fujifilm 90mm f/2 to illustrate the difference — at 11.3oz / 320g, the Viltrox lens is not far off being half the weight. When paired with an X-T5, I thought both lenses balanced well, but with a rangefinder-style camera such as the X-E5, the Viltrox would win for balance.
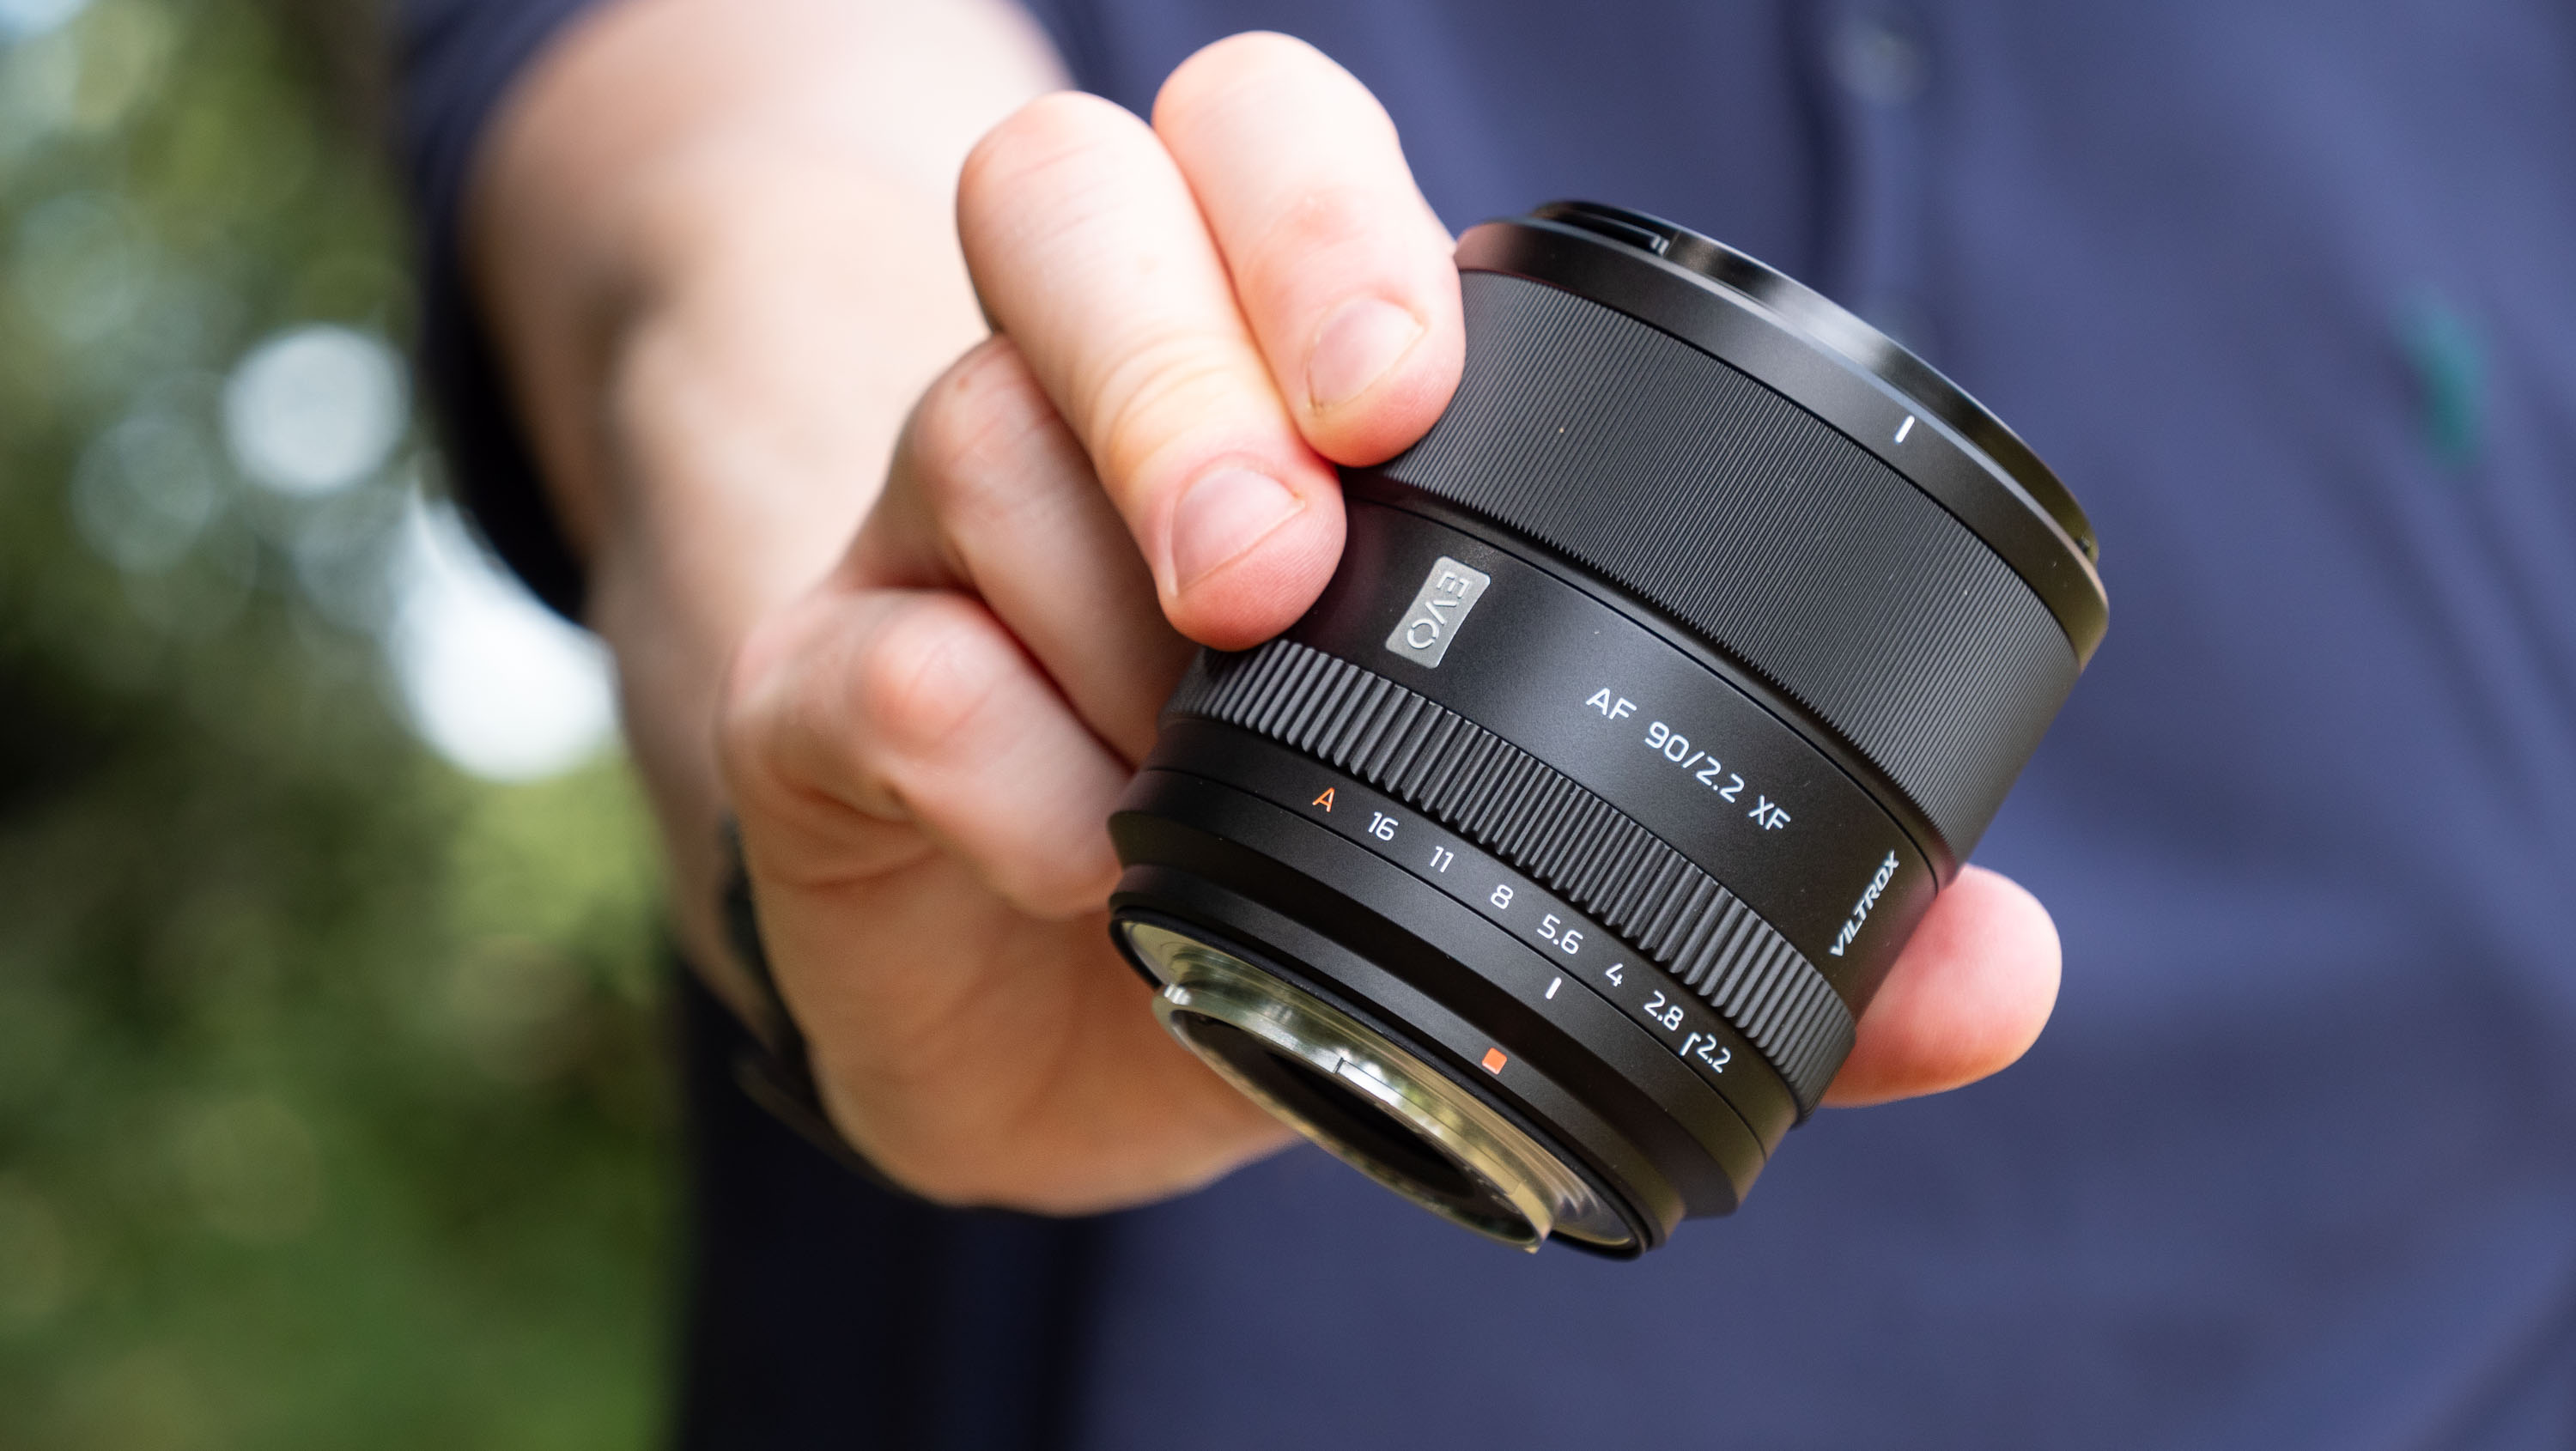
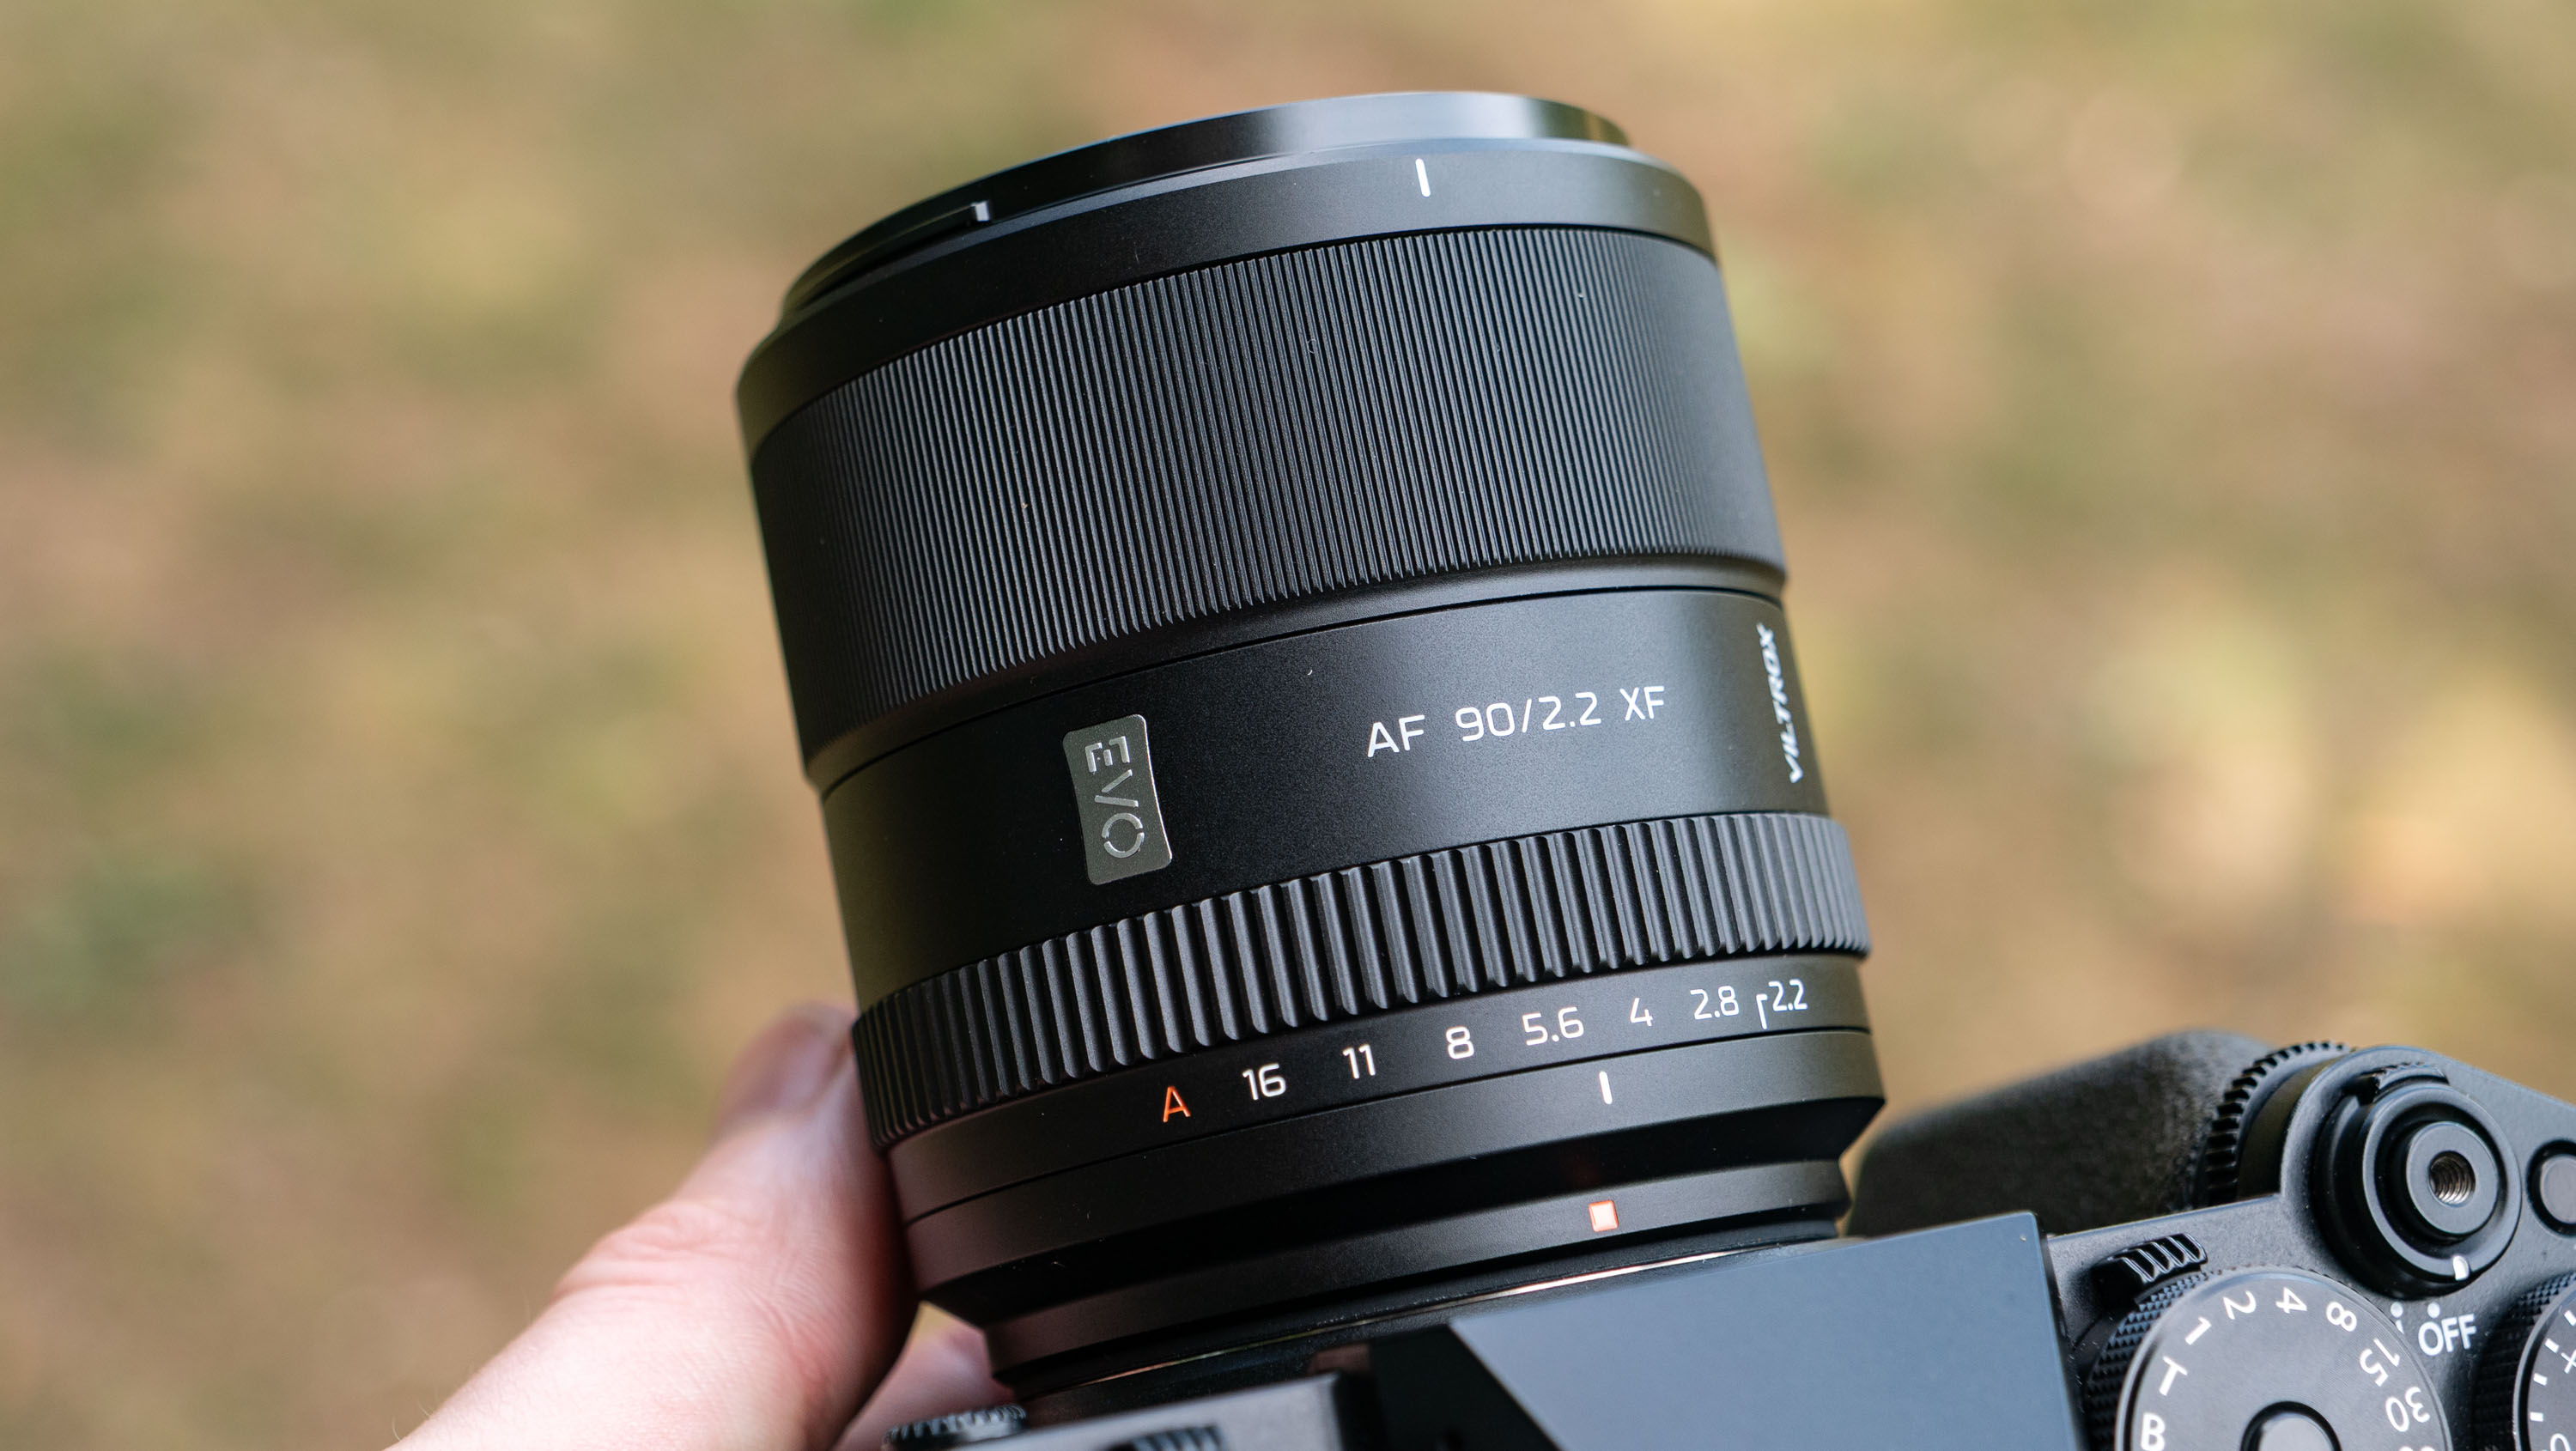
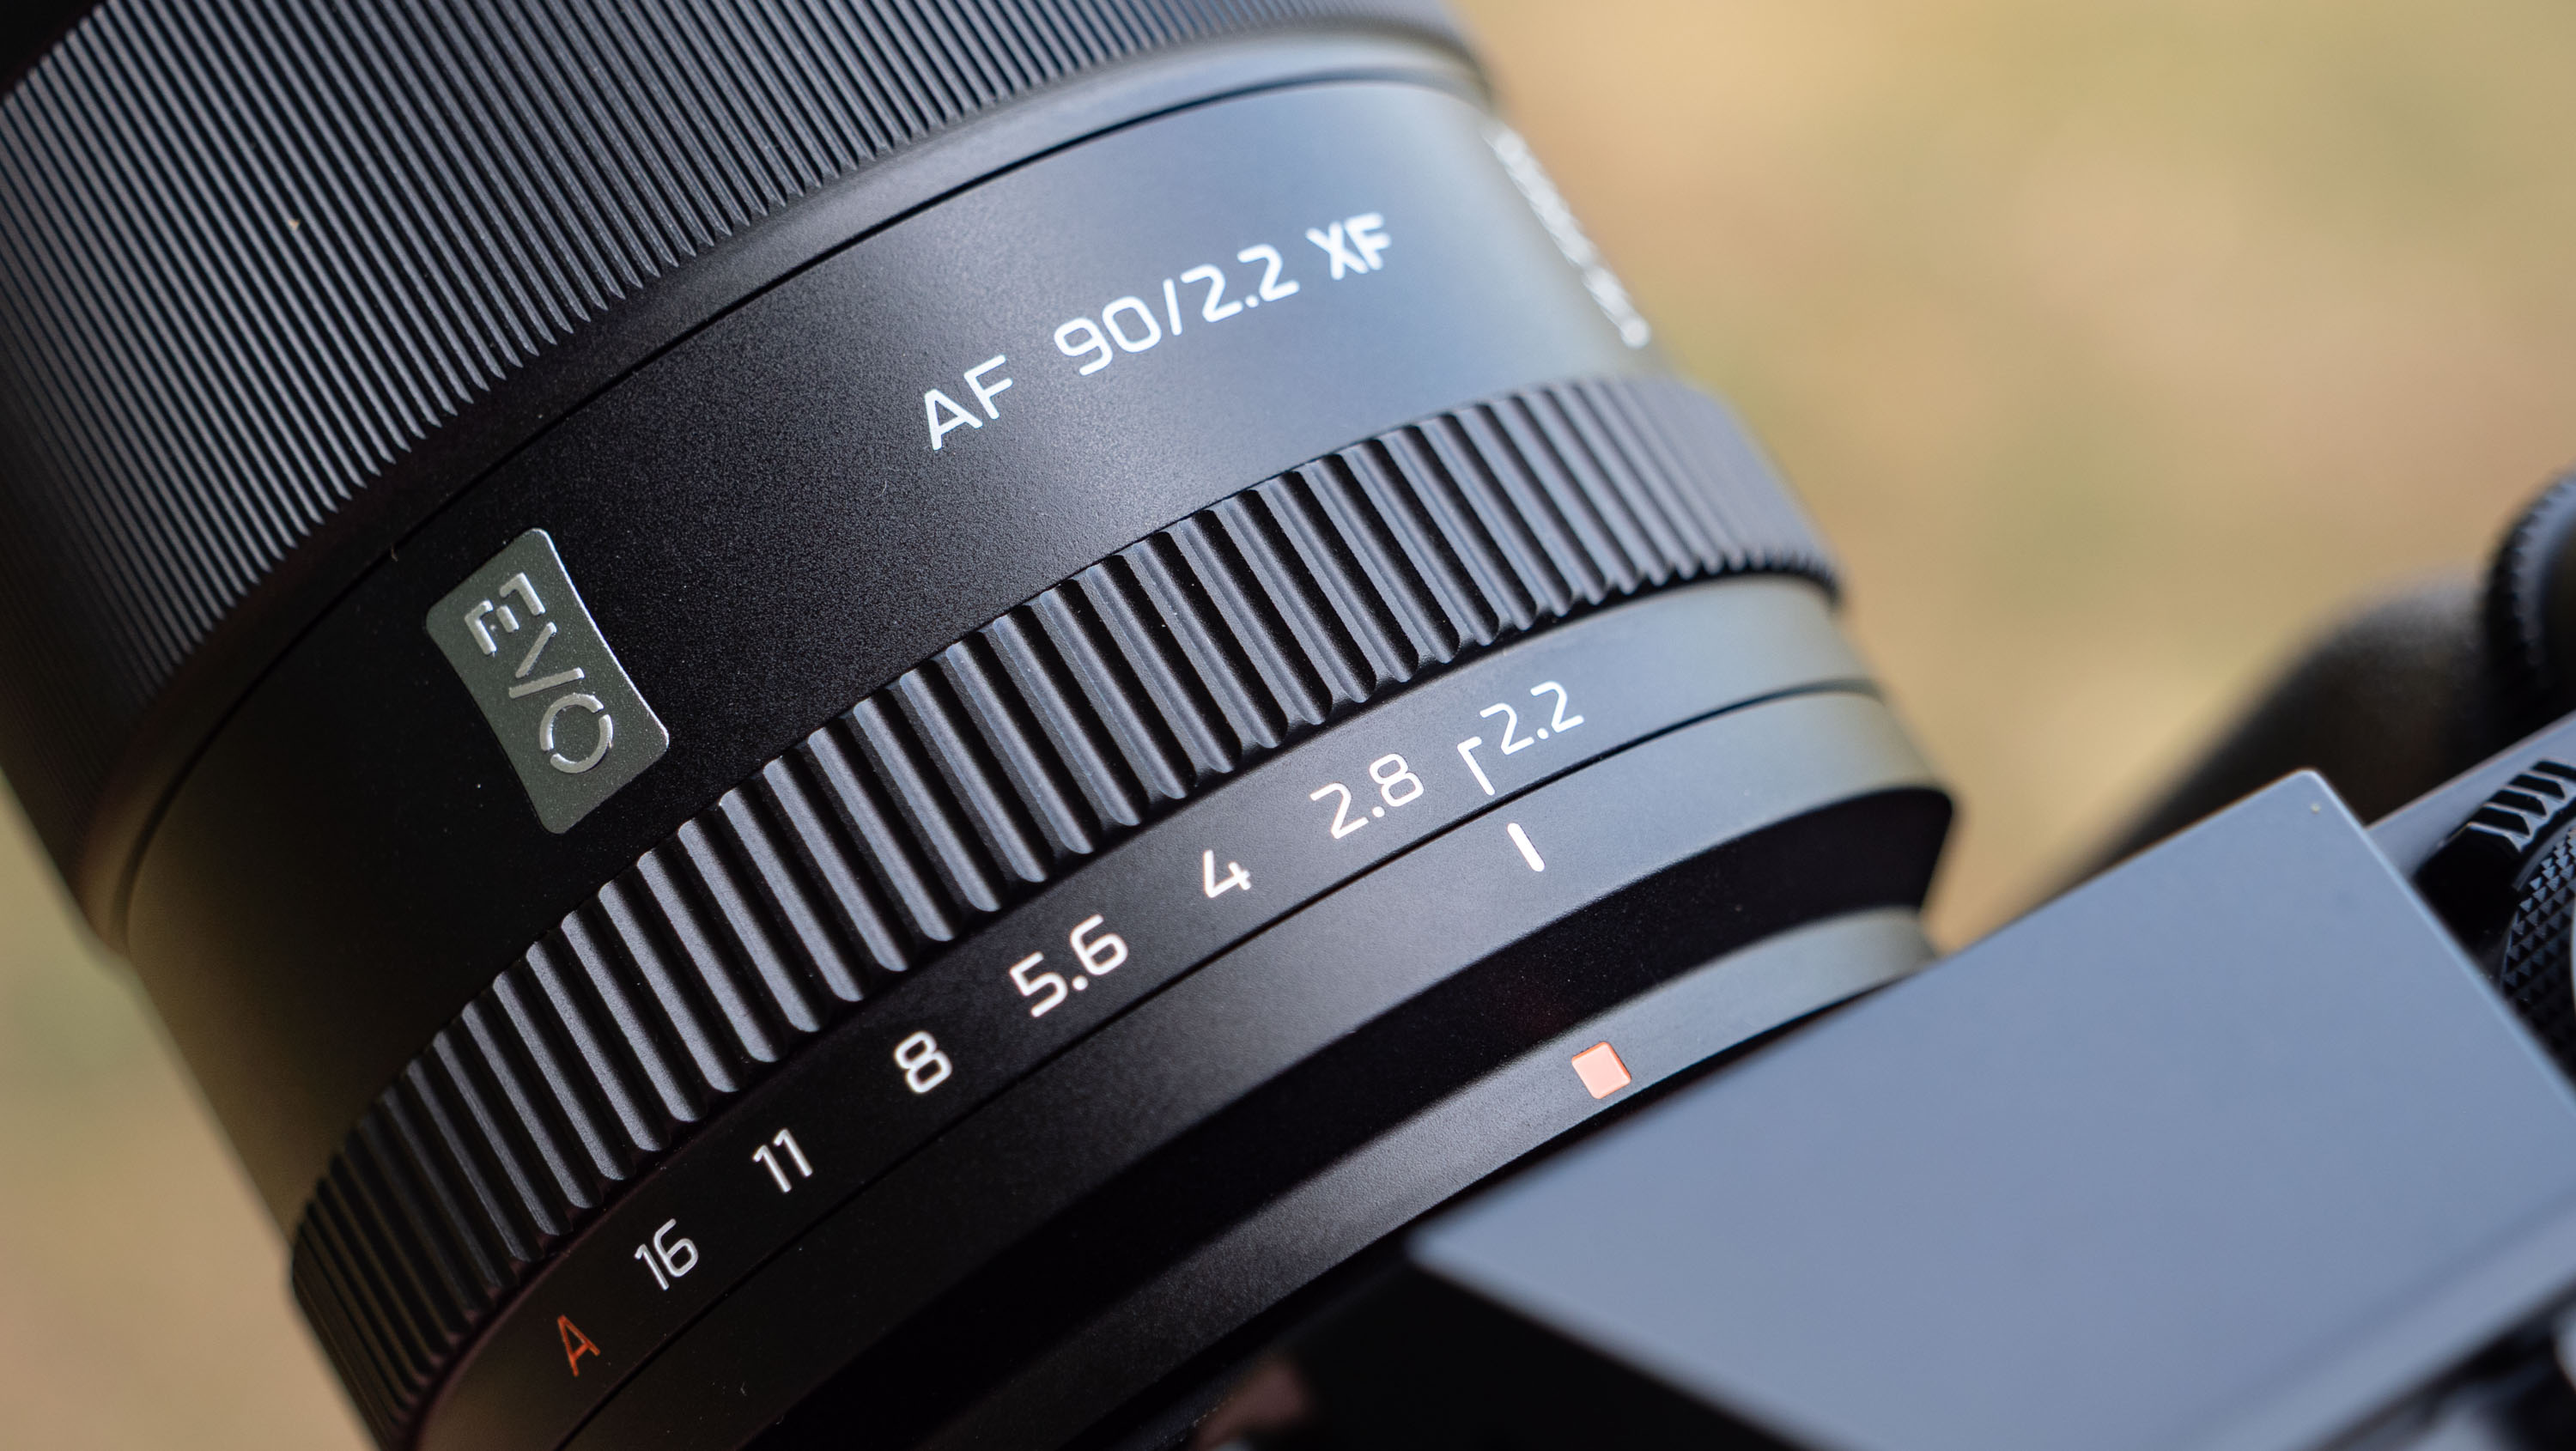
Don't let its size and price fool you, though — the Viltrox 90mm is very well made, with an all metal body, rubber-sealed lens mount, while both control rings handle beautifully: the focus ring is smooth and light, the knurled aperture ring precise. No doubt it would be a bigger and heavier lens if it had a larger maximum f/2 aperture like the Fujifilm.
The lens takes 58mm threaded filtersTim ColemanThe Fujifilm version has no external controls, whereas the Sony and Nikon versions have three buttons/ switchesTim ColemanThis means the X-mount version has a clicked aperture ring onlyTim ColemanThe rear mount has a rubber seal to keep out dust / water ingressTim Coleman
The metal barrel of some of the previous Viltrox lenses that I've tested has scratched easily. I didn't thrash the 90mm lens around particularly, so it remains mint. I'll update this review if I discover it also scratches easily.
Curiously, the X-mount version of the Viltrox 90mm f/2.2 EVO has no buttons or switches, whereas the Nikon Z and Sony E-mount versions (which I didn't ask to test) have three; an AF/MF switch, customizable function button and a click switch for the aperture ring.
Omitting the click switch especially is an oddity given that Fujifilm cameras also shoot video — Fujifilm X users here are stuck with a clicked aperture ring. As a result, despite being excellent value, it feels like Fujifilm users are shortchanged. That being said, however, the Fujifilm 90mm f/2 lens also has zero buttons or switches.
The Viltrox AF 90mm f/2.2 EVO lens (left) held alongside the Fujifilm XF 90mm f/2 lens (right)Tim ColemanTim Coleman
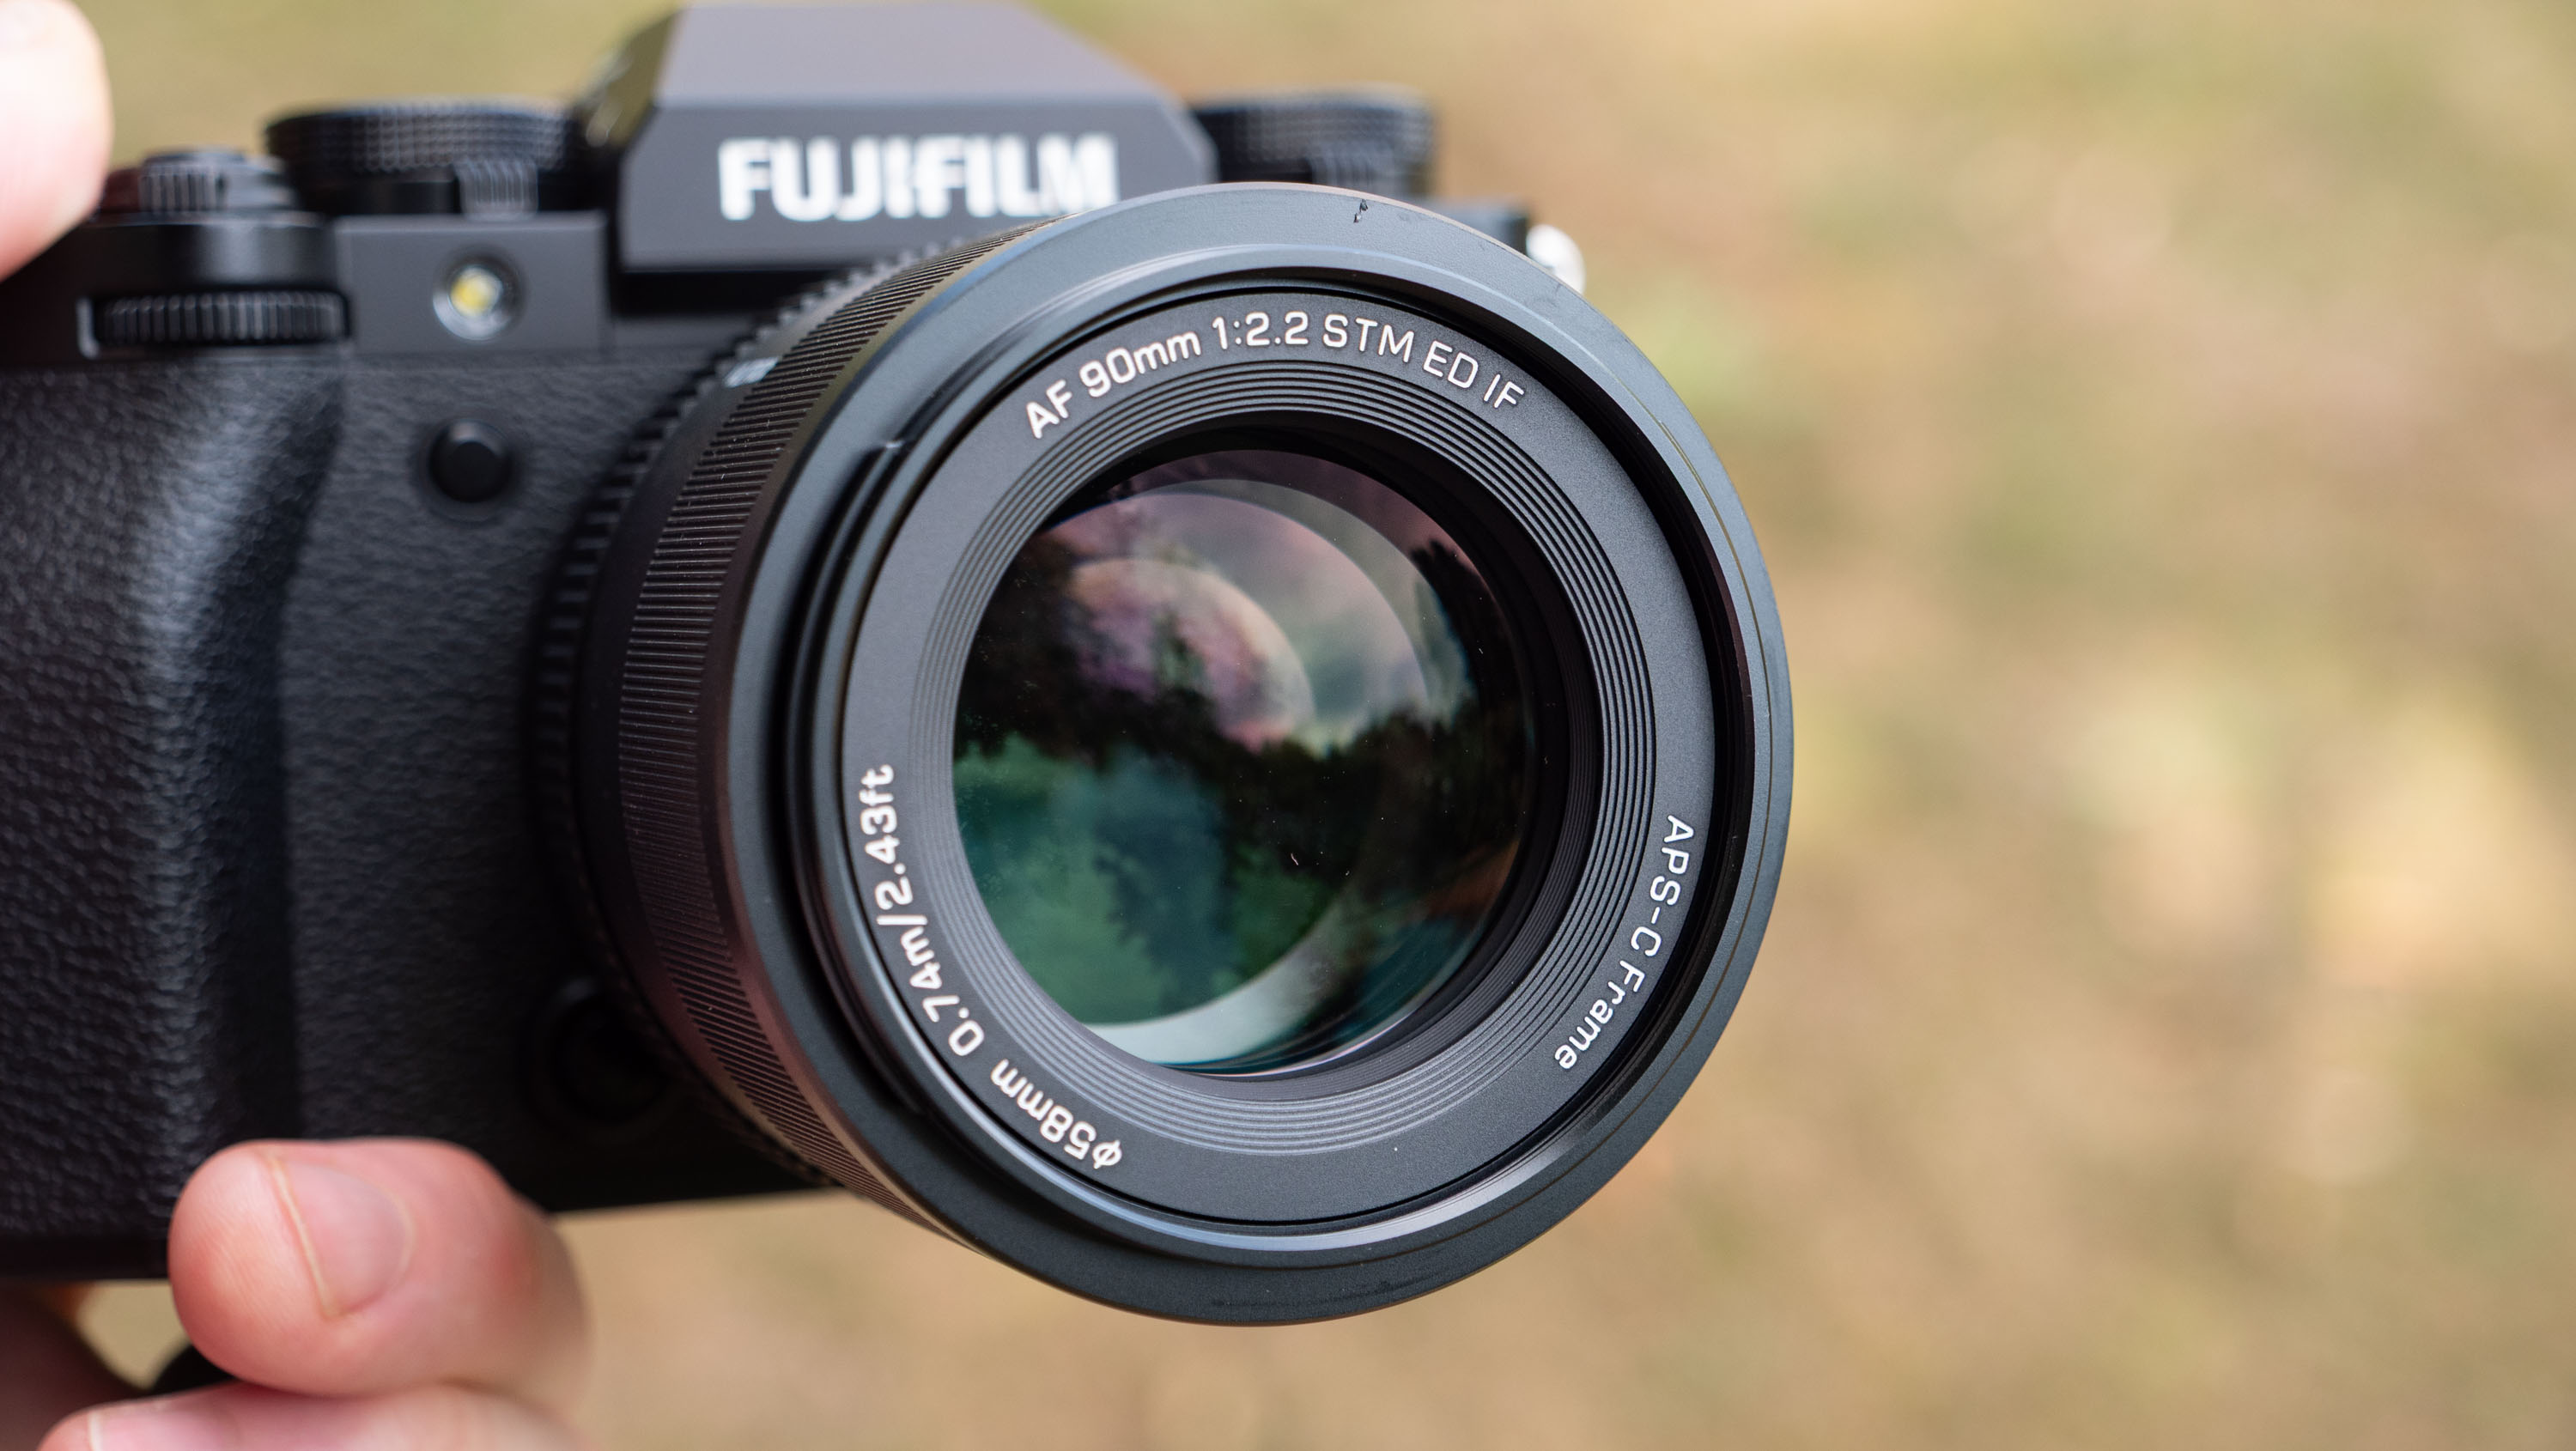
The STM stepping motor makes light work of the 10 lens elements in 8 groups, for snappy and quiet autofocus. Of course autofocus performance accuracy and speed are affected by which camera system and autofocus mode is in use, but I never felt like the lens was slowing down the X-T5 camera's autofocus.
Minimum focus is 0.74m, which delivers a maximum 0.14x magnification. Put simply, this is not a lens for closeup photography, though neither is the 75mm f/1.8 EVO which has a 0.12x magnification, nor most 135mm lenses I've used.
Viltrox AF 90mm f/2.2 EVO: Performance
Optically very sharp
Smooth bokeh, but with cats-eye shaping. Minor chromatic aberration and vignetting
Snappy and quiet autofocus
I've included a range of photos taken with the Viltrox and Fujifilm 90mm lenses below, matching the lens settings where possible (though the Fujifilm lens has an extra photo at f/2), and you can read on for my analysis of the images.
Viltrox
Viltrox at f/2.2Tim ColemanViltrox at f/2.8Tim ColemanViltrox at f/4Tim ColemanViltrox at f/2.2Tim ColemanViltrox at f/2.8Tim ColemanViltrox at f/4Tim Coleman
Fujifilm
Fujifilm at f/2Tim ColemanFujifilm at f/2.2Tim ColemanFujifilm at f/2.8Tim ColemanFujifilm at f/4Tim ColemanFujifilm at f/2Tim ColemanFujifilm at f/2.2Tim ColemanFujifilm at f/2.8Tim ColemanFujifilm at f/4Tim Coleman
Viltrox's lens portfolio is split into various series, being topped by the LAB series of full-frame lenses, which is followed by its Pro series, and then below that the Evo series. Evo lenses are mid-range; small, lightweight, excellent value, with one or two concessions.
For me, all of the Evo lenses I've tested are an easy recommendation for enthusiast photographers, including the AF 90mm F2.2. Optically its sharp. Not the sharpest lens I've ever seen, but in a similar league as the pricier Fujifilm 90mm nonetheless.
Where sharp detail is top concern, stopping the aperture down to f/4 yields better results than wide open at f/2.2. You'll see a reduction in vignetting and chromatic aberration by doing so, too. Those lens distortions are only minor at f/2.2, but they are present.
The main topic for a wide aperture 135mm equivalent lens is bokeh — the quality of out of focus areas — and I have good news, with two caveats.
Viltrox
The Viltrox lens, see the bokeh cats eye shapingTim ColemanTim ColemanTim Coleman
Fujifilm
Fujifilm XF 90mm f/2 R LM WR lens — bokeh is smooth and roundTim ColemanTim ColemanHere I've dropped the aperture down to match the Viltrox's maximum f/2.2. Tim Coleman
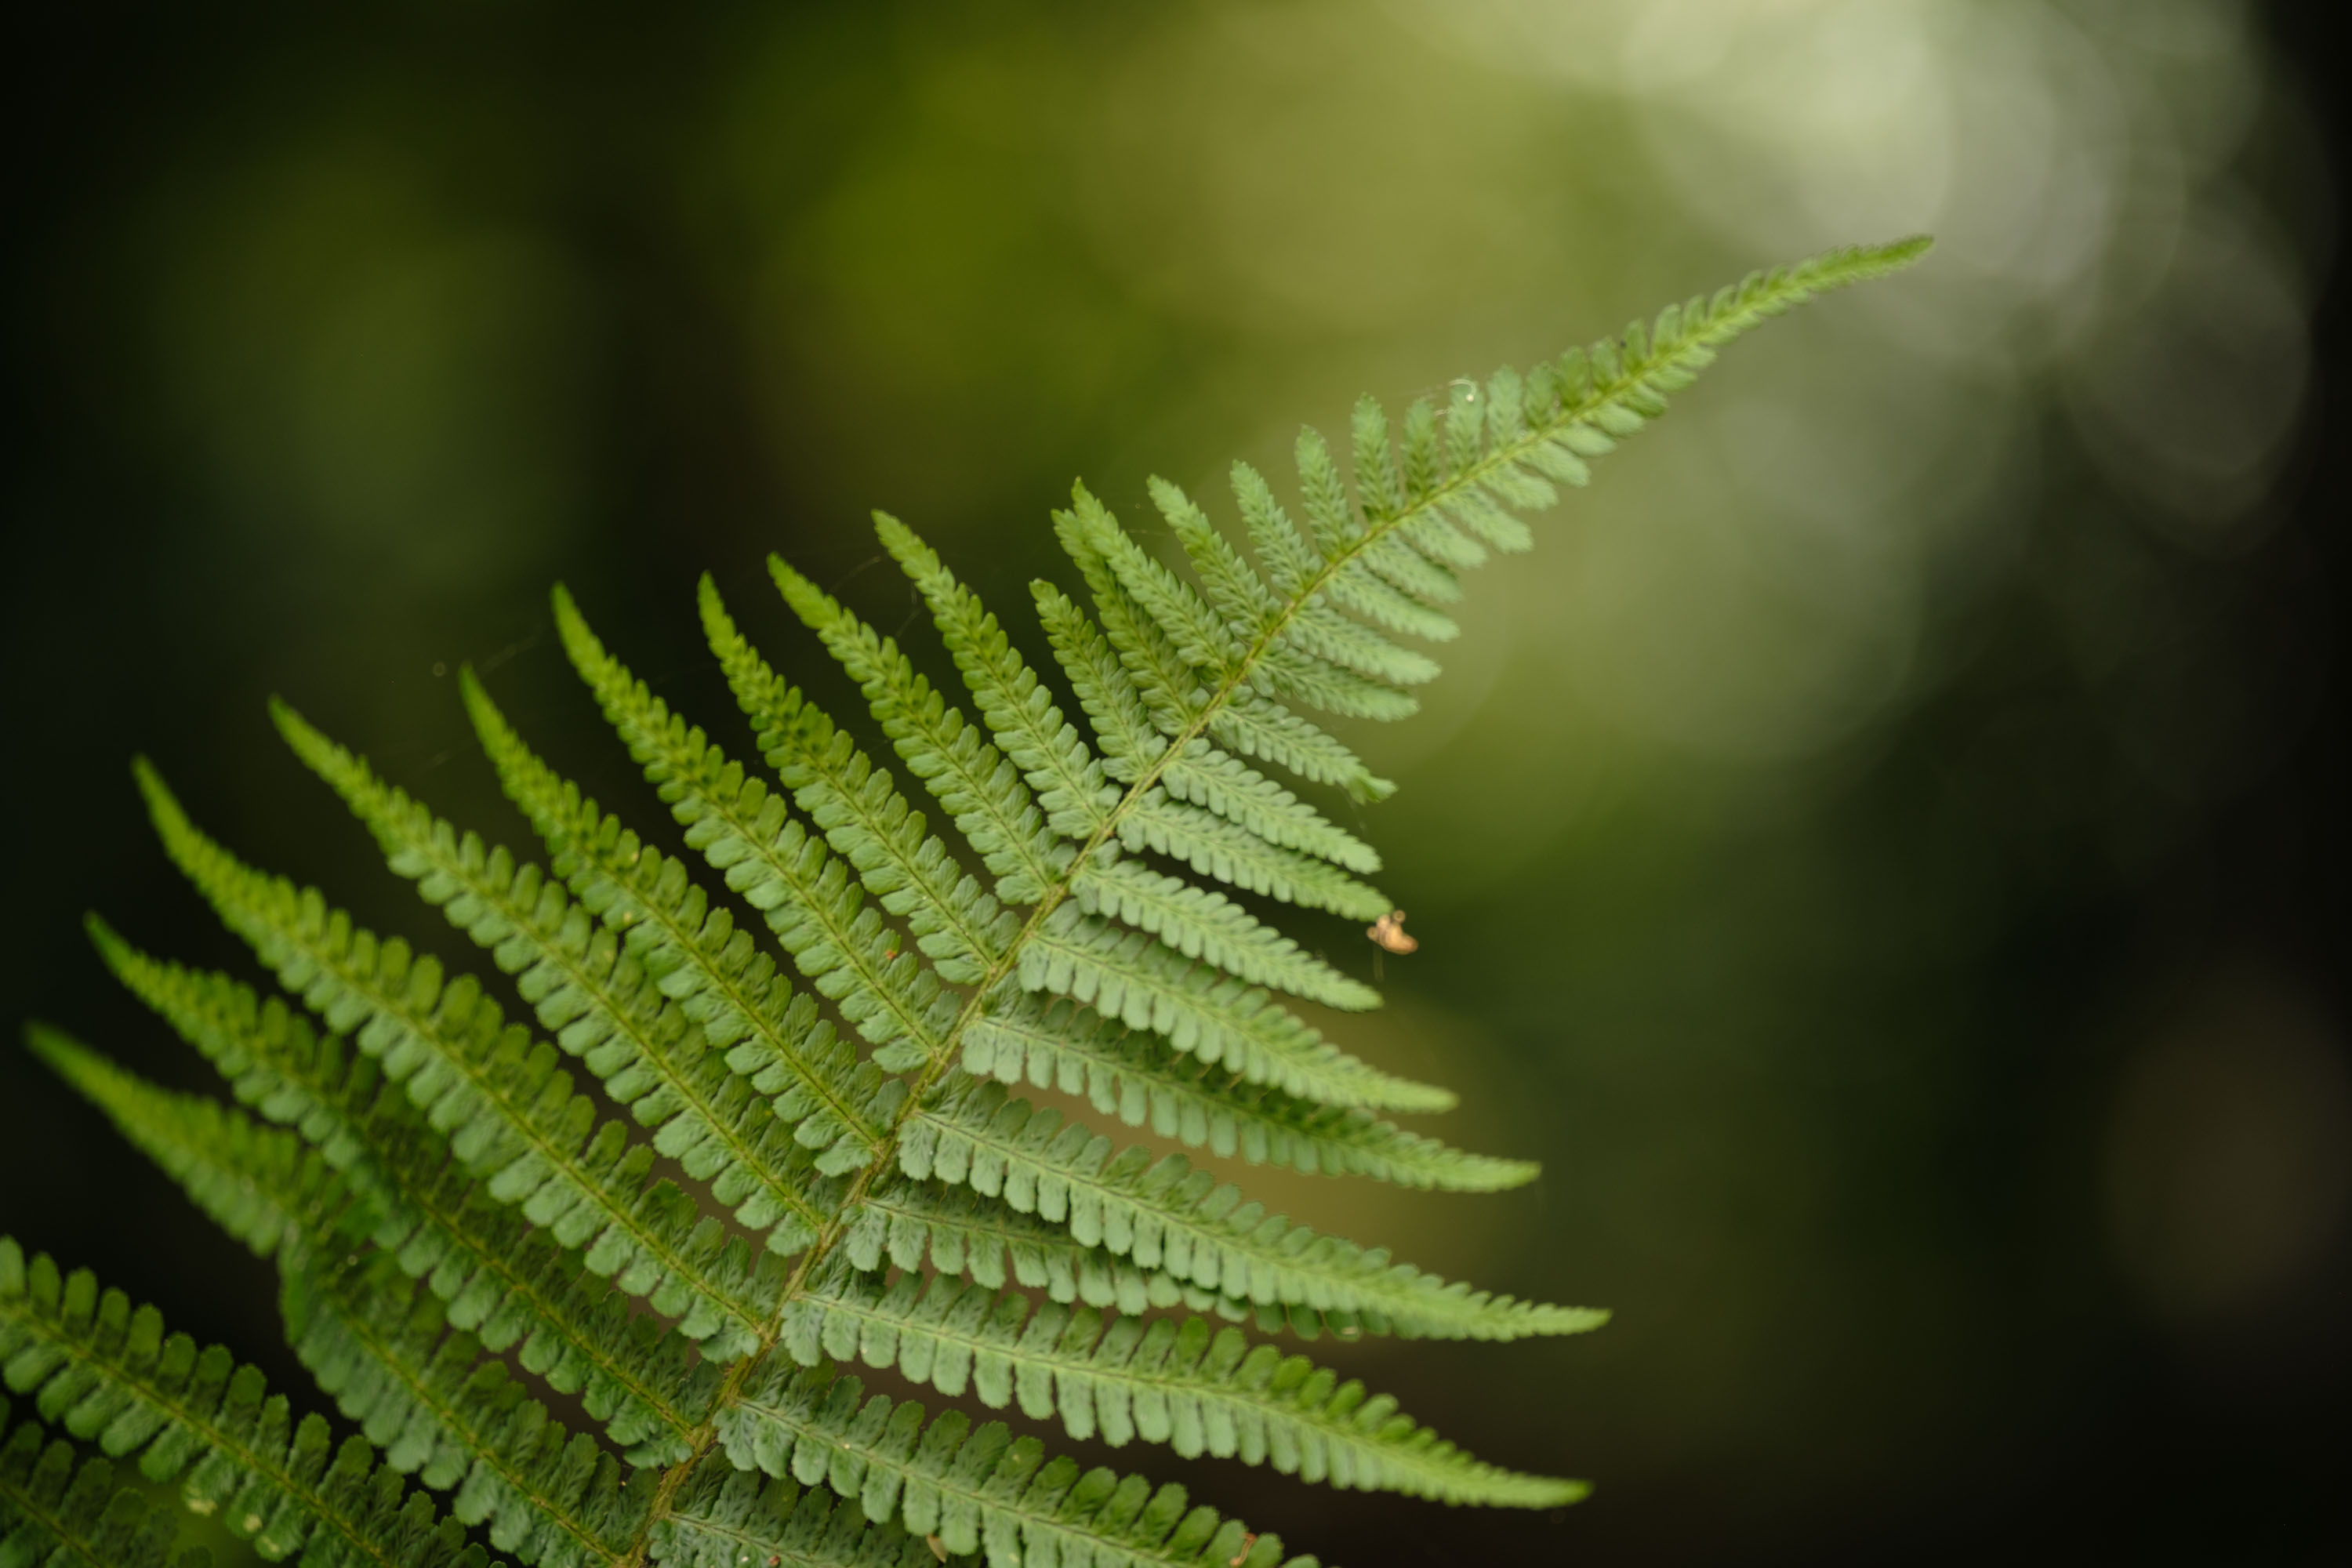
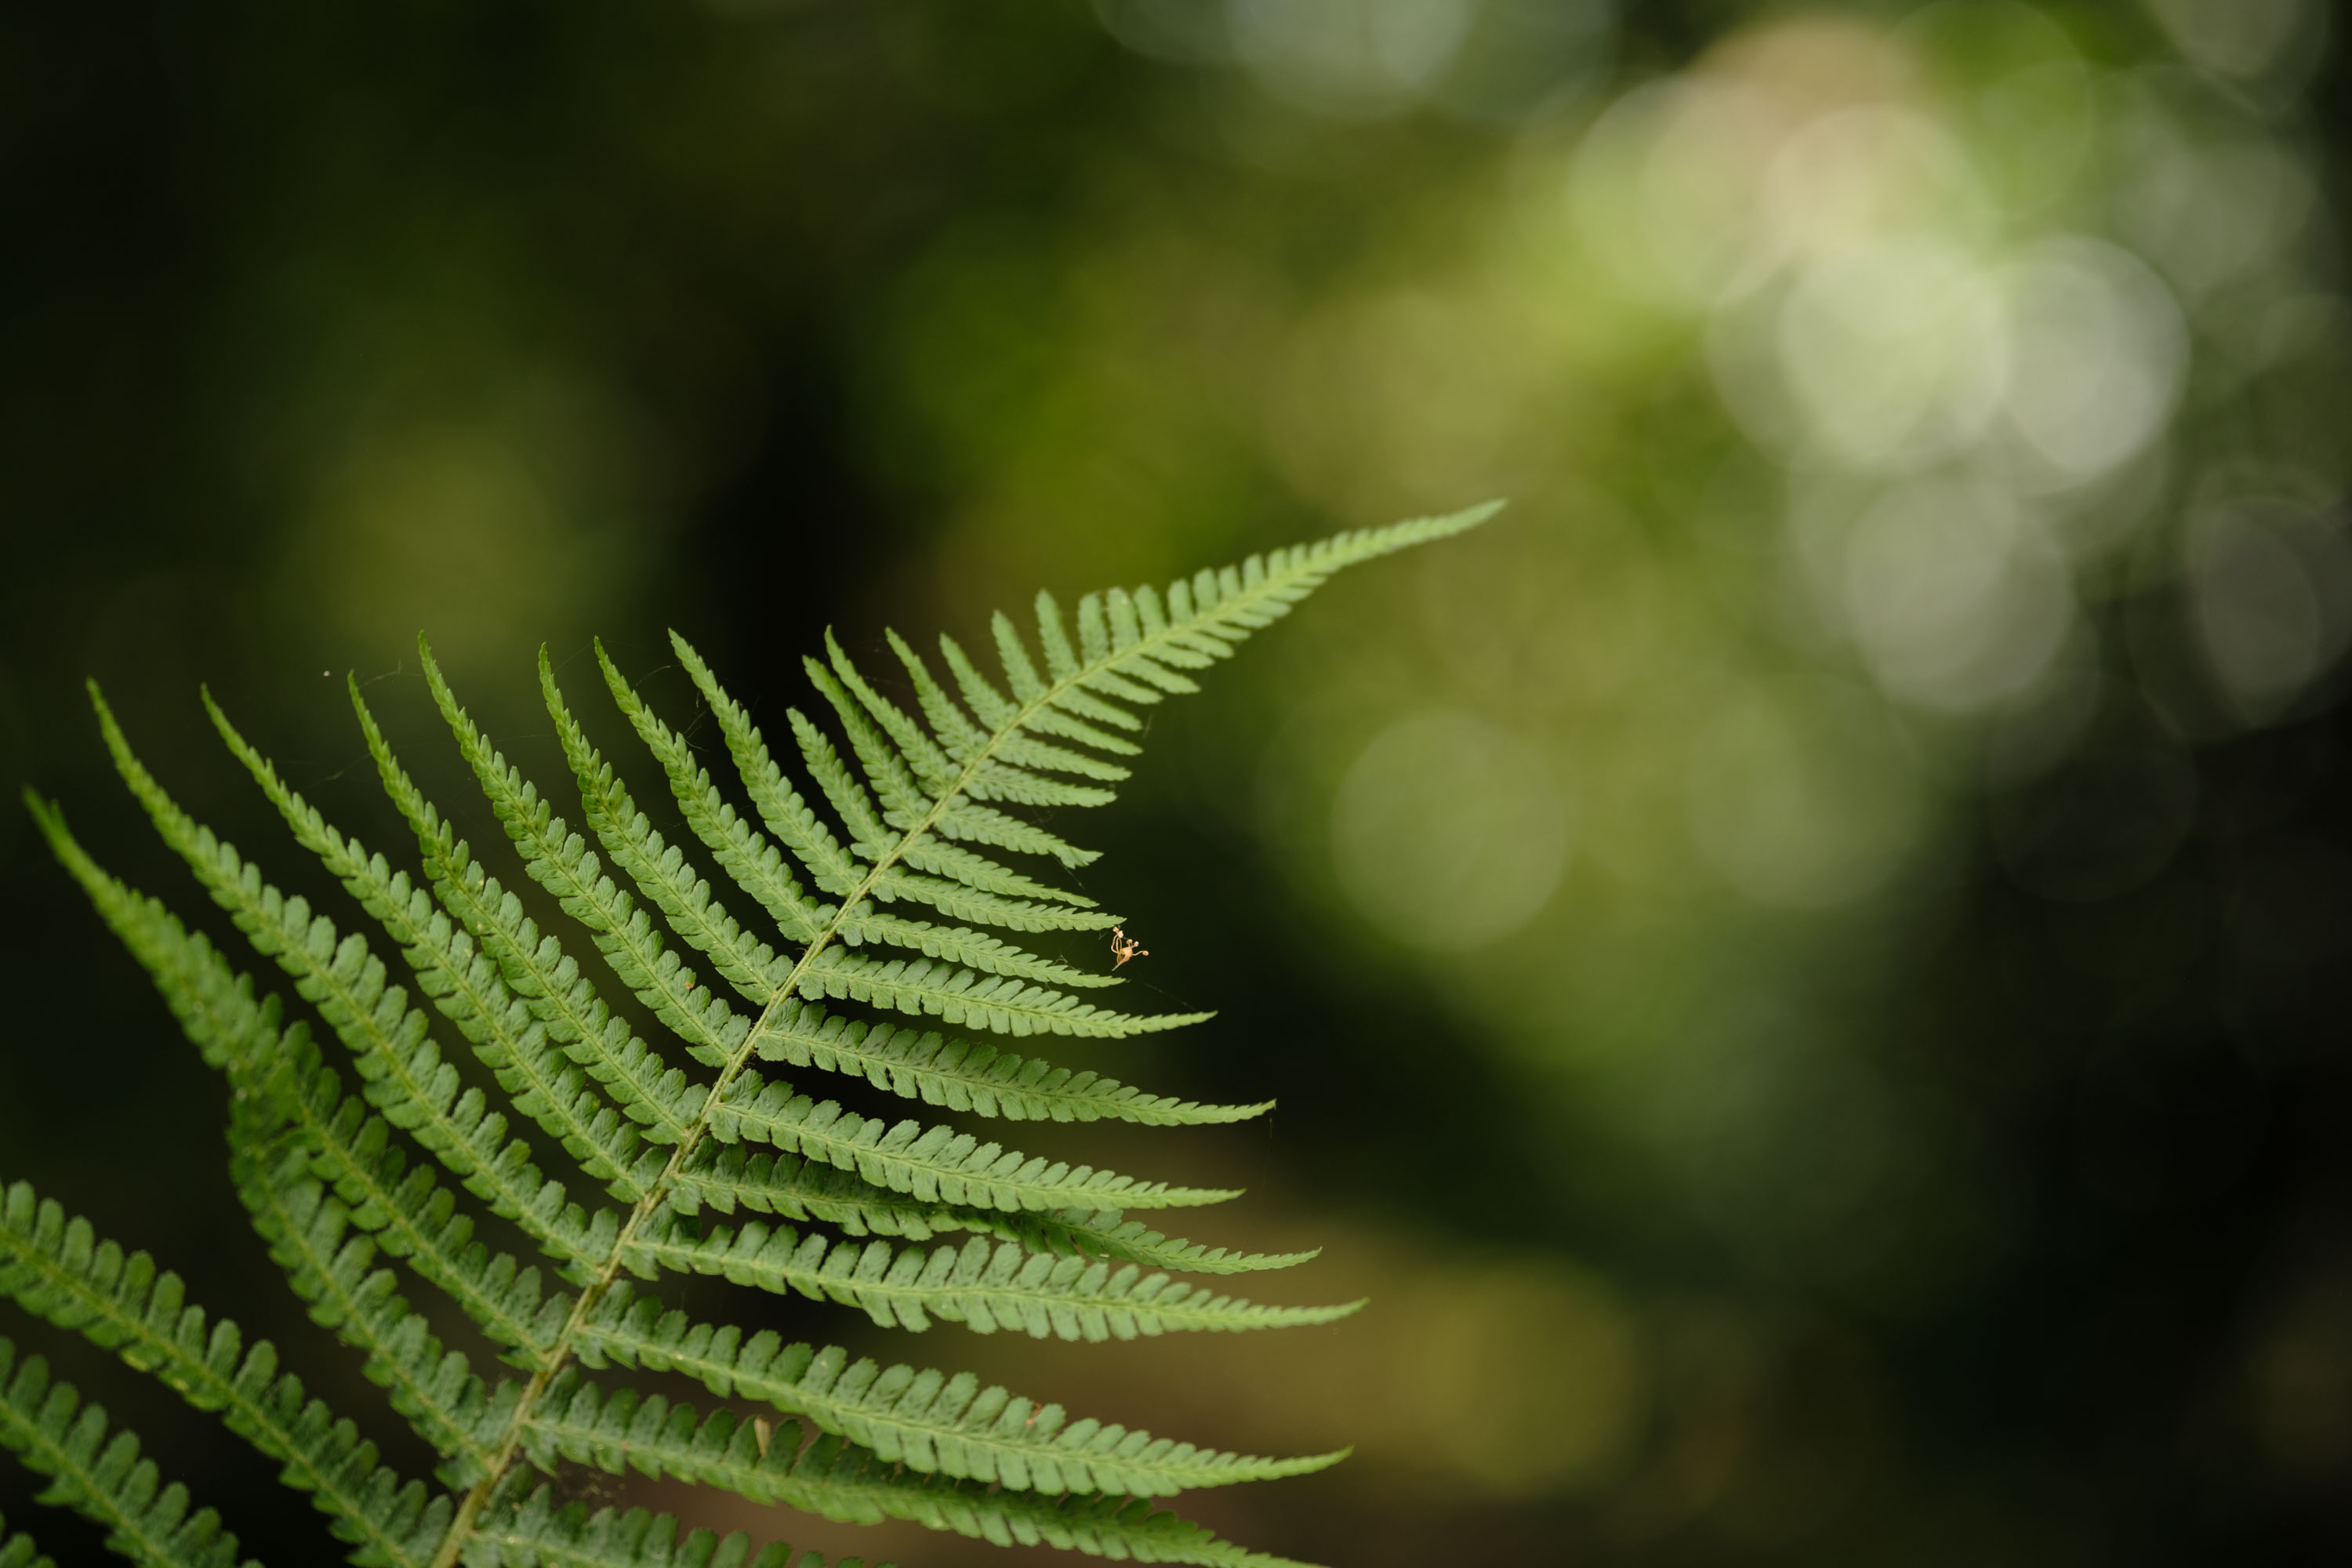
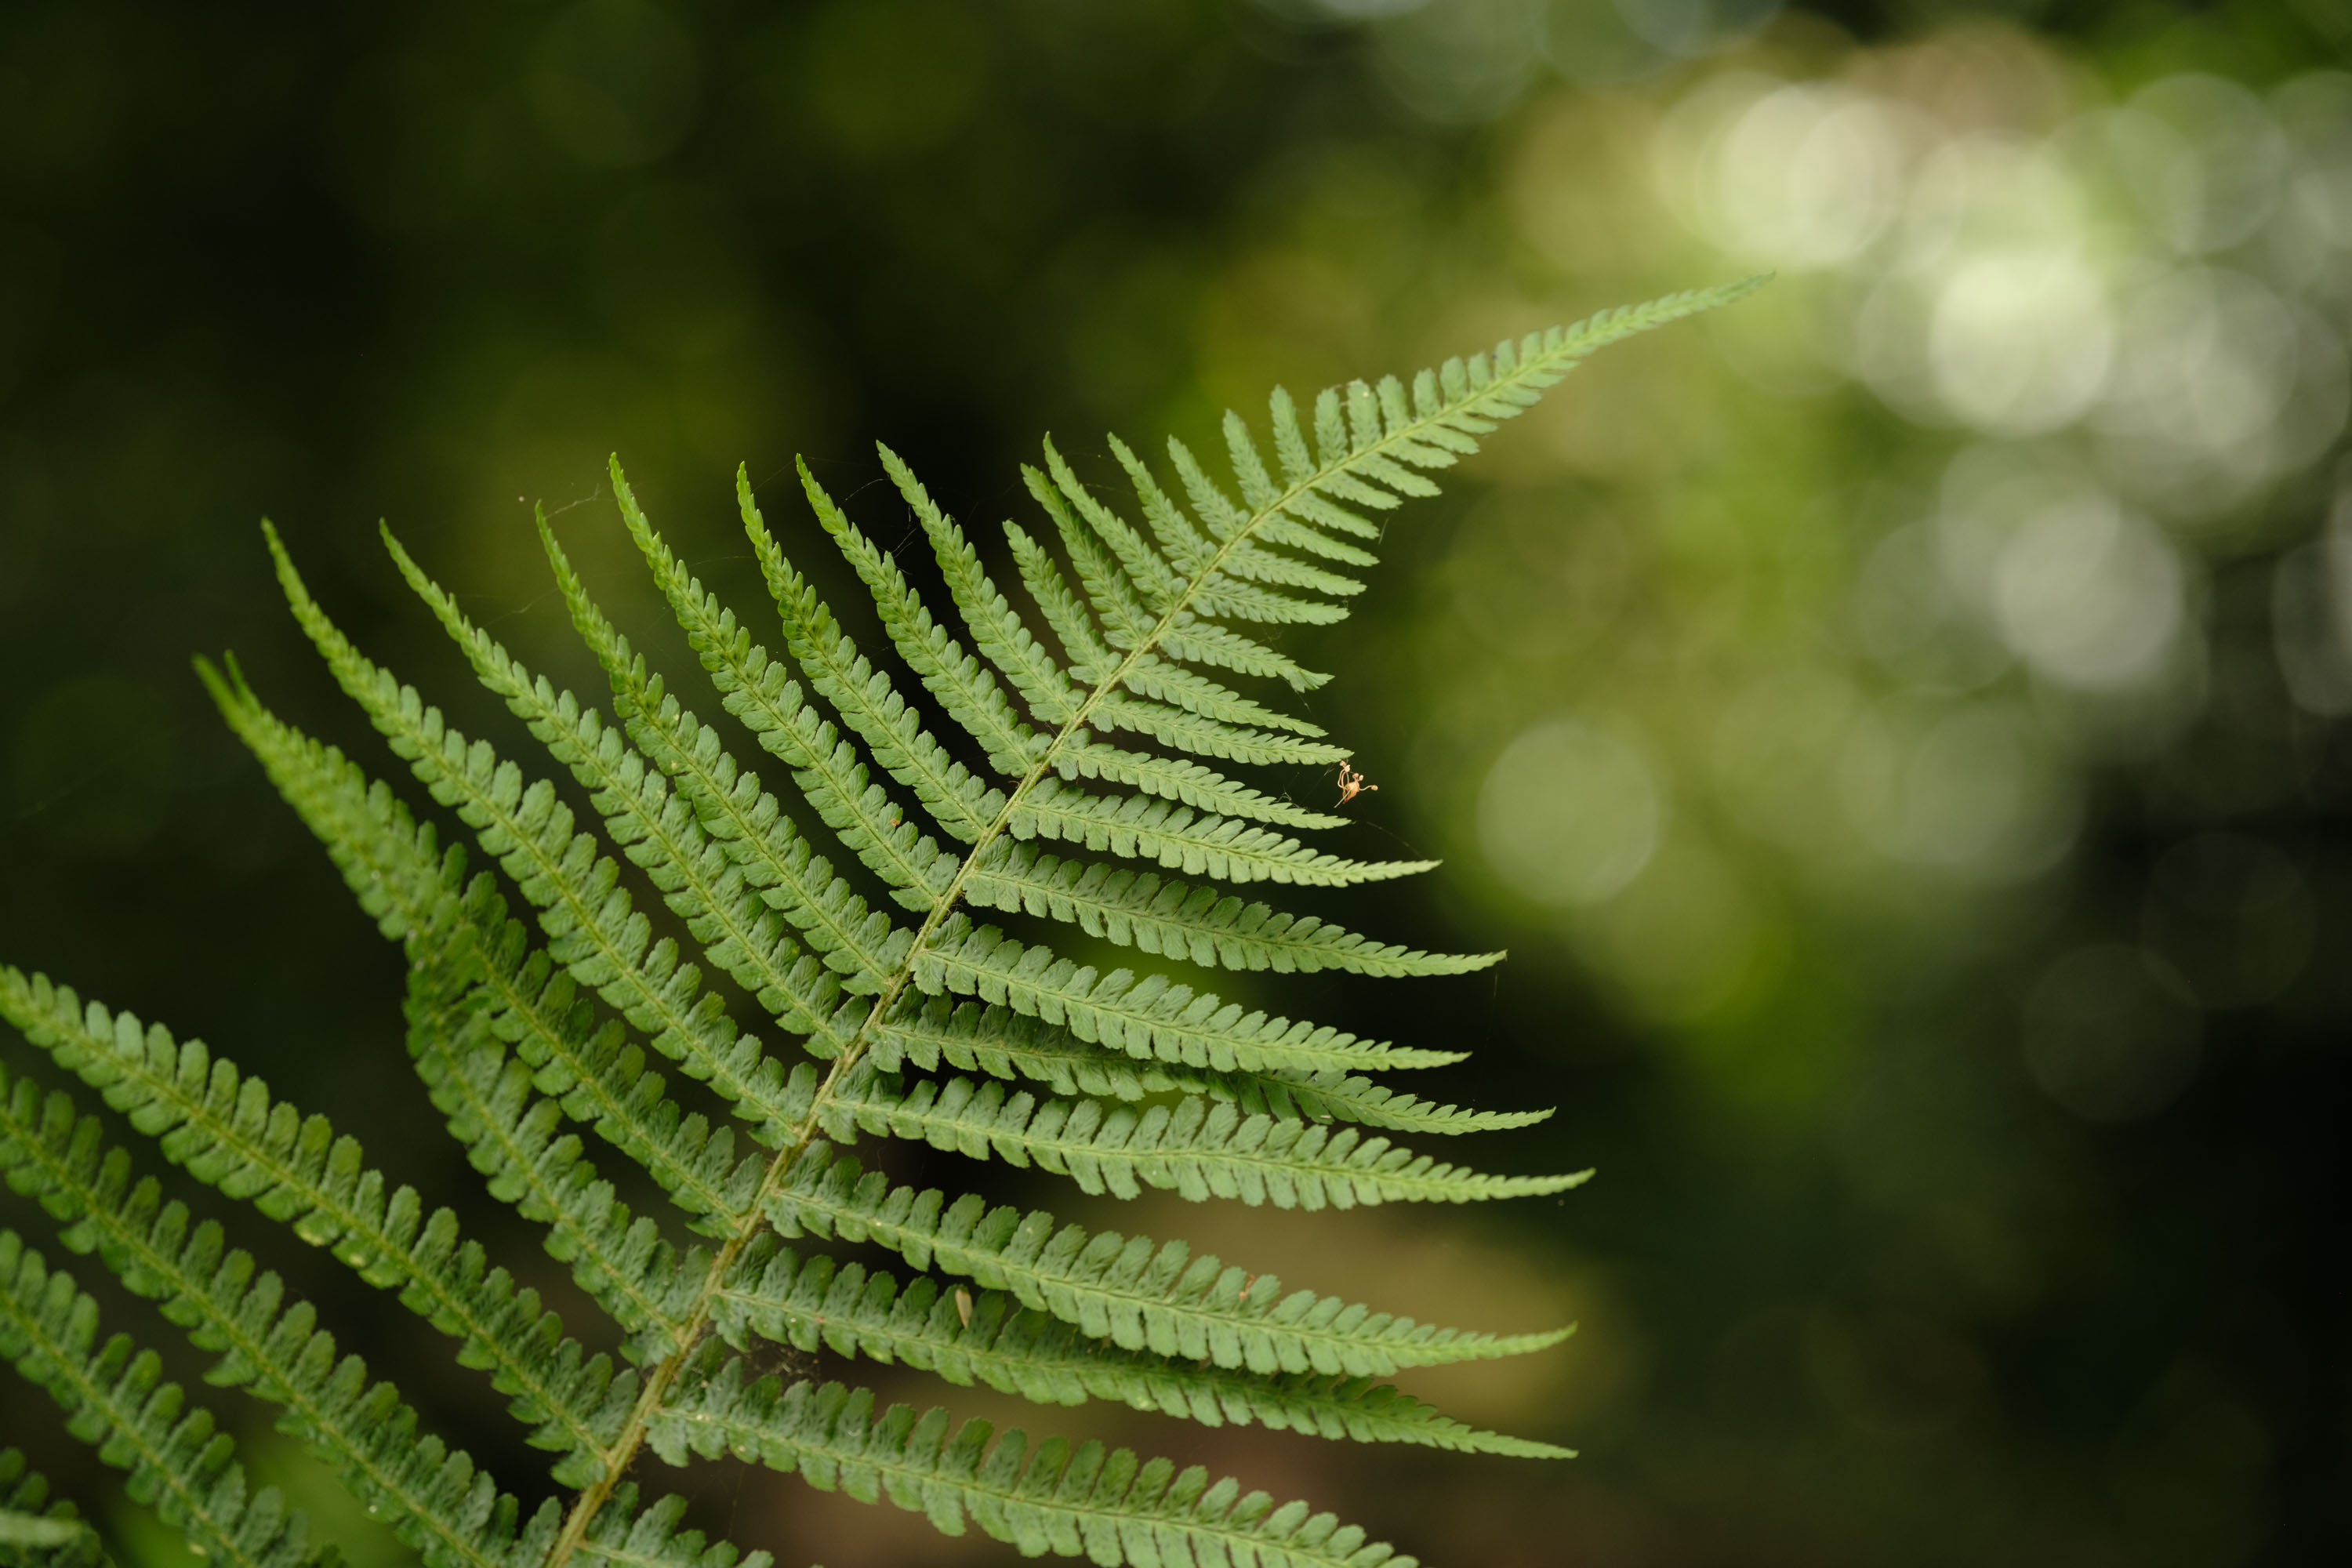
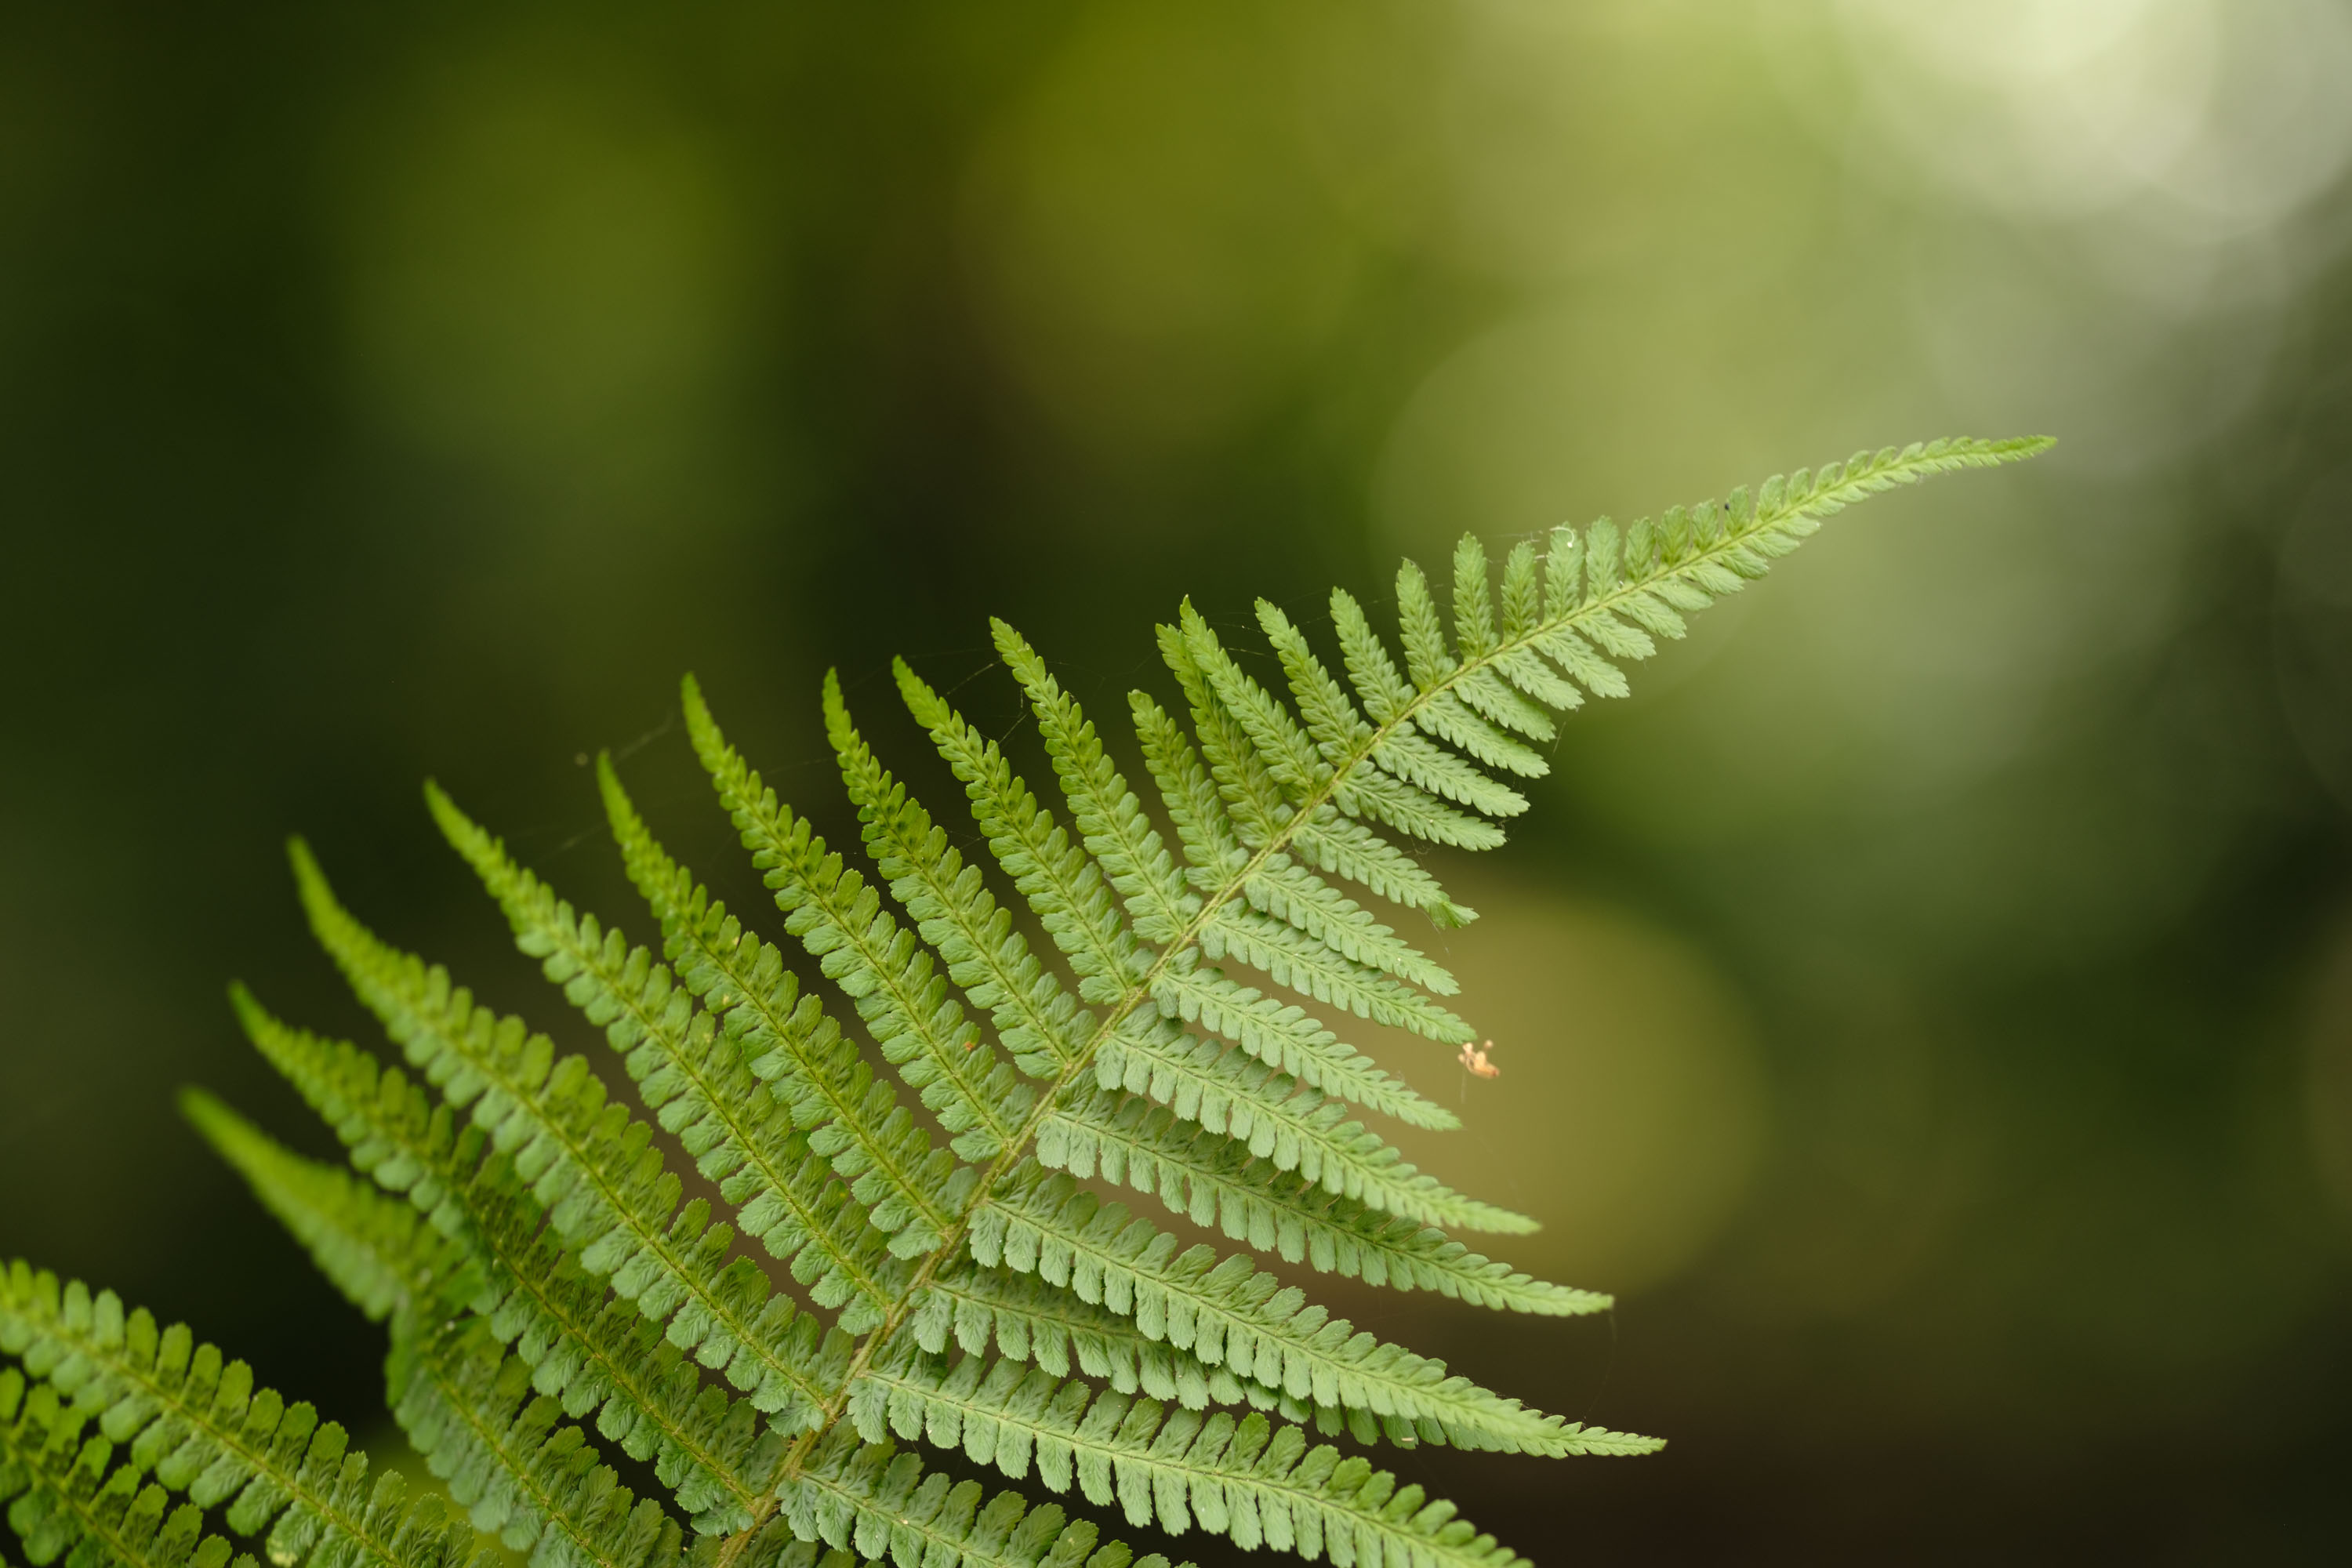
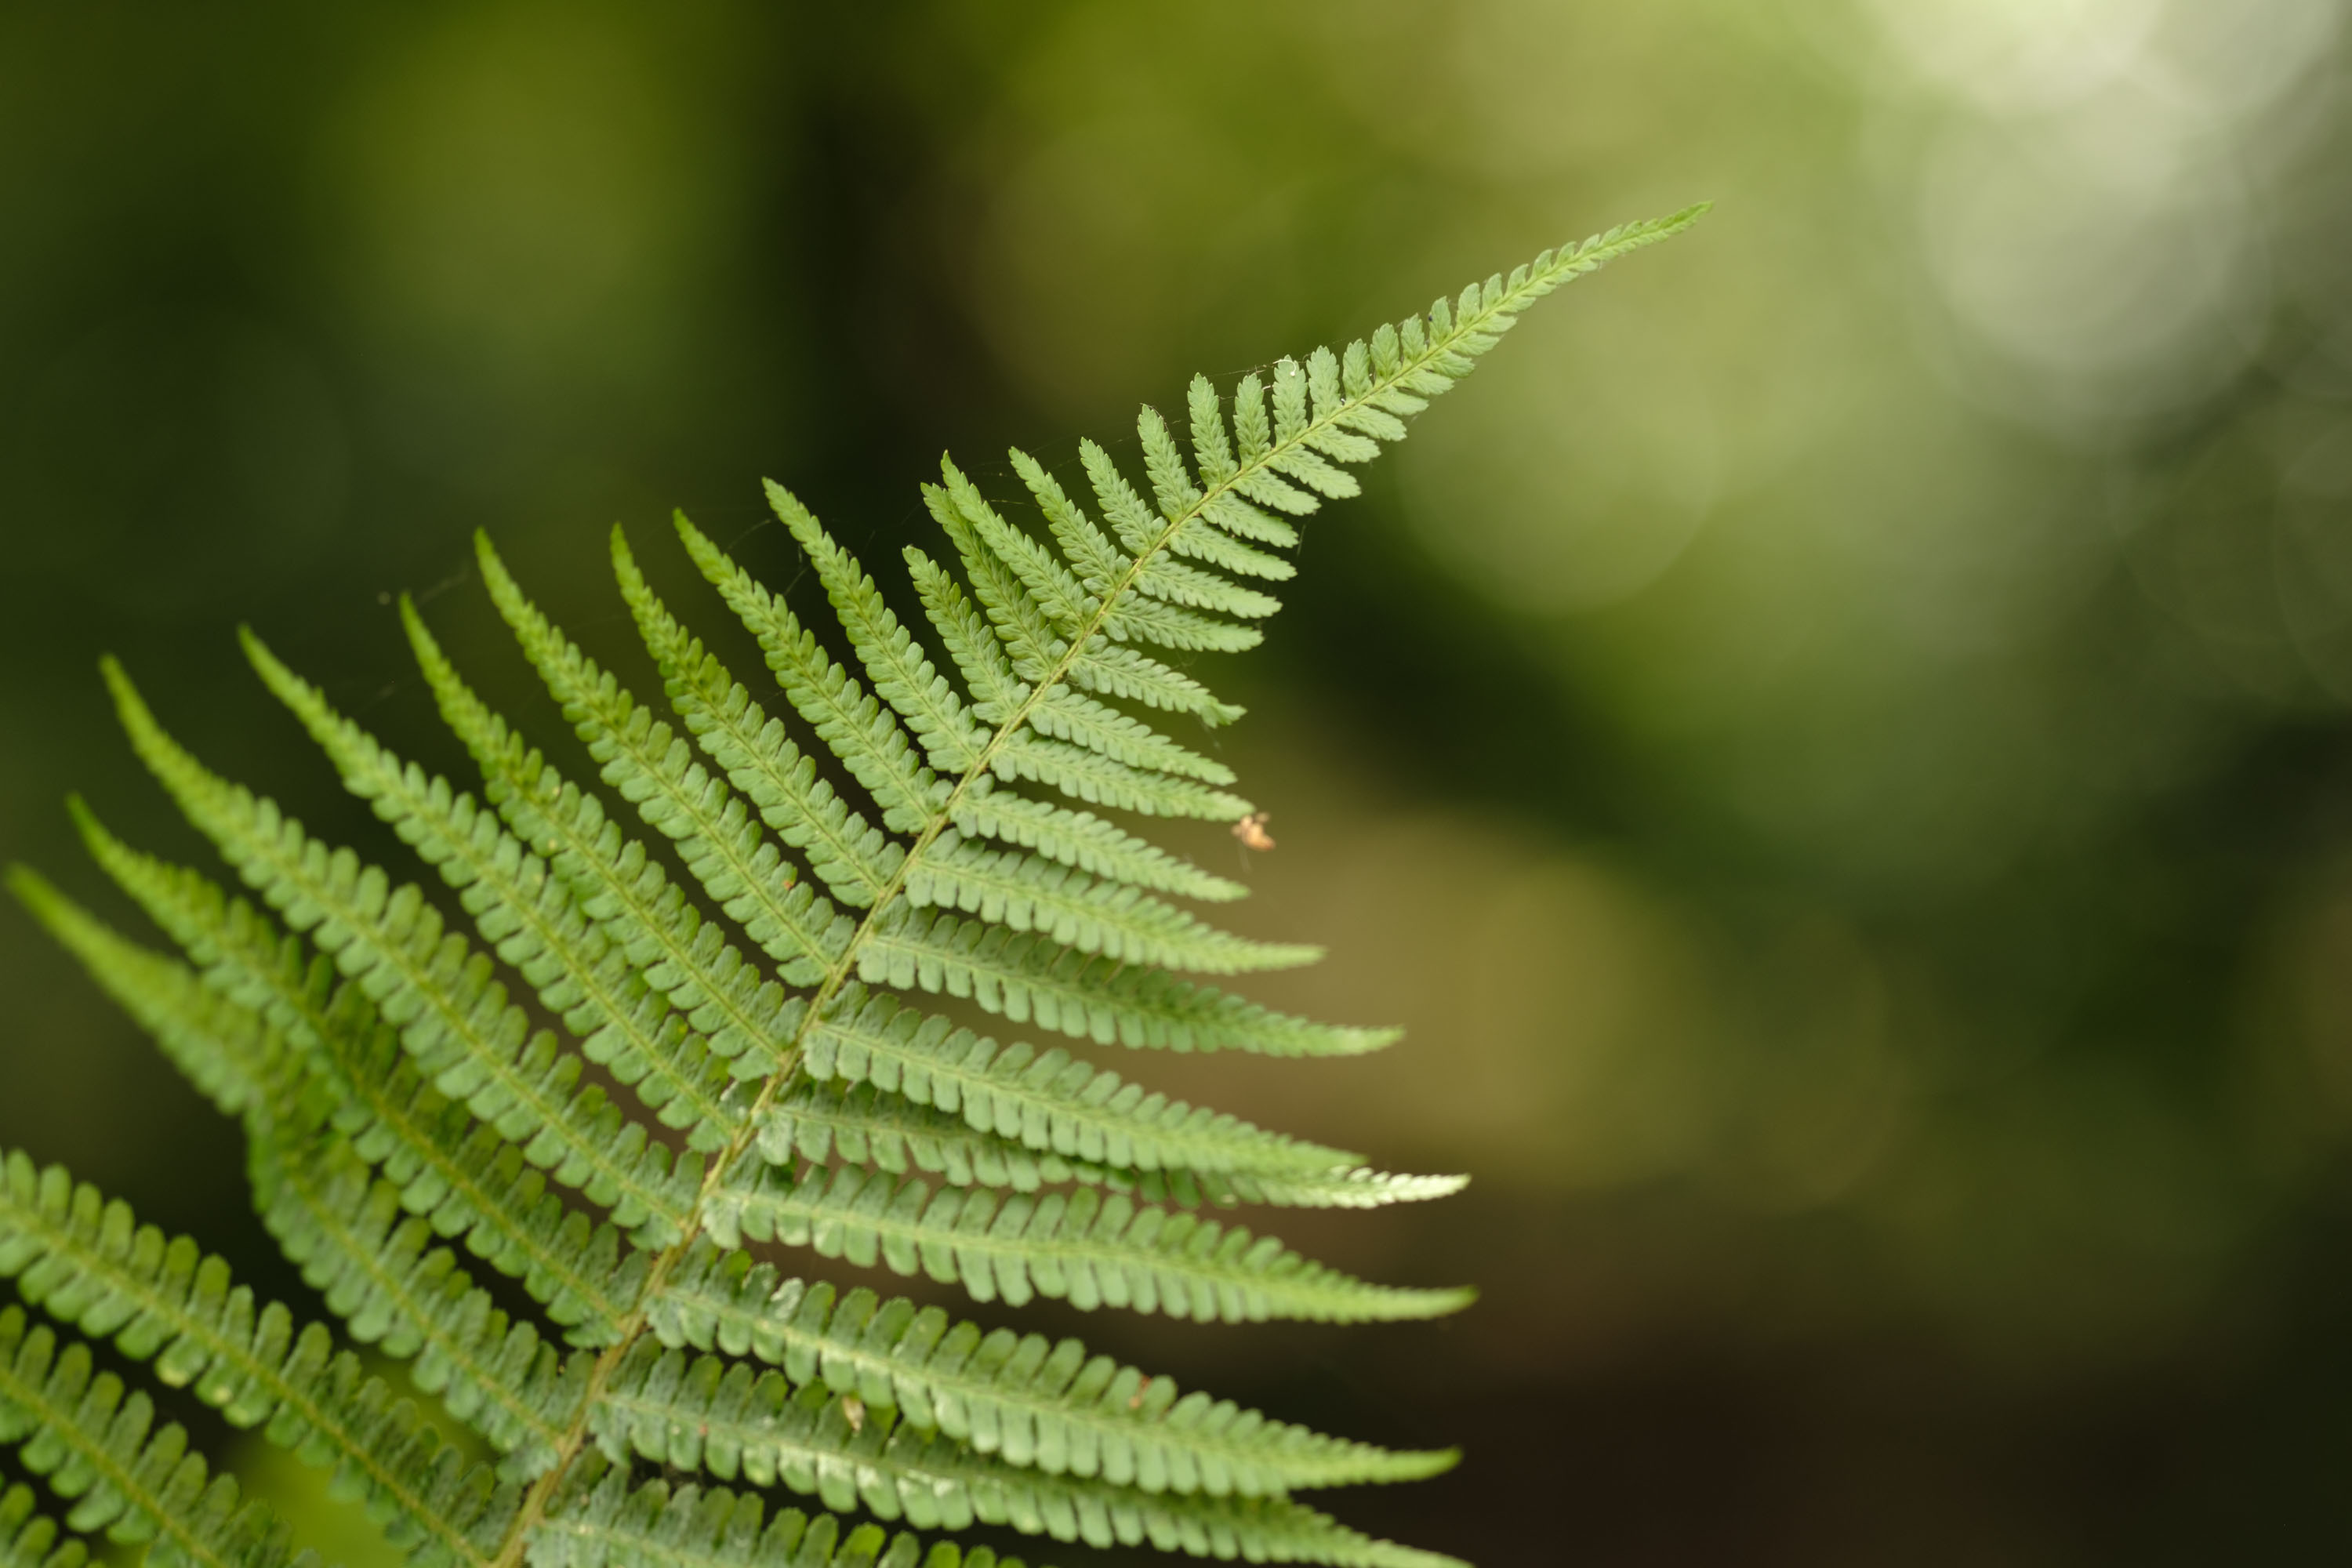
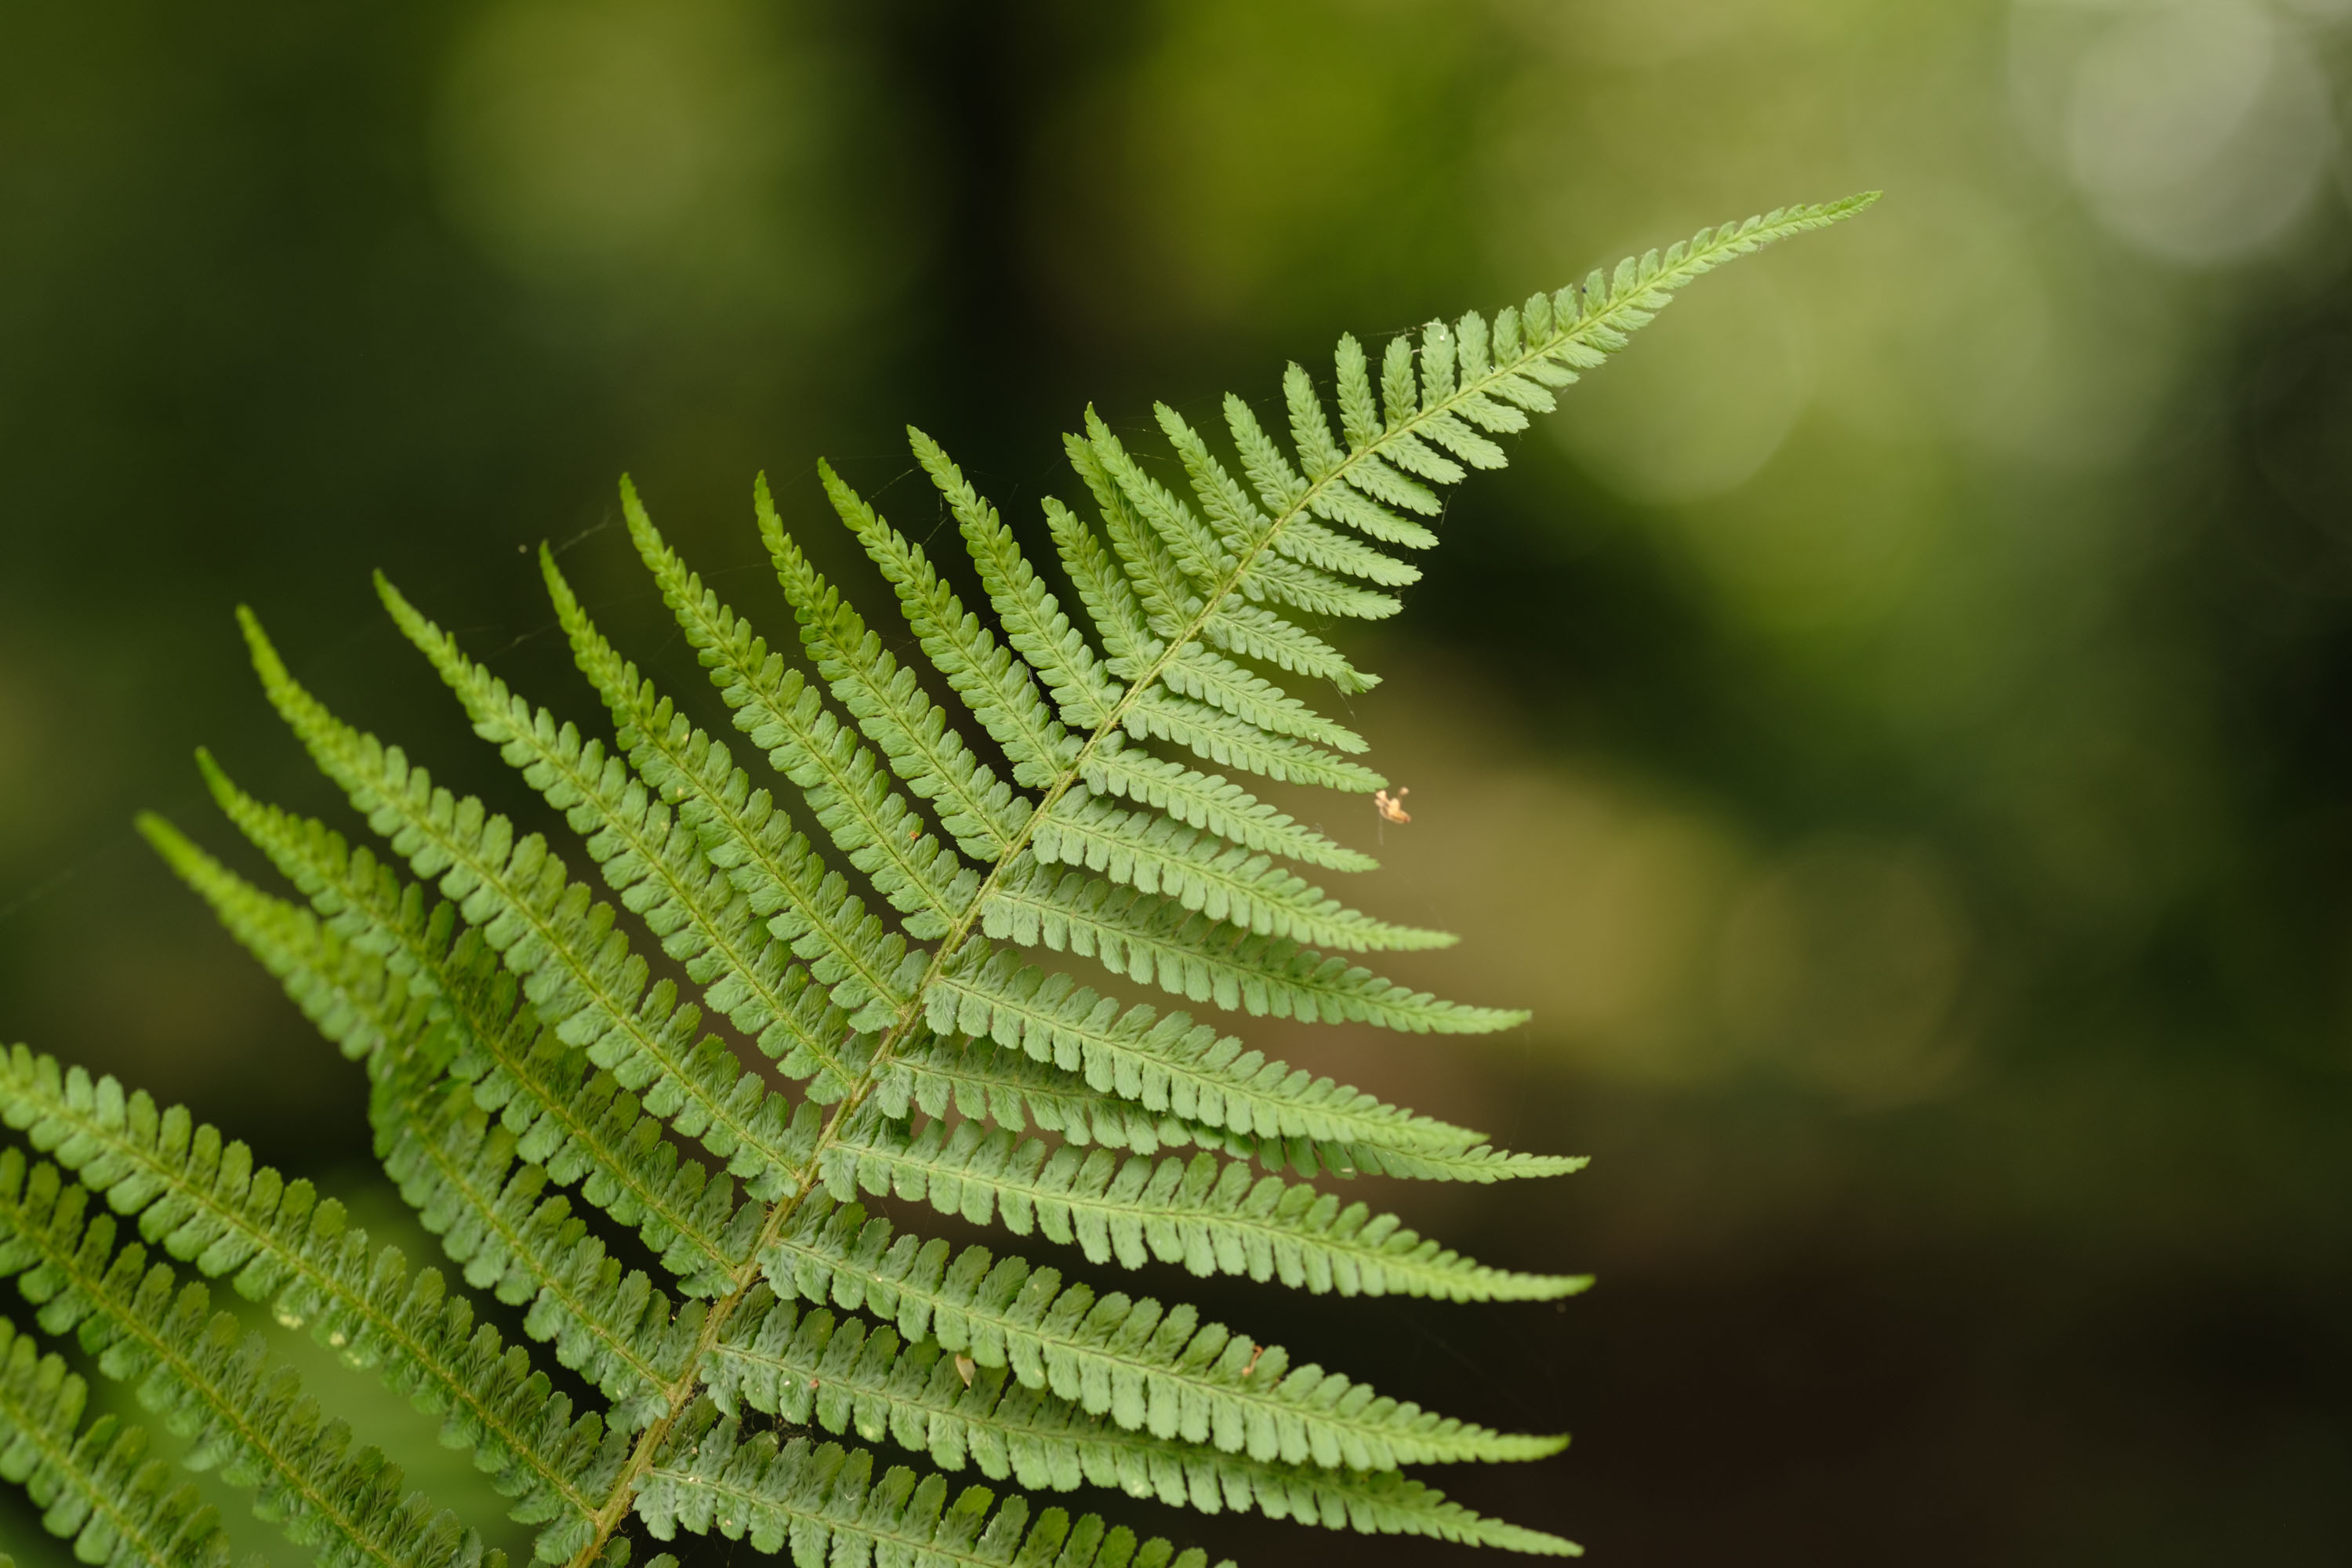
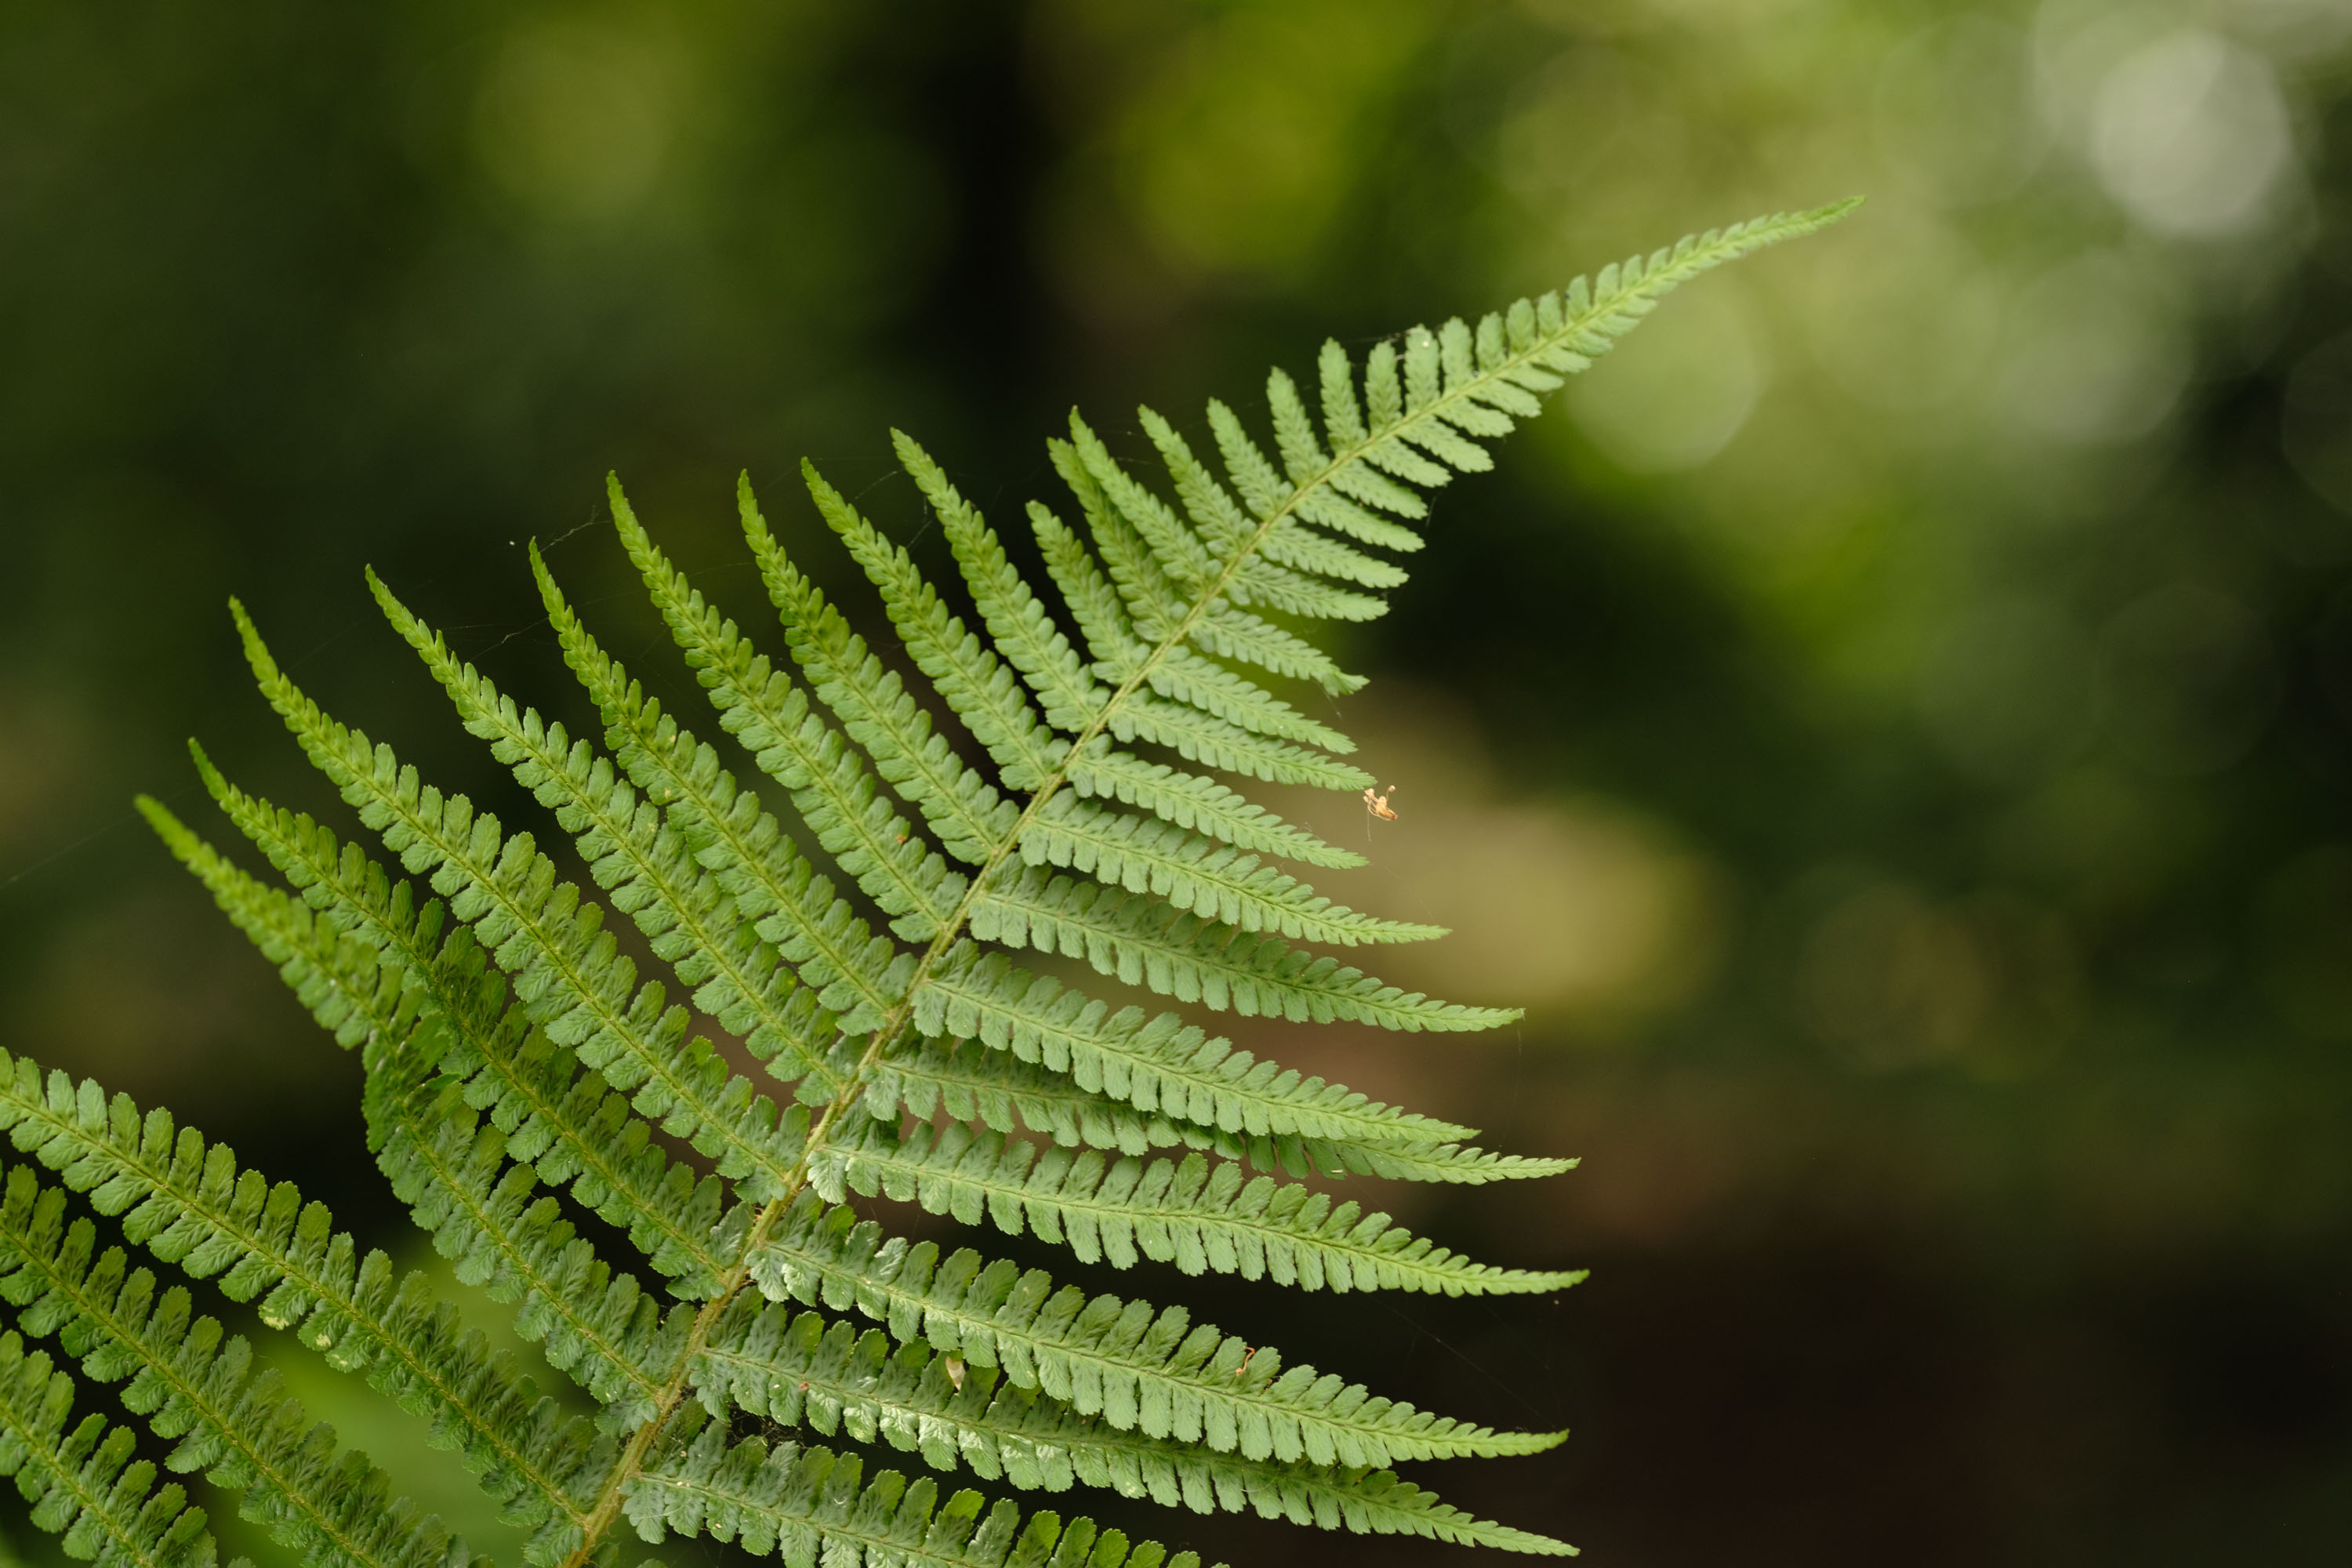
Bokeh is deliciously smooth. You can see the smooth edges in the dappled light in my self portraits and the series of photos of a fern (above). This is the most important attribute of bokeh, and the Viltrox 90mm nails it.
Bokeh is clearly cats-eye shaped, mind you, not fully round like you might find in the very best portrait lenses, such as the Nikon Plena. Personally, I don't mind cats-eye shaping in bokeh at all, while you might think it's ugly — it's subjective. What's not subjective, is bokeh smoothness, and like I say, the Viltrox lens scores highly.
The other caveat is the maximum f/2.2 aperture, which is slightly smaller than the f/2 of the Fujifilm lens I was comparing the Viltrox lens with. While this minor difference doesn't particularly affect depth of field, I did find the Fujifilm lens' bokeh to be even bigger and rounder at f/2 compared to the Viltrox lens at f/2.2.
If bokeh is a top concern, money is no object and you don't mind a larger lens, then the Fujifilm XF 90mm f/2 is the better pick (see comparisons, above).
I've included a general sample gallery and included notes with further comments on the lens quality.
Viltrox AF 90mm f/2.2 EVO sample images
I love the compression effect you get with a 135mm lens. It's possibly my favorite focal length for portraiture but also landscape photographyTim ColemanWith the aperture set to f/2.2, Tim ColemanThis unedited RAW image was shot at f/2.2. Note the dark corners and then scroll to the next image. Tim ColemanThe same scene at f/5.6. See how vignetting is gone, so the corners are brighter. Detail is also slightly sharperTim ColemanI moved to the other side of the pub sign to shoot towards bright light. The edges of the pub sign bracket and the out of focus house show minor chromatic aberration.Tim ColemanVignetting in this image worked to my advantage because it kept the detail in the sky rather than it being overblownTim ColemanTim ColemanTim ColemanTim ColemanTim Coleman
Should you buy the Viltrox AF 90mm f/2.2 EVO?
Buy it if...
You want an affordable mid-telephoto prime for portraiture At just 40% of the price of the Fujifilm XF 90mm f/2 lens, which also has an equivalent 135mm focal length, the Viltrox is much more affordable, while there is no such lens for Sony and Nikon cameras.
You'd like a compact mid-telephoto prime The Viltrox lens is particularly compact when you consider that it's a 135mm f/2.2 effective lens, especially when you see it in action alongside the bulkier Fujifilm offering.
Don't buy it if...
You want the absolute dreamiest bokeh Given its small size and low(er) price, there had to be a compromise somewhere, and for me it's bokeh — which has a tendency for cats-eye shaping — and that maximum f/2.2 aperture, which is ever so slightly smaller than the Fujifilm's f/2.
You'd like external controls Besides its clicked aperture ring and focus ring, there are no external controls in the Fujifilm version. Only with the Sony and Nikon versions do you get an MF/AF switch, function button, and click control for the aperture ring for smooth video transitions.
How I tested the Viltrox AF 90mm f/2.2 EVO
(Image credit: Tim Coleman)
Viltrox sent me the X-mount version of the AF 90mm f/2.2 EVO lens
I paired it with a Fujifilm X-T5 camera
Fujifilm loaned me the XF 90mm f/2 R LM WR lens at my request, to make comparisons
Viltrox sent me the X-mount version of the AF 90mm f/2.2 EVO lens and I paired it with a Fujifilm X-T5 camera. It's also available for Sony E and Nikon Z-mount cameras.
I tested the lens over the course of two weeks, alongside the Fujifilm XF 90mm f/2 R LM WR lens, which Fujifilm loaned to me at my request, and I have shot like-for-like images with both lenses to make comparisons.
As with all of my lens reviews, I have put the Viltrox 90mm through a number of real world tests, including a series of the same image at the various aperture settings, and situations where strong light could induce lens distortions such as flare and chromatic aberration.
I always shoot in both RAW & JPEG format, and turn off in-camera lens corrections, checking the unprocessed RAW files. I also use each lens for the situations that it is designed for, in this case portraiture and for isolating subjects.
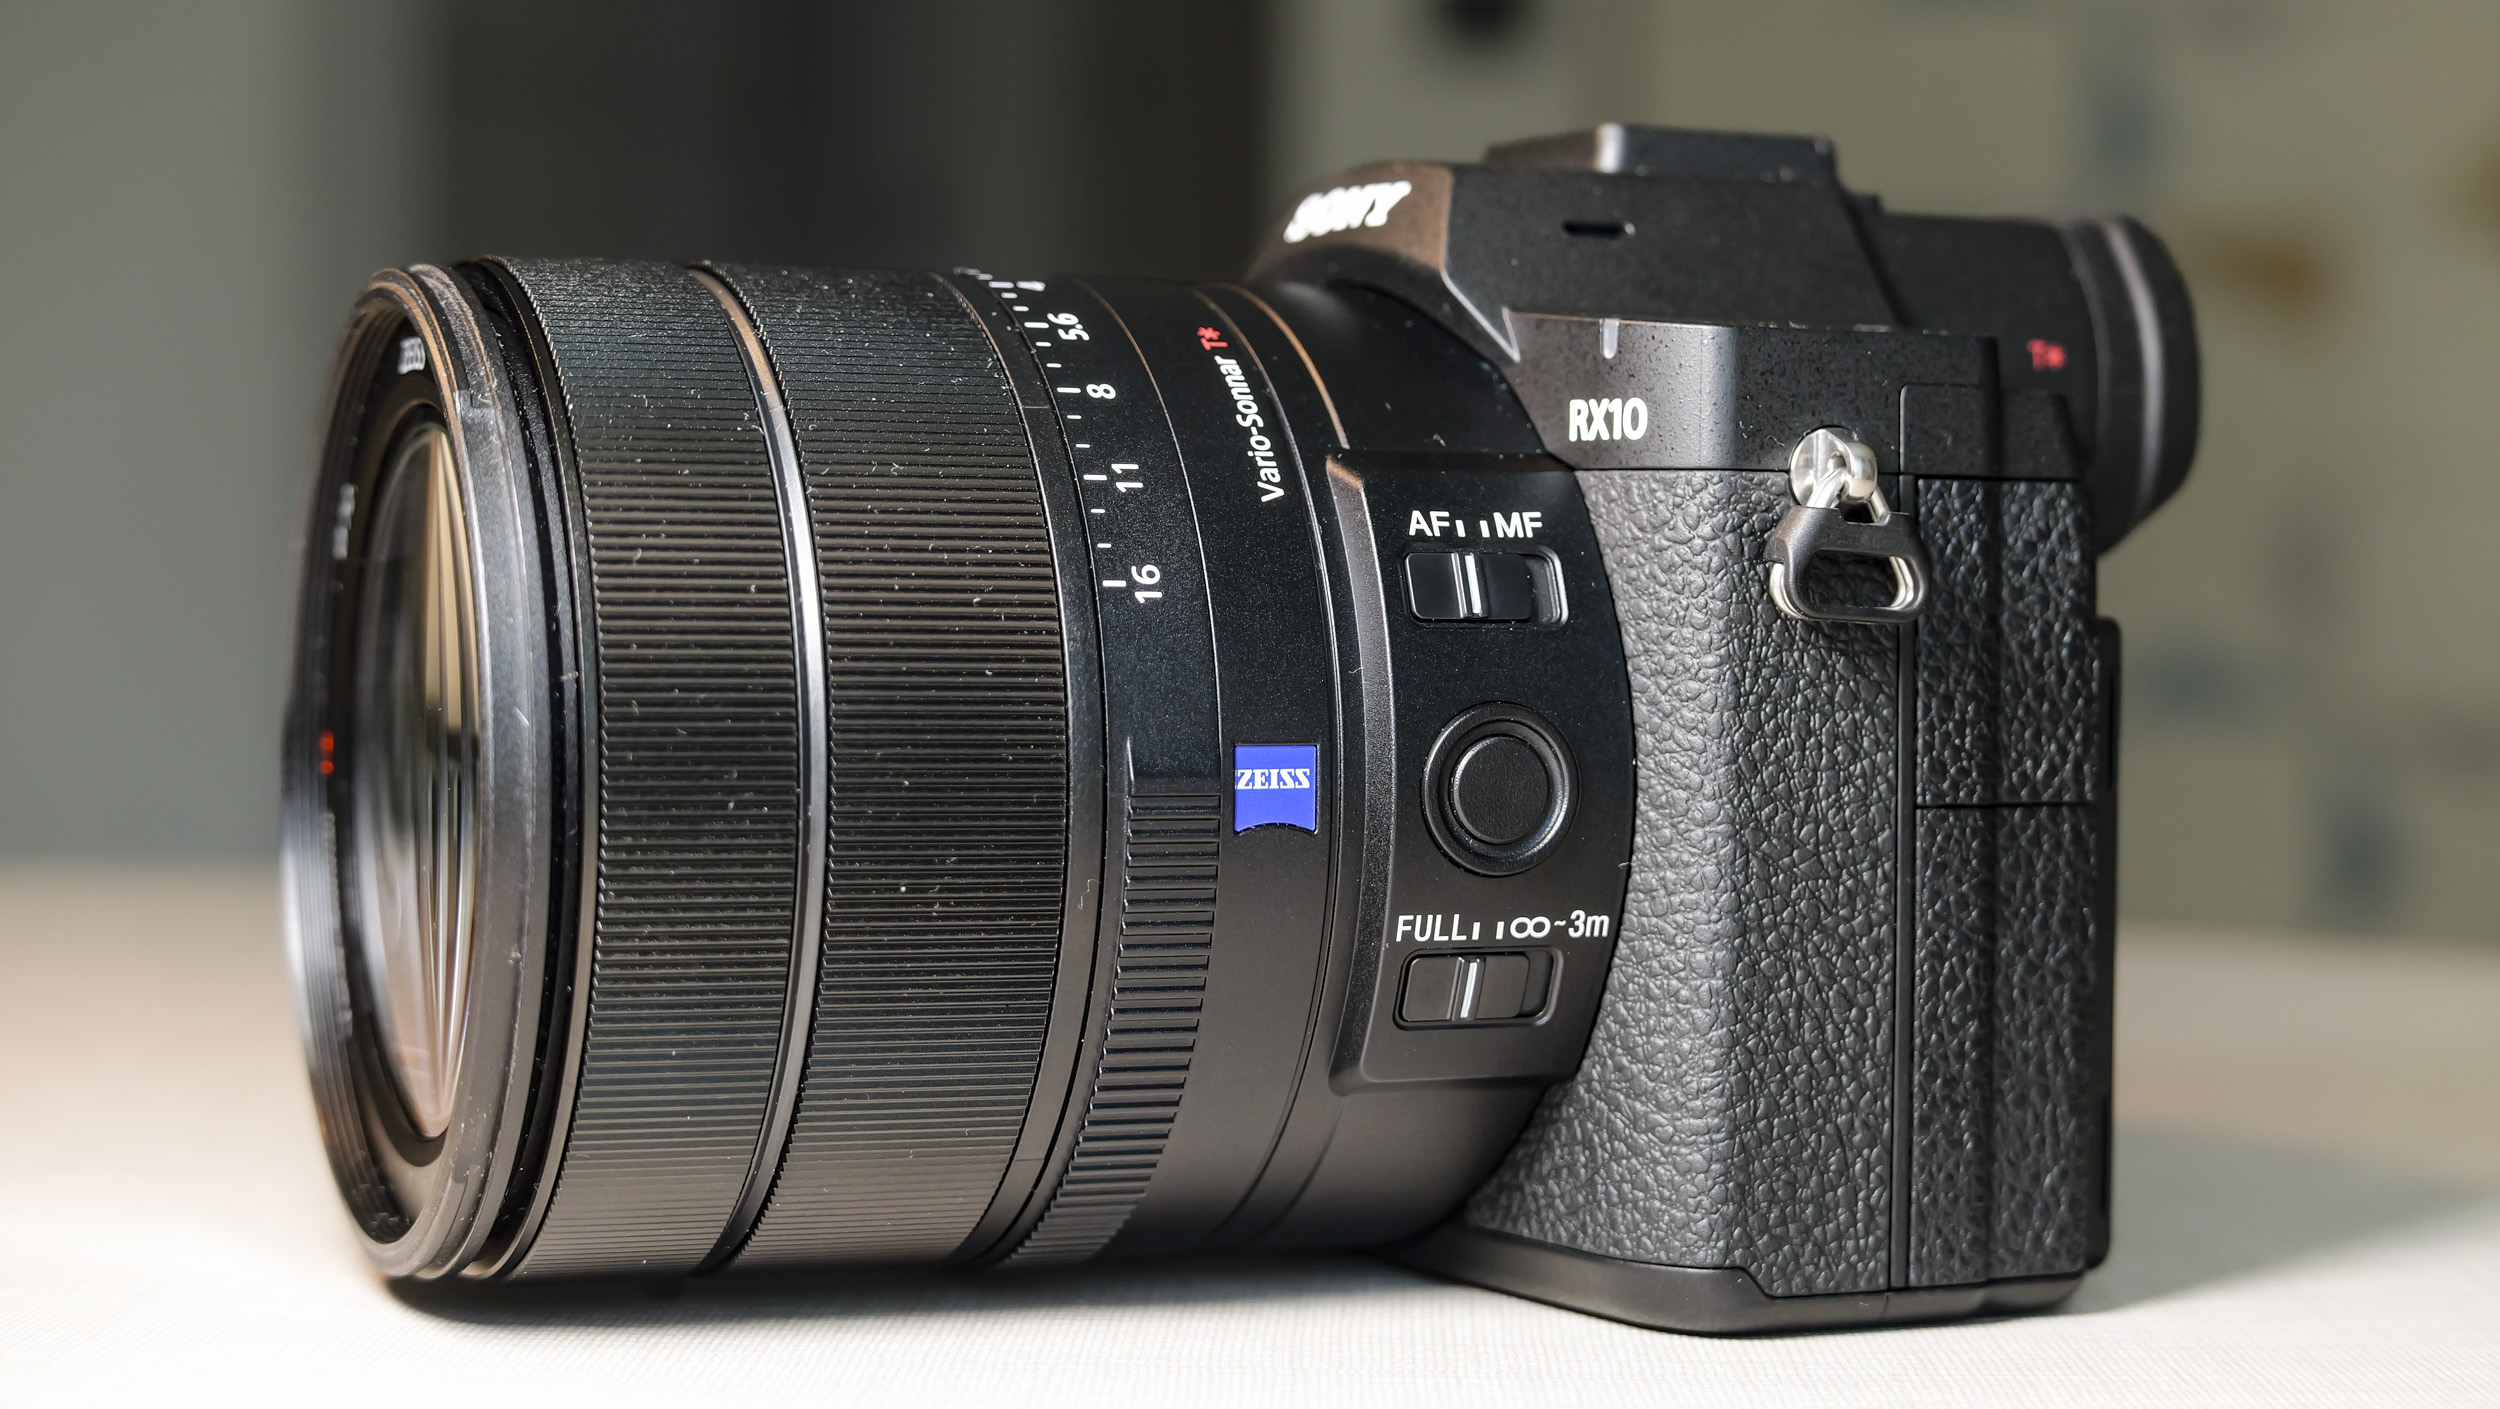
Just when you thought bridge cameras had been sunsetted, Sony returns after a nine-year gap with the new RX10 V — and it’s a genuine upgrade of the Cyber-shot RX10 IV, which was already the best camera of its kind.
We get the same winning combination of a 1-inch stacked 20MP sensor and 24-600mm F2.4-4 lens, but the mark V model has been enhanced with Sony's latest Bionz XR processor and AI chip, enabling improved burst shooting speed, 4K video features, and, most importantly, better autofocus performance.
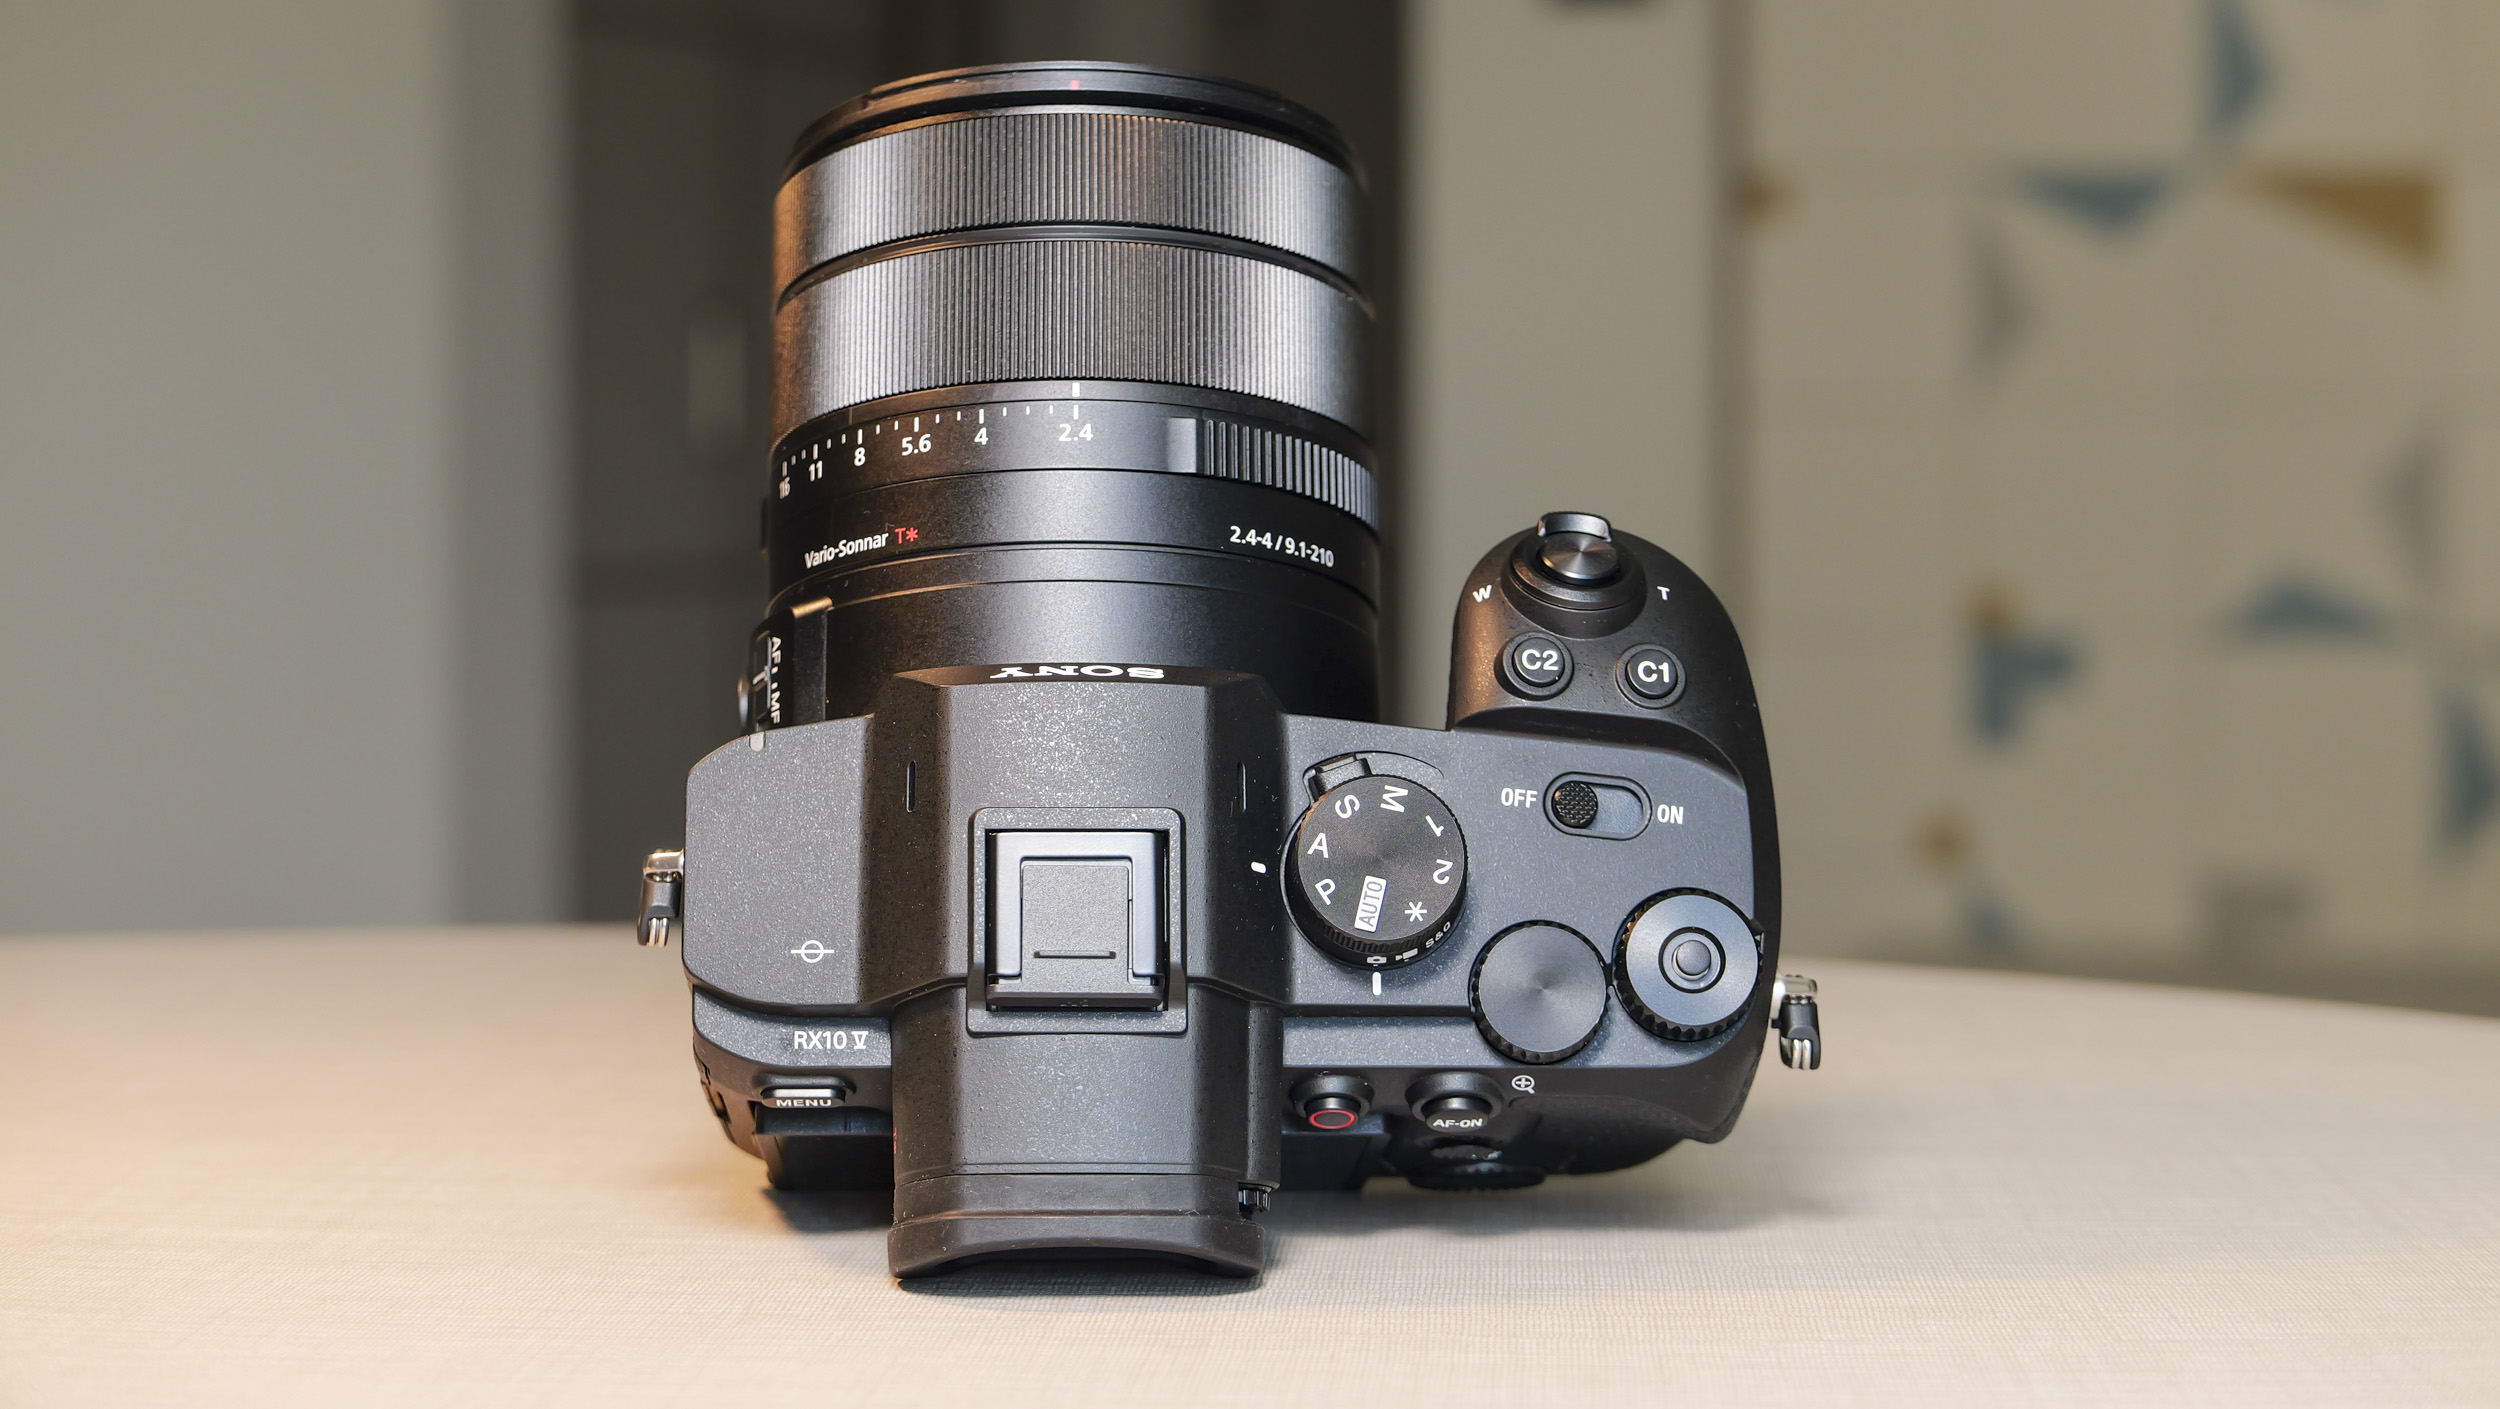
Sony has also implemented multiple design tweaks to the control layout and ergonomics, and as a result the RX10 V looks much more like an Alpha camera than the RX10 IV, which feels more Cyber-shot compact, did. For a more detailed breakdown of the differences, check out my RX10 V vs Cyber-shot RX10 IV article.
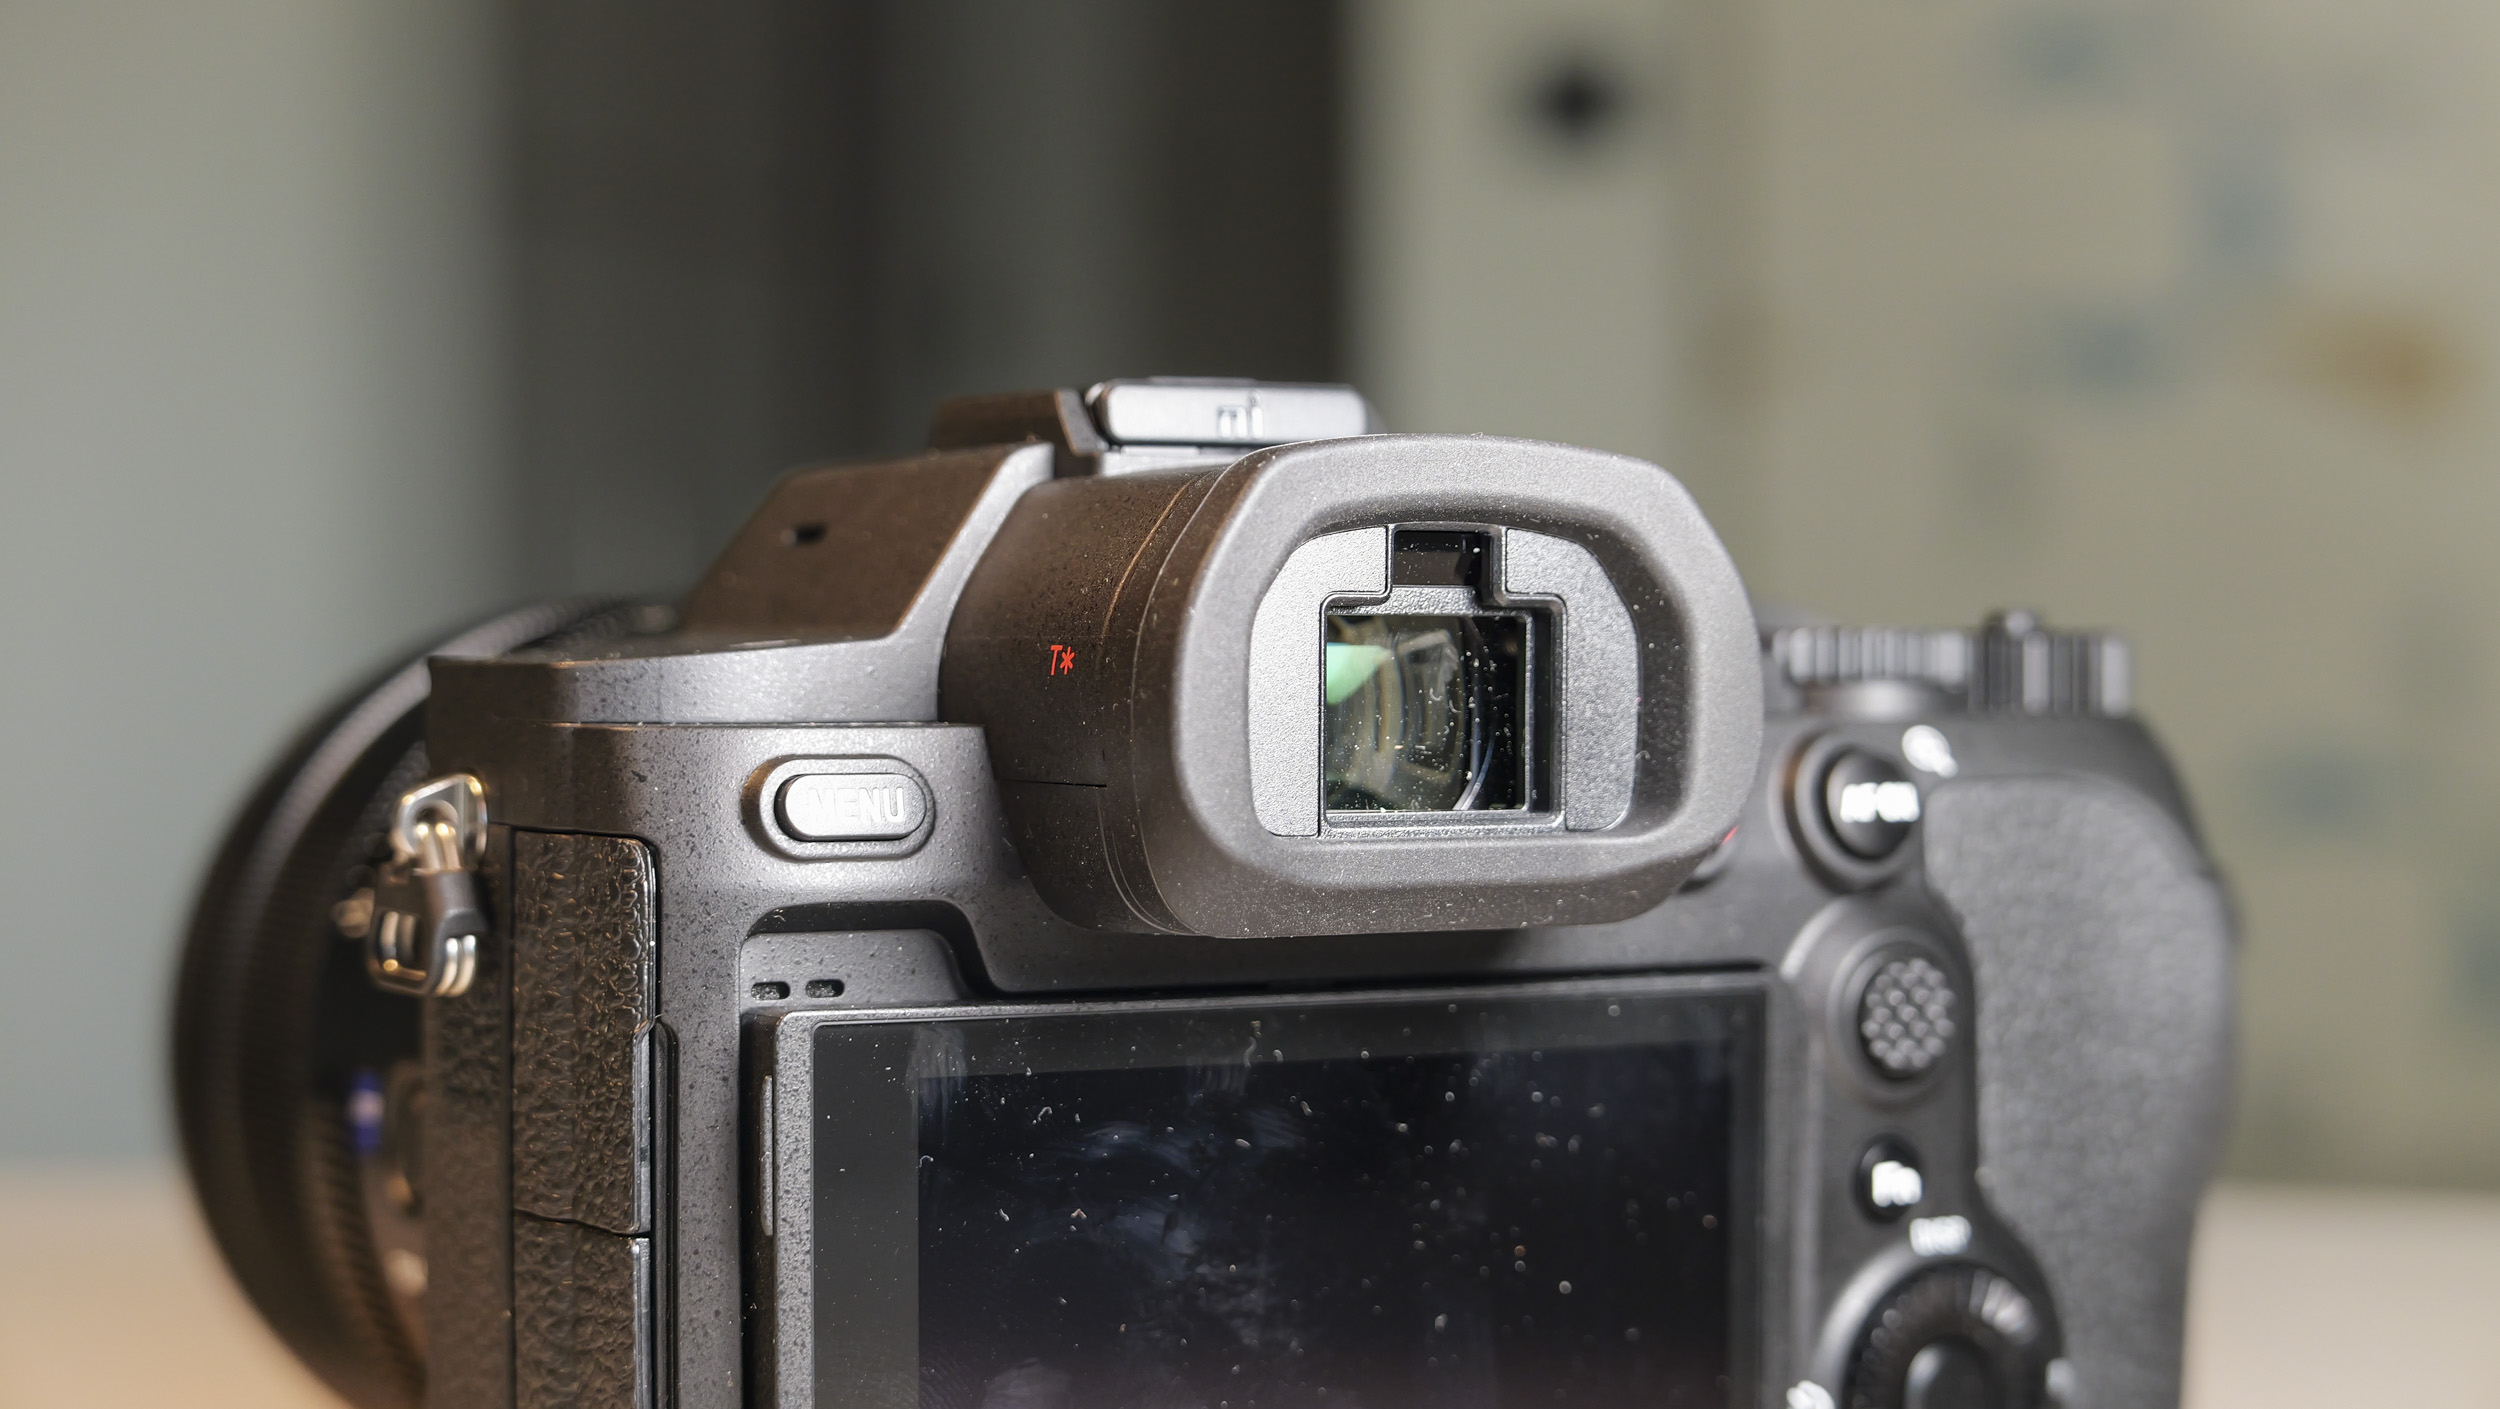
There are additional exposure dials, an AF joystick has been added (thank you, Sony!), as has a USB-C terminal, and the higher-resolution viewfinder is larger, more pronounced, and easier to see.
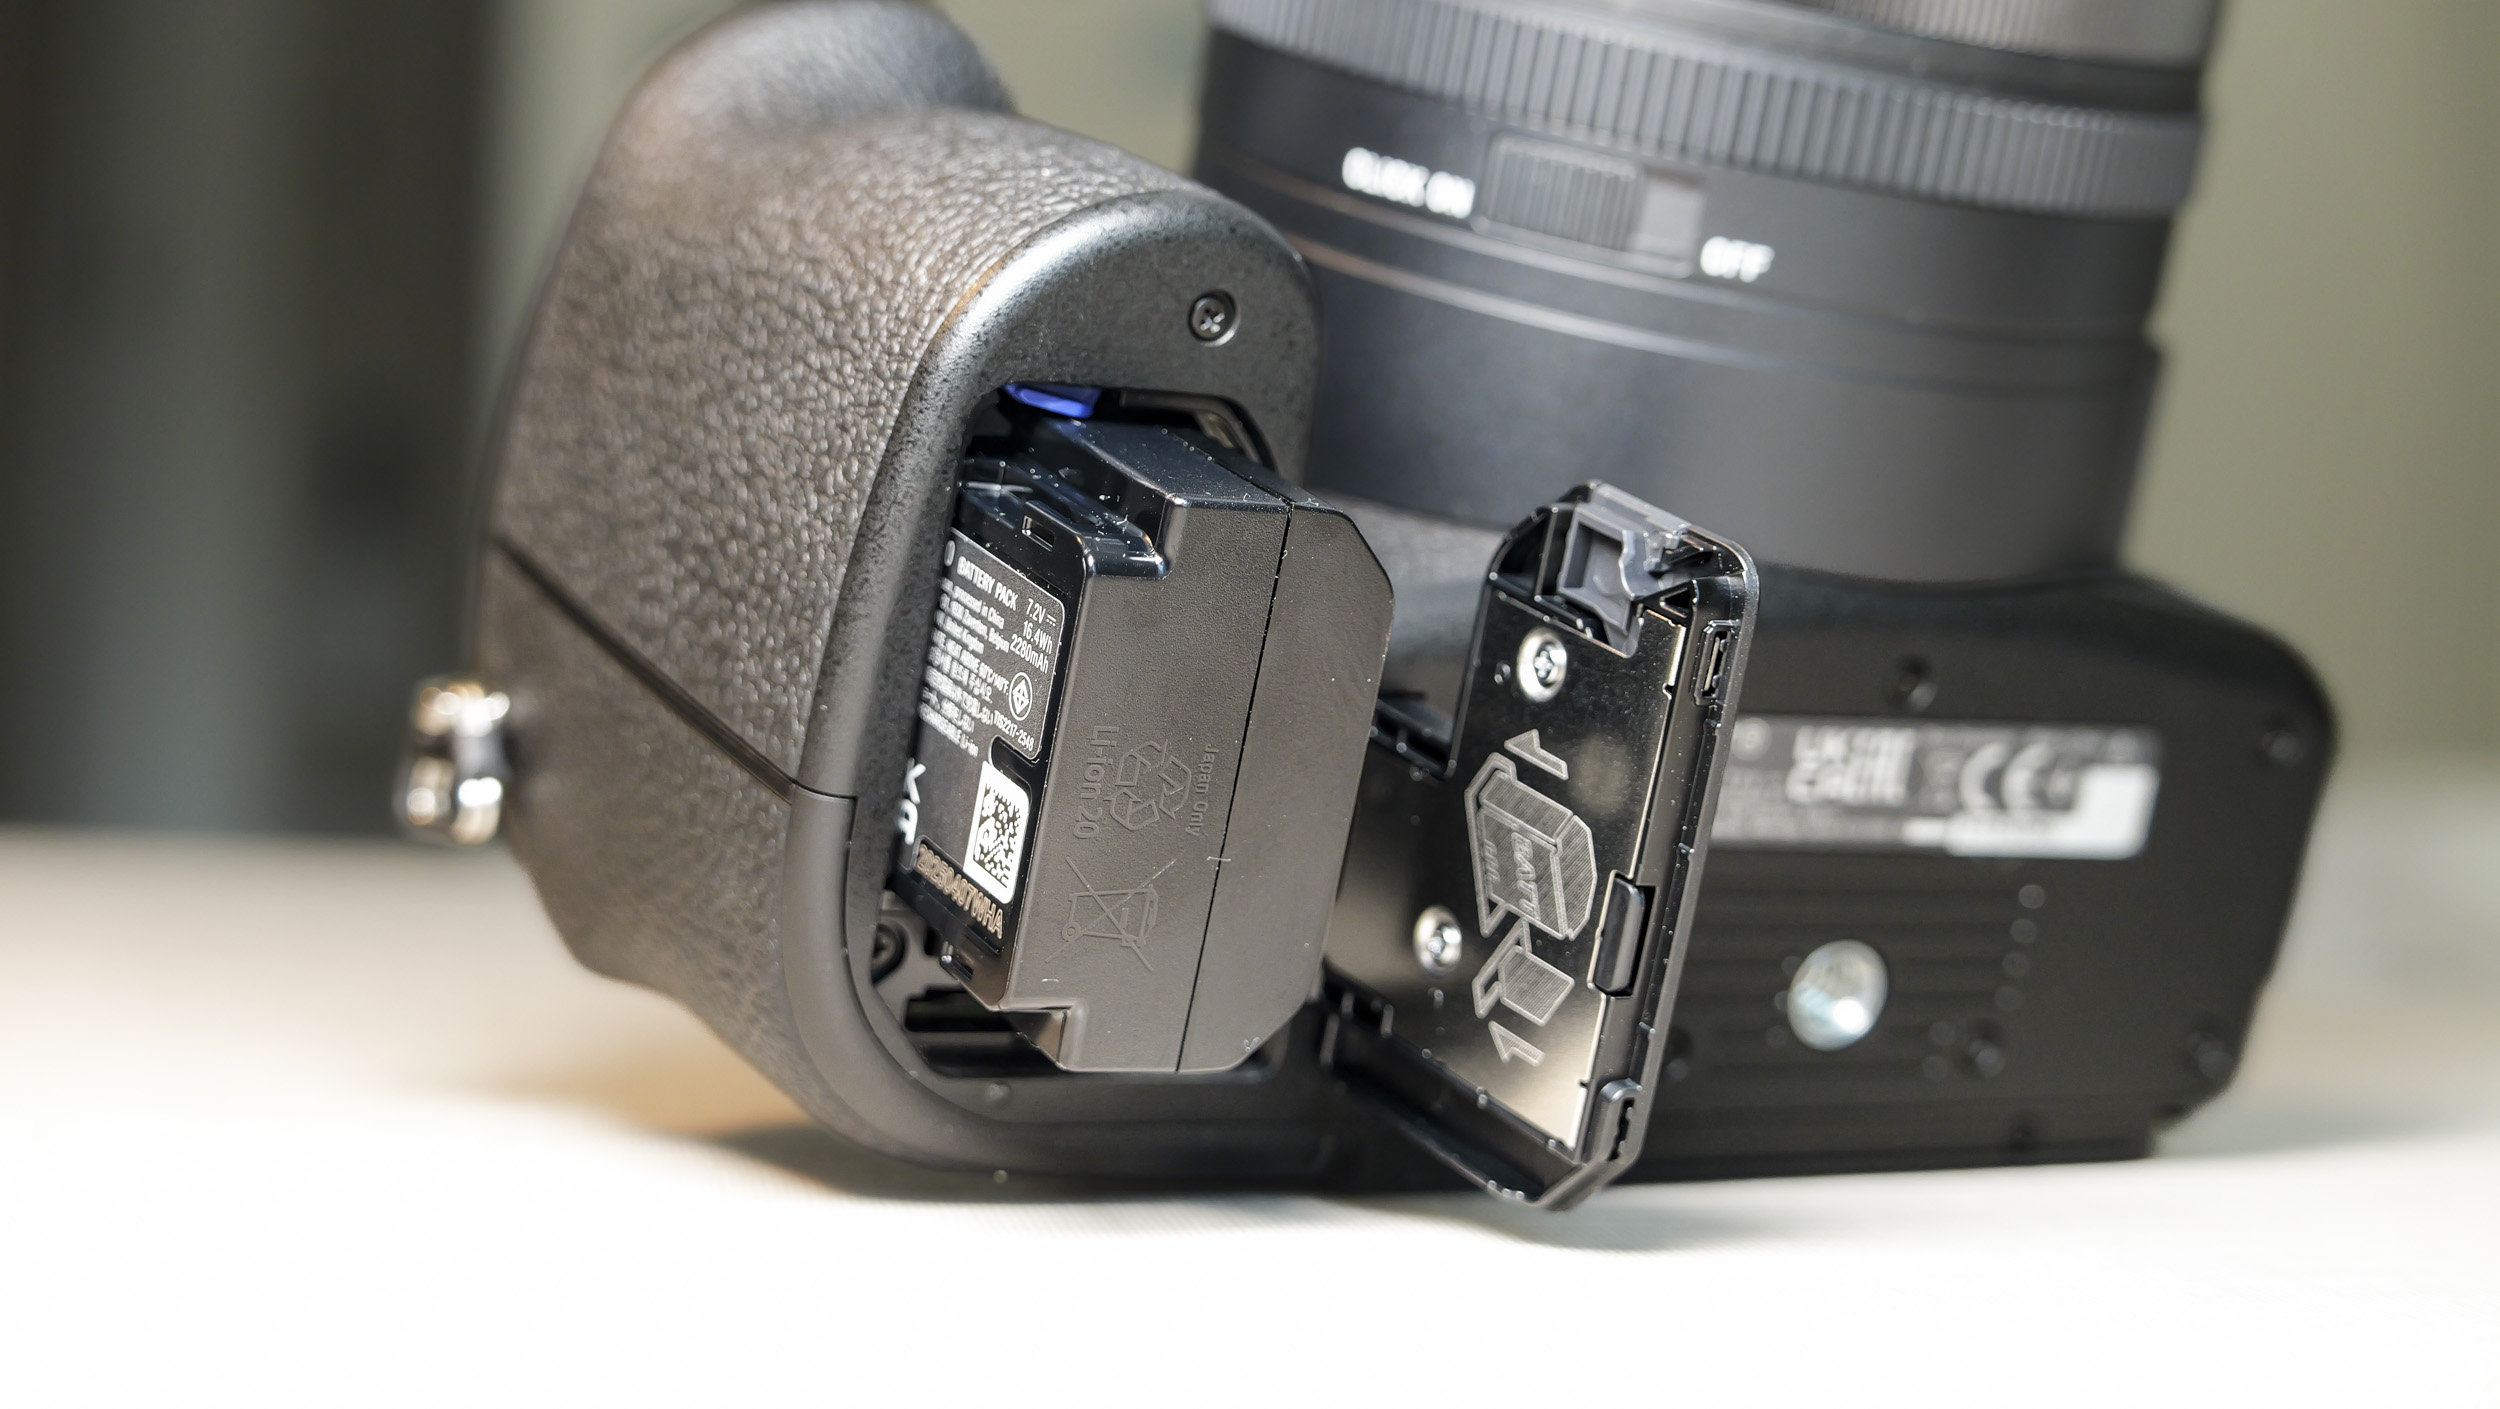
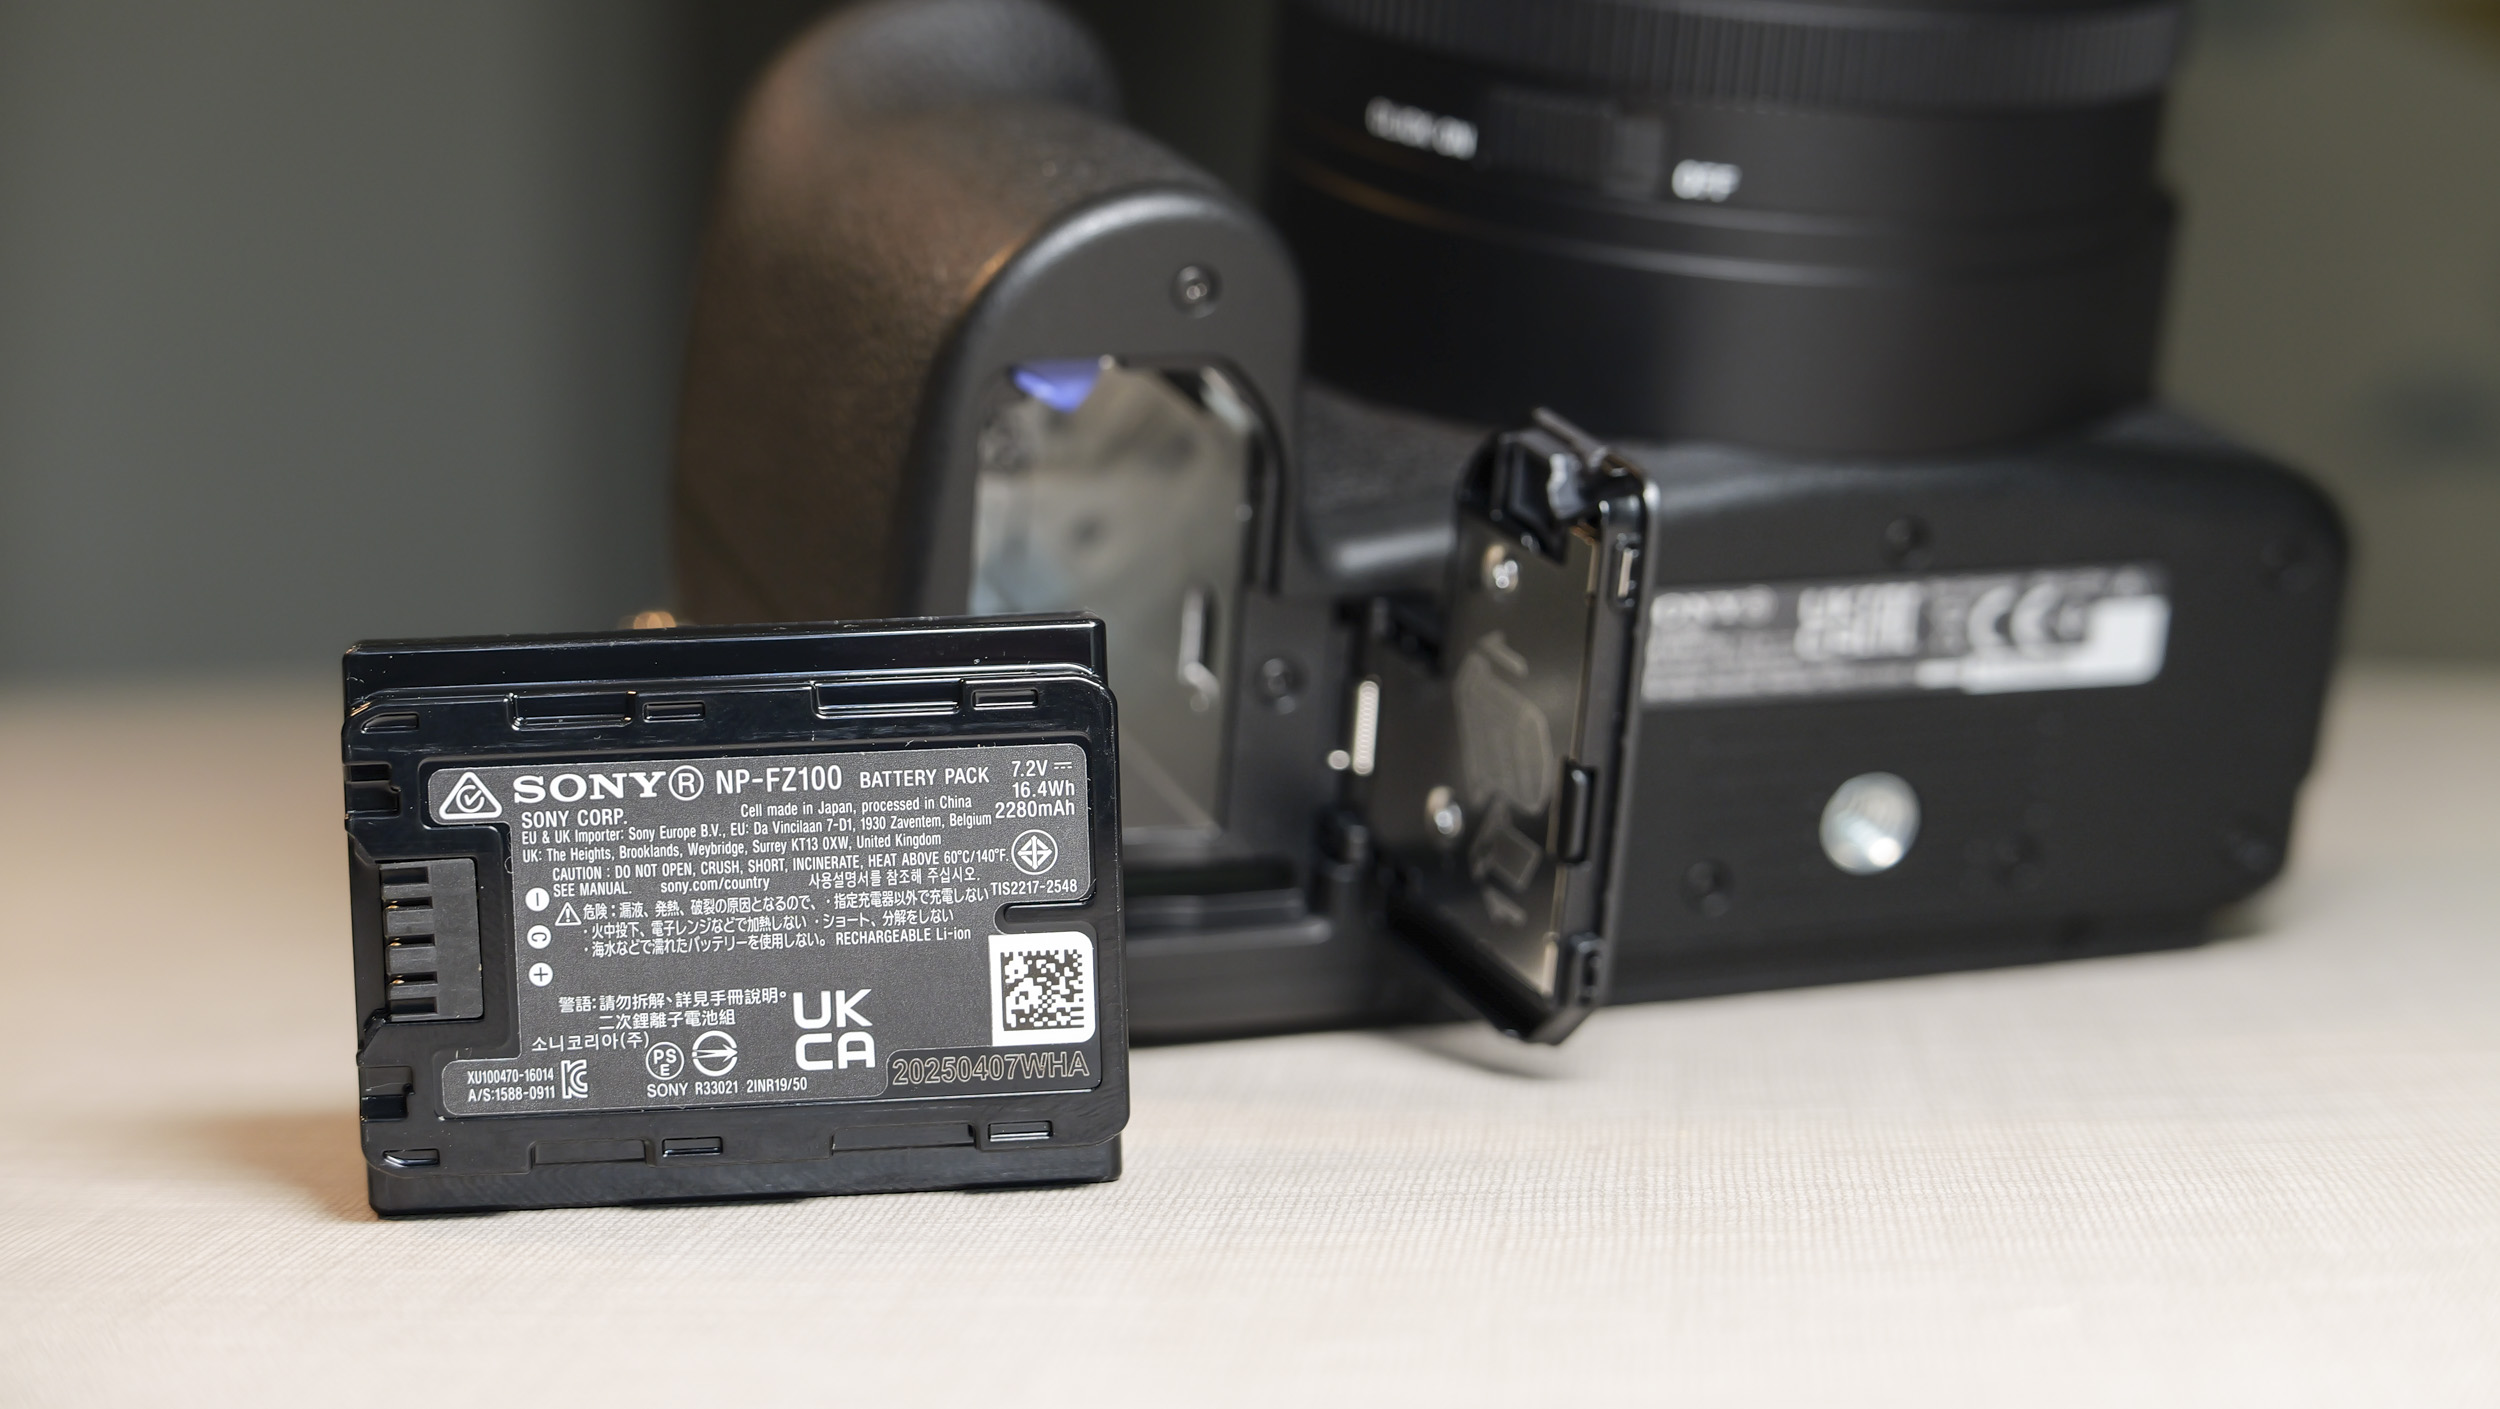
Throw in a bigger and comfier grip, which hosts the larger NP-FZ100 battery for a 50% boost in shot life, and the RX10 V is all round a slicker camera than the discontinued RX10 IV.
The A7R VI is slightly bigger than its predecessor, with a larger grip housing a new, larger battery (Image credit: Tim Coleman)
It's not all good news, mind you, depending on which way you look at it — the weather-resistant body misses out on a built-in flash and top LCD, both of which were present in the older model.
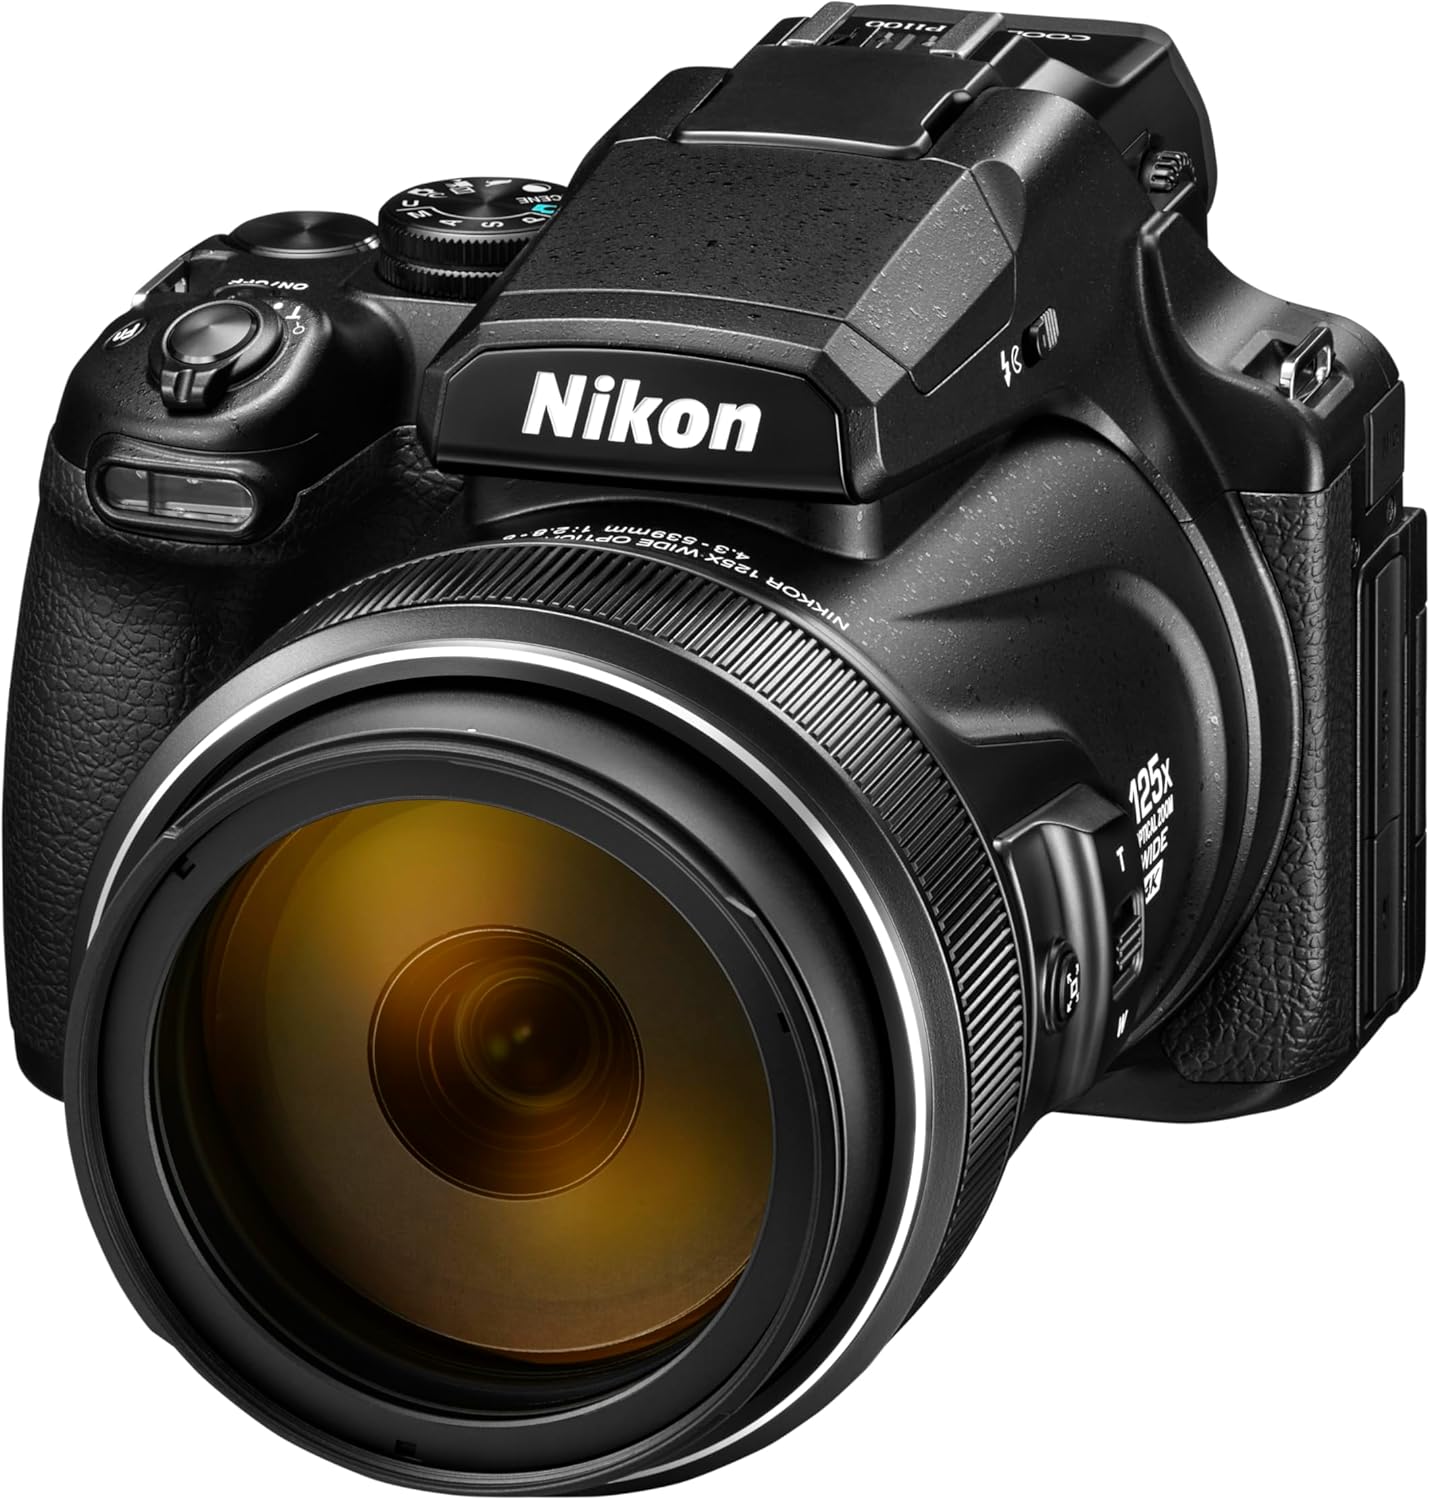
And some of the old drawbacks remain, such as the relatively sluggish zoom of the lens, which is 'just' a 25x optical zoom. I like that range, but other lesser-quality bridge cameras zoom further, such as the Nikon Coolpix P1100.
A significant sticking point is price — the RX10 V had to cost more than its nine-year-old predecessor, which was already pricier than any other bridge camera available. It's a big price to pay for this type of camera, even if you are getting a lot of camera for your money.
All that said, I've thoroughly enjoyed my lengthy review period with the Sony RX10 V, during which I've shot everything from travel to bird and macro photography, with the camera handling those and other subjects with aplomb.
It's a neatly packaged camera, especially when you consider you're getting a 600m f/4 lens when fully zoomed in. The RX10 V is a dream all-in-one camera, especially for enthusiast wildlife photographers with deep pockets.
Sony RX10 V: price and release date
Announced on July 9 2026
It costs $2,300 / £2,200 / AU$3,499
However, the A7R VI is still pretty small (Image credit: Tim Coleman)
Sony's premium RX10 bridge camera series was always pricey compared to lesser-quality alternatives, and the latest version, the RX10 V, is even pricier. I'm not surprised: the RX10 IV launched for $1,800 / £1,500 / AU$2,000 almost nine years ago, and we should expect an inflation-based price bump at least. Still, $2,300 / £2,200 / AU$3,499 for a camera of this kind is a fair whack of anyone's money, let alone the enthusiast wildlife photographers that this camera is practically perfect for.
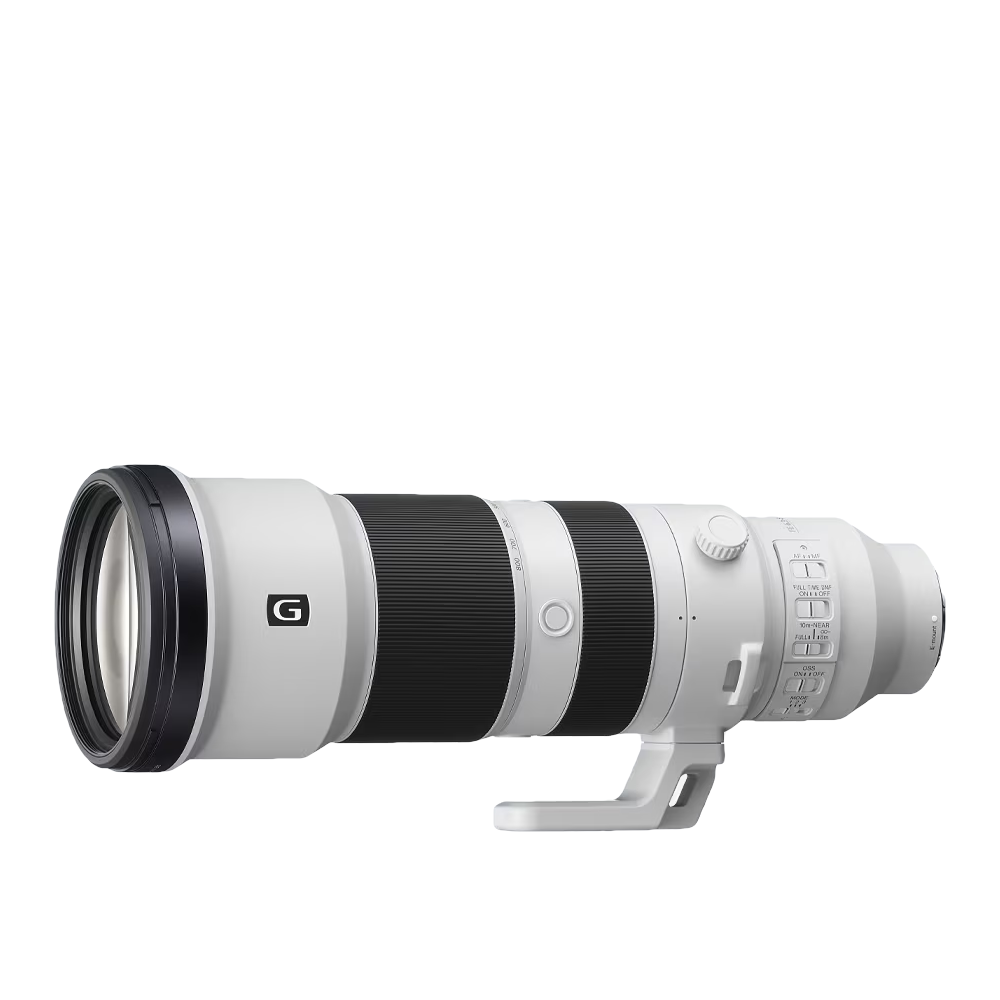
So what else could you get for similar money? If you already own a Sony mirrorless camera, the 400-800mm super-telephoto zoom lens is worth a look, especially if wildlife and bird photography are key reasons why you're considering the RX10 V. Or, if its zoom range alone that you want, and you're less concerned about outright image quality, the Nikon CoolPix with its monster 125x zoom is another option, and it costs almost half the price.
All things considered, though, I think the RX10 V is reasonable value for money, considering what you get.
Price score: 4/5
Sony RX10 V specs
Sony RX10 V Specs:
Type:
Compact camera ('bridge')
Sensor:
20.1MP 1-inch stacked BSI CMOS
LCD:
3-inch tilt-touchscreen, 1.62m dots
Memory:
1x SDXC UHS-II
Video:
4K up to 60fps (no crop) / 4K 120p (cropped)
ISO range:
ISO 100-12,800
Burst shooting
30fps (electronic), 10fps (mechanical)
Viewfinder:
3.68m-dot EVF, 0.5-inch
Processor:
Bionz XR 2
Connectivity:
4k 30p live streaming, USB-C, 5GHz Wi-Fi
Dimensions:
136.4 x 94.5 x 151.3mm
Weight:
2.45lbs / 1.11kg
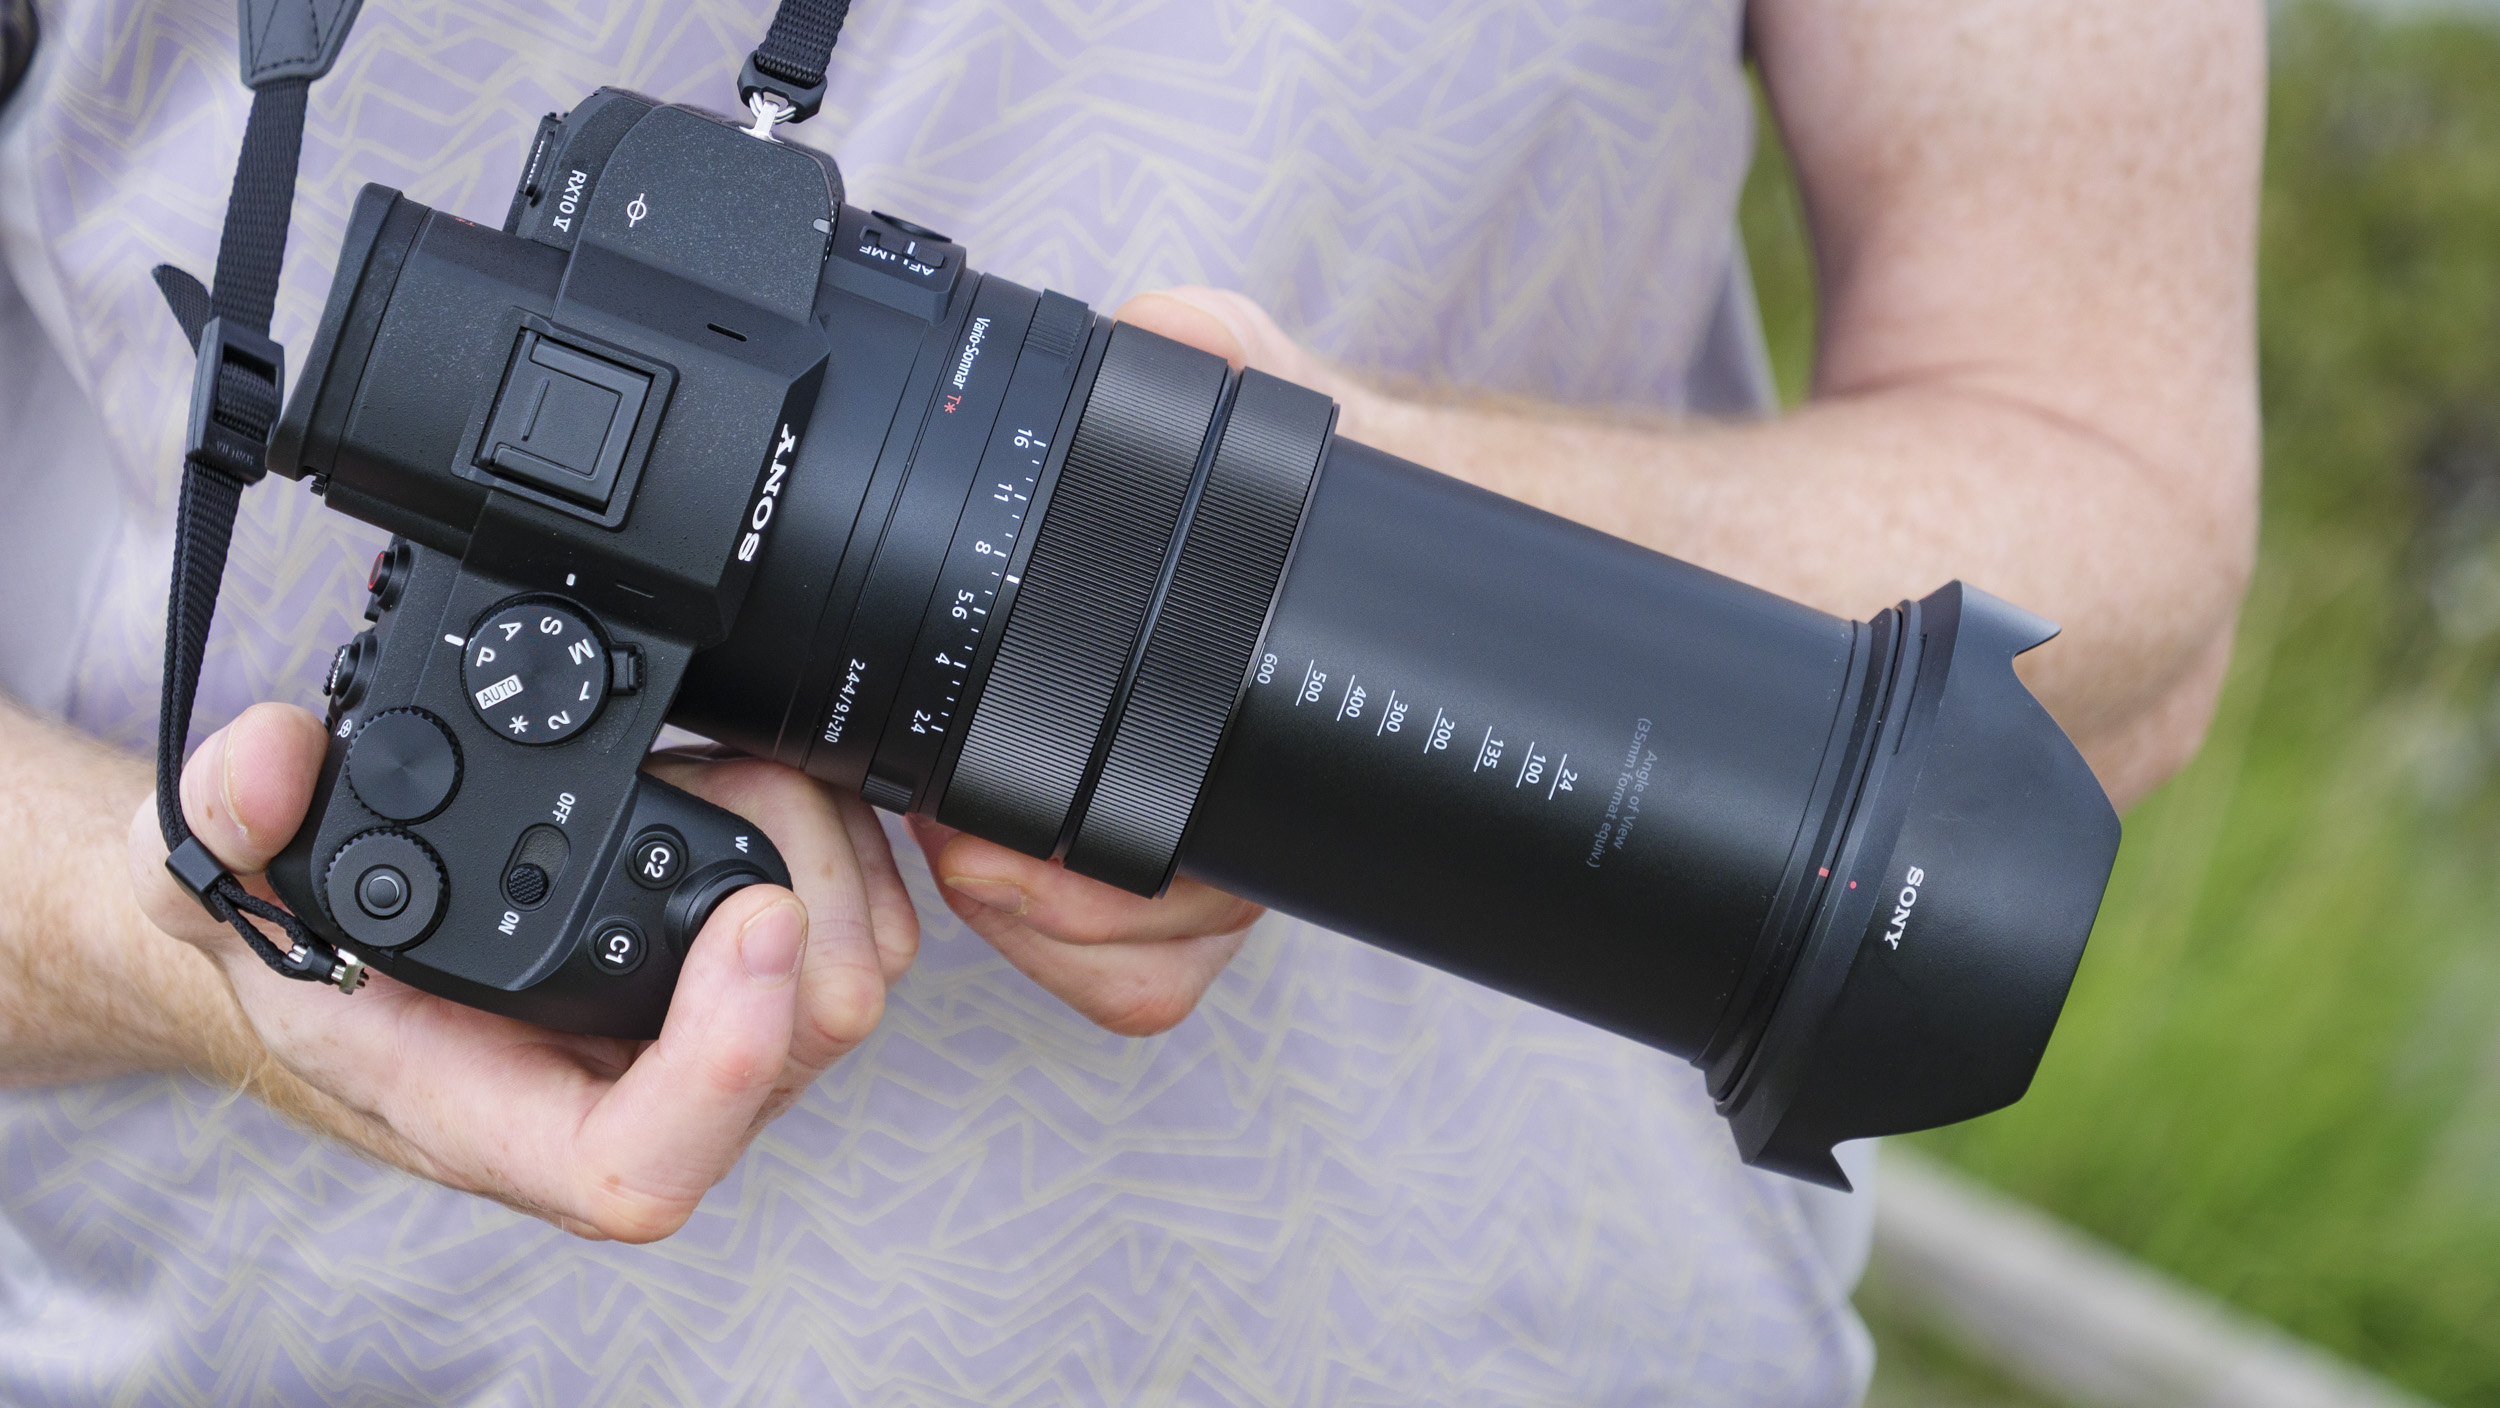
Sony RX10 V: Design
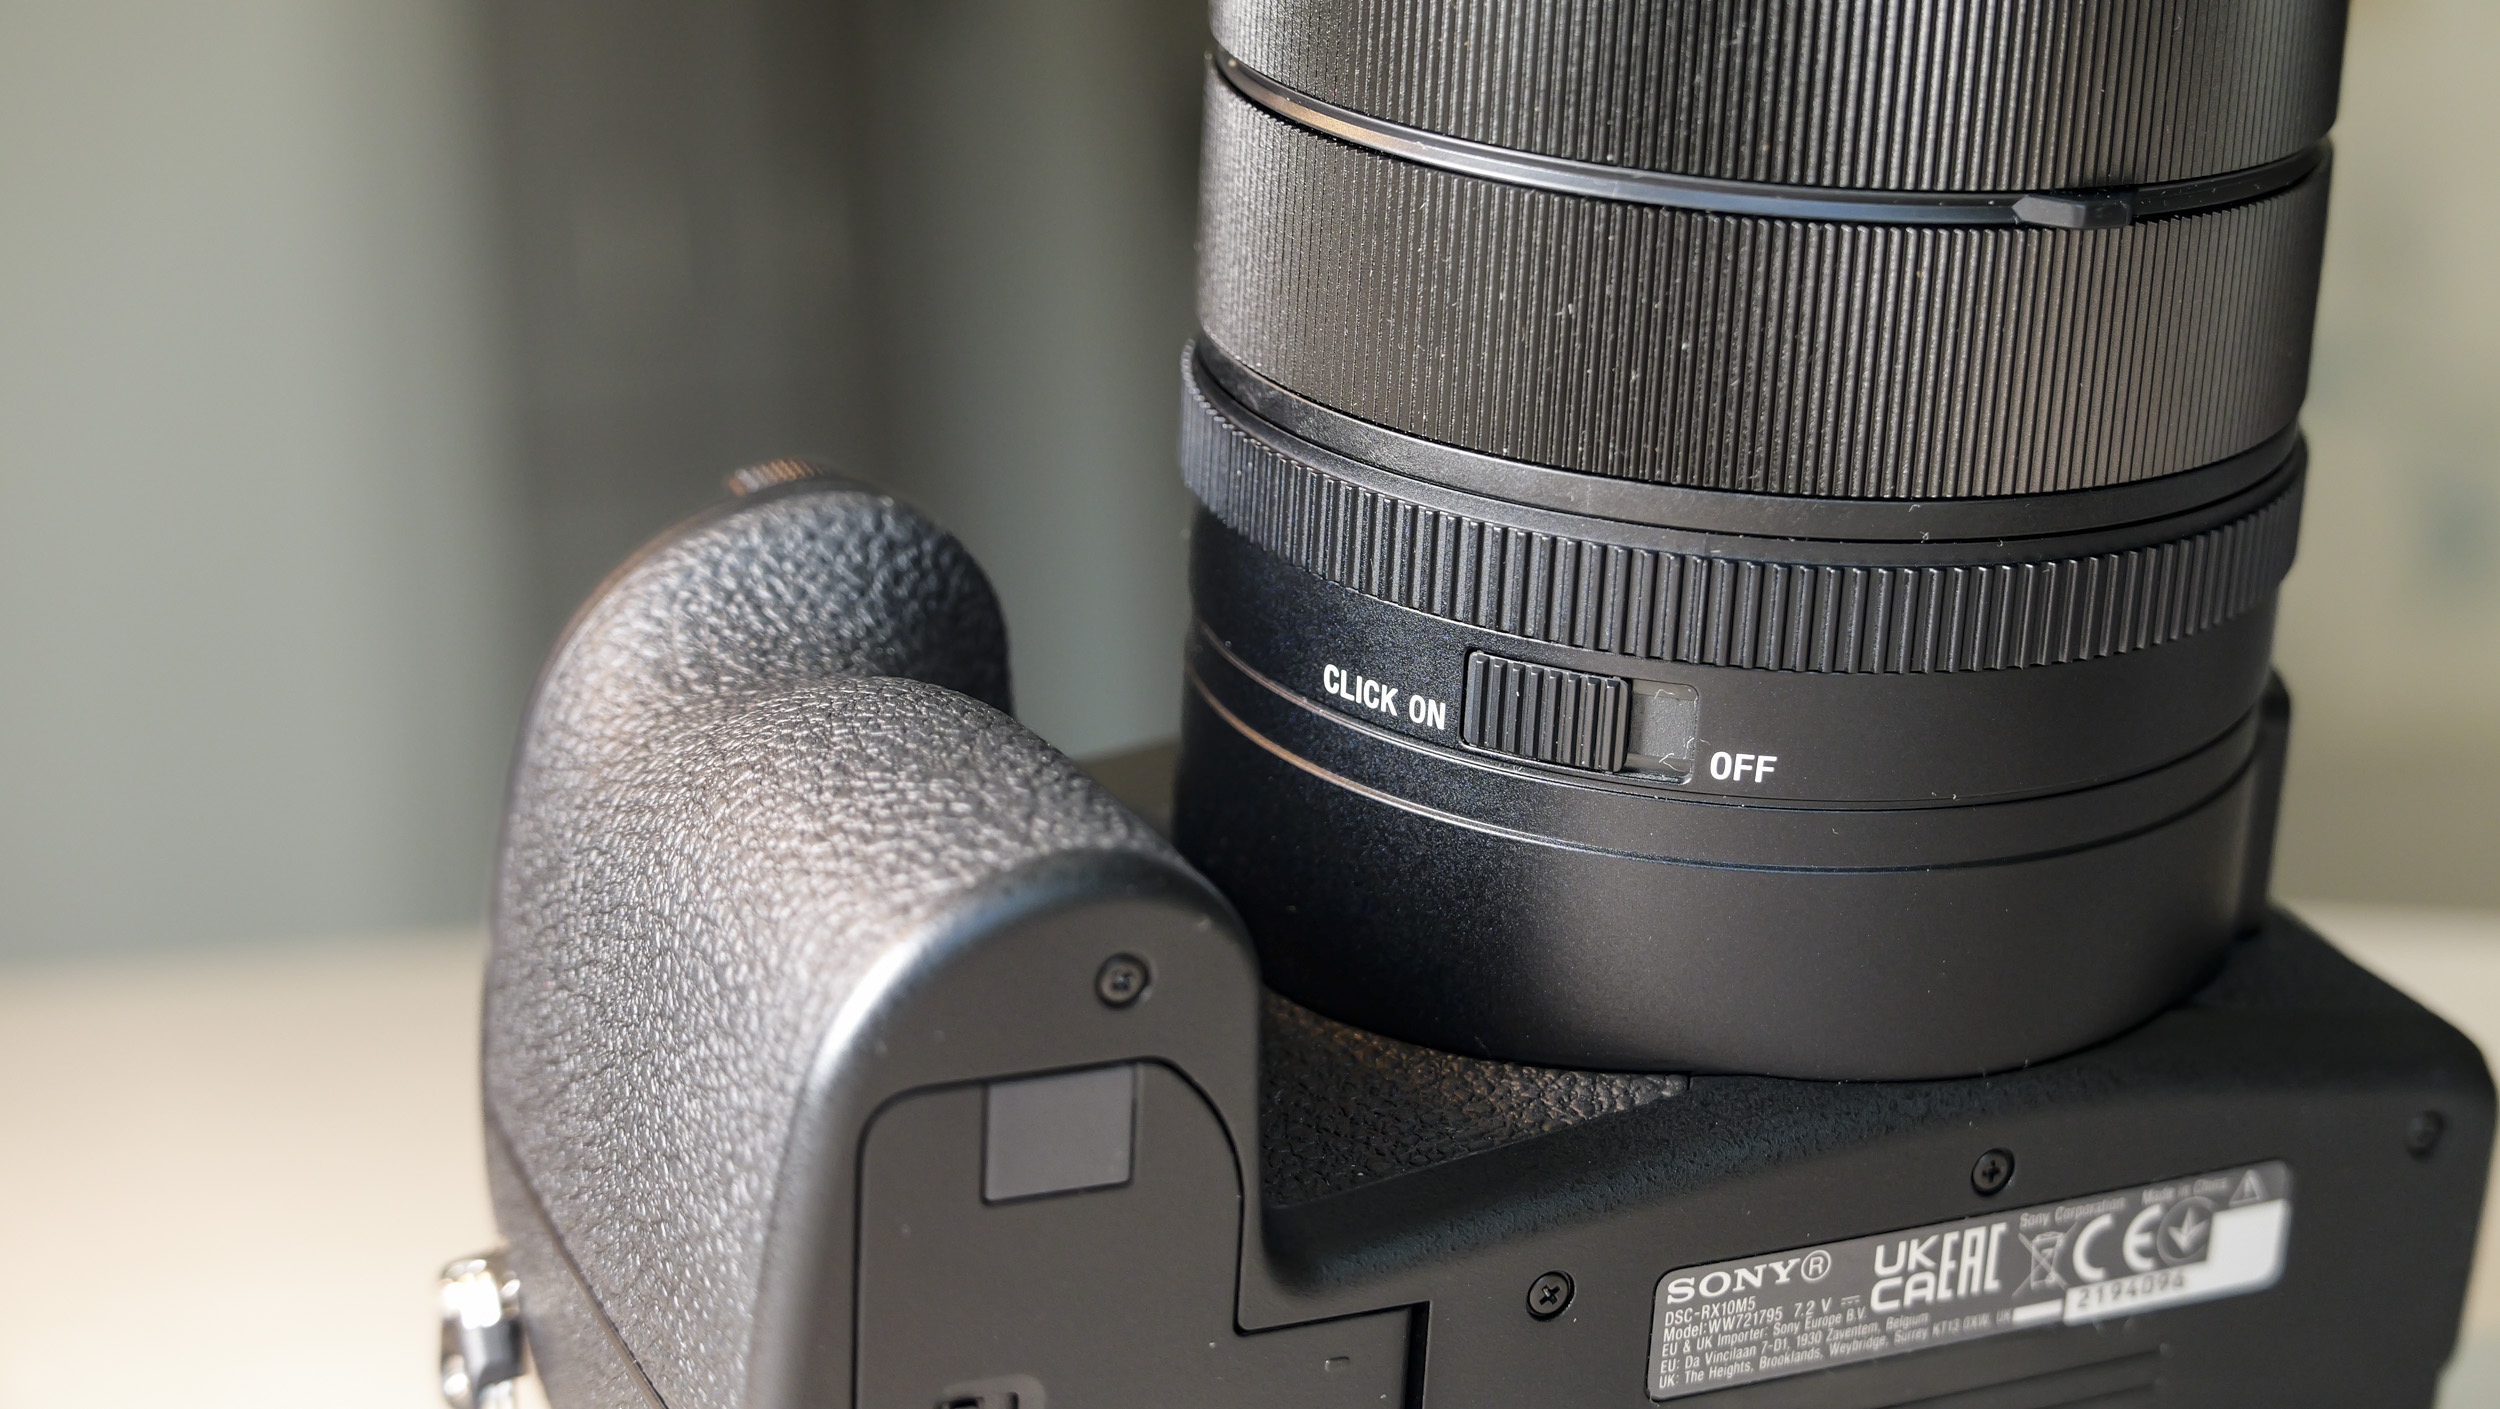
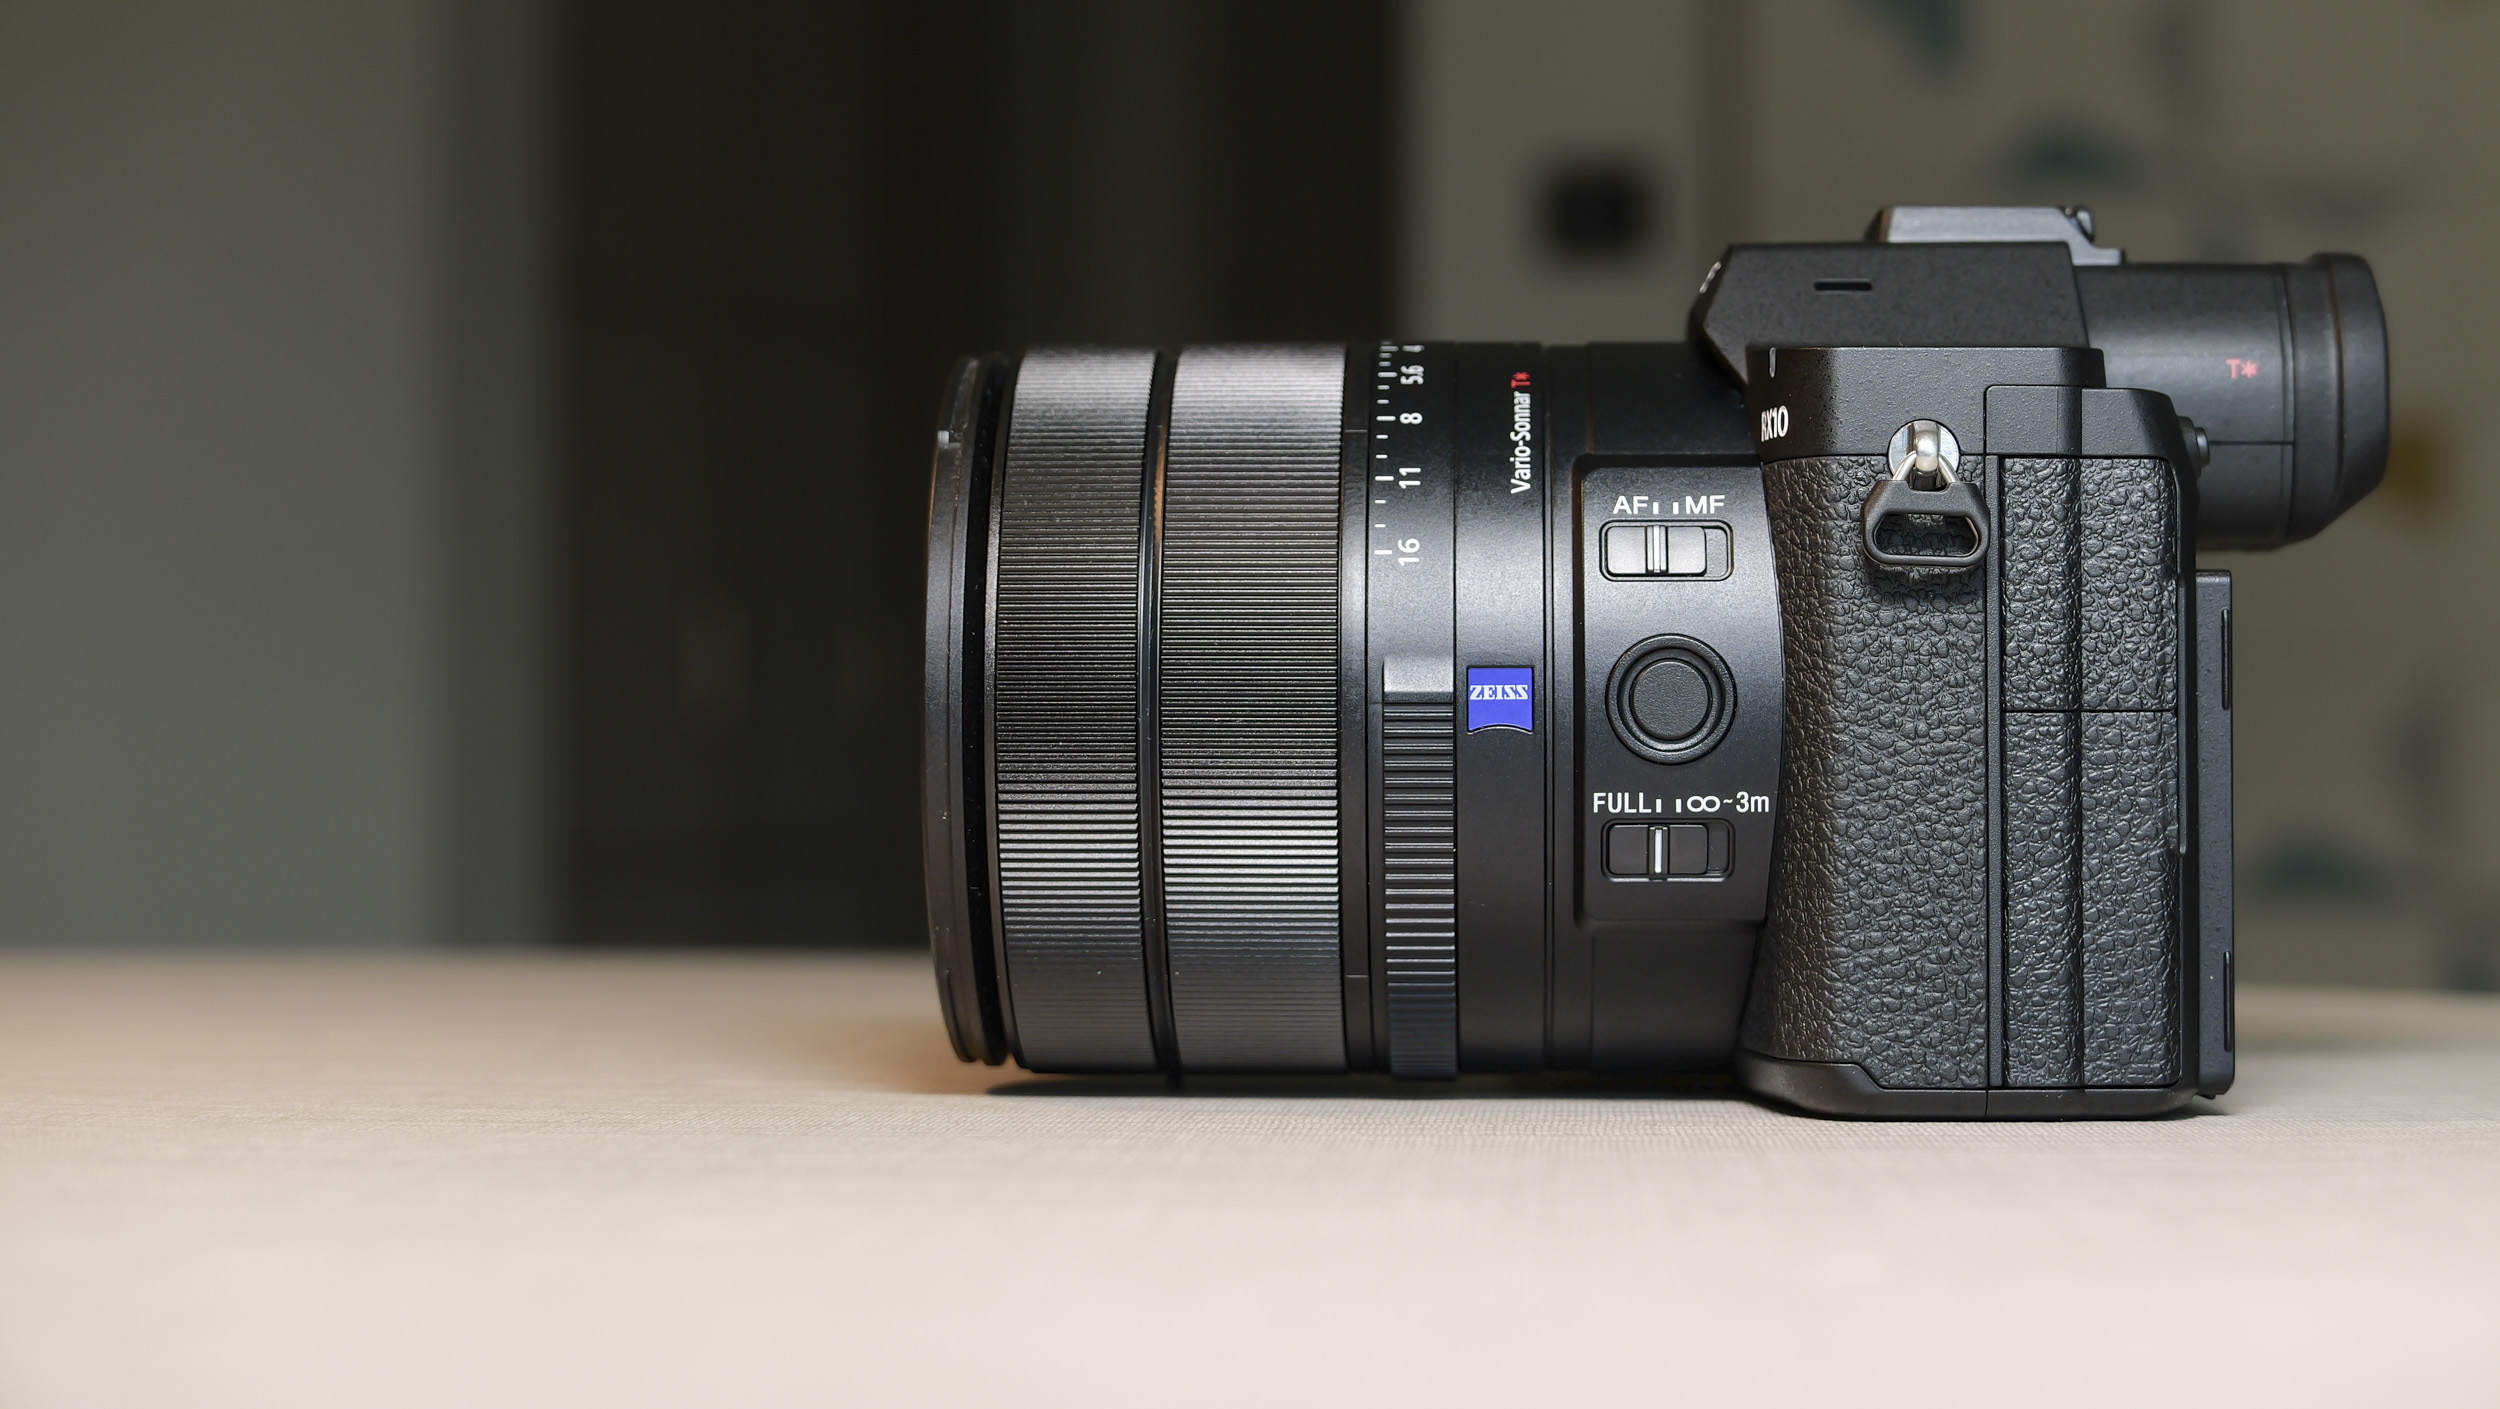
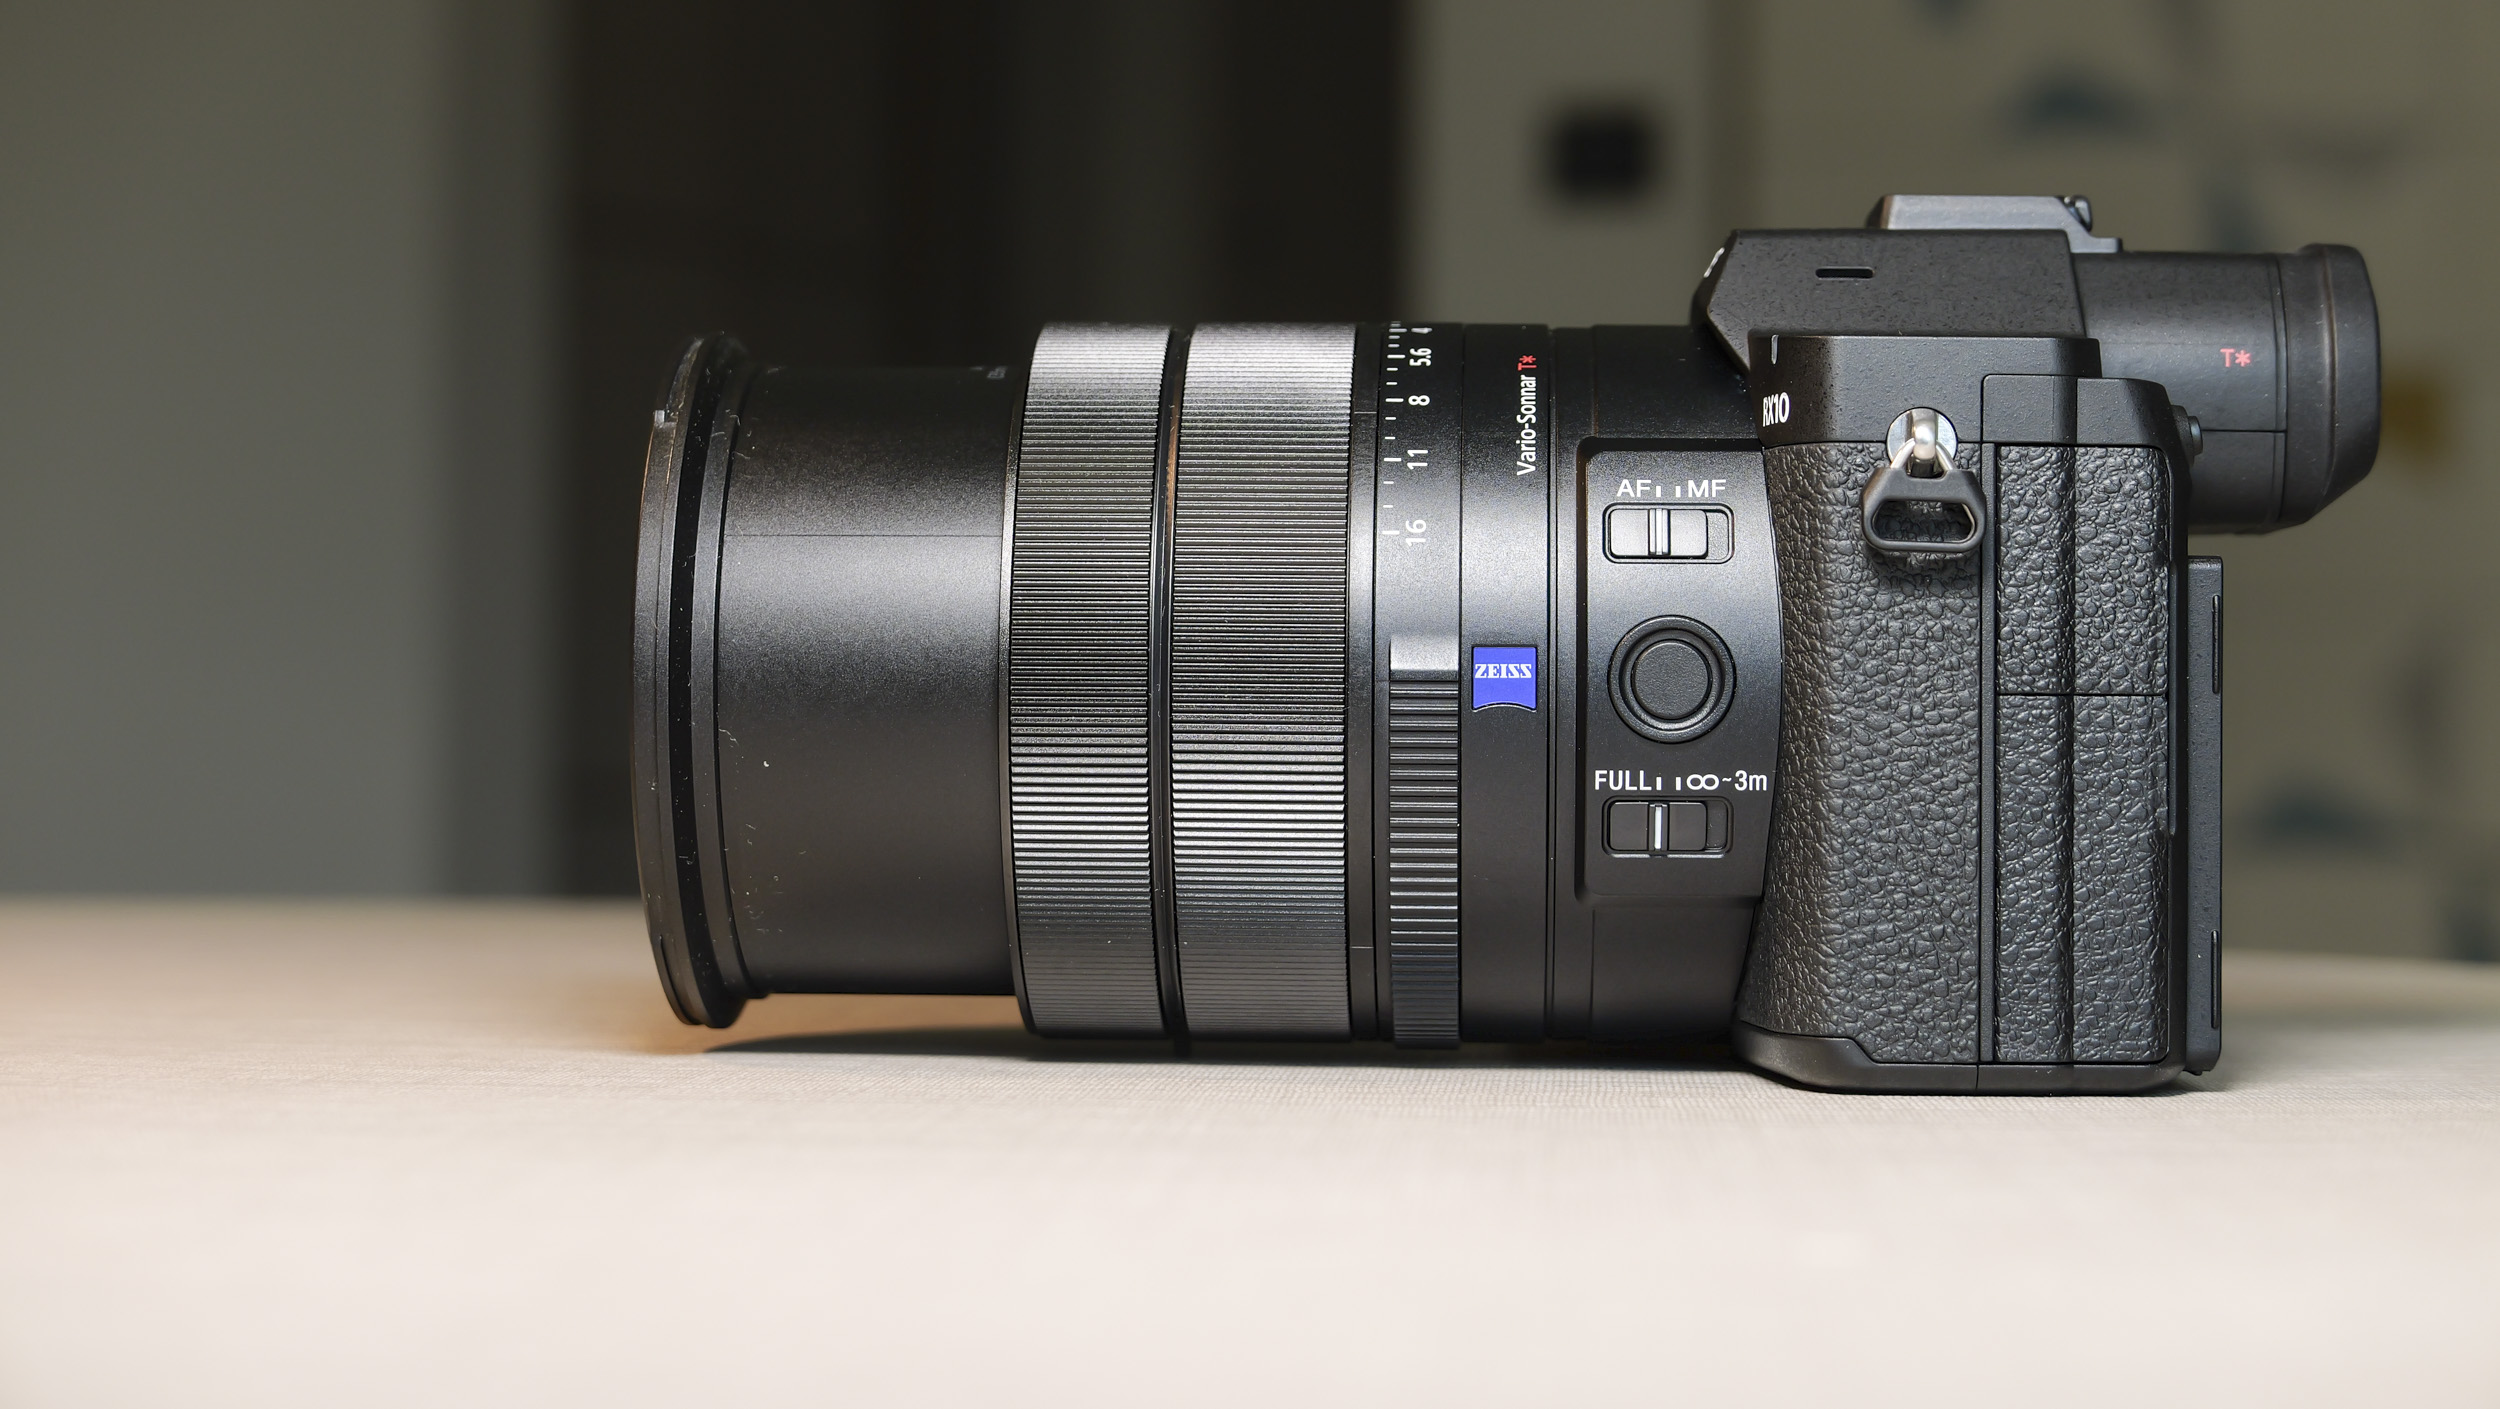
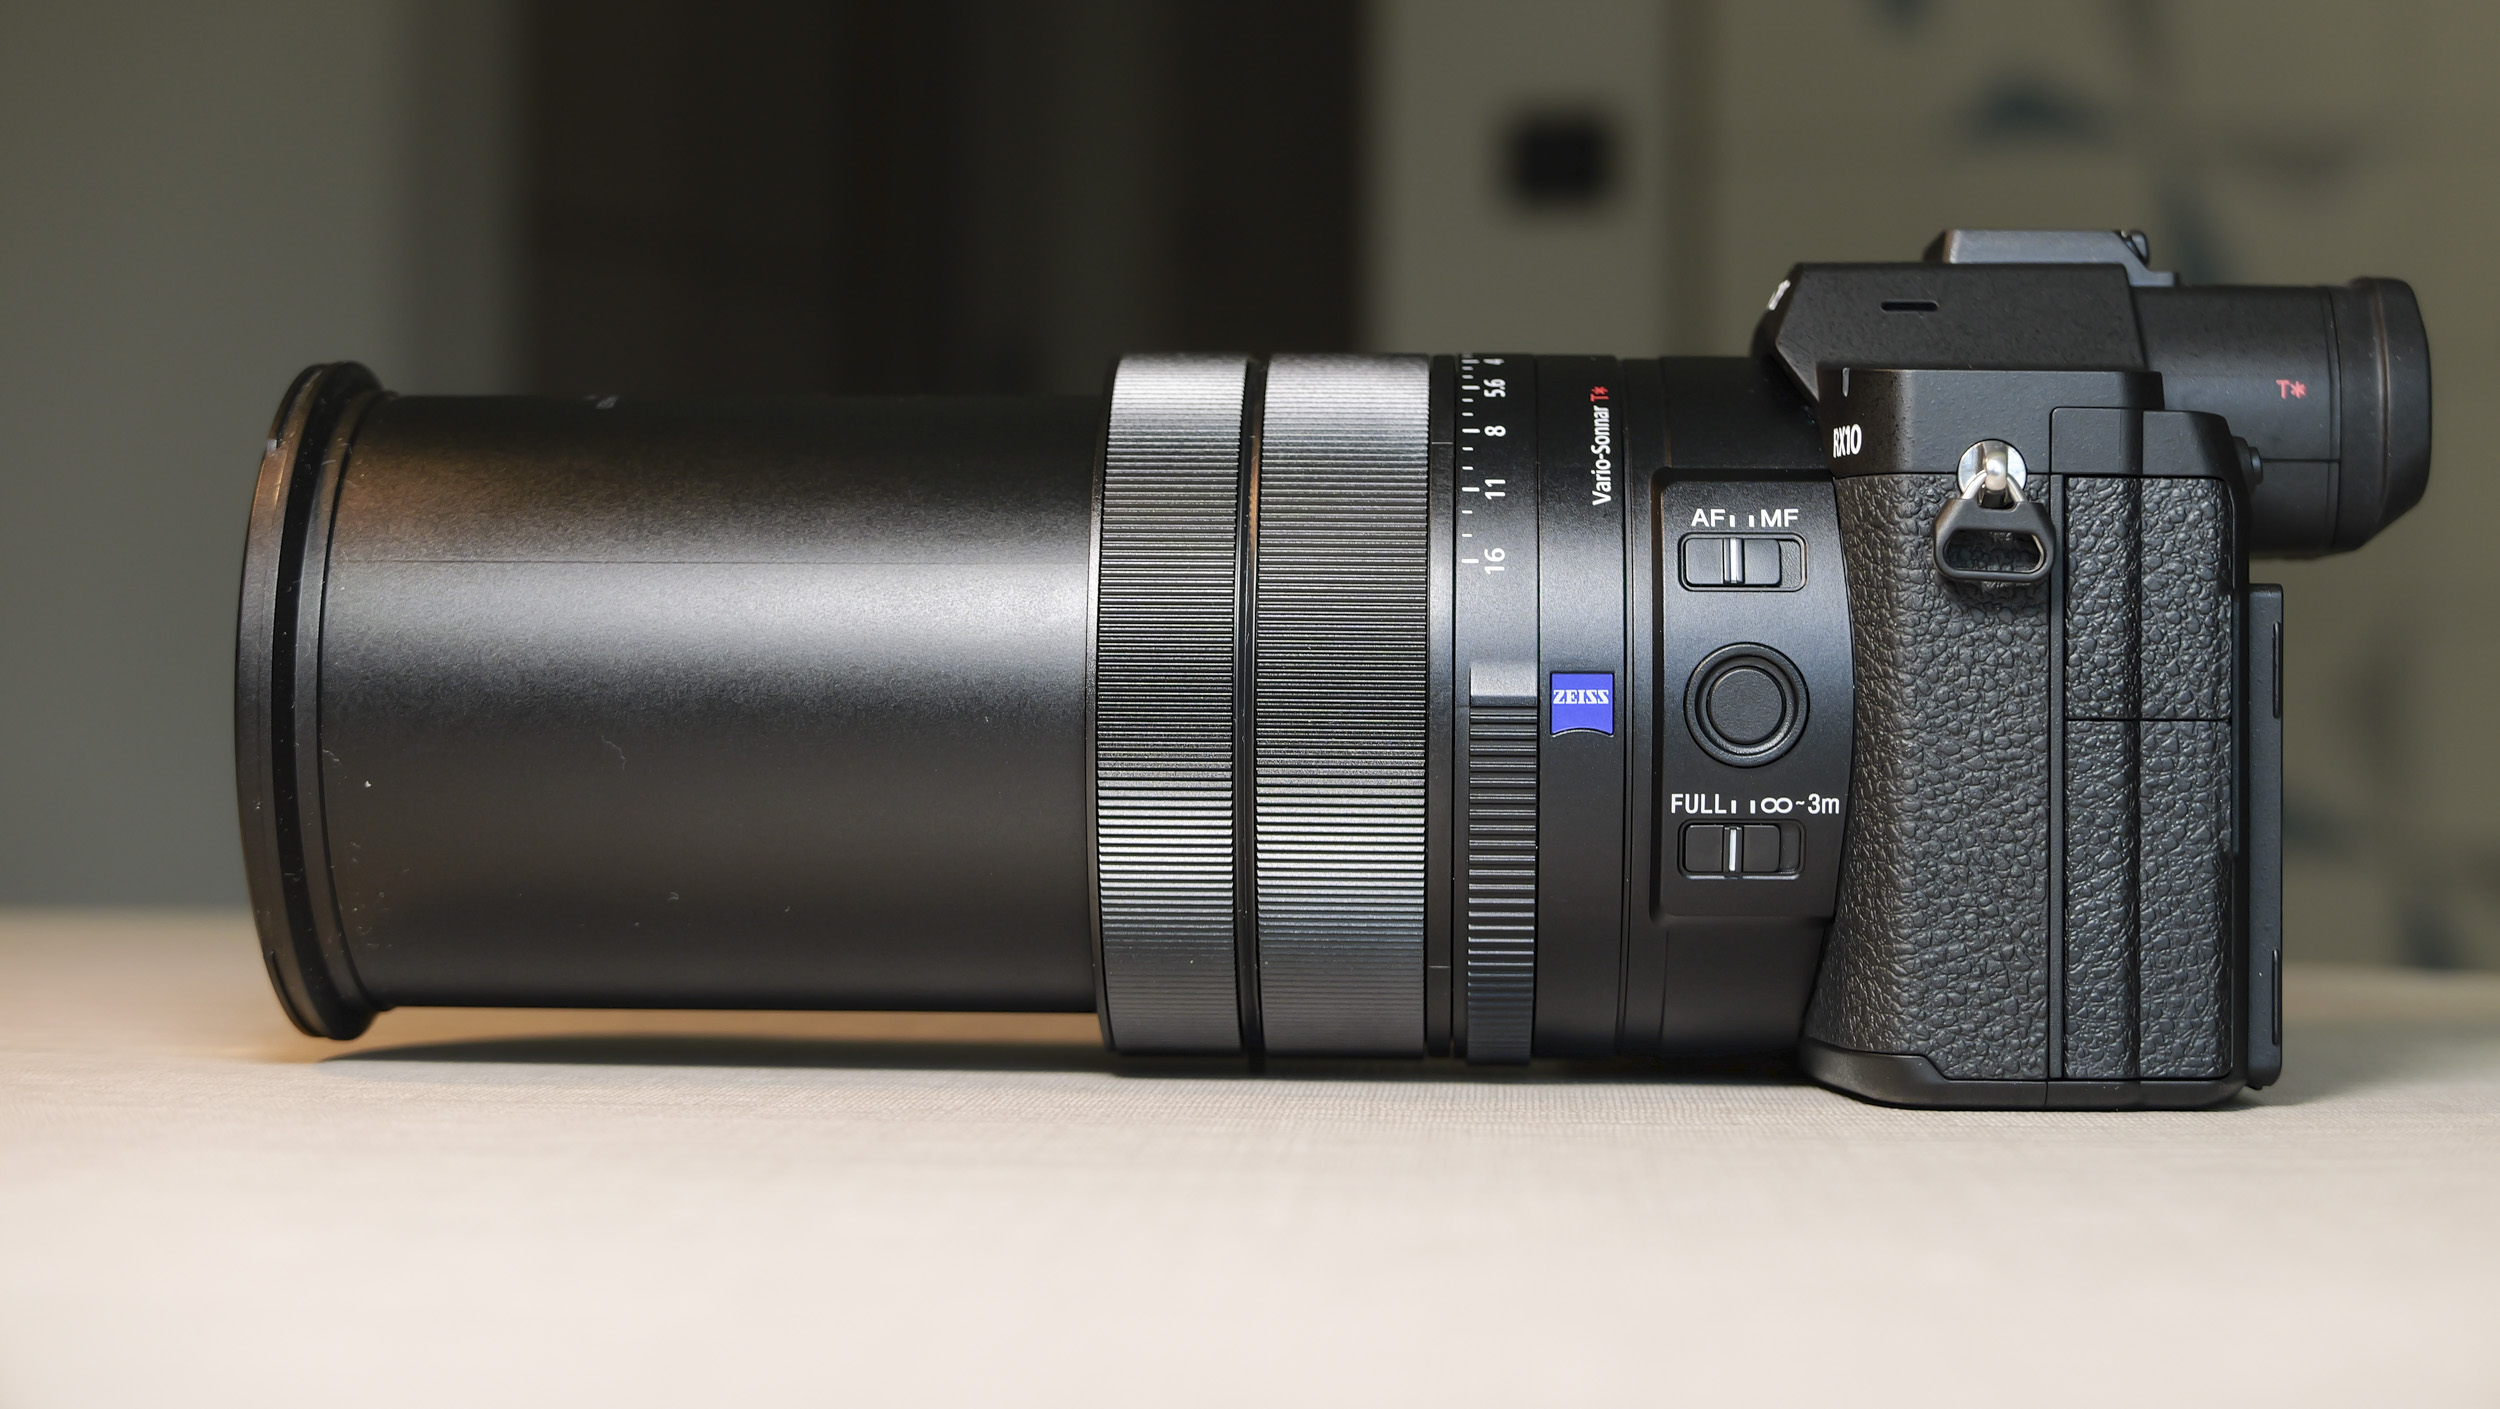
Same 24-600mm F2.4-4 optically stabilized zoom lens as the RX10 IV
Larger and more pronounced EVF with higher resolution and refresh rate
Improved ergonomics and joystick added, but flash and top LCD removed
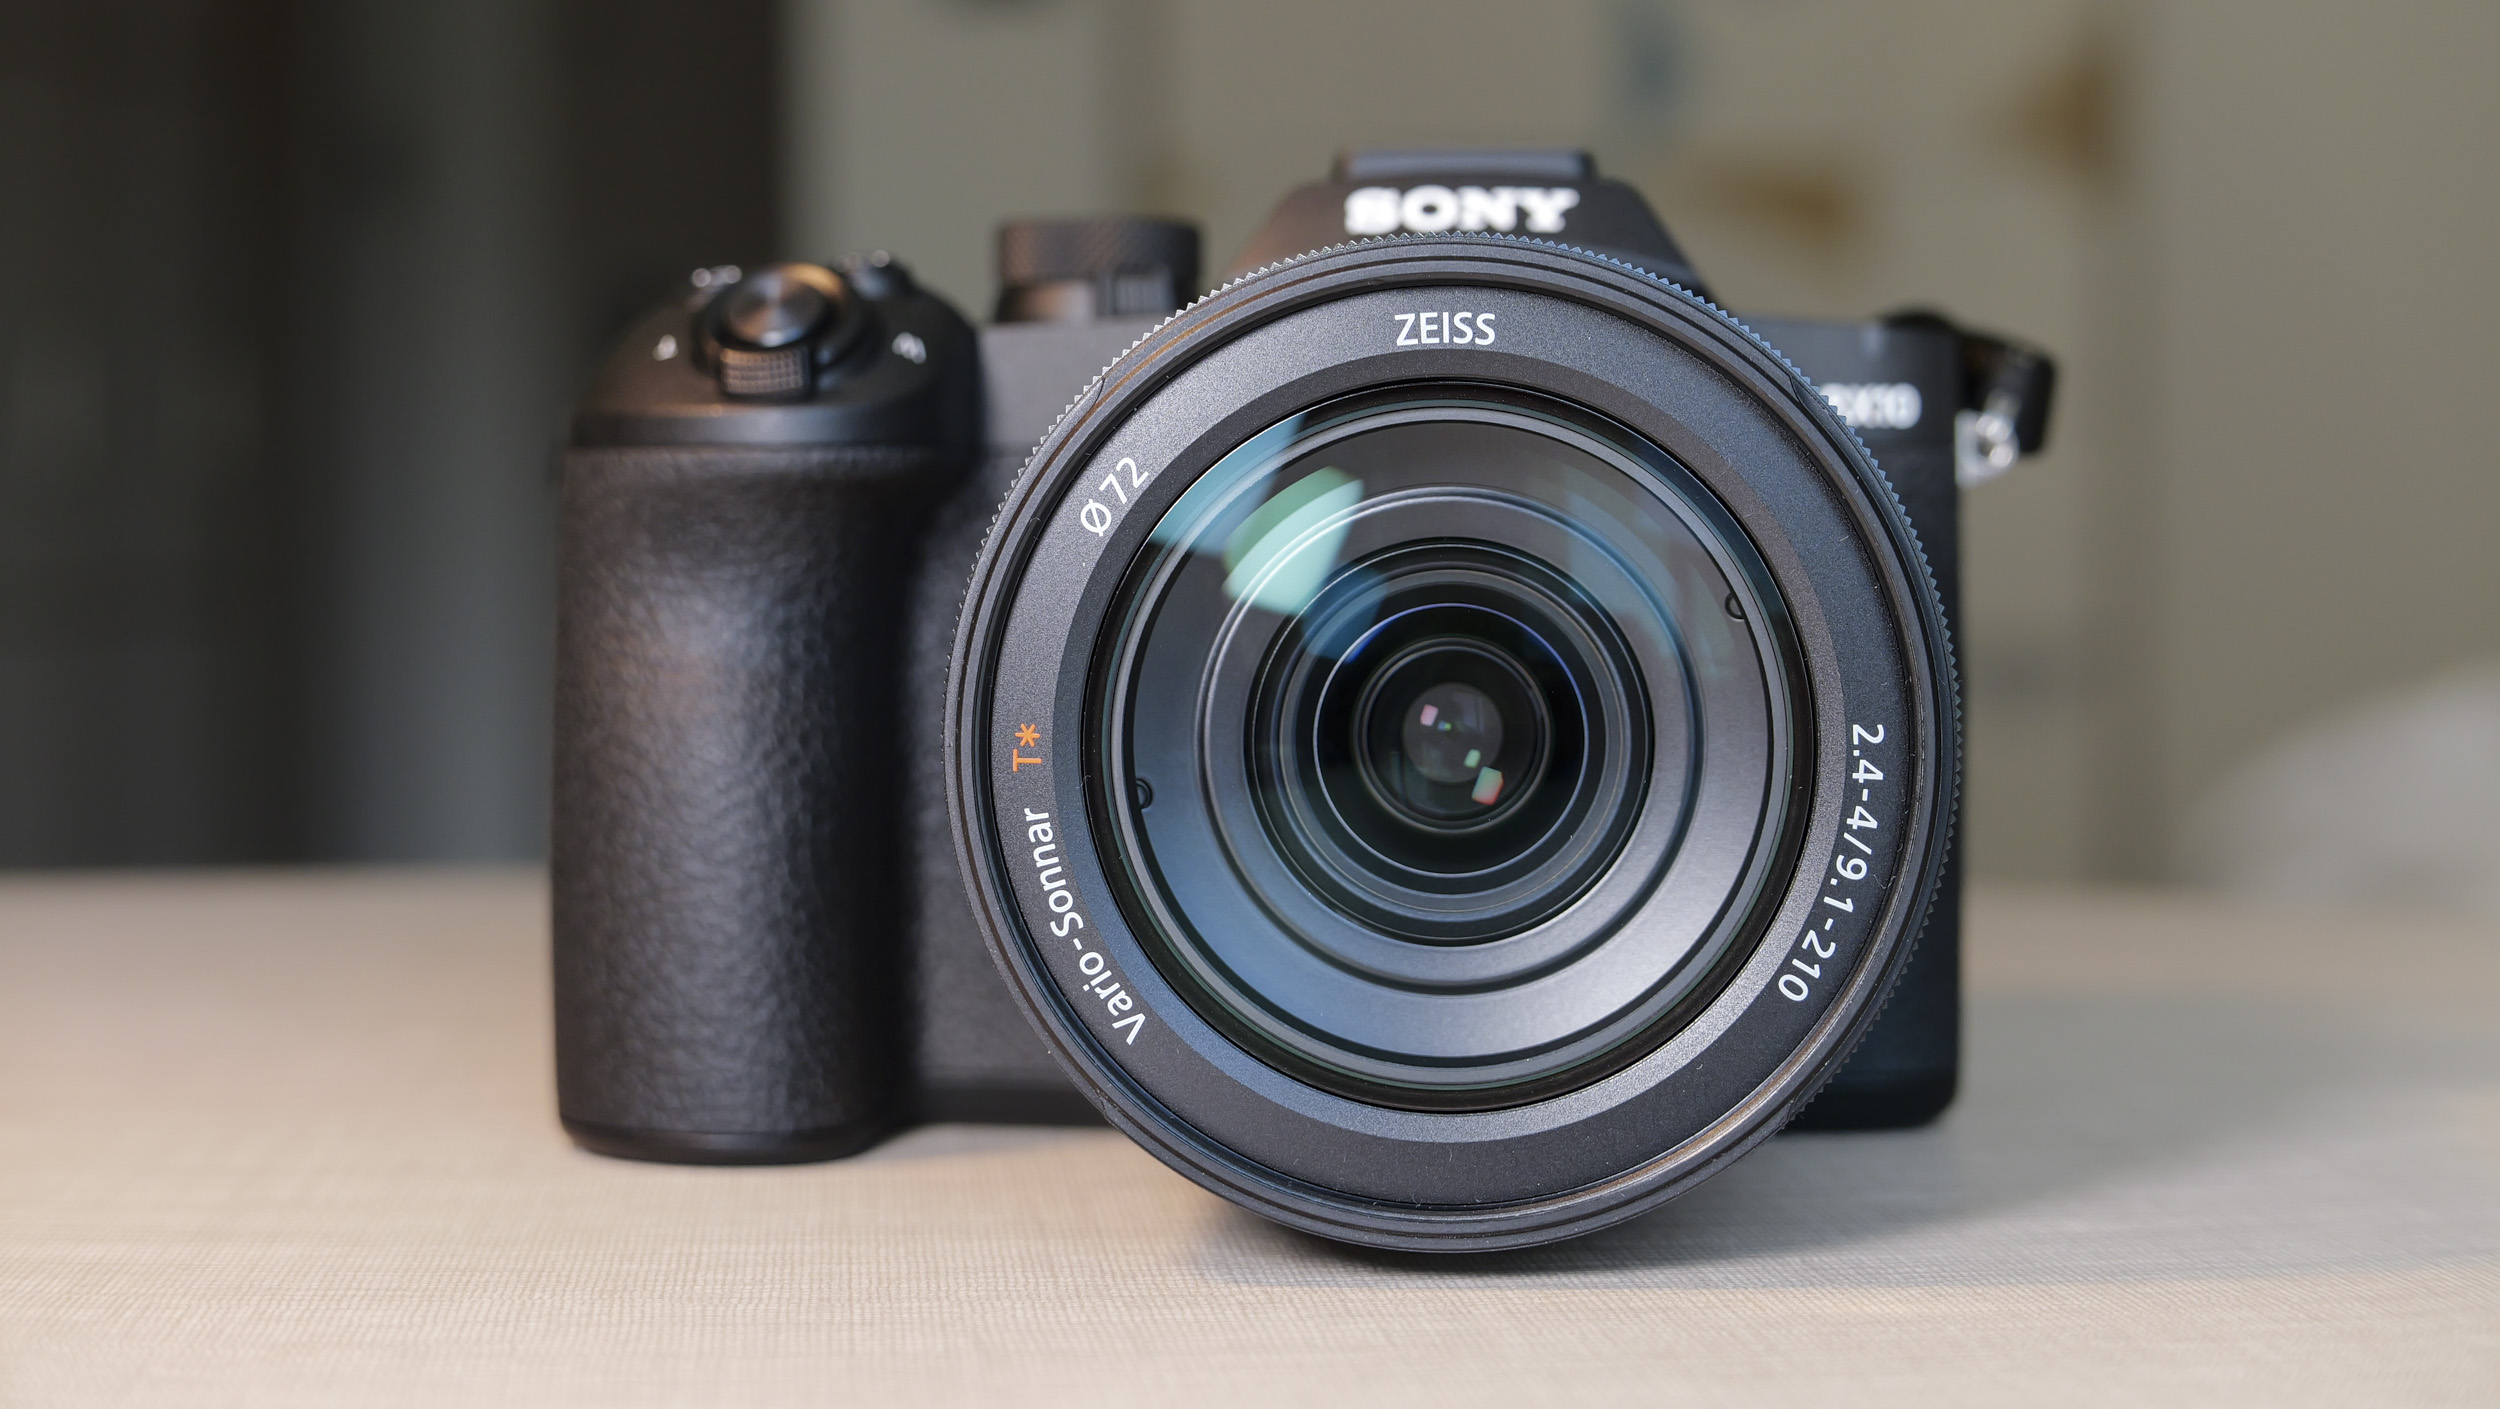
(Image credit: Tim Coleman)
People buy a bridge camera primarily to get a superzoom lens, and the RX10 V has the exact same 24-600mm F2.4-4 lens as the RX10 IV — that’s a 25x optical zoom, with macro focusing up to a 0.49x magnification. Put simply, you’re covered for everything from landscapes and bird photography to close-ups of insects.
While the RX10 V is the same form factor as the RX10 IV, it has had a fairly major brush-up, and it feels a much better camera for it.
For one, the grip is comfier. It's a new shape with better ergonomics, and that's able to fit a physically larger battery than the previous model could, with a 50% boost in shot life.
If you're familiar with the RX10 IV, the top plate of this camera will take some getting used to; there are additional exposure control dials (one of which can be locked off) making quick changes to settings easier, while the shooting mode dial has been shifted to the right-hand side where a top LCD used to be. Personally I preferred the old setup.
A similar 3-inch tilt touchscreen to before, but with added feature such as vertical displayTim ColemanExtra control dials added, and the new shooting mode dial shifted to the right where a top LCD used to beTim ColemanA new shape gripTim ColemanThe camera's protective doors for its ports are slickerTim ColemanThe viewfinder is physically more pronounced and the display larger than in the RX10 IVTim Coleman
Another major change is that the built-in flash has been removed, though a hotshoe remains for use with accessories such as an external flash.
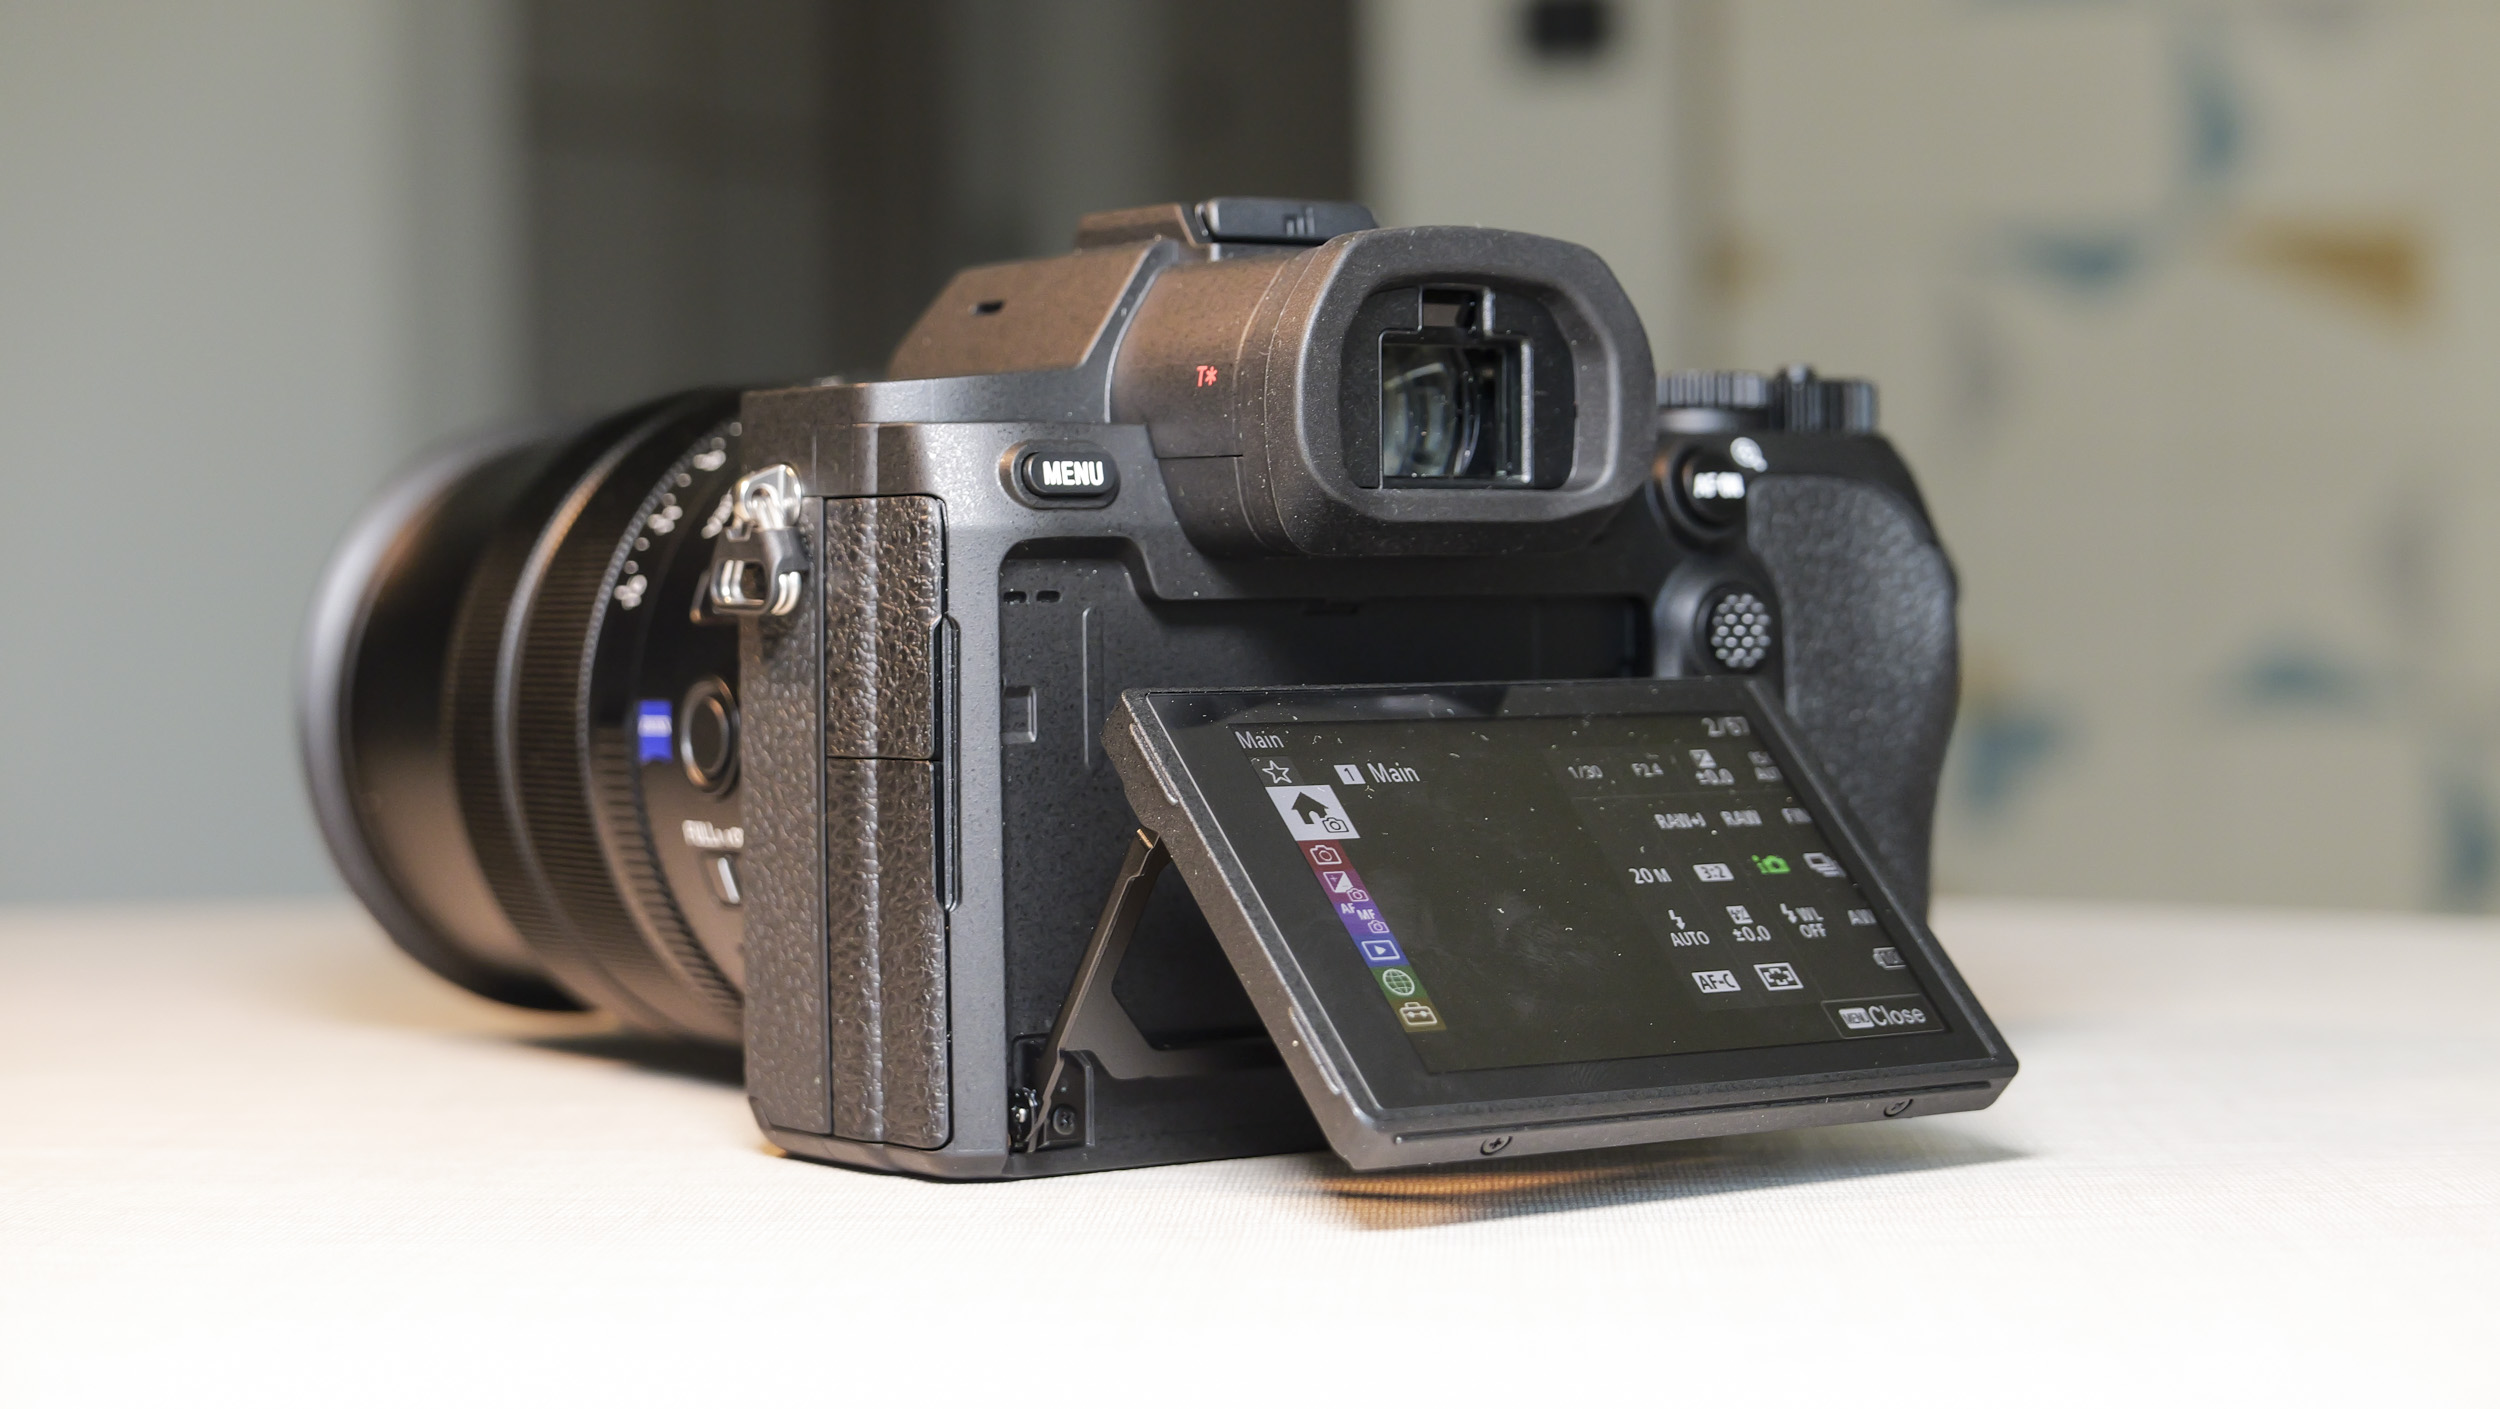
Also, the viewfinder is more pronounced, which makes it easier to look into, helped by the fact that it's a larger 0.5-inch unit with more-detailed 3.68m-dot display, whereas the RX10 IV has a 2.36m-dot 0.39-inch unit. Put simply, the viewfinder is a major upgrade.
On the camera's back side, an AF joystick has been added (Sony calls it a 'Multi selector'), which is a control I love to have for the likes of manual AF-point selection. For wildlife photography, I used it a lot, and can't imagine how I would have coped so easily in such a scenario with the older camera.
The zoom lens' position when the camera is turned offTim ColemanHere the camera is on, and the lens is set to its wide 24mm selectedTim ColemanAnd here's the camera's profile when the lens is zoomed all the way to the 600mm settingTim Coleman
Spin to the side, and the camera's ports are now neatly tucked away under rigid protective doors, with headphone and mic ports, plus a USB-C terminal has been added. The fact that the RX10 IV doesn't have a USB-C terminal is likely a reason it was discontinued, as per the EU's common charger regulations.
The tilt touchscreen is again a 3-inch type. It gets a small boost in resolution, and while that in itself isn't much of upgrade, its improved touch functions, and the fact that you can switch to a vertical format, are.
It’s possible to customize some of the buttons, including a speed-boost function during burst shooting — you can temporarily increase a medium speed, say of 10fps, to the maximum 30fps when the action begins. It’s a neat feature inherited from Sony's pro cameras, which minimizes how many photos you shoot, but the button placement is awkward for this feature — I would have liked a custom button on the front of the camera instead. A tally lamp has been added for video recording.
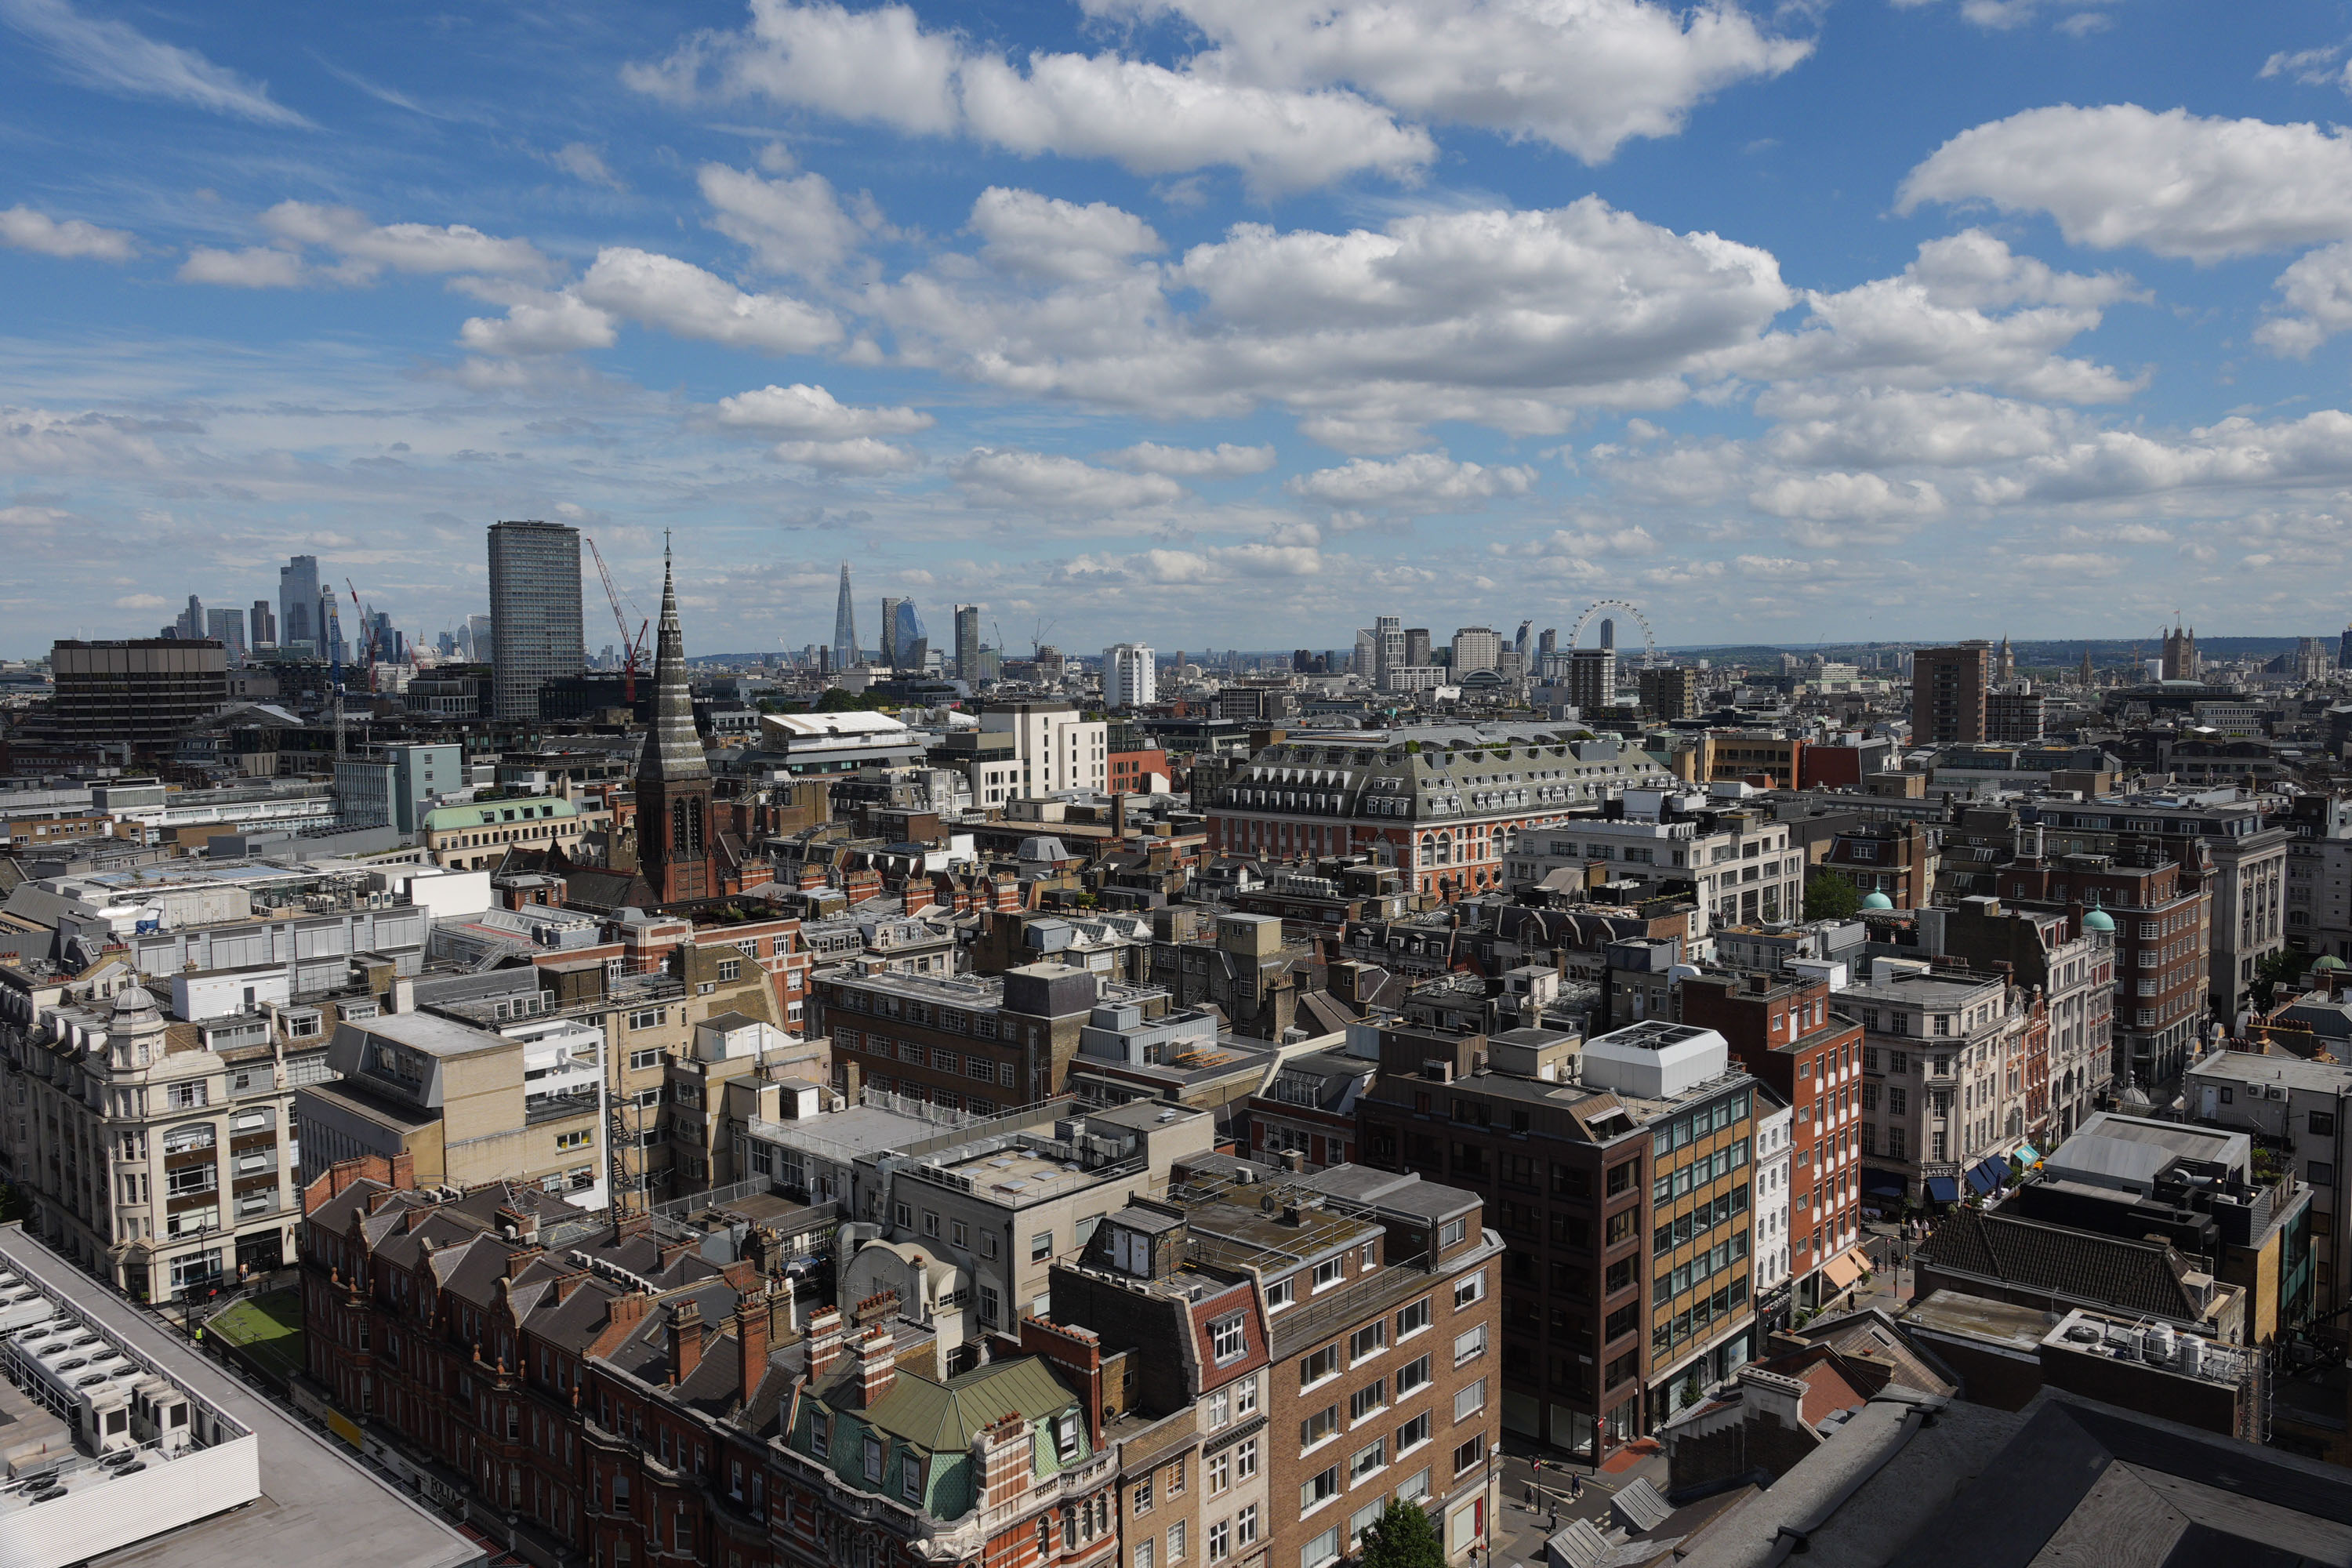
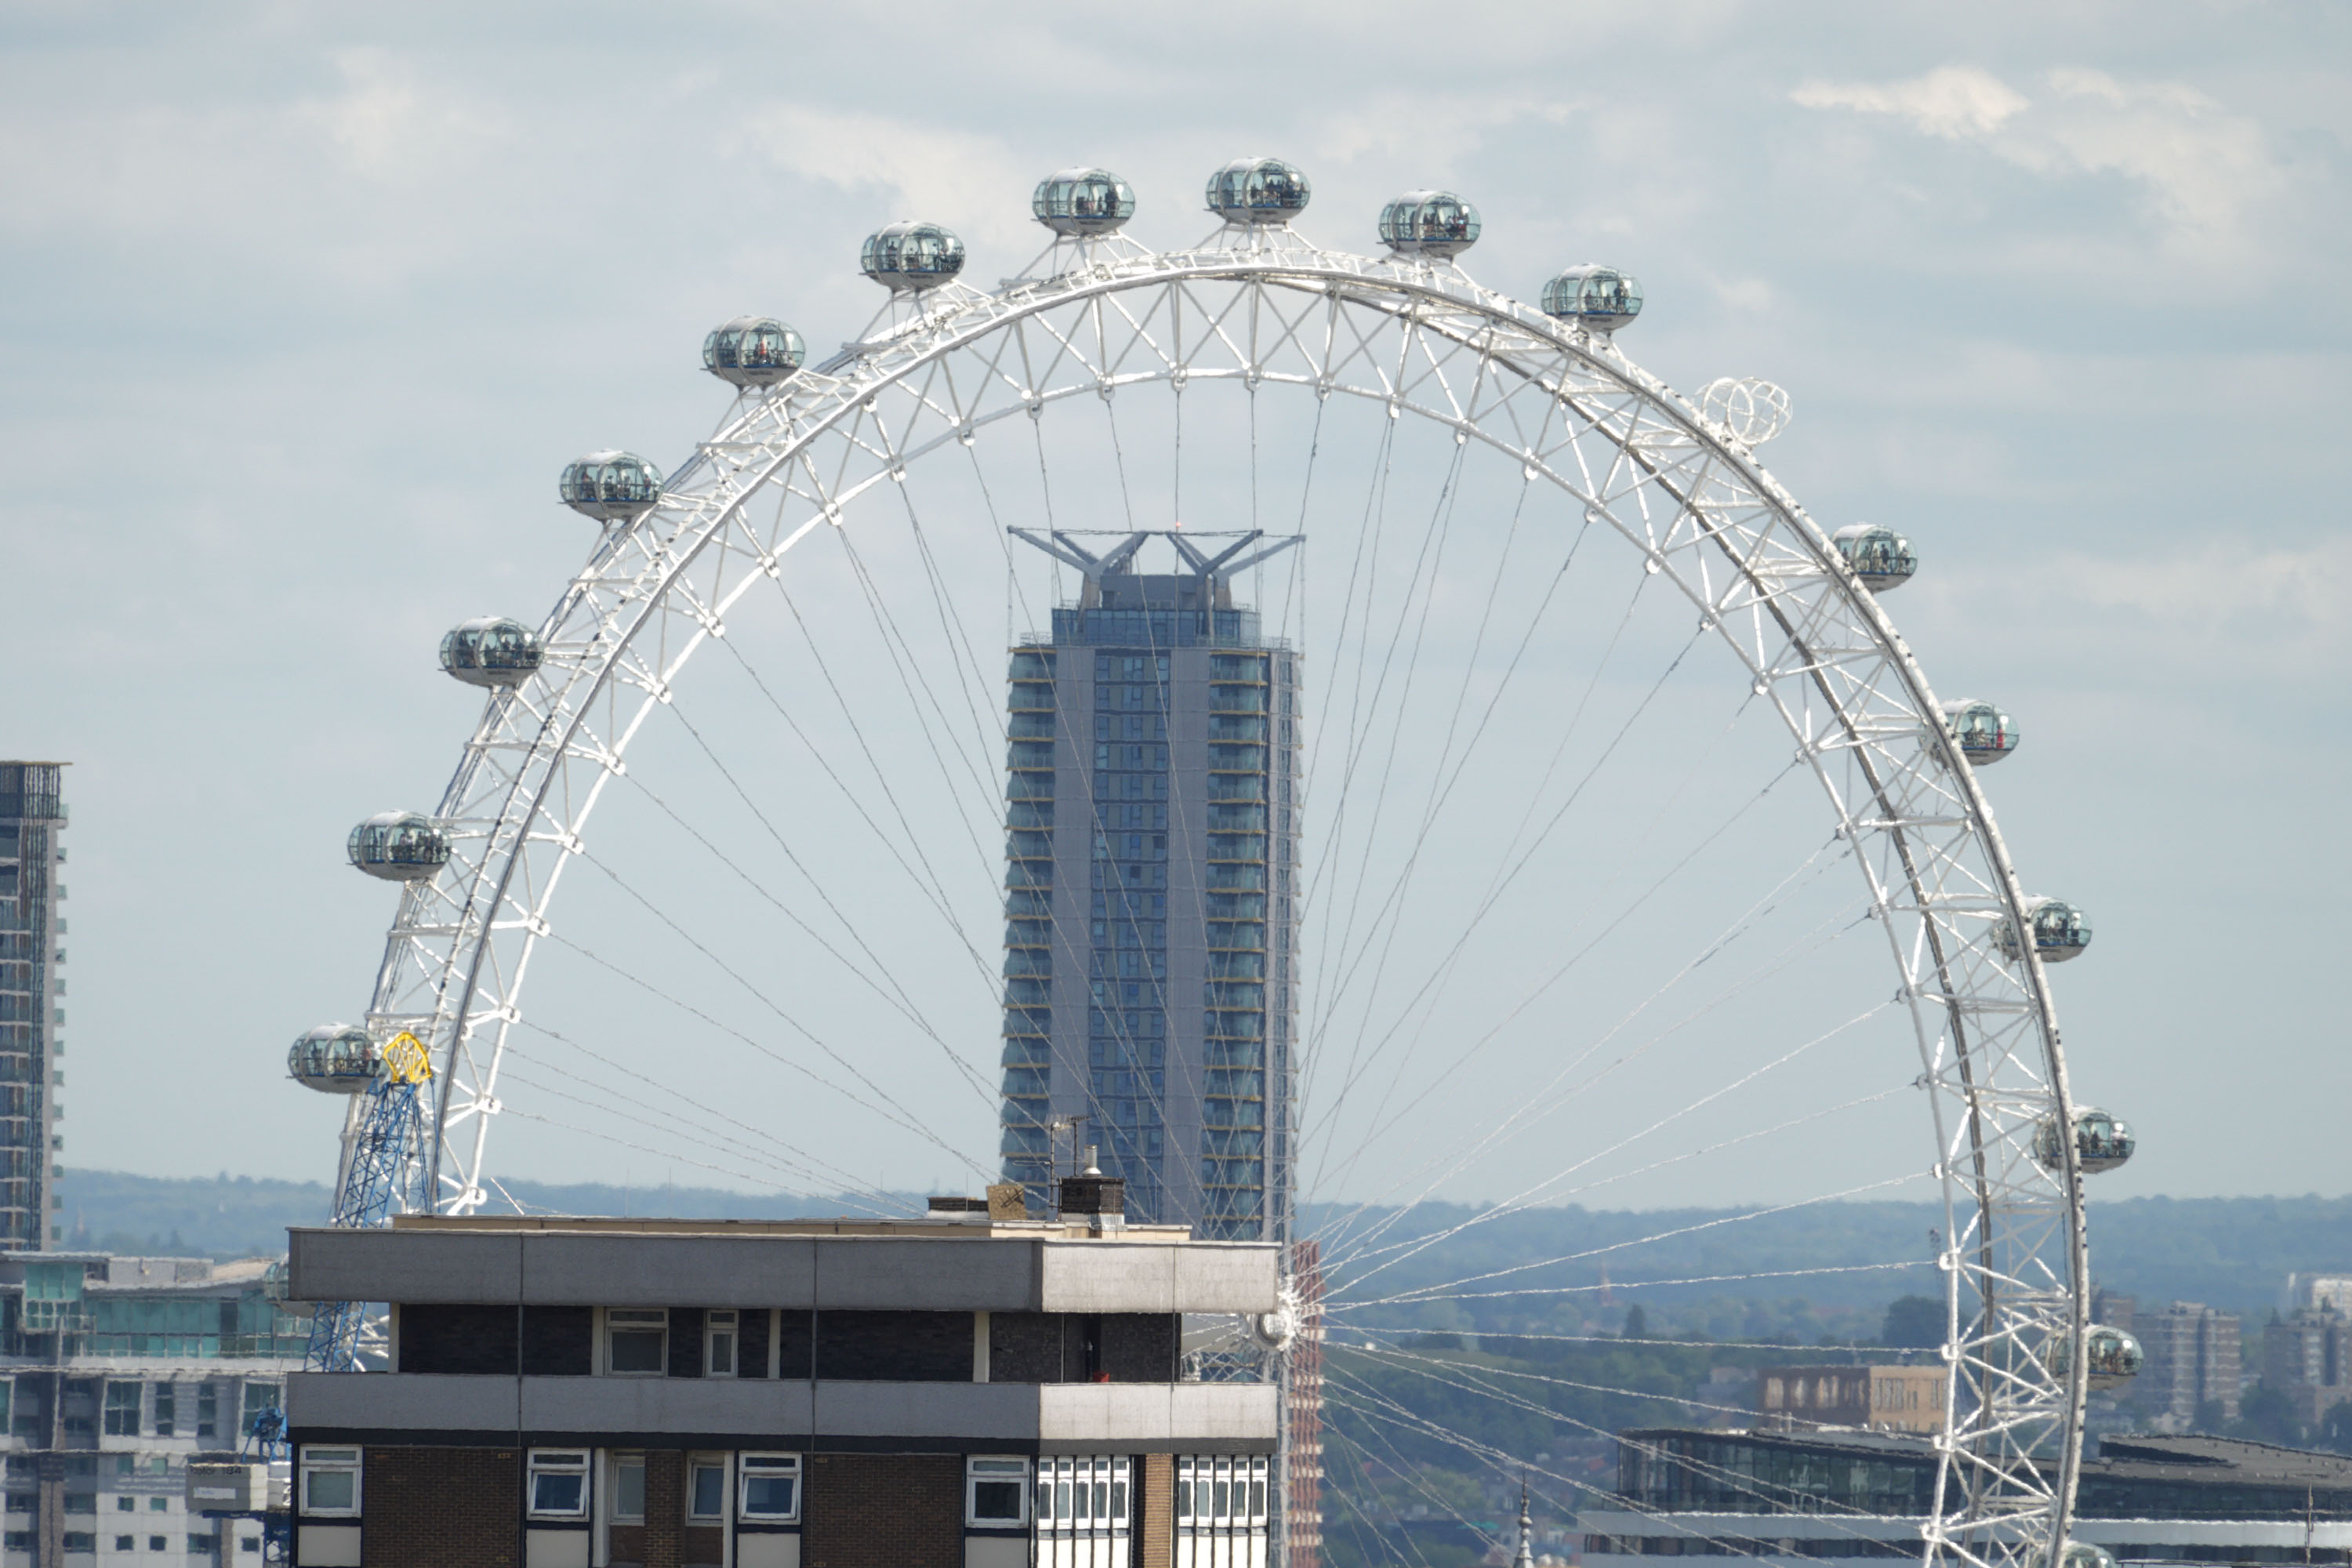
Here I've used the widest 24mm lens settingTim ColemanAnd from the same position, this is how tight the 600mm setting gets to distant subjects, in this case the London EyeTim Coleman
Design score: 4.5/5
Sony RX10 V: Performance
Sony's latest Bionz XR processor with AI chipset
Burst shooting upped to 30fps, with Sony's most up to date autofocus system that includes a wide range of subject detection modes
Now uses Sony's NP-FZ100 battery, delivering a 50% boost in shot life
Power and speed are where the major improvements are at. The RX10 V uses the same Bionz XR processor as the Sony A7 V mirrorless camera, with a combined AI chipset. The result is improved burst-shooting speeds and autofocus performance, and what Sony says is better color accuracy.
Burst-shooting speeds are boosted from the RX10 IV's 24fps to 30fps, when using the electronic shutter — which, in a camera like this with a stacked sensor, I have no problem doing. I'd hardly call this improvement in speed a reason to upgrade, though, especially since the mechanical shutter's maximum 10fps speed is enough for most scenarios.
When I was photographing action, such as for my child's sports day, or at my local nature reserve doing bird photography, I generally kept the camera to its 10fps setting, with one of the custom buttons set to a 30fps speed boost for when the action got really interesting.
This has allowed me to minimize the number of photos I've taken, while the way the camera groups burst sequences in playback makes files easier to navigate.
Something that makes the RX10 V feel like a snappier camera than the RX10 IV is that there is no viewfinder blackout, even for the 30fps setting, which is supported by continuous autofocus with Sony’s latest subject-detection autofocus.
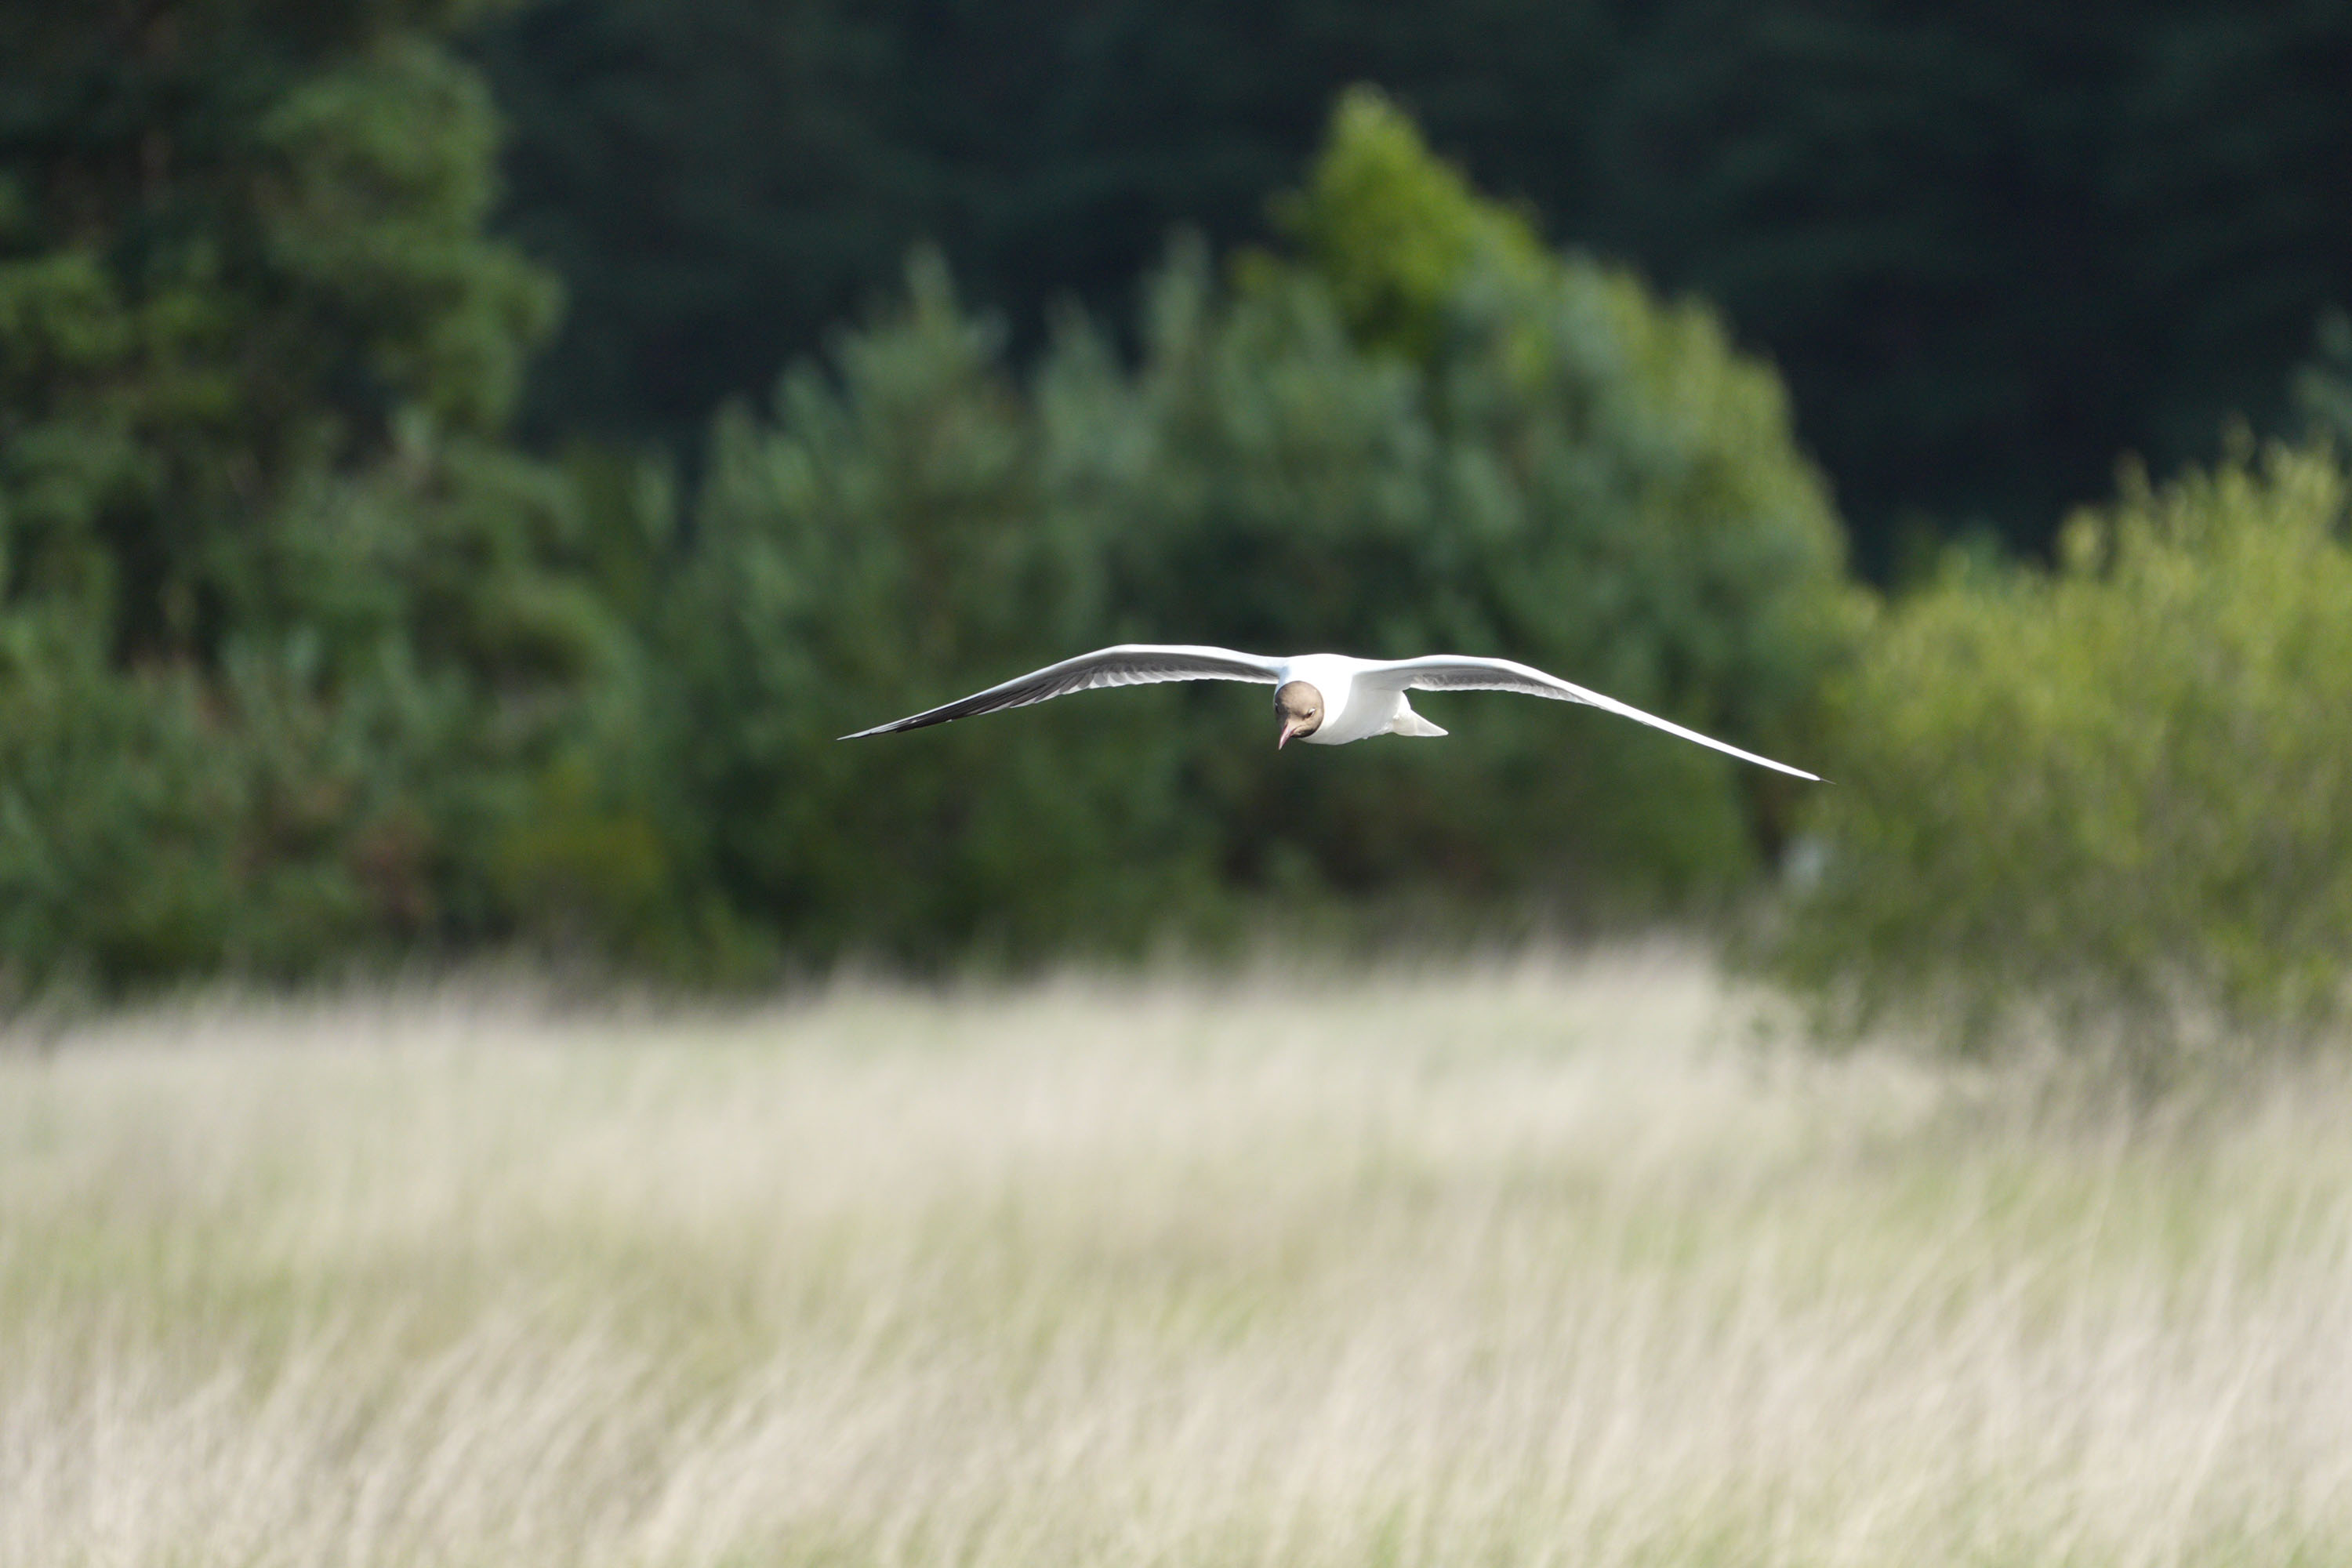
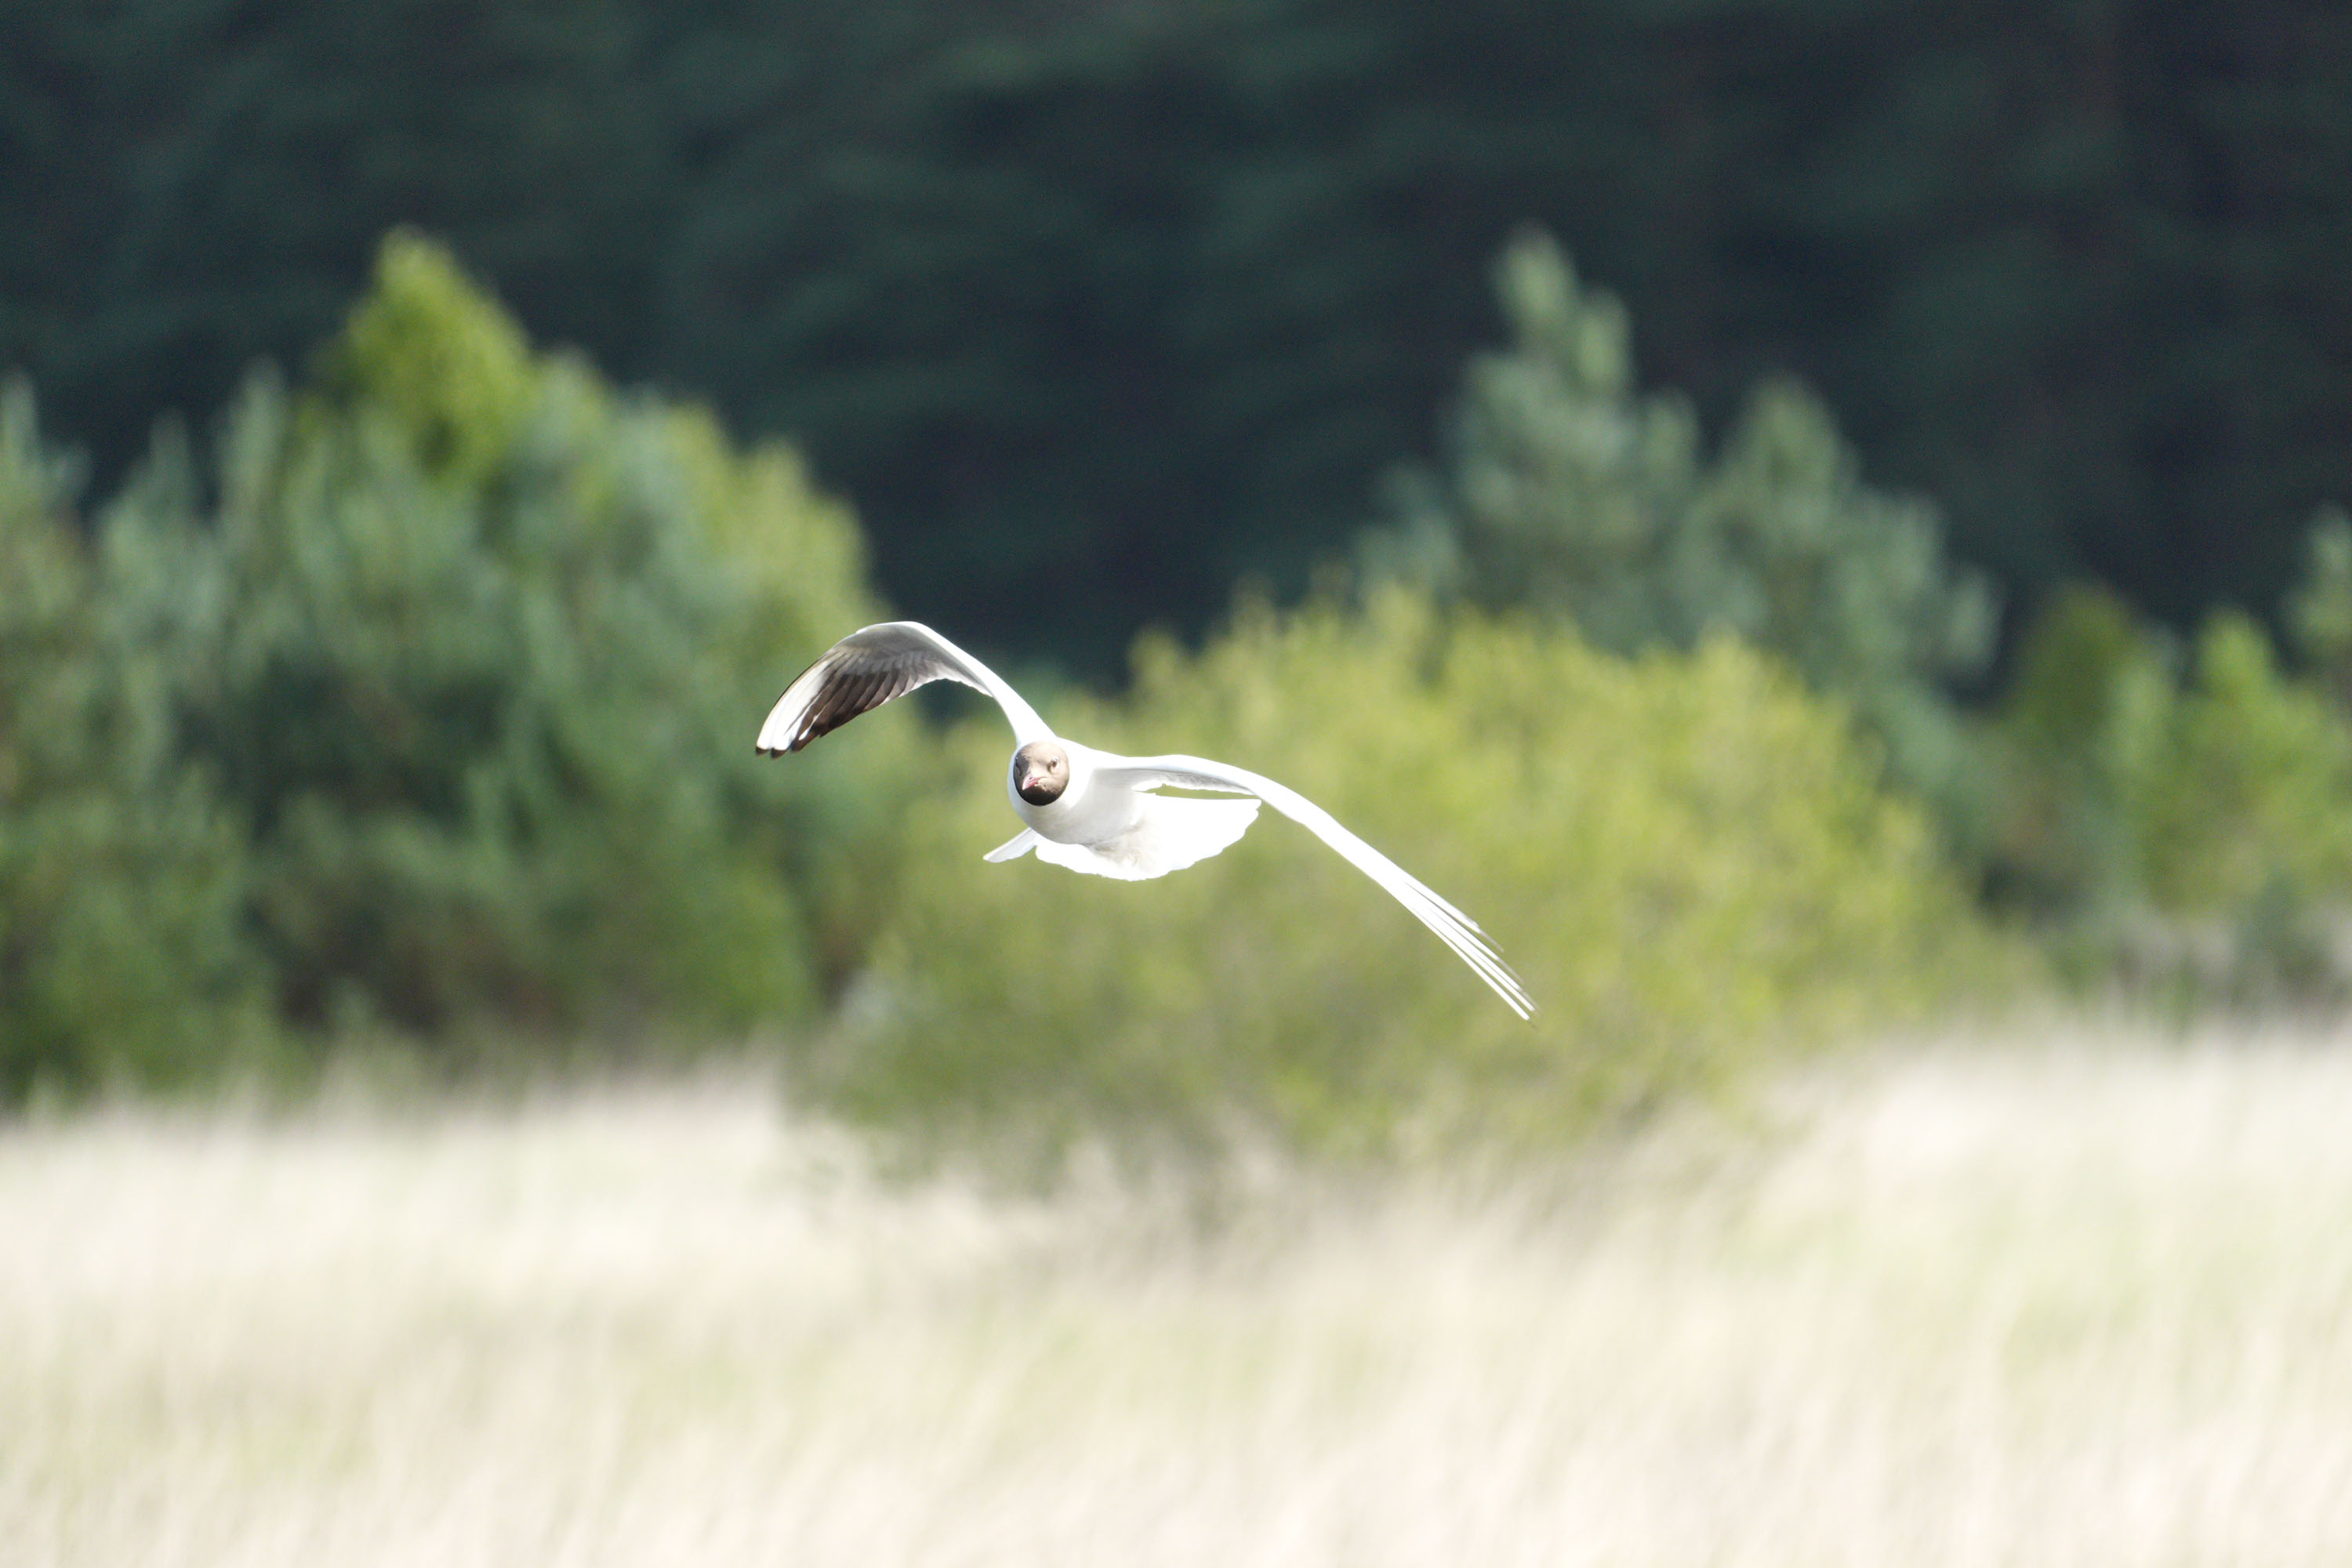
It was a challenge tracking this bird in flight, but with bird-detection autofocus active and the speed boost in play, I came away with some keepersTim ColemanNot all my photos from the sequence were sharp, but this one is also on the money. I'm not convinced I would've got as good results with the older RX10 IVTim Coleman
Compared to the RX10 IV, the RX10 V is able to detect a wider range of specific subjects with real-time recognition, including dedicated modes for birds, cats, and more.
I generally made sure I selected the specific subject when I knew that was my focus, such as with bird photography, and have been seriously impressed by how sticky autofocus is. Even when birds were small in the frame, the RX10 V was regularly able to pick them up with the camera's autofocus area set to wide.
I had more issues when photographing my child's sports day, given that there were so many faces in a lot of the photos. For such scenarios, a quick jig of the autofocus area to a small area can help to avoid the camera focusing on people in the background instead of the subject.
Tim ColemanTim Coleman
I've mentioned it already, but like most of its recent mirrorless cameras the RX10 V also uses Sony’s popular NP-FZ100 battery, which is a longer-lasting unit than the NP-FZ50 in the RX10 IV.
Sony quotes shot life as up to 630 shots compared to 400 for the RX10 IV, which is a huge performance boost. Add on-the-go UBS-C charging, and the RX10 V is a better camera for heavy photography days.
For me, all the above performance improvements are key for a camera that people typically buy as an entry point for wildlife photography.
Performance score: 5/5
Sony RX10 V: Image and video quality
Same 20.1MP 1-inch sensor and 24-600mm lens as used by the RX10 IV
New processor boosts color and autofocus accuracy
4K video frame rates upped to 60fps (no crop) / 120fps (with crop)
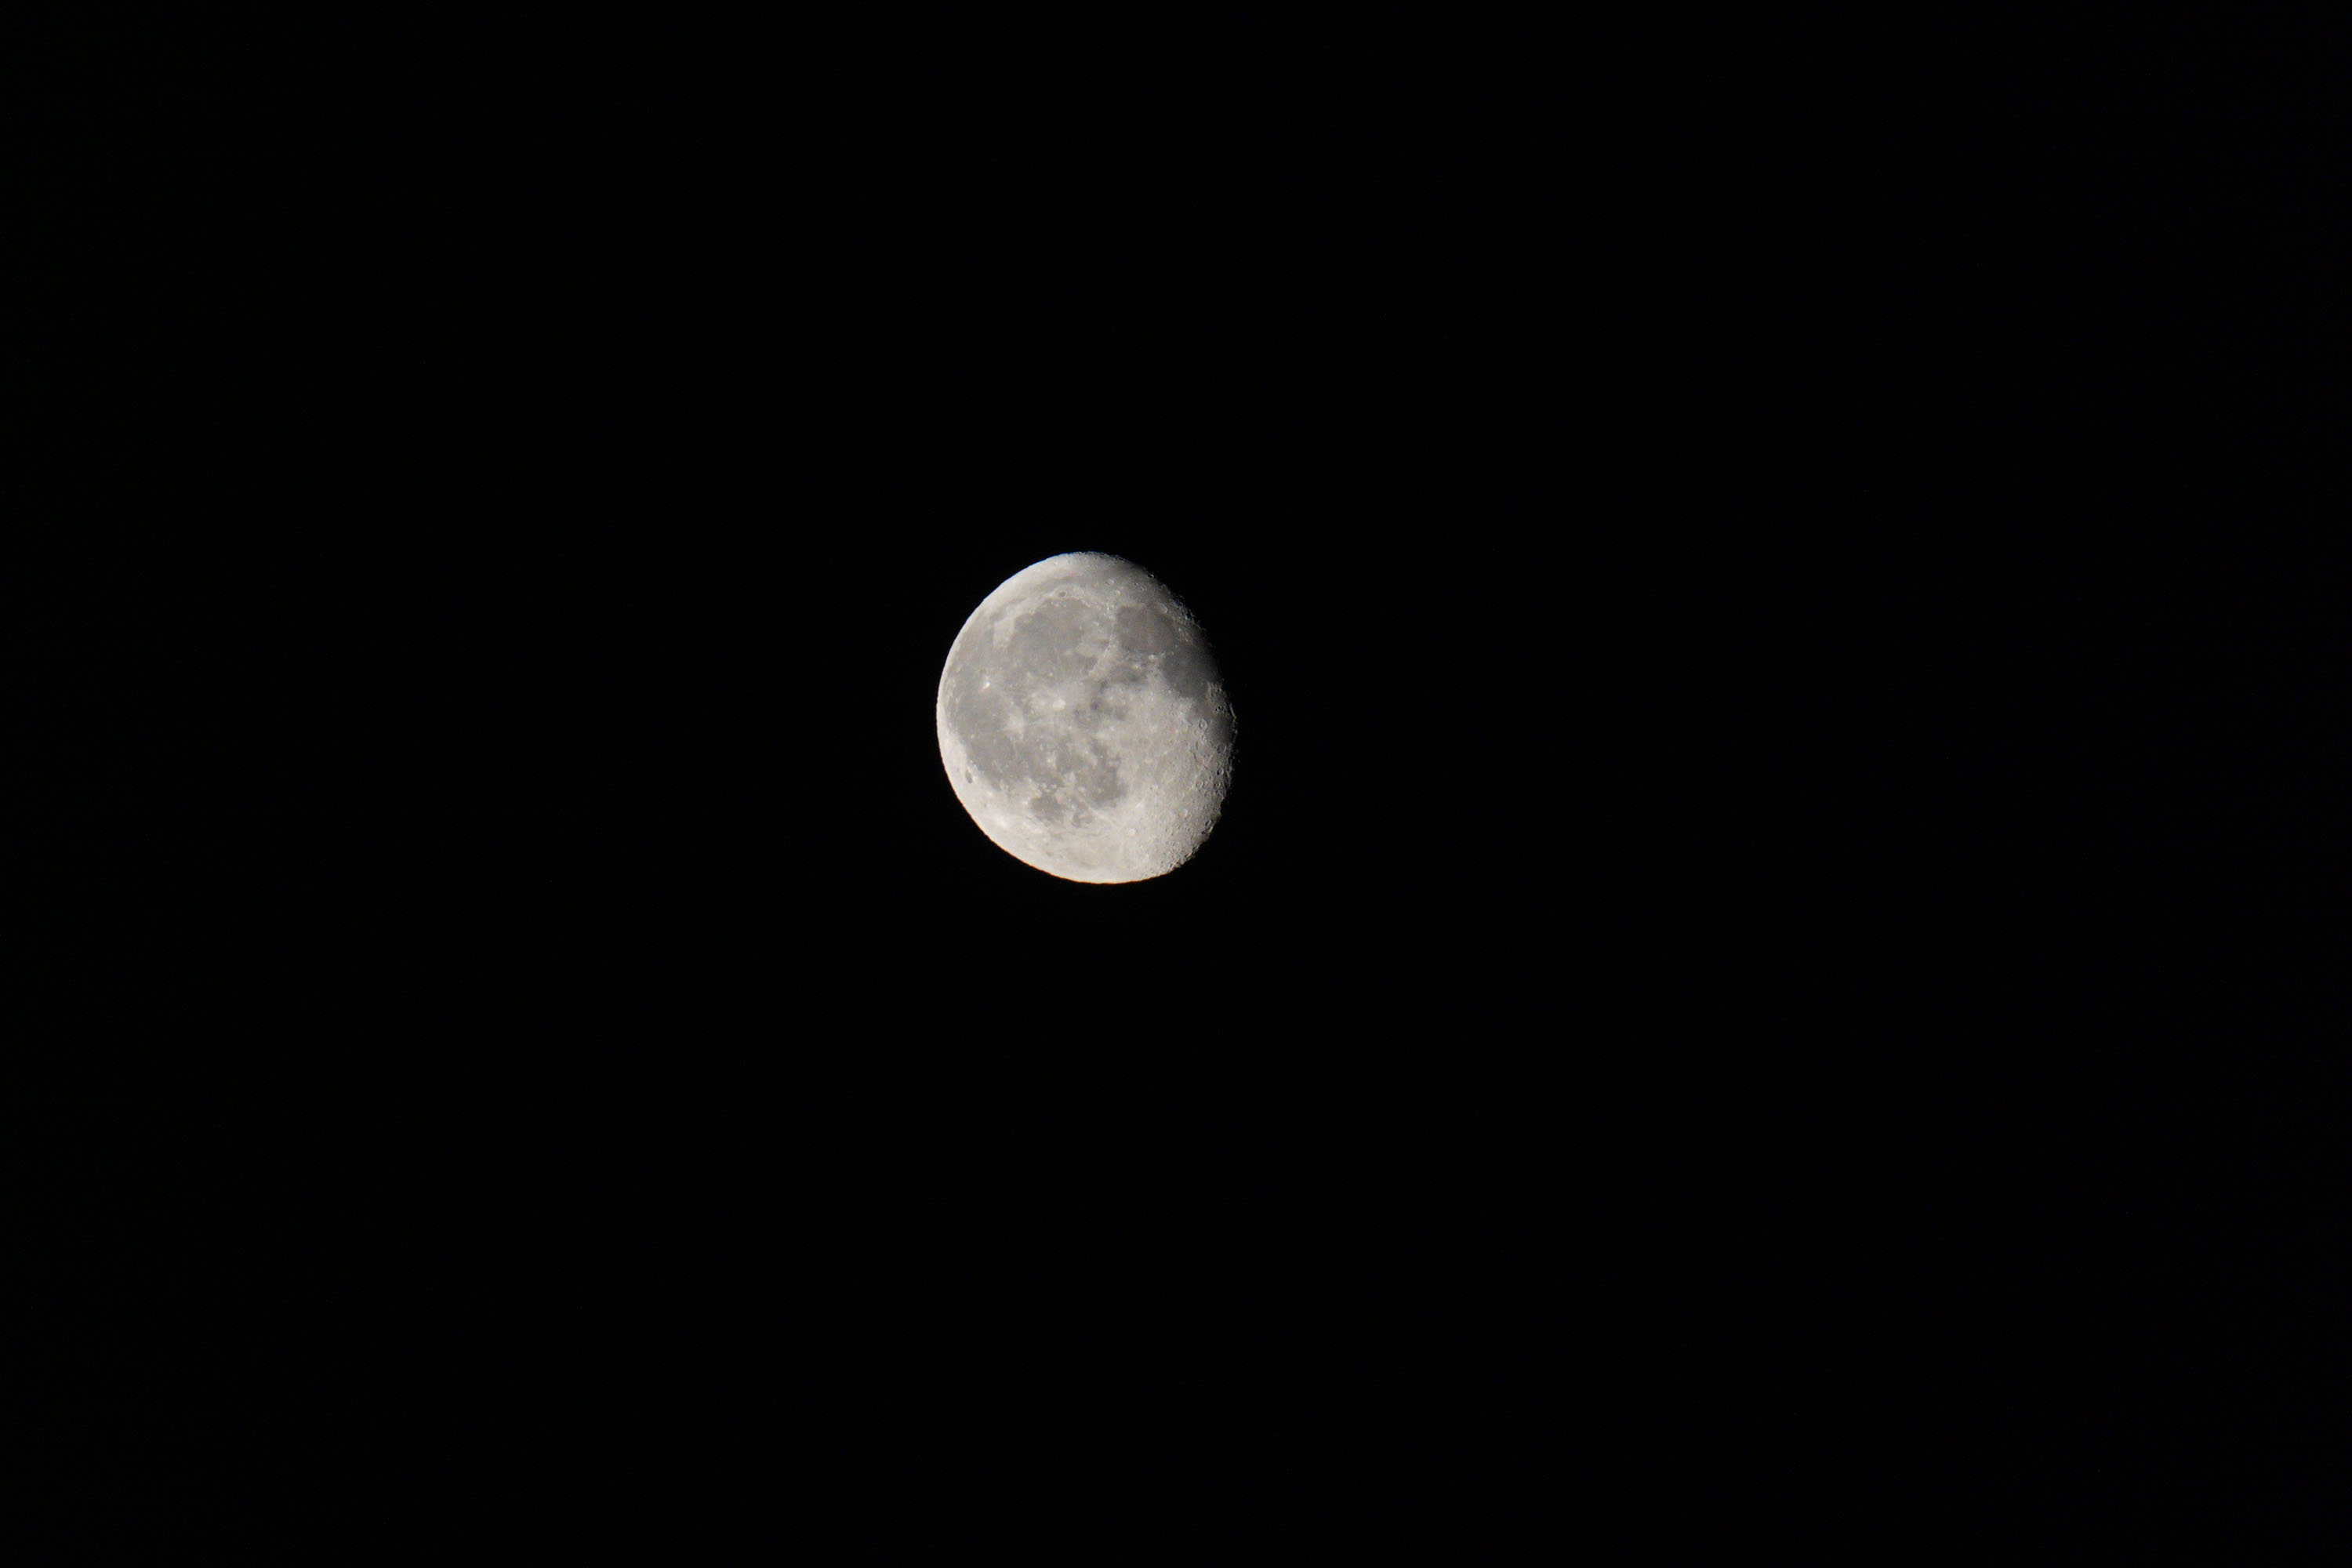
Detail is nice and sharp in this street photo shot with a moderate wide 38mm focal length Tim ColemanI dialled in negative exposure compensation using one of the exposure dials here to keep the golden colorTim ColemanIn this daylight scene, I stopped the aperture down to f/7.1, and detail is really crispTim ColemanThis is how close you get to the moon with the 600mm focal length. I could crop down further if I wished. That said, detail in the JPEG, shot at ISO 1000, is a little muddyTim ColemanThe zoom range helped me frame the person down this long alleyway. A camera like the X100VI couldn't have got this shotTim ColemanThe wide 24mm settingTim ColemanAnd zoomed in to 600mmTim Coleman24mmTim Coleman70mmTim Coleman135mmTim Coleman600mmTim Coleman
Considering the versatility of the 25x optical zoom lens, image quality is impressively sharp, while the bright aperture helps with low-light quality, and is easily able to blur backgrounds when using the telephoto settings.
That being said, there are no major image-quality improvements over the nine-year-old RX10 IV; we're still getting 20.1MP photos in RAW & JPEG, and 4K video recording.
It's largely the indirect factors that positively improve image quality: better autofocus performance and subject recognition, enabling an increased hit ratio of sharp photos, and images with greater color accuracy based on detected subjects.
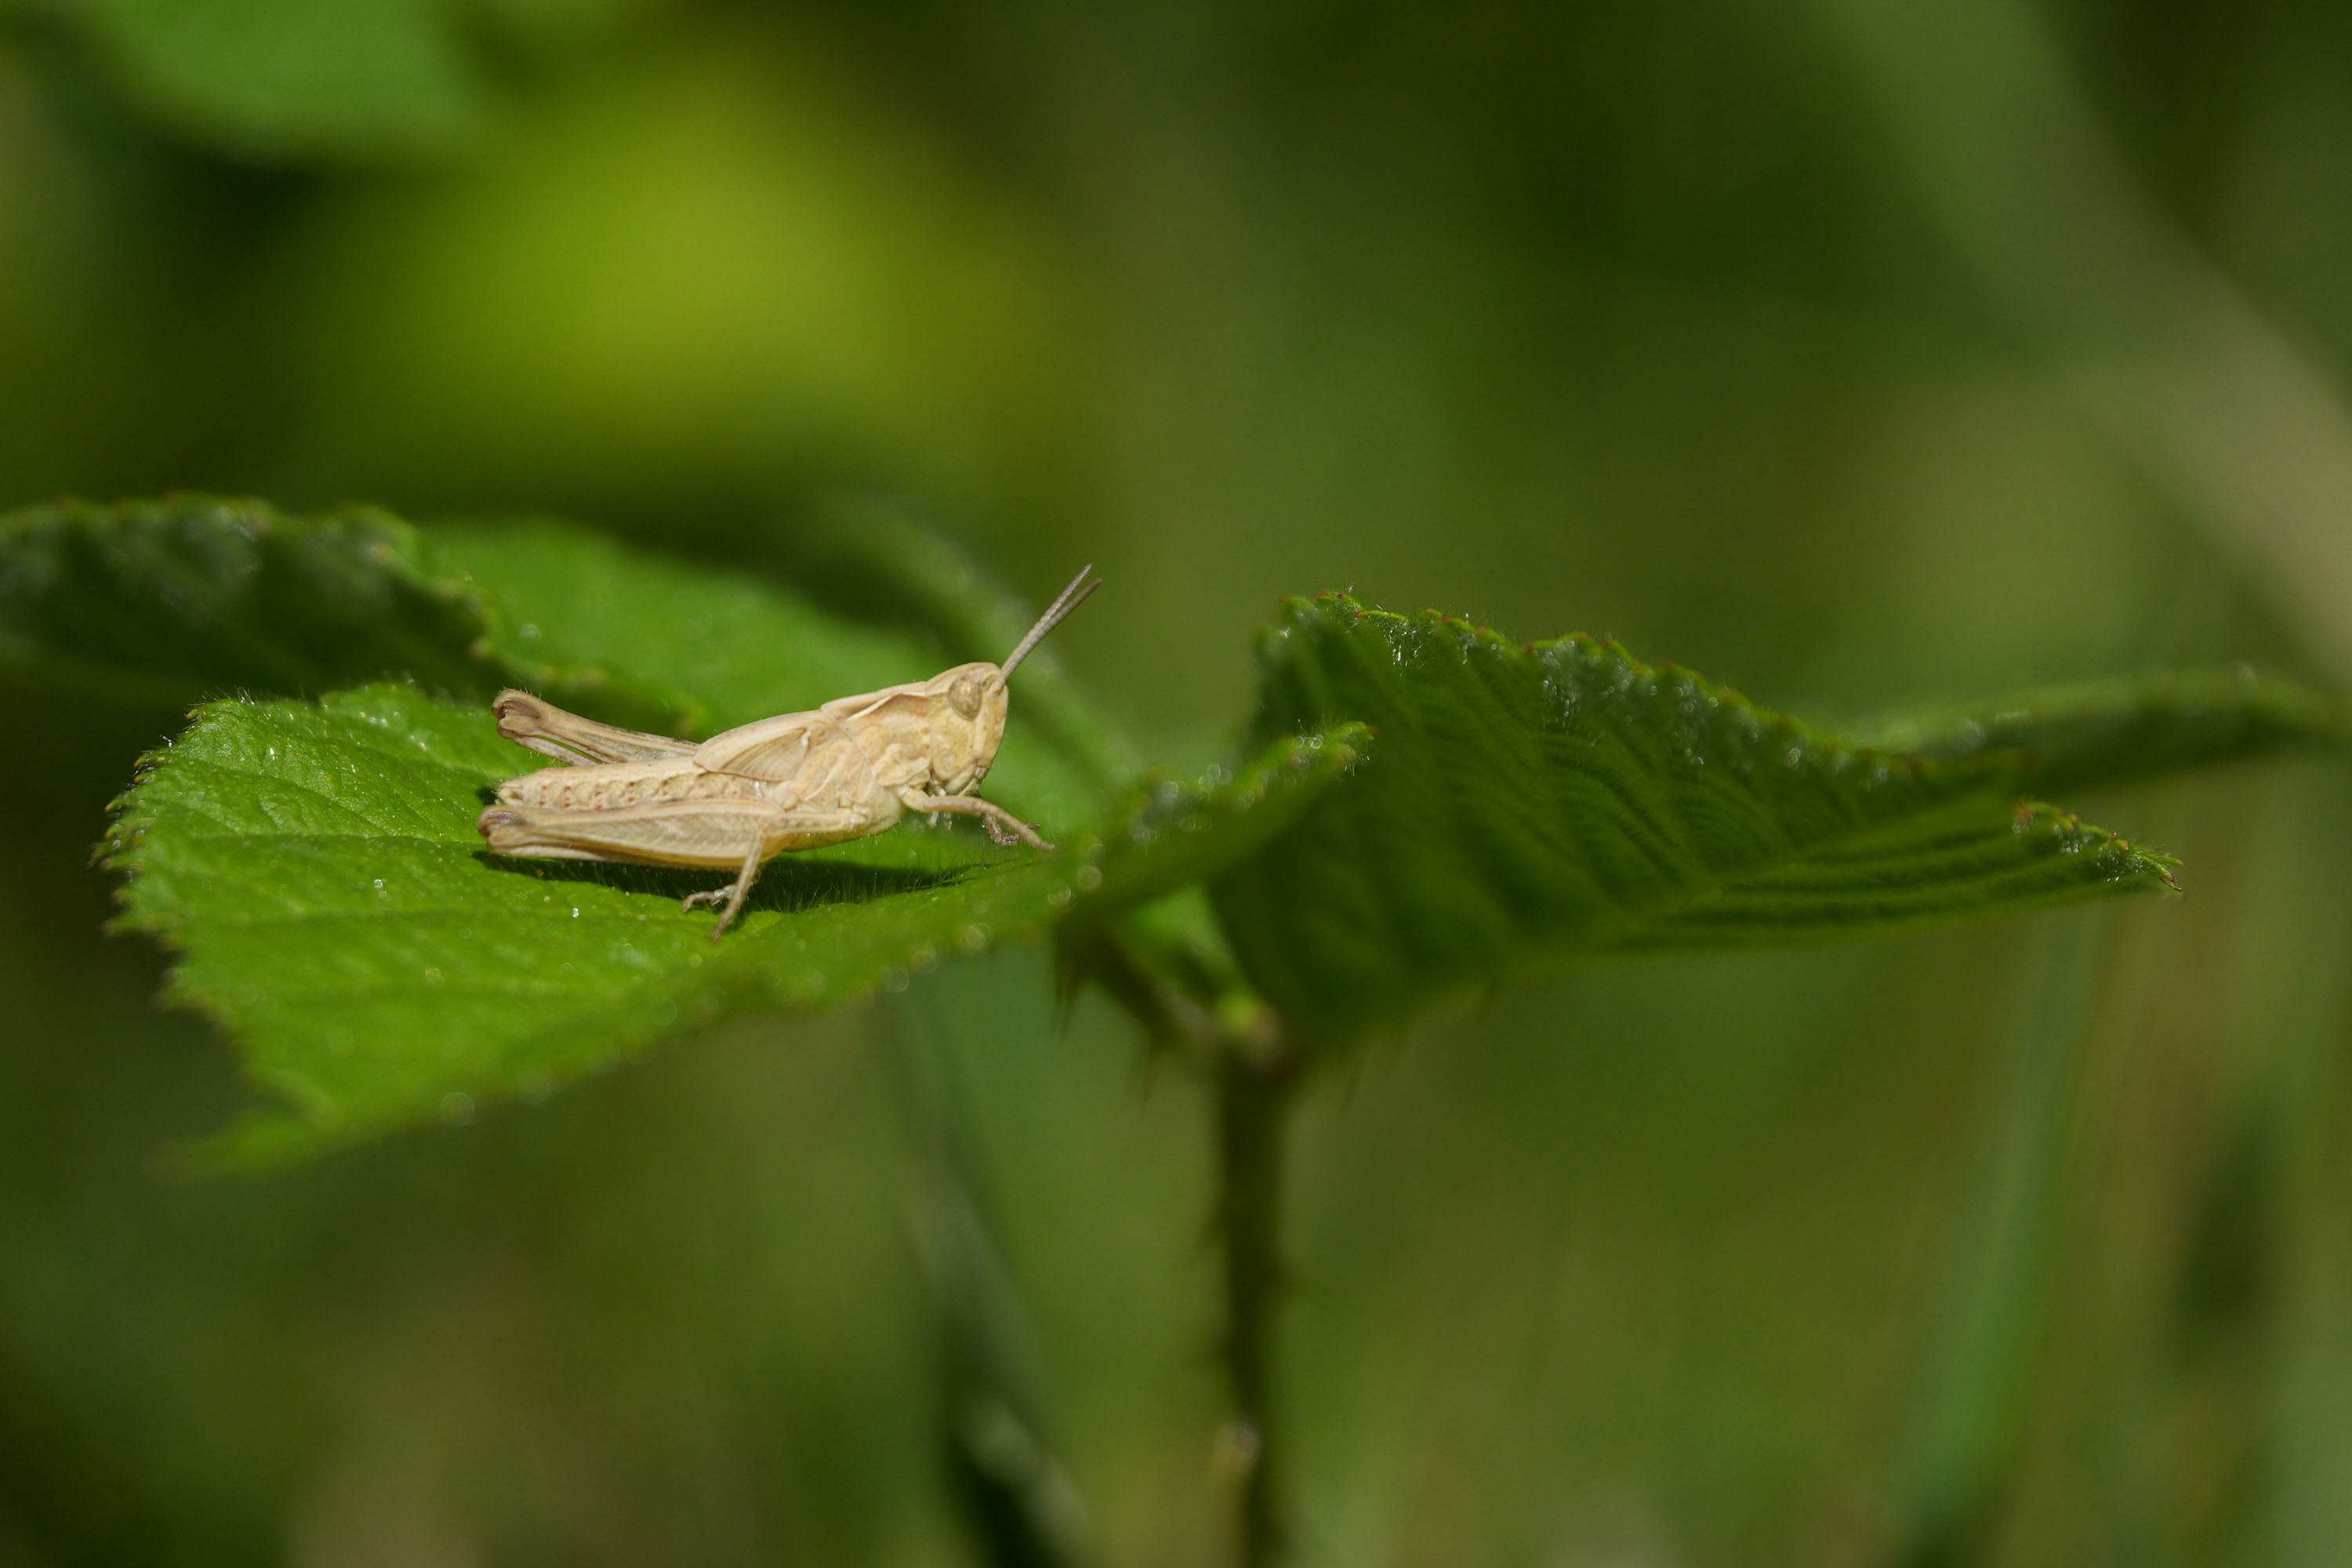
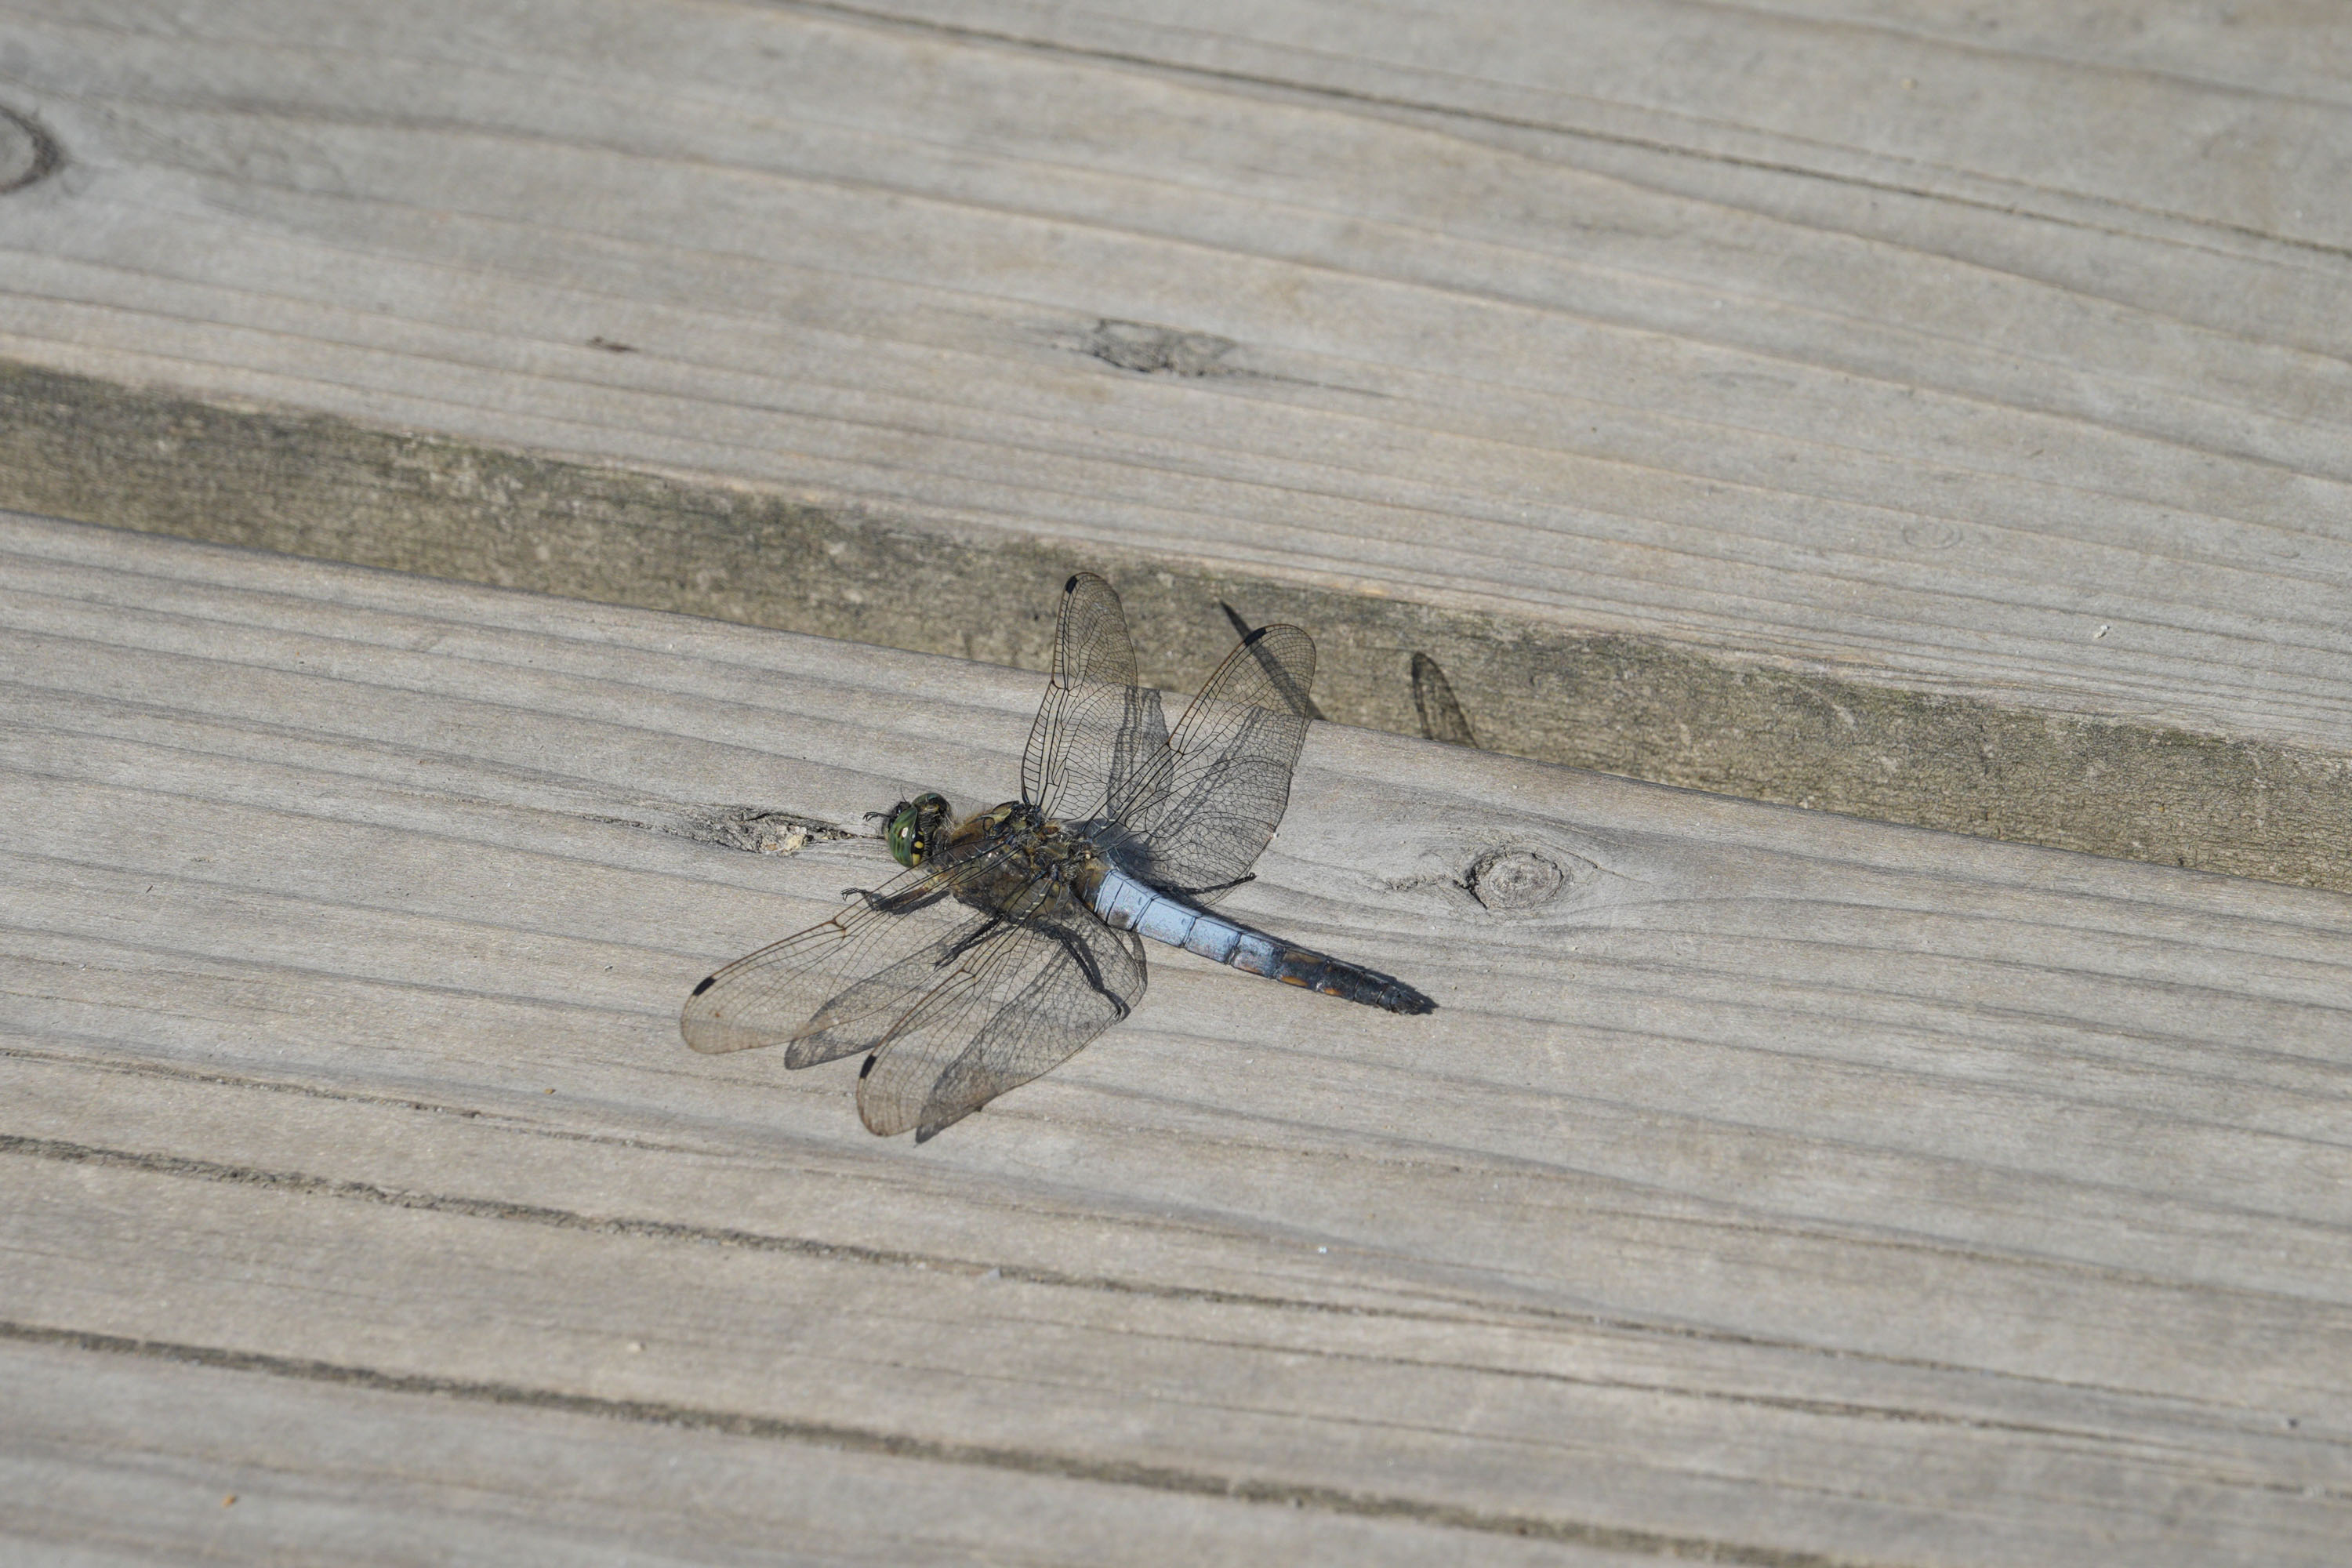
Some macro photos. At 600mm, the maximum magnification is 0.49xTim ColemanScroll to the next photo to see how far away I was in getting this photoTim ColemanYep, the dragonfly is in there, I promise you!Tim ColemanIn low light, detail can get muddy — this end of day photo was shot at ISO 5000 and I'm not sure it would pass for a big printTim ColemanTim ColemanTim ColemanTim ColemanTim ColemanTim Coleman
Other more direct improvements include a boost in 4K video frame rates: the RX10 IV was limited to 30fps, whereas the RX10 V goes up to 60fps with no crop, or 120fps with a crop. Like before, we still get a 240fps, but only in Full HD format.
And then there are the new color profiles to choose from, including Sony's popular S-Cinetone and S-Log3 for video, and the ability to import up to 16 custom LUTs profiles.
There are a bunch of extra features that make the RX10 V a better camera for video than the RX10 IV; a tally lamp, enhanced audio workflows, and it's also now possible to record an in-camera time-lapse sequence.
A few of my bird photos, all the original files, no editing or cropping. The camera had no problem detecting the subjects in all the following photosTim ColemanTim ColemanTim ColemanTim ColemanTim Coleman
If you already own a mirrorless camera, you're probably wondering if the RX10 V's quality is sufficient to replace a supertelephoto lens for photographing distant subjects. I was curious to find out, so I took the same photos of birds with the Sony A7R V professional mirrorless camera and Sony's longest telephoto lens, the 400-800mm, which is a similar price to the RX10 V.
You can see the direct comparisons between the RX10 V and Sony A7R camera with 400-800mm lens in my separate write-up. But to summarize here — yes, the RX10 V's detail is impressively sharp for a camera of this kind, but there is a reasonably obvious gulf in outright clarity from the larger and pricier Sony mirrorless setup.
Image and video quality score: 4.5/5
Sony RX10 V: testing scorecard
Sony RX10 V
Attributes
Notes
Rating
Price
It's a lot to pay for a bridge camera, but you are getting a lot of camera
4/5
Design
Excellent design tweaks improve handling, but built-in flash and top LCD are goine
4.5/5
Performance
Sony's latest processor, autofocus and bigger battery deliver where it matters most
5/5
Image and video quality
Nine years after the RX10 IV, and we still have the same 20.1MP sensor and 24-600mm lens. Best-in-class image quality, but a mirrorless camera with telephoto zoom will be even better
4.5/5
Should I buy the Sony RX10 V?
Buy it if...
You want an all-in-one camera, but you're a regular wildlife photographer Yes, the 24-600mm f/2.4-4 lens is super bright and versatile, but it's the telephoto settings that entice people to bridge cameras, and the RX10 V is the best of its kind.
You want a lightweight setup for wildlife photography Bridge cameras are hardly small, but when you consider its size against a mirrorless camera with a lens that reaches up to 600mm, the RX10 V is positively tiny and lightweight.
Don't buy it if...
You own a working RX10 IV and are happy with it If your several years-old RX10 IV is still doing the business, there are plenty of ways it matches the RX10 V, given it has the same sensor and superzoom lens.
You can stretch to a lens for your mirrorless camera instead I would primarily use the RX10 V for wildlife photography, for which a Sony mirrorless camera with a lens like the Sony 400-800mm is a higher-quality setup, even if it is heavier and bulkier.
Sony RX10 V: also consider
Nikon Coolpix P1100
For outright zoom versatility, Nikon's Coolpix P1100 wins with its ridiculous 125x optical zoom — that's a 25-3000mm focal length range! It's also less than half the price of the RX10 V. However, this camera is much bulkier, and its sensor is tiny compared to the RX10 V's — and it shows in its lower-quality images.
A left-field alternative, but if you already own a Sony mirrorless camera you'll get sharper bird photos by using the 400-800mm lens with it. Yes it's a much bigger setup, but if you're a serious enthusiast you'll want to use this lens more, and it's a similar price to the RX10 V.
Sony loaned me the RX10 V for the three weeks prior to its announcement
I took it travelling and on regular trips to my local nature reserve
I've used all the major camera and lens settings, plus made direct comparisons with Sony mirrorless gear
I made the most of my lengthy review period to properly test the RX10 V. I took it travelling where it was used in bright sunlight and hot weather, to my child's sports day, to my garden for macro photography, plus I regularly visited a nearby nature reserve which is a very popular spot for birding.
Across the various scenarios, I tested the different lens settings — the entire zoom and aperture range. I shot 20MP stills and 4K video clips, pushed the 30fps Drive Mode to its limits, tested the camera's close focusing capabilities, and shot until the battery drained.
And because I feel most people are interested in the RX10 V for wildlife photography, especially bird photography, I tested the various subject detection autofocus modes and pitted the premium bridge camera against Sony's longest lens, the 400-800mm F6.3-8, to see how it fared.
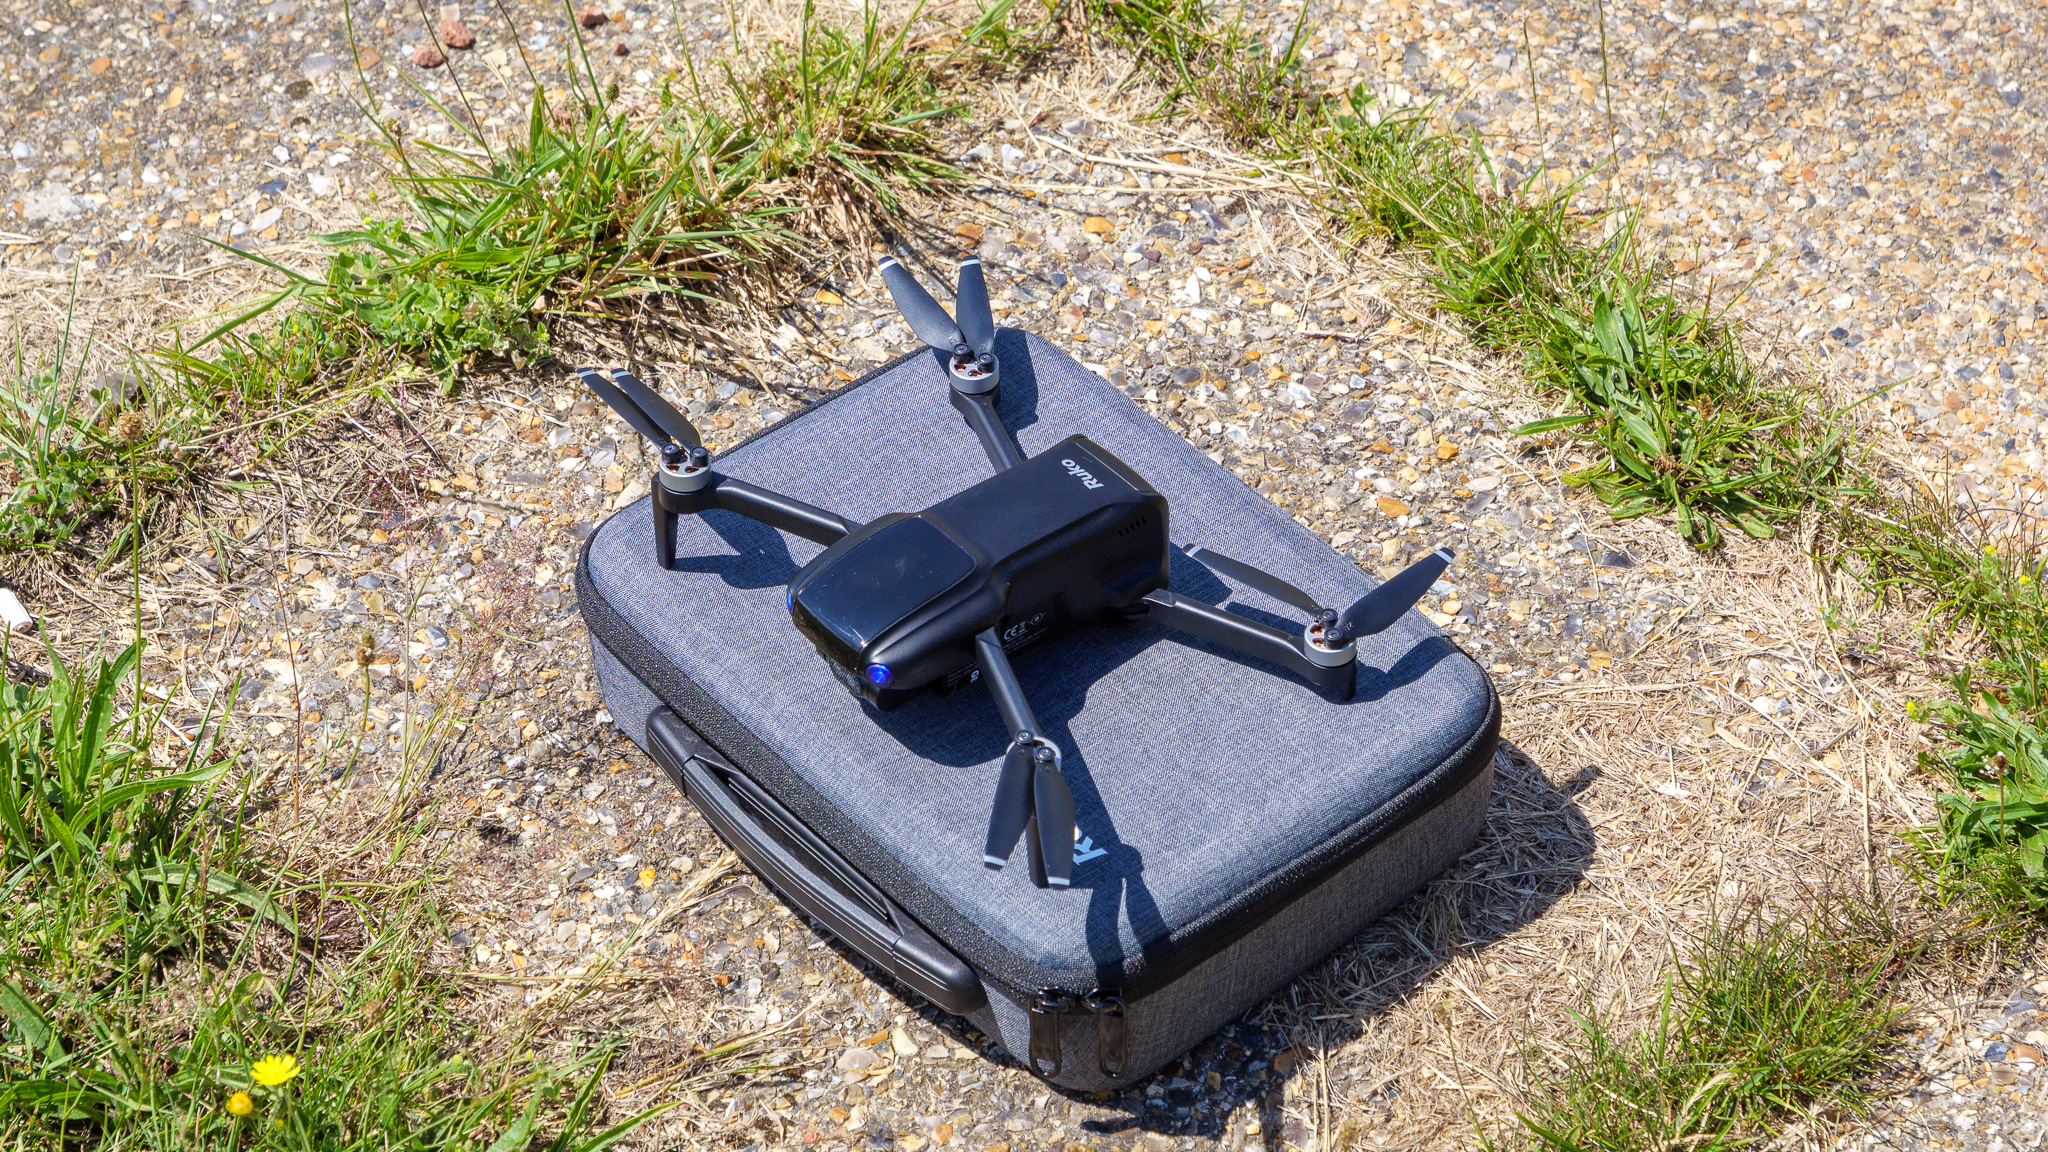
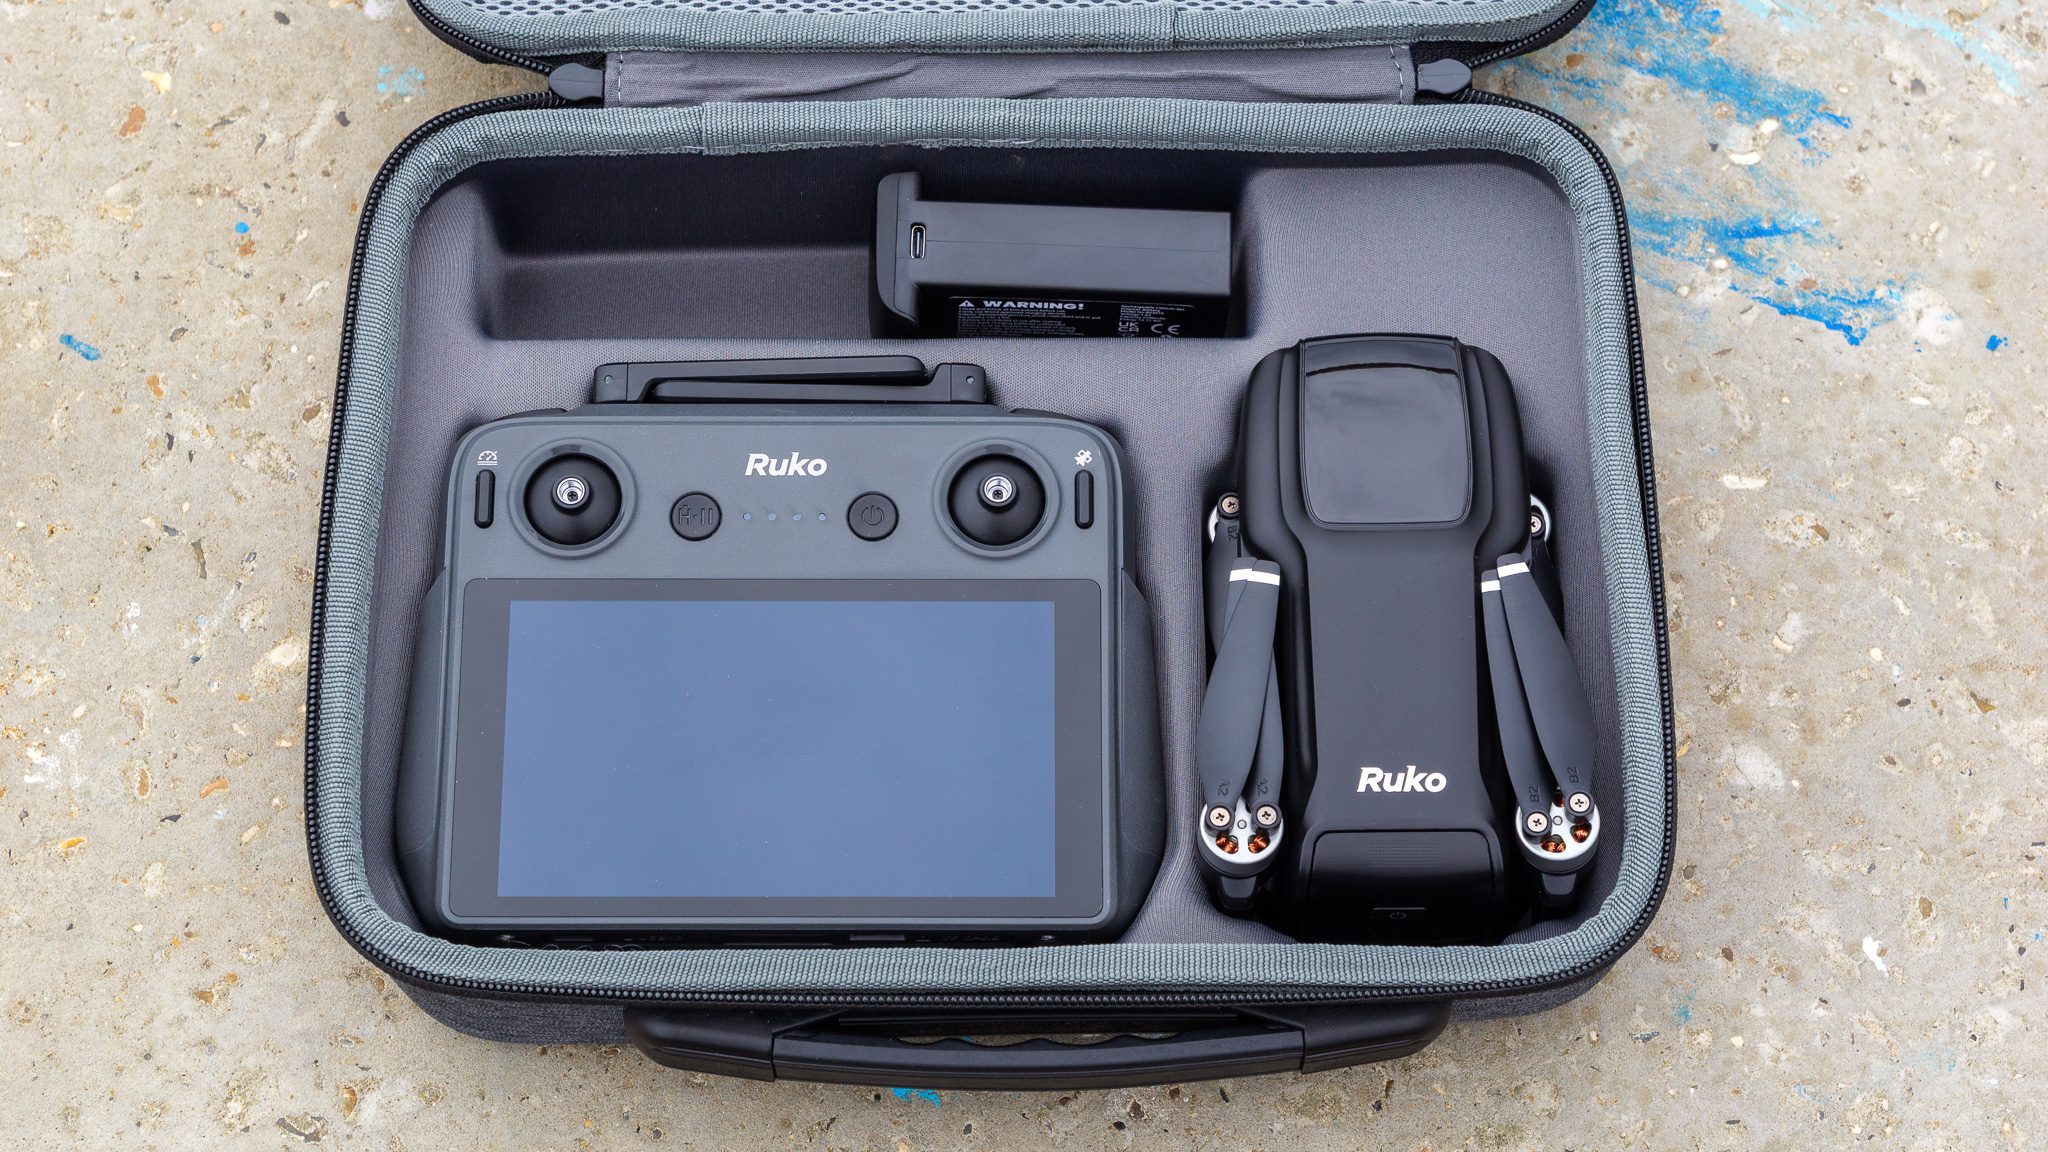
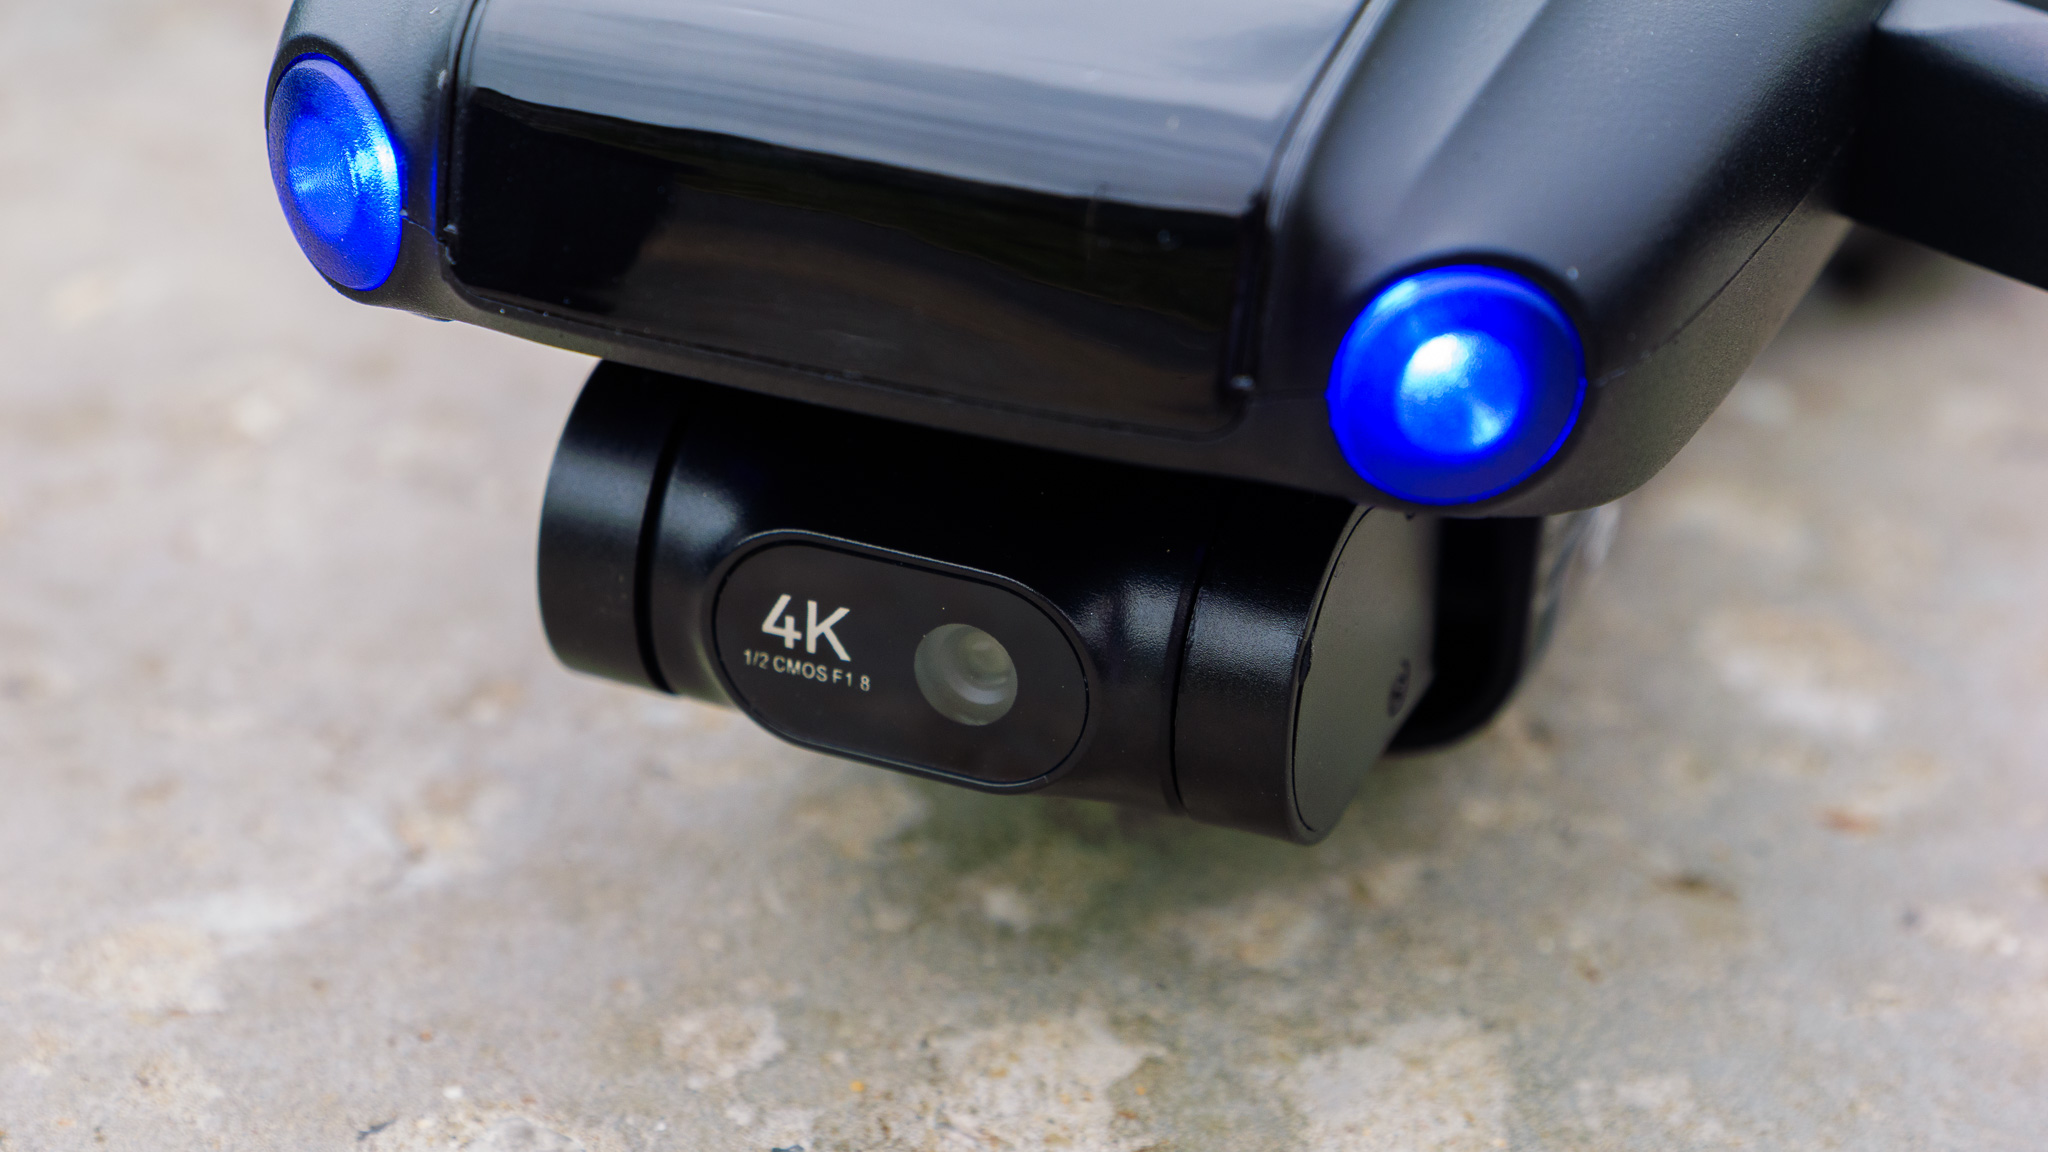
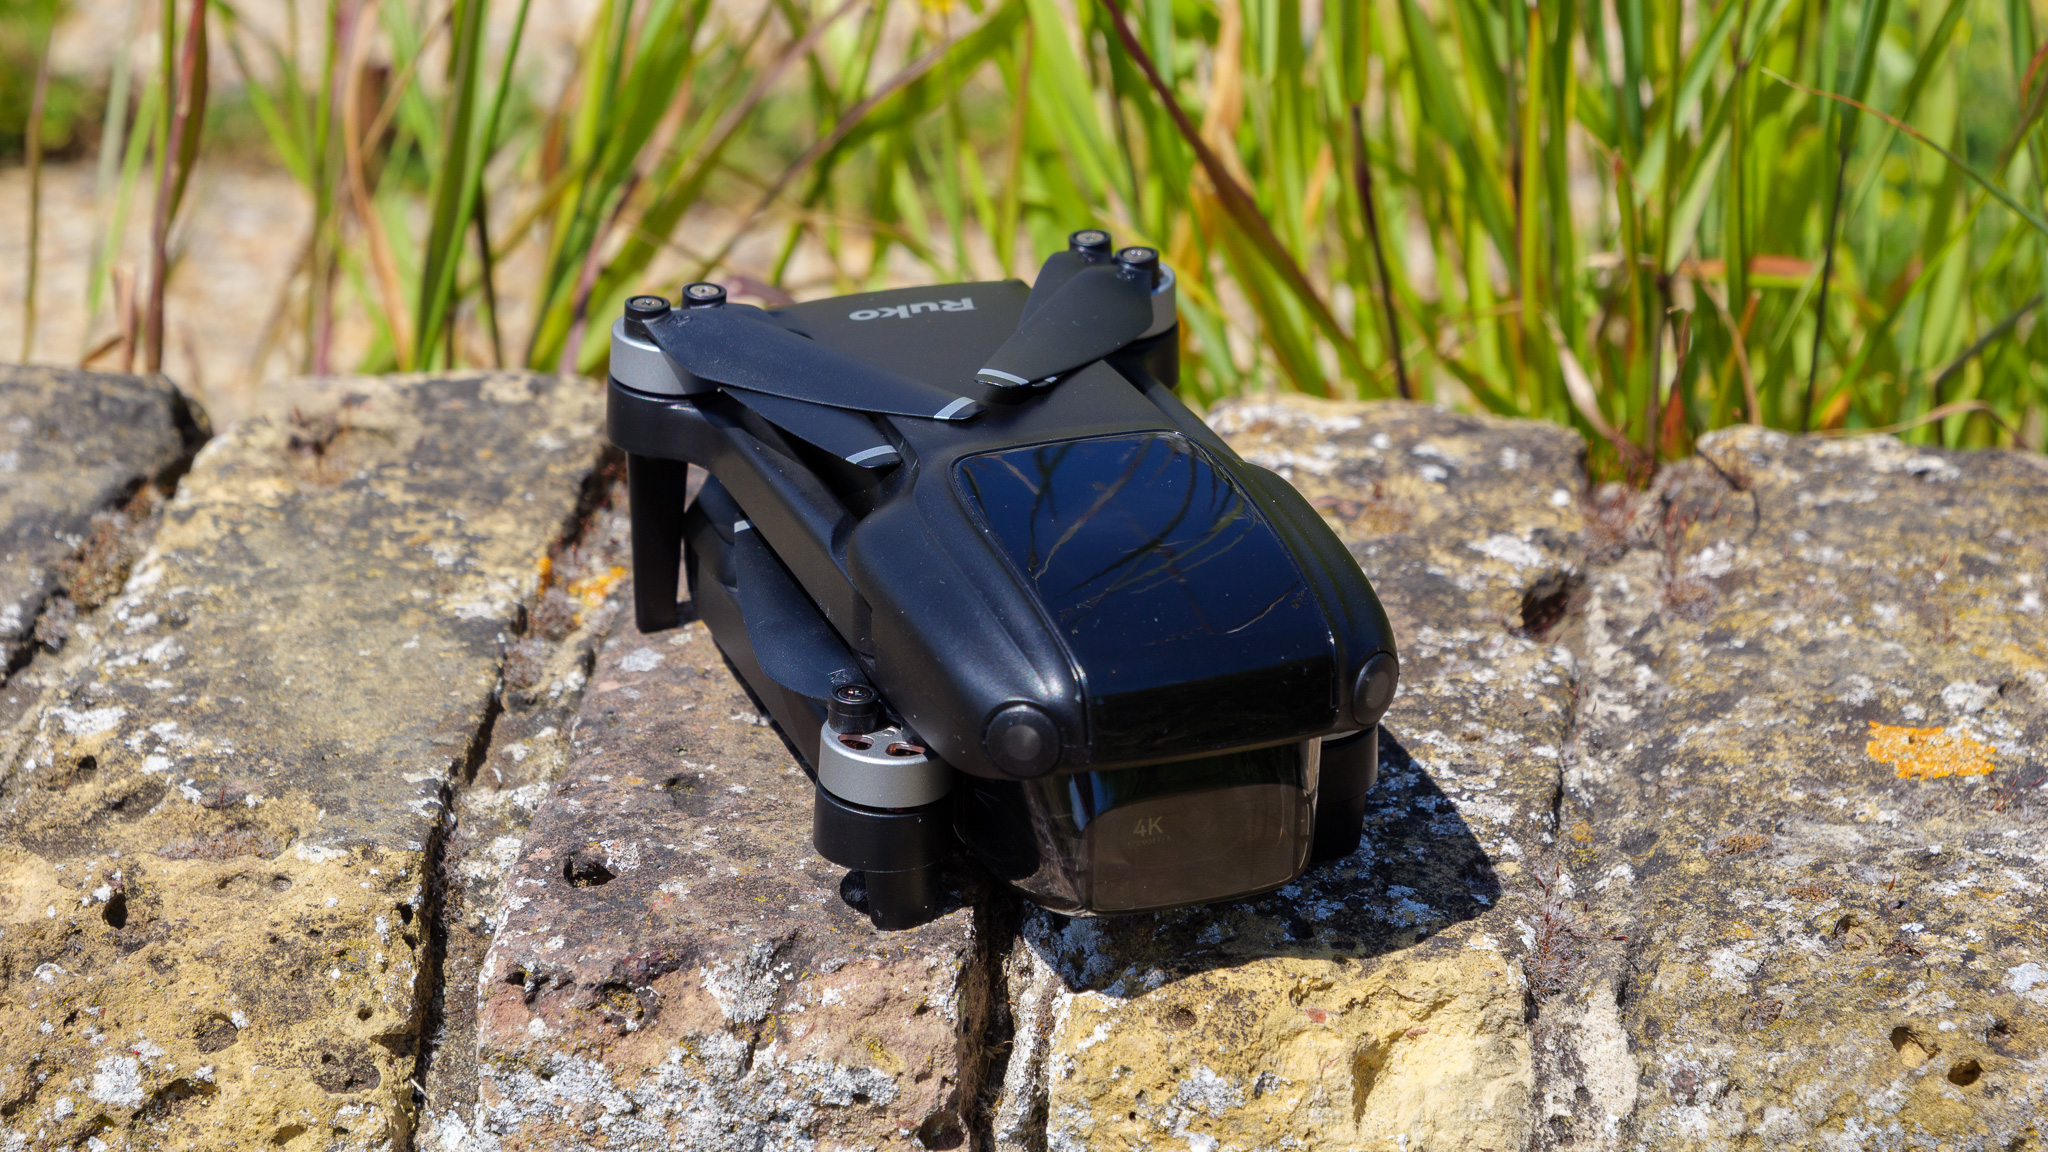
DJI's dominance of the consumer drone market is so total that you have to wonder whether any rival can land a meaningful blow. The Ruko U11Mini 4K is the latest contender to step into the ring, and on paper it looks like a credible one: a sub-250g folding quadcopter with a 1/2-inch CMOS sensor, 4K video, and an optional touchscreen controller that's clearly modeled on DJI's own RC series.
Unfortunately, the closer I looked, the more the U11Mini 4K's limitations revealed themselves, and the gulf between Ruko and DJI's similarly-priced beginner drones remains huge.
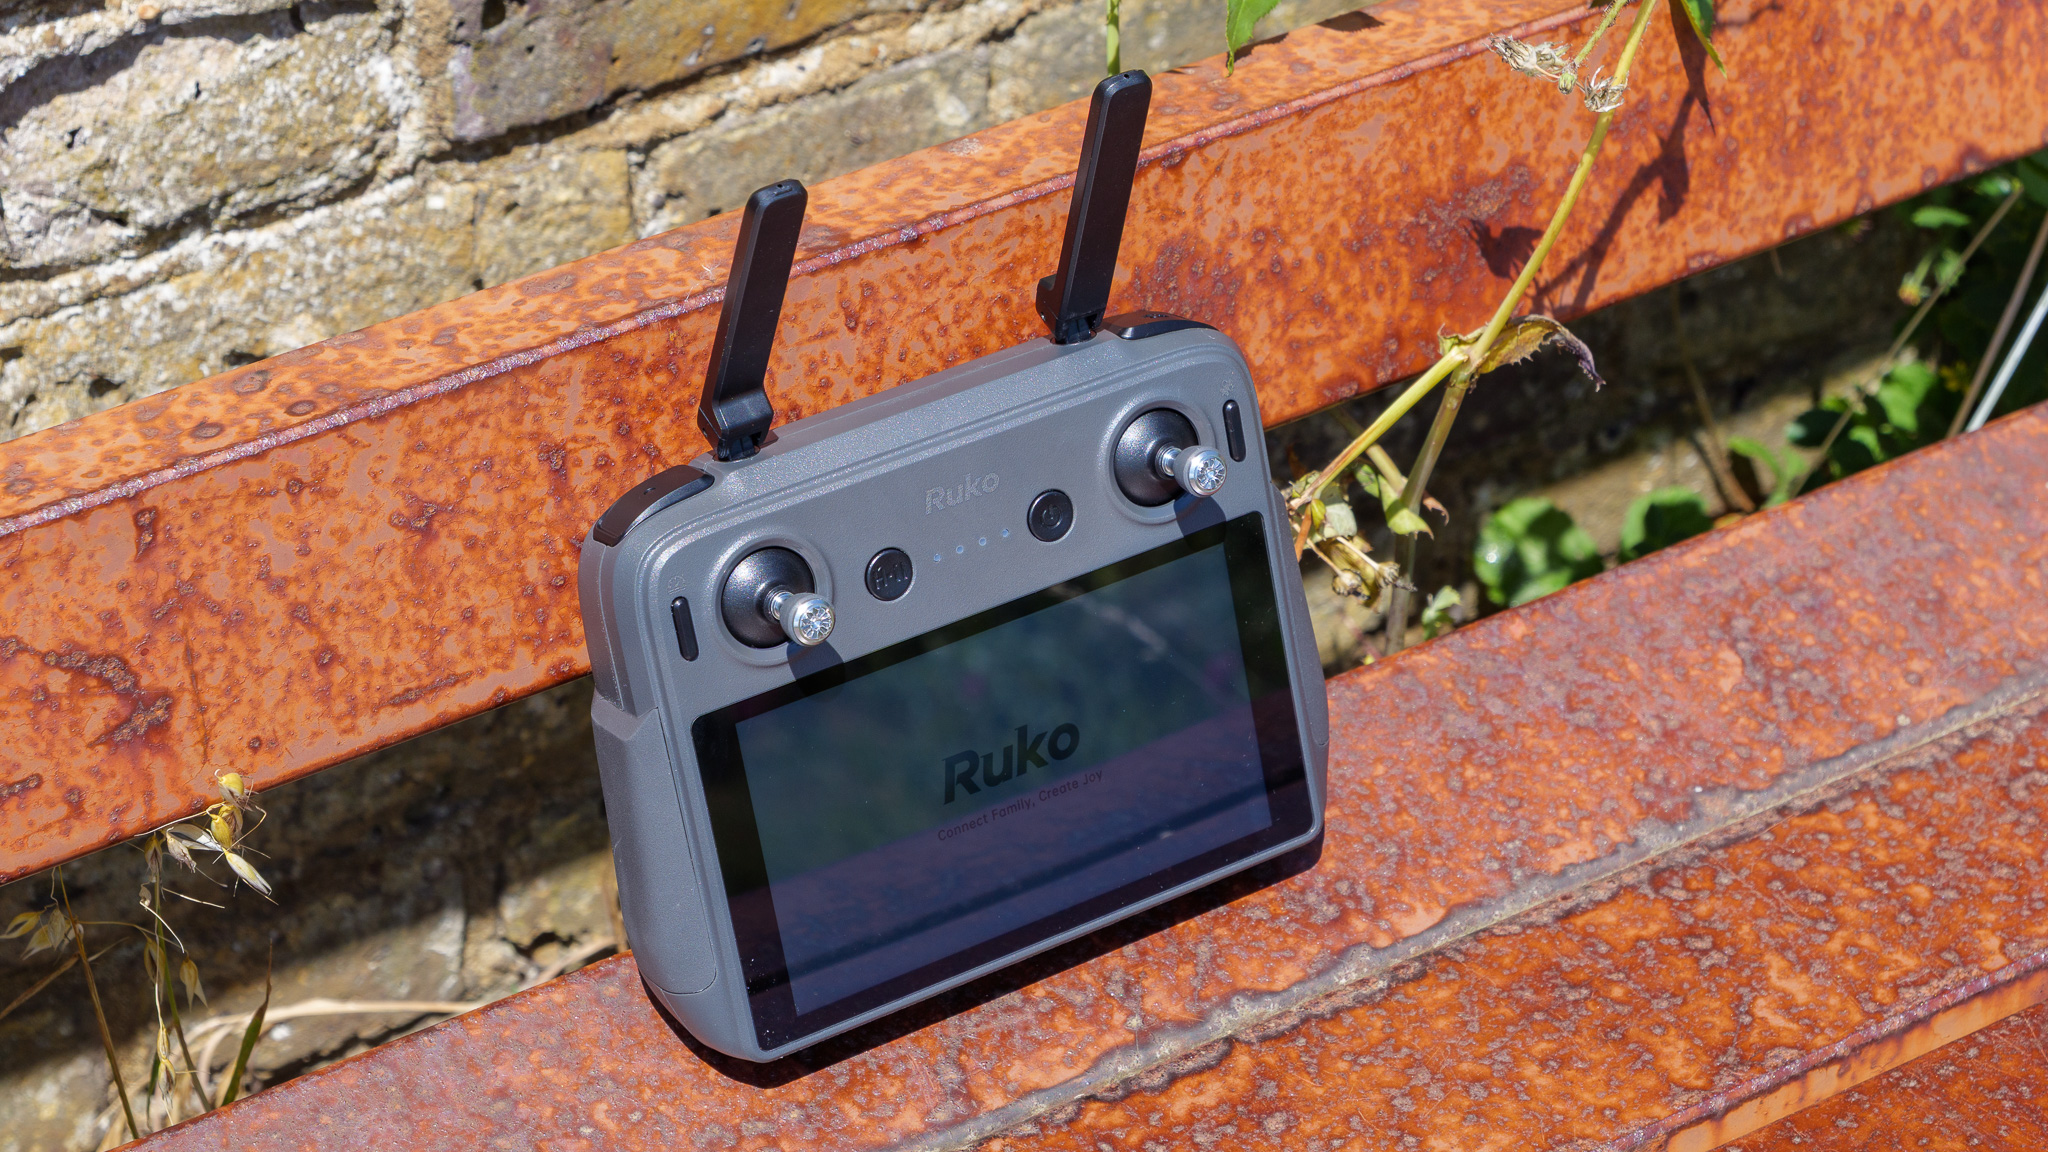
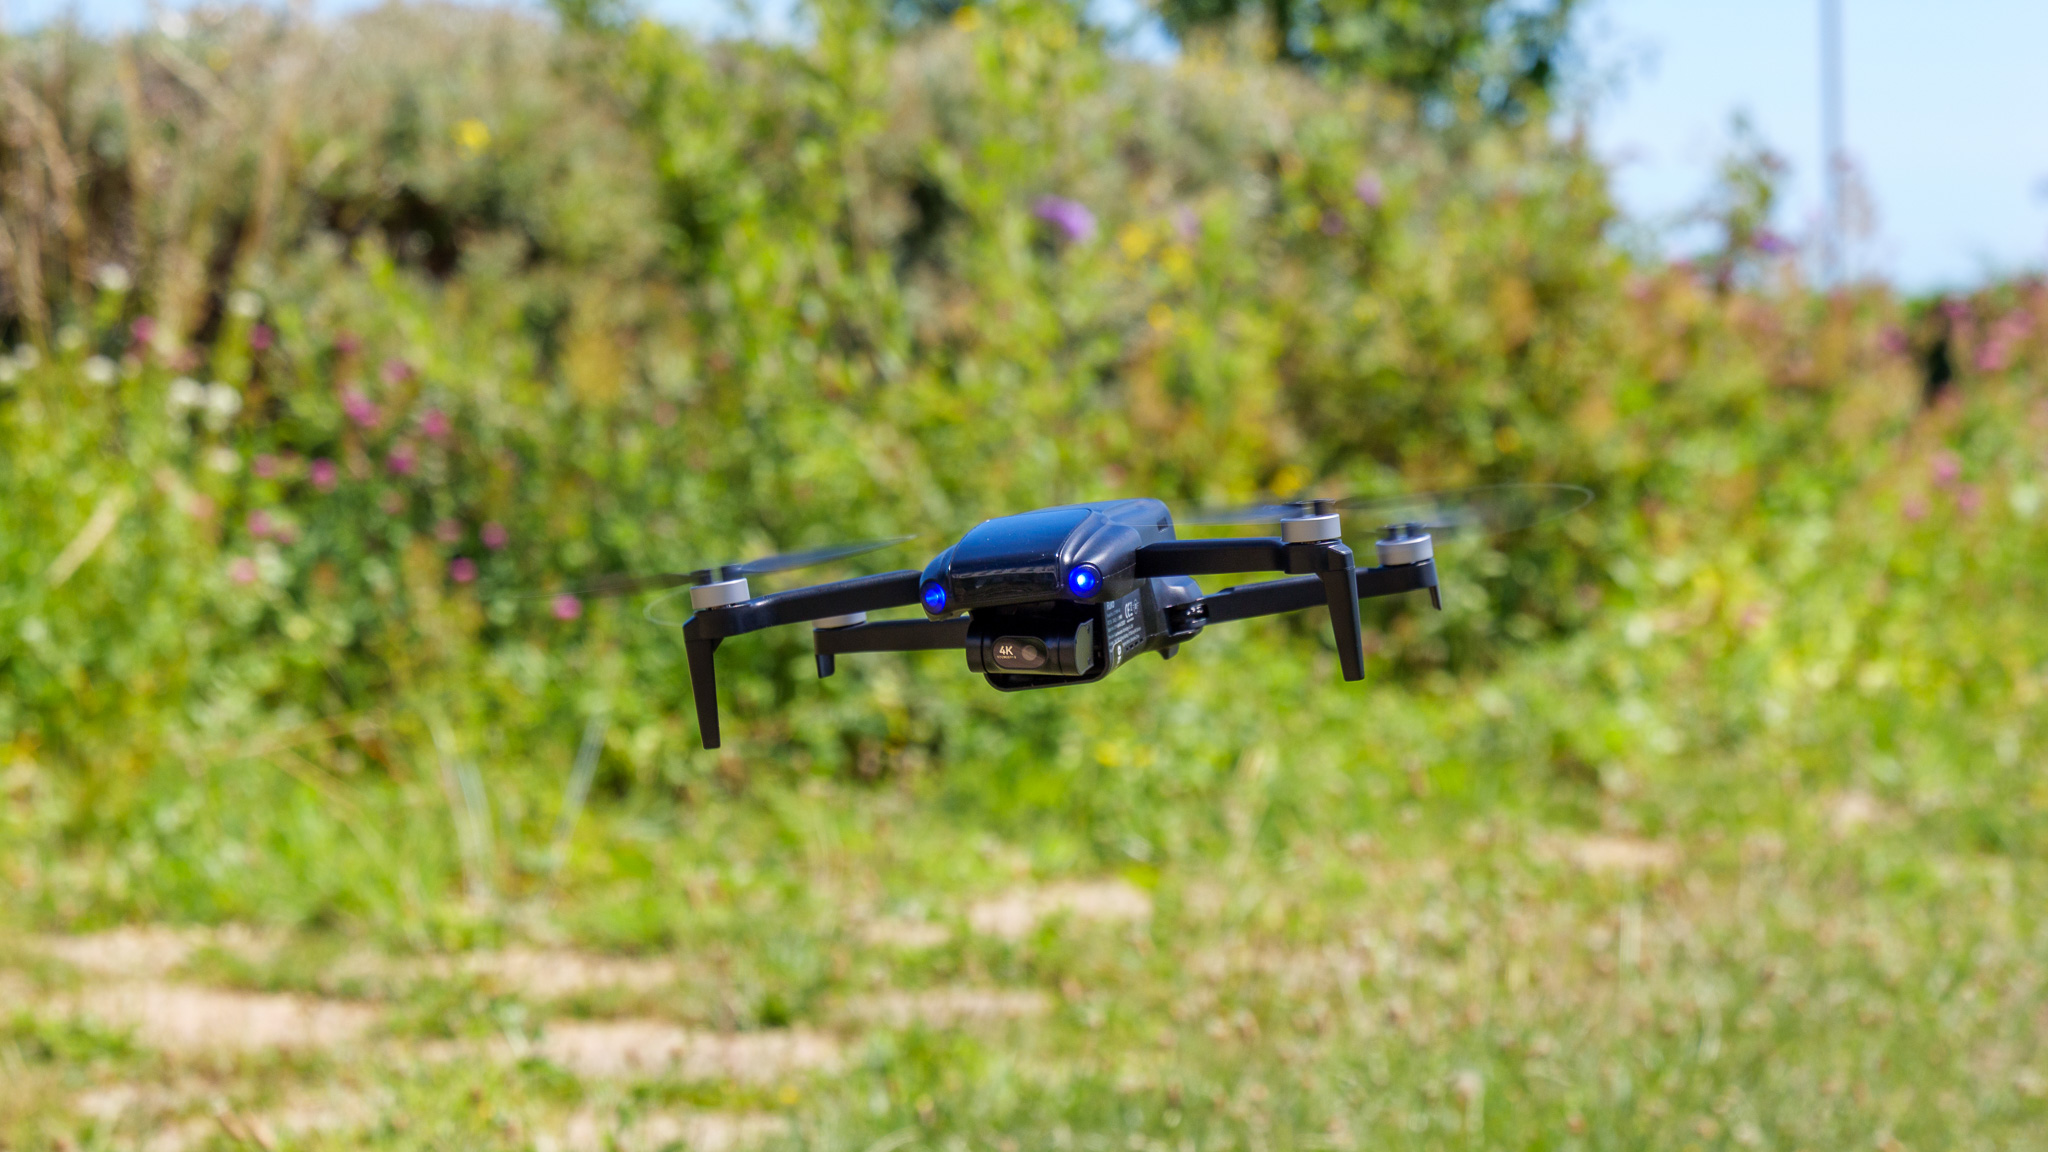
In the air, the U11Mini 4K is a mixed bag. Flight is reasonably stable in calm conditions, but it's easily pushed around by wind, and during one flight I experienced an alarming voltage drop that triggered an unscheduled emergency landing. The touchscreen RC3 controller is a solid piece of hardware, and a smart way to sidestep the usual phone-pairing headaches, but its joysticks lack the precision of DJI's equivalents, making smooth, cinematic camera moves a struggle.
There's no obstacle avoidance whatsoever, and the automated flight modes feel half-baked: Point of Interest mode, for instance, simply circles wherever the drone happens to be, rather than the subject you actually want to showcase.
On paper, the Ruko U11Mini 4K looks like a solid DJI Mini 4K competitor, but a few minutes of flying it sadly convinced me otherwise. (Image credit: Future | Sam Kieldsen)
The camera quality is similarly inconsistent. 4K video in good light is detailed and perfectly watchable, if a little flat and lacking in dynamic range, but stills are a different story; the U11Mini 4K's exposure metering routinely blows out highlights, and there's no way to fix this reliably even when dialing back the EV.
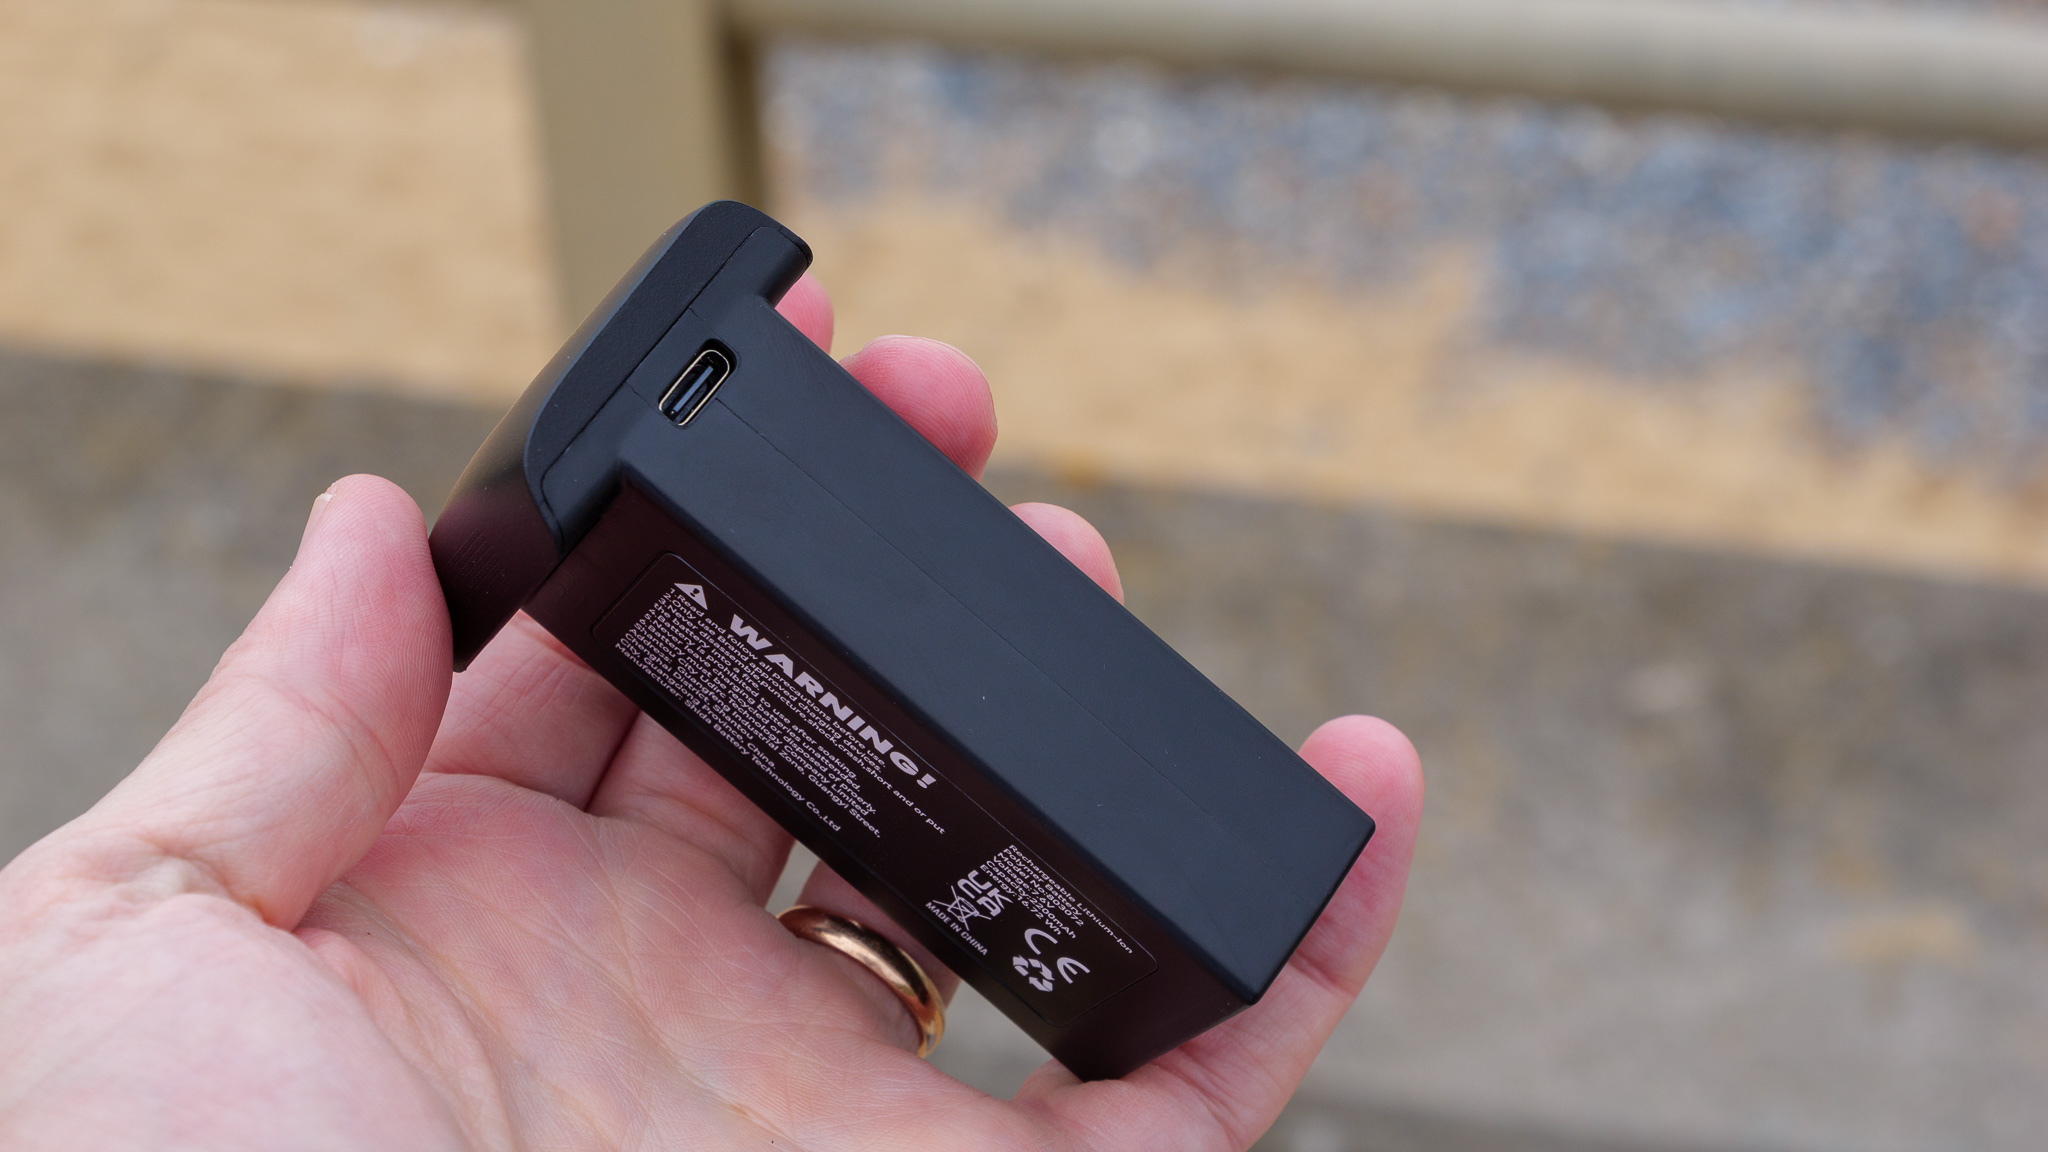
Storage is another sore point: the drone does have a small but usable amount of internal storage, but with no USB port on the aircraft itself, getting your footage off it is a major chore, and I'd recommend sticking exclusively to a microSD card instead. One that you'll have to supply yourself, as none are included in the box.
All of this would be more forgivable if the U11Mini 4K were a budget bargain, but at around £300 (rising to £499 for the bundle I tested, with its two batteries, hard case and that RC3 controller), it's pitched at almost exactly the same price as the DJI Lito 1 — a drone that beats it comprehensively on image quality, obstacle sensing and battery life. The U11Mini 4K isn't a complete disaster, but nobody should pick one over DJI's equivalent.
The Ruko U11Mini 4K is available now, sold directly through Ruko's website and via Amazon in the US, UK and Australia.
Pricing varies considerably depending on region and bundle. In the UK, the base package costs around £300, rising to £499 for the bundle I tested, which includes two batteries, a hard case, and the touchscreen RC3 controller in place of the standard smartphone-based remote.
US pricing follows a similar pattern, though at the time of writing Ruko's online store had both bundles discounted. The two-battery, hard case, RC3 controller bundle was priced at $424.99 (down from $599.99), while a separate three-battery bundle with a hard case and smartphone controller (rather than the RC3) was available for just $339.99 (down from $509.99) — making it the cheaper option overall despite the extra battery.
In Australia, Amazon lists a single-battery, smartphone controller bundle for AU$549.99, with a three-battery, hard case and smartphone controller bundle priced at AU$699.99.
The carry case is a well-designed accessory that'll keep the drone, controller and a couple of extra batteries snug and safe. (Image credit: Future | Sam Kieldsen)
In the UK and Australia, its direct rival is the recently launched DJI Lito 1. This costs £299 in the UK, while in Australia it's priced at AU$539 for the basic bundle (one battery and the RC-N3 smartphone controller) or AU$779 for the Fly More Combo (three batteries, RC-N3 controller, charging hub and shoulder bag). I'd say it's a much better value prospect than the Ruko, and shoppers should definitely consider it if they're hunting for a good entry-level model.
US buyers don't have that option, however, since due to the current DJI ban the Lito 1 isn't sold in America. That leaves older models like the DJI Mini 4K as the more relevant comparison stateside — and despite its age, it's still a better drone than the U11Mini 4K.
Price score: 2.5/5
Ruko U11Mini 4K: Specs
Ruko U11Mini 4K specs
Ruko U11Mini 4K
Camera:
48MP 1/2-inch CMOS sensor
Video:
4K 30fps
Flight modes:
Smooth, Normal, Sport
Storage:
Internal memory + microSD card slot (up to 256GB supported)
Battery:
2,200mAh / up to 32 minutes flight time
Charger type:
USB-C / Battery Charging Hub
Weight:
249g / 8.8oz (approx.)
Dimensions:
141 x 86.9 x 57.9mm / 5.55 x 3.42 x 2.28in (folded)
Ruko U11Mini 4K: Design and build quality
Folding design, weighing under 249g
Optional touchscreen RC3 controller
microSD slot supports cards up to 256GB
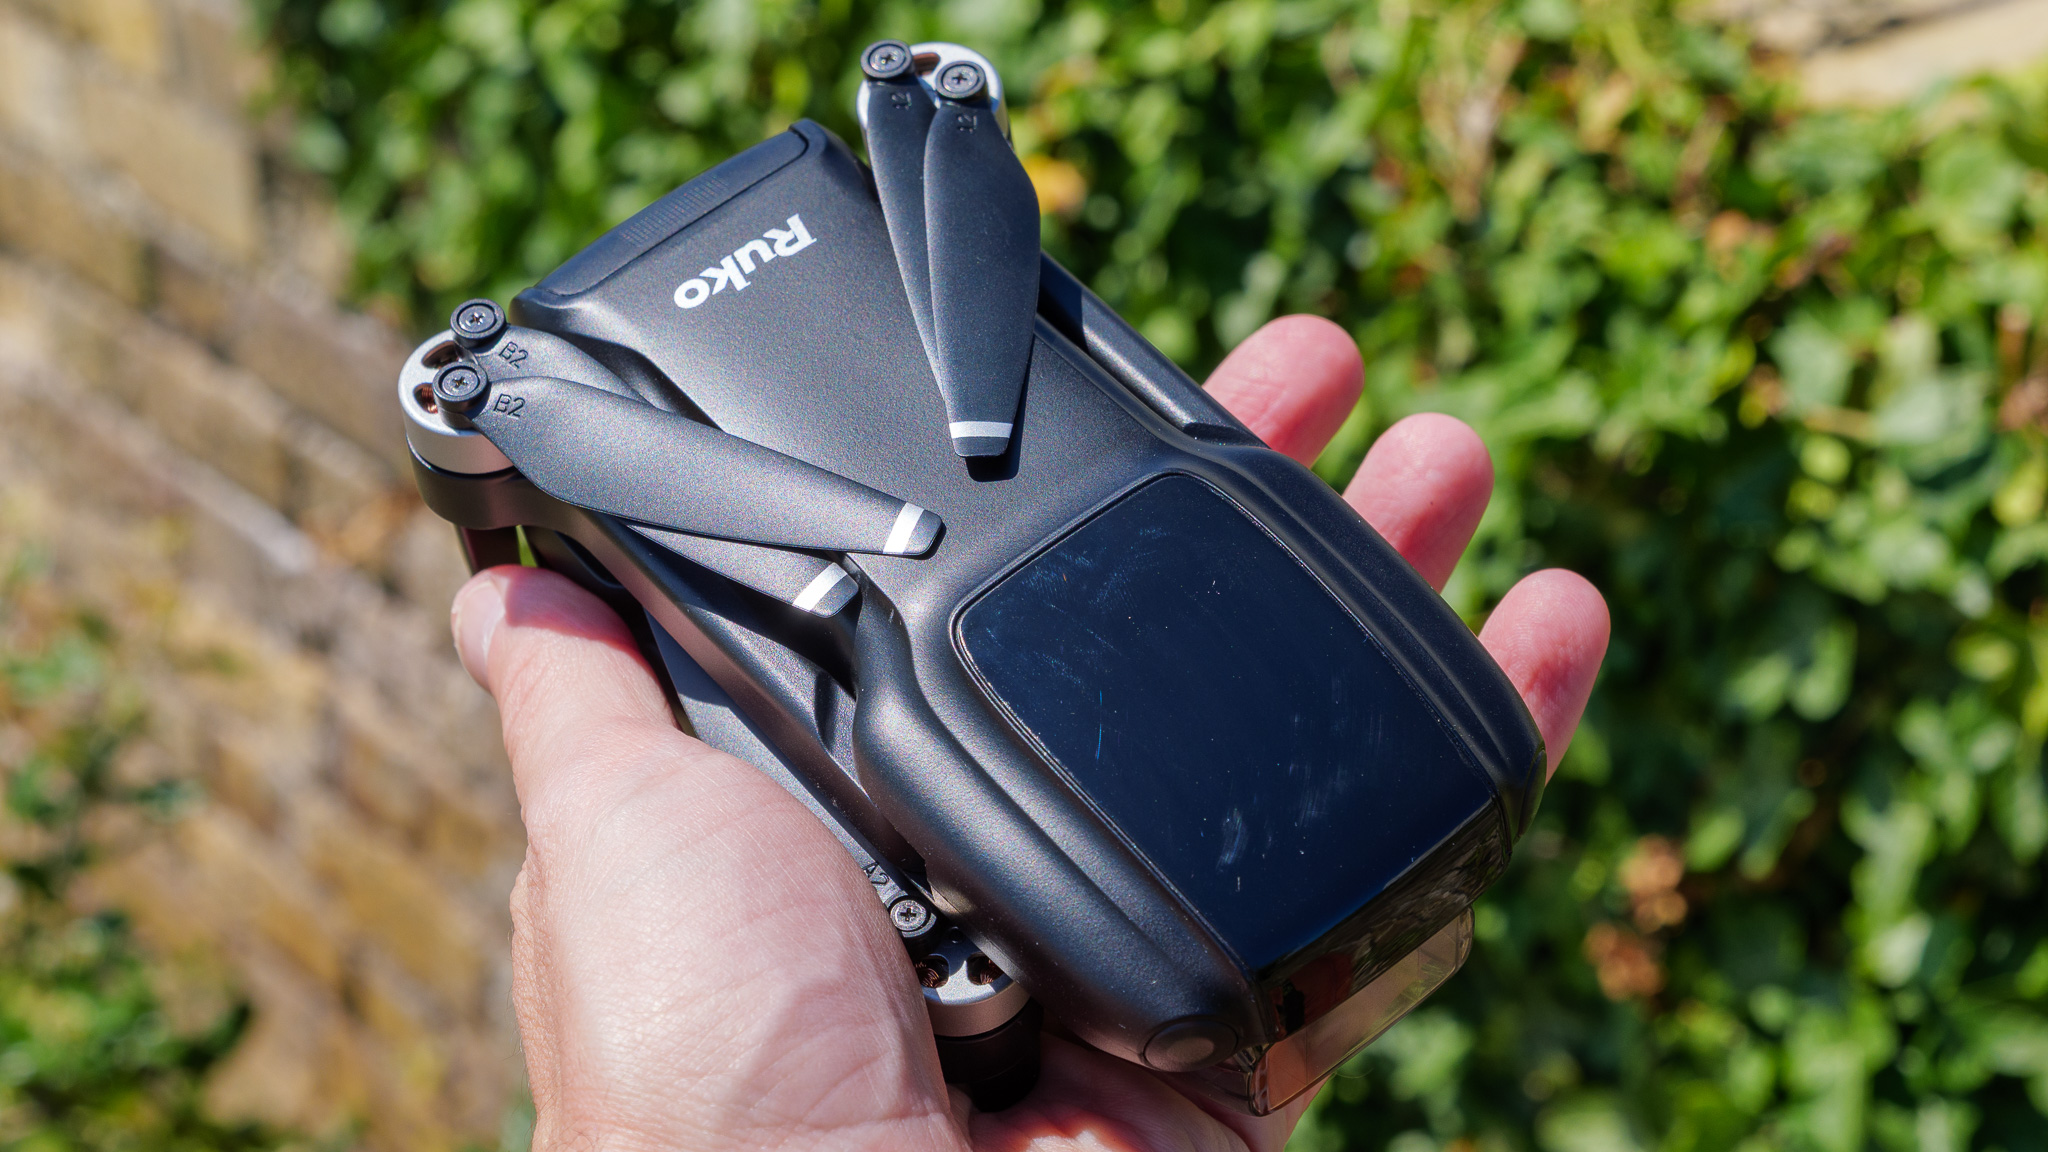
The U11Mini 4K follows the same folding quadcopter template as most sub-250g drones on the market right now, including DJI's own Mini and Lito series.
It's made from hard plastic, and folds down to a genuinely pocketable size (if we're talking coat rather than trousers, mind you). At under 249g, it sits just inside a weight threshold that exempts it from the strictest drone registration requirements in the UK, US and elsewhere.
Round the back, you'll find a microSD card slot, supporting cards up to 256GB. There's also internal storage built into the drone itself, but accessing it is far more trouble than it's worth.
That's because, bafflingly, there's no USB port anywhere on the drone. The only way to get photos and video off the internal storage is via the controller, transferring wirelessly to an app like Google Photos — a process that, in my testing, also downgraded my 4K footage to 720p in the process. So I'd strongly recommend buying a microSD card (none is included in the box) and ignoring the internal storage altogether.
When folded, the U11Mini 4K would fit in a large coat pocket.Future | Sam KieldsenThe RC3 controller is well built, but does suffer from some janky software issues.Future | Sam KieldsenThe batteries are recharged directly via their on-board USB-C port.Future | Sam KieldsenFuture | Sam KieldsenFuture | Sam Kieldsen
A clip-on cover is supplied to protect the camera and gimbal during transport, which is a sensible inclusion — if a little fiddly to fit and remove. Depending on the bundle you buy, you may also get a nicely sturdy hard-sided storage case, which comes with internal spaces for the controller, drone and up to two additional flight batteries.
The RC3 controller from the bundle I reviewed is pretty impressive, at least at first glance. Its built-in touchscreen is clearly inspired by DJI's RC series, and it's a decent effort: solid in the hand, with a bright, crisp display. But it came with its own set of connectivity issues, refusing to play nicely with my home Wi-Fi network and preventing me from downloading the latest firmware updates. I was able to connect it to my iPhone's hotspot, so the Wi-Fi antennas evidently do work in some circumstances, but the fact they wouldn't hook up to a network that works fine with every other drone I've reviewed recently suggests there's a deeper issue here.
Design score: 3/5
Ruko U11Mini 4K: Features and flight performance
32-minute quoted battery life; around 20 minutes in real-world testing
No obstacle avoidance
Automated flight modes feel underbaked
Ruko quotes a battery life of 32 minutes for the U11Mini 4K. In my testing, which happened mostly in fairly breezy coastal conditions, I got closer to 20 minutes before the low battery warnings kicked in.
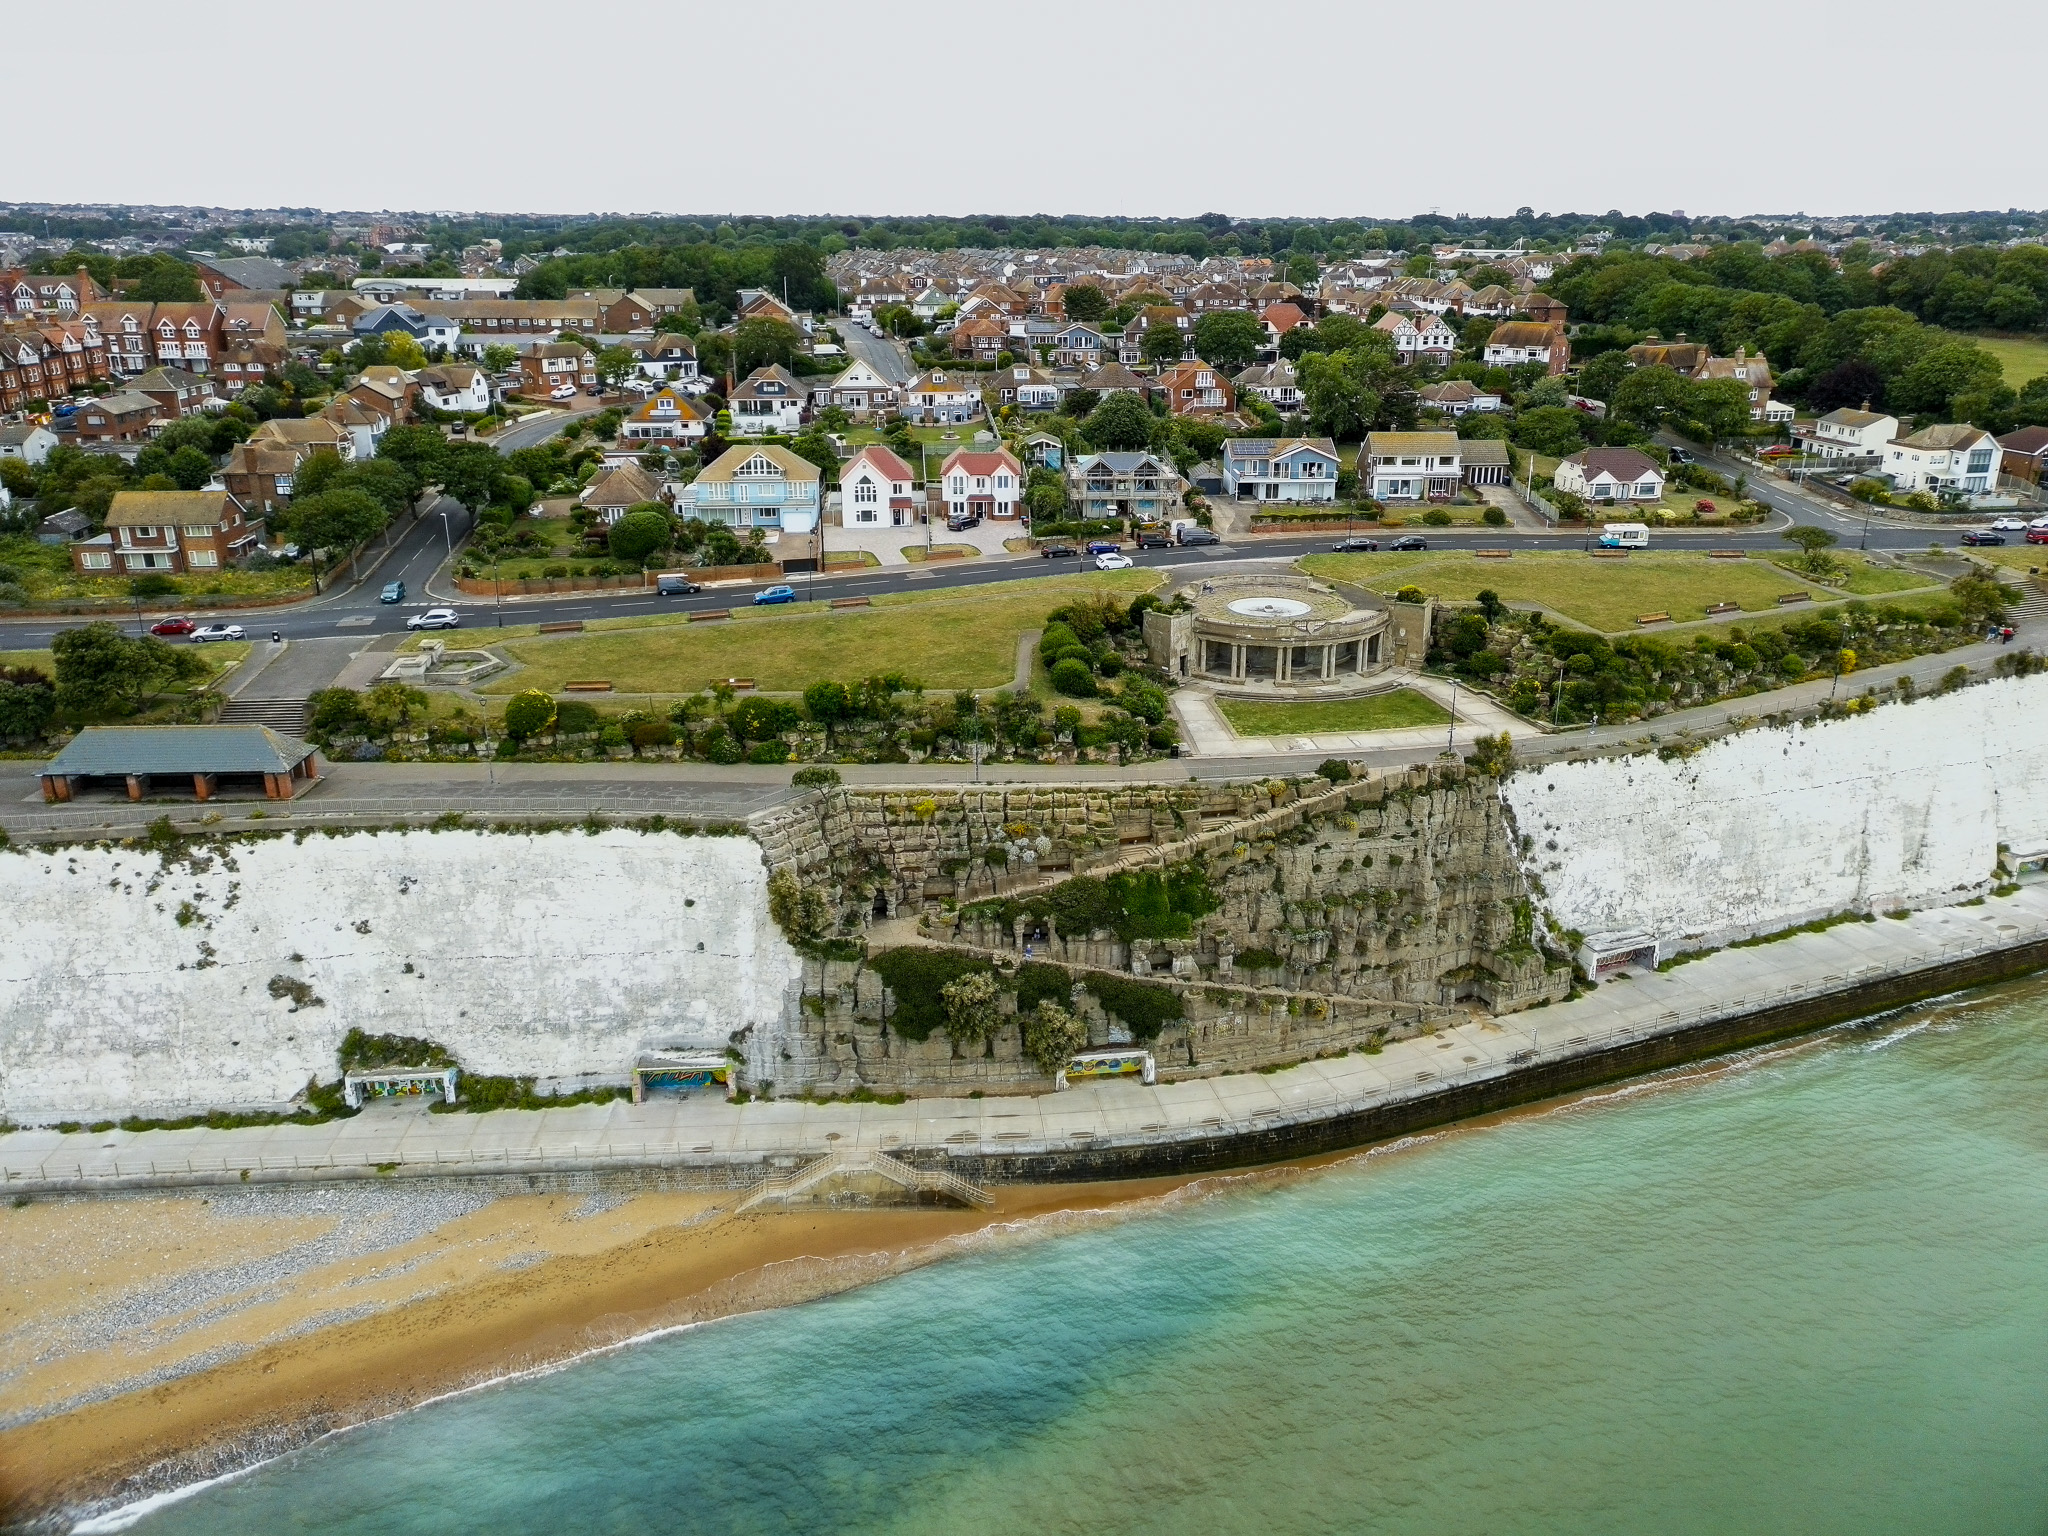
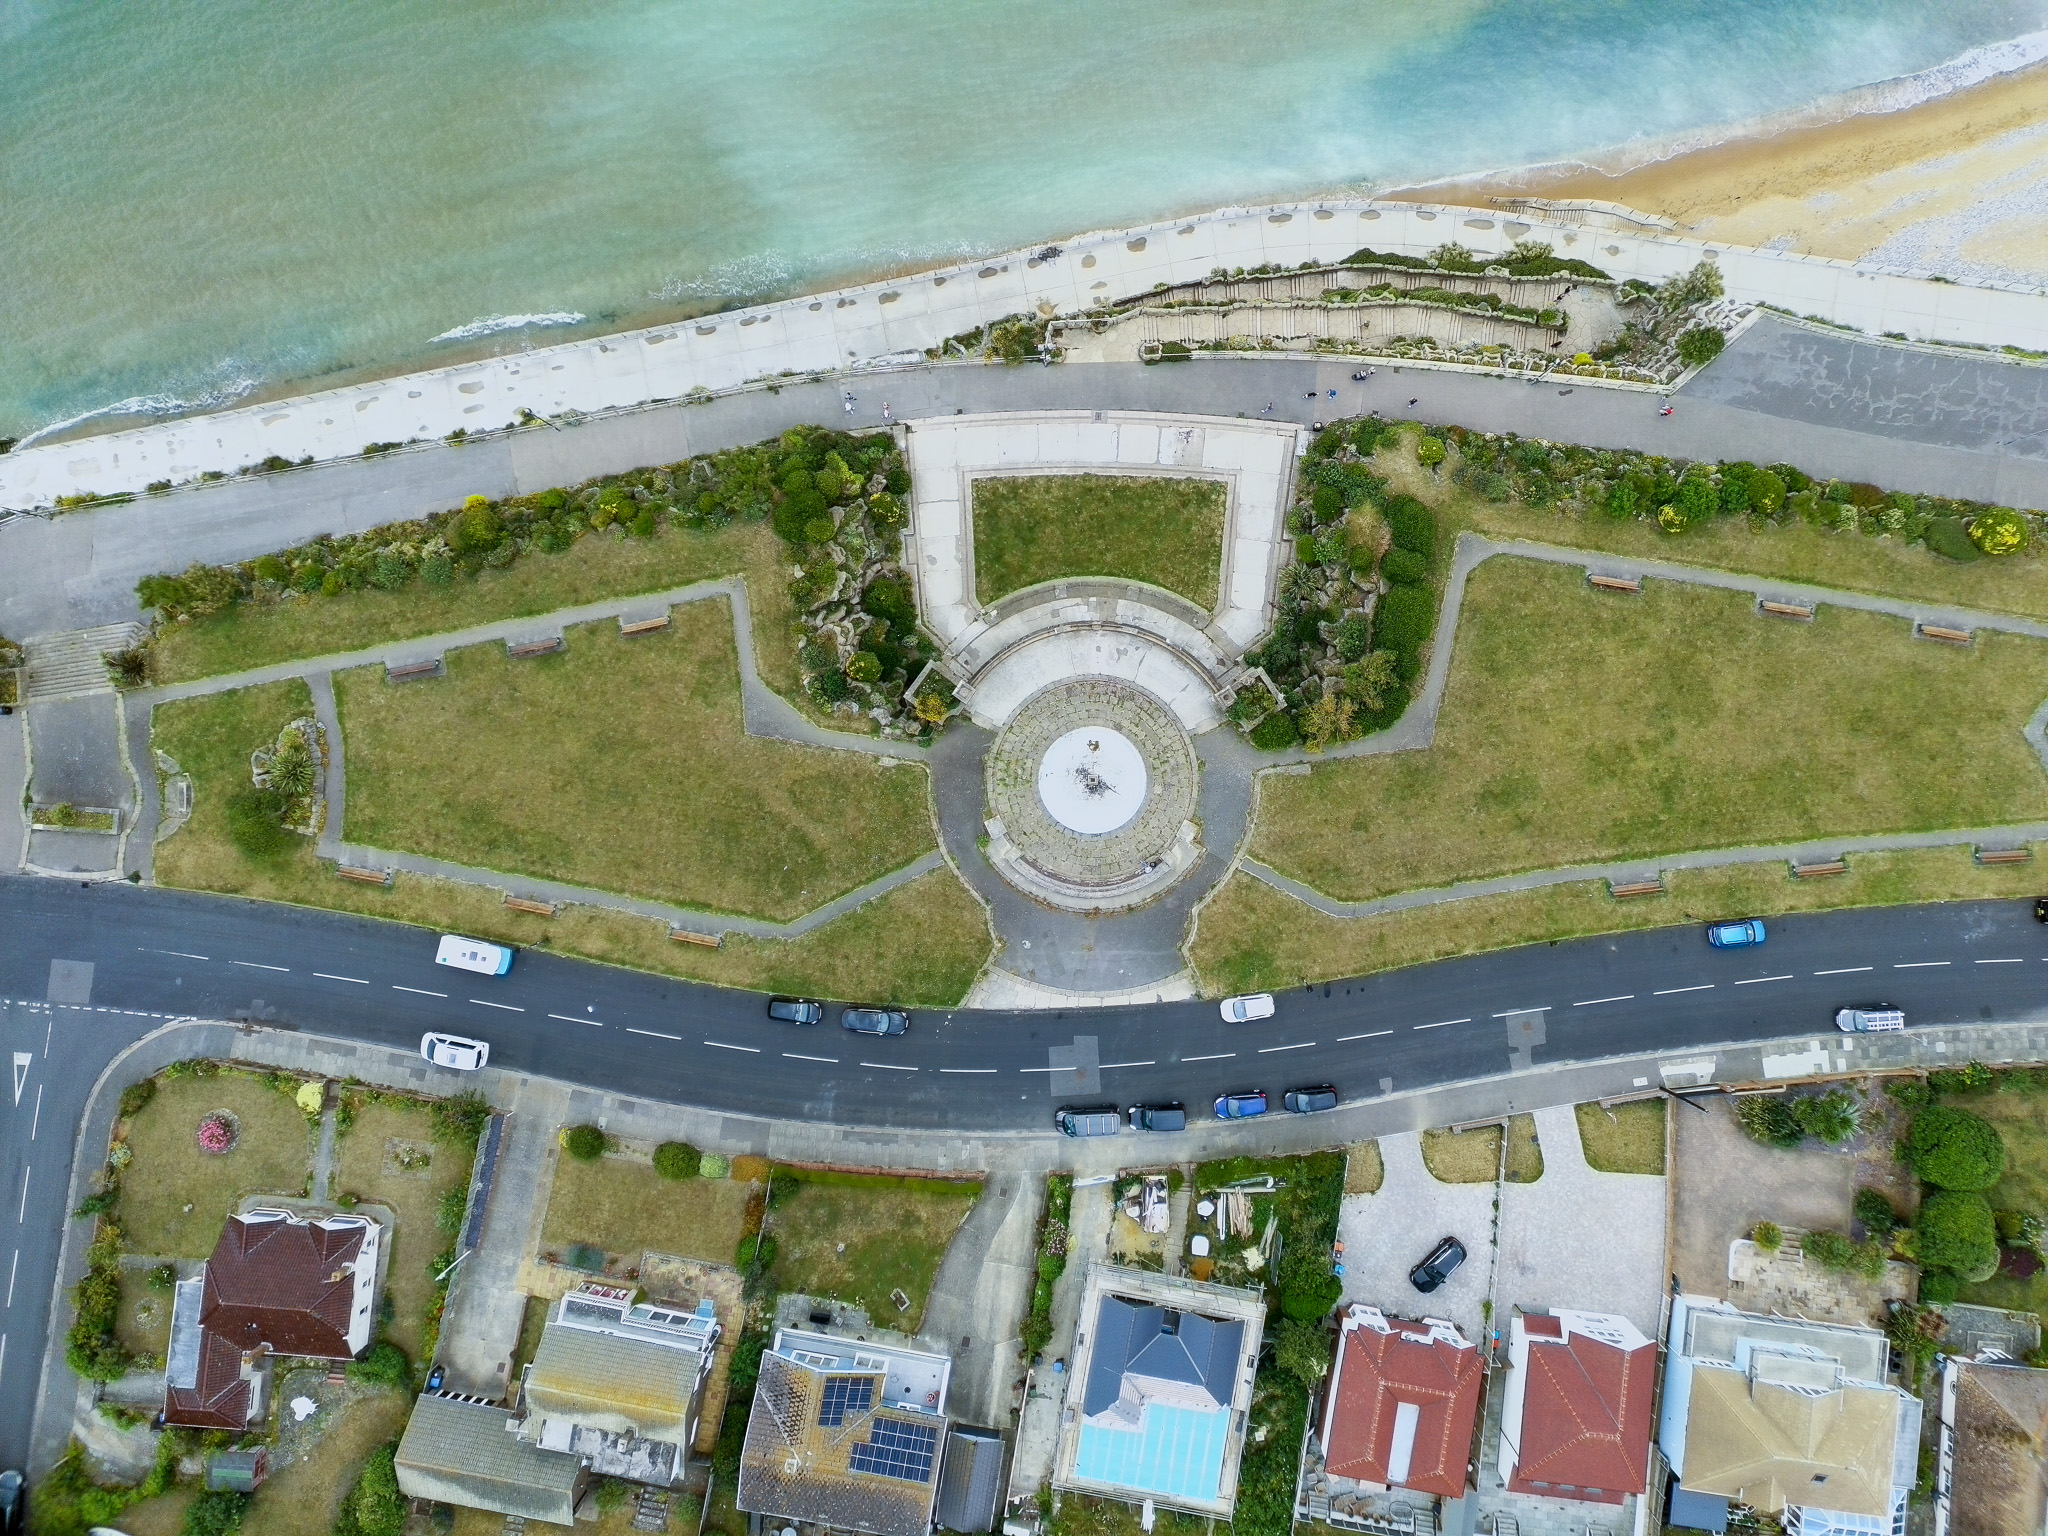
That discrepancy might be partly down to the wind, which the U11Mini 4K isn't great at handling. Despite Ruko's claimed Level 5 wind resistance (a tolerance of 19-24mph), I watched the drone get visibly knocked around by some standard coastal gusts. You can see the resulting unevenness in the horizon line on some of my footage.
One flight also threw up a worrying issue. A few seconds after take-off, with the battery indicator initially showing around 75%, a low voltage warning flashed up, the battery indicator dropped instantly to around 10%, and I immediately effected a panicked return to home (not wanting the drone to drop straight into the sea). When I checked the battery afterwards, it was still showing roughly 75% charge. Whatever caused that mid-air voltage drop, it's not a reassuring thing to experience while flying.
With no obstacle avoidance tech, you'll need to steer well clear of trees, bushes and lampposts. (Image credit: Future | Sam Kieldsen)
Flight itself is reasonably stable and responsive in calm conditions, but the RC3 controller's joysticks let the side down. There's a wide dead zone before inputs register, which makes smooth, considered camera moves all but impossible, and as far as I can tell there's no way to adjust stick sensitivity to compensate. With a DJI drone, the slightest stick pressure produces an immediate and proportional response; here, you're fighting the controller as much as the wind.
Obstacle avoidance is non-existent, so pilots will need to take a lot of care when flying. There's no forward, downward or omnidirectional sensing of any kind, which is a significant omission next to the DJI Lito 1's full suite of vision sensors.
The automated flight modes are similarly disappointing. Point of Interest mode, for instance, should really let you tap a subject on the touchscreen and have the drone circle it automatically; instead, it just flies in a circle around wherever it happens to be at the time, regardless of whether there's anything interesting in front of it. There's also a tracking mode that follows your phone, though I wasn't able to test this myself, since I was flying with the RC3 controller rather than a paired smartphone.
Flight performance score: 3/5
Ruko U11Mini 4K: Image and video quality
1/2-inch CMOS sensor, 4K video at 30fps
Stills are overexposed and oversharpened
No flat/log color profile available
The U11Mini 4K's camera is built around a 1/2-inch CMOS sensor and f/1.8 lens, which on paper is perfectly respectable for a drone at this price. There's no fundamental reason a sensor of this size can't produce good aerial photos and video, but in practice, the U11Mini 4K struggles to get the most out of it.
Stills are the weaker of the two. Exposure metering is unreliable, and the camera has a strong tendency to massively overexpose, particularly in bright conditions. Even dialing back the EV compensation for photos didn't fix this consistently; I was left with whites that were blown out and stripped of any detail far too often. Zoom into the shots even slightly and they're aggressively oversharpened and algorithmically upscaled in a jarring way, too.
Future | Sam KieldsenFuture | Sam KieldsenFuture | Sam KieldsenFuture | Sam KieldsenFuture | Sam KieldsenFuture | Sam KieldsenFuture | Sam Kieldsen
Video fares slightly better, for reasons I couldn't quite pin down. At its top quality setting — 4K at 30fps — footage is detailed and rich in good lighting, even if it lacks dynamic range and punch compared to the best in this class. Bright areas can still blow out, while shadows tend to lack detail and look slightly underexposed, but overall it's a far more usable result than the stills.
One thing that might have helped close that gap is a log color profile, but sadly there's nothing of the kind available. A log format may have given me more room to fix the exposure issues in post-production grading, but here what you capture in-camera is largely what you're stuck with, unfortunately.
Image and video quality score: 3/5
Ruko U11Mini 4K: Testing scorecard
Ruko U11Mini 4K
Attributes
Notes
Rating
Price
Competitive on paper but matched or undercut by the superior DJI Lito 1.
2.5/5
Design
Decent folding build and solid touchscreen controller, but let down by the lack of a USB port.
3/5
Features and flight
Reasonably stable flying, but imprecise controls, no obstacle avoidance, and half-baked automated modes.
3/5
Image and video quality
OK 4K video, but routinely overexposes and there's no log profile to compensate.
3/5
Should I buy the Ruko U11Mini 4K
Buy it if...
You're a US buyer priced out of newer DJI options With the Lito 1 unavailable in the US, the U11Mini 4K gives budget-conscious American buyers another option to weigh against older DJI models like the Mini 4K.
You want the cheapest possible 4K drone with a screen controller If budget is your only real consideration and you can live with its flaws, the U11Mini 4K undercuts some screen-controller rivals on price.
You only ever shoot video, never stills Video output is decent in good light, even if the photo side of things lets the side down badly.View Deal
Don't buy it if...
You can stretch to a DJI Lito 1 At the same or lower price, the Lito 1 beats the U11Mini 4K in nearly every meaningful respect.
You want precise, cinematic camera control The RC3 controller's dead zones make smooth, considered camera movement a real struggle.View Deal
You fly somewhere with lots of hazards There's no obstacle avoidance of any kind, a significant safety gap next to rivals like the Lito 1.
Ruko U11Mini 4K: also consider
DJI Lito 1
At the same UK and Australian price as the U11Mini 4K, the Lito 1 is simply a better drone in almost every way, with superior image quality, full obstacle avoidance and longer battery life. The only thing it can't match is the U11Mini 4K's RC3 touchscreen controller, which DJI doesn't bundle with the Lito 1 currently.
Smaller, cheaper and a blast to fly, the tiny, whoop-style Neo 2 doesn't need a controller at all, tracking and filming you autonomously straight out of the box. Its video quality is on par with the Lito 1's, and therefore a clear step up over the U11Mini 4K's, even though it's a much more affordable drone.
I tested all available flight modes and control methods
I captured stills and video in a range of lighting and weather conditions
I assessed battery life, wind resistance and file transfer in real-world use
I flew the U11Mini 4K over several sessions, in a mix of calm and breezy UK coastal conditions, to get a feel for how it handled real-world flying rather than just ideal, sheltered conditions. I tested manual flight extensively, paying close attention to stick precision and responsiveness, and also tried out the drone's automated modes to assess how well they lived up to their billing.
On the camera side, I shot both stills and 4K video in a variety of lighting conditions, later reviewing the footage and photos on a larger screen to properly judge exposure, detail and dynamic range. The footage you see embedded above was edited in DaVinci Resolve, but not color corrected. Photos were tweaked slightly in Adobe Lightroom.
I also tested battery life under real-world conditions rather than relying on Ruko's quoted 32-minute figure, and ran through the process of transferring footage off the drone via both the microSD card and the internal storage, to evaluate how easy (or otherwise) that process is for a typical buyer.
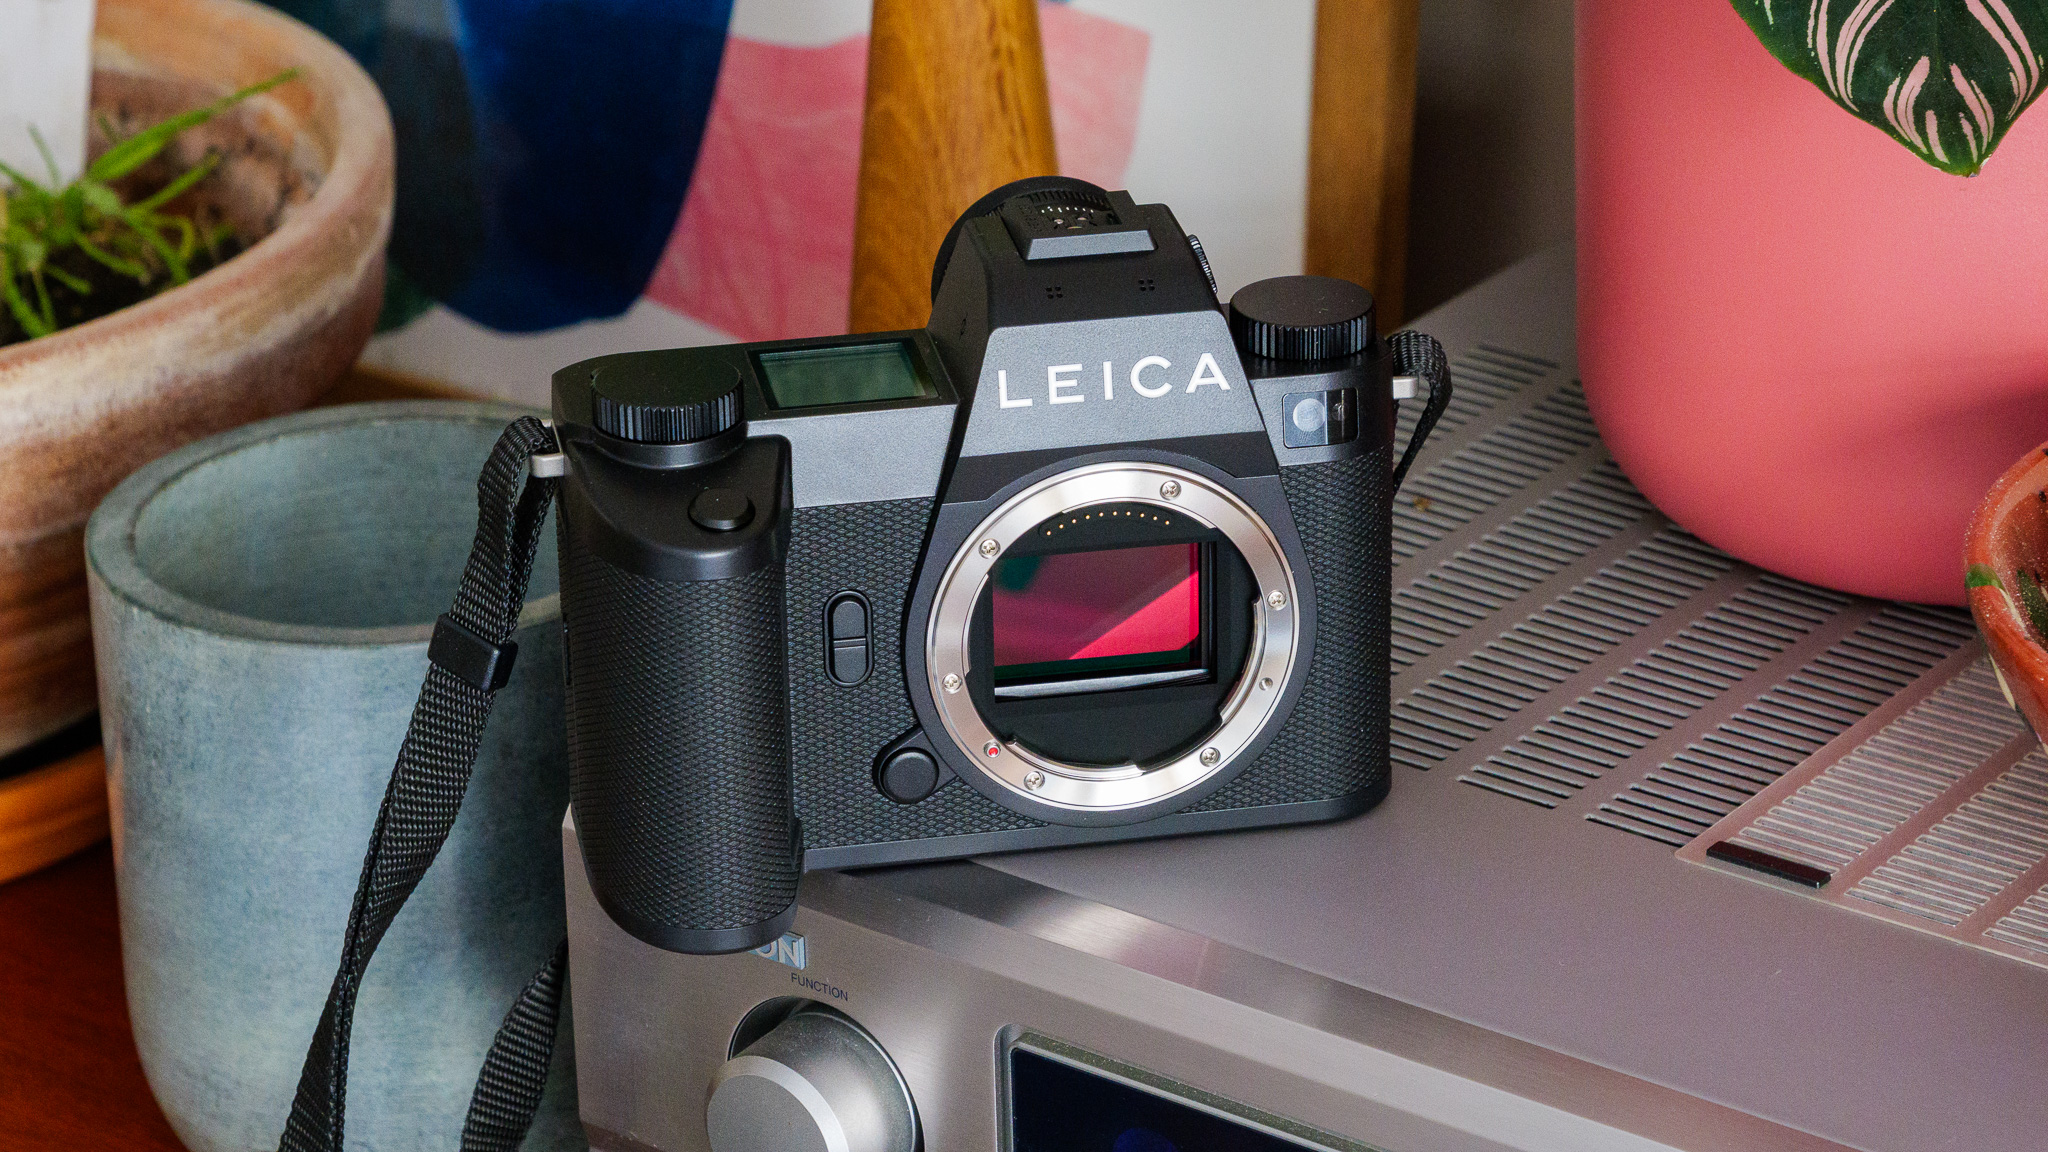
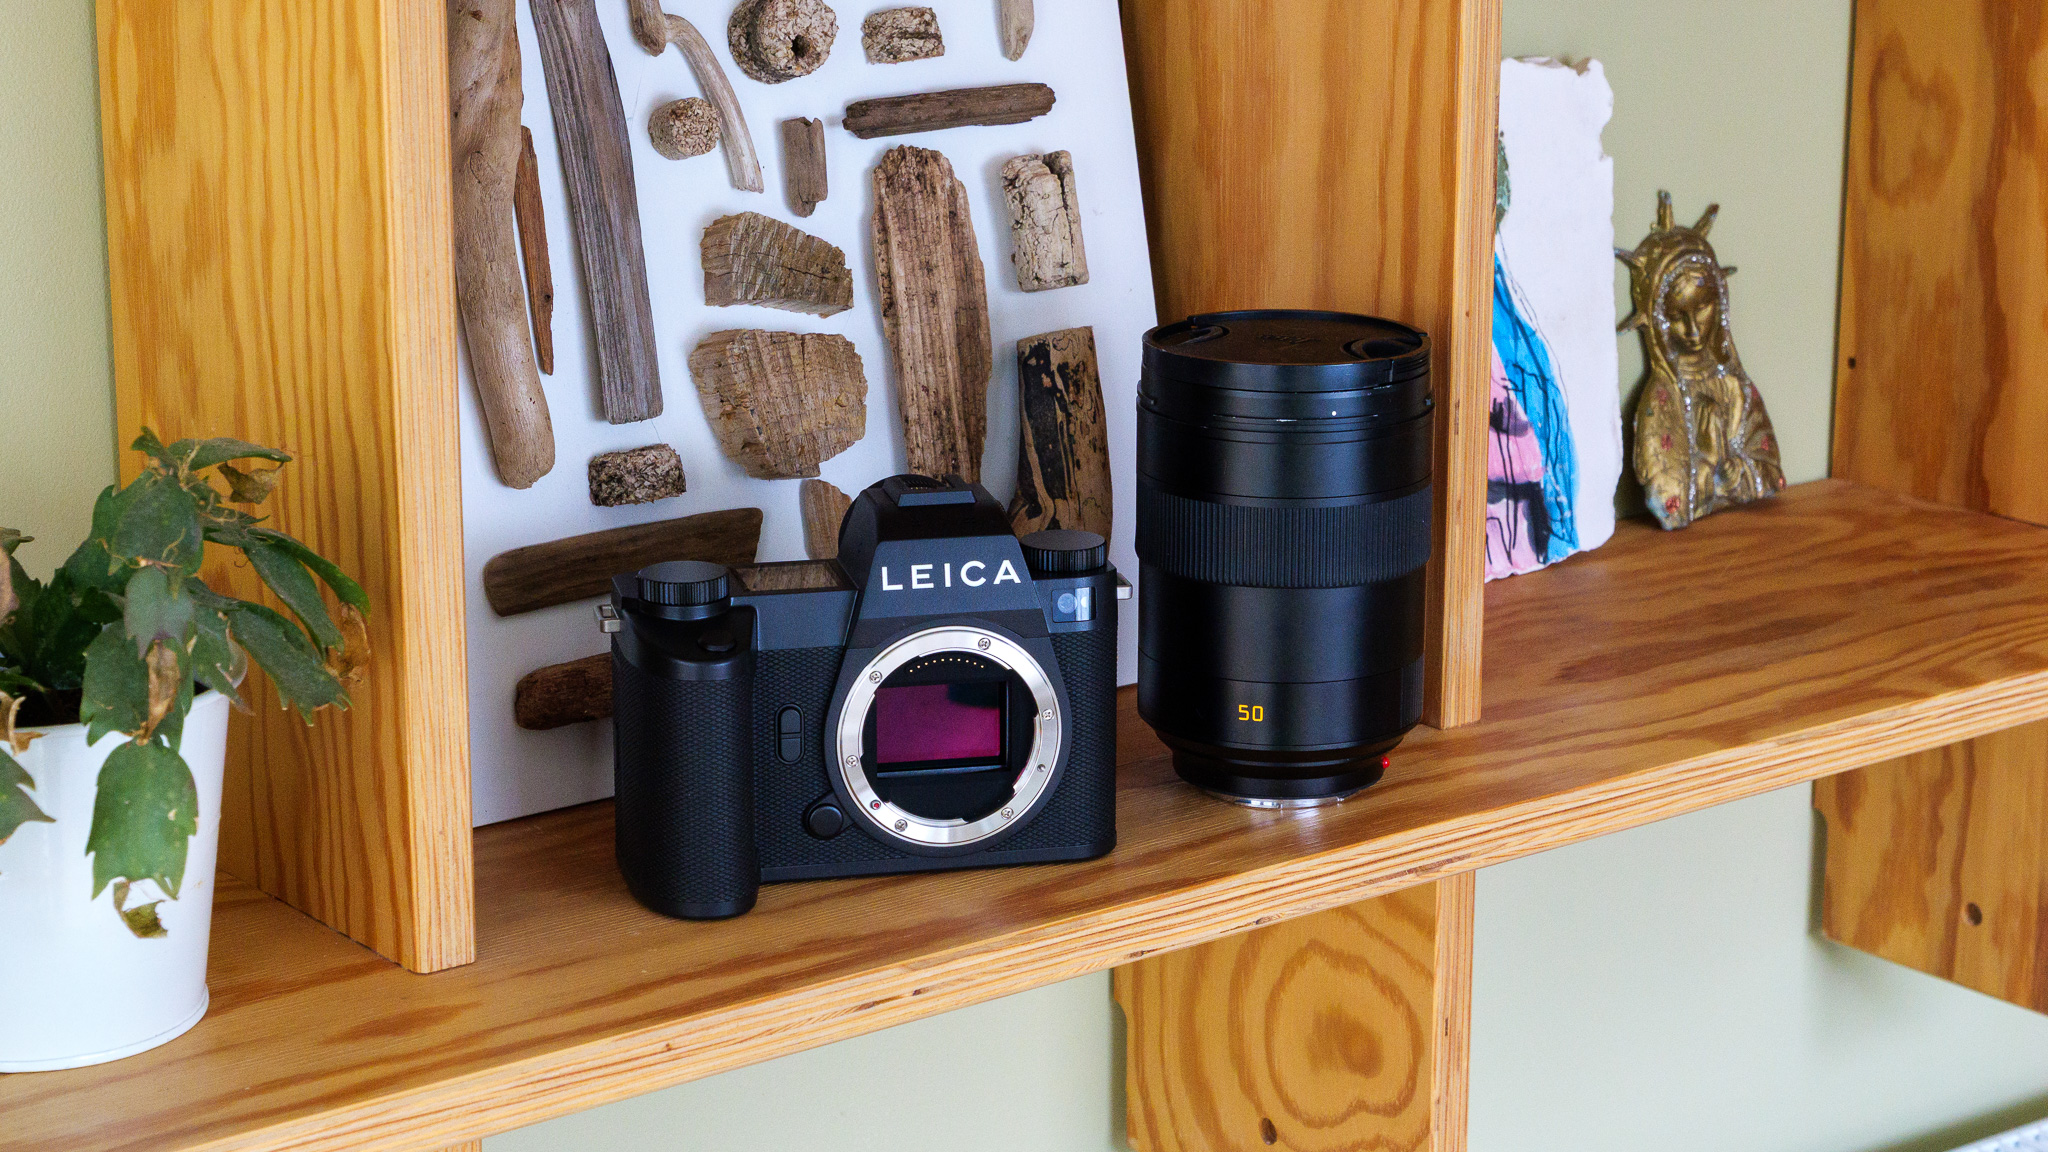
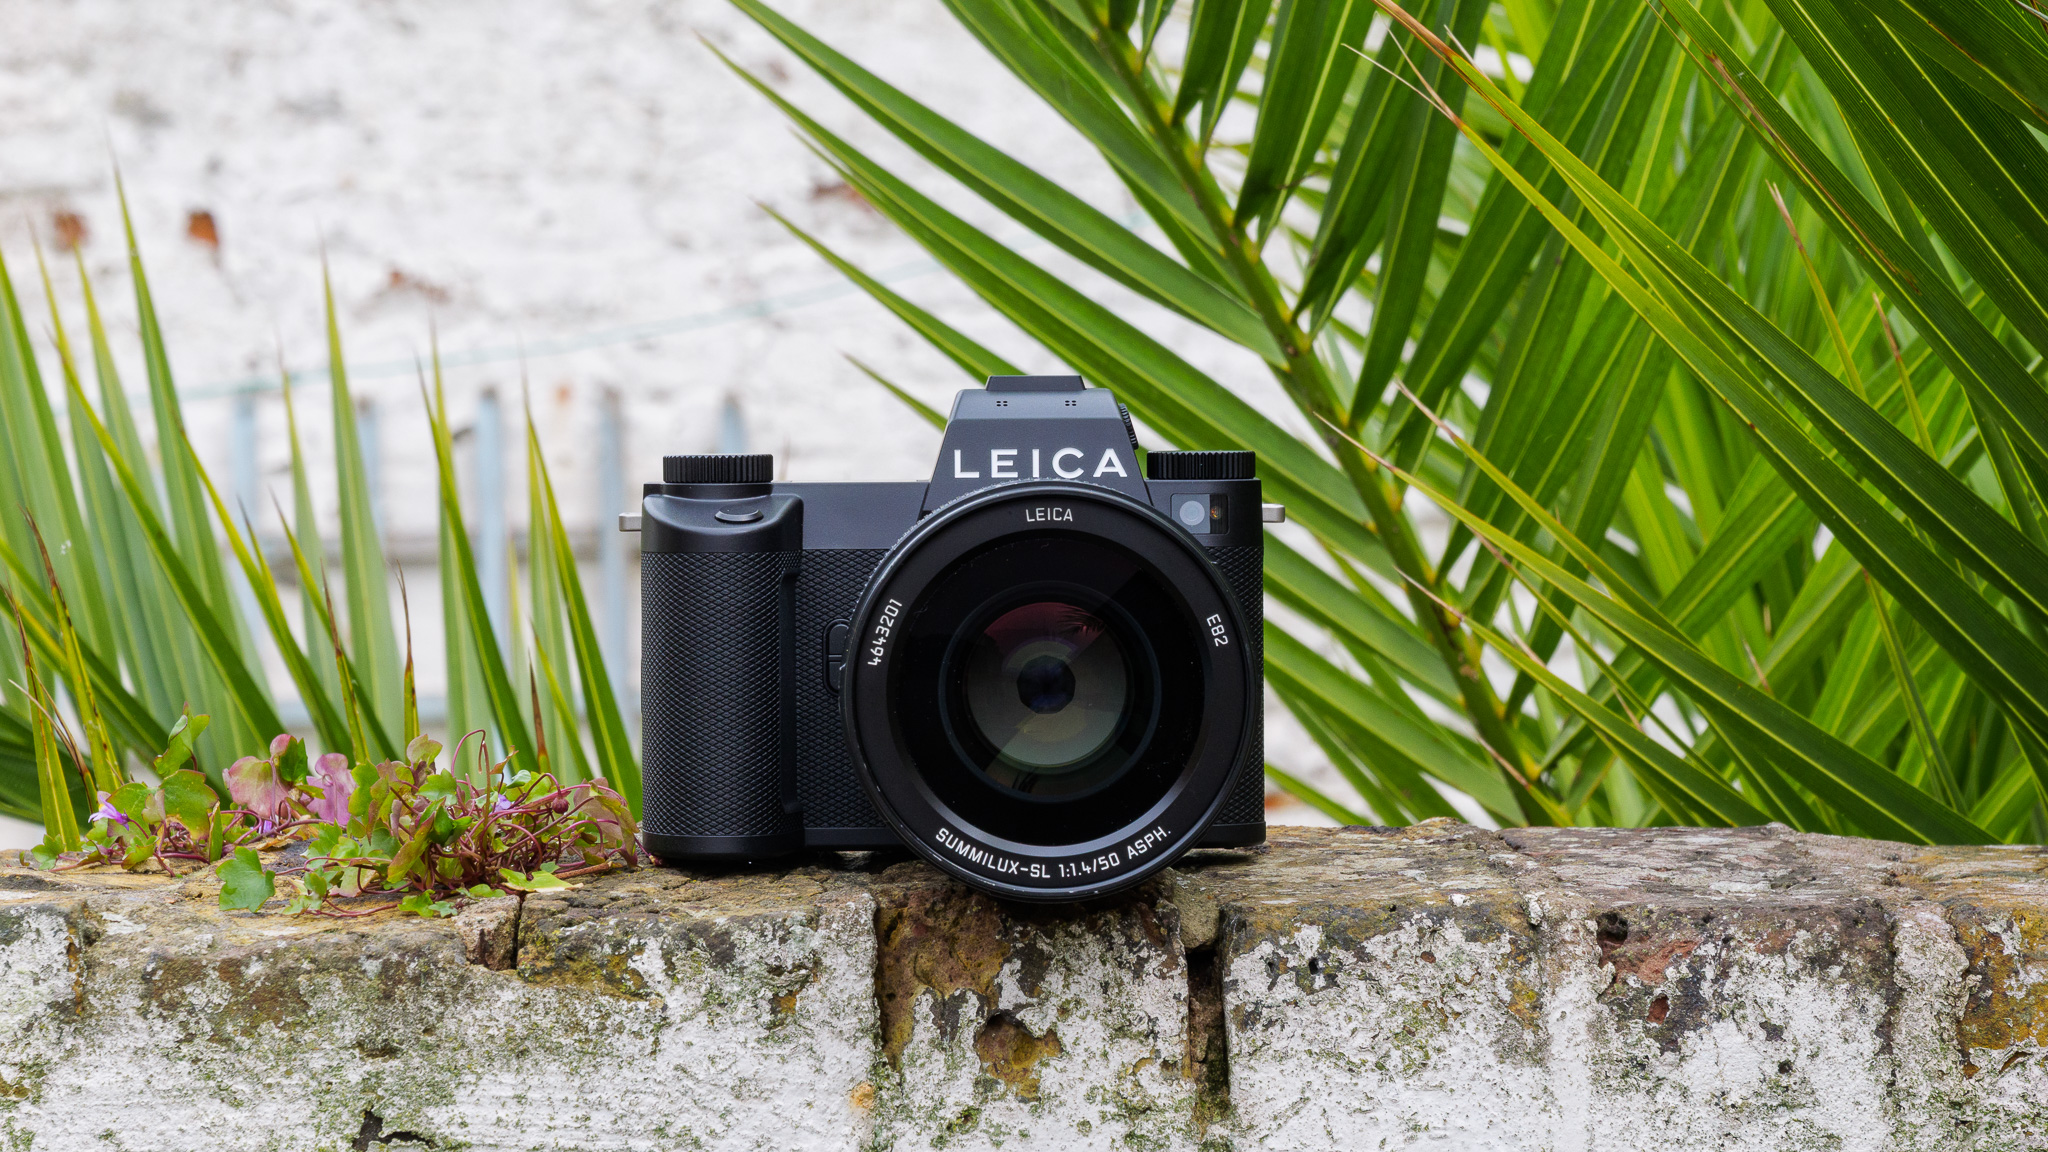
The Leica SL3-P is not a camera for everyone, and it knows it. There's no red dot logo on the front — that easy-to-spot symbol of prestige has been deliberately omitted in favor of a clean, all-black anonymity. Only the word 'LEICA' in white block capitals above the lens mount gives the game away. This is a camera built for photographers who'd rather be invisible than show off, and that philosophy runs all the way through it, with minimal controls, a stripped-back UI, and a design language that says a lot through everything it leaves out.
The SL3-P is built around the same full-frame sensor as the Panasonic Lumix S1R II. (Image credit: Future | Sam Kieldsen)
Getting to grips with it takes some patience if you're arriving from a more conventional mirrorless system. With only four labelled buttons on the body, a lot of control is handed off to the touchscreen, which is polished and logically organized once you learn its rhythms. The rear LCD tilts but doesn't swivel, which is an unusual limitation for a camera at this price — and with a serious L-mount lens fitted, the combined weight is considerable. But pick it up, hold it to your eye, and look through that large, crisp EVF, and something clicks. This is a camera that feels like it was made to be used, not admired.
Image quality is exceptional — unsurprising given the 44.7MP BSI sensor, which is of the same type used by the superb Panasonic Lumix S1R II — and battery life is impressive. The autofocus is competent and handles moving subjects well enough, though it won't trouble Sony or Canon on raw speed. At around £5,150 (US pricing TBC), it's an expensive proposition. But as a pure expression of what a modern Leica should be, the SL3-P makes a very strong case for itself.
Leica SL3-P: Price and availability
Priced at $6,690 / £5,150 body-only
Also available in three zoom lens kits
It's unlikely to come as a shock to you that the Leica SL3-P is a very expensive camera. Its launch price, for the body only, is $6,690 / £5,150 (Australia pricing is still TBC at the time of writing).
Leica is also releasing the camera in three kit bundles, each of which includes at least one Vario zoom lens. The SL3-P with a Leica 28-70mm lens is $7,790 / £6,100; with a Leica 24-70mm it's $8,390 / £6,480; and with both the 24-70mm and a 70-200mm it's $10,995 / £8,560.
Leica SL3-P: specs
Leica SL3-P specs
Type:
Mirrorless camera
Mount:
L Mount
Sensor:
44.9MP (effective) BSI full-frame CMOS
Autofocus:
Hybrid AF: 315 contrast / 819 phase detection points; Human and Animal subject detection
Continuous shooting:
Up to 40fps (electronic shutter)
Video:
Up to 8K Open Gate; ProRes to 5.8K; 4K at 120fps; L-Log, 12-bit RAW, 4:2:2 10-bit
Viewfinder:
5.76M-dot LCD EVF, 0.76x magnification
Screen:
3.2-inch tilt-only touchscreen, 2,332,800 dots
Storage:
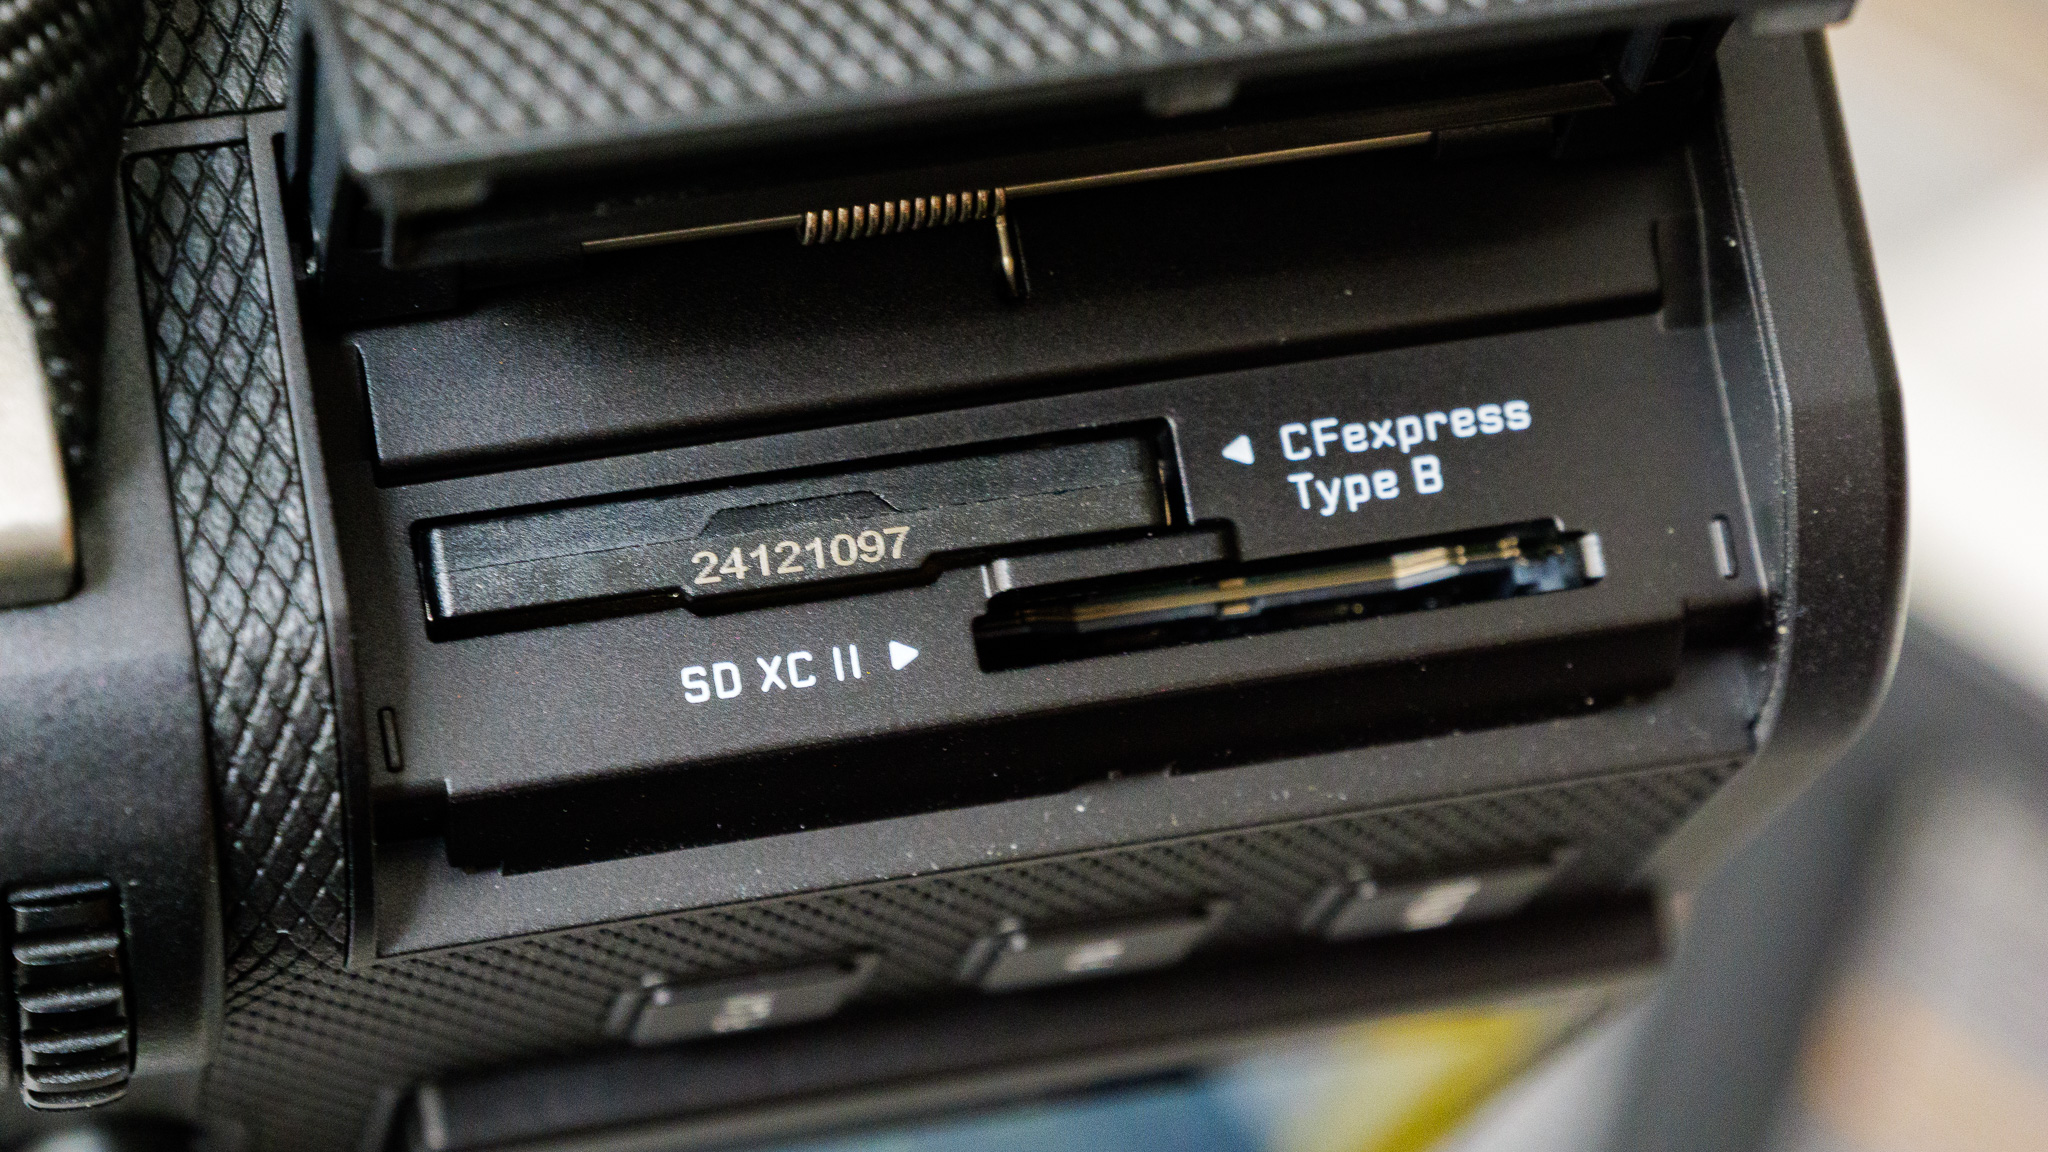
SD/SDHC/SDXC + CFexpress Type B
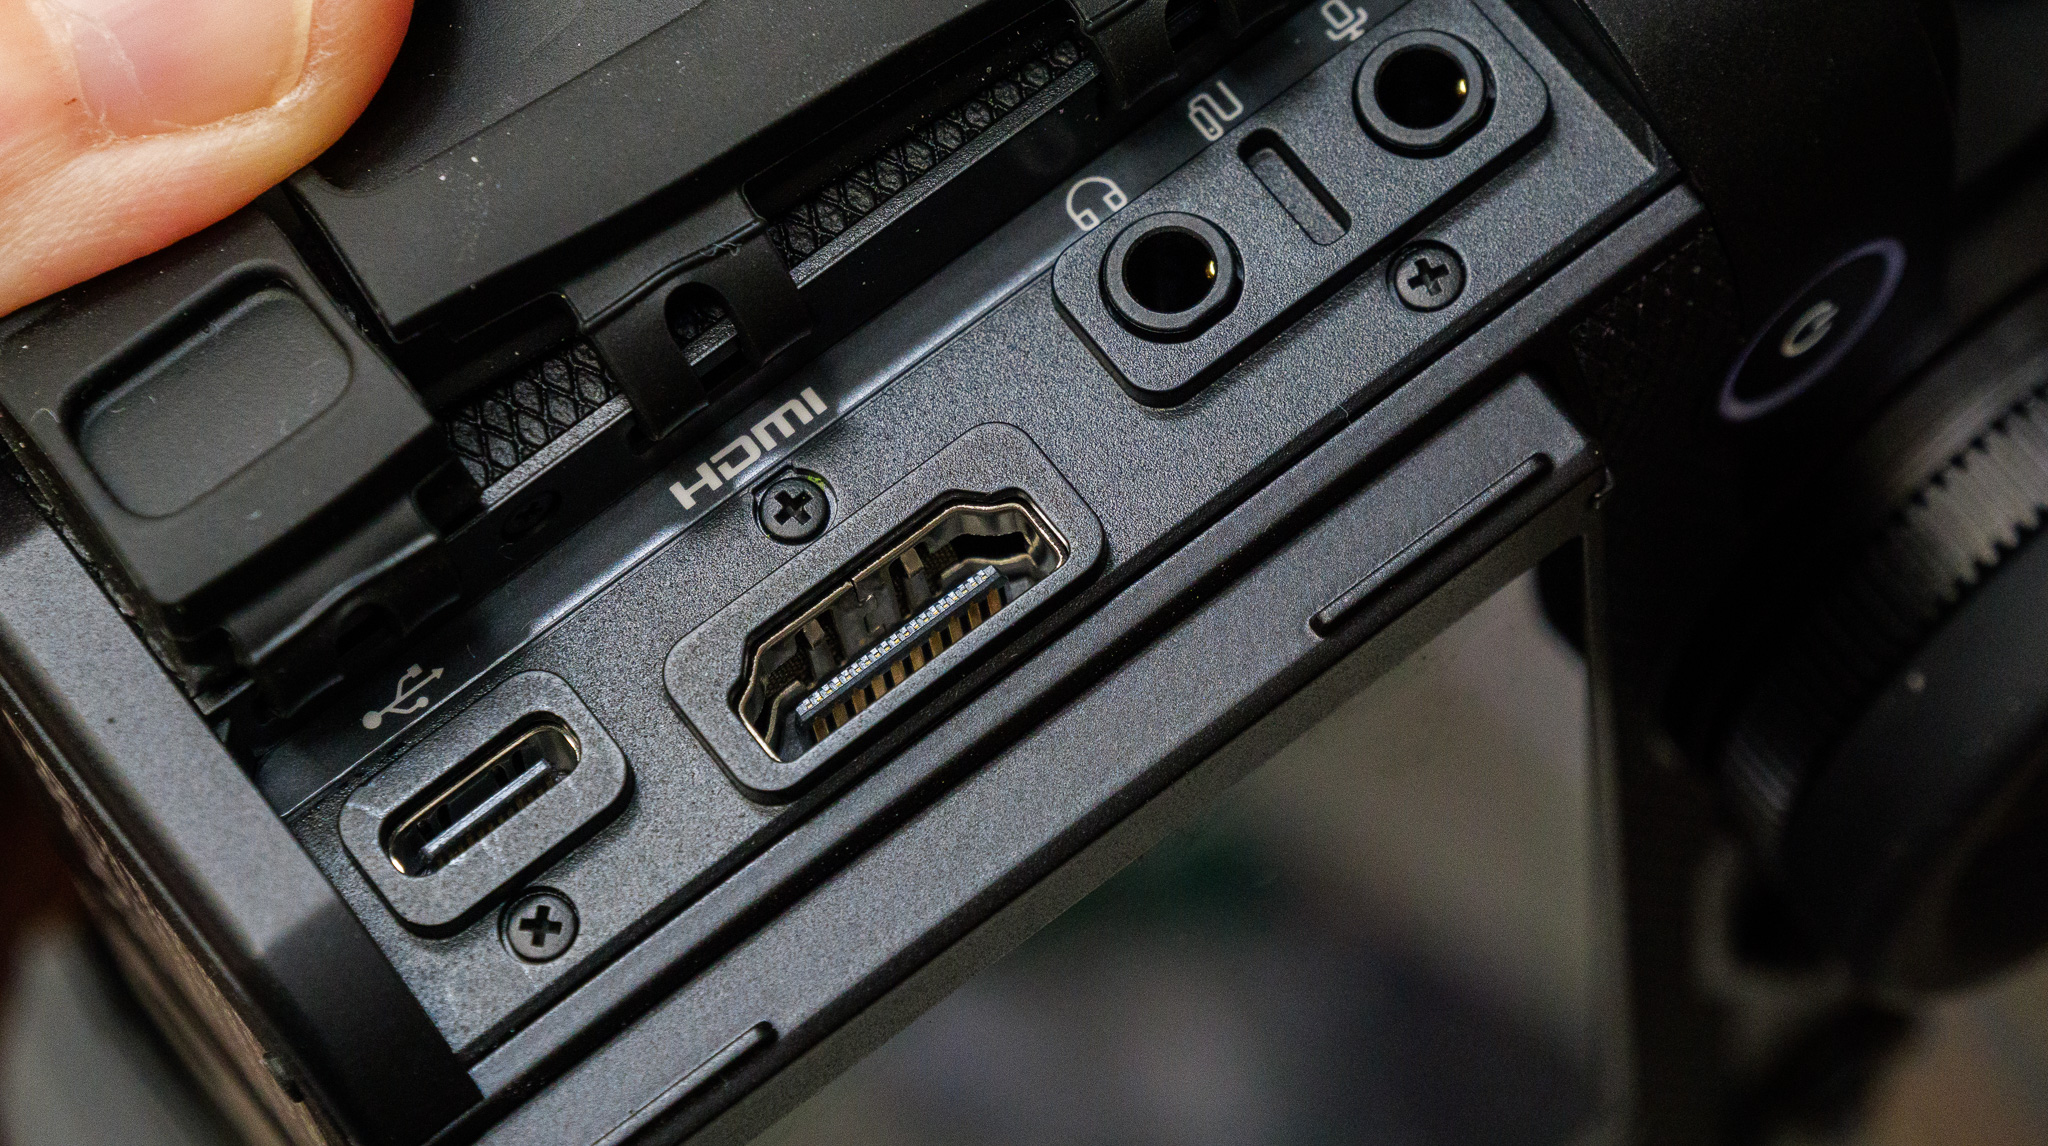
Connectivity:
USB-C (USB 3.1 Gen 2), HDMI 2.1 Type A, 3.5mm mic/headphone, Wi-Fi, Bluetooth 5.0
Weather sealing:
IP54
Dimensions:
151.45 x 80.32 x 38.09mm
Weight:
Approx. 768g (body only, without battery)
Leica SL3-P: design
All-black, badge-free design with minimalist controls
Premium full-metal construction with IP54 weather sealing
Large, comfortable EVF with twist-barrel diopter adjustment
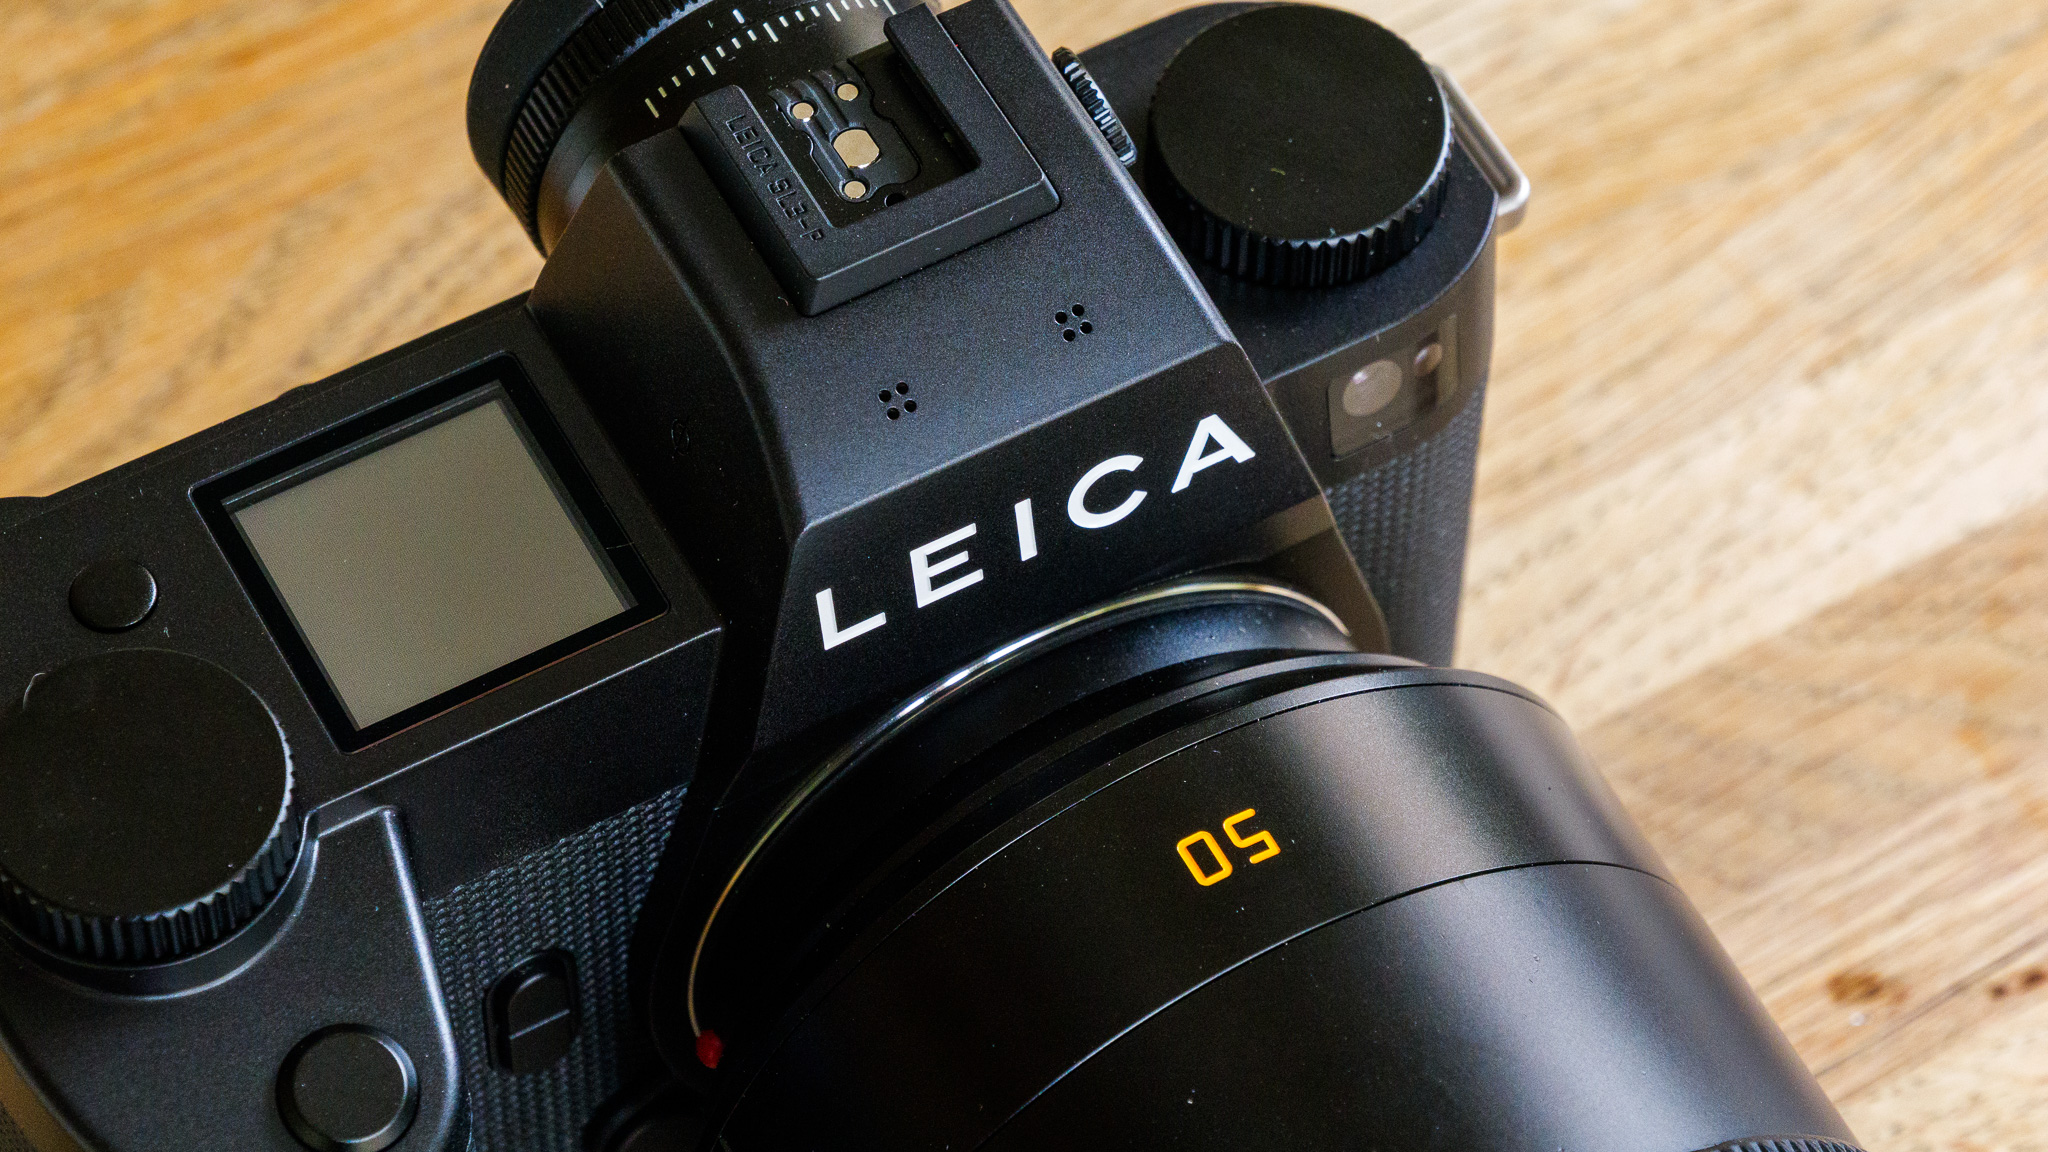
The absence of Leica's red dot is the first thing you notice, and it sets the tone for everything that follows. The SL3-P is clad entirely in black, with only 'LEICA' in white block capitals on the EVF housing to identify it. Four buttons across the whole body are labelled (one of which is the power button). It's a stealthy, understated thing — clearly designed for people who want to use a Leica but aren't fussed about being seen with one.
The German-made full-metal body felt exactly as solid and premium as I'd expect from the brand, and comes with IP54 weather sealing for extra outdoors reassurance. There's a large grip covered with a textured material that provides a secure hold even when conditions aren't ideal, and the supplied neck strap is thick and well-padded, which I appreciated given how much weight a serious L-mount lens adds to the equation.
Future | Sam KieldsenFuture | Sam KieldsenFuture | Sam KieldsenFuture | Sam KieldsenFuture | Sam KieldsenFuture | Sam Kieldsen
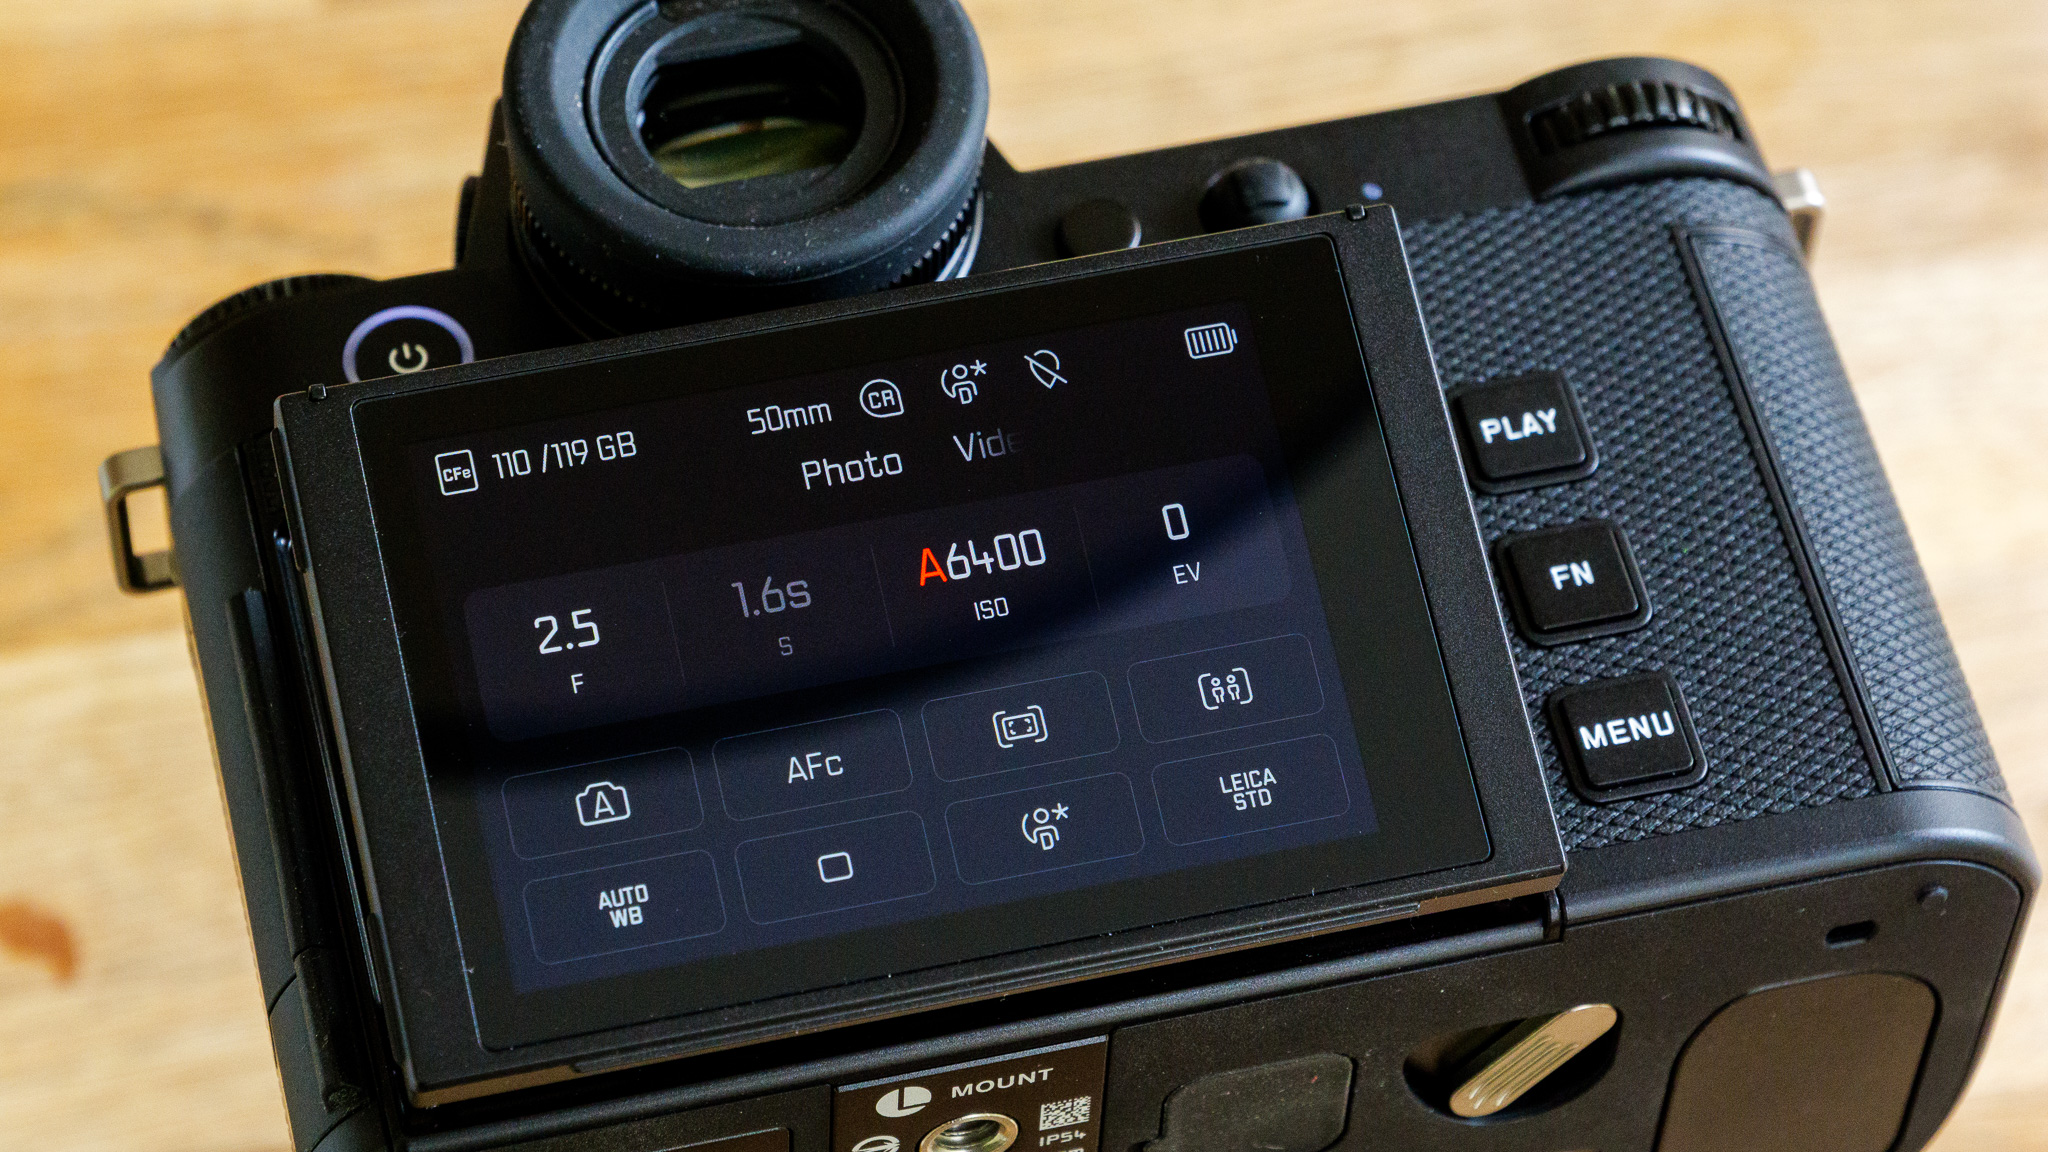
With so few physical controls, much of the camera's operation is routed through the touchscreen. The UI is stylish and well organized, with photo and video modes color coded distinctly in red and yellow respectively. And while the layout takes some adjusting too if you're used to a more button-heavy system, the logic is coherent, and settings are never difficult to locate. Touch-to-focus on the screen works exactly as expected, and custom button assignments help flatten the learning curve further.
The EVF is large, crisp and comfortable thanks to its 5.76-million dot resolution and 0.76x magnification, and as a glasses wearer I really liked the satisfying diopter mechanism that simply requires twisting the EVF barrel rather than hunting for a small dial.
(Image credit: Future | Sam Kieldsen)
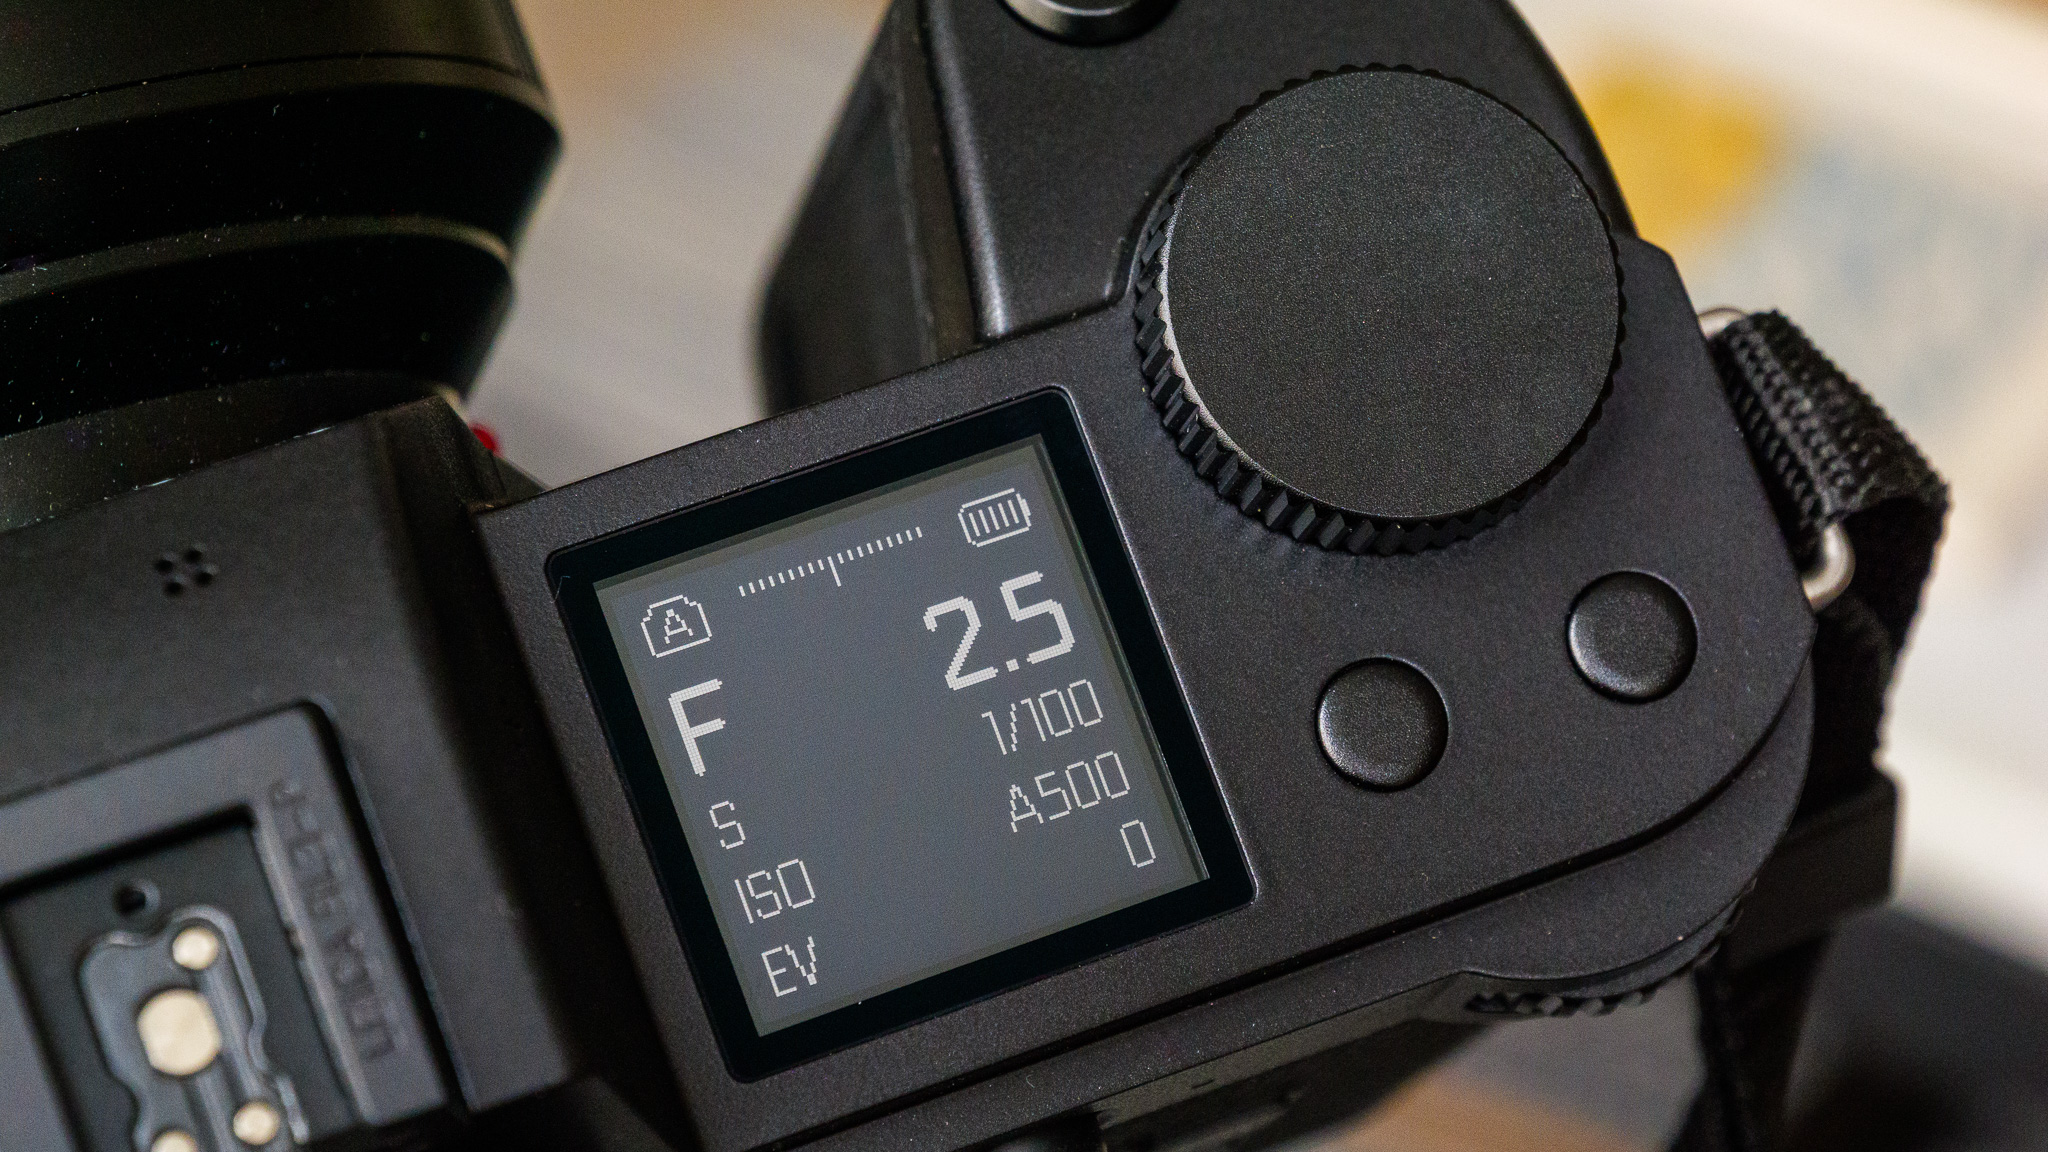
The top-plate display is a genuinely useful feature, giving you a quick rundown of current settings without you having to lift the camera to your eye. The rear LCD, however, only tilts: up to 90 degrees upward and around 45 downward. That covers most tripod and arm's-length scenarios, but there's no forward-facing position for self-shooting, and no side-to-side articulation, which feels like an unusual limitation at this price.
On a practical note, I will say that the SL3-P is not a lightweight system, especially when teamed with some high-quality glass. The Summilux-SL 50mm f/1.4 lens I used with it added over a kilogram to the body, and while the grip is secure and comfortable, a long day of handheld shooting (covering a child's birthday party, in my case) does become fatiguing. That's less a criticism — after all, there are plenty of heavy cameras around — and more of a warning about how and when it can be used.
Leica SL3-P: Performance
Exceptional image quality from a 44.7MP BSI full-frame sensor
Competent hybrid autofocus with broad subject detection, including birds
Impressive battery life and extensive video options including 8K and ProRes
Future | Sam KieldsenFuture | Sam KieldsenFuture | Sam KieldsenFuture | Sam KieldsenFuture | Sam KieldsenFuture | Sam Kieldsen
The SL3-P shares its 44.7MP BSI full-frame CMOS sensor with the Panasonic Lumix S1R II — a camera I've tested and rate very highly — and the image quality is, predictably, exceptional.
Raw files processed in Lightroom offer tremendous latitude, with smooth tonal gradation, wide dynamic range and excellent high-ISO performance. JPEGs are very good straight from camera too, and five film-look presets — three color, two monochrome — add some welcome creative options. The high-contrast black-and-white preset is particularly striking, and feels authentically Leica in character.
Video capabilities are more extensive than the camera's photographer-first positioning might suggest: 8K Open Gate, ProRes to 5.8K, 4K at 120fps, L-Log, 12-bit RAW and 4:2:2 10-bit are all available. It's a serious toolkit, even if the handling feels more naturally attuned to stills.
Future | Sam KieldsenFuture | Sam KieldsenFuture | Sam KieldsenFuture | Sam KieldsenFuture | Sam KieldsenFuture | Sam Kieldsen
The hybrid autofocus combines 315 contrast AF points with 819 phase detection points, with human, animal (including birds) and car detection. Tracking held up well in practice; testing on an active cat, the camera maintained focus through erratic movement without significant trouble.
Outright acquisition speed with the Summilux 50mm f/1.4 in AF-C is where it falls short of class leaders; it's capable rather than decisive, and anyone shooting fast action should look elsewhere. For portrait, street or documentary work, though, it certainly gets the job done.
Five-axis IBIS rated at up to five stops works quietly and effectively, and battery life is a genuine highlight. After a full charge I shot well over 100 frames across a lengthy session, and the indicator remained full. That seems in line with Leica's claimed 383 shots per CIPA standard cycle.
Should you buy the Leica SL3-P?
Buy it if...
You value craft and image quality above speed The build, finish and sensor are among the best in class. For considered, unhurried shooting, this is a very rewarding camera to use.
You want a discreet full-frame system The badge-free design and understated profile make the SL3-P ideal for work where a conspicuous camera would be a liability.
Don't buy it if...
You need fast and precise autofocus Sony, Canon and Nikon all offer more decisive AF systems at comparable or lower prices. The SL3-P's AF is capable rather than class-leading .
Solo video is central to your work The tilt-only screen and stills-focused handling mean this isn't the best choice for self-shooting video creators.
How I tested the Leica SL3-P
(Image credit: Future | Sam Kieldsen)
Leica loaned me a sample for over a week, along with a 50mm prime lens
I used it indoors and outdoors for several days, shooting photos and video
All sample photos were shot in raw and processed in Adobe Lightroom
Leica loaned me a review sample of the SL3-P camera to test out in real-world use, a few weeks ahead of the official release.
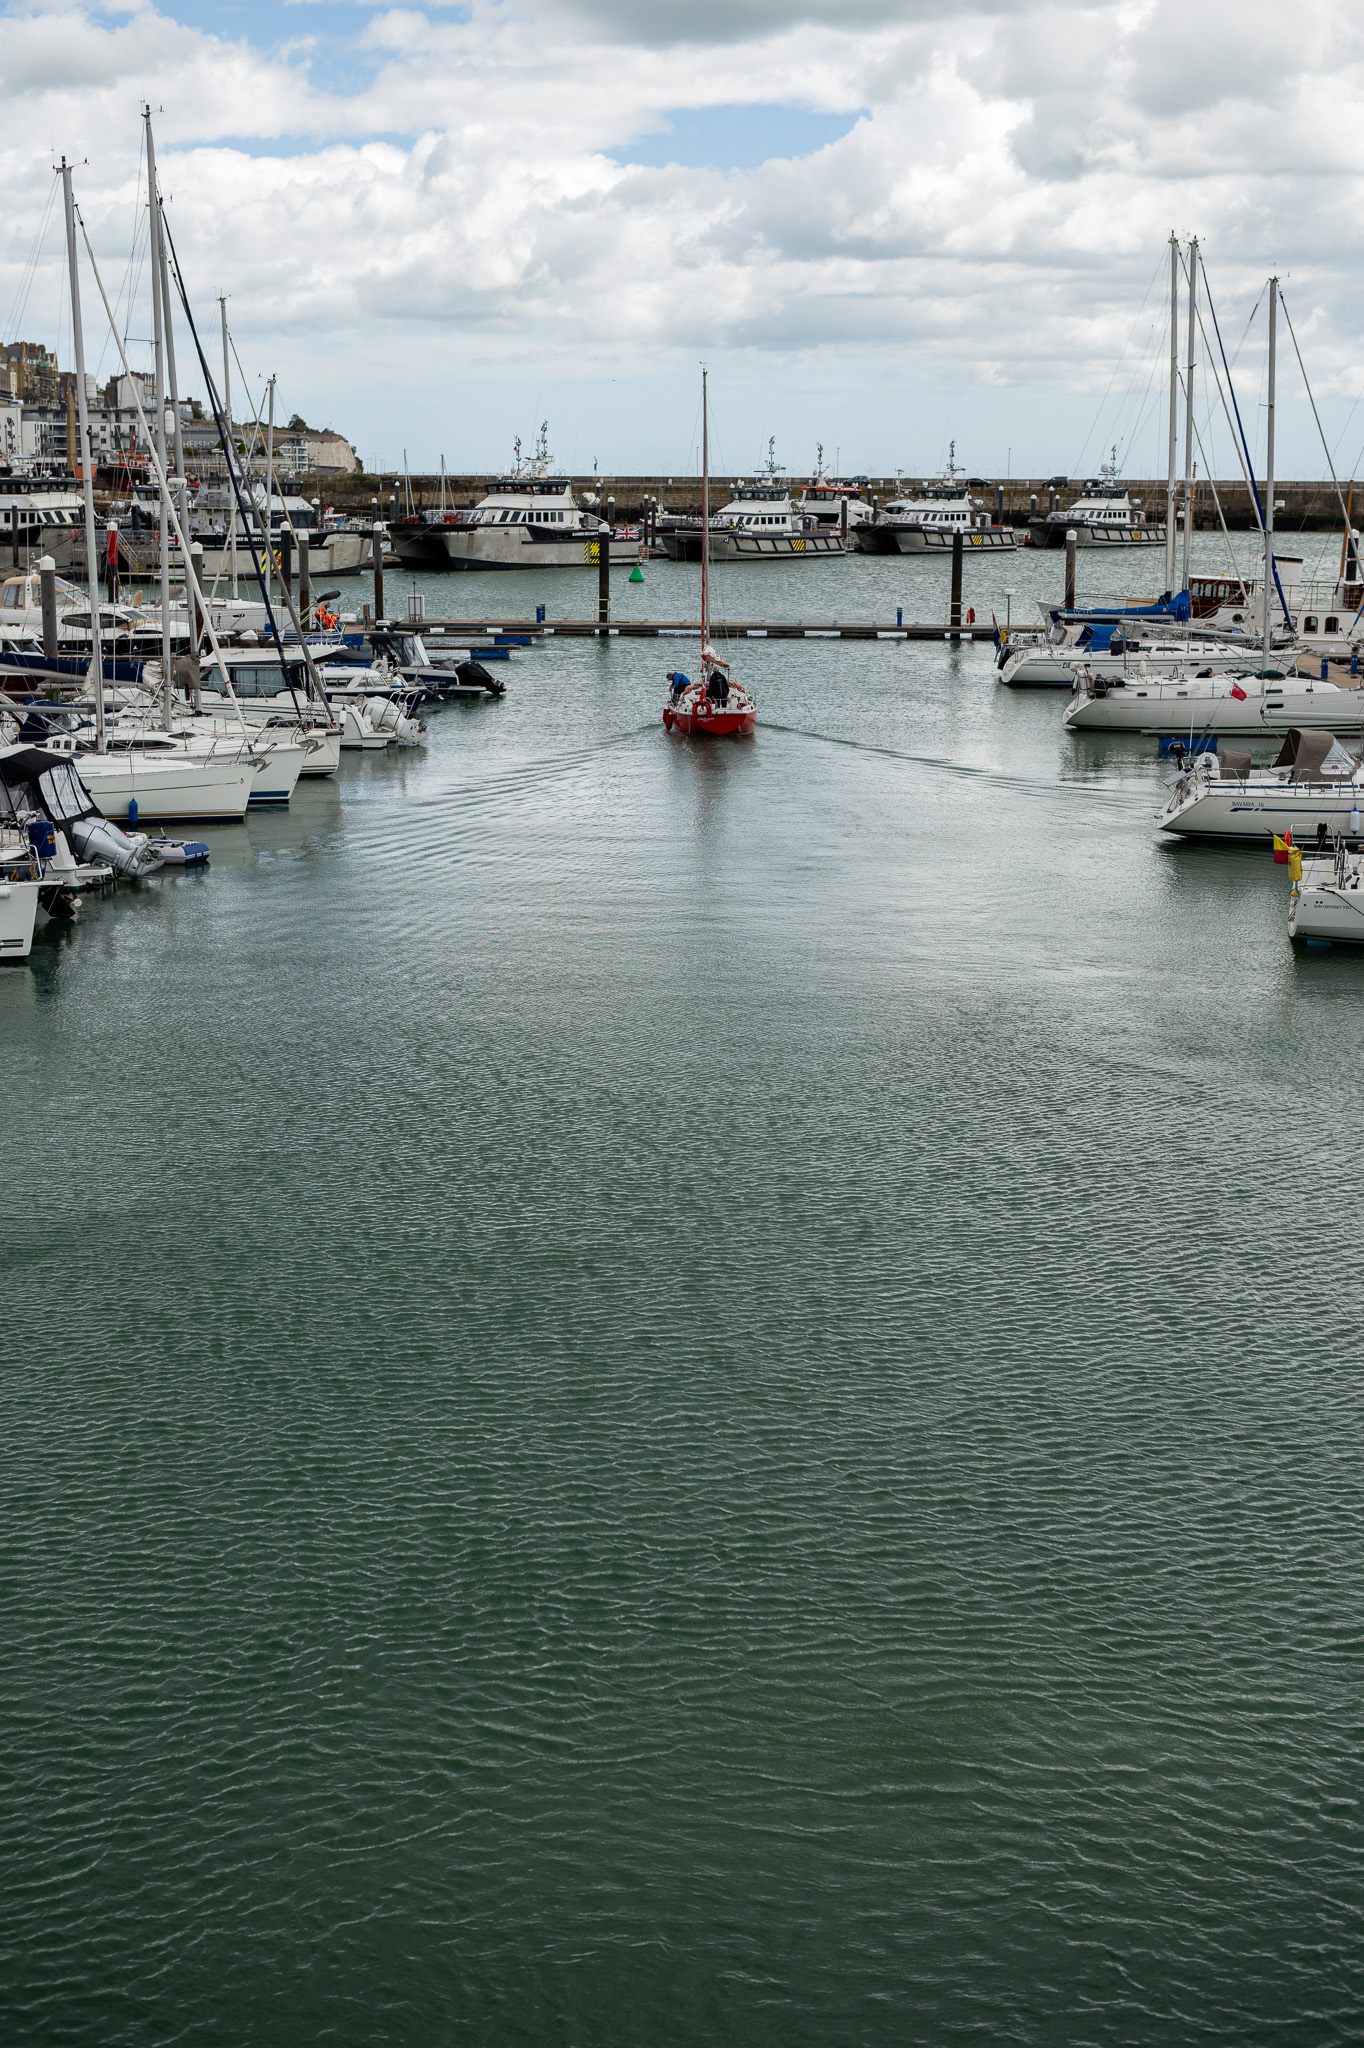
I reviewed the Leica SL3-P over the course of a week, using it exclusively with the Leica Summilux-SL 50mm f/1.4 ASPH. prime lens. My shooting covered a wide range of scenarios: street photography and candids outdoors, landscape work, and indoor shooting in both natural daytime light and normal interior lighting at night — the latter without flash or studio lighting assistance of any kind.
All sample images were captured in raw format and processed in Adobe Lightroom.
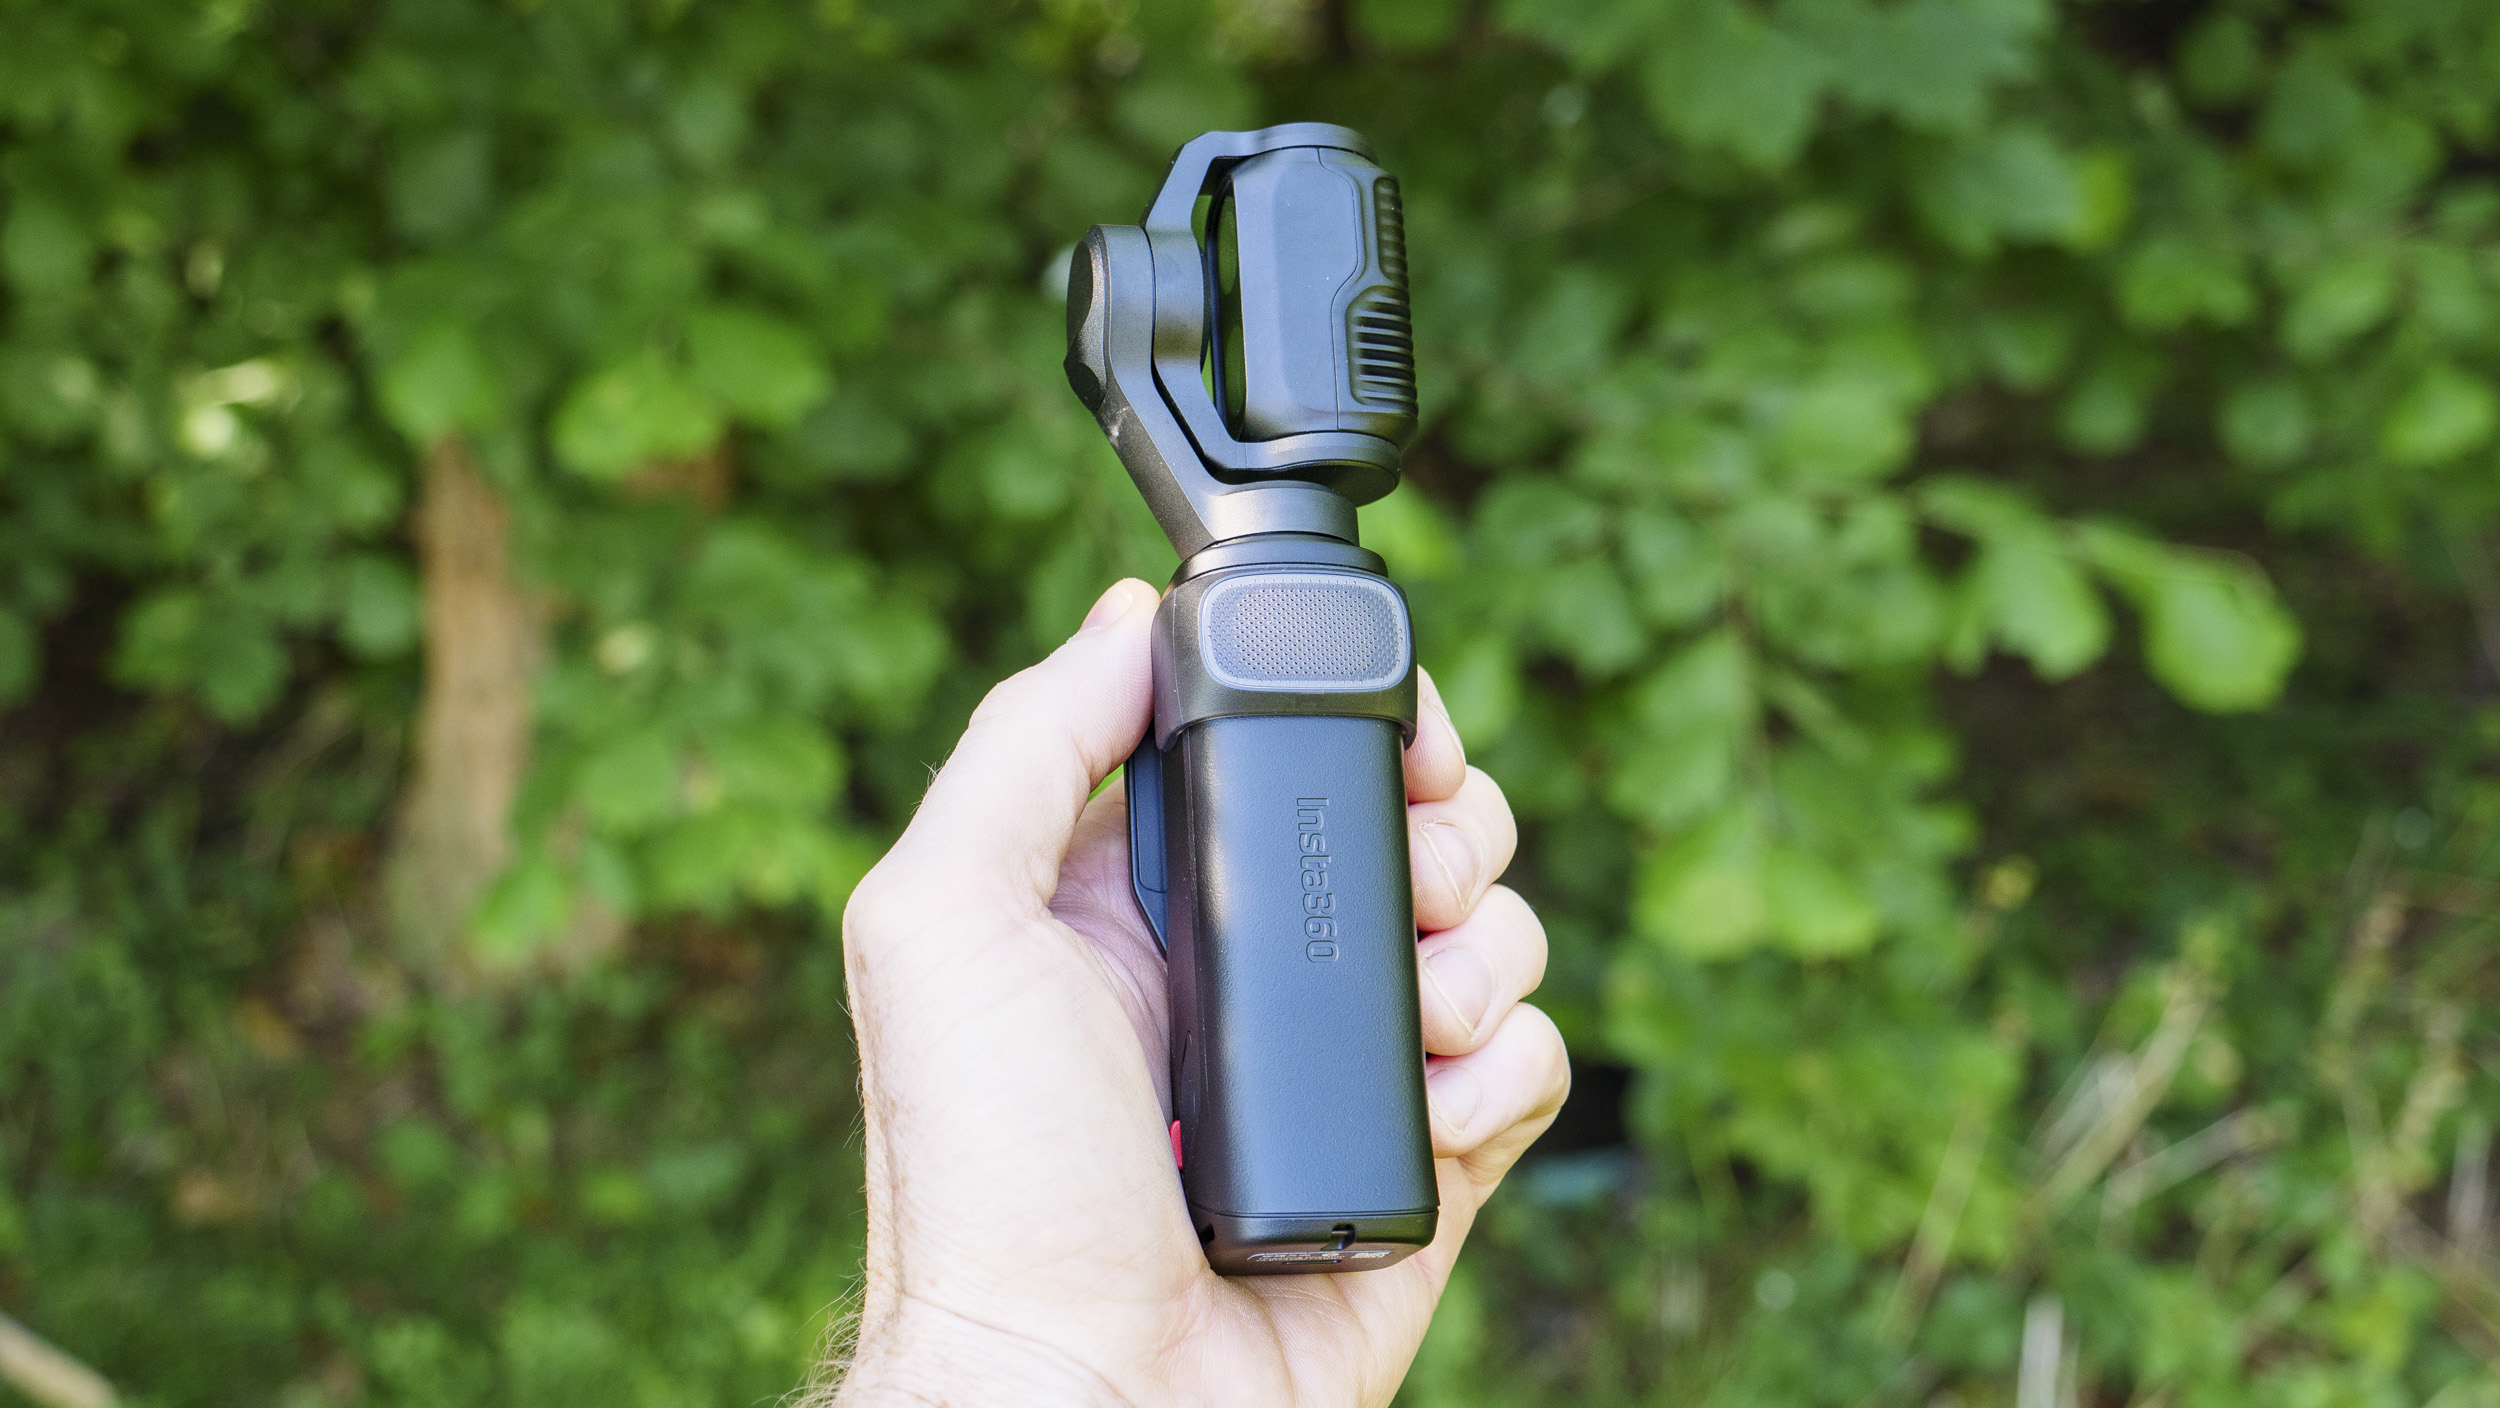
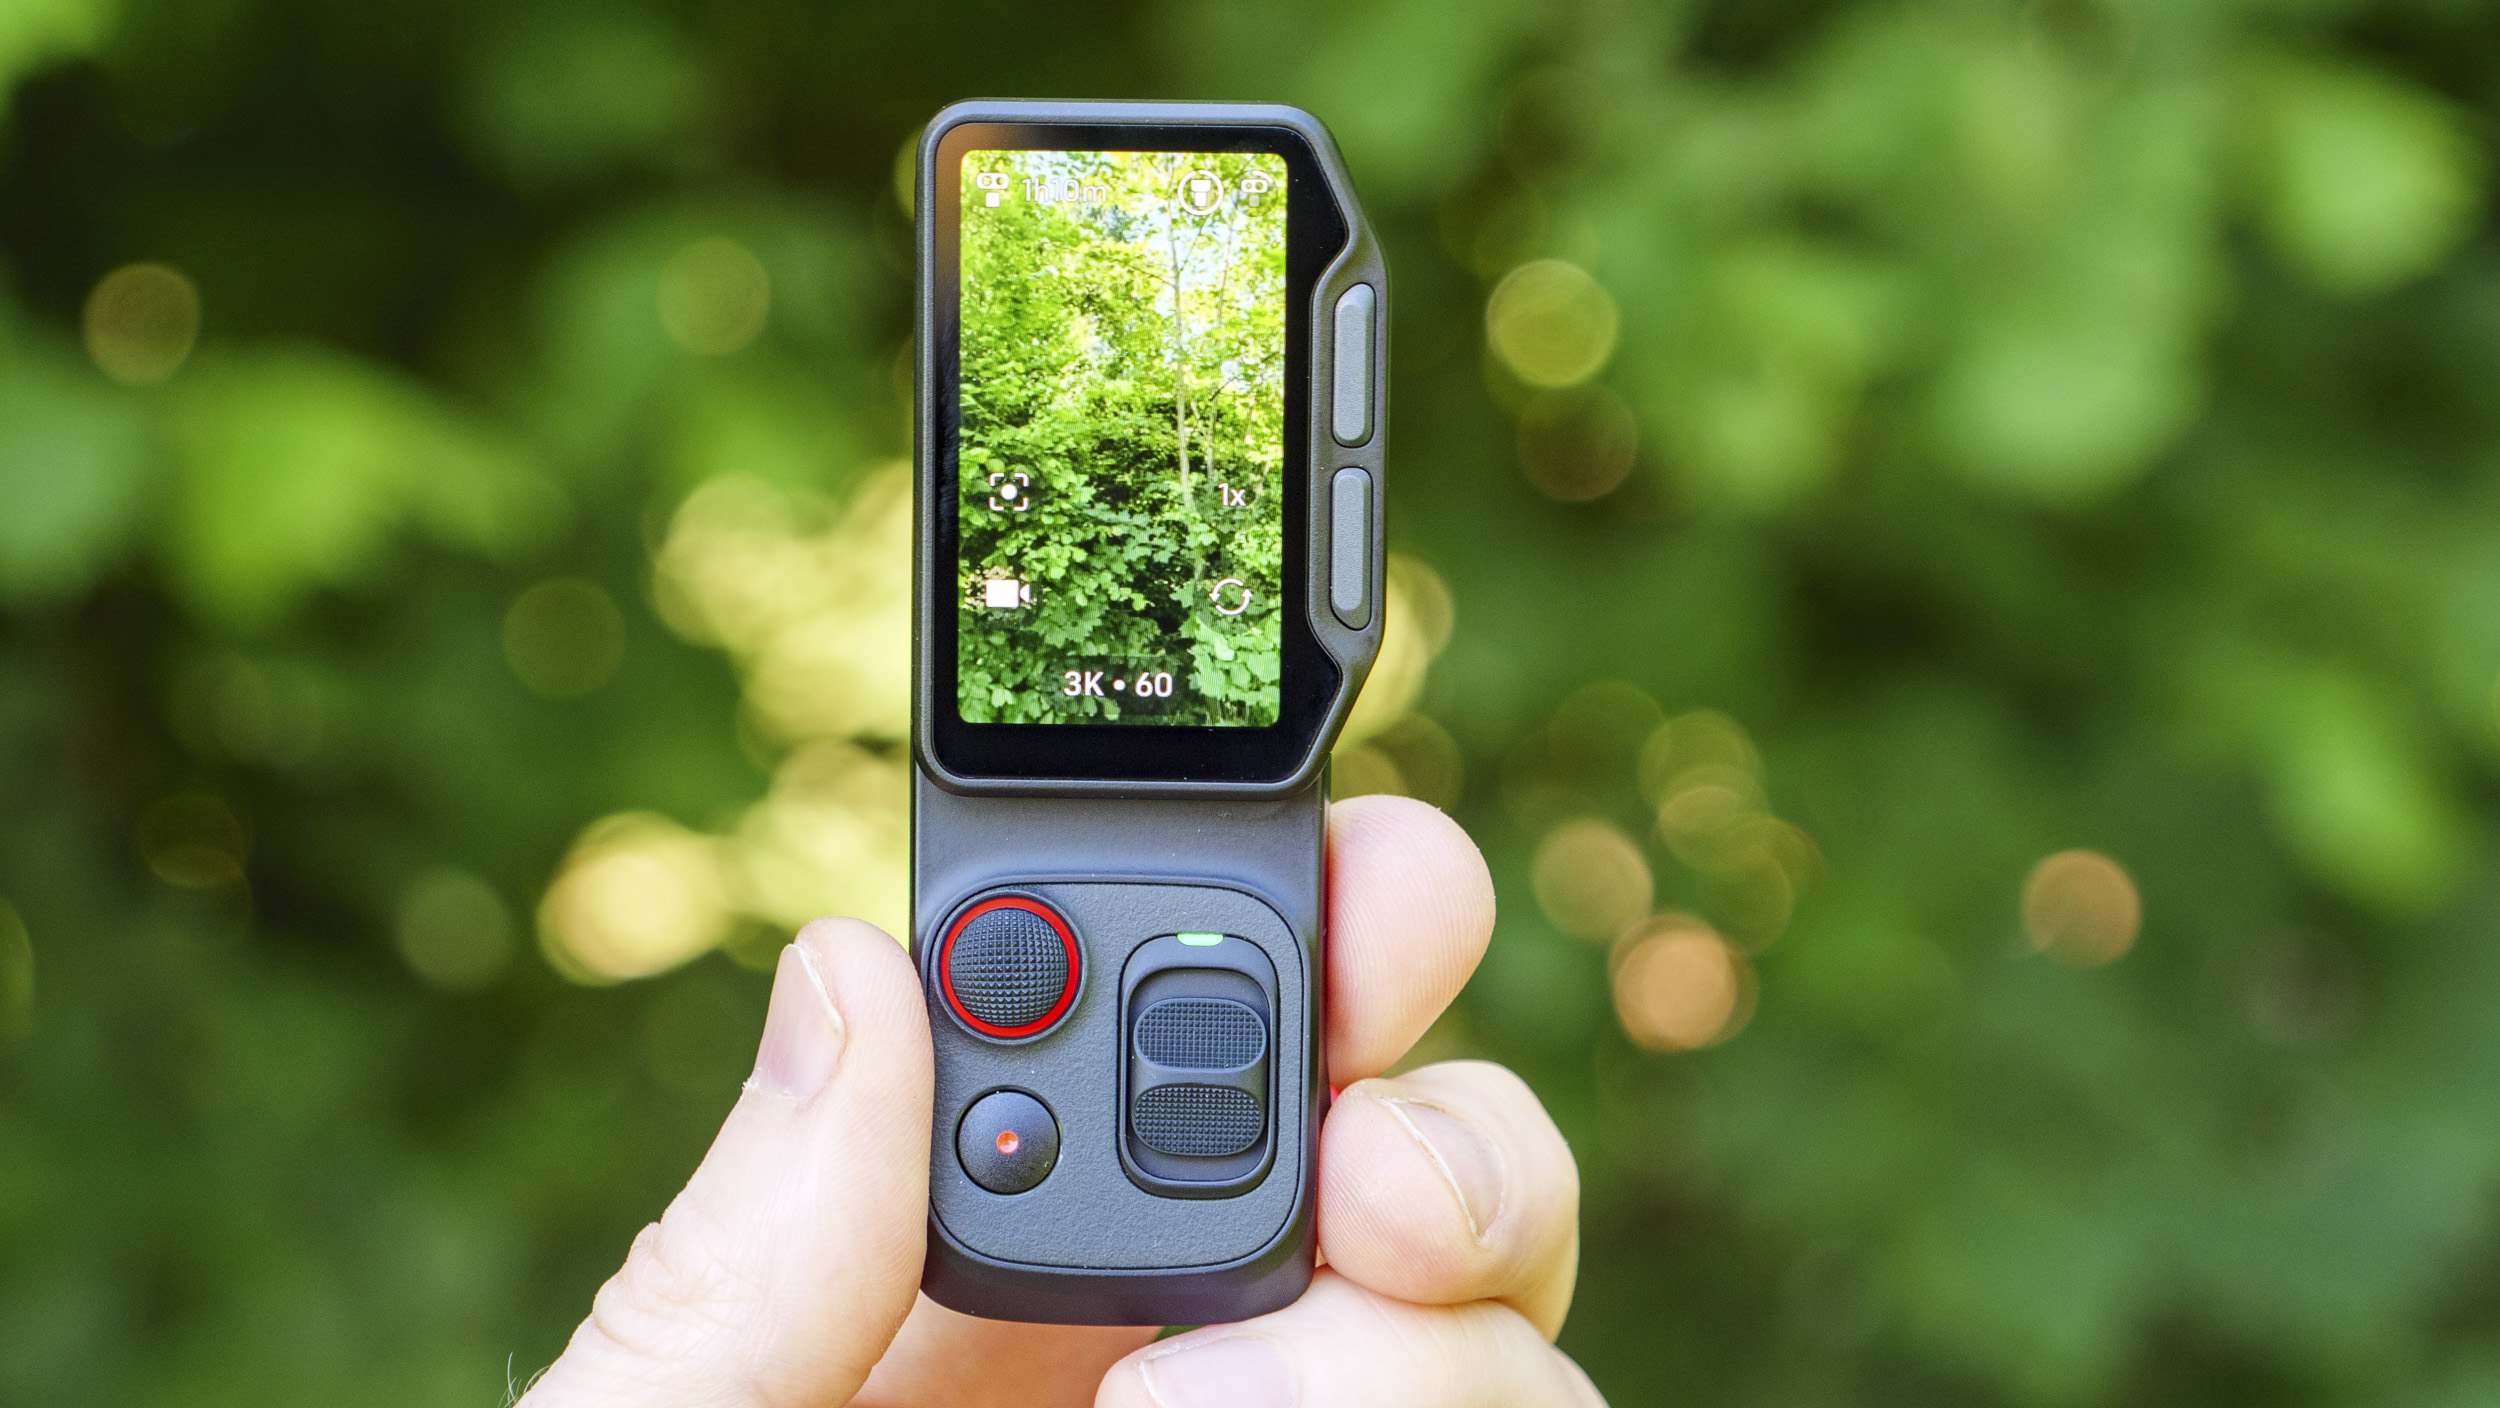
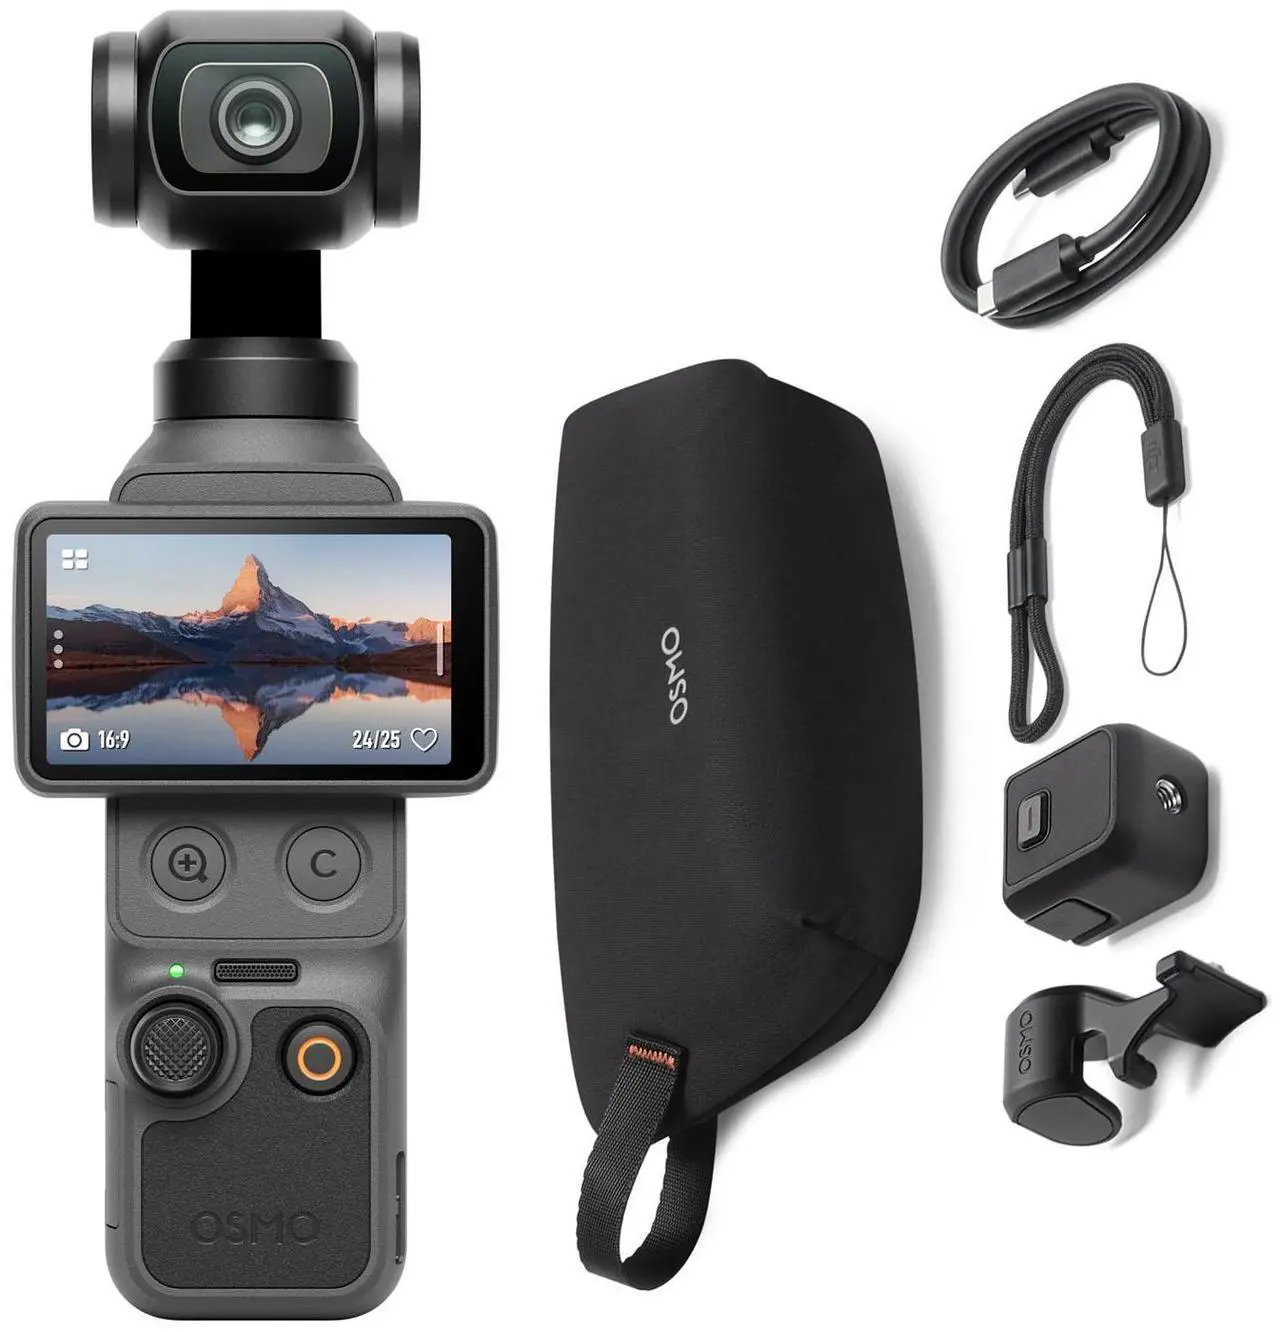
Despite being Insta360’s first vlogging camera with multiple Insta360 firsts, the Luna Ultra, overall, feels like a polished and bold product. Its triple chipset ably supports powerful features — especially the gimbal-stabilized 8K 30p video with 10-bit color depth and 4K 120p slow motion video recording, Log color profile, autonomous subject tracking autofocus and 32-bit float audio.
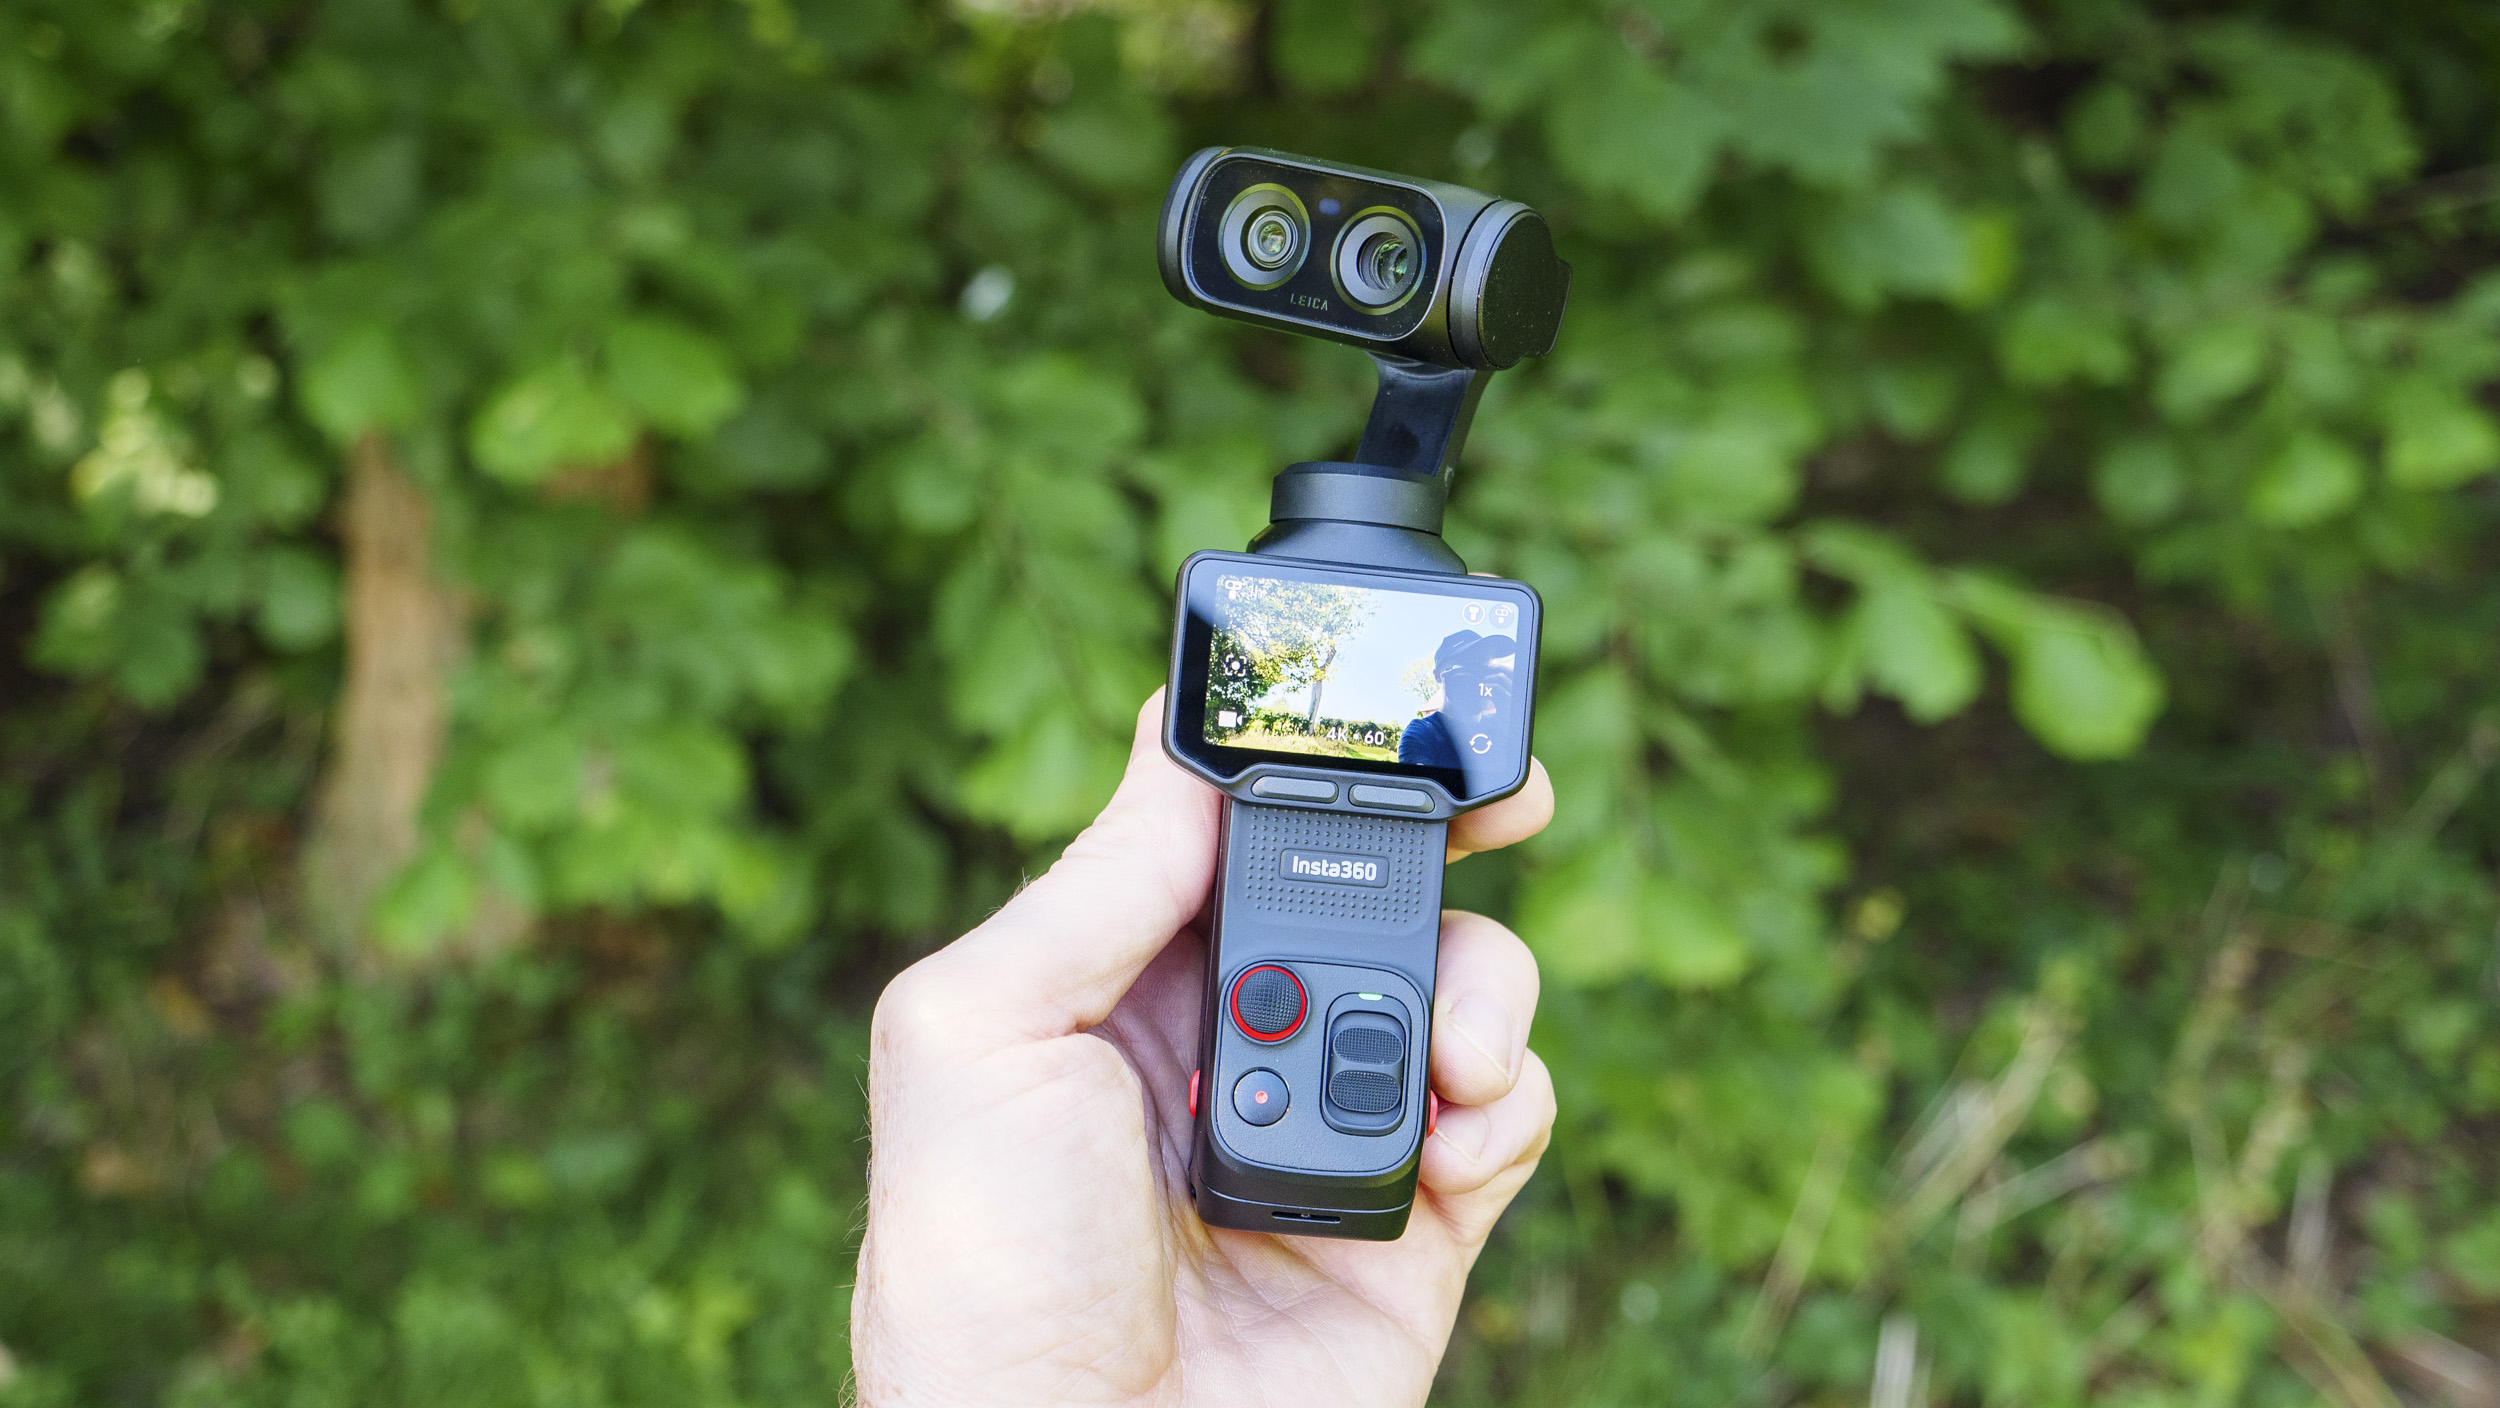
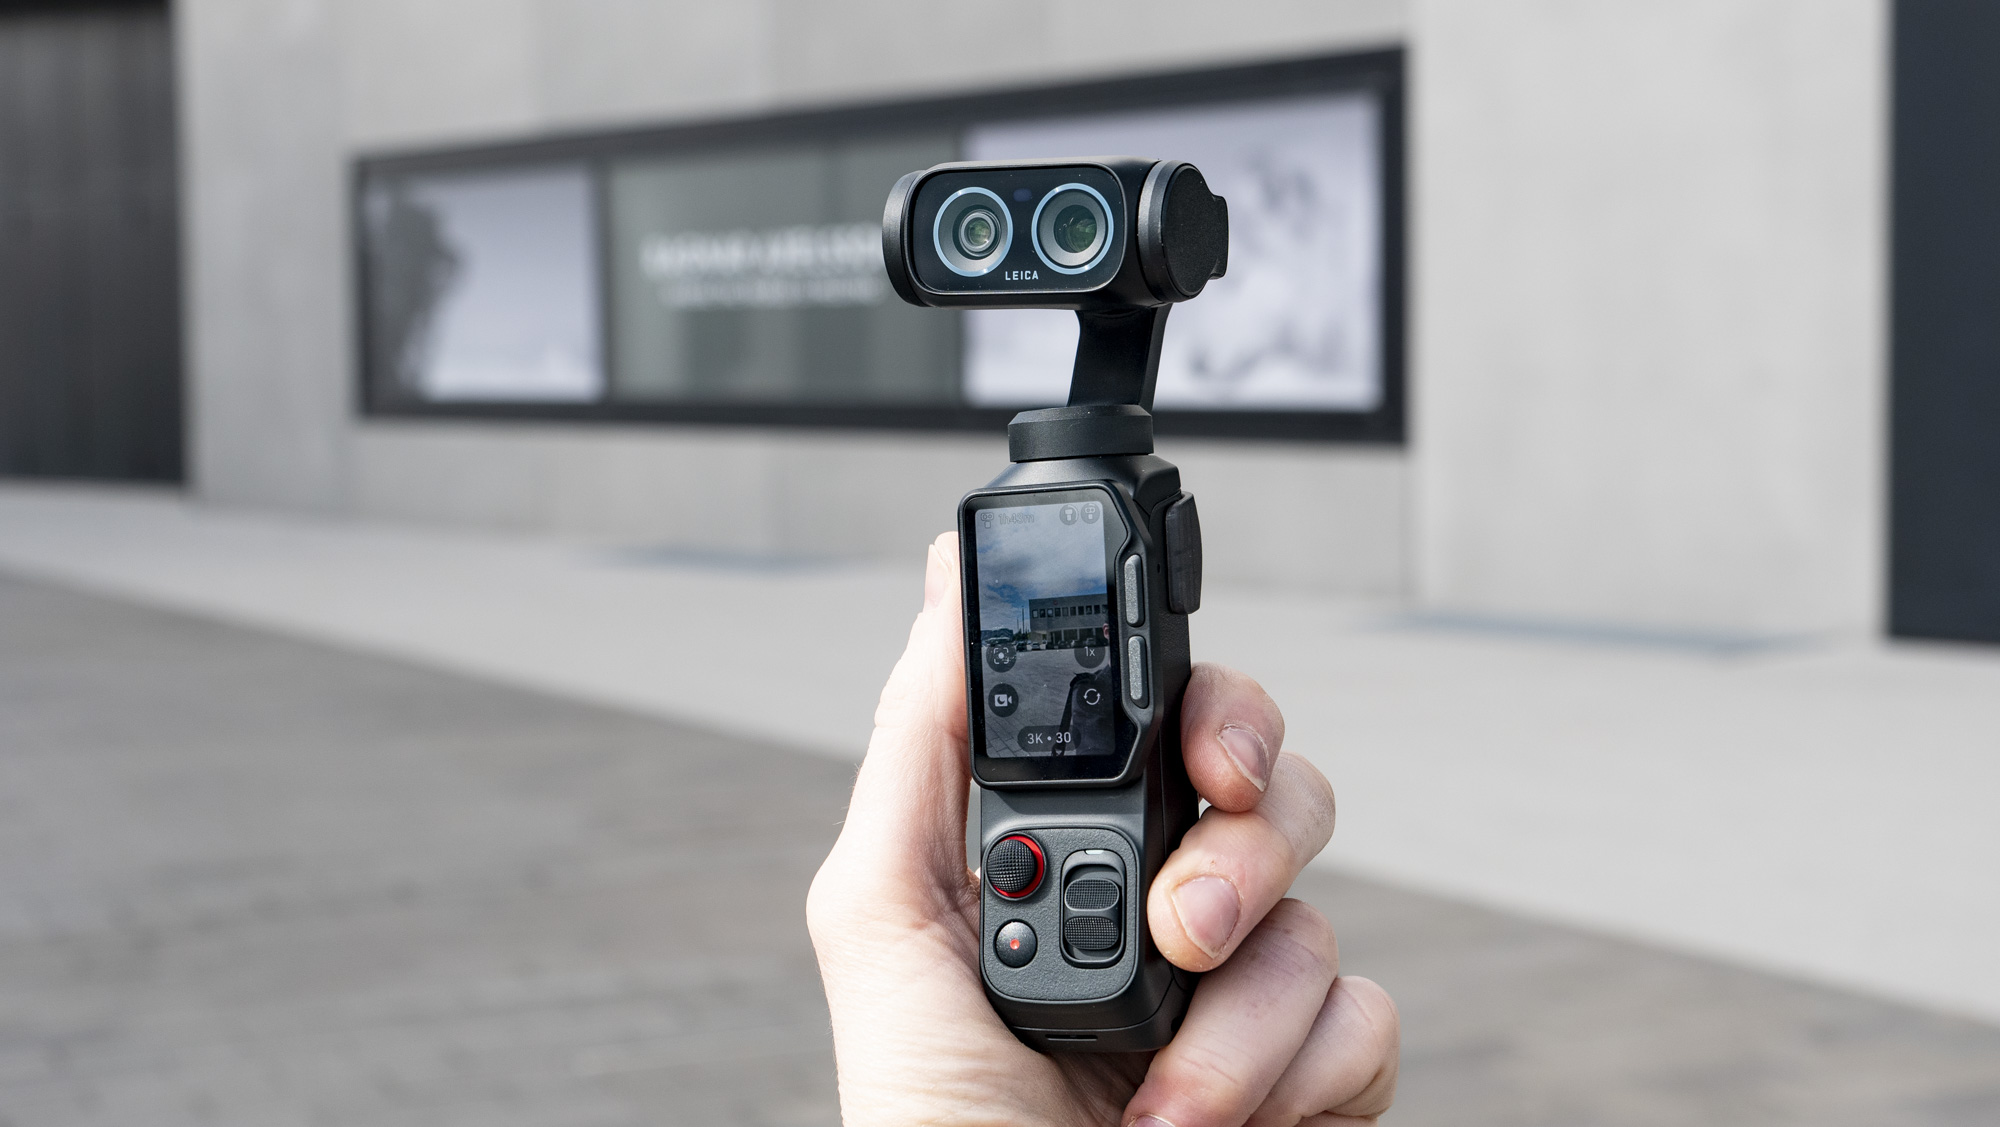
With dual 20mm f/1.8 and 60mm f/2.0 lenses, each with its own sensor, you truly are getting two cameras in one. And having enjoyed the Luna's ultra-wide and impressive 3x telephoto versatility for a month, it will be hard for me to go back to a single-lens compact vlogging camera.
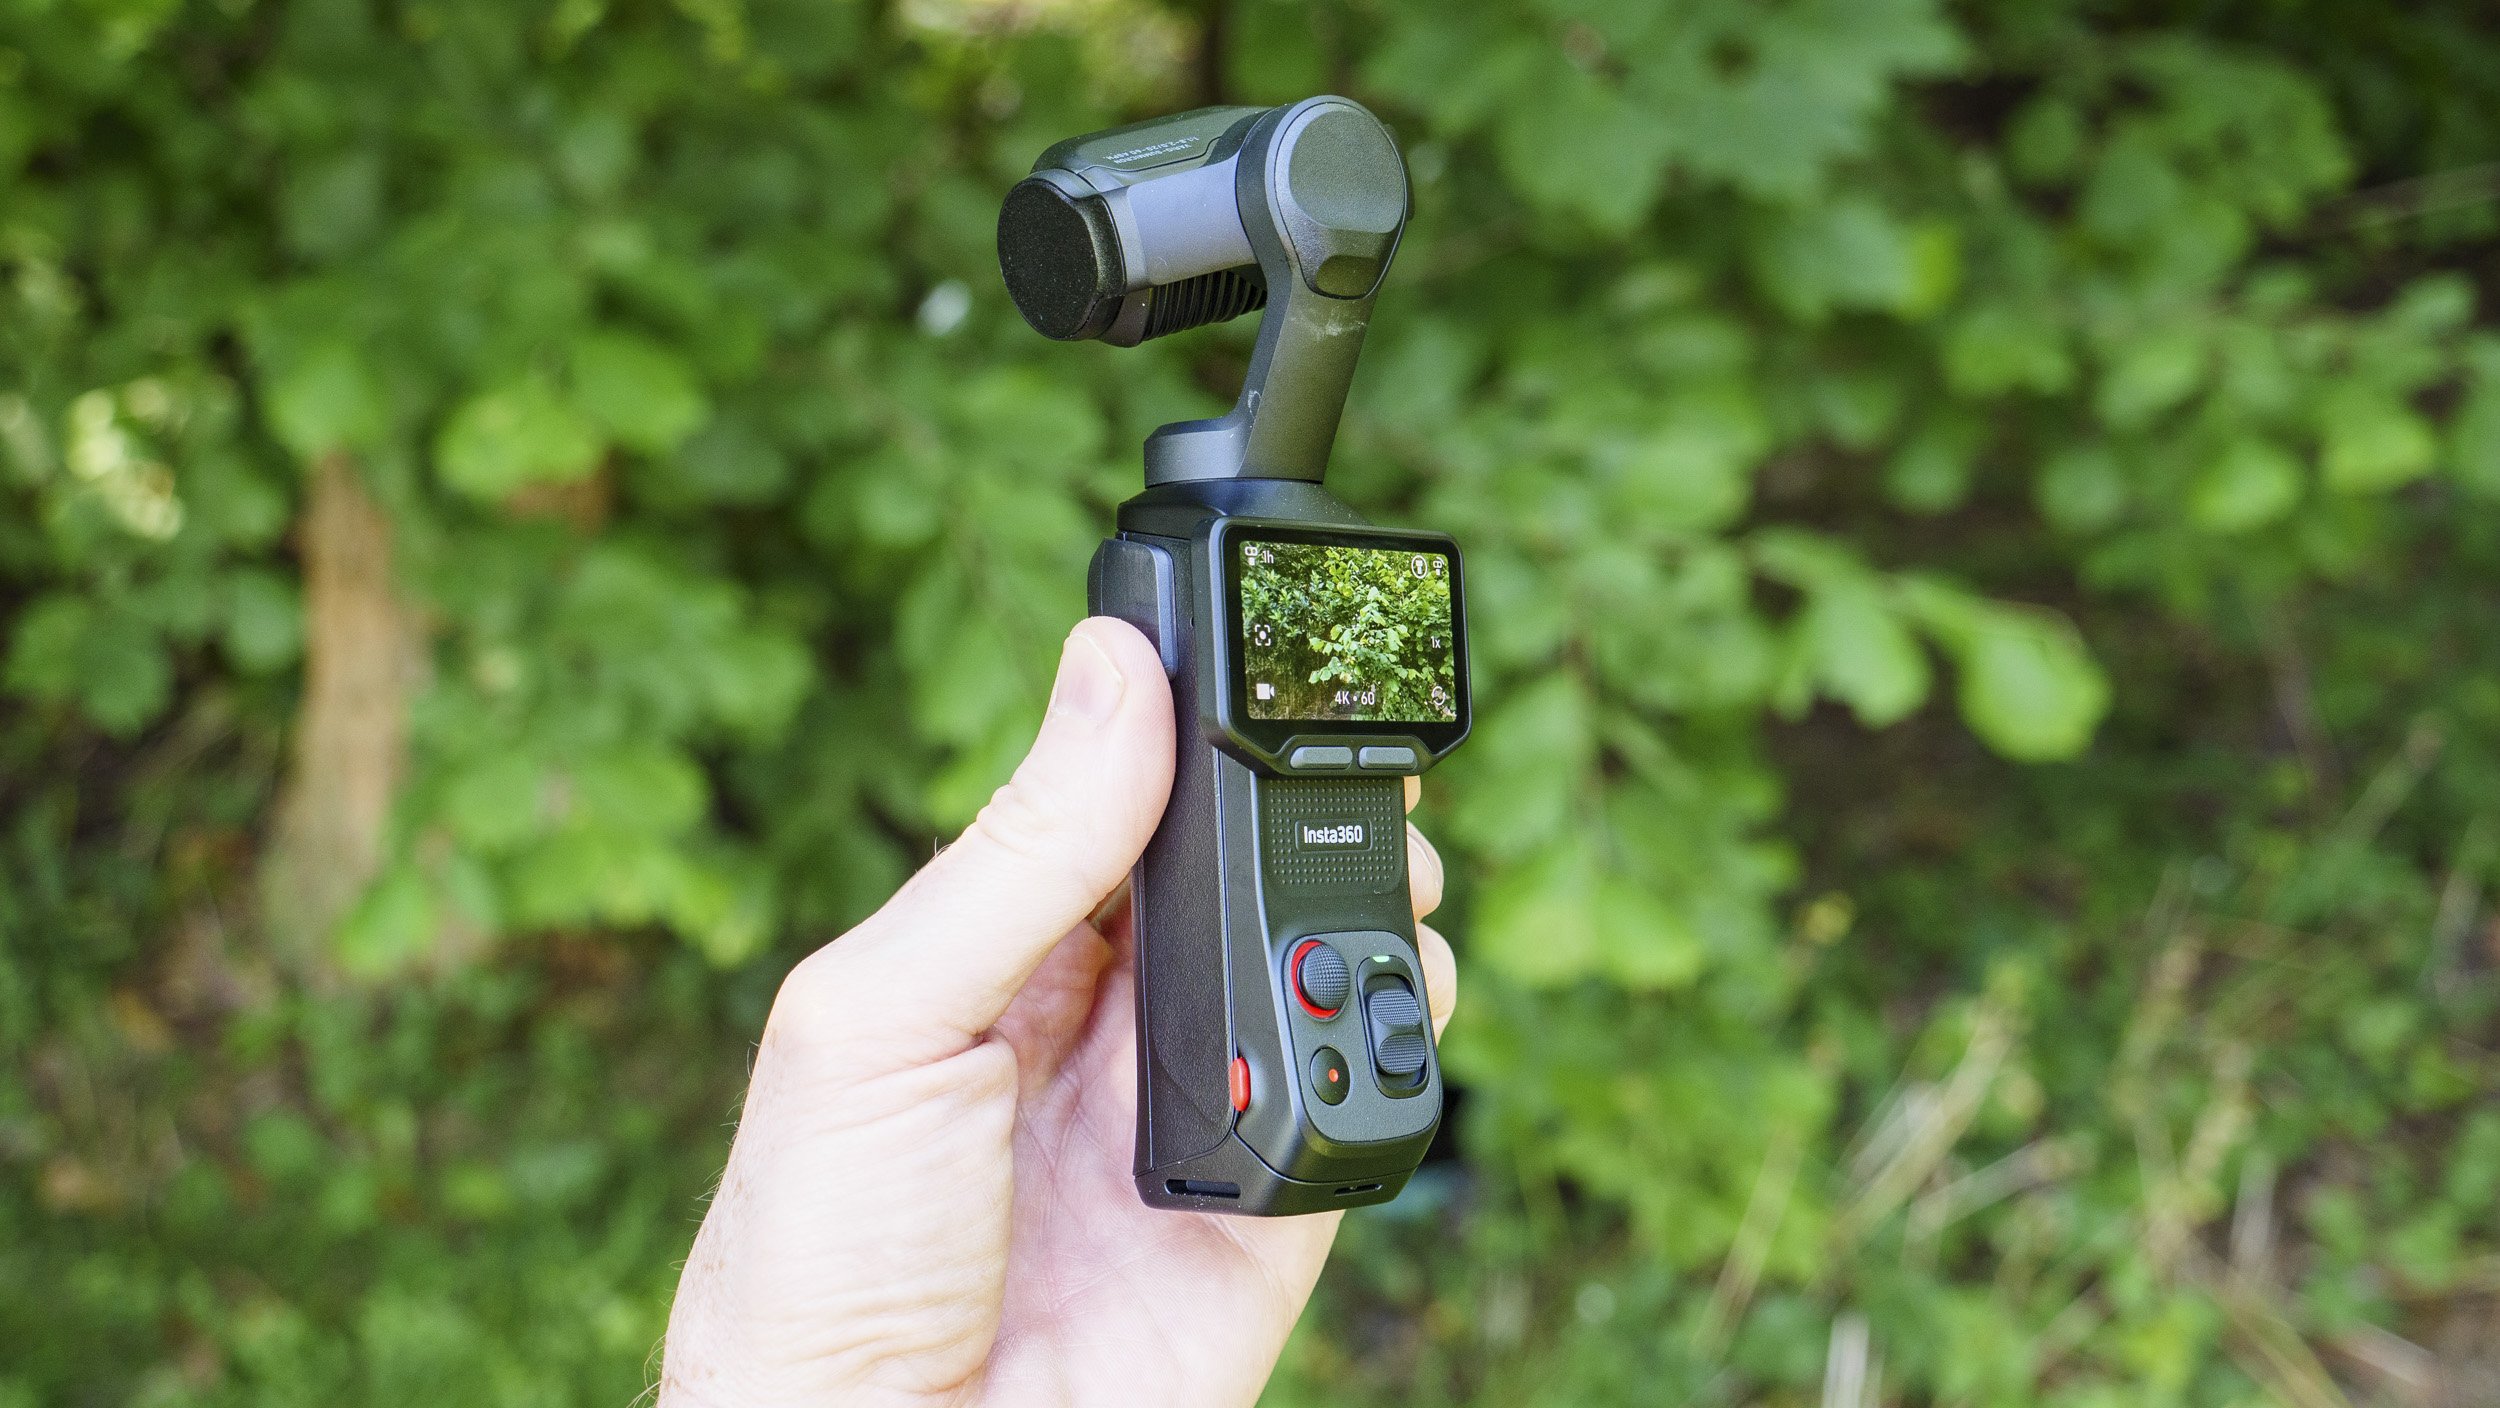
The detachable remote module — which features the two-inch OLED touchscreen, main camera controls and built-in microphone — has, understandably, won many admirers. It's such a clever and well-implemented design feature that truly enhances the user experience, especially for solo vlogging.
Here the module has been removed. It has a 20m transmission range and when removed it functions just as if it's attached to the camera (Image credit: Future / Tim Coleman)
Initially I had a few minor niggles navigating various camera settings, and it certainly paid dividends to spend time customizing the Luna Ultra to the way I like to shoot. It's also notably bulkier than DJI's Pocket 4 vlogging cameras, and pricier than single-lens alternatives.
Despite its infancy in this space, Insta360 has to its credit already produced crucial supporting accessories — including tripod and battery grips, plus the Insta360 Mic Pro wireless mic for top quality audio — meaning you can stick within the Insta360 ecosystem and enjoying the best possible user experience and compatibility, including full Bluetooth support.
Yes, DJI has been in the compact vlogging camera space for much longer and has refined its Pocket series with every iteration, but the Luna Ultra enters with a bang and is an impressive alternative.
Two lenses in one device, with an additional zoom — an approach familiar to smartphone users (Image credit: Future / Tim Coleman)
Insta360 Luna Ultra: price and release date
Full release on June 12 2026
Available in black or white with prices starting at $769.99 / £649 / AU$1,229.99
Multiple bundles to choose from, including the Creator Bundle
The Titanium Gold version comes with a matching auto lens cap (Image credit: Future / Tim Coleman)
"We're not going to compete on price" is what Insta360's co-founder Max Richter told me at a pre-launch event for the Luna Ultra, the company's first vlogging camera and DJI Osmo Pocket series rival.
And the Luna Ultra is much pricier than previous Pocket cameras. However, those were single-lens models and, like DJI's most recent Pockets, the single-lens Pocket 4 and dual-lens Pocket 4P, the Luna comes in two varieties: the single-lens Pro and the dual-lens Ultra.
Prices for the Ultra start at $769.99 / £649 / AU$1,229.99. That’s a fair whack more than the latest single-lens models, but you are truly getting two cameras in one device.
Insta360 sent me the Creator Bundle to review, which includes multiple extras such as the Mic Pro transmitter and battery grip and costs $969.99 / £829 / AU$1,549.99. I expect the dual-lens Osmo Pocket 4P to cost less than the Luna Ultra, but it won't be available in the US because of the DJI ban.
Both Luna models are available in black or white versions, and in a further variety of bundles that cater for various use cases; Standard, Essential, Endurance, VLOG, POV and Creator.
Price score: 4/5
Insta360 Luna Ultra specs
Insta360 Luna Ultra Specs:
Type:
Compact video camera
Lenses
20mm f/1.8 and 60mm f/2.0
Sensors:
1-inch and 1/1.3-inch
Video:
8K up to 30p / 4K up to 120p / FHD up to 240p
Photo:
9MP JPEG & RAW / 37MP UltraPhoto mode / panorama
LCD:
2-inch OLED, detachable
Memory:
47GB internal, 1x micro SD (up to 1TB)
Battery
1,550mAh, rated up to 4 hours of 1080p
Dimensions
2.1×6.7×1.5in / 52.4×169.9×38.5mm
Weight:
8.2 oz / 233g (black) 8.3oz / 235g (white)
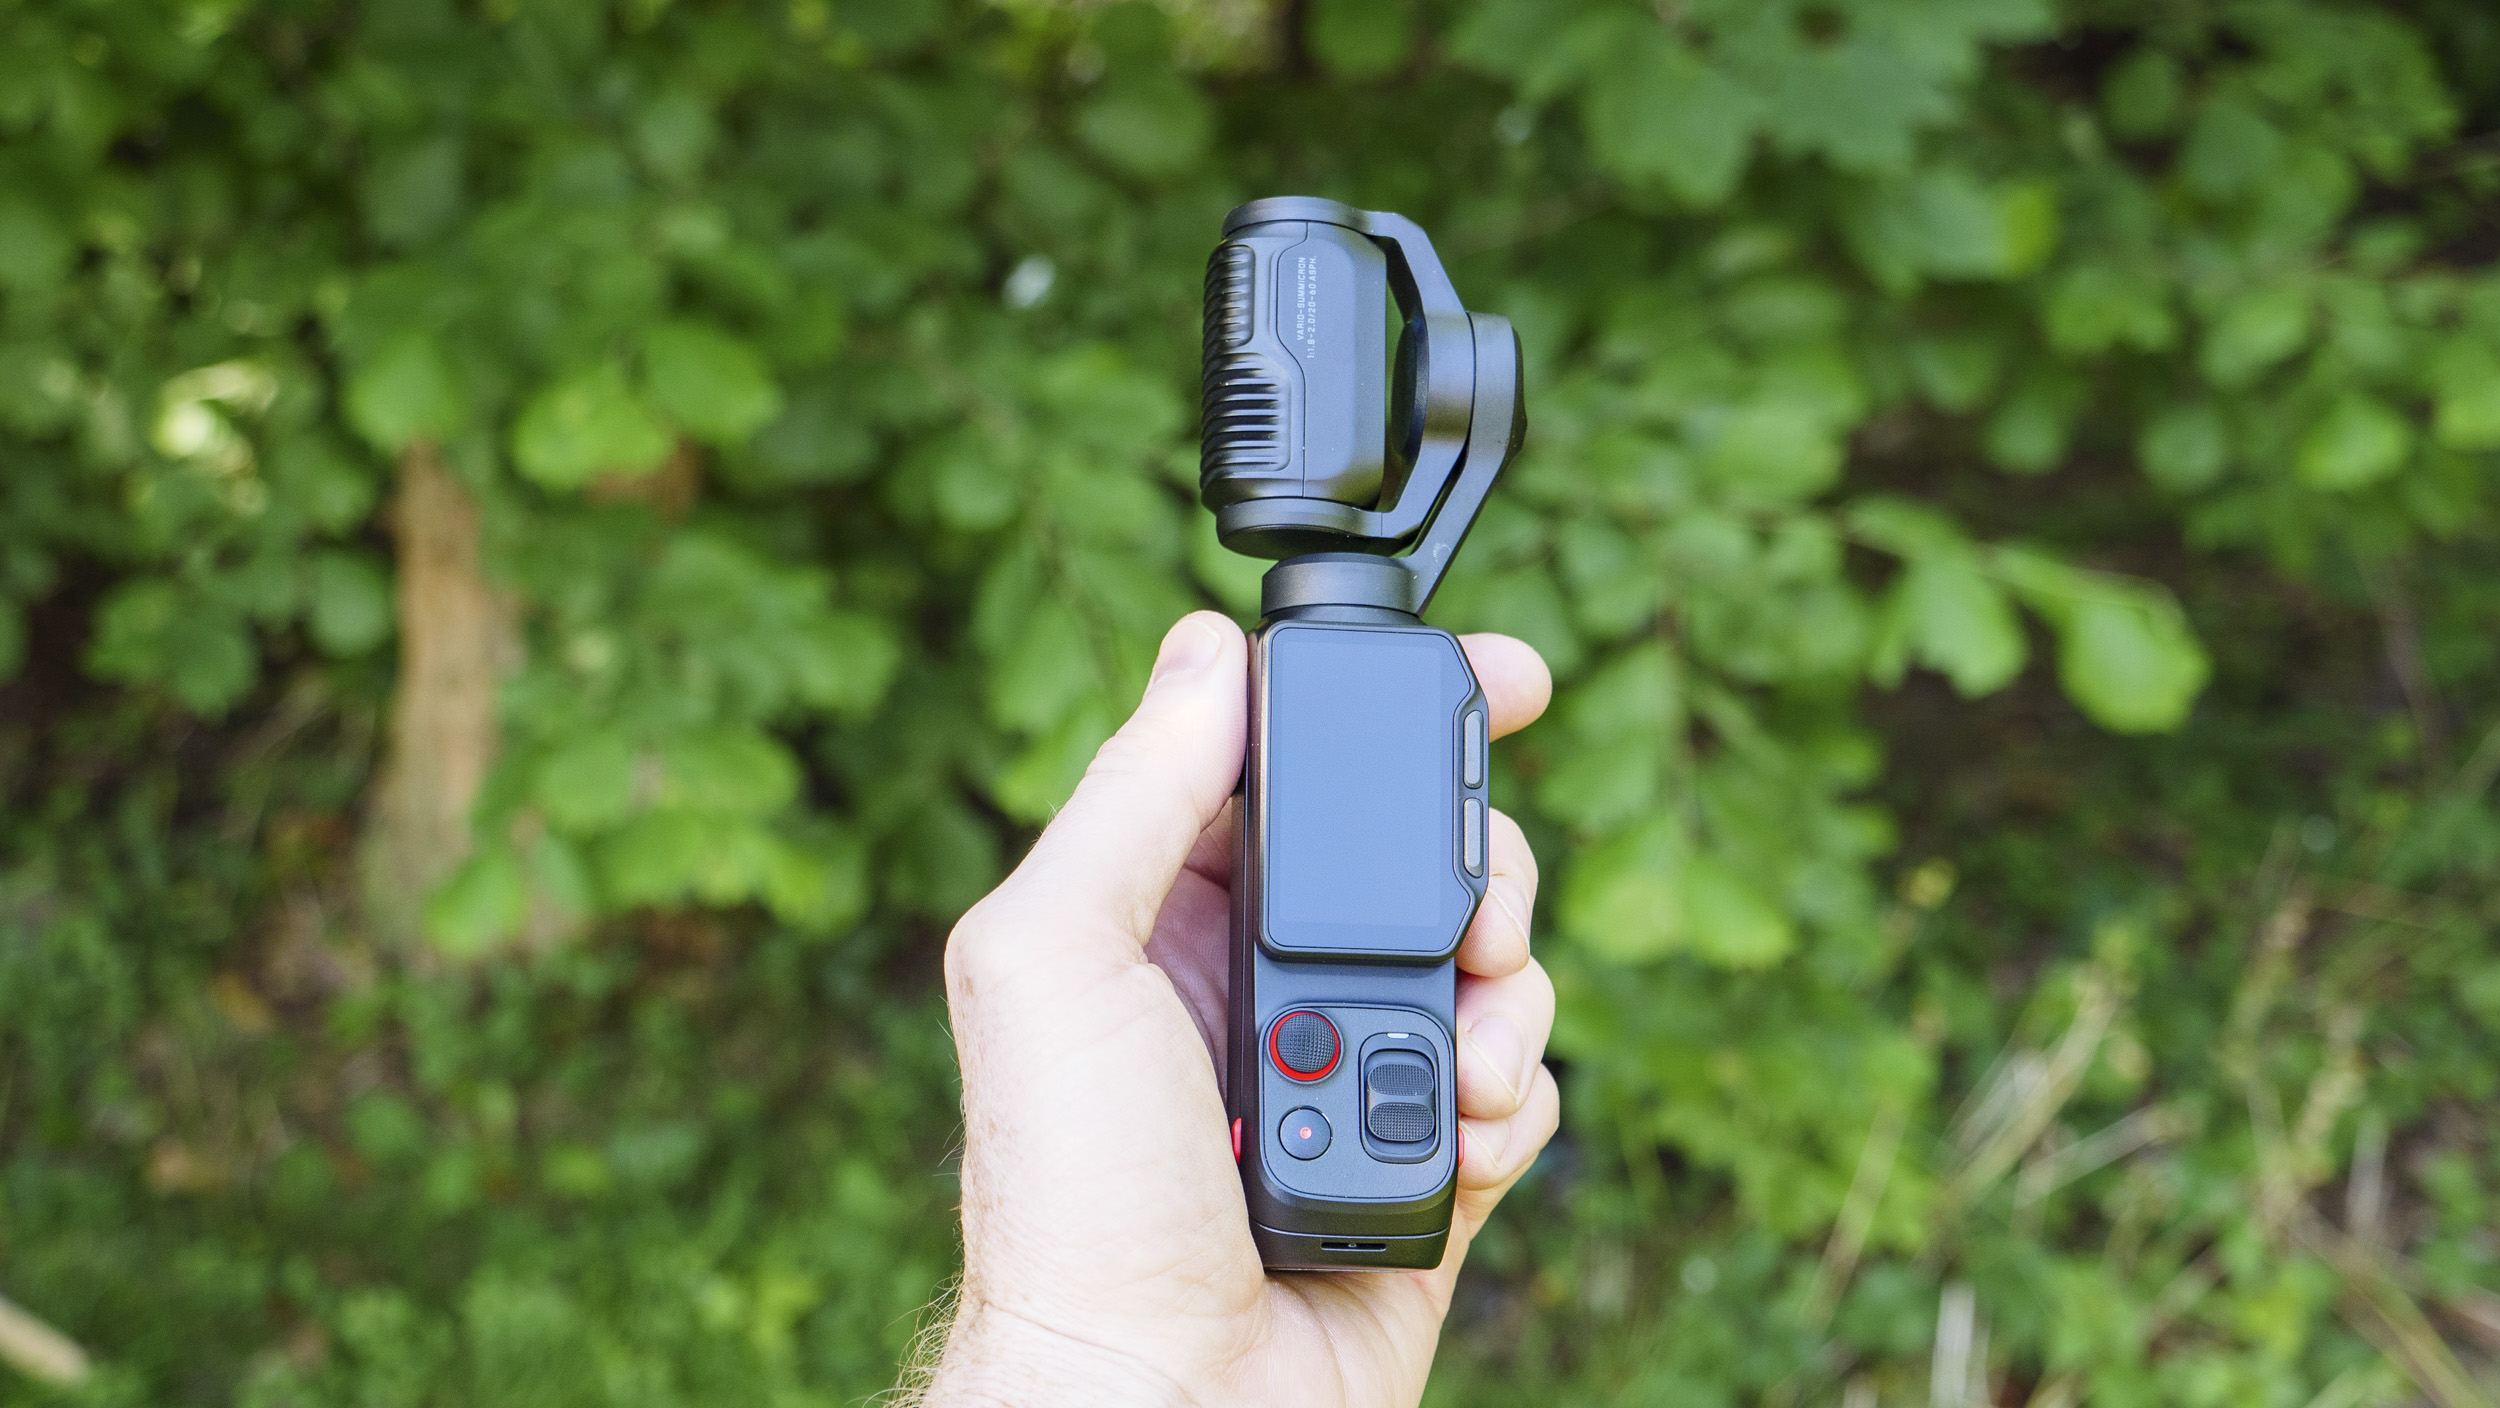
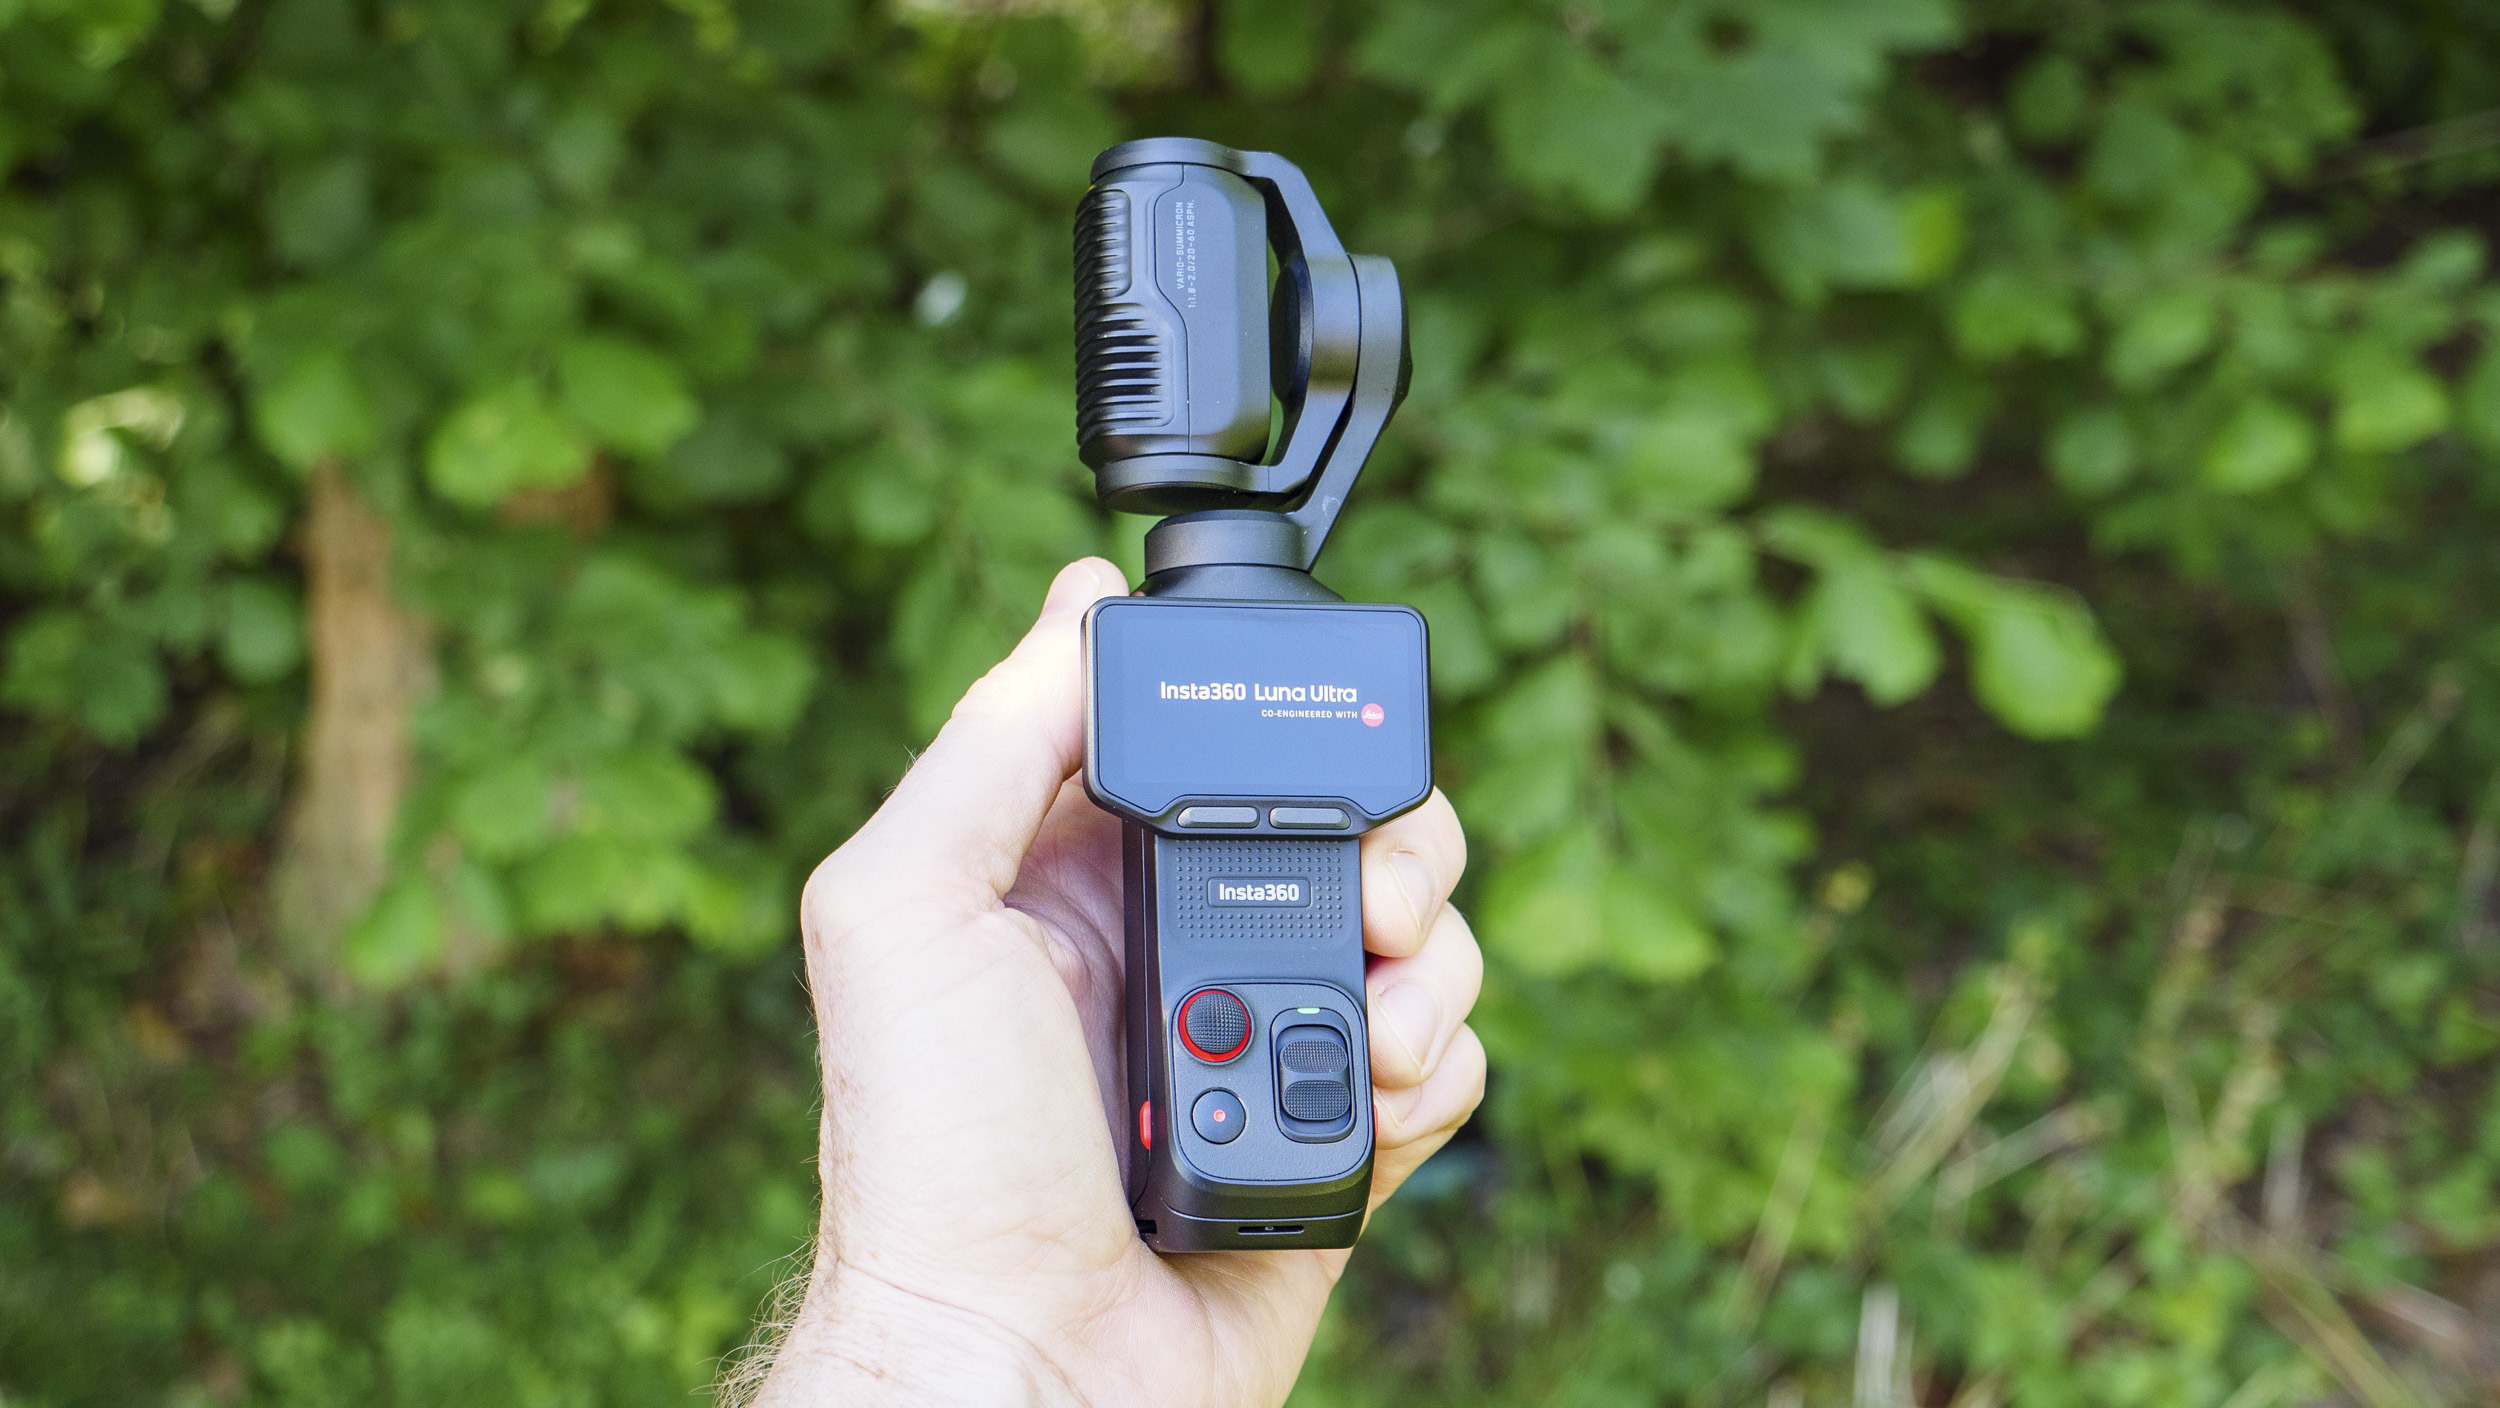
Insta360 Luna Ultra: design
First compact vlogging camera to land with dual lenses, ahead of the Pocket 4P
Similar design cues to the DJI Pocket series (but a little larger), with stick-like form factor and camera supported by a three-axis gimbal
Unique detachable controller which includes a two-inch OLED screen and built-in mic
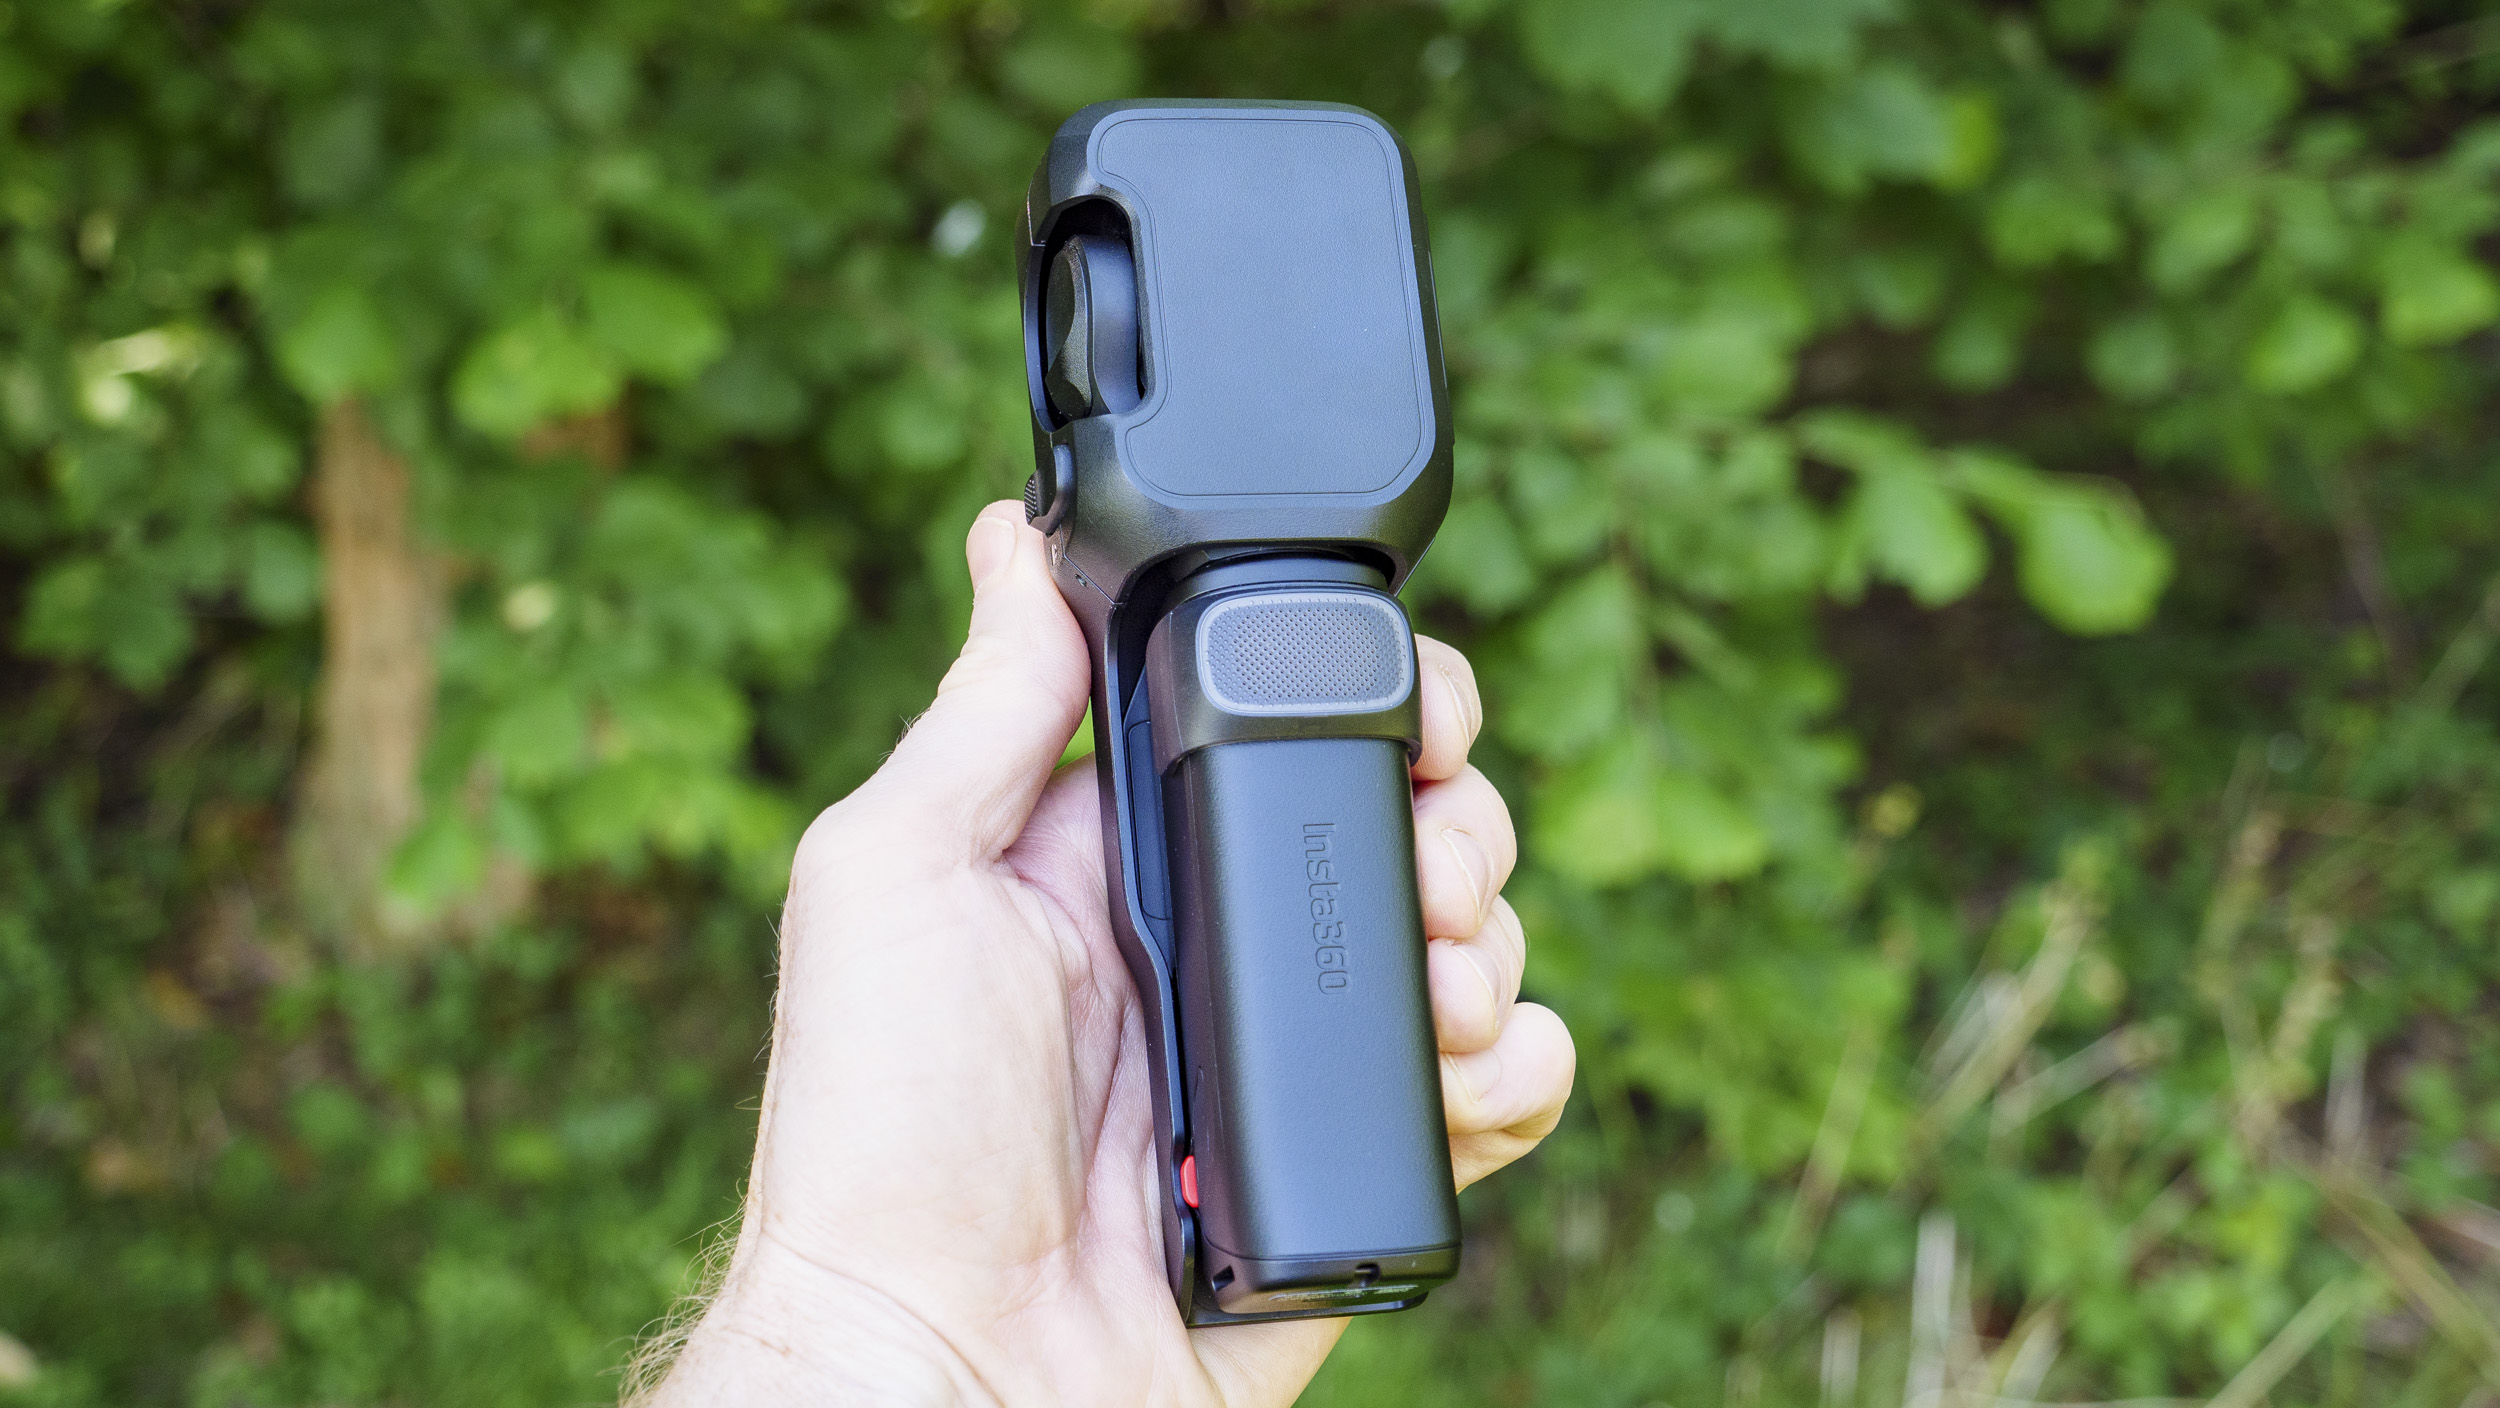
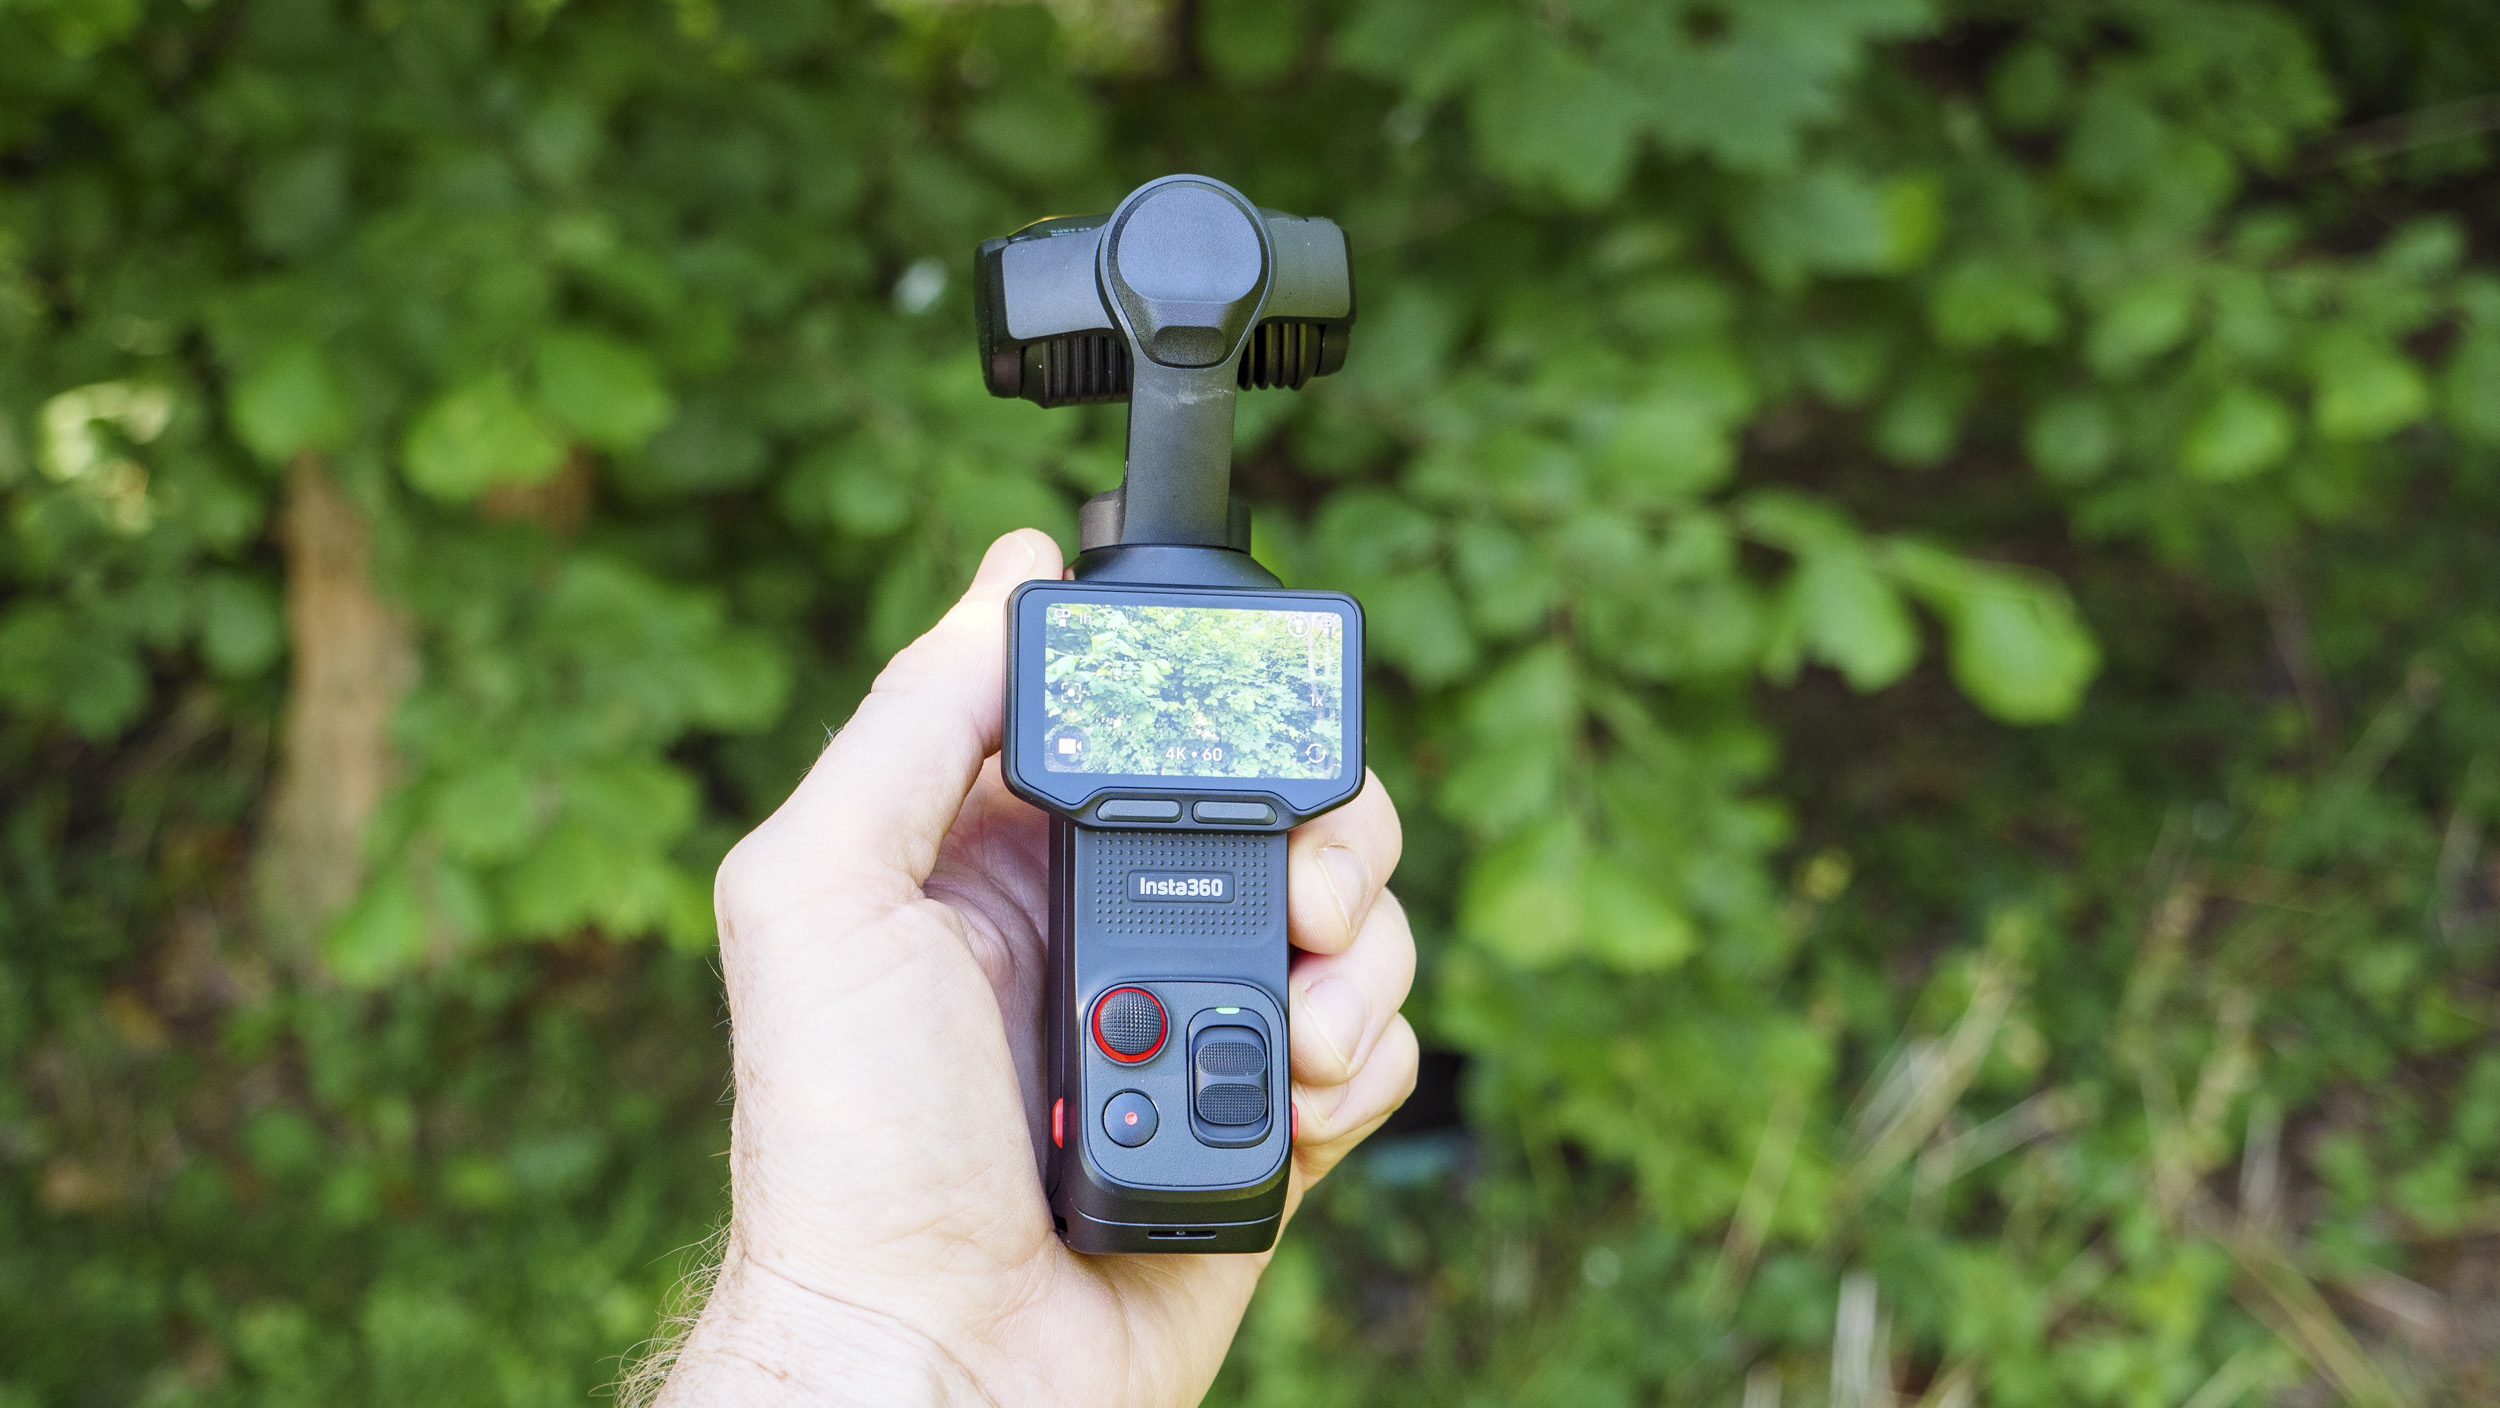
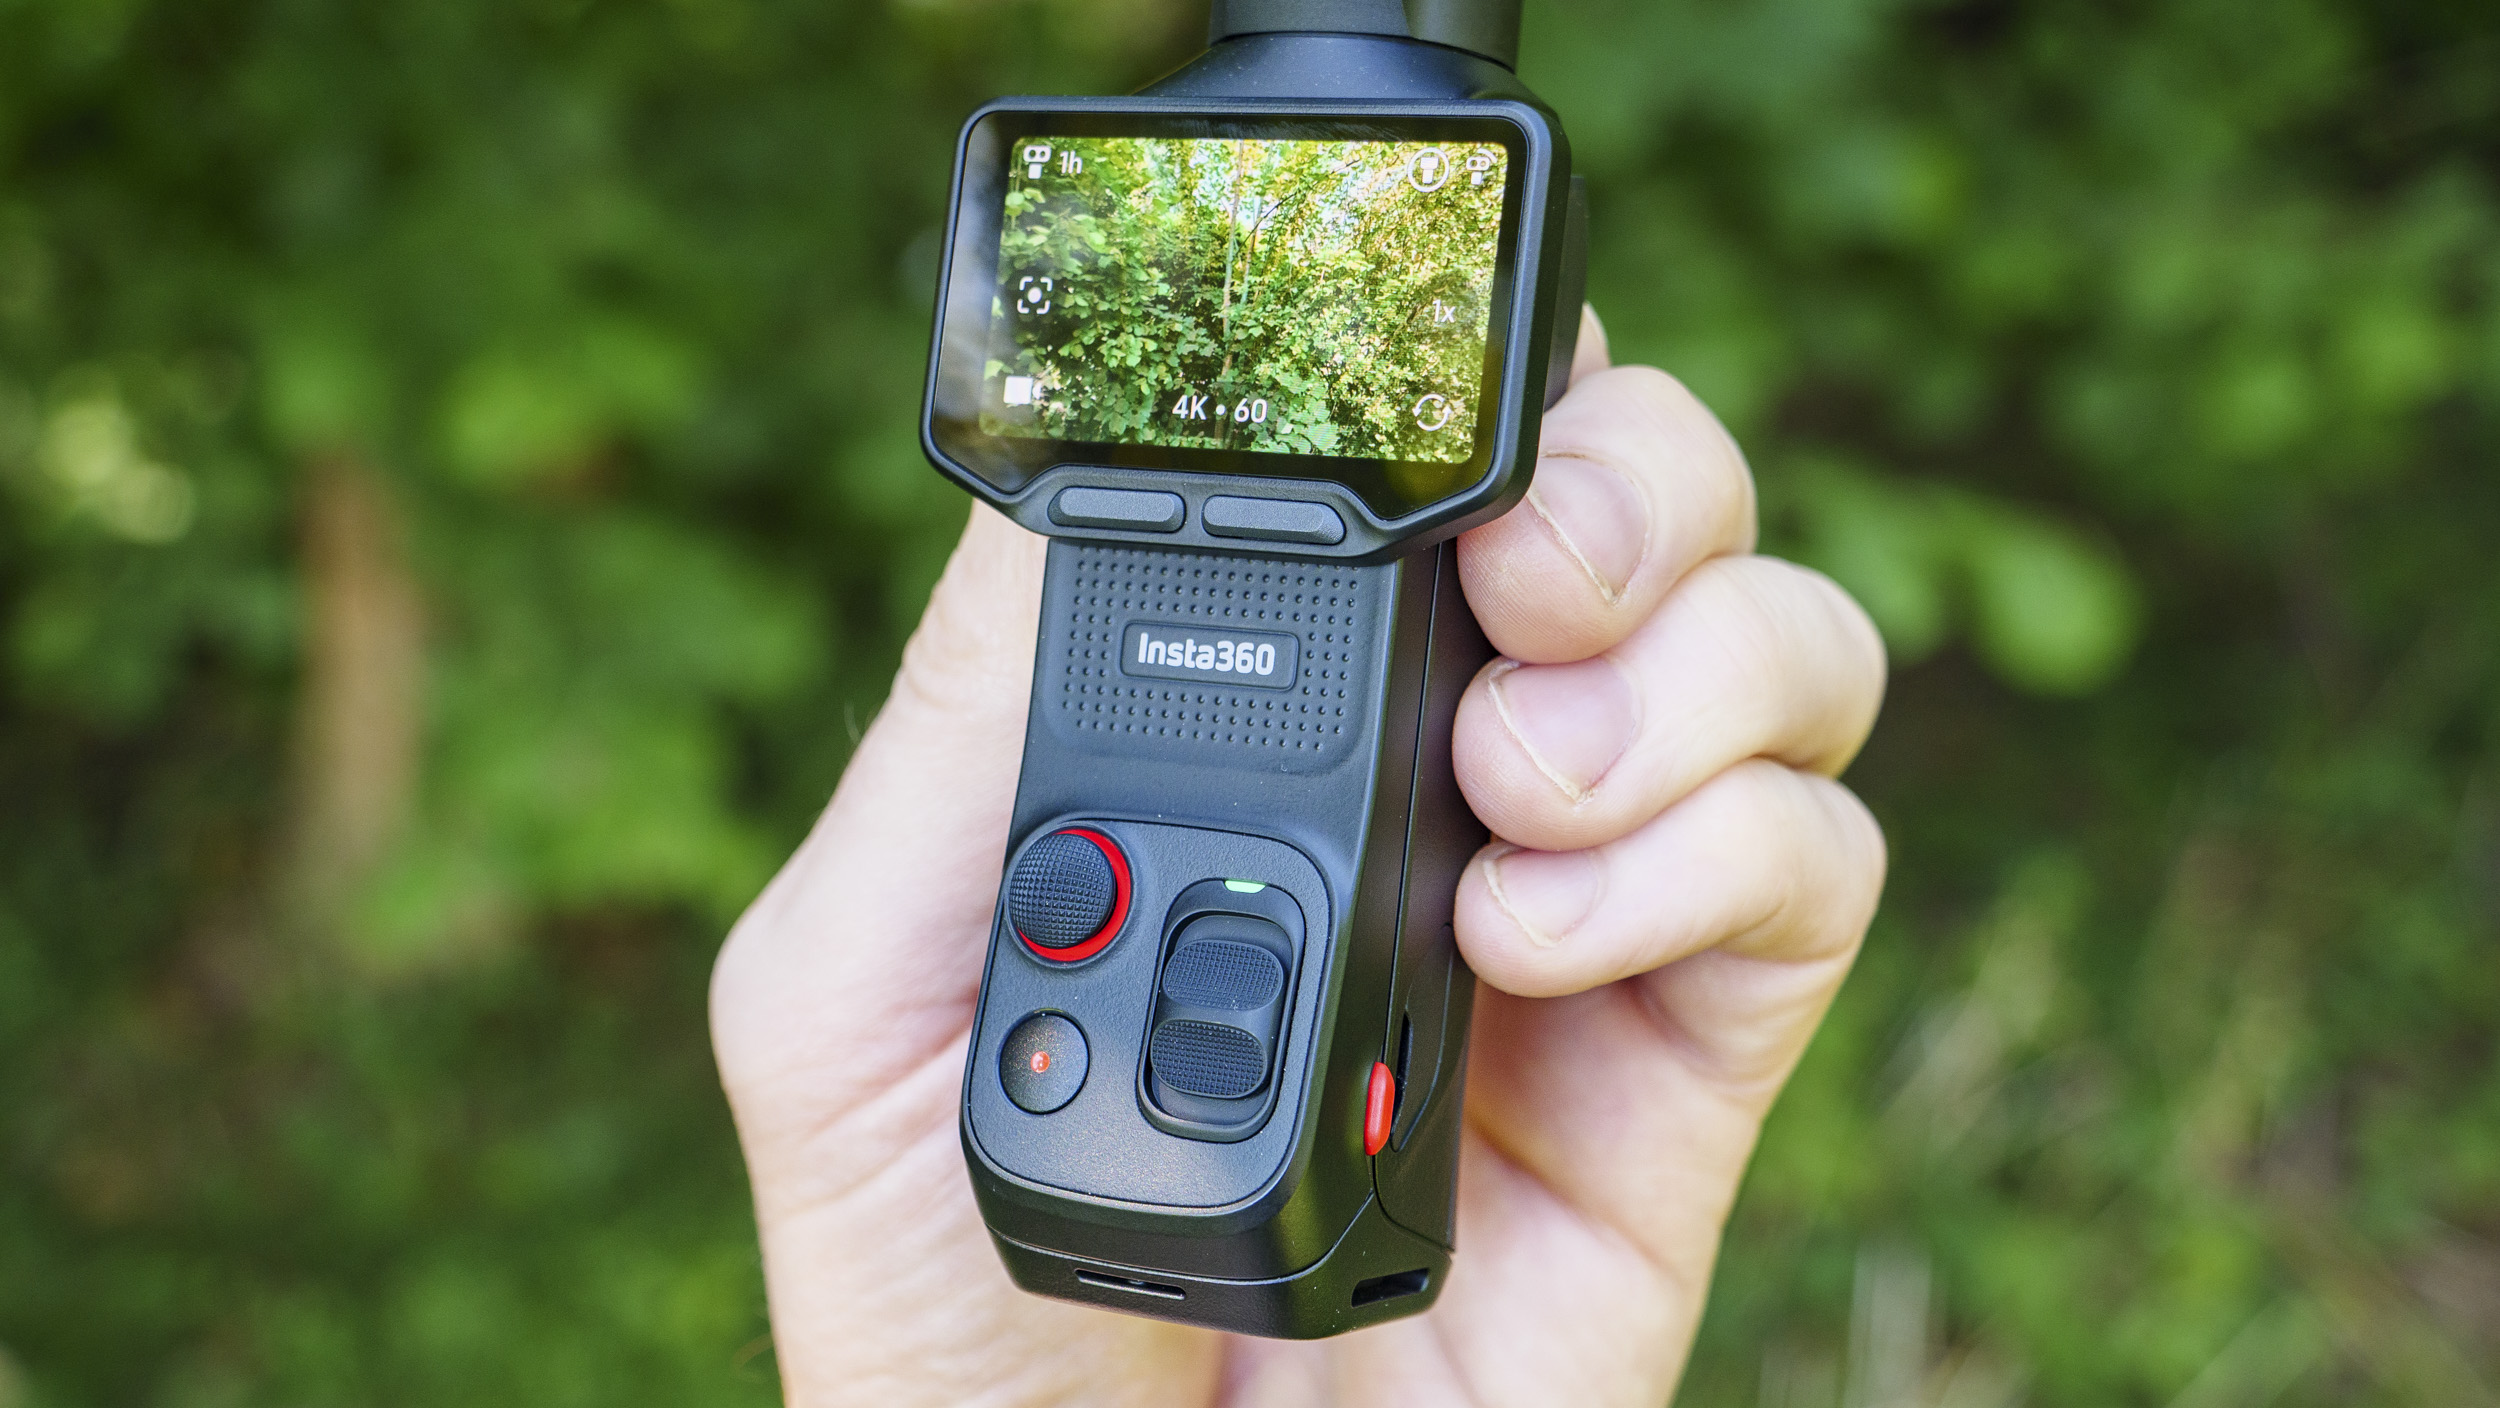
The chunky protective caseFuture / Tim ColemanThe wind guard attached to camera's mic pickupsFuture / Tim ColemanThe dual-lenses tuck away vertically when the camera is turned off.Future / Tim ColemanOne way to power up the camera is rotating the screen, but there's also a power buttonFuture / Tim ColemanHorizontal video is available in 8K, 4K and 1080pFuture / Tim ColemanThe profile of the camera — the lowest part is pronounced to accommodate the detachable moduleFuture / Tim ColemanOn the right side is a micro SD card slot, behind a fiddly rubber coverFuture / Tim Coleman
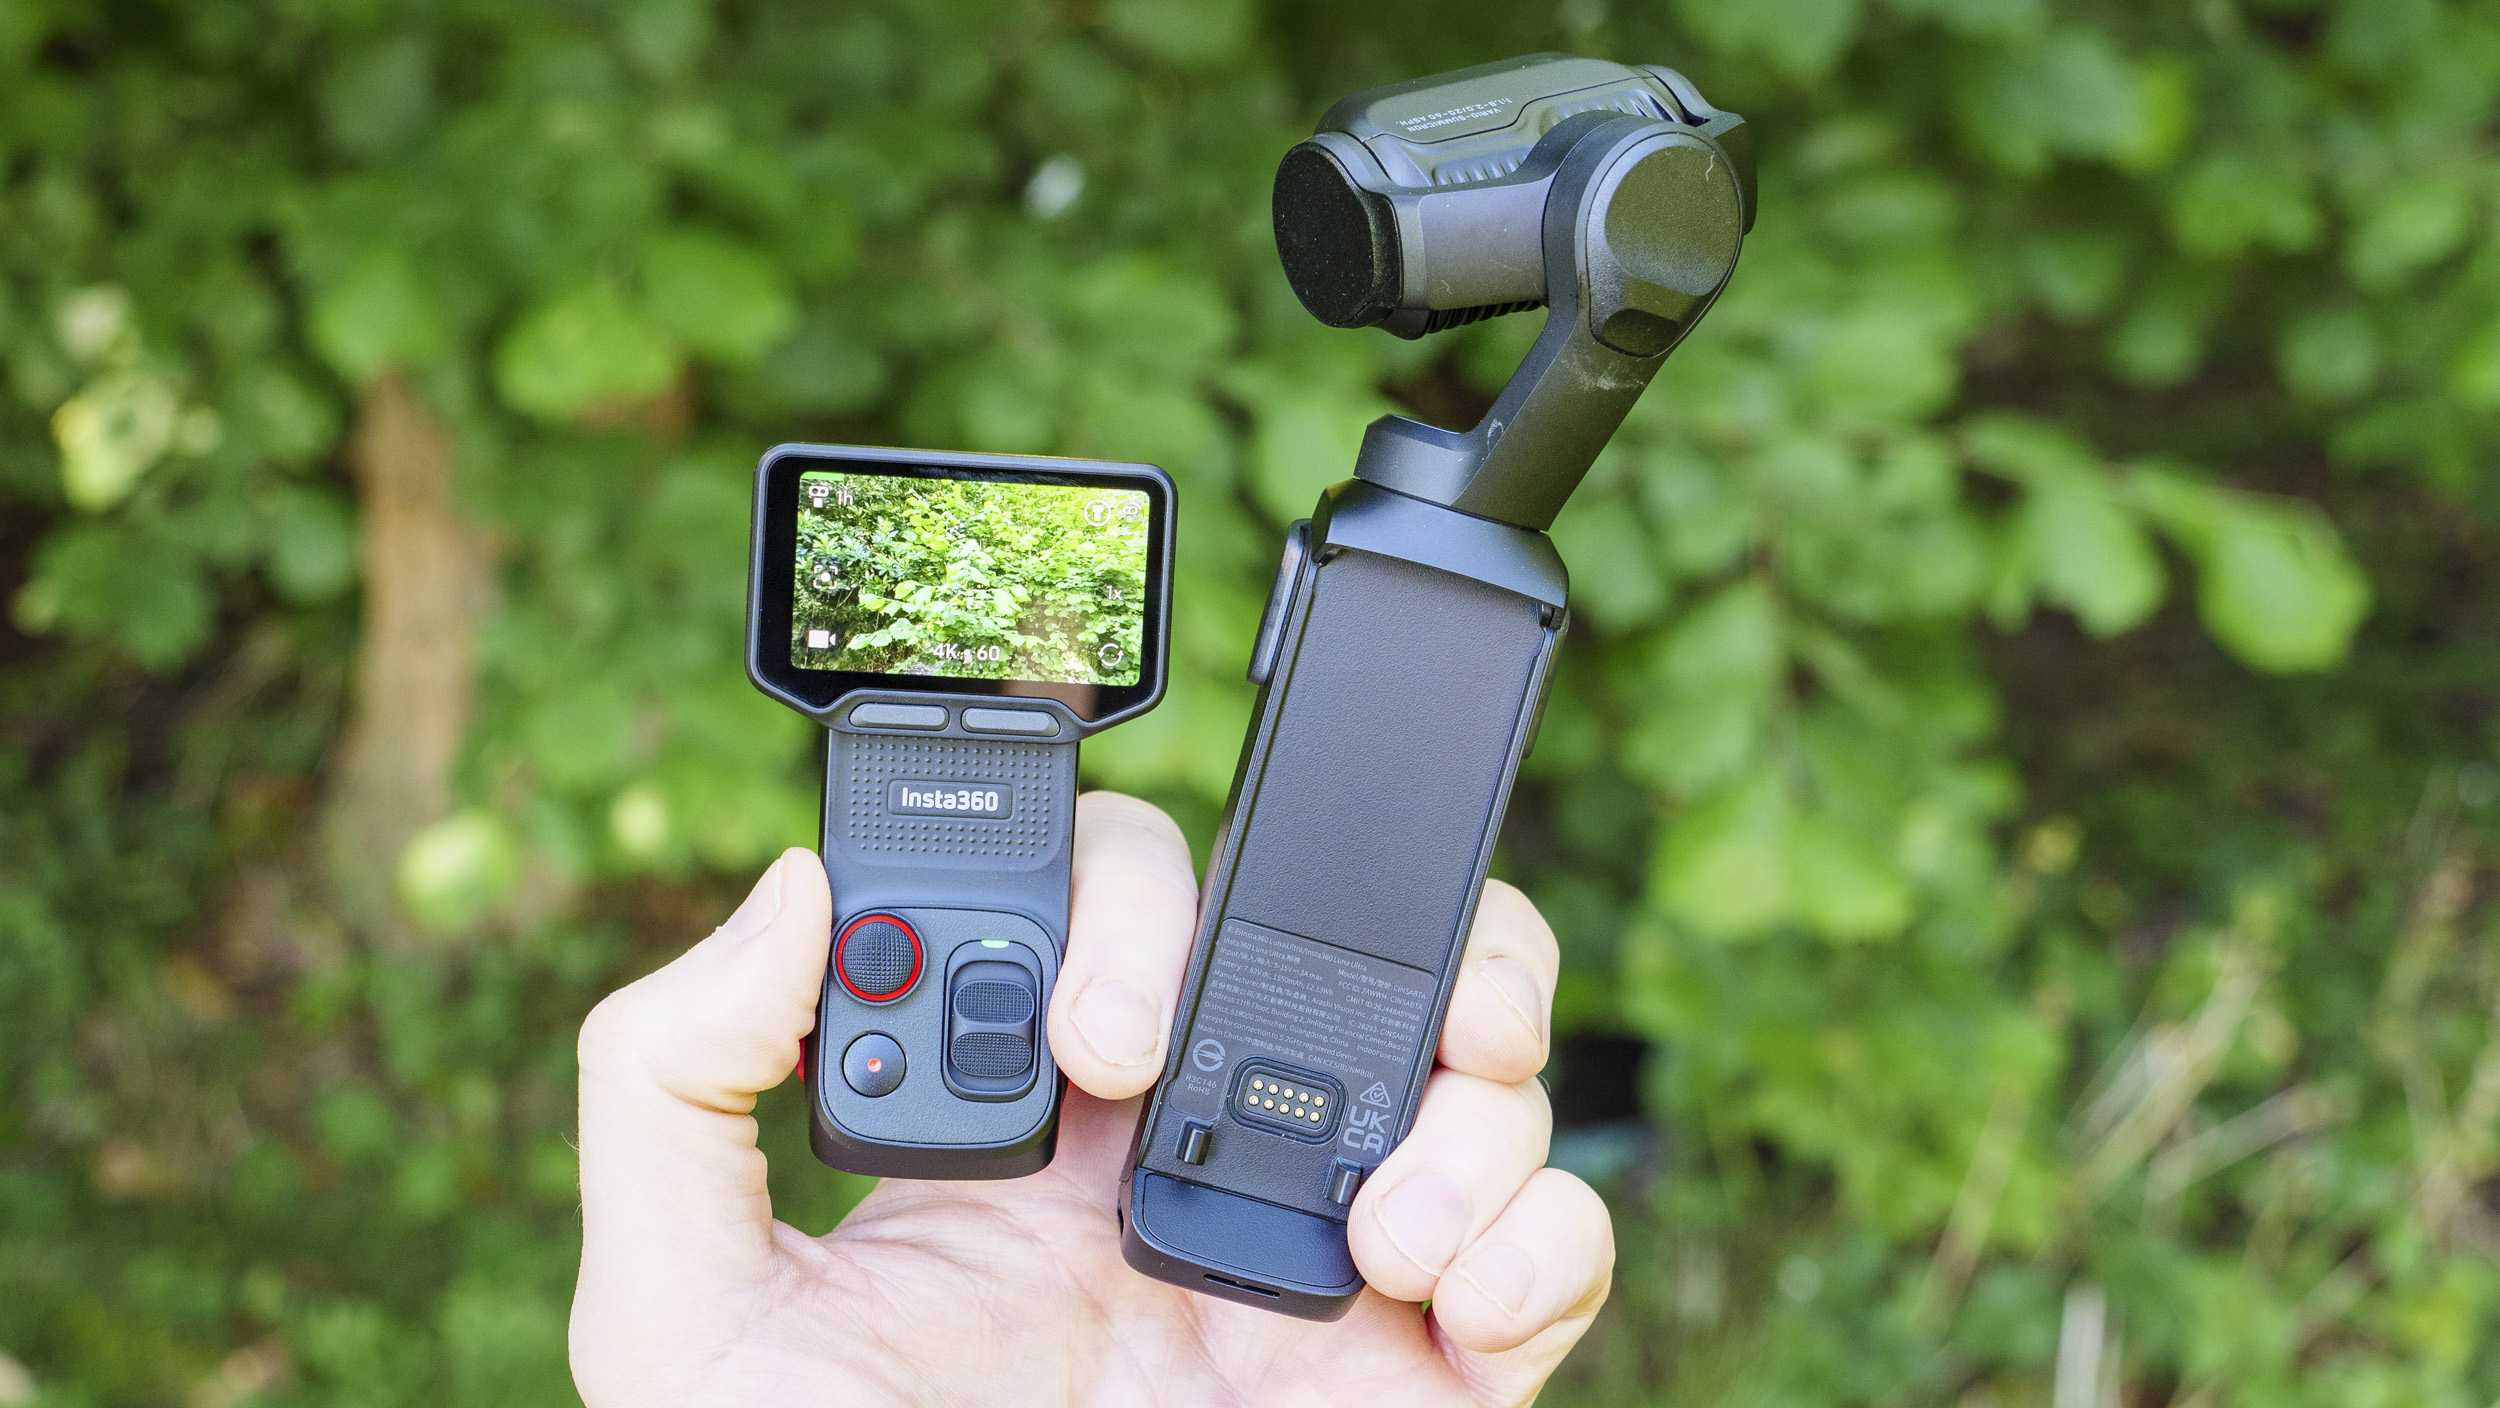
The Luna Ultra’s form factor is familiar — it's a bit like the compact, stick-like design of DJI’s Pocket series. DJI isn’t happy about it, by the way; it has filed a lawsuit accusing Insta360 of patent violations (which Insta360 has responded to with a countersuit).
However, there are some key design differences. Lunas are slightly larger than Pocket models. Not majorly so, but the difference is clear when you hold them side by side as I did (albeit the dual-lens Ultra alongside the single-lens Pocket 4).
In practice, I didn’t really feel that the Luna’s extra weight and size negatively affected its handling — it’s easy in the hand for on-the-go vlogging. If you want the absolute smallest option, however, DJI is your best best. Even the dual-lens Pocket 4P is smaller.
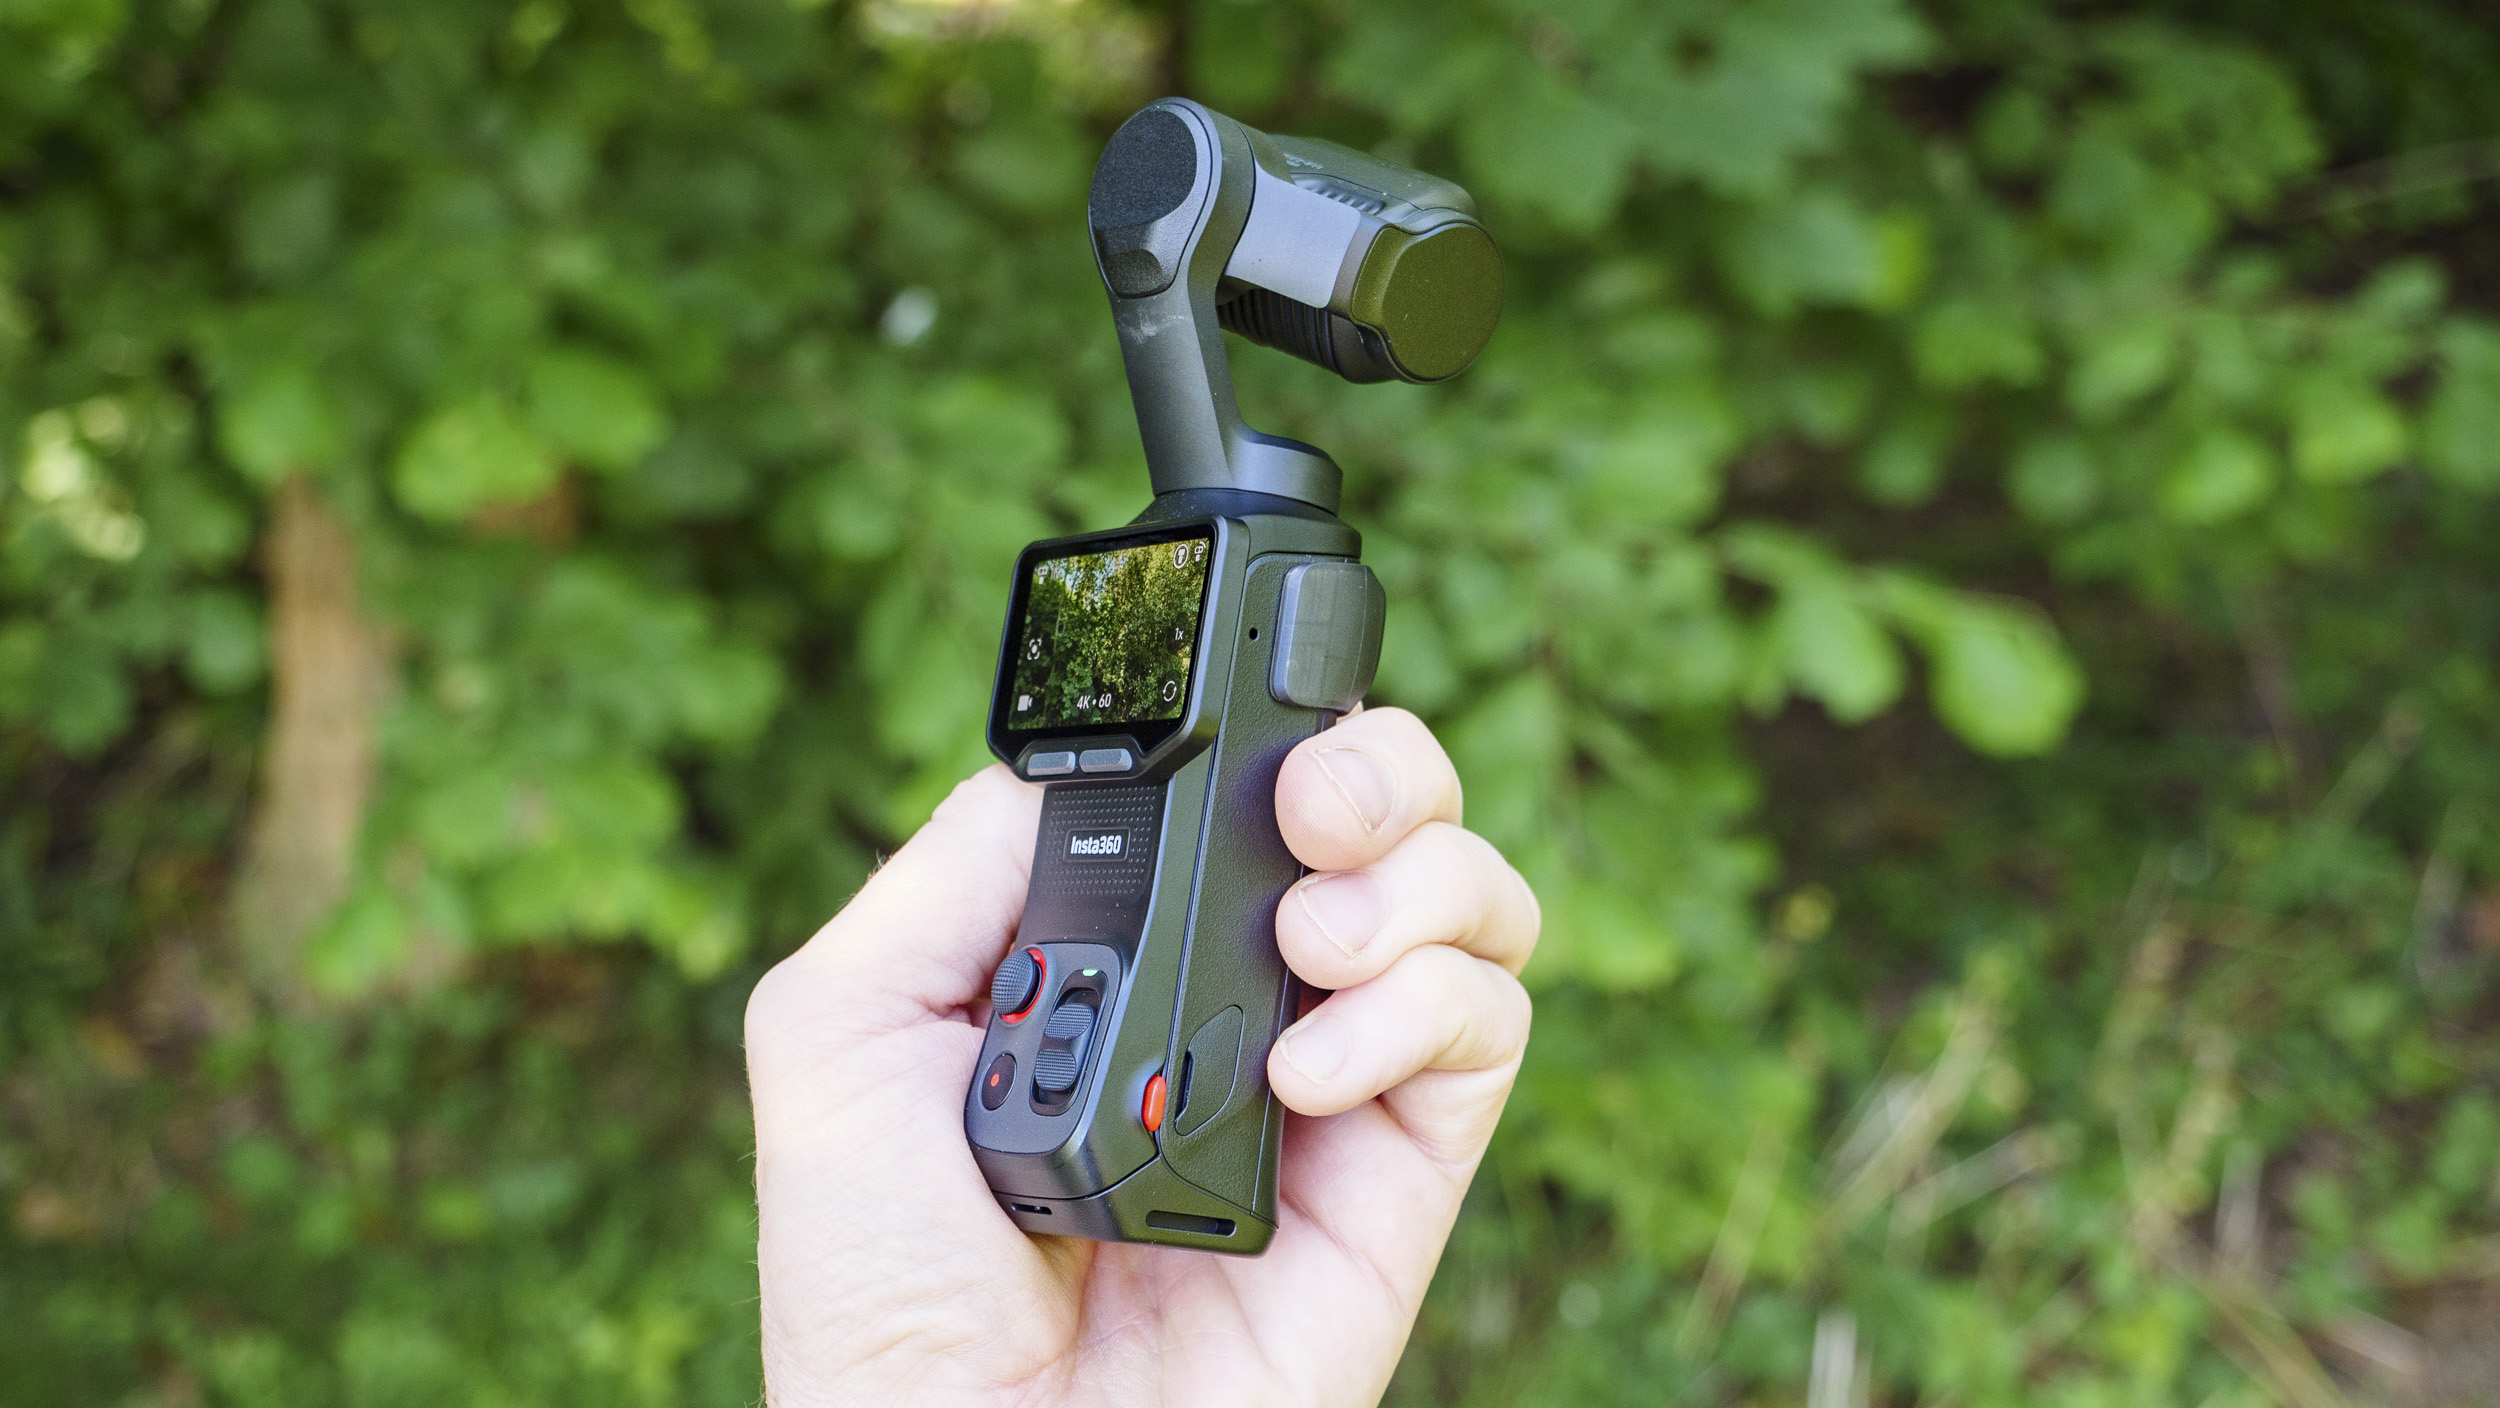
There’s a good reason why the Luna cameras are bigger, and that’s for a super clever and unique feature: a detachable remote control, which is a module that packs the camera's main controls and rotatable two-inch OLED screen. Simply squeeze the red buttons on either side of the Luna, and the module pulls away from the body.
Future / Tim ColemanFuture / Tim ColemanFuture / Tim ColemanFuture / Tim Coleman
The module has a 20m transmission range and operates exactly the same way as if it’s on the camera, with the touch display offering a remote view, and the main camera controls on hand, including gimbal, zoom and record. Transmission range is impacted by the surroundings — I found the feed froze inside 15 meters when other people passed in front of me in a busy urban space — but I could see it happening on the screen in my hand and could rectify the situation.
What’s really neat is that the module has a built-in microphone, so you can easily check your frame and present to the camera. It’s certainly better than using the on-camera mic, though a wireless mic such as Insta360’s own Mic Pro with its customizable E Ink display is an even better pick for audiophiles. The camera has direct Bluetooth support for this mic and Insta360’s Mic Air. The video below gives an idea of what the module is like to use remotely.
I really appreciated how much easier it was to frame my shots with the controller module in hand. There’s also smart subject tracking and autofocus (more on this in the performance section), meaning the camera can track you as you move around, within the gimbal’s range, keeping you or your subject centered in the frame. Controlling the Luna using the module and tracking is like having your own cameraperson filming you, provided you can find a secure surface to rest the camera on or a support to fix it to.
On that note, the Luna Ultra can stand freely on flat surfaces, while the battery grip, which extends battery life plus the physical height of the camera, featurestiny flip-out tripod feet for extra stability.
The battery grip is larger than the regular tripod grip and extends the battery life of the camera, which was already impressive being rated at up to four hours of 1080p filming. Not bad for a 1,550mAh unit that can be recharged to 80% in just 23 minutes.
At first I had a few niggles with the handling of the Luna Ultra from how it comes straight from the box. Beyond finding it physically clunkier than the Pocket 4, I needed to change various settings to taste, such as its behavior when rotating the two-inch touchscreen.
Overall, however, I can't find much fault with the Luna Ultra's design, which is seriously impressive for a first generation product.
Design score: 4.5/5
Insta360 Luna Ultra: Performance
Triple chipset, with 4nm and AI chips ensures smooth operation
Smart subject tracking and autofocus, but it's not perfect
Can get a little warm when using the most powerful features
The Luna Ultra is equipped with a triple chipset, comprising powerful 4nm and AI chips. As such, I never really experienced any performance issues, even shooting a lot of 8K video (though never for more than 10 minutes at a time).
The camera does get a little warm when using power-hungry features such as 8K video, and I did see a lag when switching from the 12x zoom back to 1x using the stepped zoom control on the touchscreen. However, those were my only issues.
In addition to regular 8K video, the Luna Ultra has a range of shooting modes, including; Slow Motion up to 240fps (in Full HD), Timelapse, TimeShift and Barrel Roll. I've included some slow motion clips in a sample video below.
Both Luna cameras accept a micro SD card up to 1TB, and include 47GB internal storage — less than DJI’s Osmo Pocket 4 / 4P, which have more than double the capacity. I shot plenty of video clips and photos directly onto the internal memory, and still had plenty of space left over — the maximum 120Mbps bitrates of video files are fairly low and don't take up too much memory.
And there’s plenty more for audiophiles, namely a decent wind guard for the camera’s internal four-mic array, plus 32-bit float audio. This pro-level setting avoids clipping, and is ideal for unpredictable and noisy environments, but for simpler audio edits, the 24-bit setting is probably your best bet.
The quality of the detachable module's built-in mic impressed me, though for the clearest pickup it's pretty fussy about how close you hold it and the angle it's pointed in.
Subject tracking is impressively sticky, though I did find that it switches to a new subject a little more easily than the DJI Pocket 4. In one situation, I was walking with the camera tracking me when other people came between me and the camera and tracking stopped.
In another scenario as I held a product up to the camera for it to focus on, the camera focused back on my face in the background all too keenly when I came back into view. In such a scenario, I think DJI's tracking performs better.
Performance score: 4.5/5
Insta360 Luna Ultra: Image and video quality
Dual 20mm f/1.8 (1-inch sensor) and 60mm f/2.0 (1/1.3-inch sensor) cameras are effectively like having a decent zoom
8K 30p and 4K 120p video with color grading-friendly I-Log profile — a first for Insta360
9MP photos are decent enough, especially in RAW format, and can be upped to 37MP in UltraPhoto mode
(Image credit: Future / Tim Coleman)
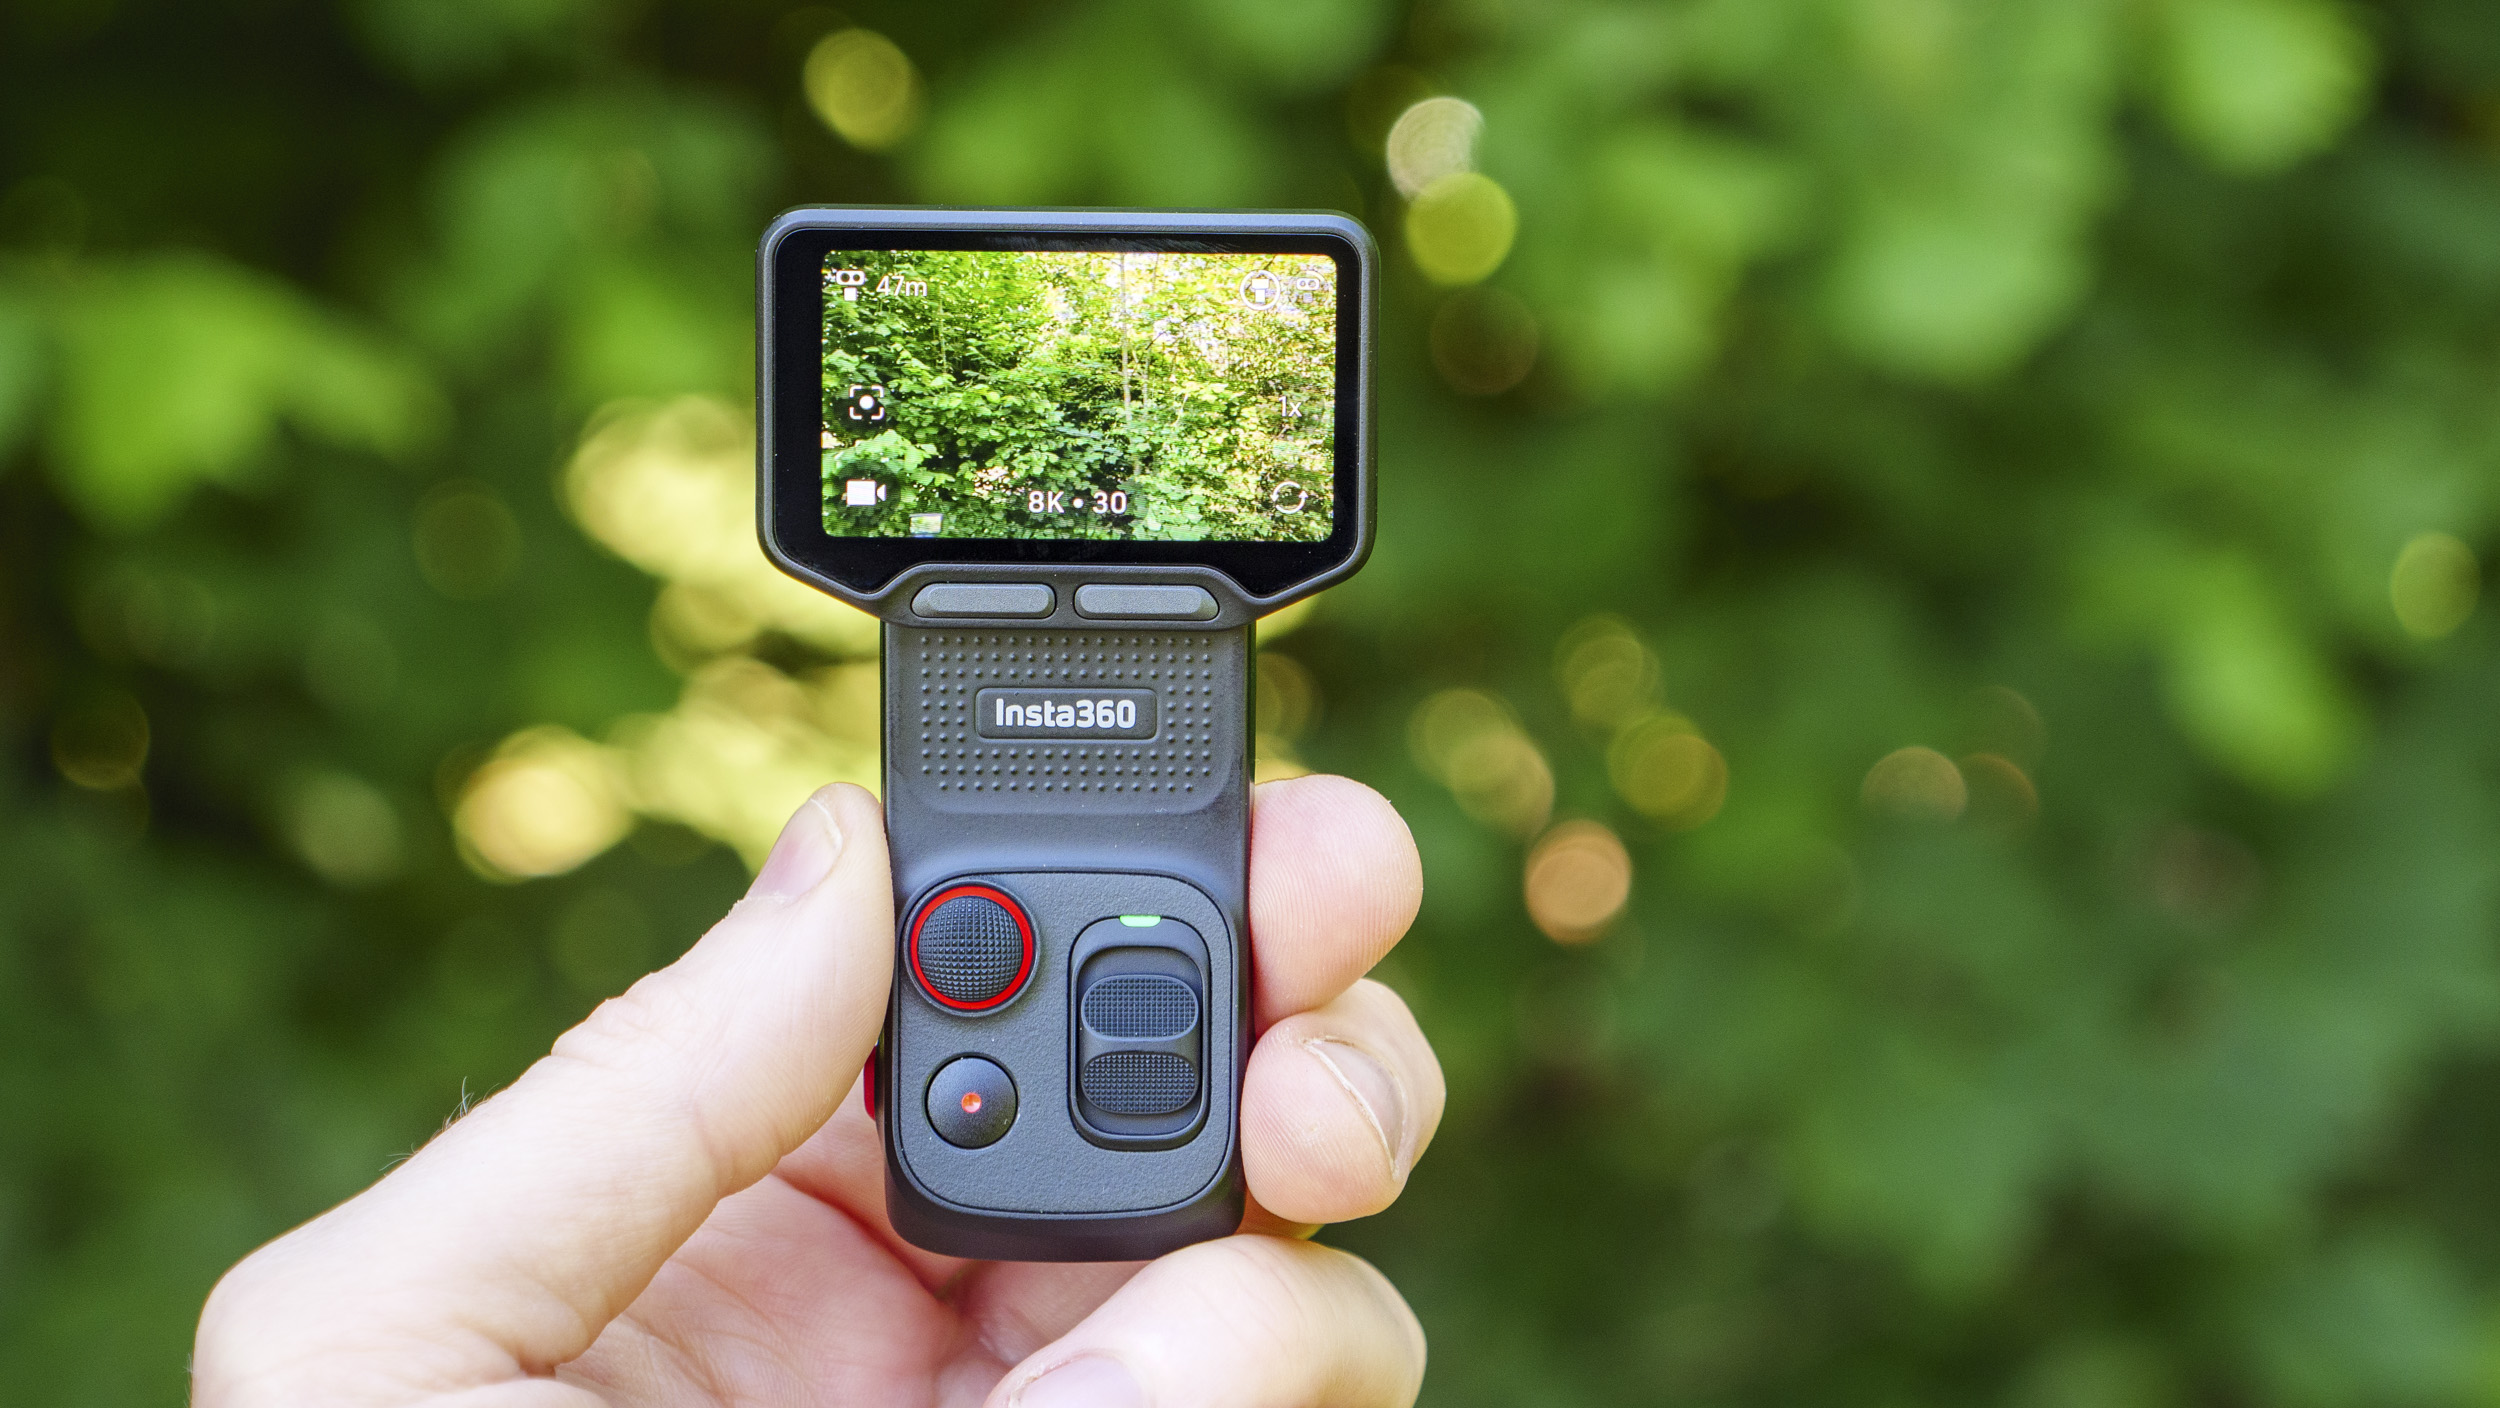
The Luna Ultra ups the ante in this camera category with 8K video — double the resolution of the Osmo Pocket 4, which shoots in 4K. It’ll shoot 8K up to 30fps, complete with Dolby Vision (aka HDR) and I-Log color profile.
This is the first Insta360 camera with Log, a flat color profile that pros like to use to maximize the color grading potential and for the most dynamic range possible from their camera, which in this case is up to 14 stops.
DJI has billed the Pocket 4P as having 17 stops dynamic range with its new D-Log2 profile — I look forward to comparing the footage of both cameras to see which is better once I have my hands on the Pocket. 4P.
Insta360 thinks its night mode is superior to DJI, with its PureVideo mode boosting dynamic range in 4K 60p videos. That’s another comparison test I’m looking forward to conducting. From the shots I've taken at night in this mode, detail looks impressively sharp, though of course no match for the quality of daytime footage.
Insta360’s Leica partnership goes beyond the Luna’s Leica-branded lenses and into various Leica color profiles. If you like the simplicity of attractive color profiles with no need for color correction, then the Luna has some great alternatives to Log.
I was impressed with the 3x telephoto camera — provided the subject isn't too far away, it's possible to throw depth of field for punchy portraits. I'm talking upper body shots with notable shallow depth of field.
The zoom of that lens can be further extended with a 6x 'lossless' zoom, a term that suggests you shouldn't notice a drop in image quality — I certainly didn't. I can't say the same for the 12x digital zoom setting, which looks a little more pixelated on close inspection. Still, that 12x zoom is a handy addition should you really need to zoom closer.
Honestly, having enjoyed the variety of two lenses in such a small camera, and how impressive the quality of the telephoto camera is (the sensor is bigger than the main sensor in most smartphones), I know I'll struggle if I have to go back to a single-lens compact vlogging camera.
Video is, of course, the primary use for the Luna Ultra, but it shoots decent-quality 9MP photos too, in JPEG and RAW format, albeit with just eight-bit color depth. I've included a couple of scenarios below, taking JPEG and RAW (DNG format) photos simultaneously at night and in daylight, with the 1x and 3x lenses.
I haven't edited the RAWs so you can see the kind of processing that takes place for JPEGs. All the photos are 9MP, but there is also an UltraPhoto mode which quadruples resolution to 37MP.
Insta360 Luna Ultra photo gallery
An unedited RAW DNG file. Note the vignetting (dark corners) and muted colorsFuture / Tim ColemanThe standard color profile, JPEG format. This gives an idea of the kind of camera corrections that take place during JPEG processingFuture / Tim ColemanAnother example. Interestingly, the RAW files use a lower ISO value than JPEGs when shooting. in RAW+JPEG simultaneously. Future / Tim ColemanThe previous RAW image was ISO 180, this JPEG is ISO 360. All of the four dragon photo were taken with the 1x ultra-wide camera.Future / Tim ColemanAgain, a RAW file. There's more detail in this photo than the corresponding JPEG, and I haven't even played with exposure corrections or shadow / highlight recoveryFuture / Tim ColemanI tried the 'Fresh' color profile here, which is bright and airy. The intensity for any color profile can be adjustedFuture / Tim ColemanThe RAW DNG format again and, like the previous portraits, taken with the 3x telephoto camera.Future / Tim ColemanThe corresponding JPEG to the previous imageFuture / Tim Coleman
Image and video quality score: 5/5
Insta360 Luna Ultra: testing scorecard
Insta360 Luna Ultra
Attributes
Notes
Rating
Price
Considering you get two cameras in one, a detachable touchscreen module and high-end video features, the Luna Ultra is decent value, but it does cost a lot more than single-lens alternatives and DJI almost always costs less
4/5
Design
Slightly clunkier than the rival Osmo Pocket 4 / 4P, but the detachable control is well implemented and seriously useful
4.5/5
Performance
Triple chipset ably supports high-end features, subject tracking works well and gimbal performance is decent
4.5/5
Image and video quality
Twin camera versatility for different shots, sharp 8K footage, I Log and Leica color profiles. You'll struggle to find better image quality in this camera format, though I haven't directly compared footage with the Osmo Pocket 4P yet
5/5
Should I buy the Insta360 Luna Ultra?
Buy it if...
You want a versatile compact vlogging camera Dual lenses are a revelation for this camera format. You're no longer restricted to ultra-wide shots, but dynamic portraiture and b-roll details are entirely possible.
You're a solo vlogger The detachable remote with two-inch touchscreen, camera controls and built-in mic aid solo vlogging, in terms of the range of shots you can easily get, especially with subject tracking on board.
Don't buy it if...
You want the smallest possible vlogging camera The Luna Ultra is clunkier than the DJI Osmo Pocket 4 / 4P. Not hugely so, but DJI's cameras are even more pocketable.
You don't need two lenses For me, having used the Luna Ultra, it's now hard to go back to a single-lens compact vlogging camera, but if you don't need that second telephoto camera, the single-lens Pocket 4 / Luna Pro alternatives cost much less.
Insta360 Luna Ultra: also consider
DJI Osmo Pocket 4 / 4P
At the time of writing, I've only reviewed the single-lens DJI Osmo Pocket 4 which isn't a fair comparison especially with the dual-lens Pocket 4P on the horizon and the direct rival to the Luna Ultra. However, if you'd like to know how the cameras compare, check out my Luna Ultra vs Pocket 4 article.
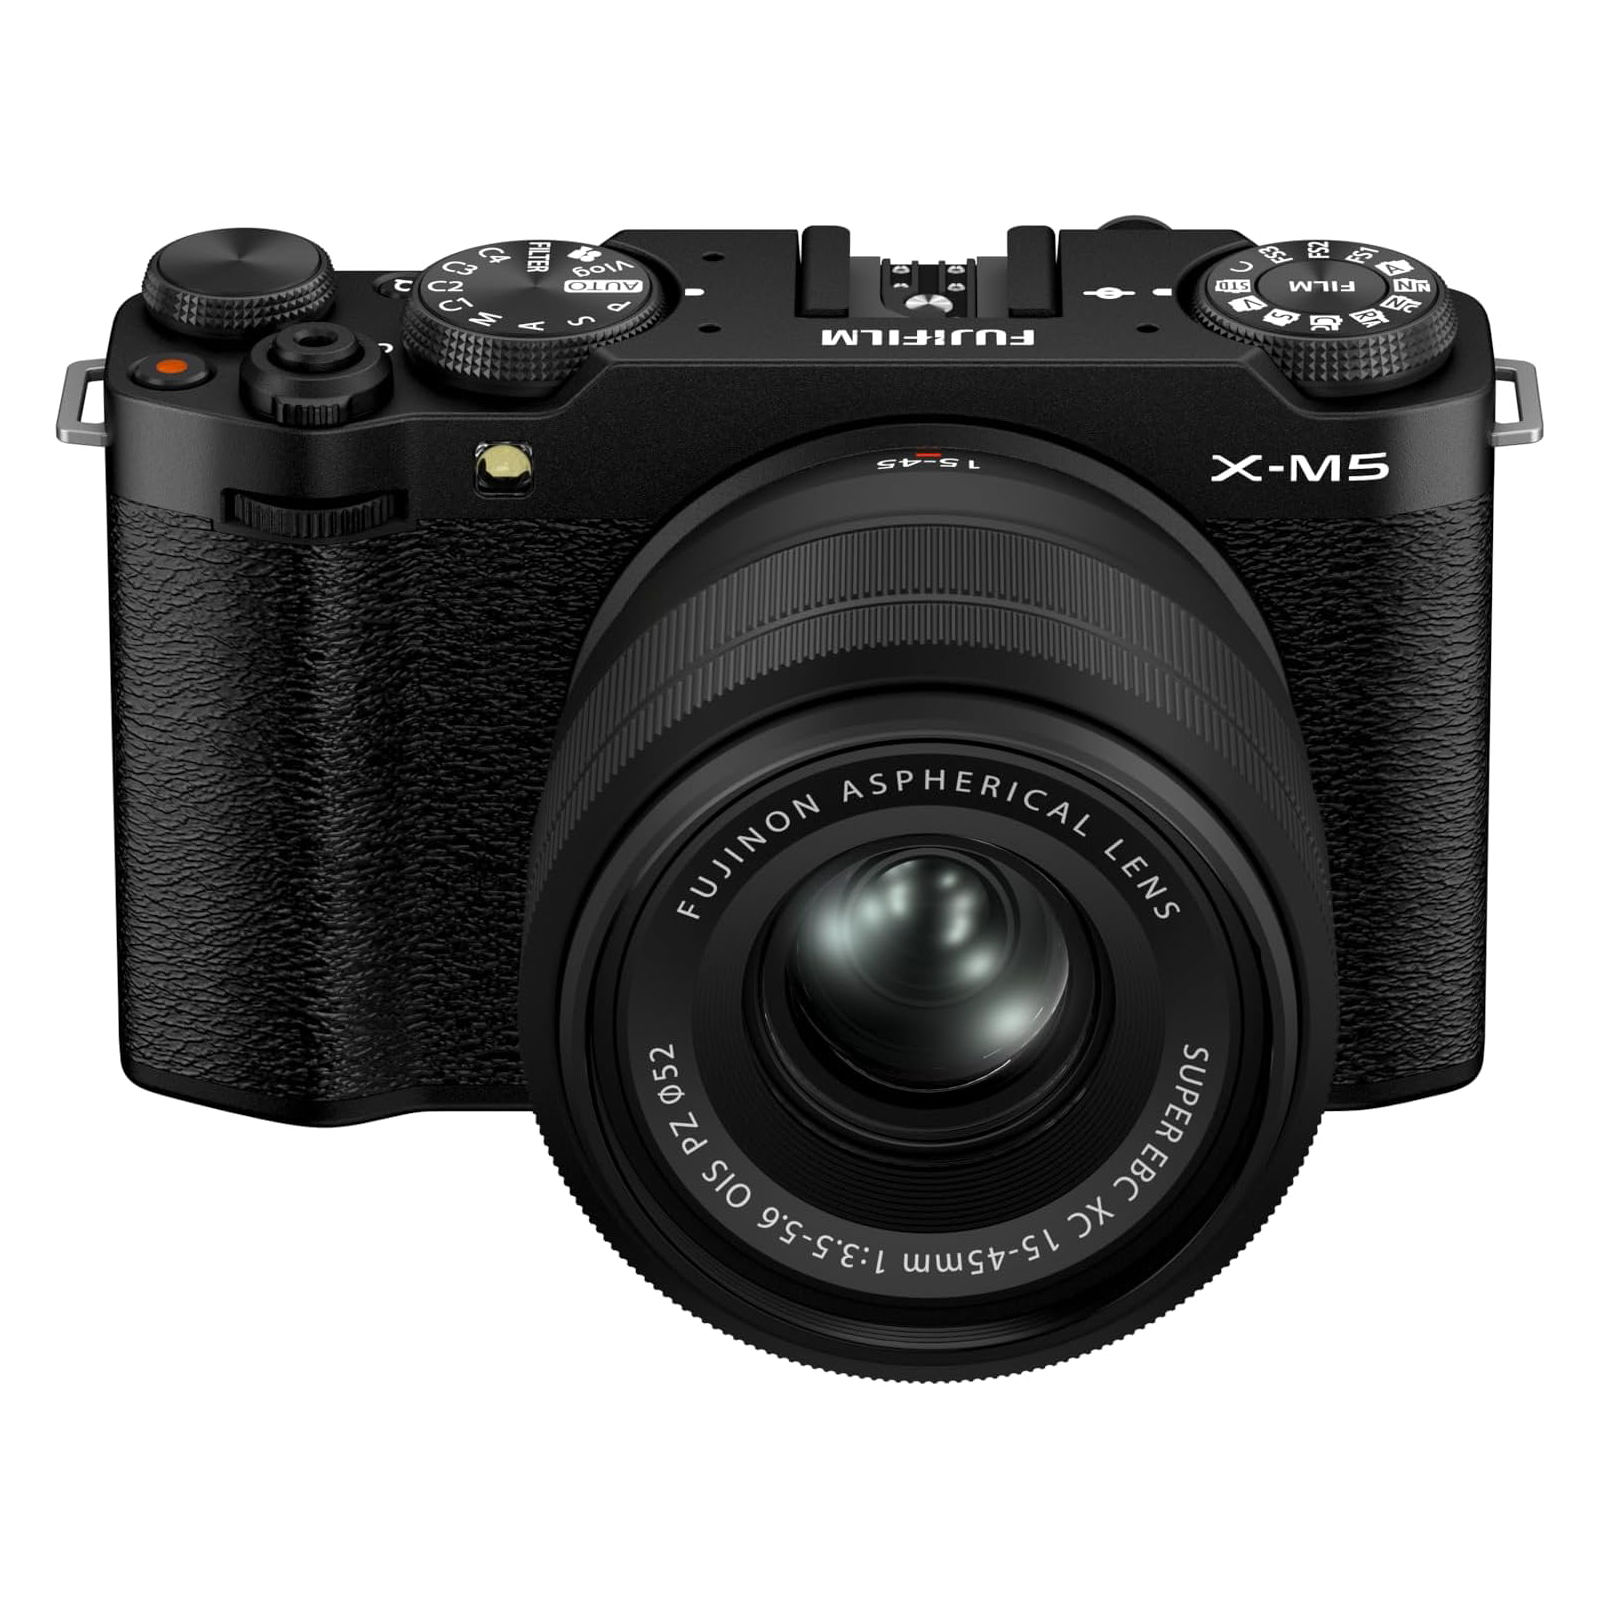
If we're going on price, there beginner mirrorless cameras enter the picture, and for me the Fujifilm X-M5 is the best-equipped hybrid for the money. It has a bigger APS-C sensor, shoots 6K video recording (with Full HD vertical vlogging mode) and 26MP photos and it's a stunning camera. The drawback is that there's no in-body stabilization, so you'll probably want an additional gimbal to smooth out on-the-go clips.
Insta360 supplied me with the Luna Ultra Creator Bundle, which includes 2x grips, Mic Pro transmitter, soft carry case and more
I tested the camera regularly for a month shooting day and night, mainly focusing on video content. I've tried the monitor in various configurations
I was testing the DJI Osmo Pocket 4 simultaneously, and could draw comparisons
I had early access to the Luna Ultra Creator Bundle ahead of its launch, and tested the kit out over the following weeks before writing this review. During this review period, I also had the single-lens DJI Osmo Pocket 4, meaning I was able to make comparisons.
The camera shoots decent still photos with RAW format editing flexibility, but my main focus video performance. I've shot horizontal and vertical vlogging-style videos in the various resolutions and frame rates available in each format, and experimented with various color profiles.
I've made sure to try out all of the accessories supplied to me and the various configurations of the detachable monitor. I've checked the camera and detachable monitor's audio quality, and how easily and reliable it pairs with an Insta360 Mic Pro wireless mic.
Cards on the table: I love Polaroids. I’m of the right generation to have grown up with these instant-film wonders on holidays and at parties, and I was thrilled when the brand was properly revitalised in 2017 under new ownership. From the early OneStep cameras to more recent efforts like the Polaroid Flip (which I currently own), I’ve used a lot of nu-Polaroid’s offerings, and I was thrilled to try out the Polaroid Go Gen 3.
The Go series are Polaroid’s range of super-small instant cameras. They use their own dedicated ‘Go’ film, producing prints measuring 66.6mm x 53.9mm with an image area of 47mm x 46mm (for context, a full-size I-Type print measures 107mm x 88mm with an image area of 79mm x 77mm). They still have that Polaroid look, that lo-fi charm, that iconic square format. They’re just smaller.
The Go Gen 3 is the smallest camera the series has yet produced. It is clearly pitched at a younger crowd — festival-goers, beach-enjoyers, selfie-takers, and it has a selfie mirror to facilitate this. Its controls are extremely simple; you can’t control settings, you just point and shoot.
Most of this was also true of previous Go cameras, such as the Go 2, so what exactly is new here? Well, as well as the reduced size, Polaroid has outfitted the Gen 3 with a boosted flash and a redesigned lens sporting a narrower focal length of 63.75mm, compared to 51.1mm on the Gen 2. This gives you a slightly tighter perspective, gets you closer to your subjects, and makes your selfies that little bit more flattering.
(Image credit: Jon Stapley)
So, it's a much simpler offering than the Flip, which has a fancy four-zone focus system and offers full settings control via the Polaroid app. The Polaroid Go Gen 3 does have a shutter speed range of 1/500–1sec and aperture settings of f/14.4 and f/32, but it will be selecting those for you. However, that’s not to say you’re completely without agency. You can turn the flash on and off via the flash control button, which also activates a self-timer mode and a double exposure mode — meaning you can expose the same frame twice for surreal, creative effects.
I used the Polaroid Go Gen 3 for about a week, mostly capturing shots on photo walks outdoors, but also making use of the selfie mirror to shoot some self-portraits indoors. I’ve been very impressed with the level of quality those little prints are able to display — when the light’s been right, I’ve found myself absolutely poring over images, appreciating all the subtle details that are conveyed in these tiny prints. Even in the smaller size, you still get the feeling of Polaroid’s signature lo-fi tones.
It’s not perfect. I found ultra-bright sunlight to be a problem, with the prints easily becoming blown out and overexposed on sunny days — which also seem to me like the days you’re most likely to want to use the camera. However, the relative affordability of Go film compared to I-Type makes me much more willing to play, experiment and have fun with the Go Gen 3, and not sweat my mistakes too much. Which as far as I’m concerned, is what instant photography should be all about.
(Image credit: Jon Stapley)
Polaroid Go Gen 3: price and availability
Polaroid has been cannily stalking the Instax market share with the Go series, and part of that has been keeping the cameras nice and cheap. The Go Gen 3 comes at a reasonable launch price of $89.99 / £79.99 / AU$150, which is about the same as the comparable Instax camera, the Instax Mini 13, and similar to cheap lo-fi digital cameras like the Camp Snap.
However, as it’s a film camera, you have ongoing costs to factor in. Polaroid Go cameras use dedicated Polaroid Go film, which costs around $21.99 / £18.99 / AU$39 for a pack of sixteen shots (two cartridges of eight). Again, this is similar to Instax mini, which is slightly cheaper at around $20.99 / £14.99 / AU$34.95 for a pack of twenty.
Happily, it’s much more reasonably priced per shot than full-size I-Type film. As much as I love proper Polaroids, $18.99 / £16.99 / AU$32 for just eight shots is really quite brutal, and makes the experience a bit less fun. You don’t kick yourself for a fluffed Go shot in quite the way you do for a fluffed I-Type shot, and it makes the Polaroid Go Gen 3 a more realistic option for kids and families.
Polaroid Go Gen 3: Design
Super small, trop mignon, fits in the palm of your hand
Very simple operation with just three buttons
No tripod thread, but there are lugs for a strap (and one is supplied)
Polaroid Go cameras have always been cute — it’s practically their key USP — and the Go Gen 3 is the cutest yet. The makers call it the world’s smallest instant camera, and I certainly can’t think of a challenger. This thing is tiny, sitting comfortably in the palm of a hand. It measures 106.5 x 83.8 x 64.6 mm and weighs just 8.9oz / 251g.
As such, there isn’t a whole lot of room for bells and whistles, and operation of the Polaroid Go Gen 3 is no-frills. There are just three buttons — power, shutter, and flash control, the latter of which also activates self-timer and double-exposure modes. The entire bottom of the camera is taken up by the film door, meaning there’s no tripod screw thread — best find a flat wall if you actually want to use that self-timer. There also isn’t any of the app-based camera-trigger functionality that you get with the likes of the Polaroid Flip, which also means you won’t be capturing long exposures or anything like that.
The viewfinder is small but lovely. I really enjoy looking through it; I just love that square frame. It really fires my imagination compositionally, and if I hadn’t been limited by how much film I had on hand, I would have been firing off shots left and right. Flip the camera around, and you’ll see that the front of the viewfinder is reflective. This is the selfie mirror, and I have to say, it works exactly as intended.
Jon StapleyJon StapleyJon StapleyJon StapleyJon Stapley
On the side, there’s a USB-C port for charging, and at the back are two lugs on the right and left for attaching straps, and a rope-style wrist strap is included in the box. And, well, that’s pretty much it! This is a very simple offering, something that works in its favor as a lo-fi camera for fun, friends and family. It’s a camera so simple a child could use it, something I tested by giving it to a three-year-old, who — with a little coaching — did indeed manage to capture a photo. If you’re looking for a camera with kid-appeal, I can attest that the Go Gen 3 has it in abundance.
It’s available in five stylish colorways: white, black, teal blue, ice blue and purple. As you can see, I had the white version, and as I took it out and about, it did draw a few comments and compliments from passers-by. This is a nice-looking camera.
(Image credit: Jon Stapley)
Polaroid Go Gen 3: Performance
Lovely detail and tonality in prints, even with small size
But ultra-bright sun can easily overwhelm images
Flash is always on, so you need to remember to turn it off every time if you don’t want it
When a Polaroid works, there’s nothing like it. Even in the smaller Go size, I’m really impressed by the level of detail and tonality you can get out of this thing. For me, it beats Instax any day of the week. In good light, with a well-chosen subject, you can make images that absolutely sing, and I genuinely adore some of the shots I’ve captured with this camera.
I'm really impressed with the level of depth and detail here. The reflection is gorgeous and there are some lovely hints of blue in the sky. (Image credit: Jon Stapley)
One thing that really impressed me was the selfie-taking capability. The Polaroid Go Gen 3’s reworked lens and powerful flash are designed to facilitate just that, and using the mirror as a compositional aid, I was able to capture selfie images that were vivid, detailed and true-to-life, the flash comfortably illuminating the scene without blowing it out.
The flash automatically adjusts by distance for a balanced image. (Image credit: Jon Stapley)
Out in the big wide world, of course, you can and will run into issues. While I was testing the Gen Go 3, we were blessed with several days of glorious sunshine, and in very bright conditions — you know, the exact kind of conditions where you might find yourself saying something like, ‘Darling, it’s lovely out, shall we bring the Polaroid?’ — it’s easy for those little frames to just be overwhelmed.
For all these frames, conditions were just a bit too bright, even with the flash off. (Image credit: Jon Stapley)
More than a few of my images were quite significantly bleached by very bright sunlight, even when I remembered to turn the flash off — and you have to do this manually every single time, because the camera will always turn it back on. Even, as I discovered, halfway through a double exposure.
This worked better than I expected, but that blast of flash probably wasn't needed. (Image credit: Jon Stapley)
I’m generally a bit wary of double-exposure modes on instant cameras; I feel like most of the time, I’m likely to end up wasting a frame on a blurry, muddled mess. However, the lower cost of the Go film made me much more willing to give it a try than I ever am with my Polaroid Flip, and I ended up with a decent image — though I think it would have been better without that unexpected blast of flash halfway through.
Ultimately, as with any Polaroid camera or indeed any instant camera, the Polaroid Go Gen 3 is solid knockabout fun. You’ll get some images you like, and some that feel like a bit of a waste of film. That’s just the game, and it’s a much easier game to enjoy when the film is more reasonably priced than full-size I-Type.
Polaroid Go Gen 3: Should you buy?
(Image credit: Jon Stapley)
Buy it if...
You want an instant camera to take travelling With its tiny dimensions and relatively cheap film, the Go Gen 3 is a great option for trips.
You want simple, point-and-shoot operation The Polaroid Go has minimal controls and is very straightforward to operate.
You want an all-analog experience No screens, no apps — at the core, the Polaroid Go is just chemicals and light.
Don't buy it if...
You want a high level of image quality. While I like the look of the little prints, there are limits to what they can manage. Bright sunlight in particular posed a problem.
You don’t want ongoing costs While Polaroid Go film is cheaper than I-Type, it still represents an ongoing cost that you won’t get with, say, a digital Camp Snap.
How I tested the Polaroid Go Gen 3
(Image credit: Jon Stapley)
I received a sample camera from the manufacturers, along with some Go film
I took the camera on several photo excursions, mostly shooting outdoors
I shot with and without flash, and tested the double-exposure mode
I’ve had the Polaroid Go Gen 3 with me for the past couple of weeks, and I’ve taken it on excursions around London, as well as on a trip to Bradford-upon-Avon. During that time I’ve gone through a double pack of Polaroid Go film, and have tested out the camera in different scenarios and lighting conditions, with a particular focus on seeing how it renders different colors.
I have shot outdoors and indoors, both with and without the flash. I also gave the double-exposure mode a whirl, using it to create a composite image of my own face from different angles. I shot selfies with flash using the selfie mirror as a compositional aid.