
If you are interested please click on this link and make an Offer
Thank you!
By: DJI
Originally posted on October 30th, 2019
Introducing DJI’s most compact and portable drone yet. At just 249 grams, the ultralight Mavic Mini delivers a 30-minute max. flight time, 4km HD video transmission, and powerful safety features. Capture every vivid detail in 2.7K Quad HD video and enjoy simplified recording and editing with the new, hyper-intuitive DJI Fly app. Whether you’re trekking through the mountains, enjoying a day at the beach, or just lounging in your own backyard, Mavic Mini was made to elevate the experience.
Learn more at http://bit.ly/Fly-As-You-Are-DJI
Subscribe:  http://www.youtube.com/user/djiinnova...
Like us on Facebook:  https://www.facebook.com/DJI
Follow us on Twitter:  http://www.twitter.com/DJIglobal
Follow us on Instagram:  http://www.instagram.com/DJIglobal
Website:  http://www.dji.com/
GoPro is a name that's synonymous with the action cam market, with the brand having largely been responsible for the explosion in popularity of such cameras over the past two decades. The brand has come a long way since its first Hero camera, a 35mm film-compatible wearable model released in 2004.
Now the likes of the GoPro Hero 13 Black and GoPro MAX 2, are considered amongst the best action cameras available, and largely dominate the market. And despite rumors that the company intends to kill off the Hero Black range, GoPro has dismissed the speculation. In other words, the GoPro family seemingly has a bright future ahead. In fact, as I completed this review, GoPro announced the next generation GP3 processor which will power a new wave of GoPros for 2026 and beyond.
That being said, the direction of the range can sometimes take an odd turn, and one such example is 2025’s GoPro Lit Hero, a sort of replacement for the GoPro Hero (2024), which was itself a weird compromise of price over specification.
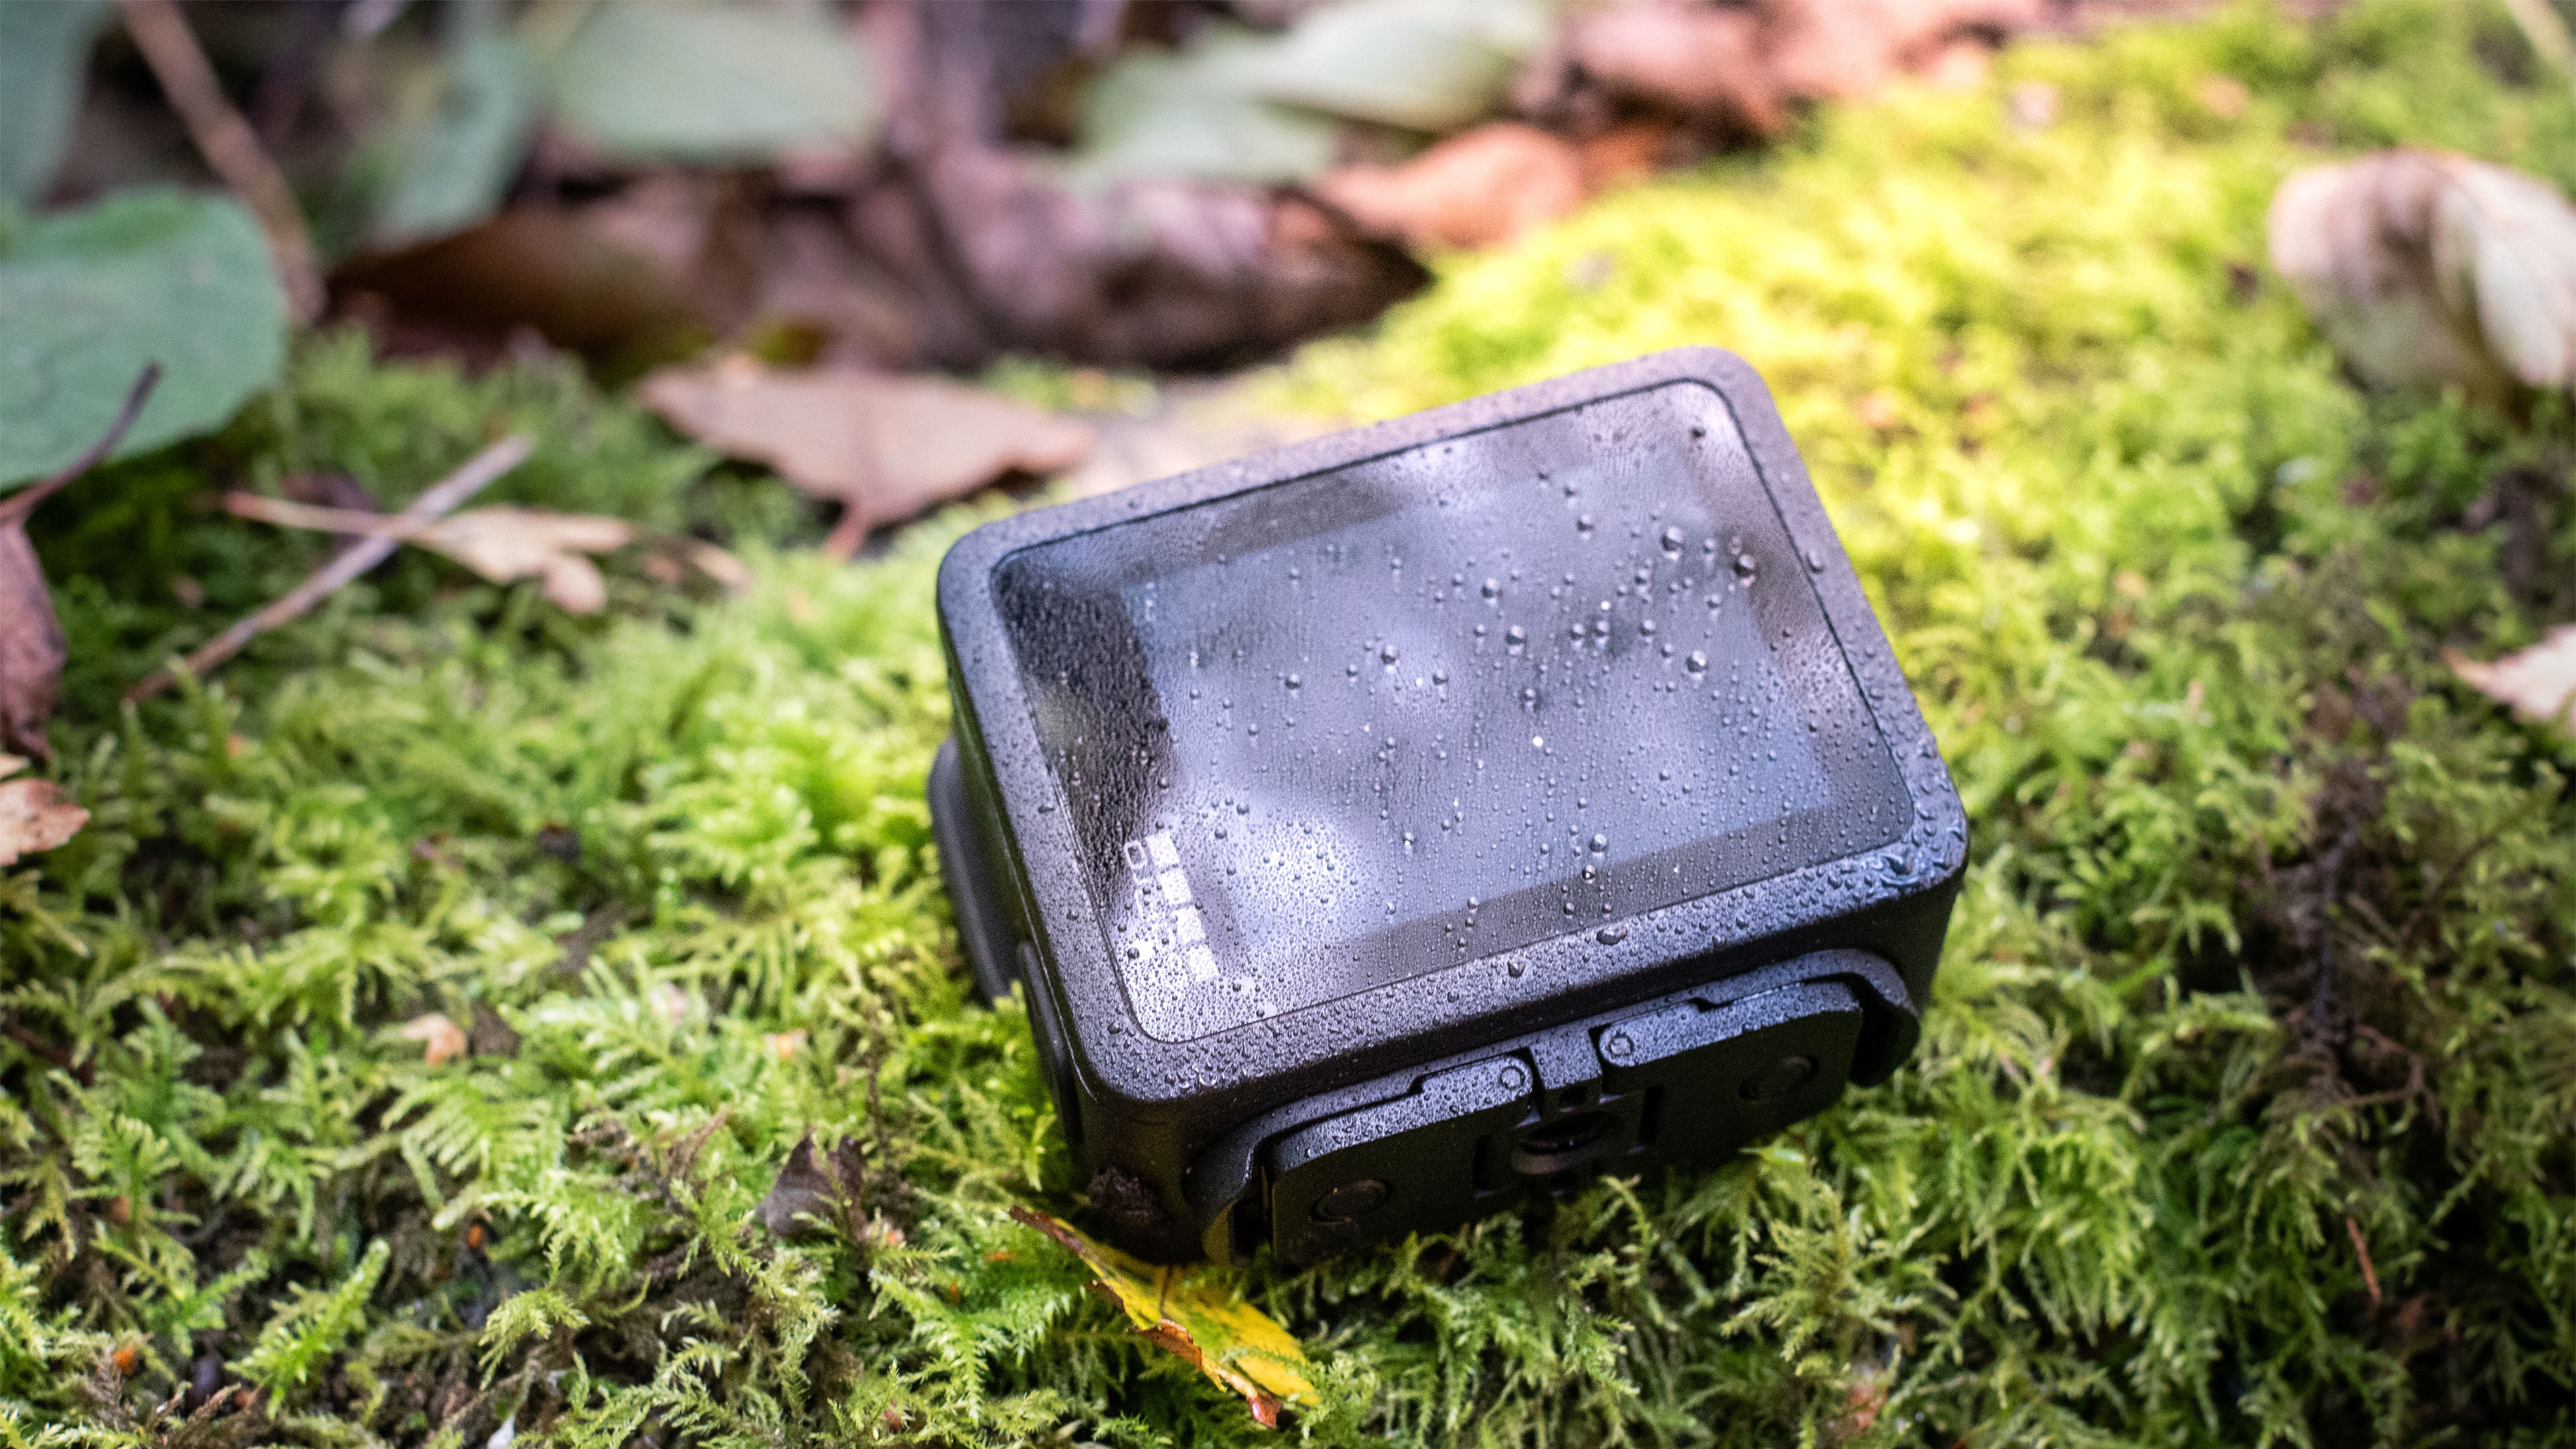
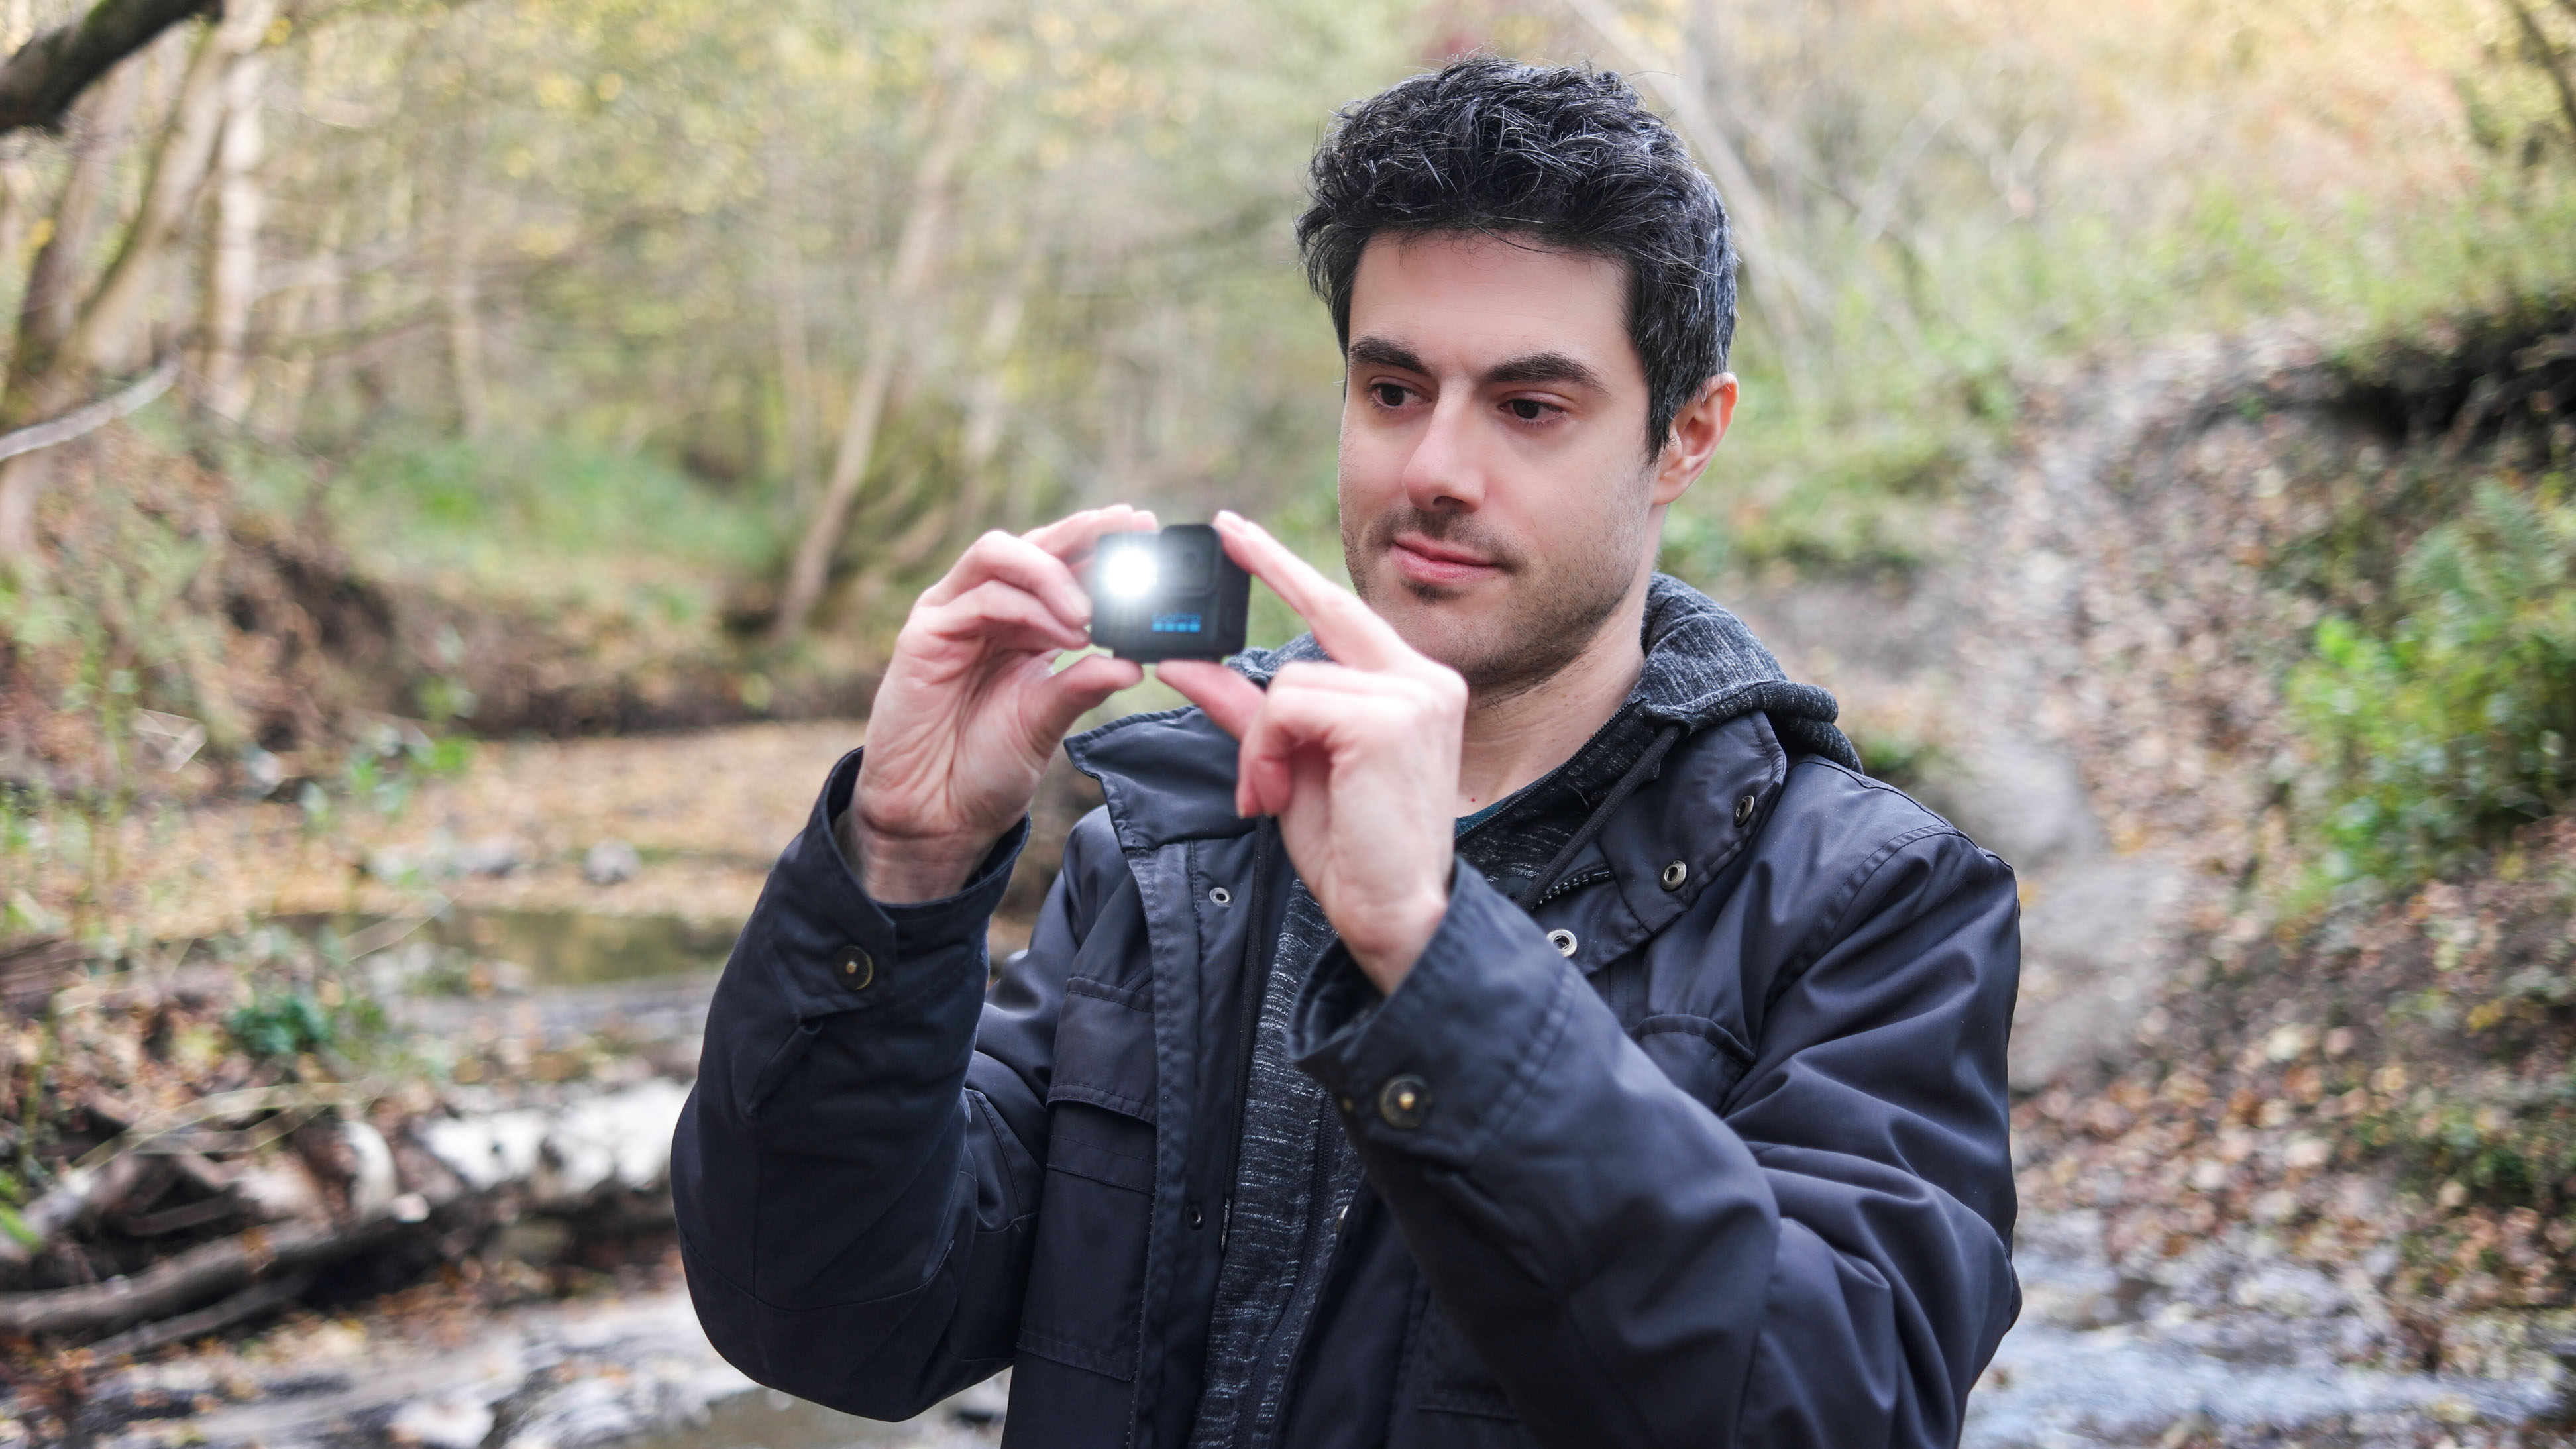
You certainly can’t criticize the camera’s portability — it’s one of the smallest and lightest action cameras you can find anywhere, and there’s no danger of it weighing you down whilst out on a cycle ride or when travelling. Before hopping on a plane, there was none of the usual "Should I, shouldn’t I?" dilemma I often experience when choosing what to take on a trip, and it was a simple case of "Why not?" and throwing it into my camera bag.
There haven’t been many compromises in terms of build quality, and the Lit Hero feels rugged despite its diminutive size.
However, the tiny screen makes changing settings a challenge, while there isn’t a lot of room for camera controls on the body, making the handling experience frustrating at times. The screen itself isn’t always easy to use for image previews and is quite fiddly. It’s not a camera you can use in a hurry, which is a problem given the type of content you’d probably shoot with it.
There's very little in the way of manual controls: if you just want a point-and-shoot camera, you'll be fine, but if you hope to take control over the image-making process, there isn’t much here to satisfy a creative appetite.
Image quality is passable, but not mind-blowing. The camera struggles in low light thanks to its tiny imaging sensor, and despite offering 4K shooting, footage is anything but pro-level. Stills and video are sharp enough, but quickly lose detail as the sensitivity is increased. Meanwhile, colors are quite natural.
Overall, the GoPro Lit Hero is an affordable entry to the action cam market, and is a good take-anywhere choice. It won’t draw too much unwanted attention, or take up room in a bag. The problem is that too much has been stripped away to facilitate the small size. If you were expecting a simplified Hero Black, with similar properties, just smaller, you would probably be disappointed.
I'm not sure who the Lit Hero was designed for, specifically. Yes, it's an entry-level camera, so beginners might benefit. However, the naming convention is confusing, and I'm uncertain as to why such a powerful LED was incorporated. It's also still not that cheap, which I fear is more because of the brand name than any real premium advantages it offers.
As a result, the camera doesn't really hit any target market well. It sounds mean, but it might be best suited for filmmakers who want a camera that they're happy to risk destroying in the pursuit of extreme shooting angles. Otherwise, I can't think of anyone in particular to whom I'd recommend the Lit Hero.
Type: | Action camera |
Sensor: | 1/2.8-inch CMOS |
LCDs: | 1x rear 1.76-inch touchscreen |
Memory: | Micro SD |
Lens: | 15mm equivalent, f/2.3 |
Battery: | Embedded rechargeable 1255mAh Enduro Lithium-Ion |
Video: | Up to 4K/60p, 4K/30p (4:3) |
Photo: | 12MP (4000 x 3000 pixels) |
Dimensions: | 56.6 x 48.4 x 29.45mm (W x H x D) |
Weight: | 3.3oz / 93g |
The GoPro Lit Hero went on sale from October 21 2025 for a price of $269.99 / £239.99 / AU$419.95, but months later and with the next generation of GoPros set for 2026 it can be purchased for less. The camera is available in kits too, including the Starter Bundle, which includes a bike mount and camera case and retails for $344.99 / £304.99 / AU$539.95.
Other activity-specific bundles are available, such as the Water Activities Bundle ($332.99 / £296.99 / AU$519.95), Bike and Camp Bundle ($349.99 / £399.99 / AU$ 546.95) and a Kid’s Bundle for $359.99 / £322.99 / AU$ 572.95, which supplies a Shorty mini tripod, case and Flexible Grip Mount.
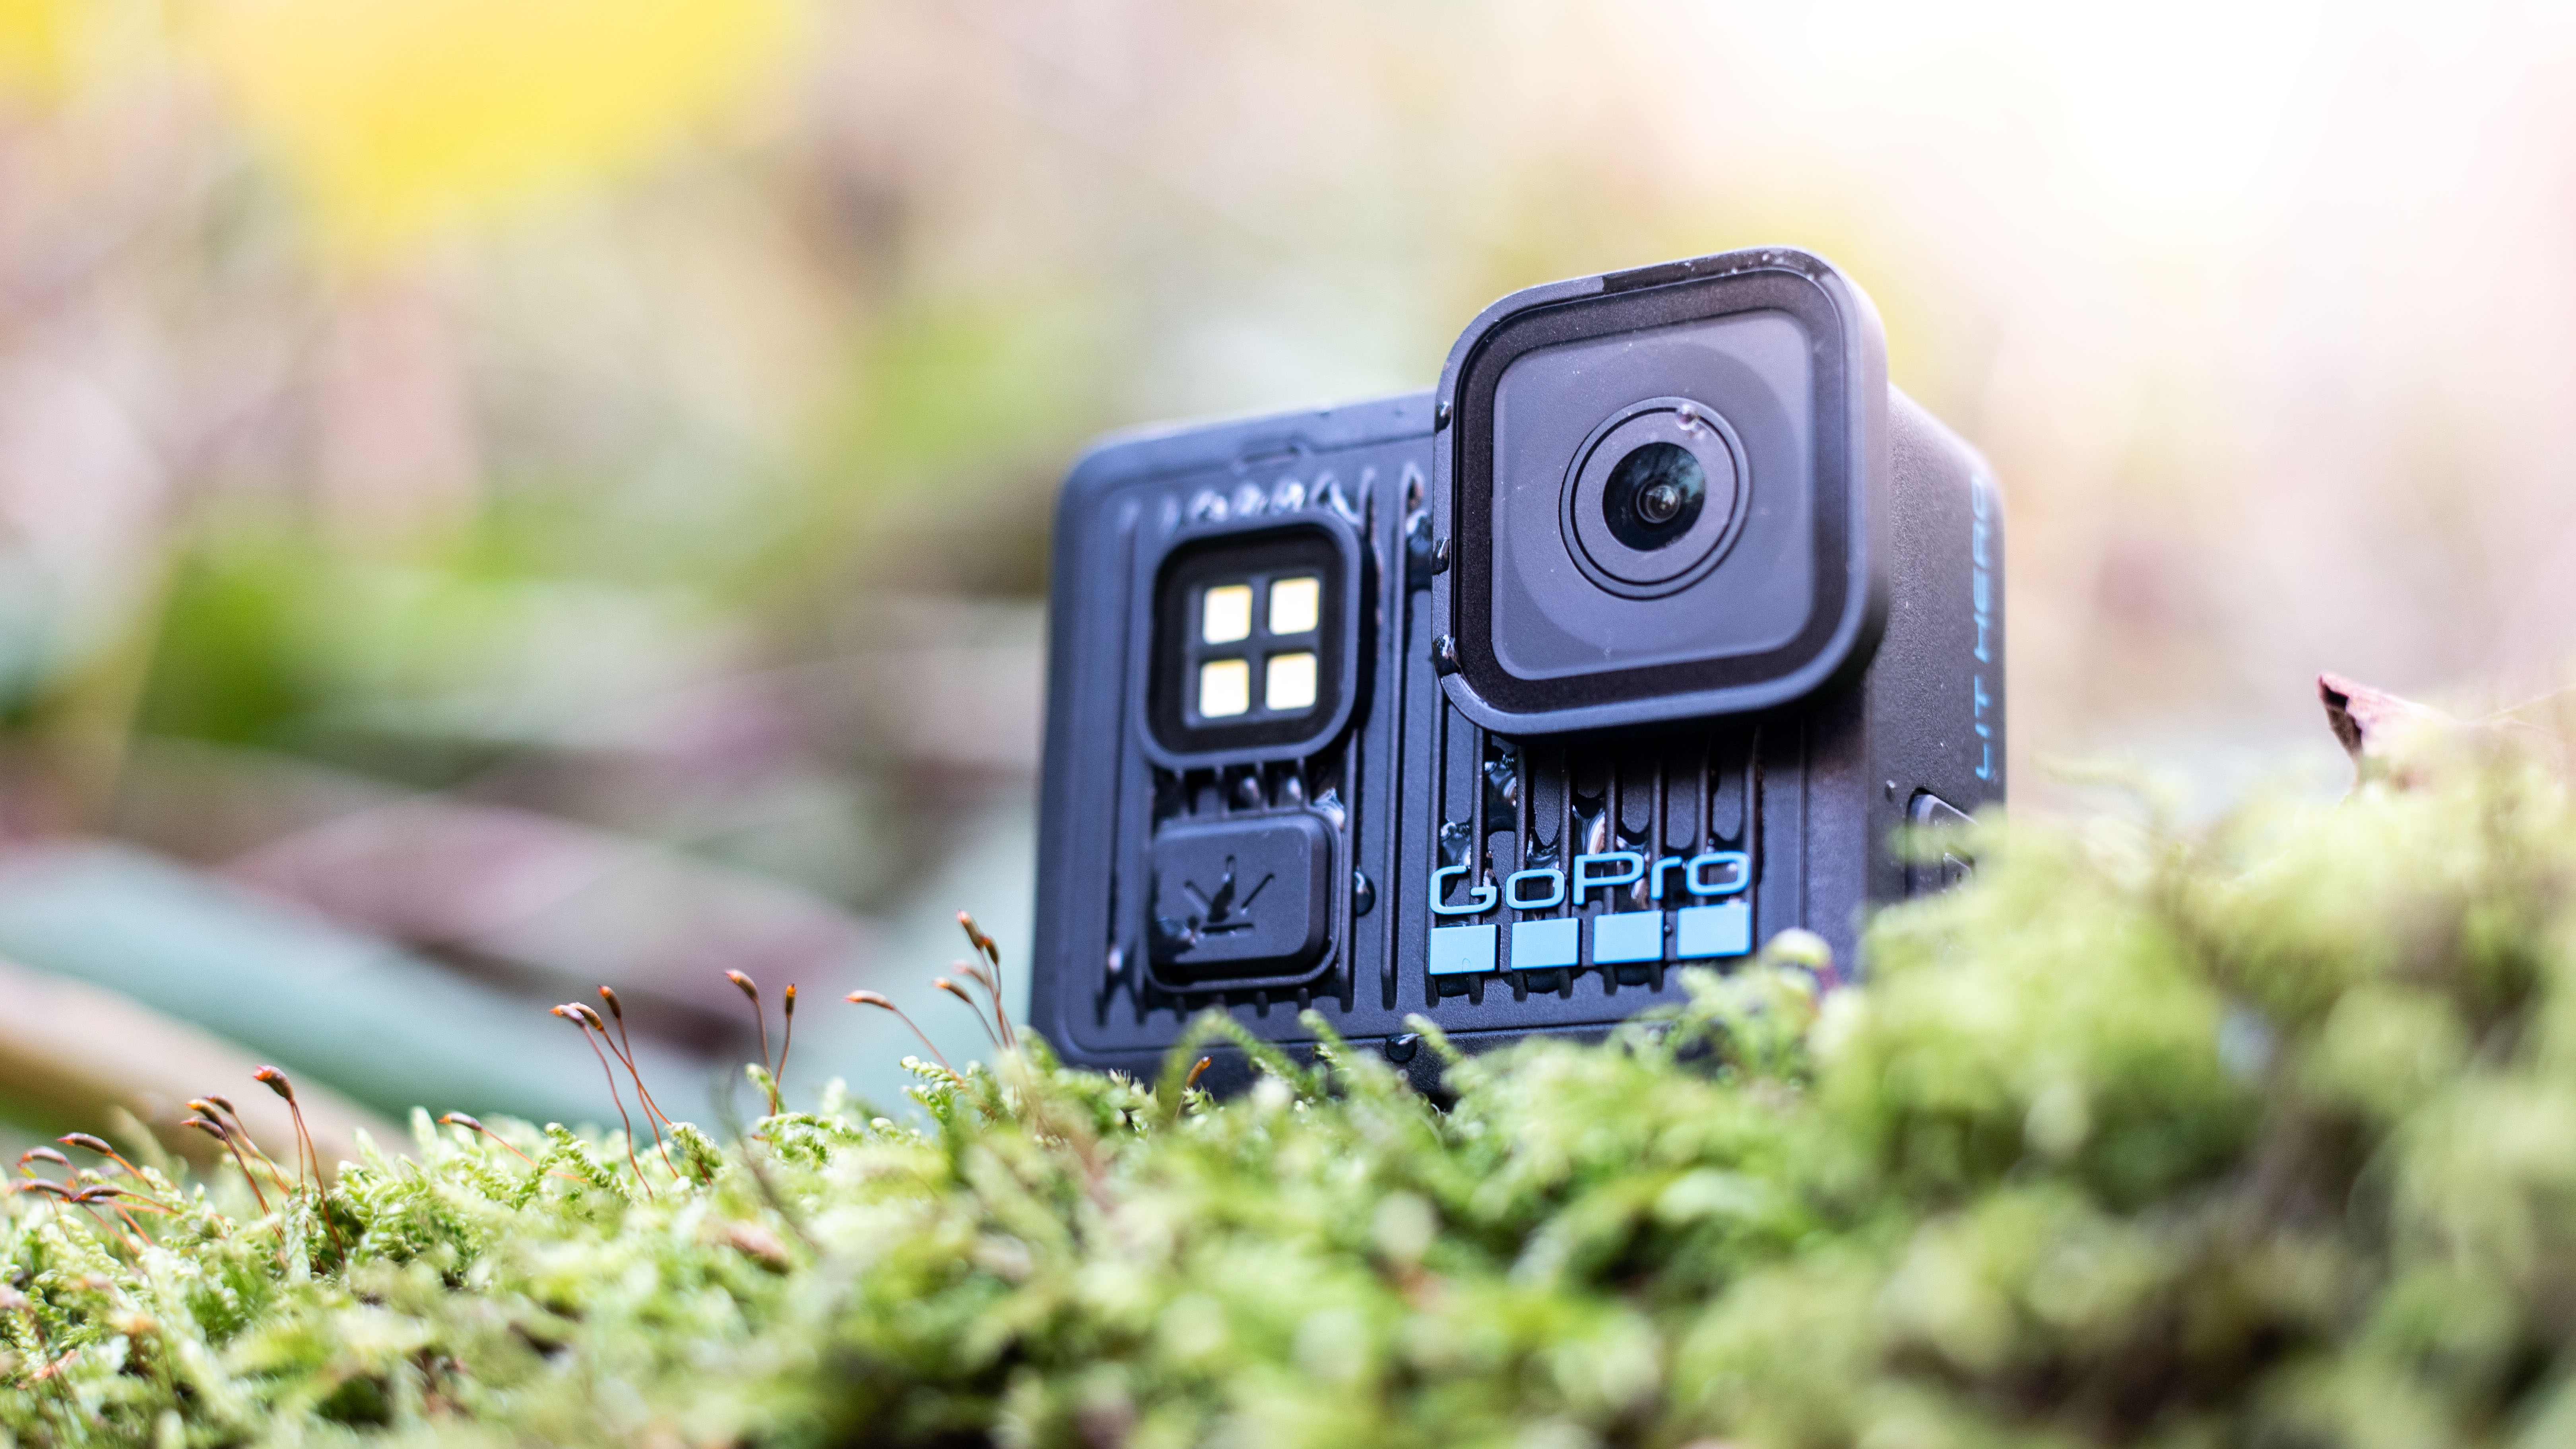
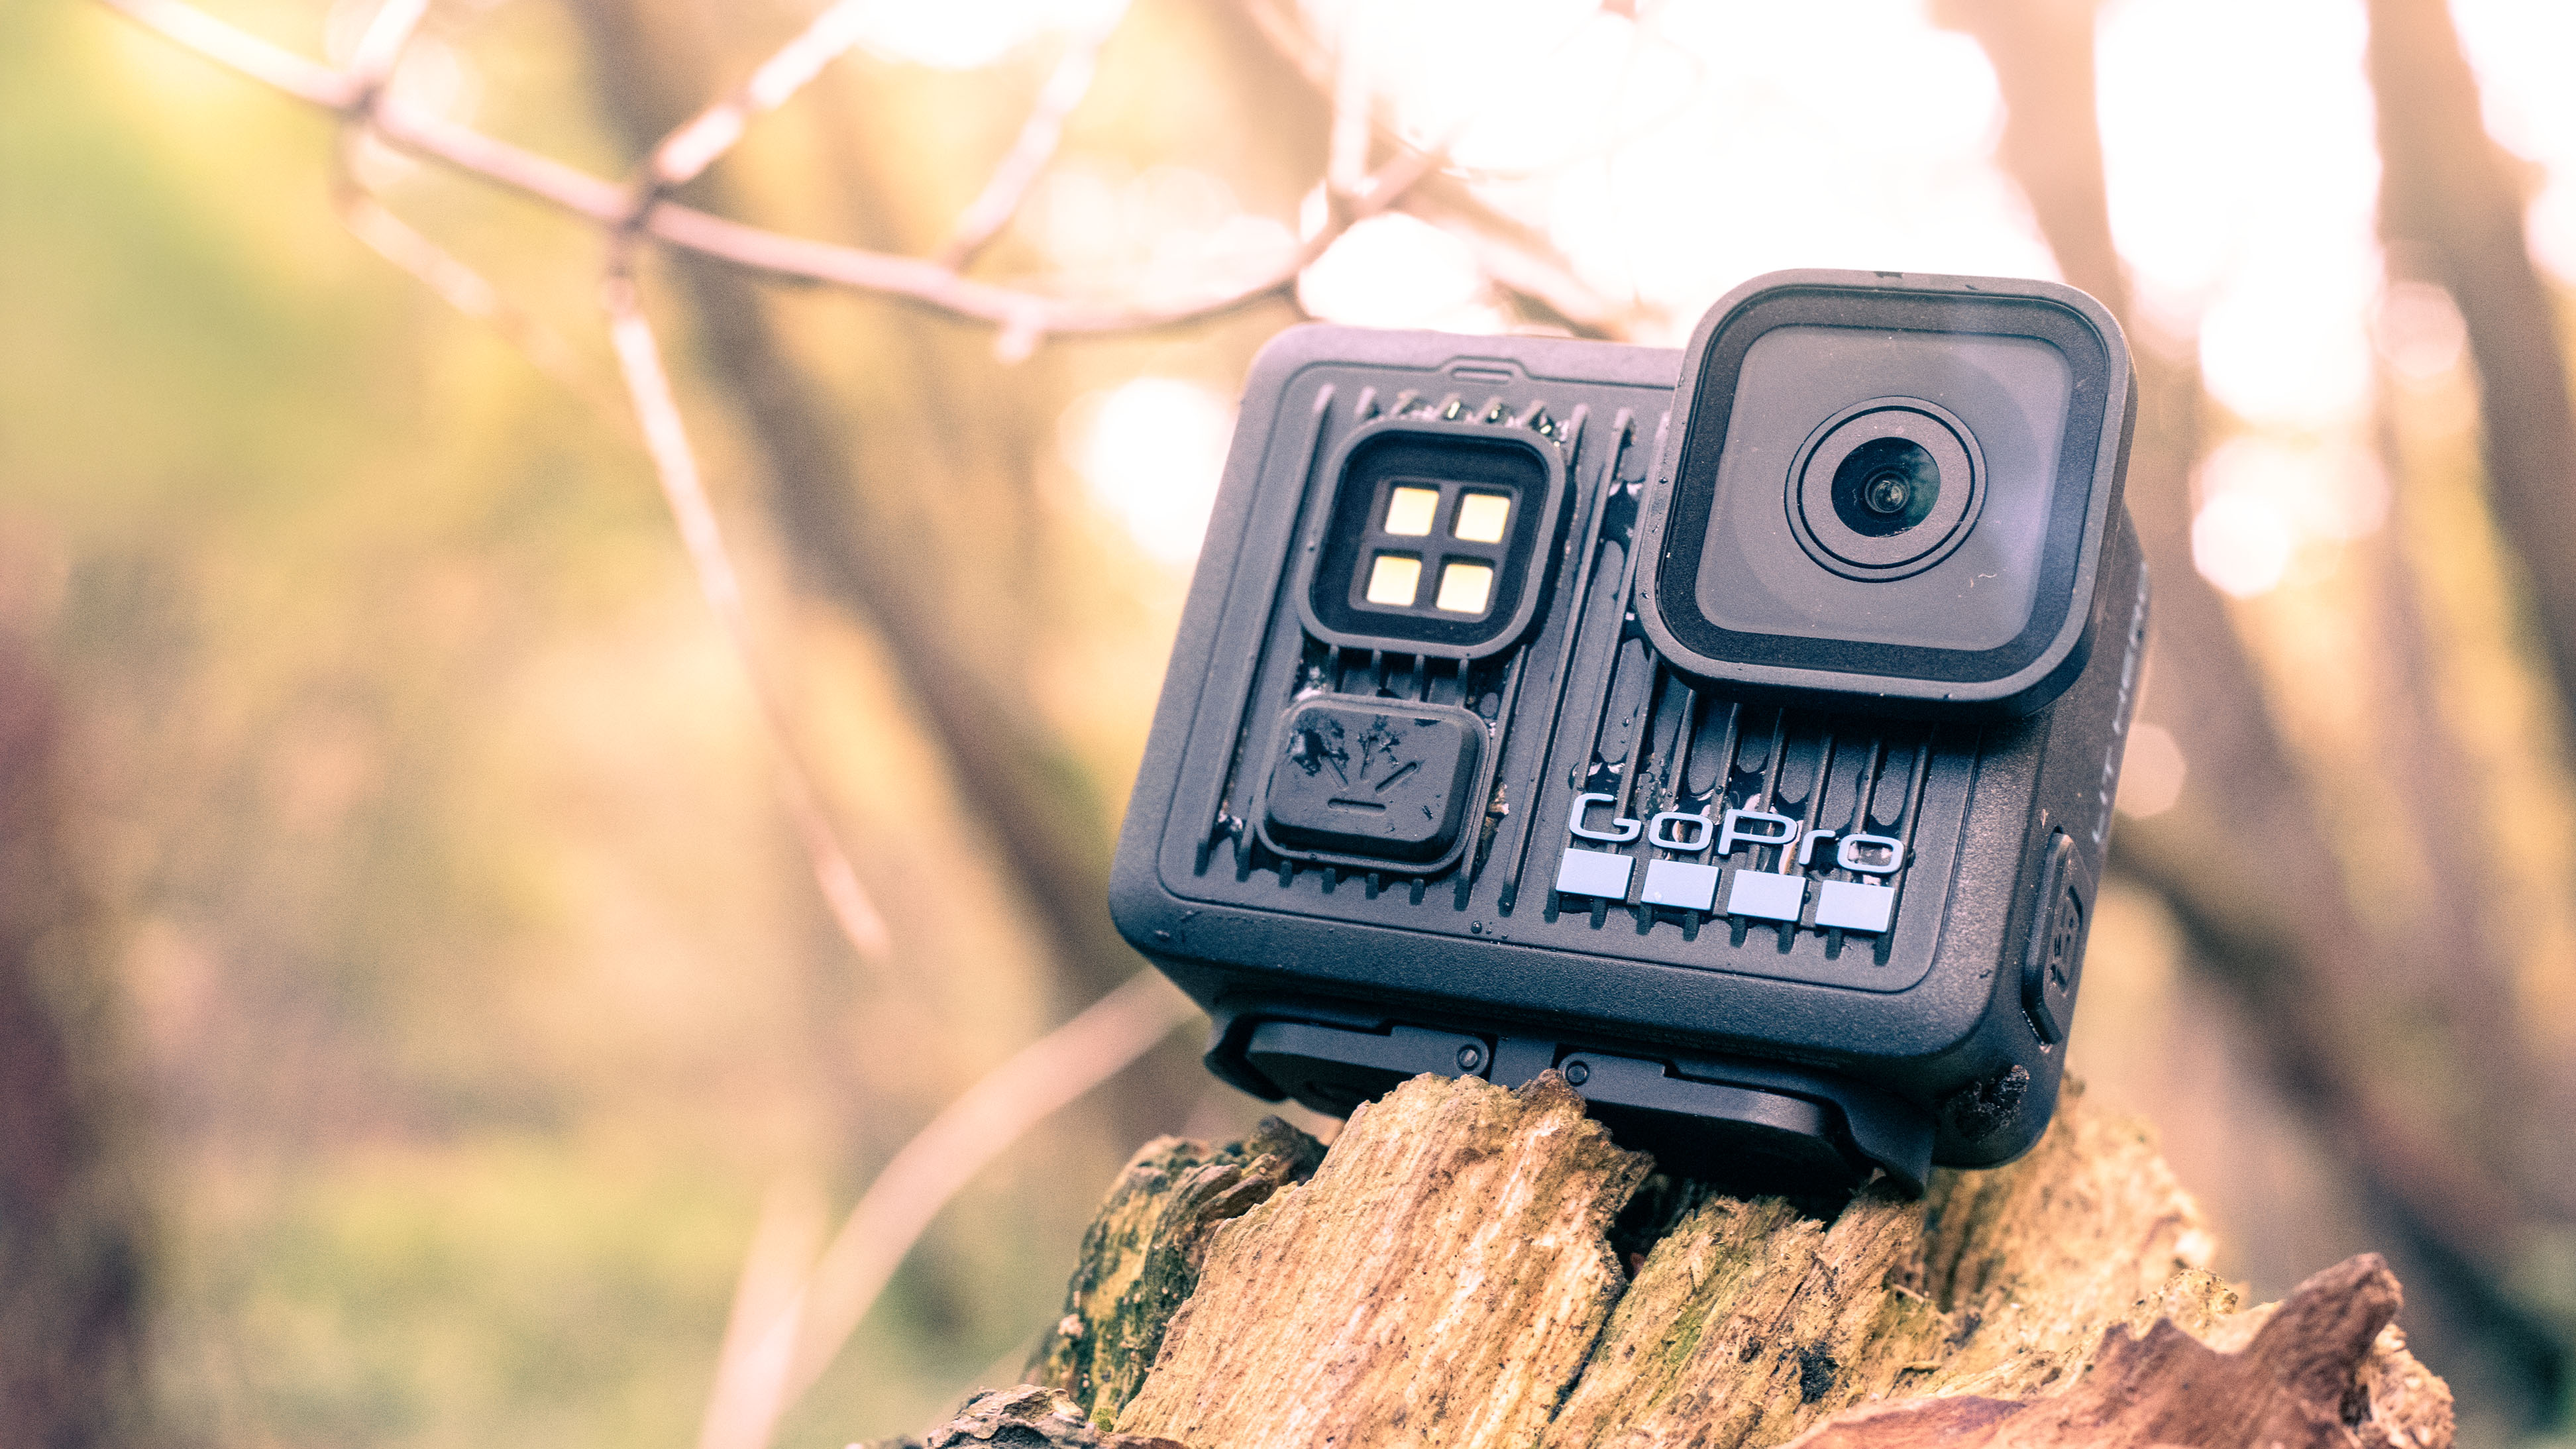
The Lit Hero certainly looks the part, and has many of the traditional design markers of a GoPro product. The rear of the camera is dominated by the 1.76-inch LCD screen, with no physical buttons or controls whatsoever. This isn’t unusual for an action camera, and the same is true of a higher-end model like the DJI Osmo Action 6. The difference there is the screen size, which at 2.5 inches is much easier to interact with and operate.
The monitor on the Lit Hero is so small that my fingertips dwarfed some of the icons, making the precise selection of settings tricky when on the move and when outside in winter, digits numb from the cold. The active area of the screen is much smaller than the back of the camera, too, so there really isn’t much control real estate to be working with. If, like me, your hands are on the large side, it’s something to be aware of if the Lit Hero is on your shopping list.
It’s also not the most detailed LCD I’ve ever used, and it’s not ideal for judging the sharpness of captured images and footage. A few times, I thought I’d got the subject in focus, only to find the camera had back-focused upon opening the images and footage on the large screen of my laptop.
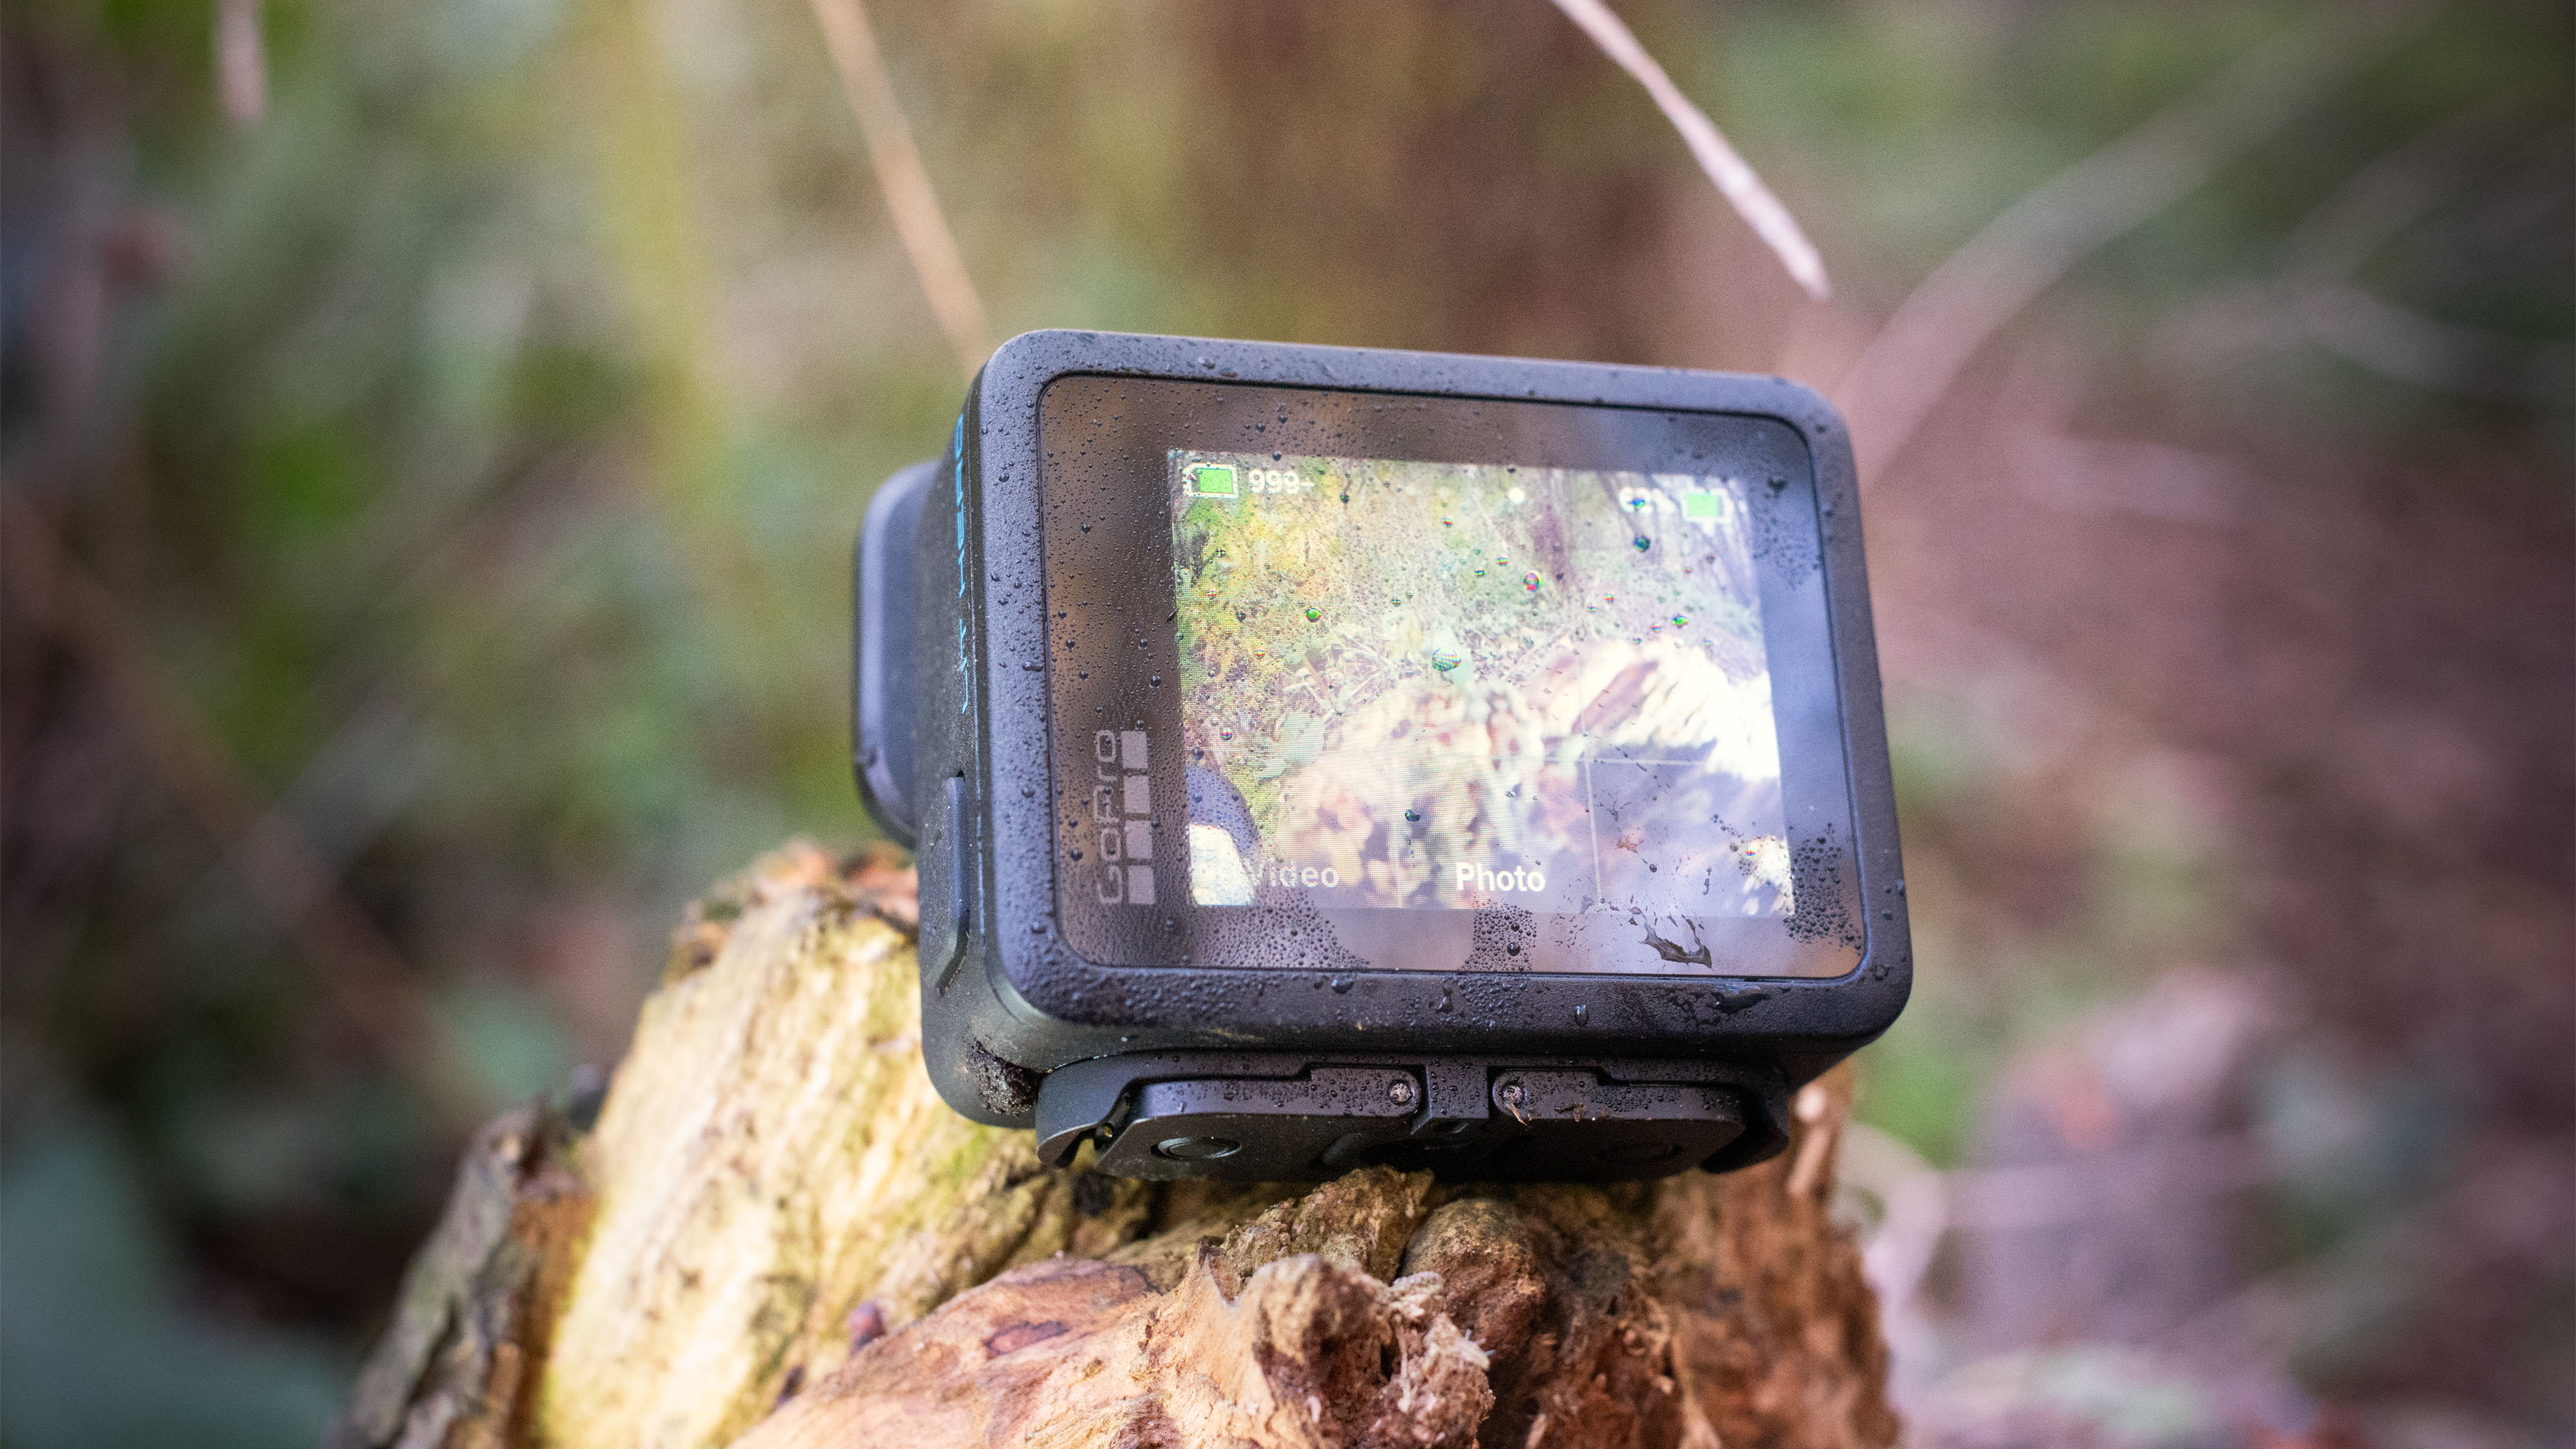
The touch function is useful (well, actually essential as it happens), but it isn’t hugely responsive, and it can take a few taps to get the desired menu to open, or multiple swipes with wet or muddy fingers to scroll through previews. Overall, it’s definitely a good idea to download the dedicated GoPro Quik app onto your phone, via which you can more accurately quality-control your footage.
The rest of the body is incredibly simple, which is both a negative and a positive. On one hand, this means you have to rely on the tiny screen to operate most of the camera’s functions, frozen fingers or not, but it also gives the Lit Hero a reassuringly unintimidating layout for beginners. There aren’t so many buttons that you might be worried about accidentally changing a setting you subsequently can’t figure out how to reset.
The Polycarbonate and TPE (thermoplastic elastomer) construction material is easy to grip, with a good amount of texture to provide friction even when the camera is wet. At no point did I worry about it slipping from my hands while using it handheld.
The other inescapable side-effect of such a small body is that when handling it, even just to remove it from a bag, it’s easy to touch the lens and leave behind fingerprints. It’s easily wiped clean, but this can be irritating.
The camera itself is quick to start up, which was something I was concerned about, given the expected shrinking of the processor assembly to allow for the Lit Hero’s tiny dimensions. There’s very little delay between pressing the power button on the top of the camera and it being capture-ready.
Focus is also quick, at least as far as I could tell from my ‘hit rate’, looking back through captured images – looking at the screen, it’s very difficult to see the focusing in action, especially given the wide focal length. This was impressively maintained in low light and I didn’t notice a significant increase in out-of-focus shots in poor ambient lighting.
A big downside for me is the lack of integrated image stabilization. Rather than using an optical or sensor-shift IBIS system, you must first transfer footage to your smartphone using the GoPro Quik app, then apply algorithmic stabilization there. I’m not a fan of digital stabilization anyway, but not having it applied in-camera means you can’t preview how the final footage will actually look at the point of shooting. It’s a laborious extra step that slows things down.
An added frustration is that the connection between my phone and the Lit Hero was fairly unstable. It kept dropping out, meaning that live previews of what the camera could see using my phone screen were so pixelated as to be largely useless. The transfer speeds were also predictably sluggish. Yes, it’s possible this is due to the age of my handset, or even a model-specific compatibility issue, but I’d experienced no such issue when pairing it to the Insta360 X4 Air and Insta360 X5 the day before.
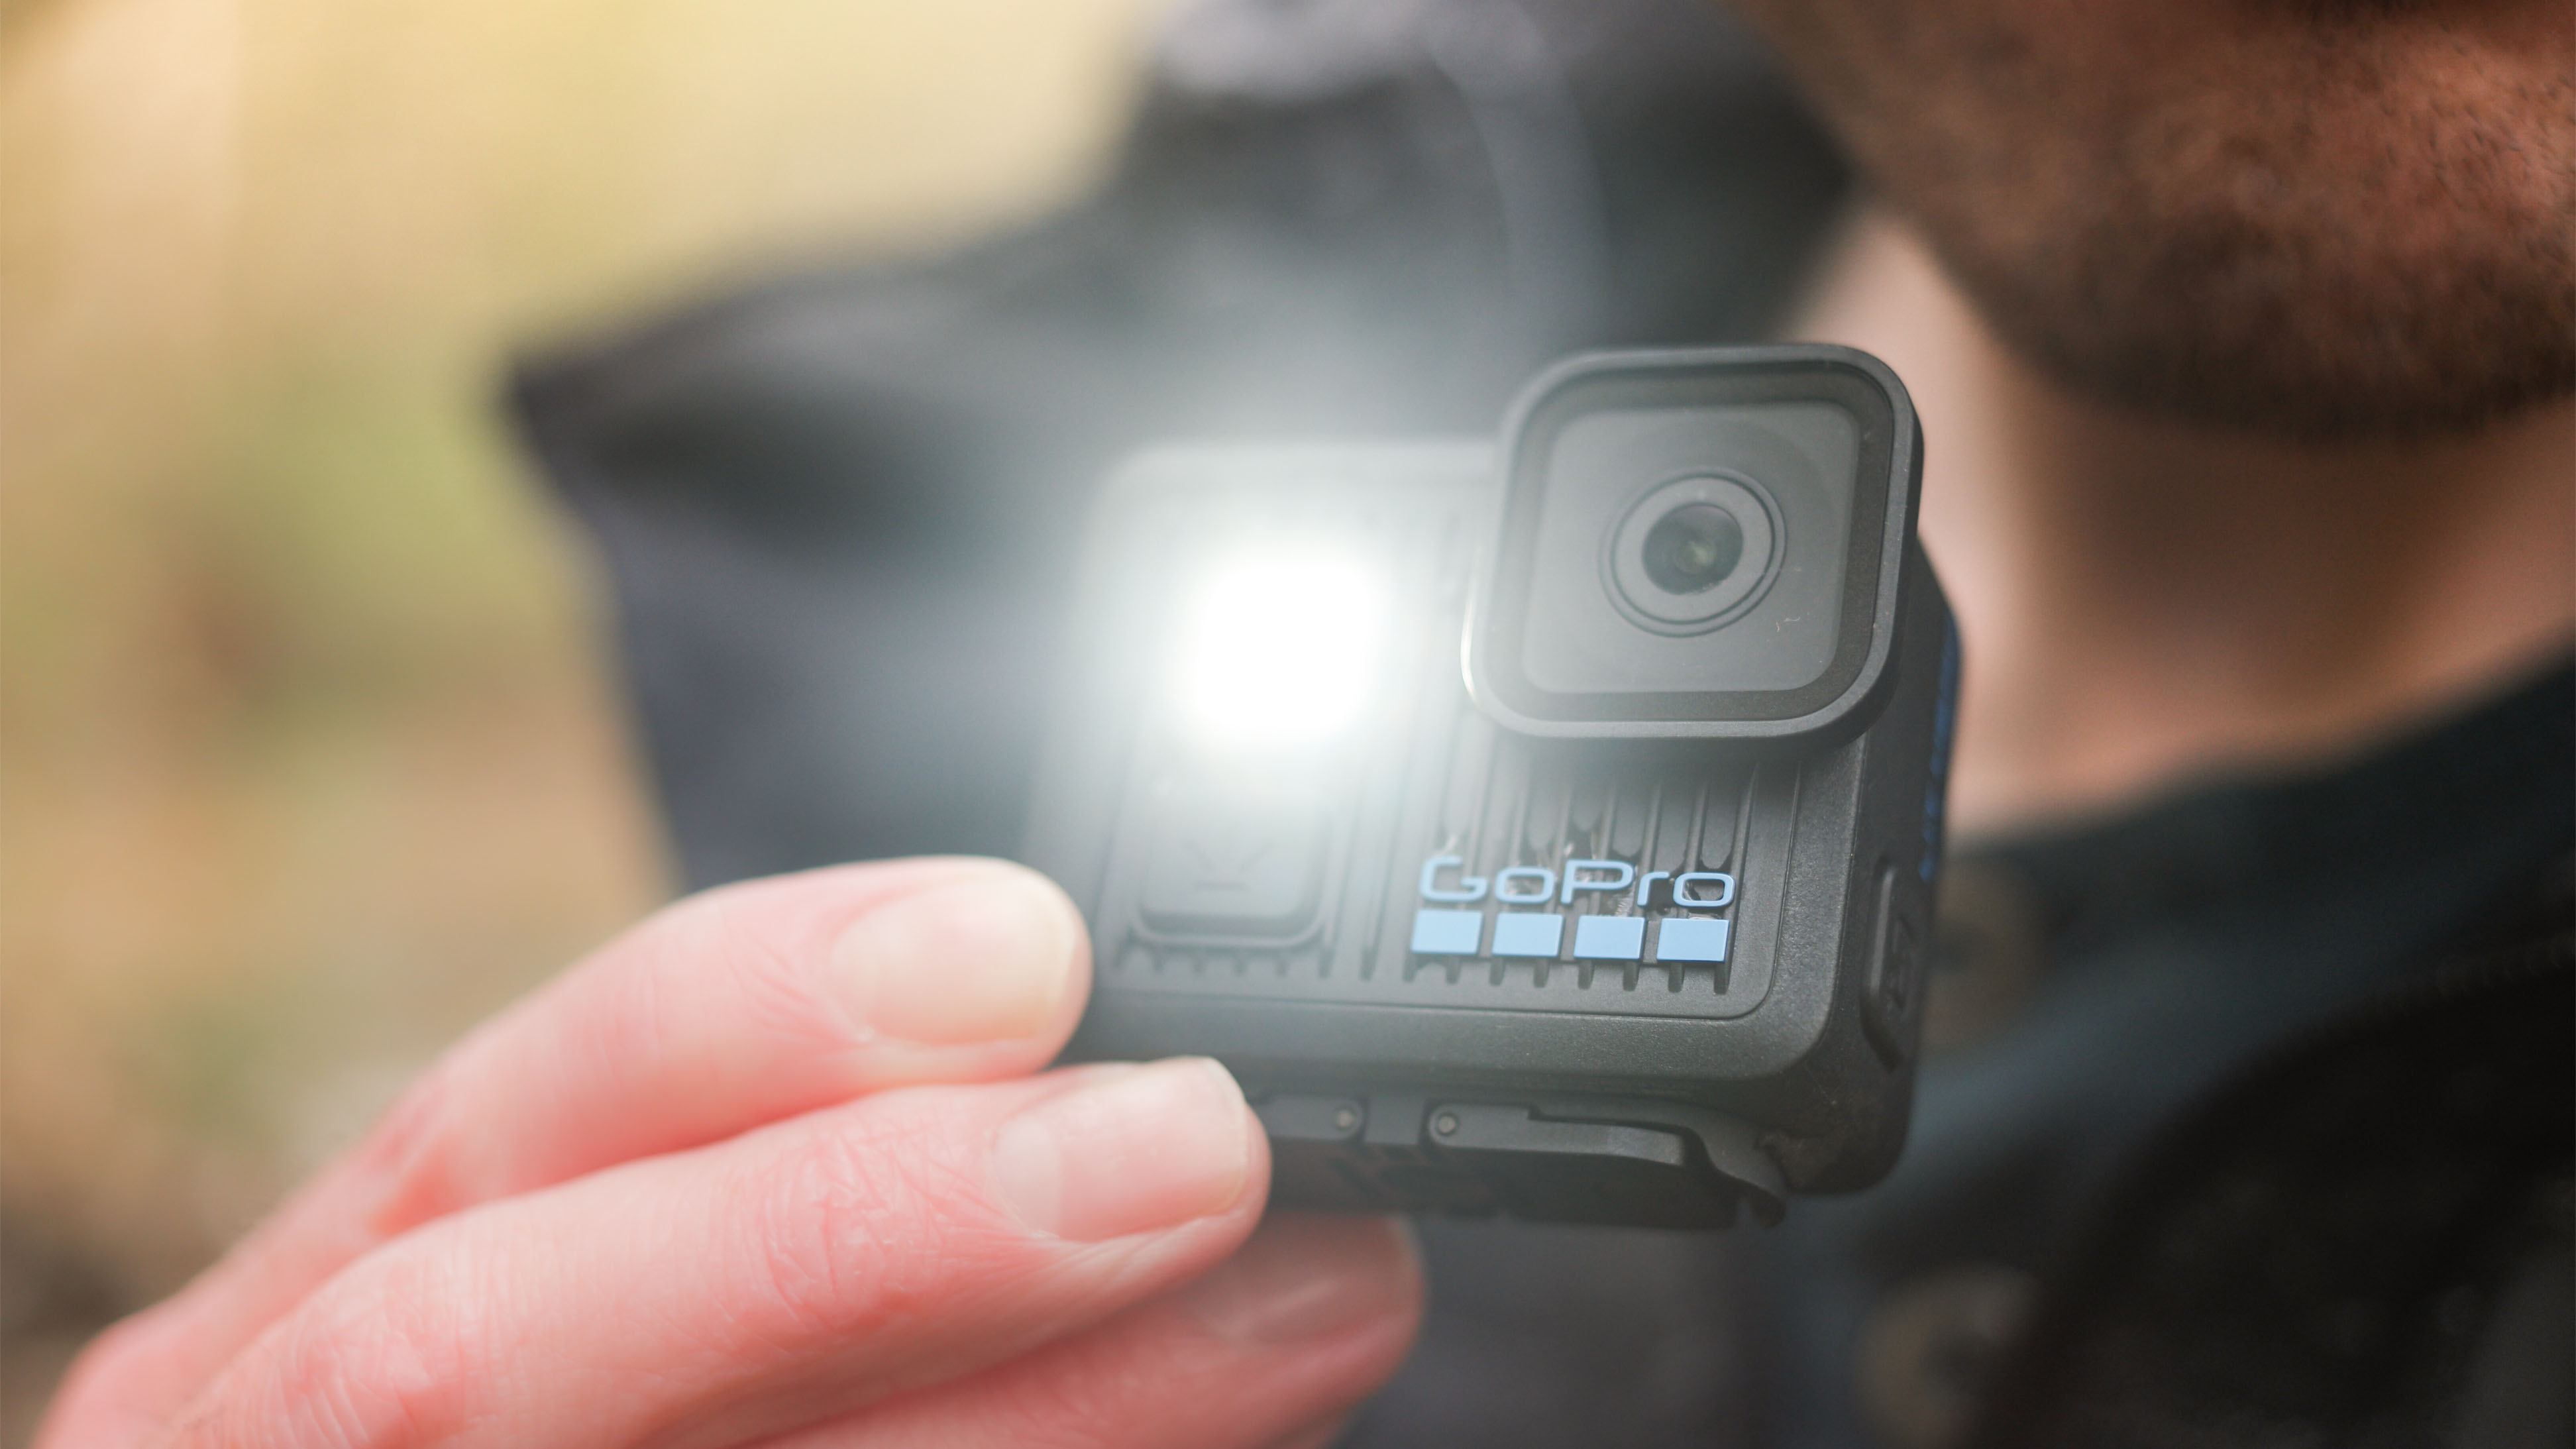
The ‘Lit’ element of the camera’s name stems from the powerful LED torch on the front of the body. It’s really the only instantly noticeable change from the GoPro Hero (2024). I wasn’t sure a camera could ever be defined by its built in flash or continuous light, but oh wow, did this thing get my attention.
It’s inexplicably bright. For the size of the camera, the light output is impressive if not completely overkill. It’s so bright at the maximum setting that I found it impossible to perform a piece to the camera with it shining in my eyes. Of course, it might come in useful in dark conditions, but I found it just looked ugly in most cases. I found it helped when shooting underwater clips in a sediment-filled stream, but the exposure fall-off is very obvious and unsightly.
On a positive note, the battery life is decent, and I could easily get around an hour and a half of continuous use out of it, in chilly outdoor temperatures, before it ran out of juice. Since the battery is integrated and can't be swapped, this is good news.
I found the body warmed up pretty rapidly when shooting longer video clips; not problematic, but a little uncomfortable when using it handheld. I found the more powerful DJI Osmo Action 6 heated up less quickly after prolonged use.
With such a small (1/2.8-inch) imaging sensor at its heart, the Lit Hero is limited in its light-gathering capacity. As such, noise levels are quite high at every sensitivity. There are very few manual controls, with no true PASM modes that allow the user to manipulate exposure settings, meaning you’re at the mercy of the camera’s own decisions, often resulting in grainy footage.
While it’s easier to hide in fast-moving video, the mushiness of detail is clearly visible in stills. In daylight conditions, results are actually quite sharp, but this isn’t maintained for long as ambient light falls.
The autoexposure system is fairly dependable, and it was able to quickly assess each scene during my testing and correctly adjust the parameters to prevent obvious overexposure. Similarly, the auto white balance does a good job of keeping colors natural, even under mixed lighting. This is all good news since there’s little opportunity to amend these settings yourself.


I’d equate the experience and resulting images to those from a basic smartphone or compact camera – I wouldn’t recommend the Lit Hero for ‘serious’ still photography work, but it’s good enough for off-the-cuff content creation and vacation shots.
There isn’t much latitude for post-processing work either. Shadows can be blocked quickly, probably because the camera seems to be biased towards underexposure to keep the highlights in check, but it’s not a good idea to lift these too far. There is no Log mode so color grading must be applied to the pre-processed video, which can break down the tones if pushed too far.
Attributes | Notes | Rating | |
|---|---|---|---|
Price | As one of the most affordable action cameras available, the Lit Hero won't break the bank, but it's still questionable value for the spec on offer | 3.5/5 | |
Design | I have no real complaints about the design. Yes, it's fiddly but that's the trade-off for such a portable size | 4.5/5 | |
Performance | The screen isn't particularly responsive, the camera isn't that quick to operate, and it gets warm quite quickly after extended shooting | 3/5 | |
Image quality | While not terrible, the small sensor struggles in low light and detail turns mushy. Colors are good though, if not punchy. | 3/5 |
You're married to GoPro
If you have plenty of existing GoPro accessories and are very familiar with the system, the Lit Hero might make a useful, extra-small addition to your collection. It could also serve as a B-roll camera or backup model in the field.View Deal
You're on a tight budget
If you aren't ready to invest in a high-end action camera such as the GoPro Hero 13 Black, the Lit Hero is an ideal entry point to the GoPro ecosystem. If you need a model for occasional use, or alternatively, a sacrificial camera for extreme punishment that you don't mind being destroyed, the price of the Lit Hero is appealing.View Deal
You need top-level quality
There's only so much a 1/2.8-inch sensor can achieve, and if you need footage and stills for a professional project, you'd be better off with a less entry-level specification. Images from the Lit Hero probably won't cut it for anything other than casual, everyday needs.View Deal
You like creative control
There isn't much to the Lit Hero's menu system, indicating a lack of any true manual intervention in the image creation process. There's a limited choice of frame rates and no log mode for later grading. View Deal
In many ways the Go 3S is the best of both worlds: you get both an incredibly portable, wearable action camera and the benefits of the Action Pod, including easier handling and improved battery life. You get 4K resolution at up to 30p, waterproofing up to 33ft / 10m, and a slow-motion mode in 1080p of 200fps. If you want a truely tiny action cam that is tough enough to withstand some punishment, the Go 3S has no true rival beyond the DJI Osmo Nano (see below).
Read our in-depth Insta360 Go 3S review
Proving there's life beyond GoPro, the DJI Osmo Nano offers some brilliantly modular features. Not only does it weigh a mere 52g, but you also get the benefit of some professional features, like the excellent DJI D-Log M mode for advanced color grading possibilities in post-processing. It also provides 4K recording, using a larger 1/1.3-inch CMOS sensor – the same one featured DJI Osmo Action 5 Pro. If you want a camera that's light enough to go everywhere with you, without compromising heavily on spec, this is a great choice.
Read our in-depth DJI Osmo Nano review
While I always like to subject action cameras to some degree of punishing conditions, I like to use them as I might as part of an average shoot for which it was designed. As such, I don't make a habit of dropping them out of windows or running them over with a Jeep.
Instead, I took the GoPro Lit Hero with me on several outdoor shoots, in a range of weather, from rainy to full sun. I used the camera to capture behind-the-scenes content of my shoots and environmental imagery. This included submerging it in a stream and getting it down and dirty in muddy undergrowth.
I left the camera recording for extended durations to test battery life and heat management. I shot both still photos and video, then processed these in Adobe Lightroom and DaVinci Resolve to see how much detail I could recover from the extreme ends of the tonal range. Images shown here are the unprocessed out-of-camera Jpgs and video (cut together in the case of the latter).
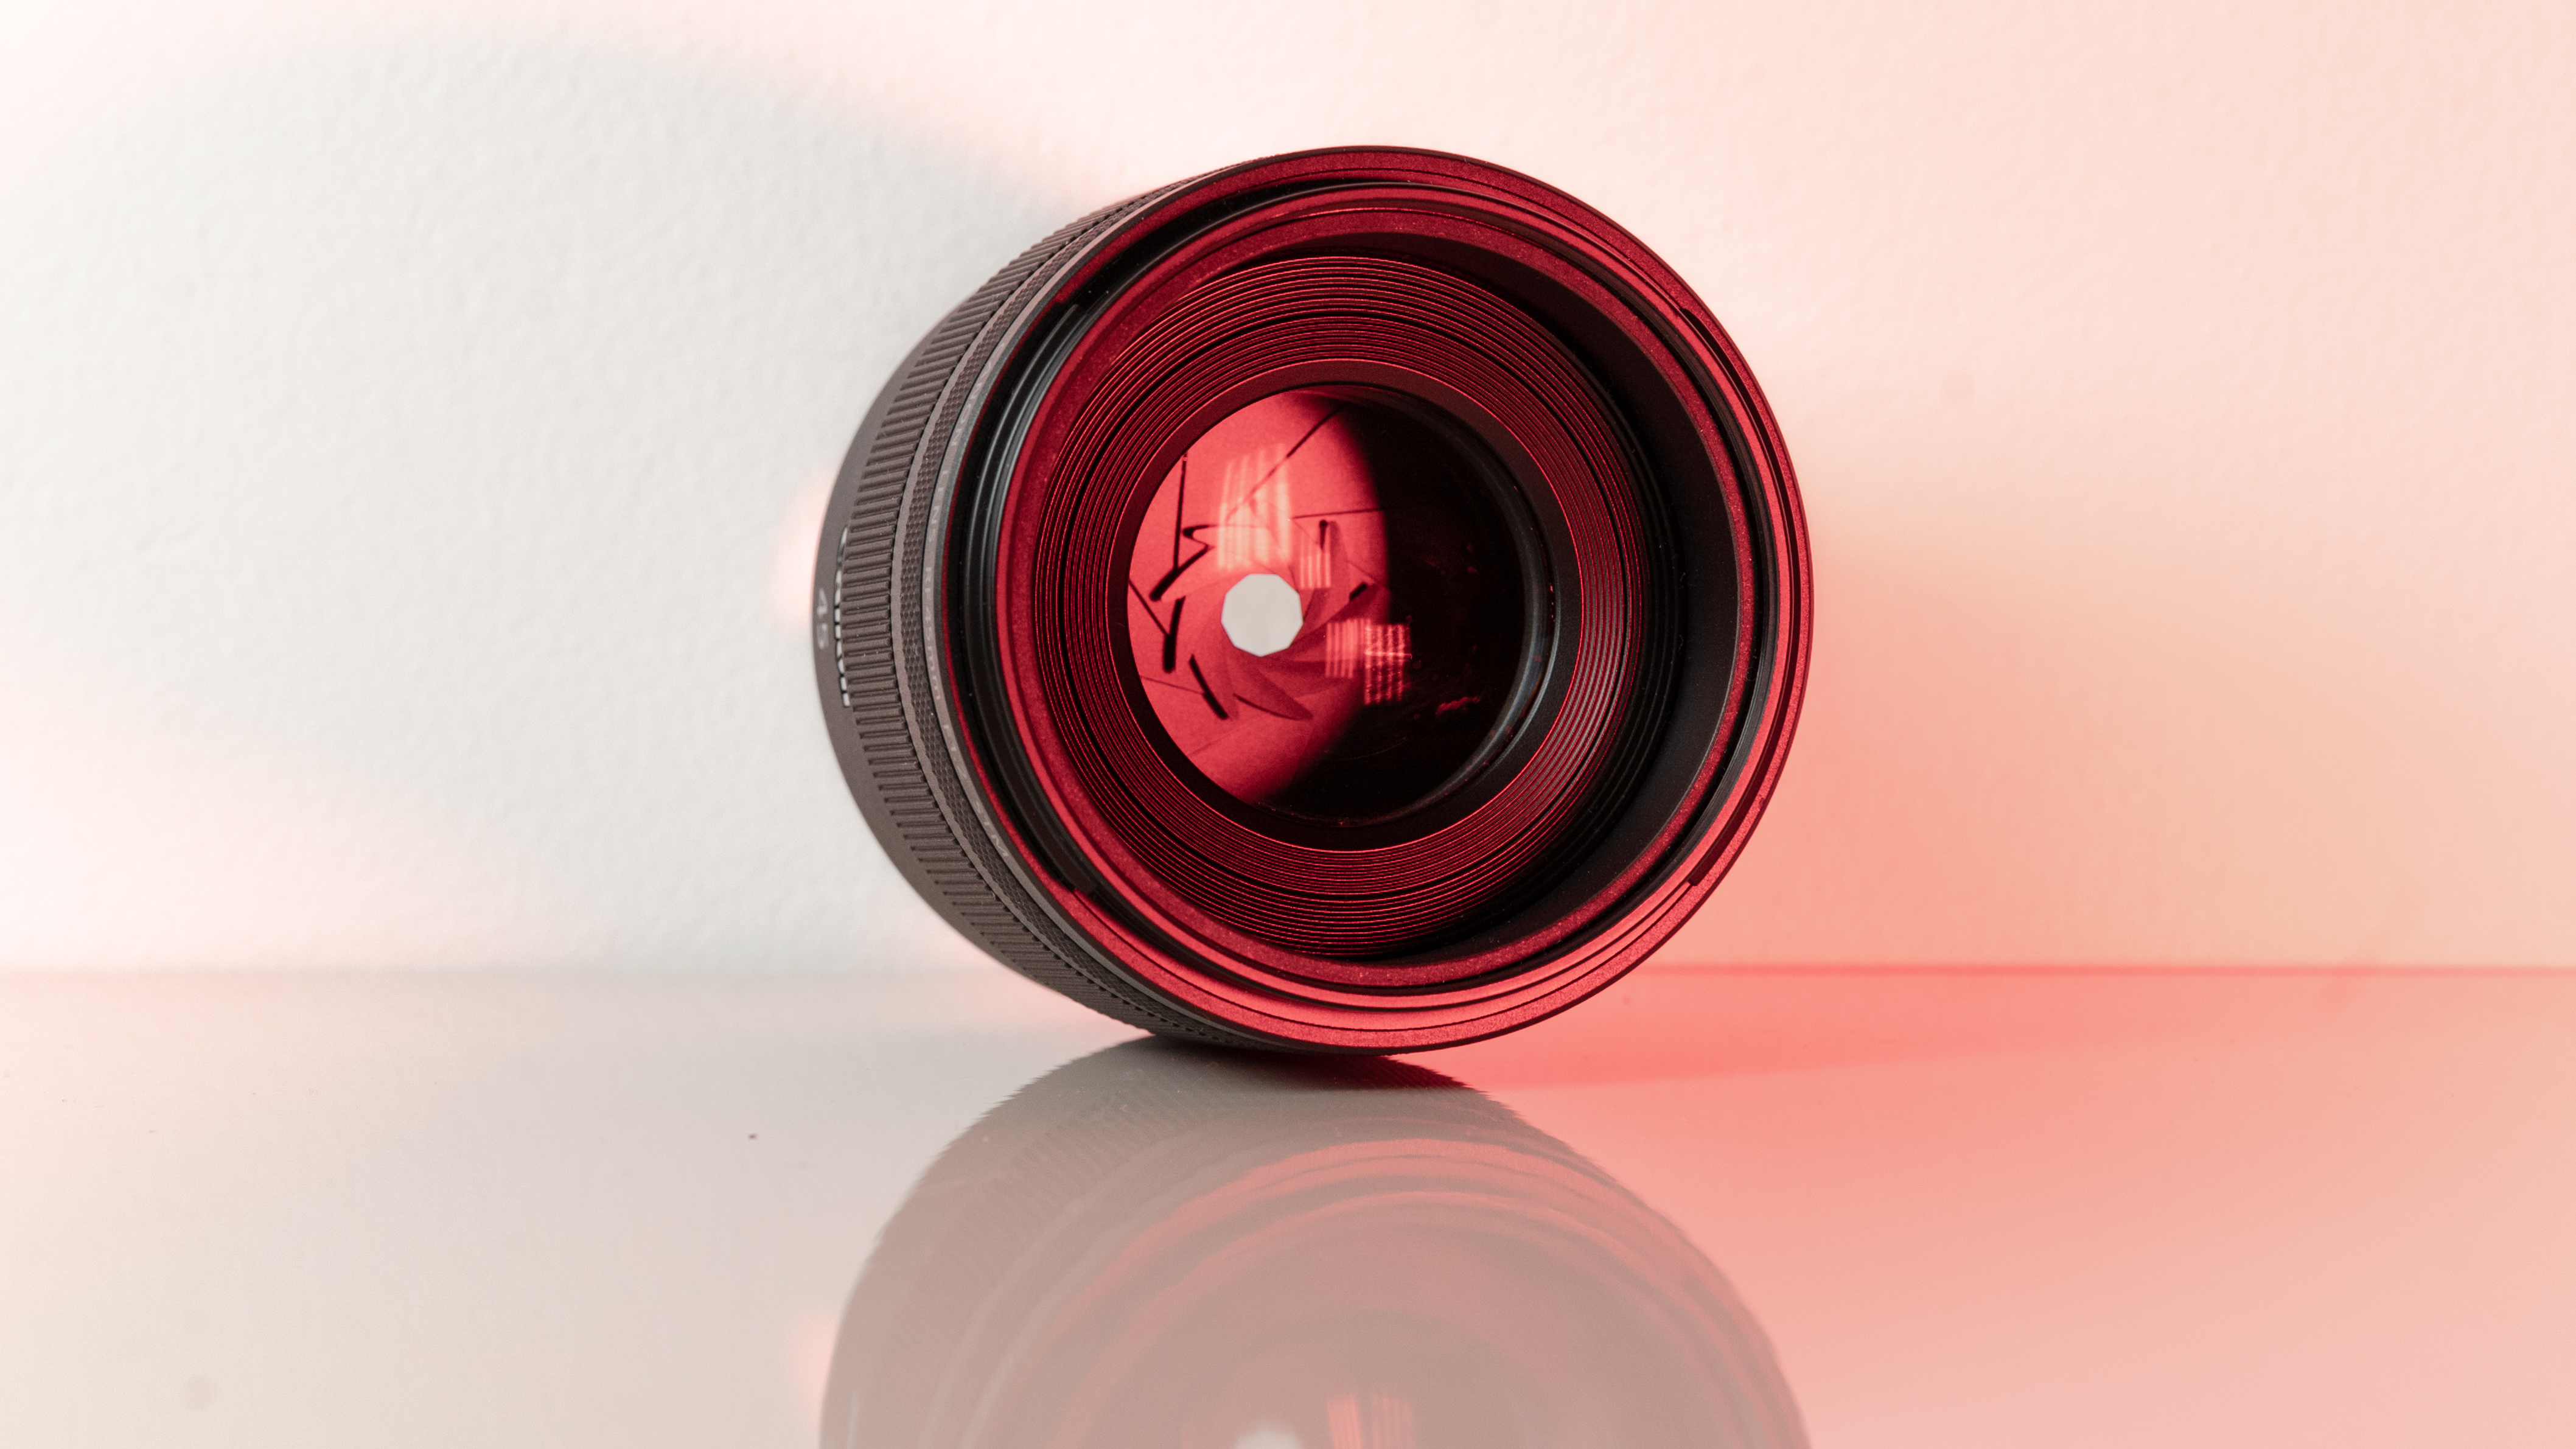
The Canon RF 45mm F1.2 STM is a beautiful mess of a lens. It's impossibly light, cheap, and wide, but nonetheless comes with a few optical niggles that will likely make the more discerning pixel peepers baulk.
At $599 / £479 / AU$699.95, the RF 45mm f/1.2 has the potential to be an essential component of any Canon shooter's kit bag. And, it has to be said, it's a lens that doesn't really have any rivals or alternatives at this price point. No other brand, third-party or otherwise, offers an autofocus full-frame lens with f/1.2 for $600. Canon is definitely worthy of praise for this - it's an innovative, forward-thinking lens from a brand that's often criticized for its closed mount.
As mentioned, however, optically, the RF 45mm f/1.2 leans more towards 'character' than perfection. The bokeh is busy and swirly, while the chromatic aberration is off the charts at the widest aperture. Even with in-camera corrections, this lens imparts its character on every image if you're shooting wide.
You also don't get weather sealing or a lens hood. While this lens is well built and a great pairing with any of the brand's high-end mirrorless bodies, it's very much a lens that's been shoehorned into a specific price point. I can forgive the lack of weather sealing, but paying extra for the hood feels slightly miserly to me.
If you can look past its flaws, however, the 45mm f/1.2 does offer a lot for the price. No other Canon lens right now offers as many creative options as this 45mm in the standard focal length. Emphasis on the 'creative' here, mind you, because the wide aperture opens possibilities for shots simply not possible on the usual kit lens.
Aside from serious low-light chops, this lens is also fantastic for environmental portraits, where you can blow out the background on a relatively wide scene.
In summary, the 45mm is an often frustrating lens, but one I can't help but like. I don't think it's a 'killer' lens that will cause Nikon and Sony users to switch, but it certainly is unique and praiseworthy. Is it one of the best Canon lenses? Technically, absolutely not. But is it worth it? Absolutely... if you're looking for 'character' rather than 'perfection', that is!
At $599 / £479 / AU$699.95, the RF 45mm f/1.2 is cheap for a Canon full-frame RF lens, let alone one with such a wide aperture. It's much closer in price to the entry-level Canon RF 50mm F1.8 STM (£239 / $219 / AU$299) than premium L-series glass - and offers a similar level of optical quality for the budget-conscious.
It's a good thing Canon has made this lens, too, as the brand currently doesn't support third-party glass on its full-frame mount. Unlike rival mounts from Nikon and Sony, Canon users have fewer low-cost alternatives outside of the usual starter primes and kit lenses.
Luckily, this lens is a great example of Canon doing something a little different. It's not quite a budget lens, but it's certainly unique, and definitely a sign that the brand is willing to try new things for its RF mount.
Type: | Standard prime |
Mount: | Canon RF |
Sensor: | Full-frame |
Focal length: | 45mm |
Max aperture: | f/1.2 |
Minimum focus: | 0.45m, 0.13x max magnification |
Filter size: | 67mm |
Dimensions: | 78 x 75mm |
Weight: | 12.2oz / 346g (lens only) |
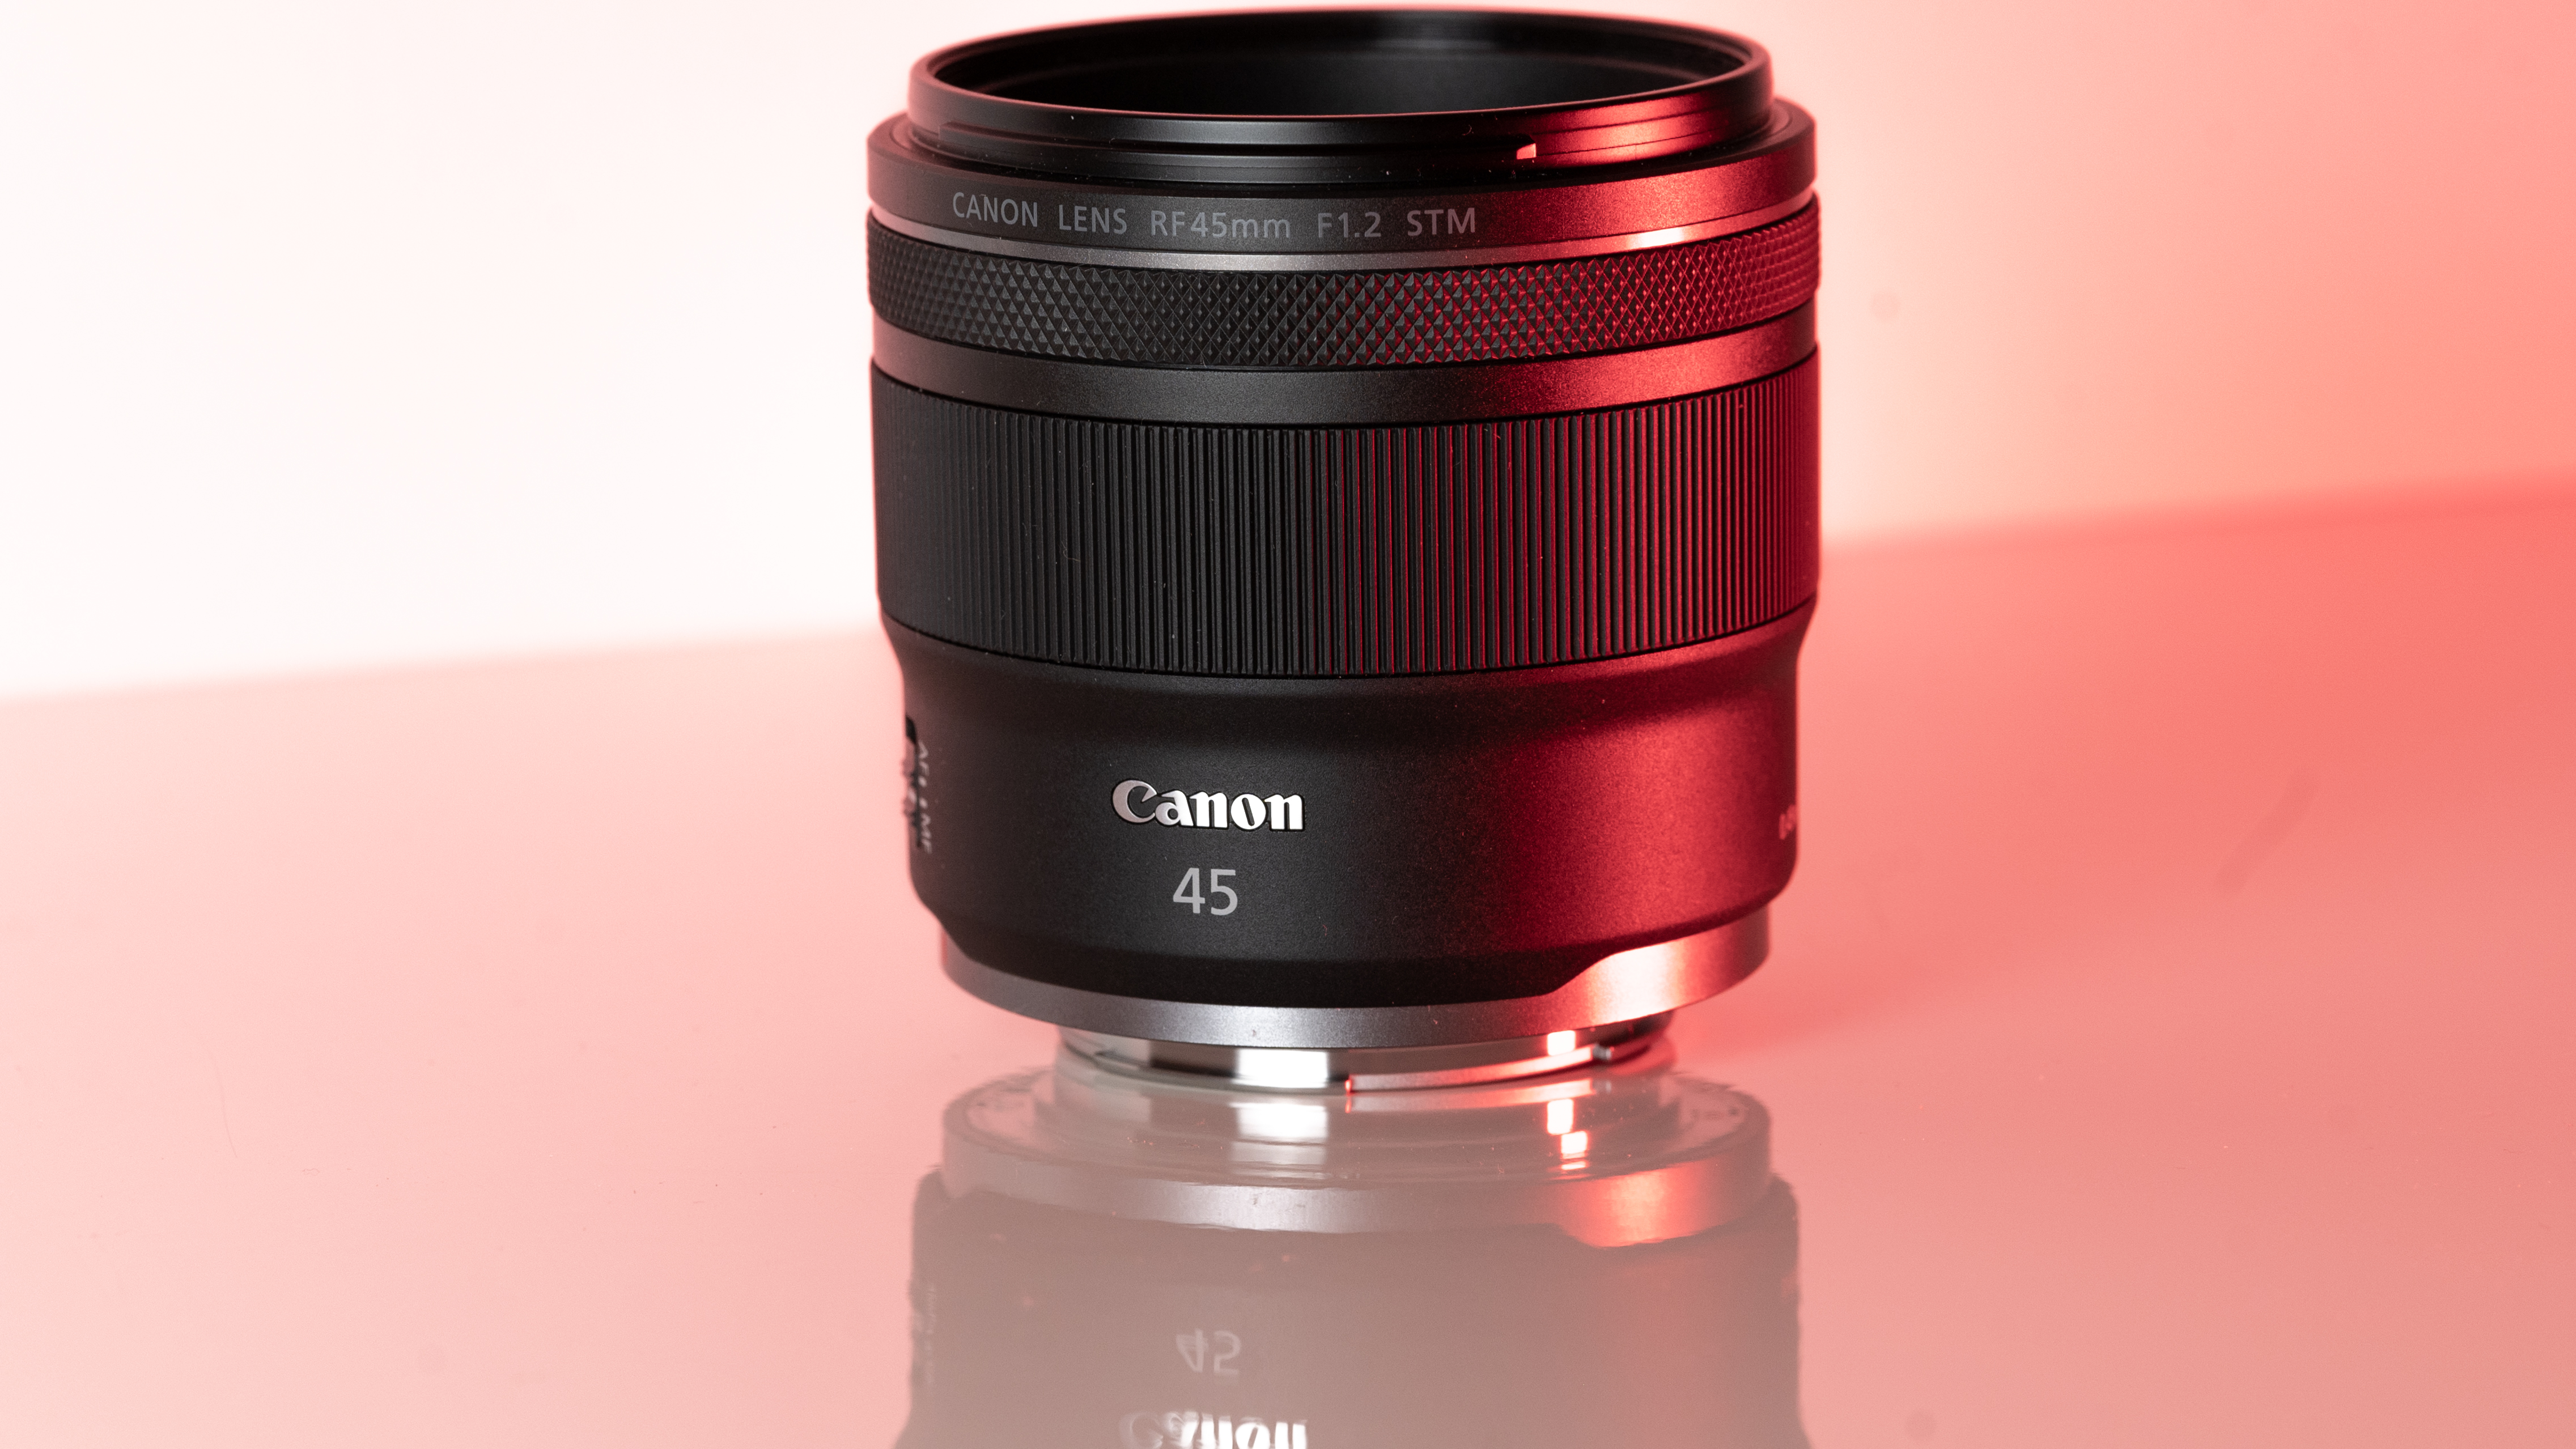
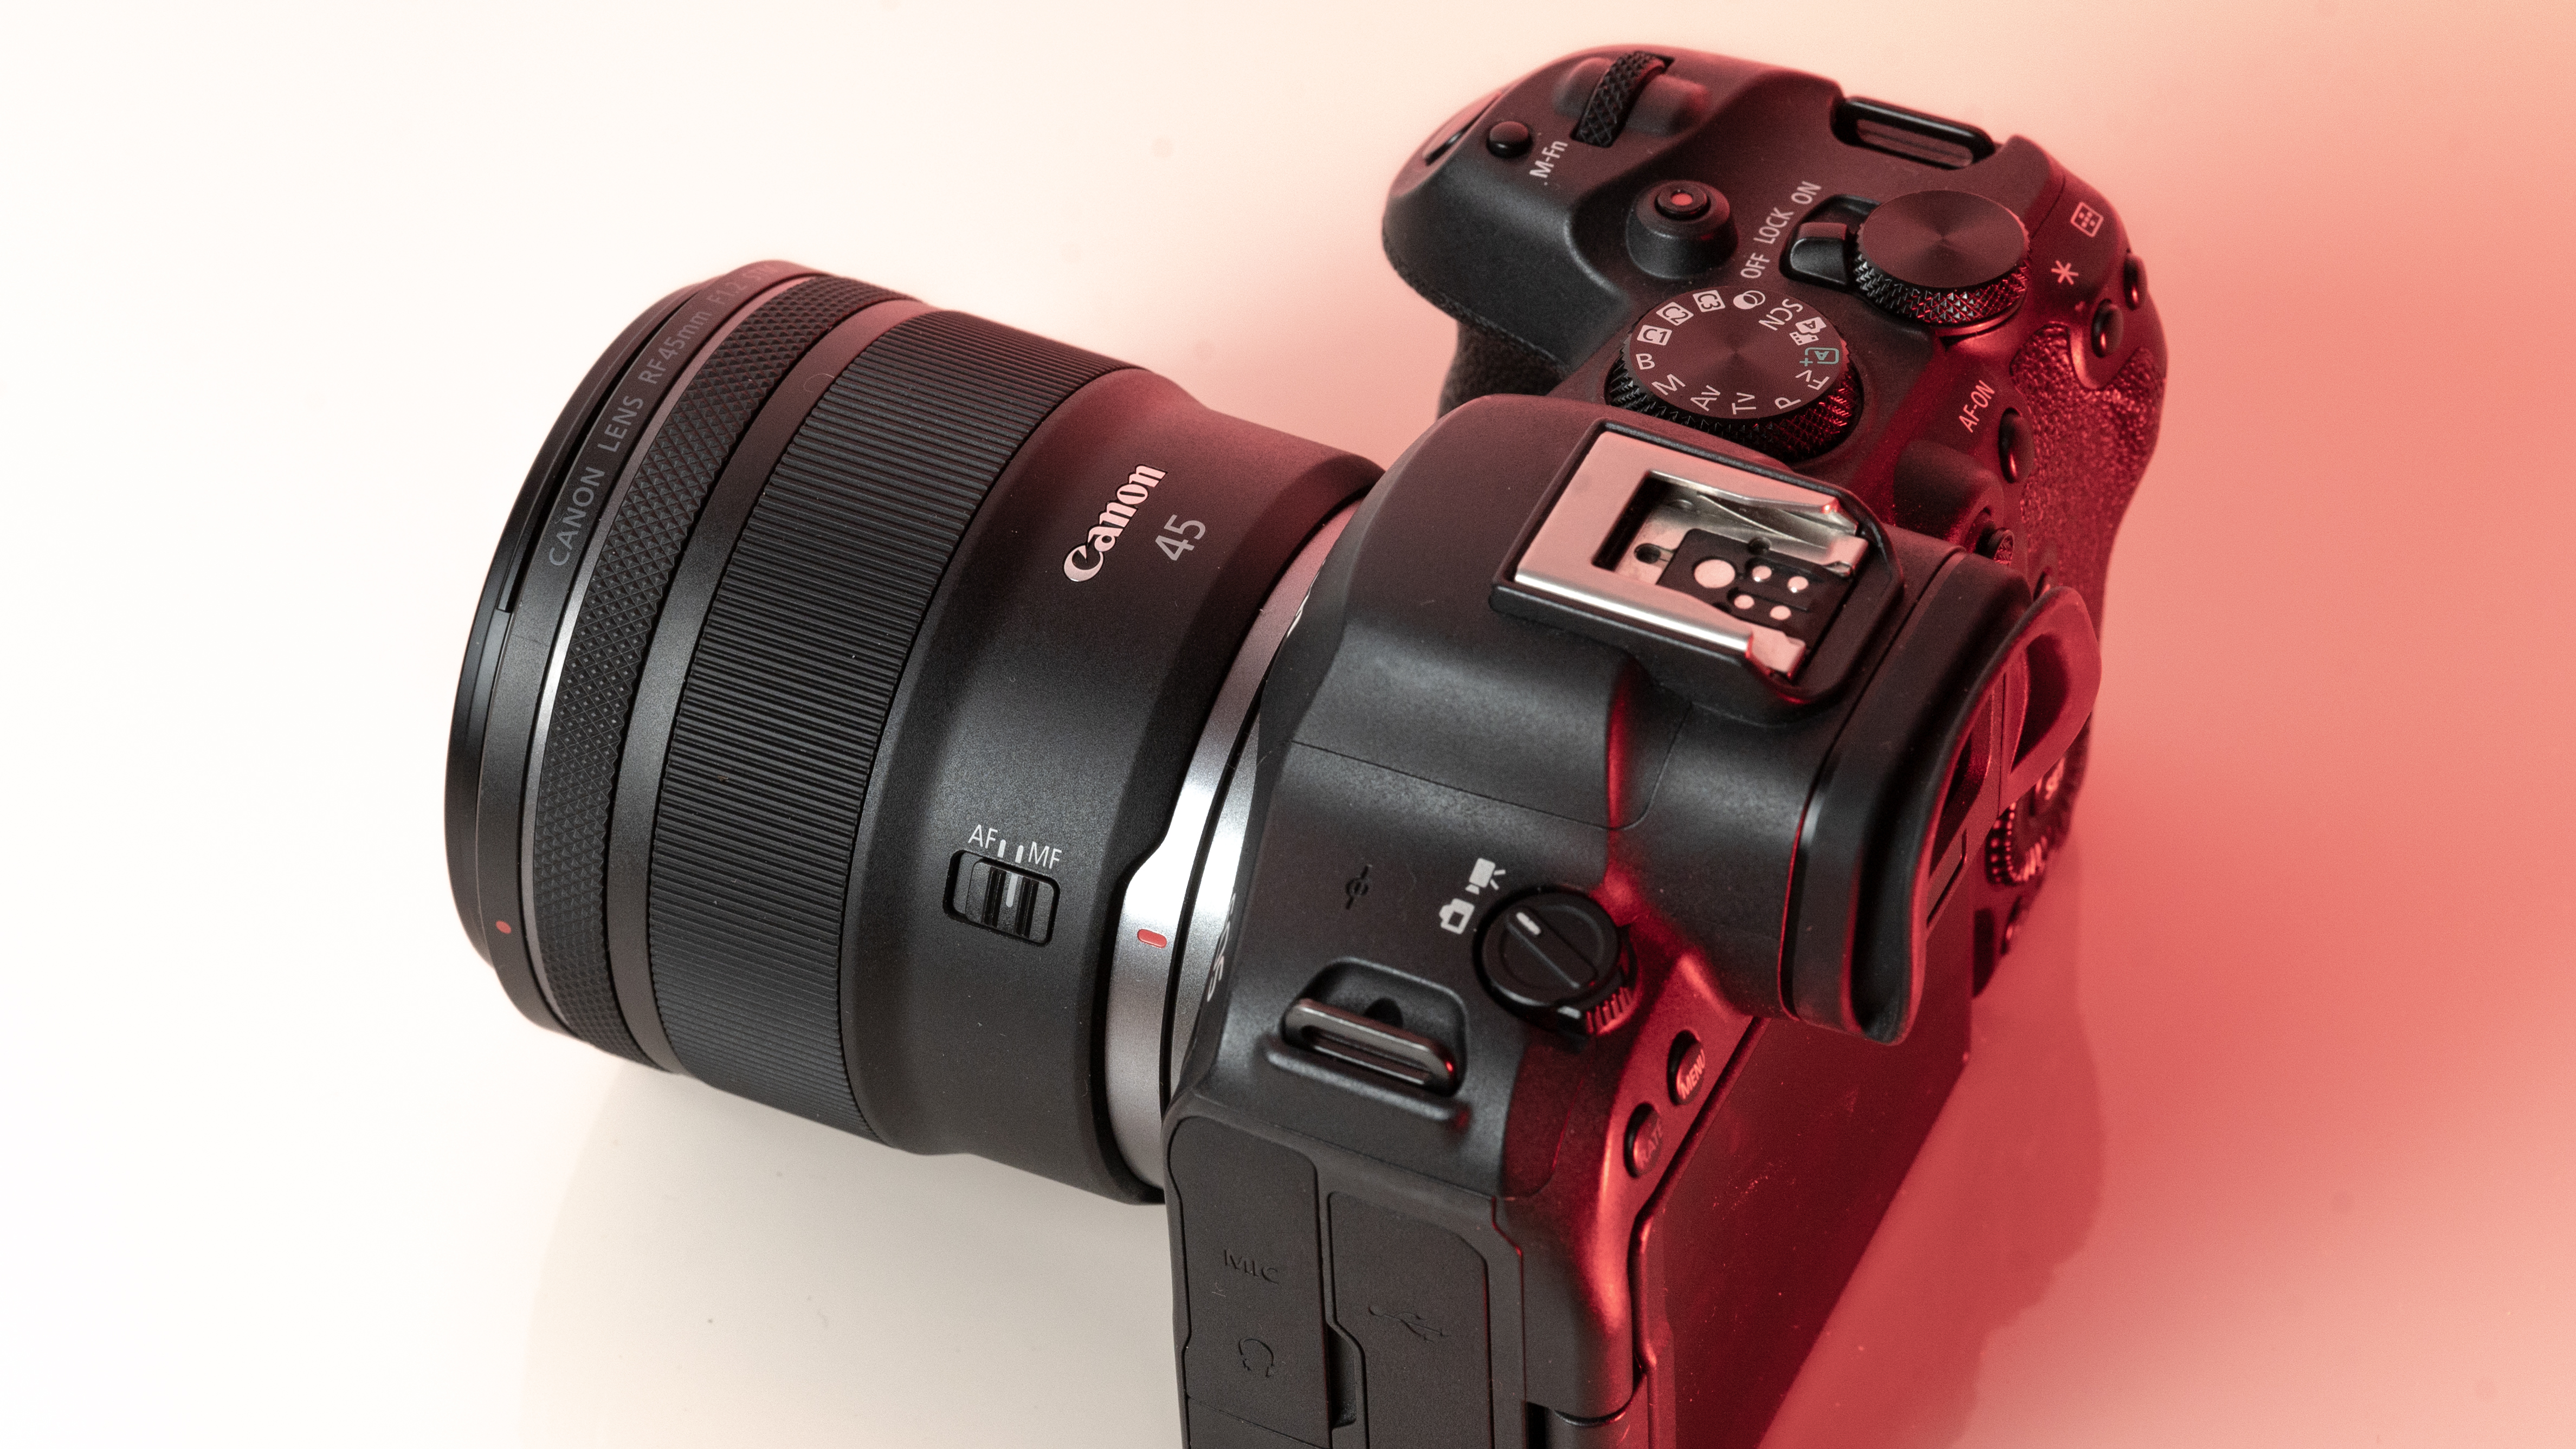
As you'd imagine from a relatively affordable lens, the RF 45mm f/1.2 has quite a minimalist design. You do get a few handy controls, however, such as the MF/AF switch and a fully customizable control ring right next to the lip of the lens' barrel.
The action on the focus ring is smooth and well-damped, but the control ring has a nice solid click to it that pairs nicely with its burled metal finish. Otherwise, the lens features a wholly plastic build apart from the mount — you can expect a metal mount in all modern Canon lenses, including the higher-end L series models.
Speaking of which, build quality for the RF 45mm f/1.2 doesn't feel that far off from the premium lenses. There's nothing here to suggest that this is a cheaper lens in the RF line-up, aside from the lack of the distinctive red barrel ring. In the hand, the RF 45mm f/1.2 feels solid and sturdy enough for a lens of this type.
With that said, Canon has cut a few corners to build this lens at a price. For one, you don't get a lens hood included - nor does the lens feature any weather sealing. Perhaps the lens will hold up to some light rain, but I certainly didn't want to risk it with my review unit.
These points aside, the most impressive thing about the RF 45mm's design is that it weighs just 12.2oz / 346 grams - something that feels almost impossible for a lens with this kind of aperture. It really is the main selling point for this lens, in my opinion. The 45mm is so compact that you'd be mistaken into thinking this lens is an f/1.8 prime, given its size.
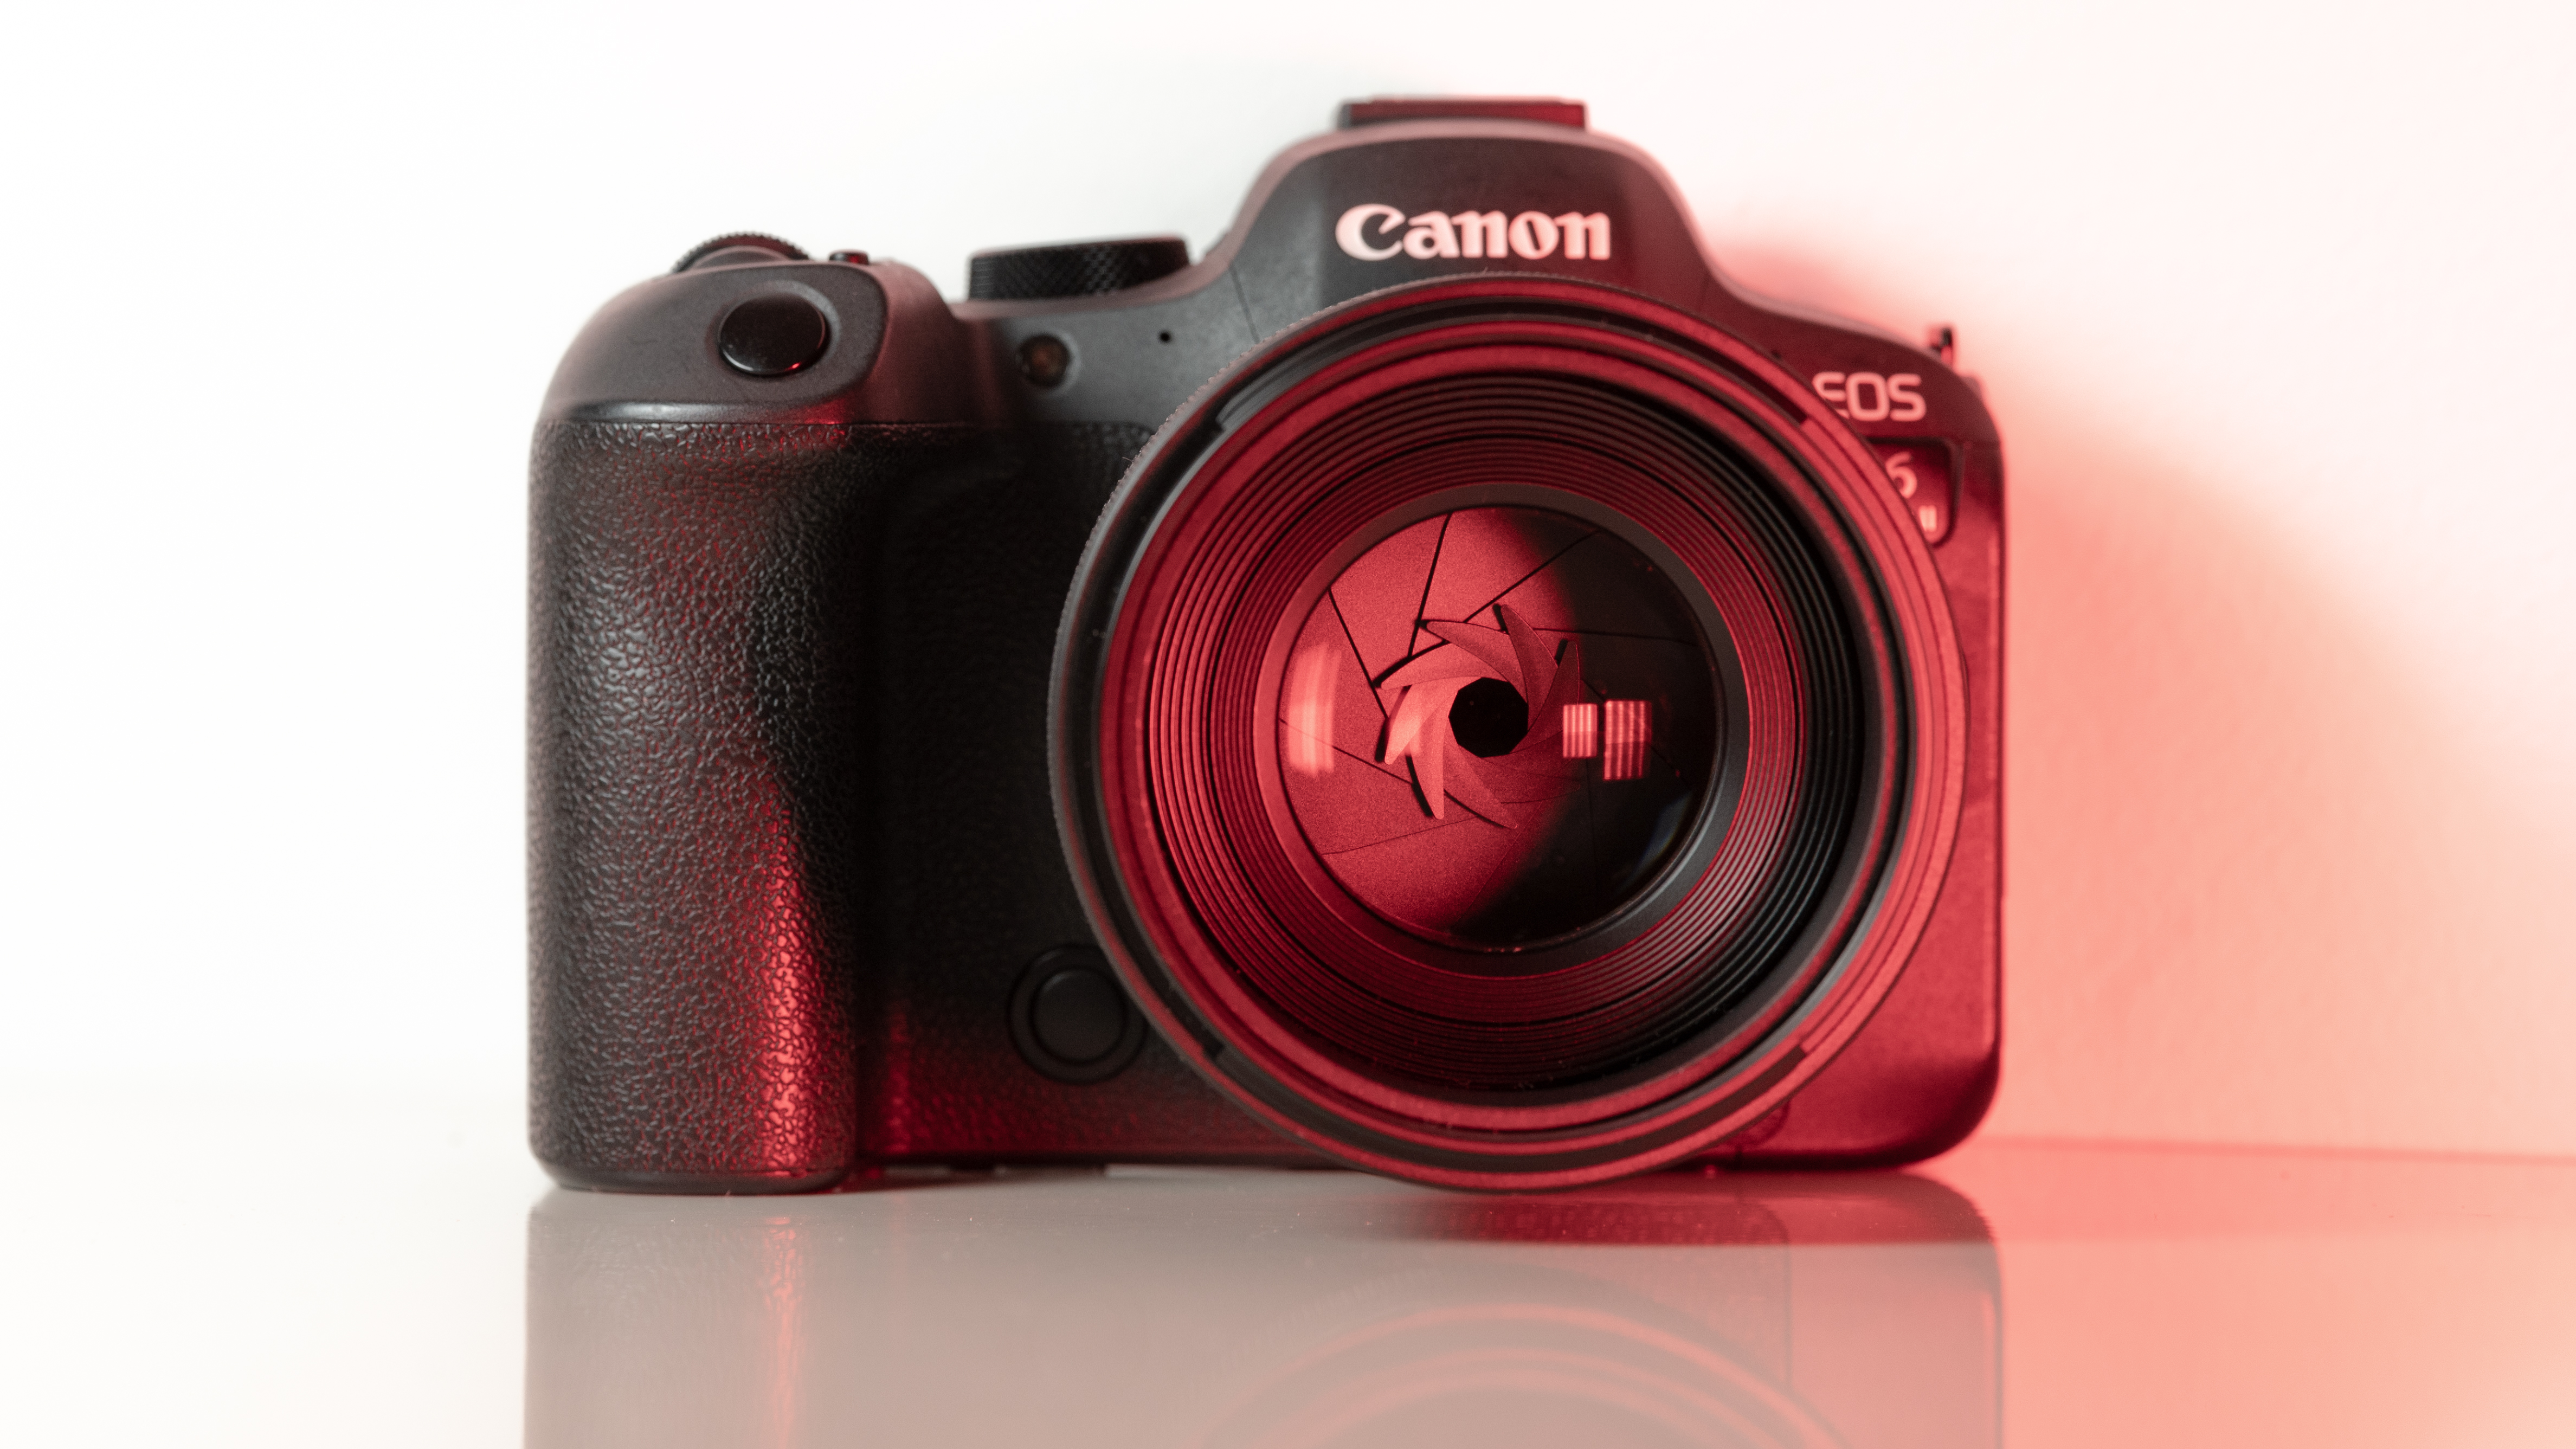
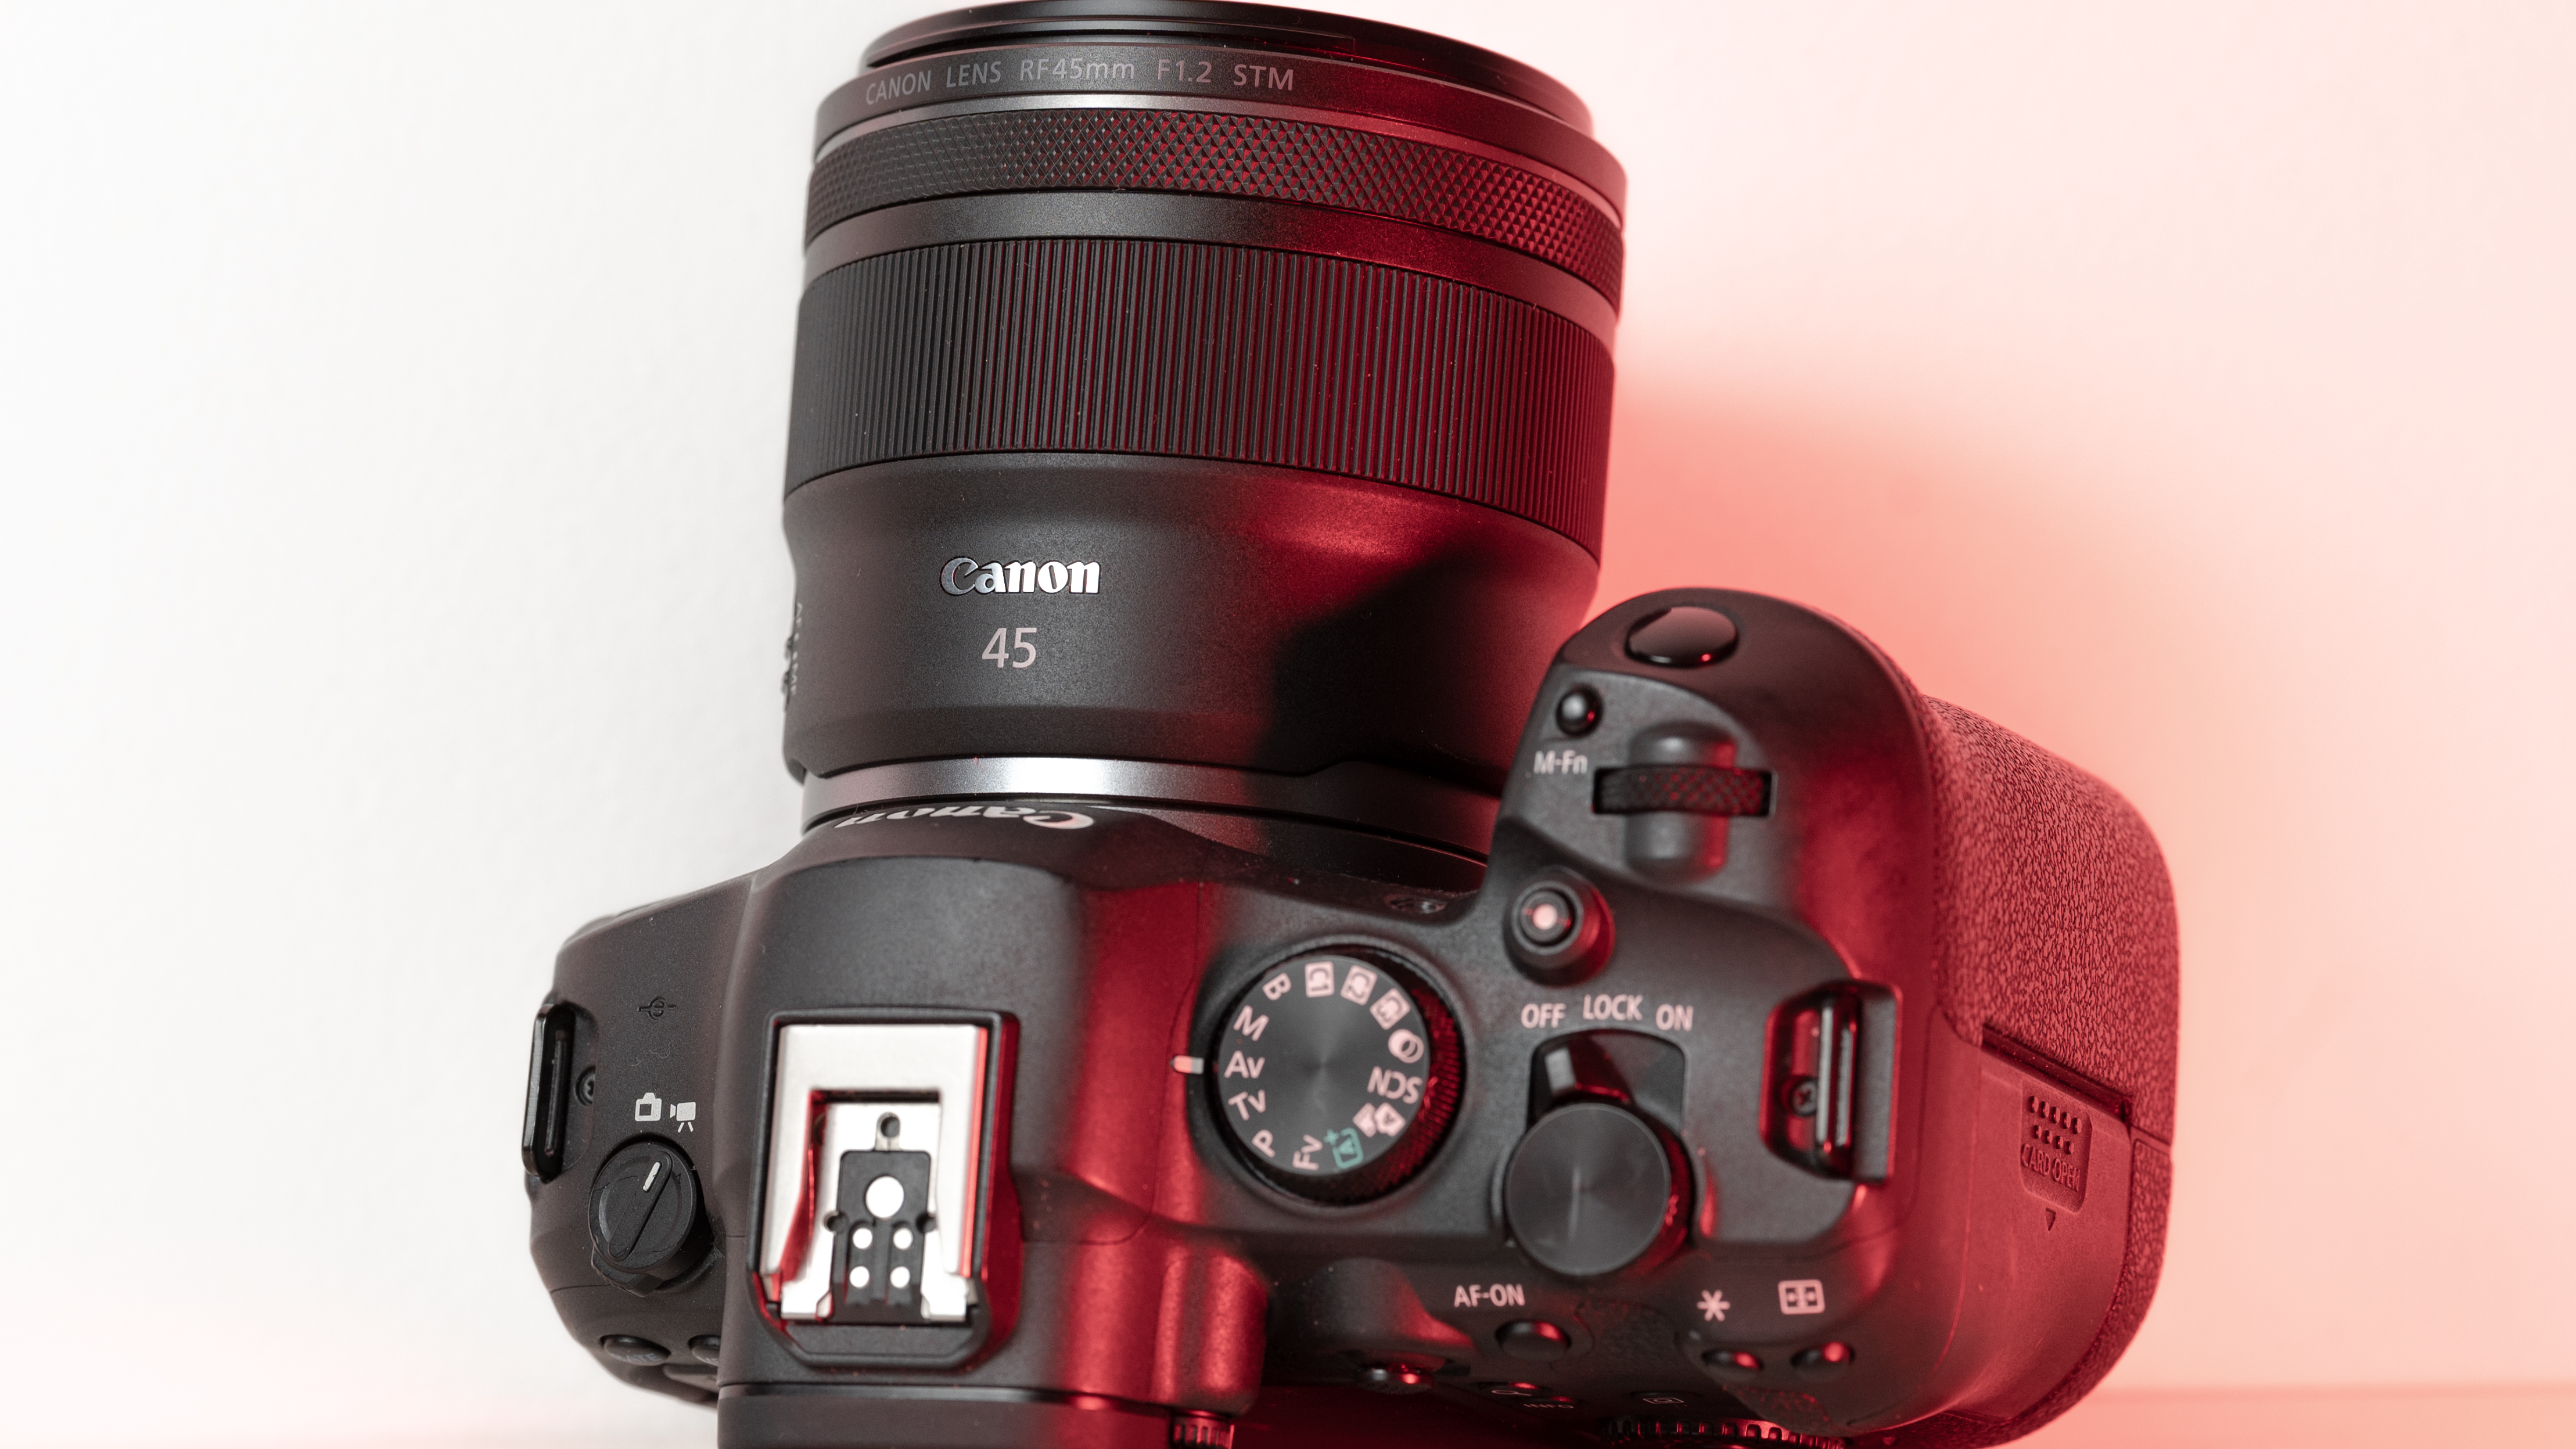
As you can see from the product pictures on this page, the 45mm pairs nicely with the EOS R6 Mark II, which is a full-frame body with a substantial hand grip. The lens is actually twice the weight of Canon's RF 50mm F1.8 STM prime (160g), but it's still light enough to hit that sweet spot where you don't feel like you're lugging around a huge piece of glass everywhere.
As stated, I tested this lens on the R6 Mark II. I think you'll also be fine if you pair this 45mm up with the Canon EOS R8, but the R8's comparatively small grip may result in a slight amount of front-heaviness. This is a light prime considering the aperture, but it's certainly no pancake lens.
You may be wondering - if the RF 45mm is cheap, small, and extremely wide, what's the catch? Well, unfortunately, there are a few quirks when it comes to outright image quality for the 45mm F1.2 STM. This is definitely a 'character lens', for better or worse.
Firstly, the good stuff. If you're looking for those dreamy, blown-out backgrounds, then this lens definitely delivers. The aperture is so massive that you can get a good level of background separation here, even with relatively wide scenes. I could see this being a good option for environmental or full-body portraits on a budget.
The 45mm also offers a good level of sharpness. This is particularly the case in the centre of the frame, but stopping down the lens offers a great level of edge-to-edge sharpness. But of course, who's buying this lens to stop it down?


No, people are going to buy this lens because they want to make full use of that f/1.2 aperture at this exceptional price. Annoyingly, there are a few caveats when shooting wide open with this lens, however.
The first is the busy bokeh - something which I think will likely be the most contentious attribute for prospective buyers. There's no escaping that, at f/1.2, you get a significant cat's-eye effect on the bokeh with the 45mm. Once you see it, you can't really un-see it, and the swirling effect gets more extreme towards the edge of the frame. I think some people will love the distracting swirly effect of this lens, whereas others will find it too busy.
After using the lens in a range of scenarios, I'm somewhere in the middle of the two camps. As you can see from the samples, the bokeh balls not only have quite strong cat's-eye shapes, but also hard to remove fringing. They're technically very imperfect, but there's obviously something to be said for a lens with this much character if you're going for a certain 'vintage' look. It's definitely subjective.


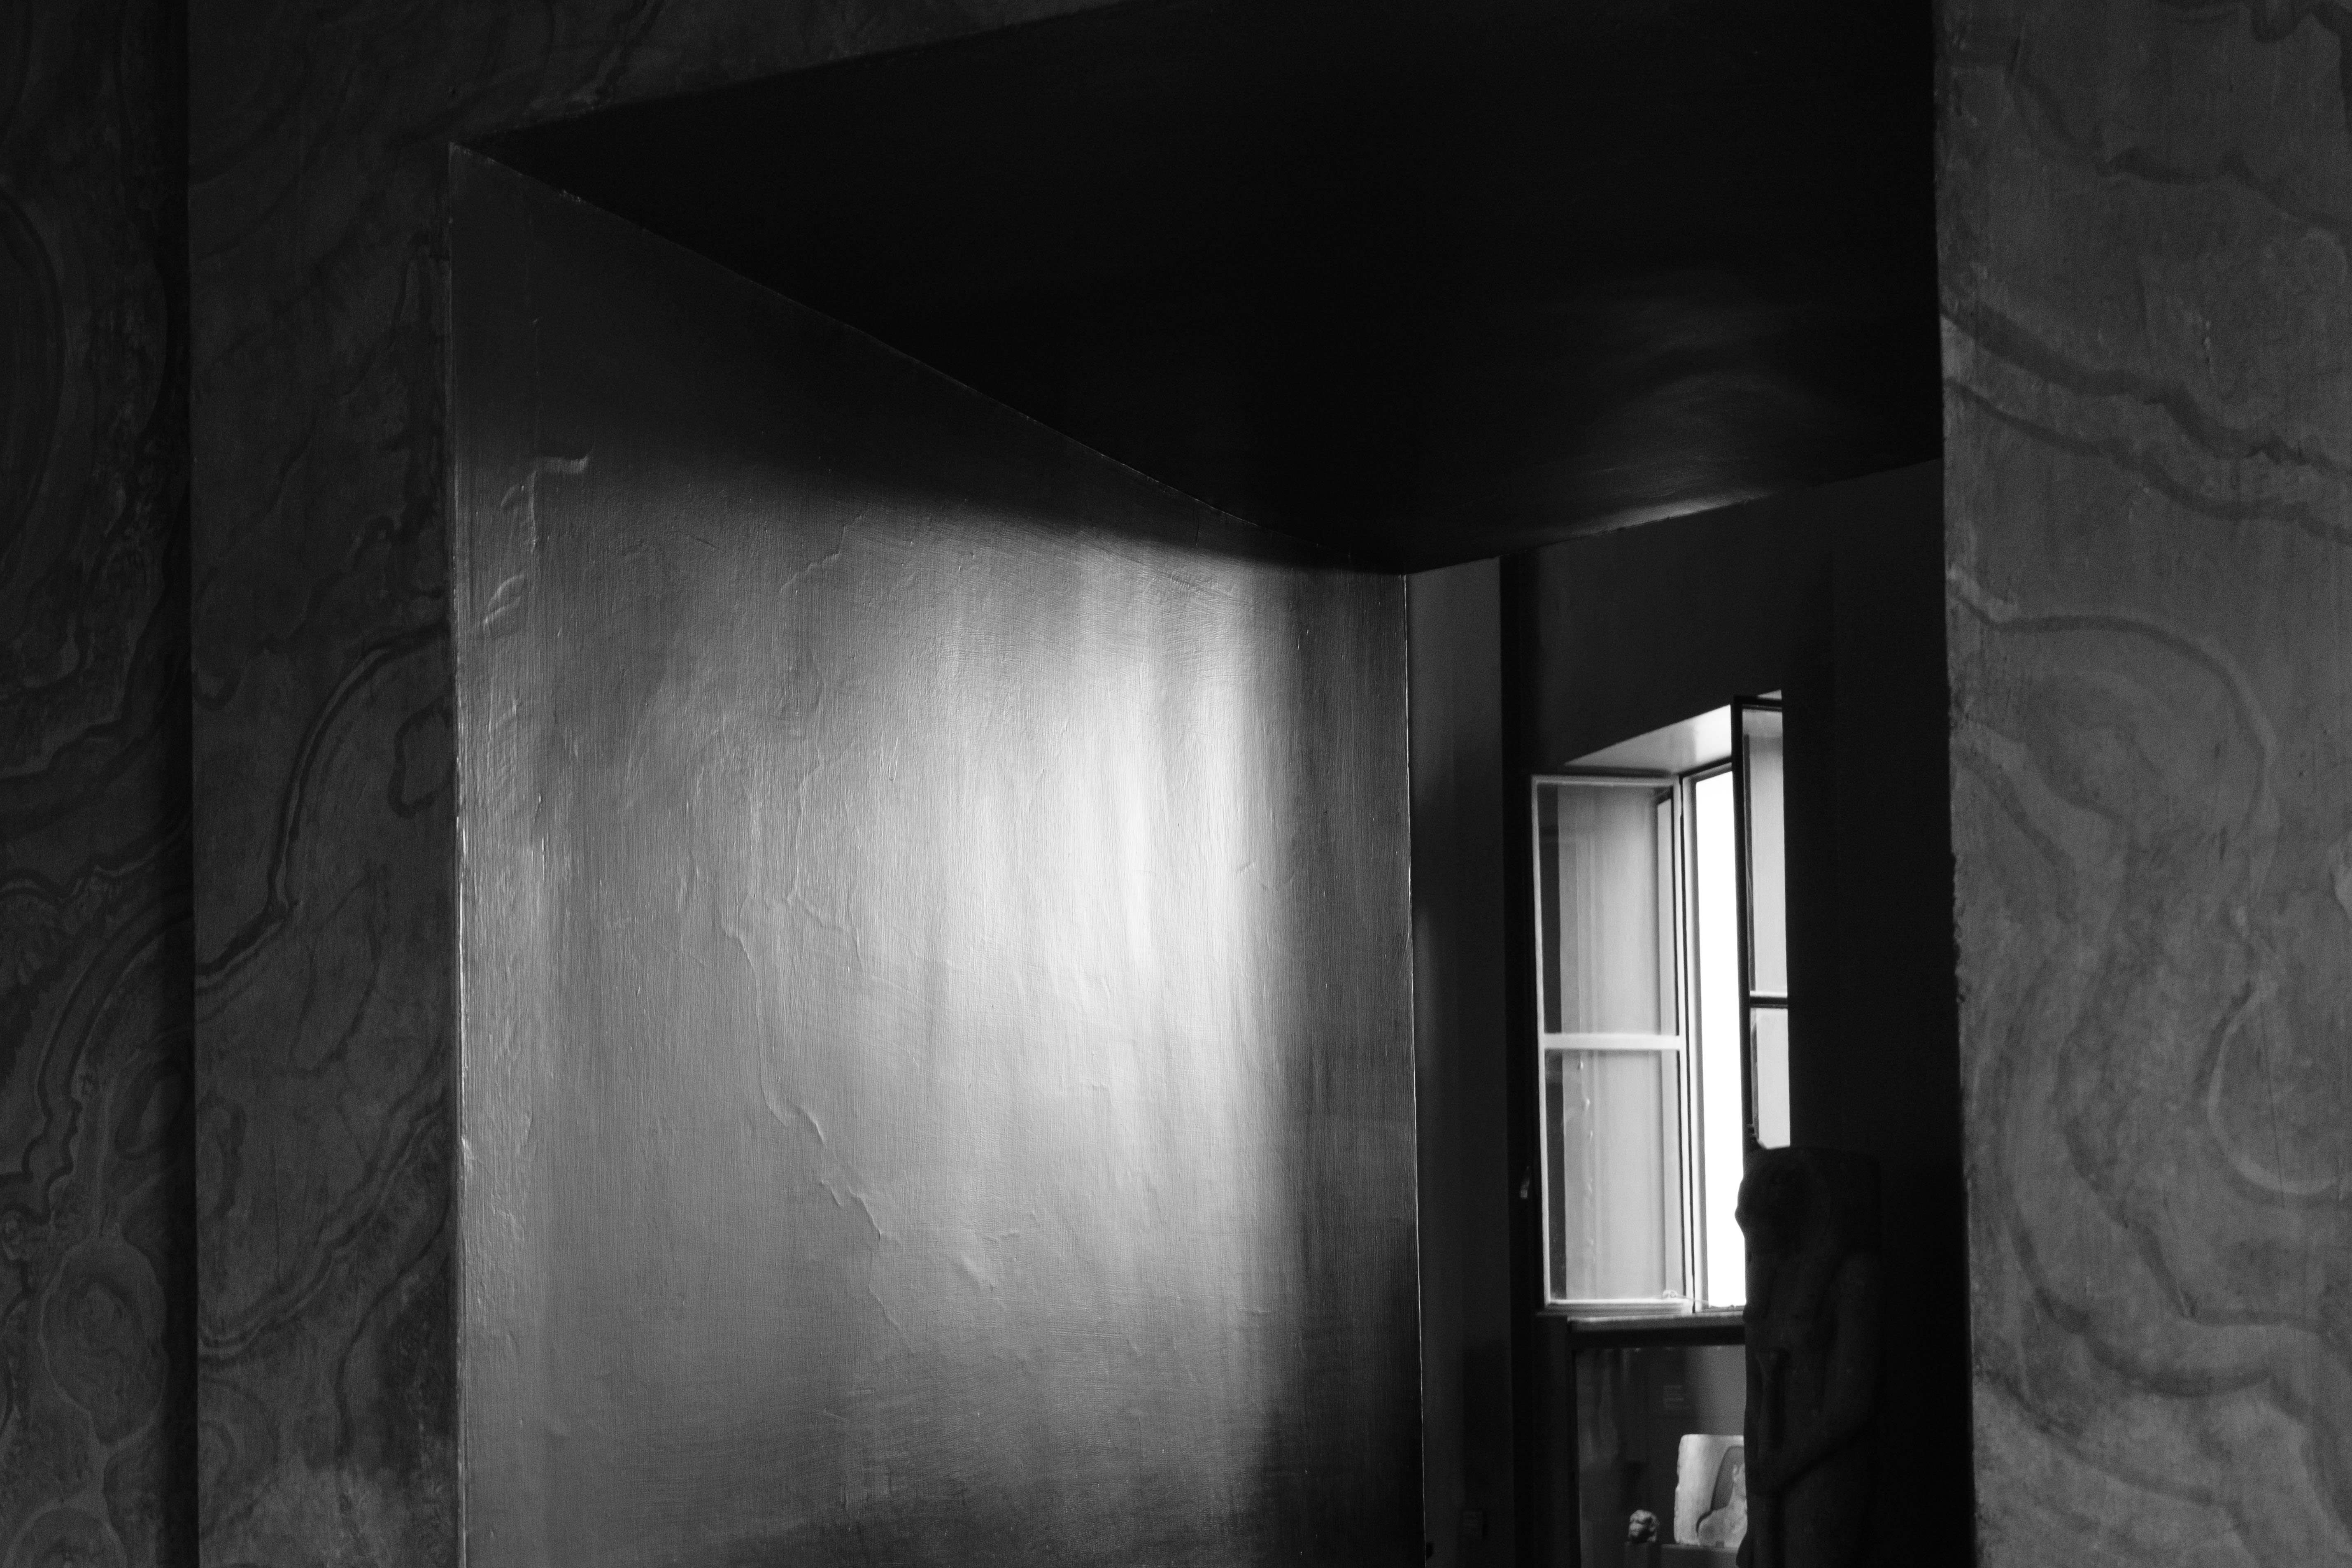
One thing I'm less on the fence about, however, is the extreme level of chromatic aberration this lens exhibits at its widest aperture. I don't think I've used a modern lens with this much CA in recent years.
The image above is a good example. You can see a significant amount of purple fringing around the backlit pattern on the wall. Towards the center of the frame, CA is relatively well controlled, but the fringing gets progressively worse toward the edges. It's notable because this particular shot is a JPEG straight from the Canon EOS R6 Mark II, with all in-camera lens correction applied.
If you do buy this lens, you're going to have to get well acquainted with the de-fringing tool in your photo editing app of choice. Luckily, this is one of the quickest and easiest fixes that anyone can make these days, so it's not a complete deal breaker for a relatively affordable lens like this.
In terms of focusing, the RF 45mm F1.2's proprietary STM stepping motor isn't as quick or silent as the ones featured in Canon's higher-end models, but it is more than sufficient, and able enough to provide quick and reliable autofocus at f/1.2 when paired with the brand's latest full-frame bodies.
One thing I did notice is a very small amount of focus breathing when close focusing at f/1.2. There is also a very slight whining noise when acquiring focus, which again, could be something worth considering if you're thinking about using this lens for video. With the example I've included above, you can see the lens slightly hunting for focus when it attempts to re-lock on the closer object.


You want to shoot environmental portaits
I think this lens is perfect for slightly wider scenes where you still want to separate the subject from the background.
You shoot a lot of low-light work
What's an f/1.2 aperture good for? Low light, of course! It shouldn't even need to be said that this lens's extremely wide aperture is fantastic for making sure as much light as possible hits your camera's sensor.
You need something weather sealed
As a cheaper lens in the Canon line-up, the RF 45mm doesn't feature any environmental sealing. This one isn't for use in extreme inclement weather.
You need perfect image quality
While the RF 45mm offers an extremely wide aperture, this comes with some optical trade-offs. This lens has a lot of character, unlike the more 'perfect' L-Series models.
Canon provided TechRadar with the Canon RF 45mm F1.2 STM for one week only, which is a relatively short window for a lens review. With that said, I was able to fully test the lens in both studio and real-world scenarios.
During my week with the Canon RF 45mm F1.2 STM, I tested the lens across a wide range of apertures for both video and photography. In that time, I made sure to try to get examples at f/1.2 to show prospective buyers what to expect with such a wide aperture - including the various flaws that this lens sometimes showcases.
First reviewed March 2026
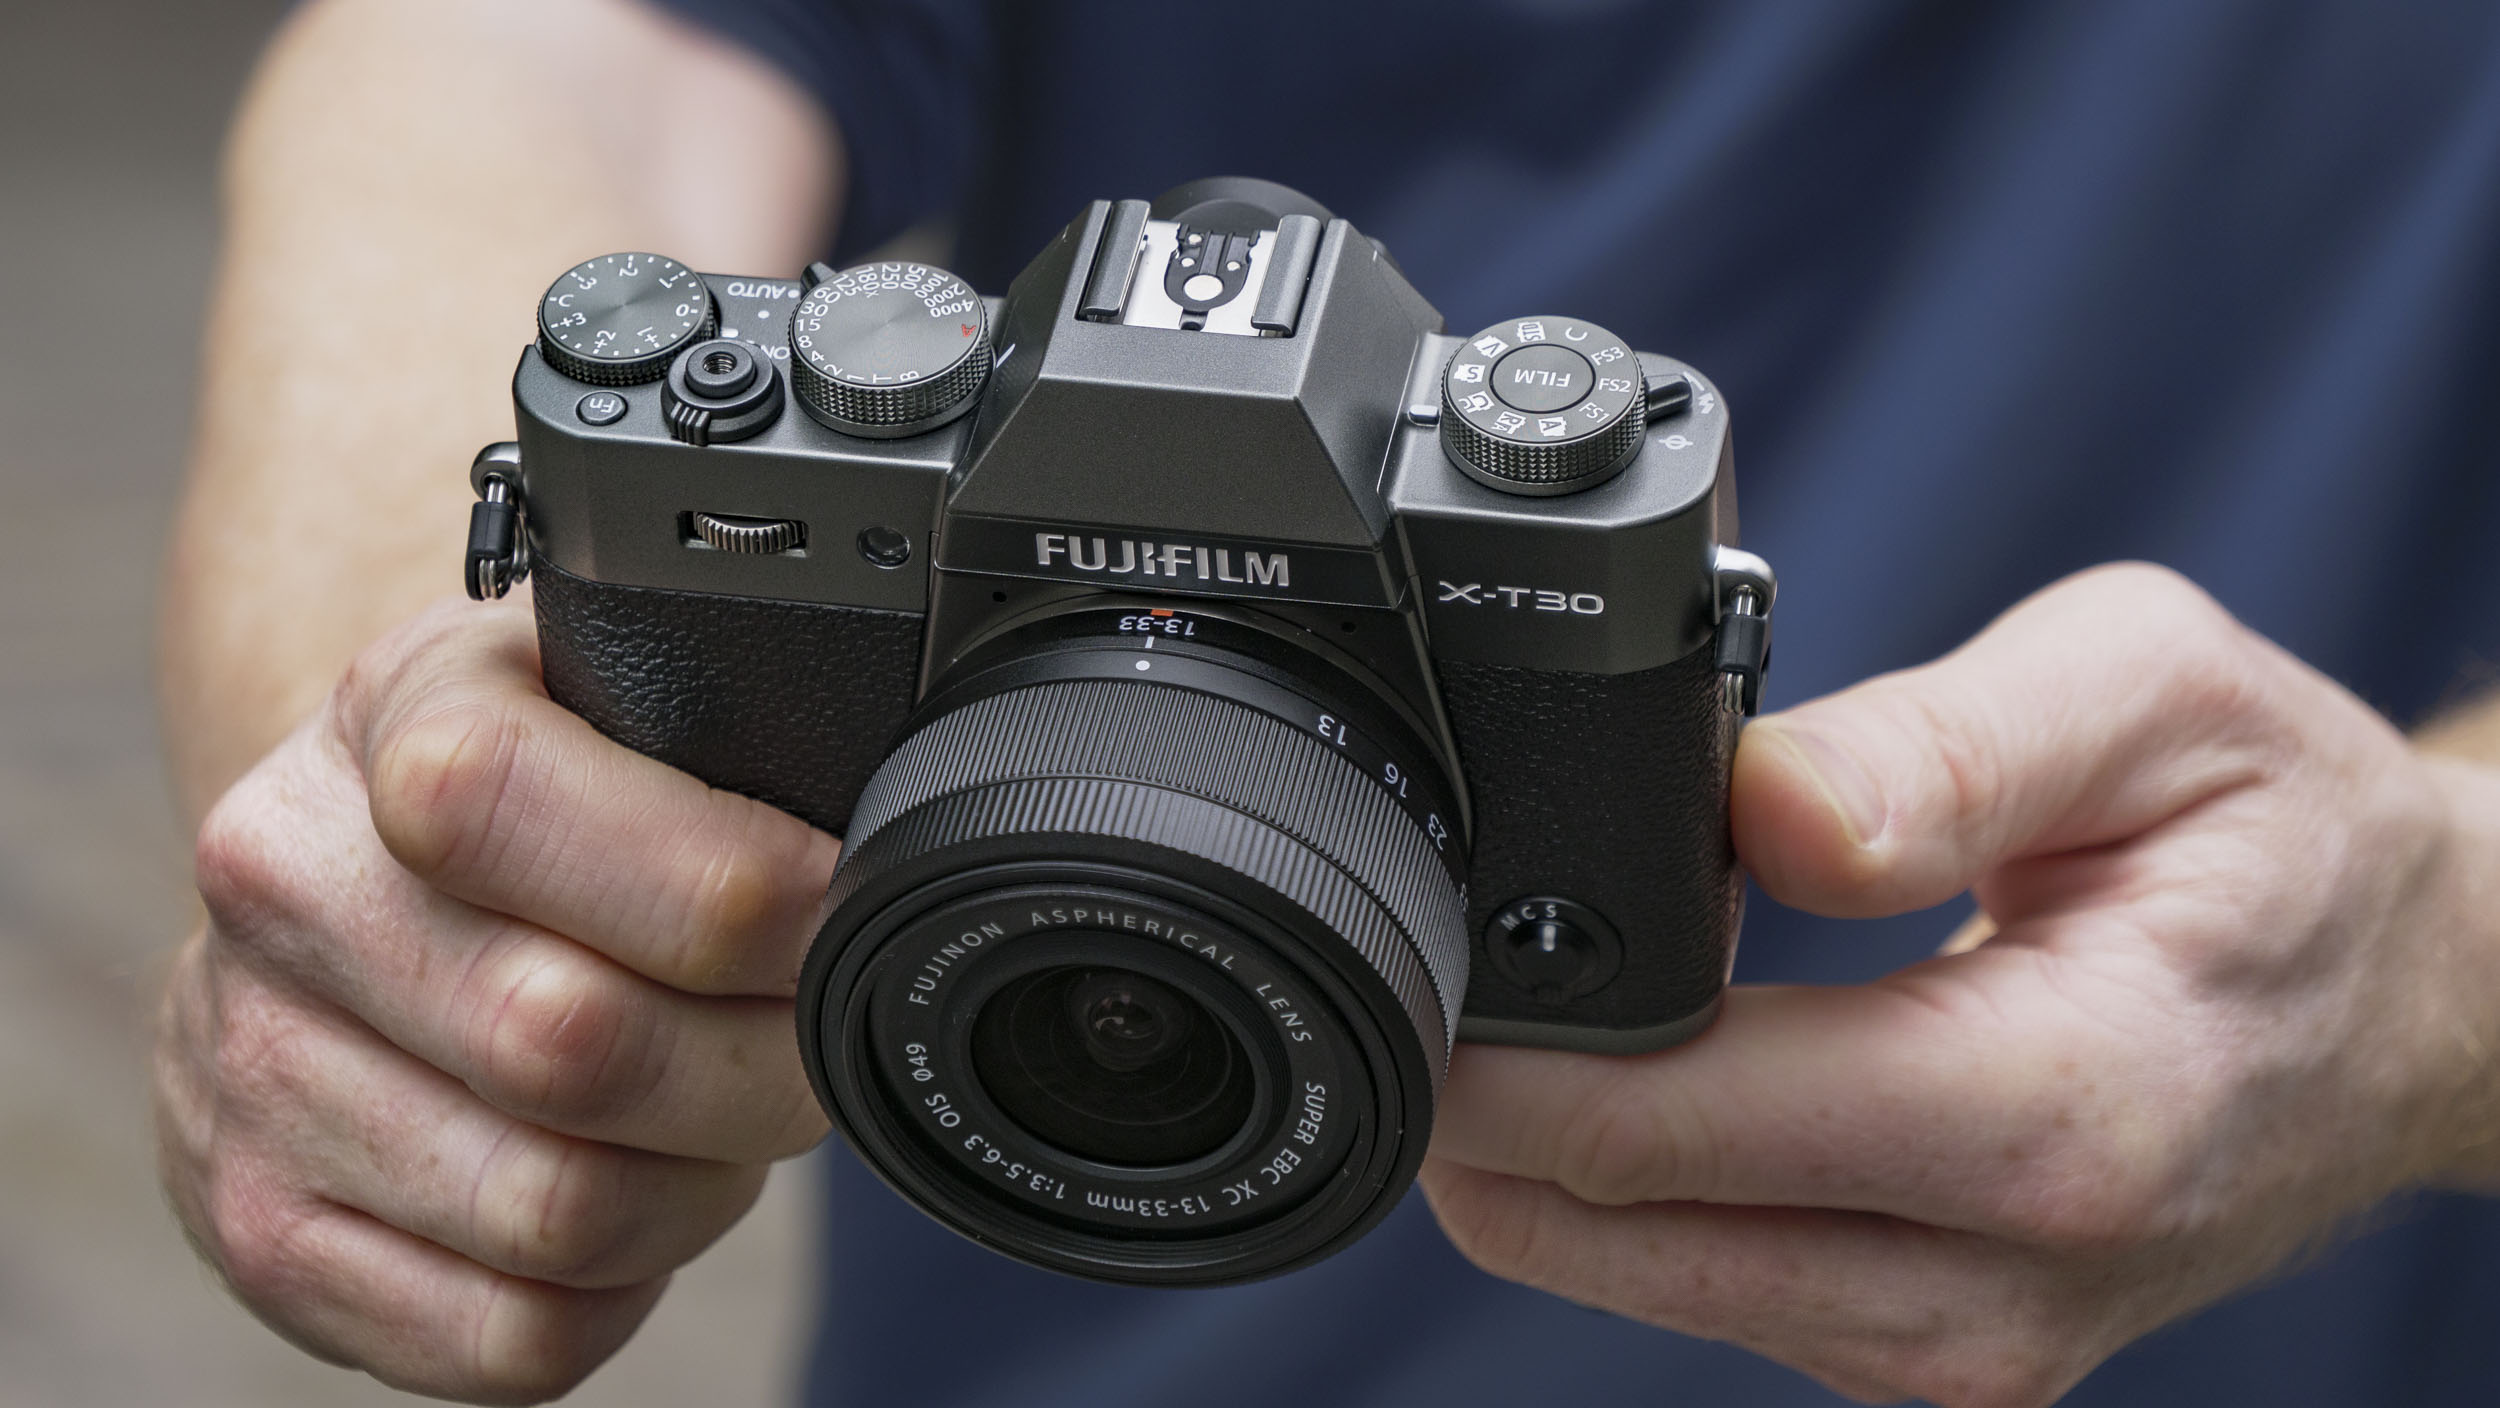
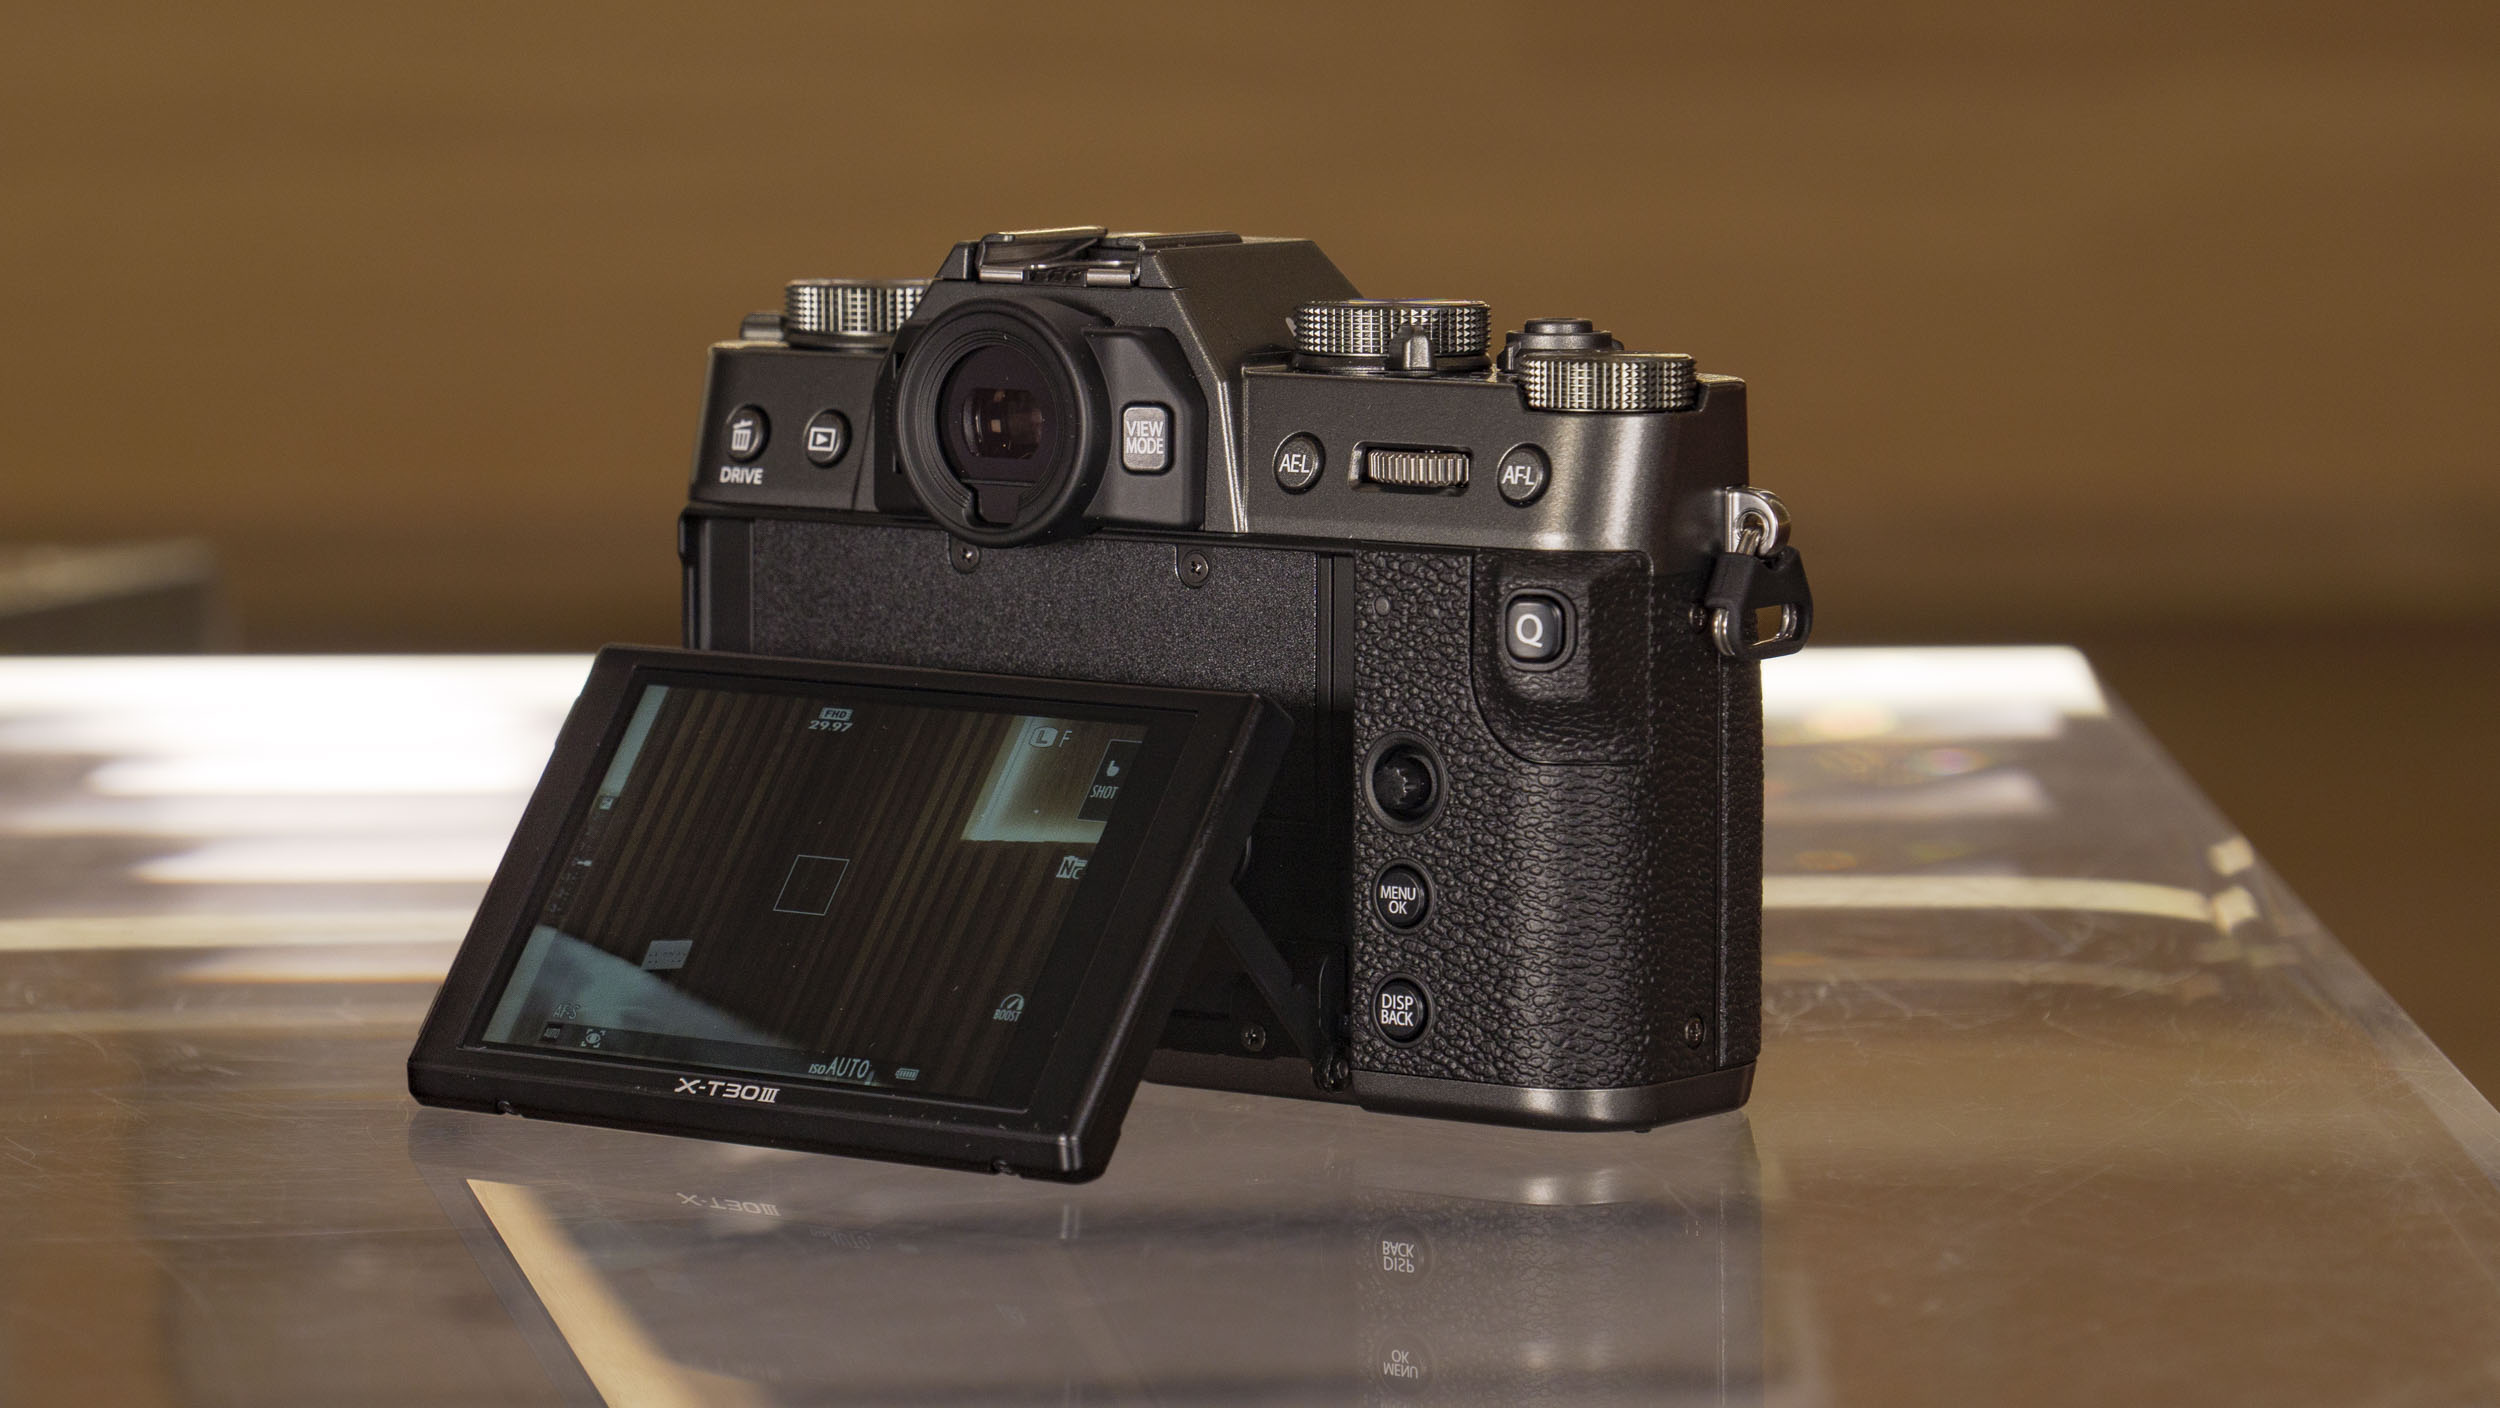
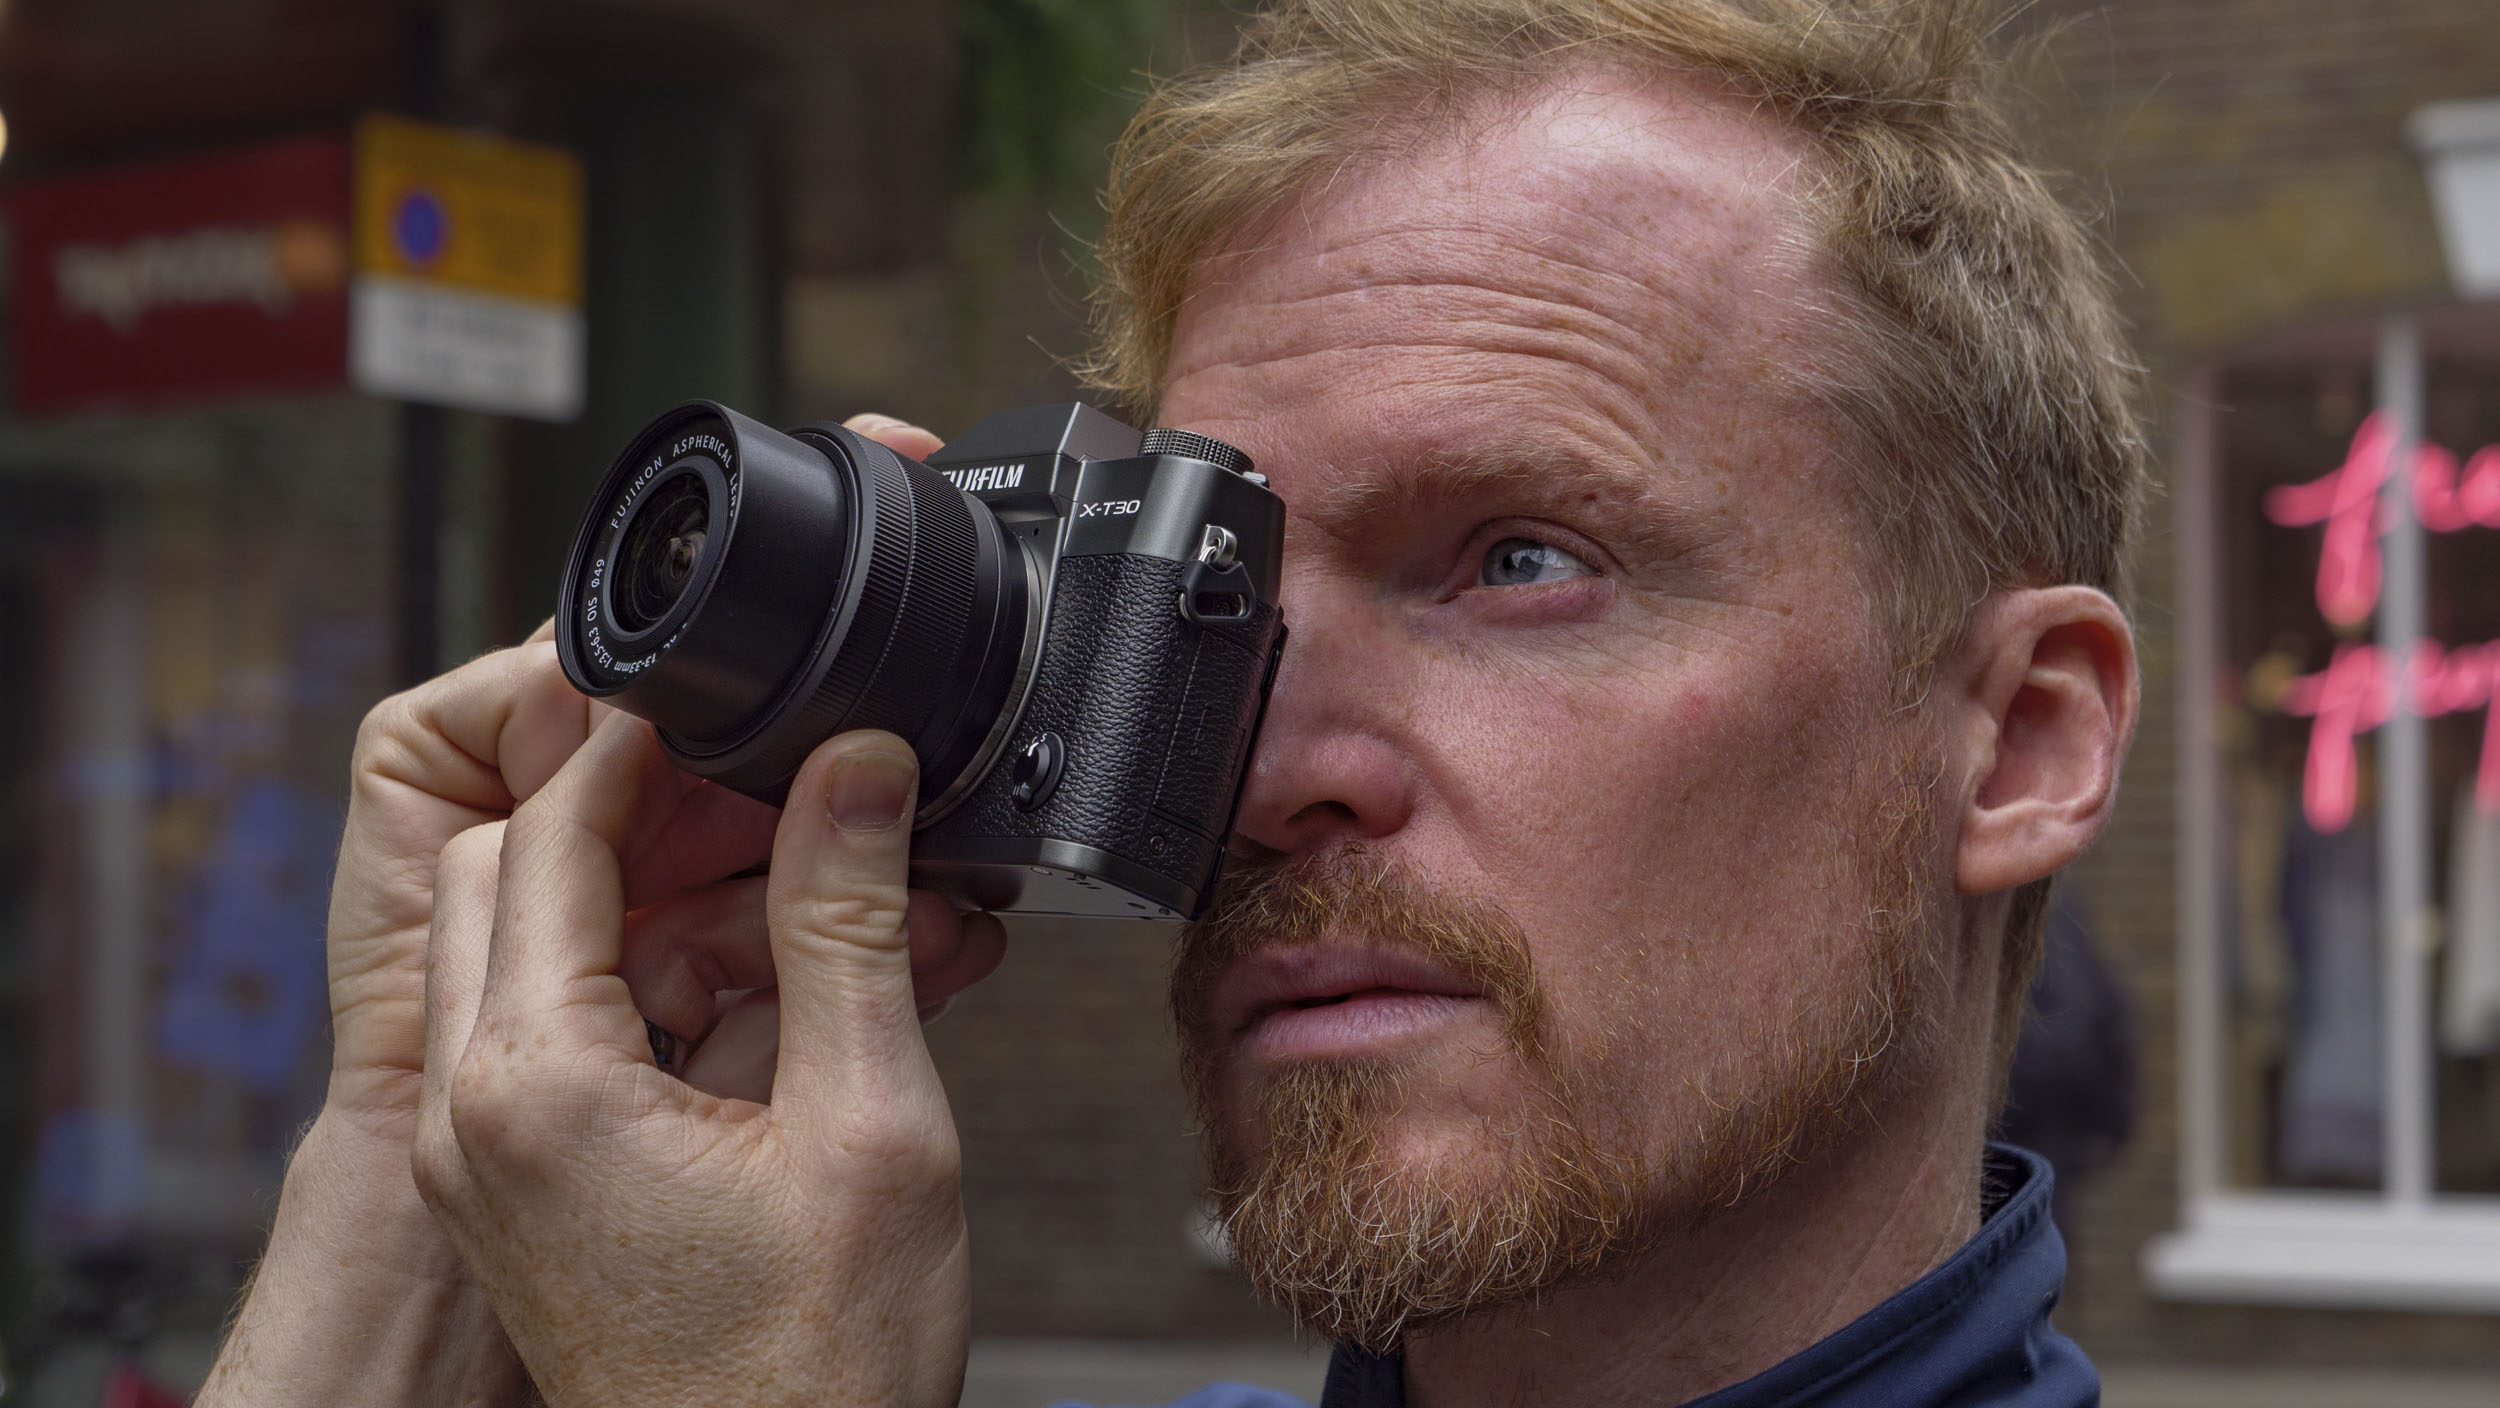
Fujifilm has updated its beginner mirrorless camera for photographers with the new X-T30 III, which comes four years after the Fujifilm X-T30 II.
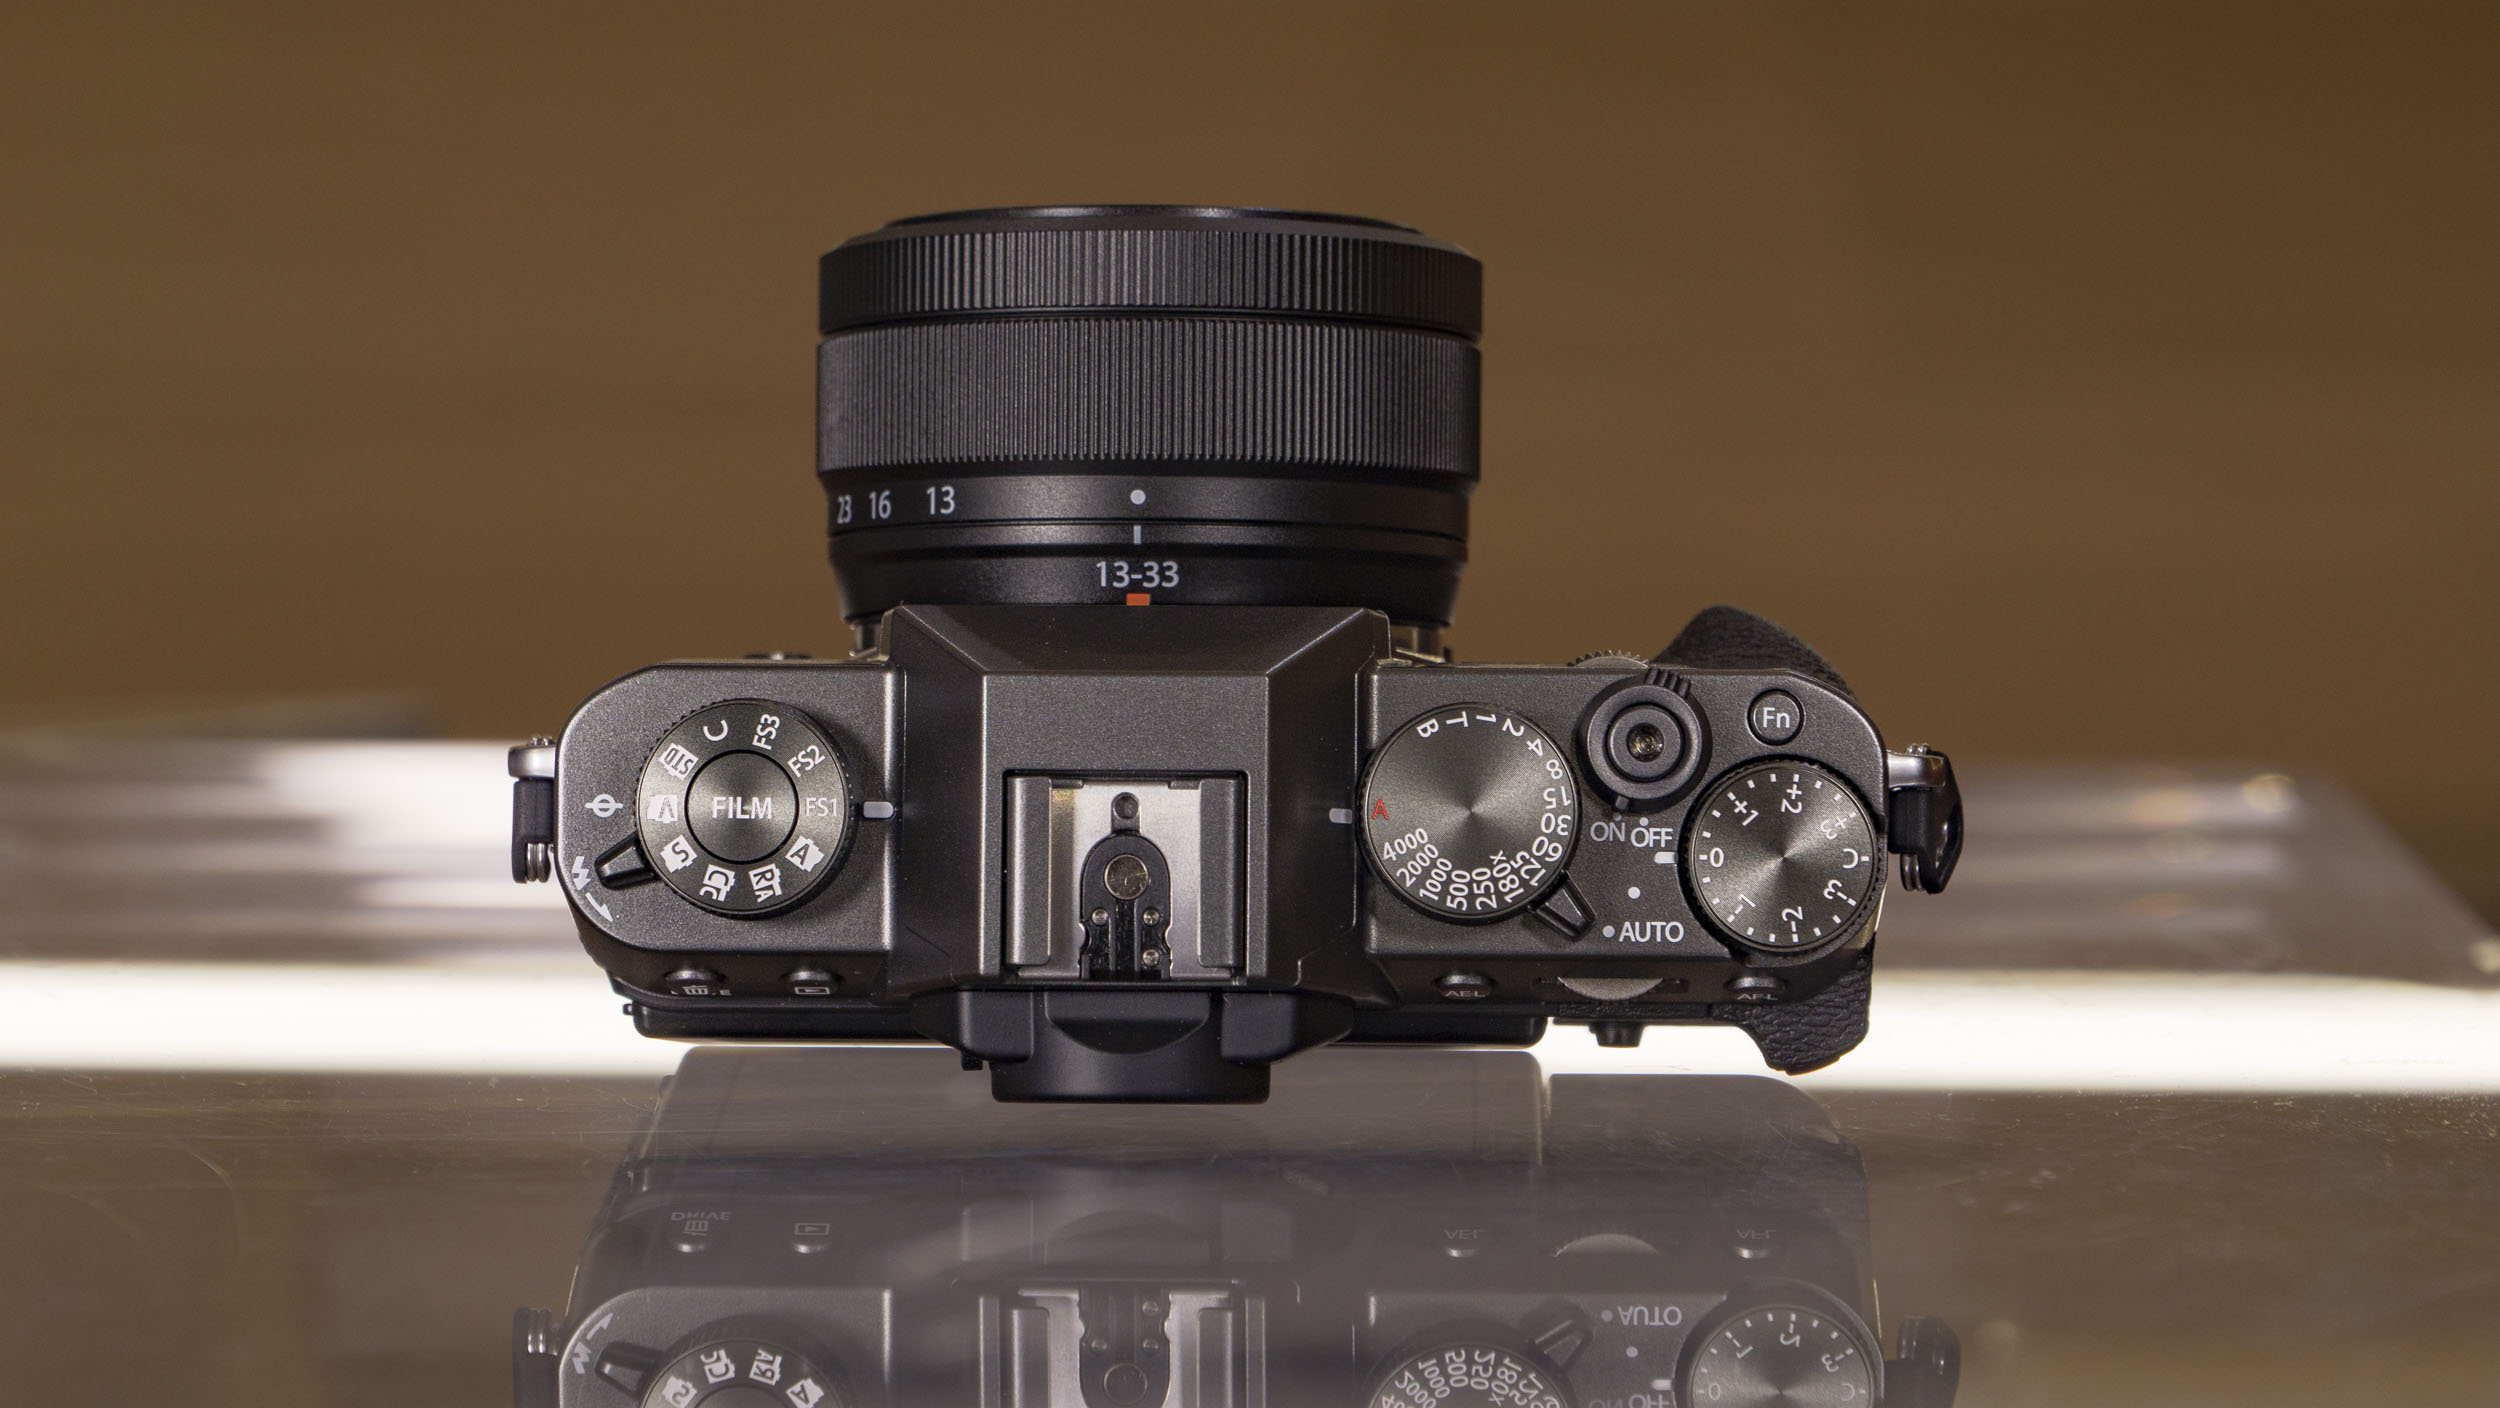
It launches alongside a tiny new XF 13-33mm f/3.5-6.3 OIS kit lens (that's a 20-50mm effective focal length) that's smaller and lighter than the 15-45mm, the previous kit lens packaged with Fujifilm’s low-cost cameras. The portable pair weigh just 17.7oz / 503g combined.
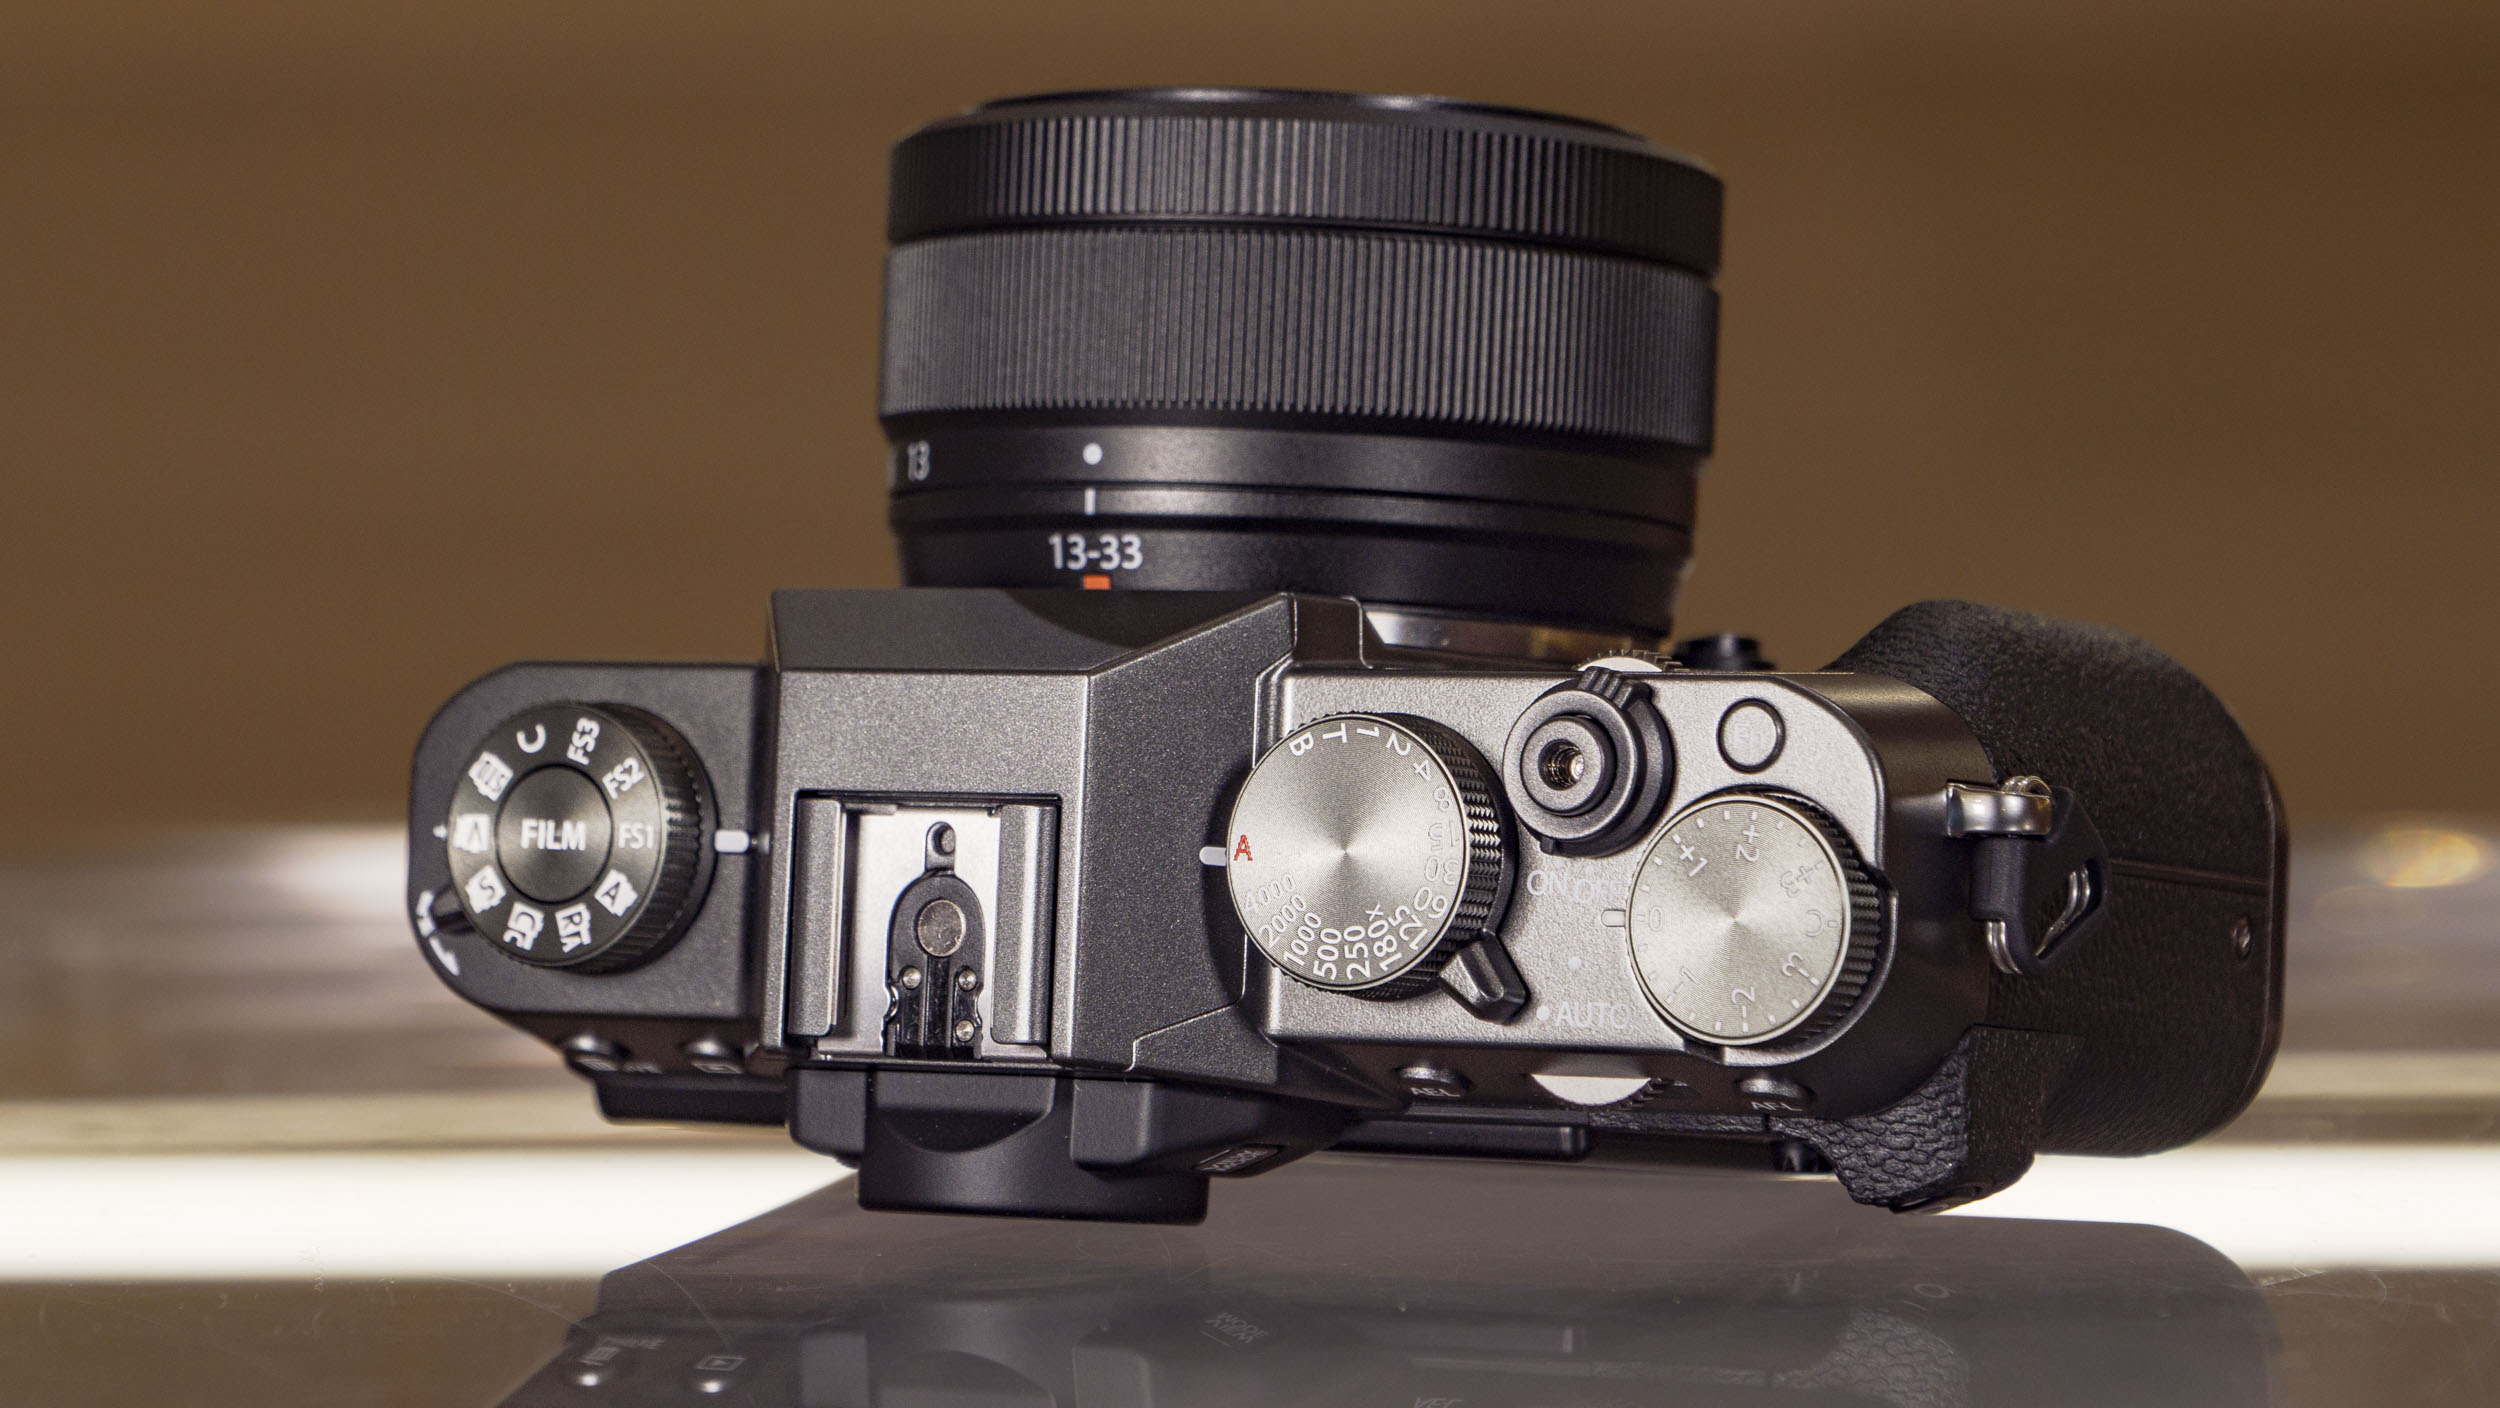
Going on appearances alone, very little has changed. There's now a film simulation dial in place of a shooting mode dial, much like on other recent Fujifilm cameras including the X-T50, with all 20 simulations available, and the ability to add film recipe shortcuts.
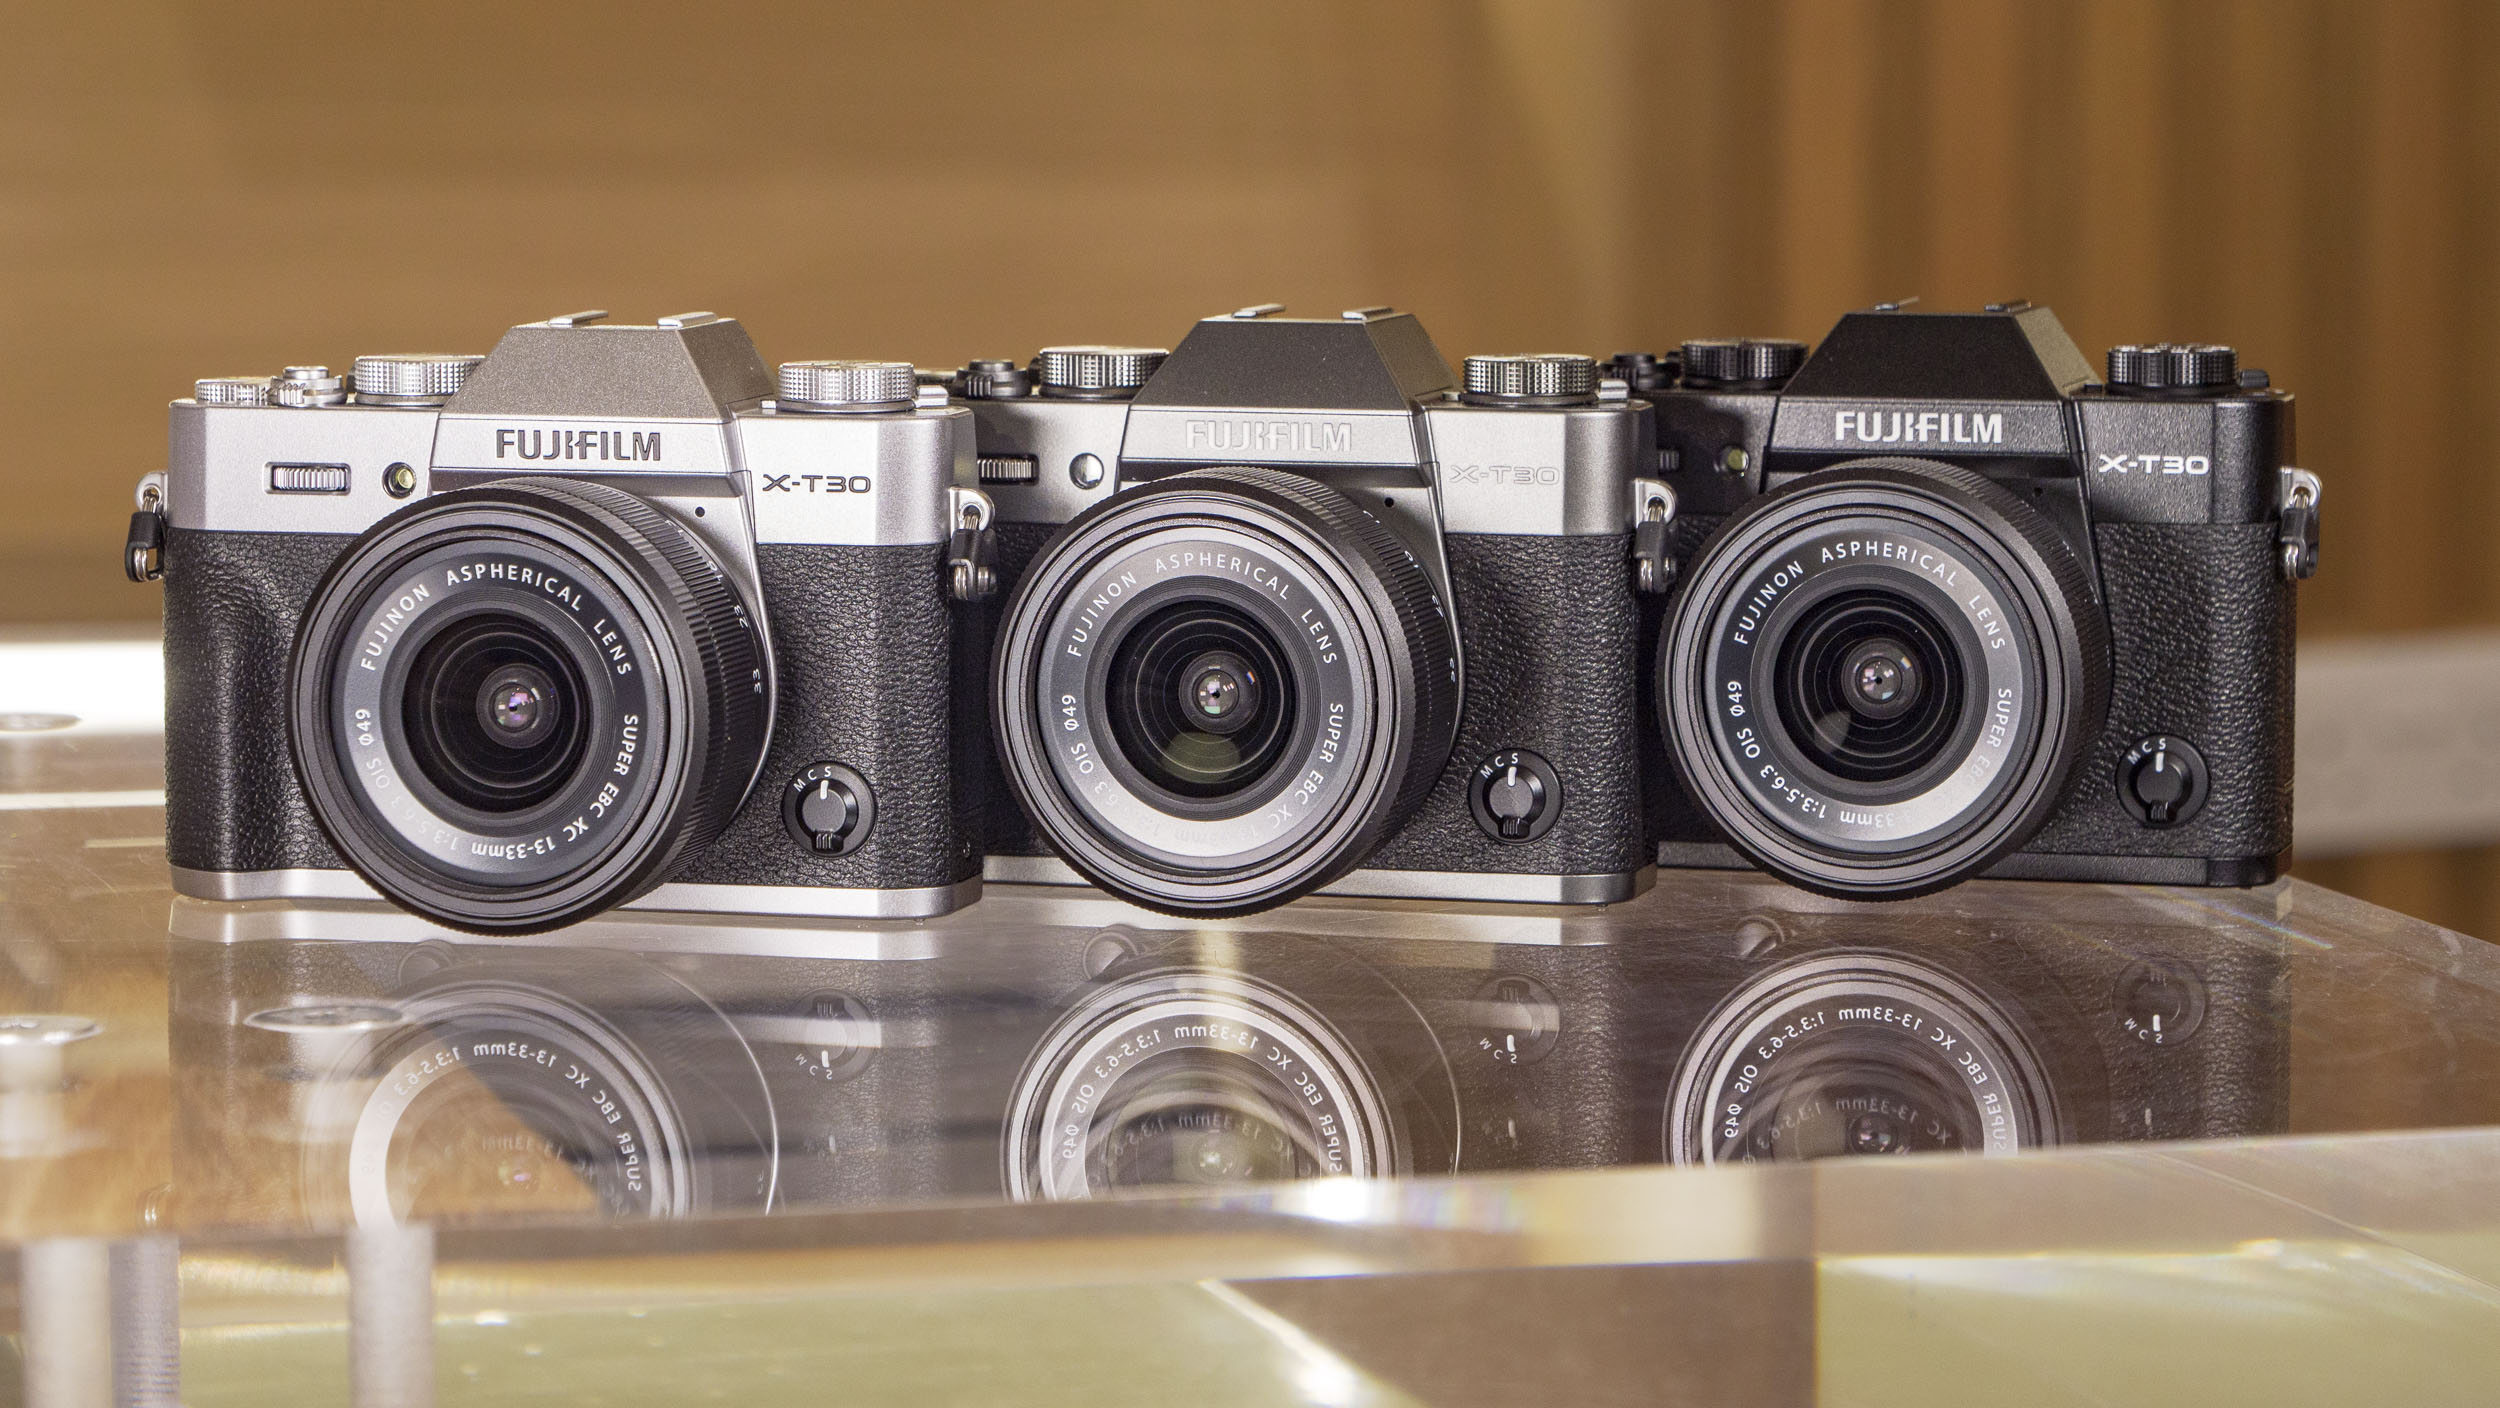
Otherwise, the size, weight, profile and control layout are pretty much identical to the X-T30 II – this is a really small camera and lens combo that easily slips into a jacket pocket.
Headline features include the same 26MP sensor and current fifth-generation processor combo as used in the X-M5 and X-S20. This means the X-30 III sits below the pricer X-T50, which uses the latest 40MP stabilized sensor.
It has more in common with the slightly pricier X-S20, which with its in-body image stabilization, feels like a better pick. Otherwise, the specs are almost identical to those of the X-M5, which, with its viewfinder-less video-first design, costs less.
Despite its photography-friendly design, which also factors a built-in flash, the X-T30 III does in fact have the same video features as the compact X-M5, including 6K video with 10-bit color depth, 4K 60fps video and a vertical 9:16 short movie mode for social.
Personally, I think Fujifilm’s X-series range is getting a little crowded now, and would have liked to have seen the X-T30 III priced around 10% lower to help it to truly stand out for beginners.
However, it's still a compelling retro package – $1,150 / £1,000 / AU$1,950 for an attractive portable camera and lens with sharp 26MP stills and impressive 6K video is pretty respectable.

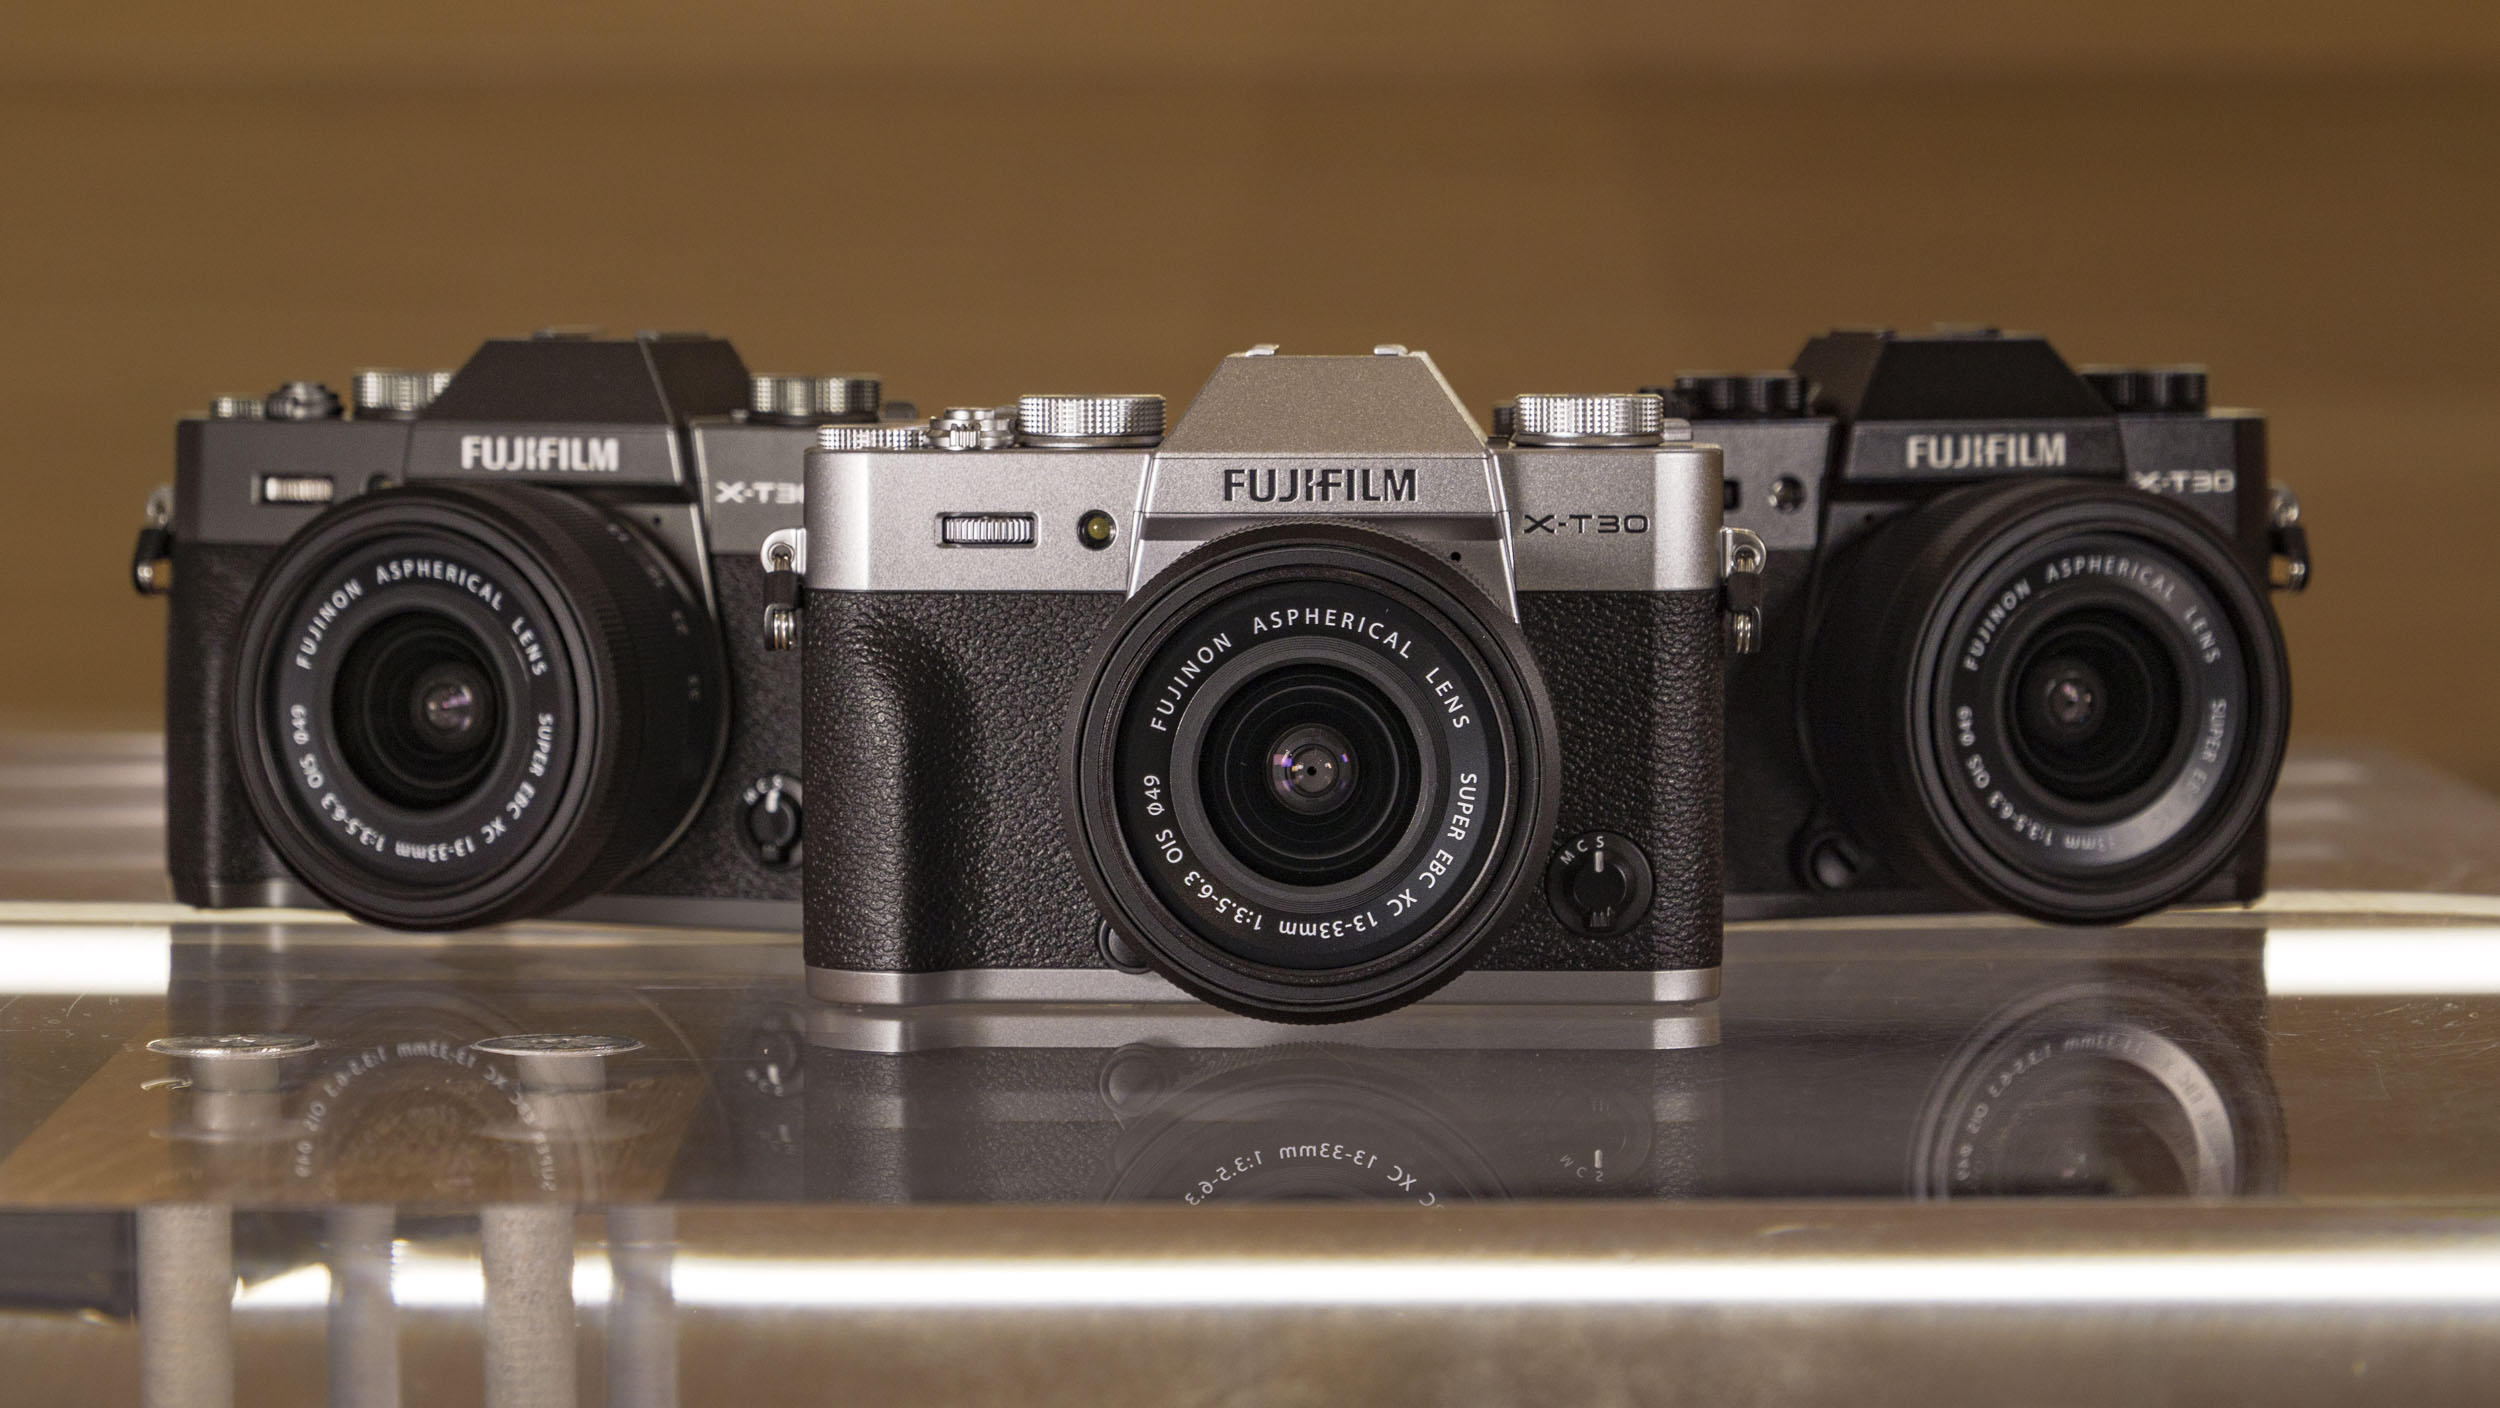
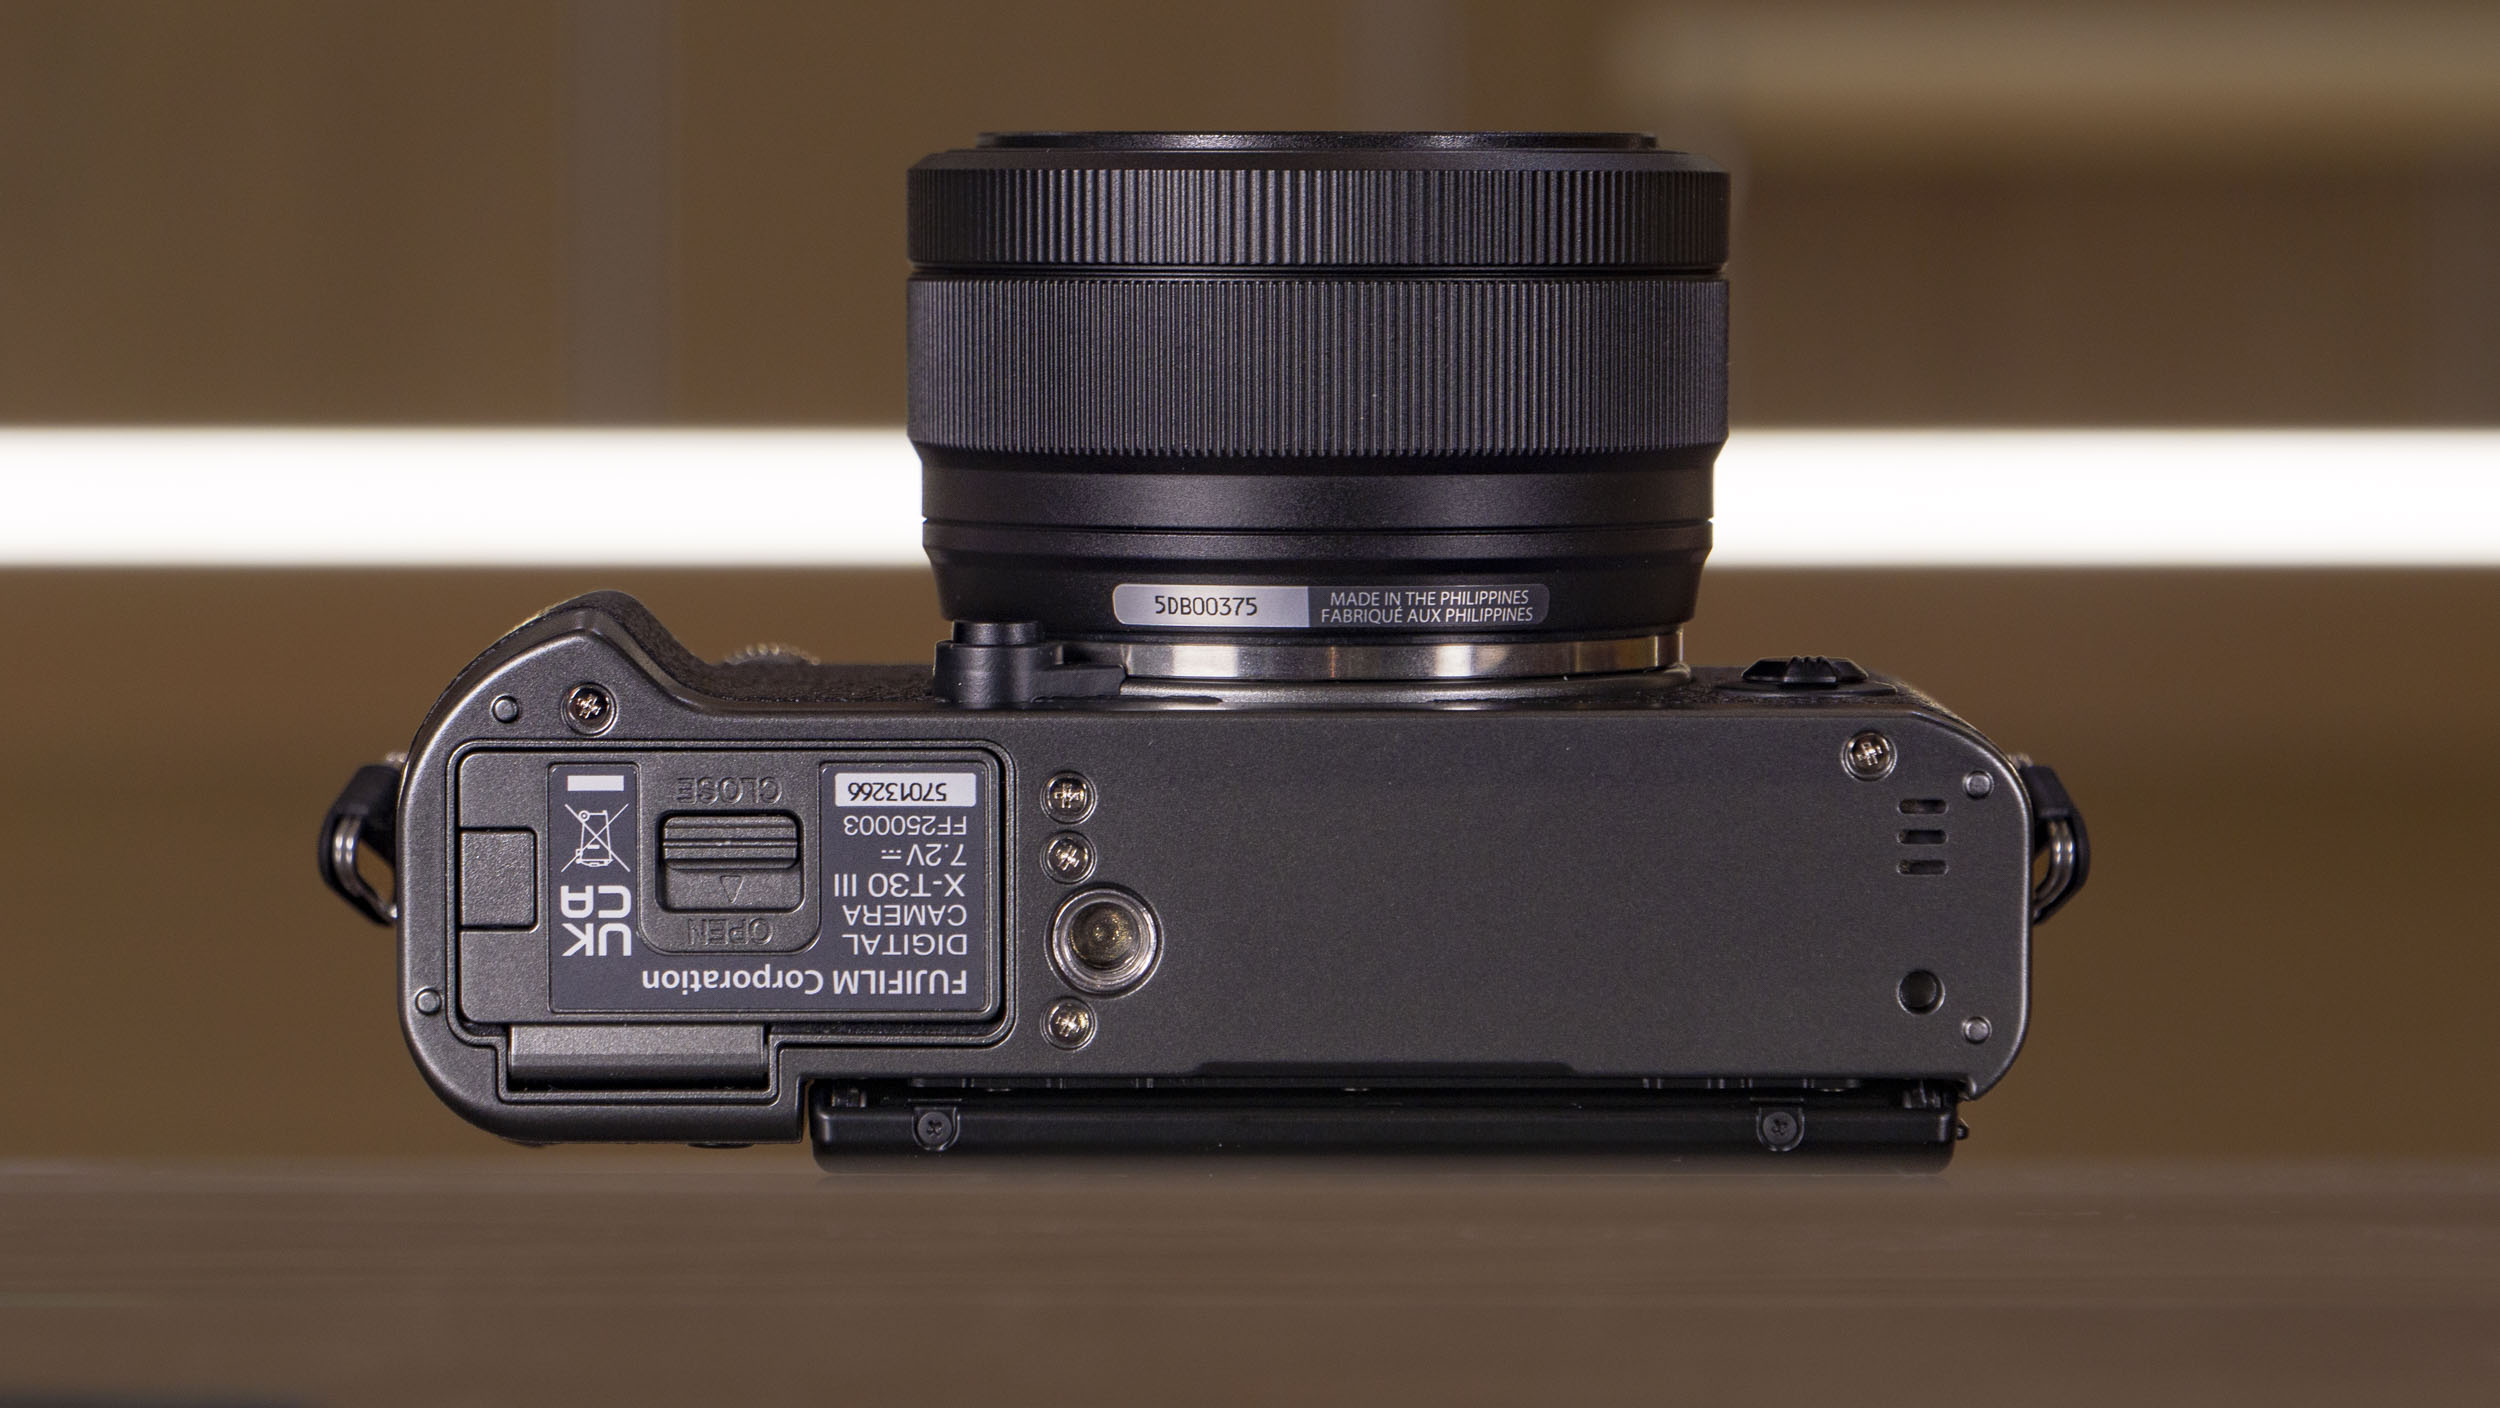
Designed for beginners, the X-T30 III was available from November 20 in silver, black and charcoal options, for a body-only price of $999 / £829 / AU$1,679, or with the new 13-33mm lens it costs $1,149 / £999 / $1,949.
The X-M5 remains the lowest-priced model in Fujifilm's range of X-mount cameras; the X-S20 is a fraction more, while the X-T50 is more again. Considering its features, I would prefer that the X-T30 III was around 10% cheaper in order for it to be more competitive.
Video | 6K 30fps / 4K 60fps, 9:16 mode |
Photo | 26MP APS-C |
Lens mount | Fujifilm X |
Autofocus | Intelligent hybrid phase / contrast |
Cont shooting | 8fps (mechanical), 20fps (electronic), 30fps (electronic with 1.25x crop) |
Screen | 3-inch, 1.62m-dot tilt touchscreen |
Viewfinder | 2.36m-dot |
Weight | 13.3oz / 378g (incl battery and card) |
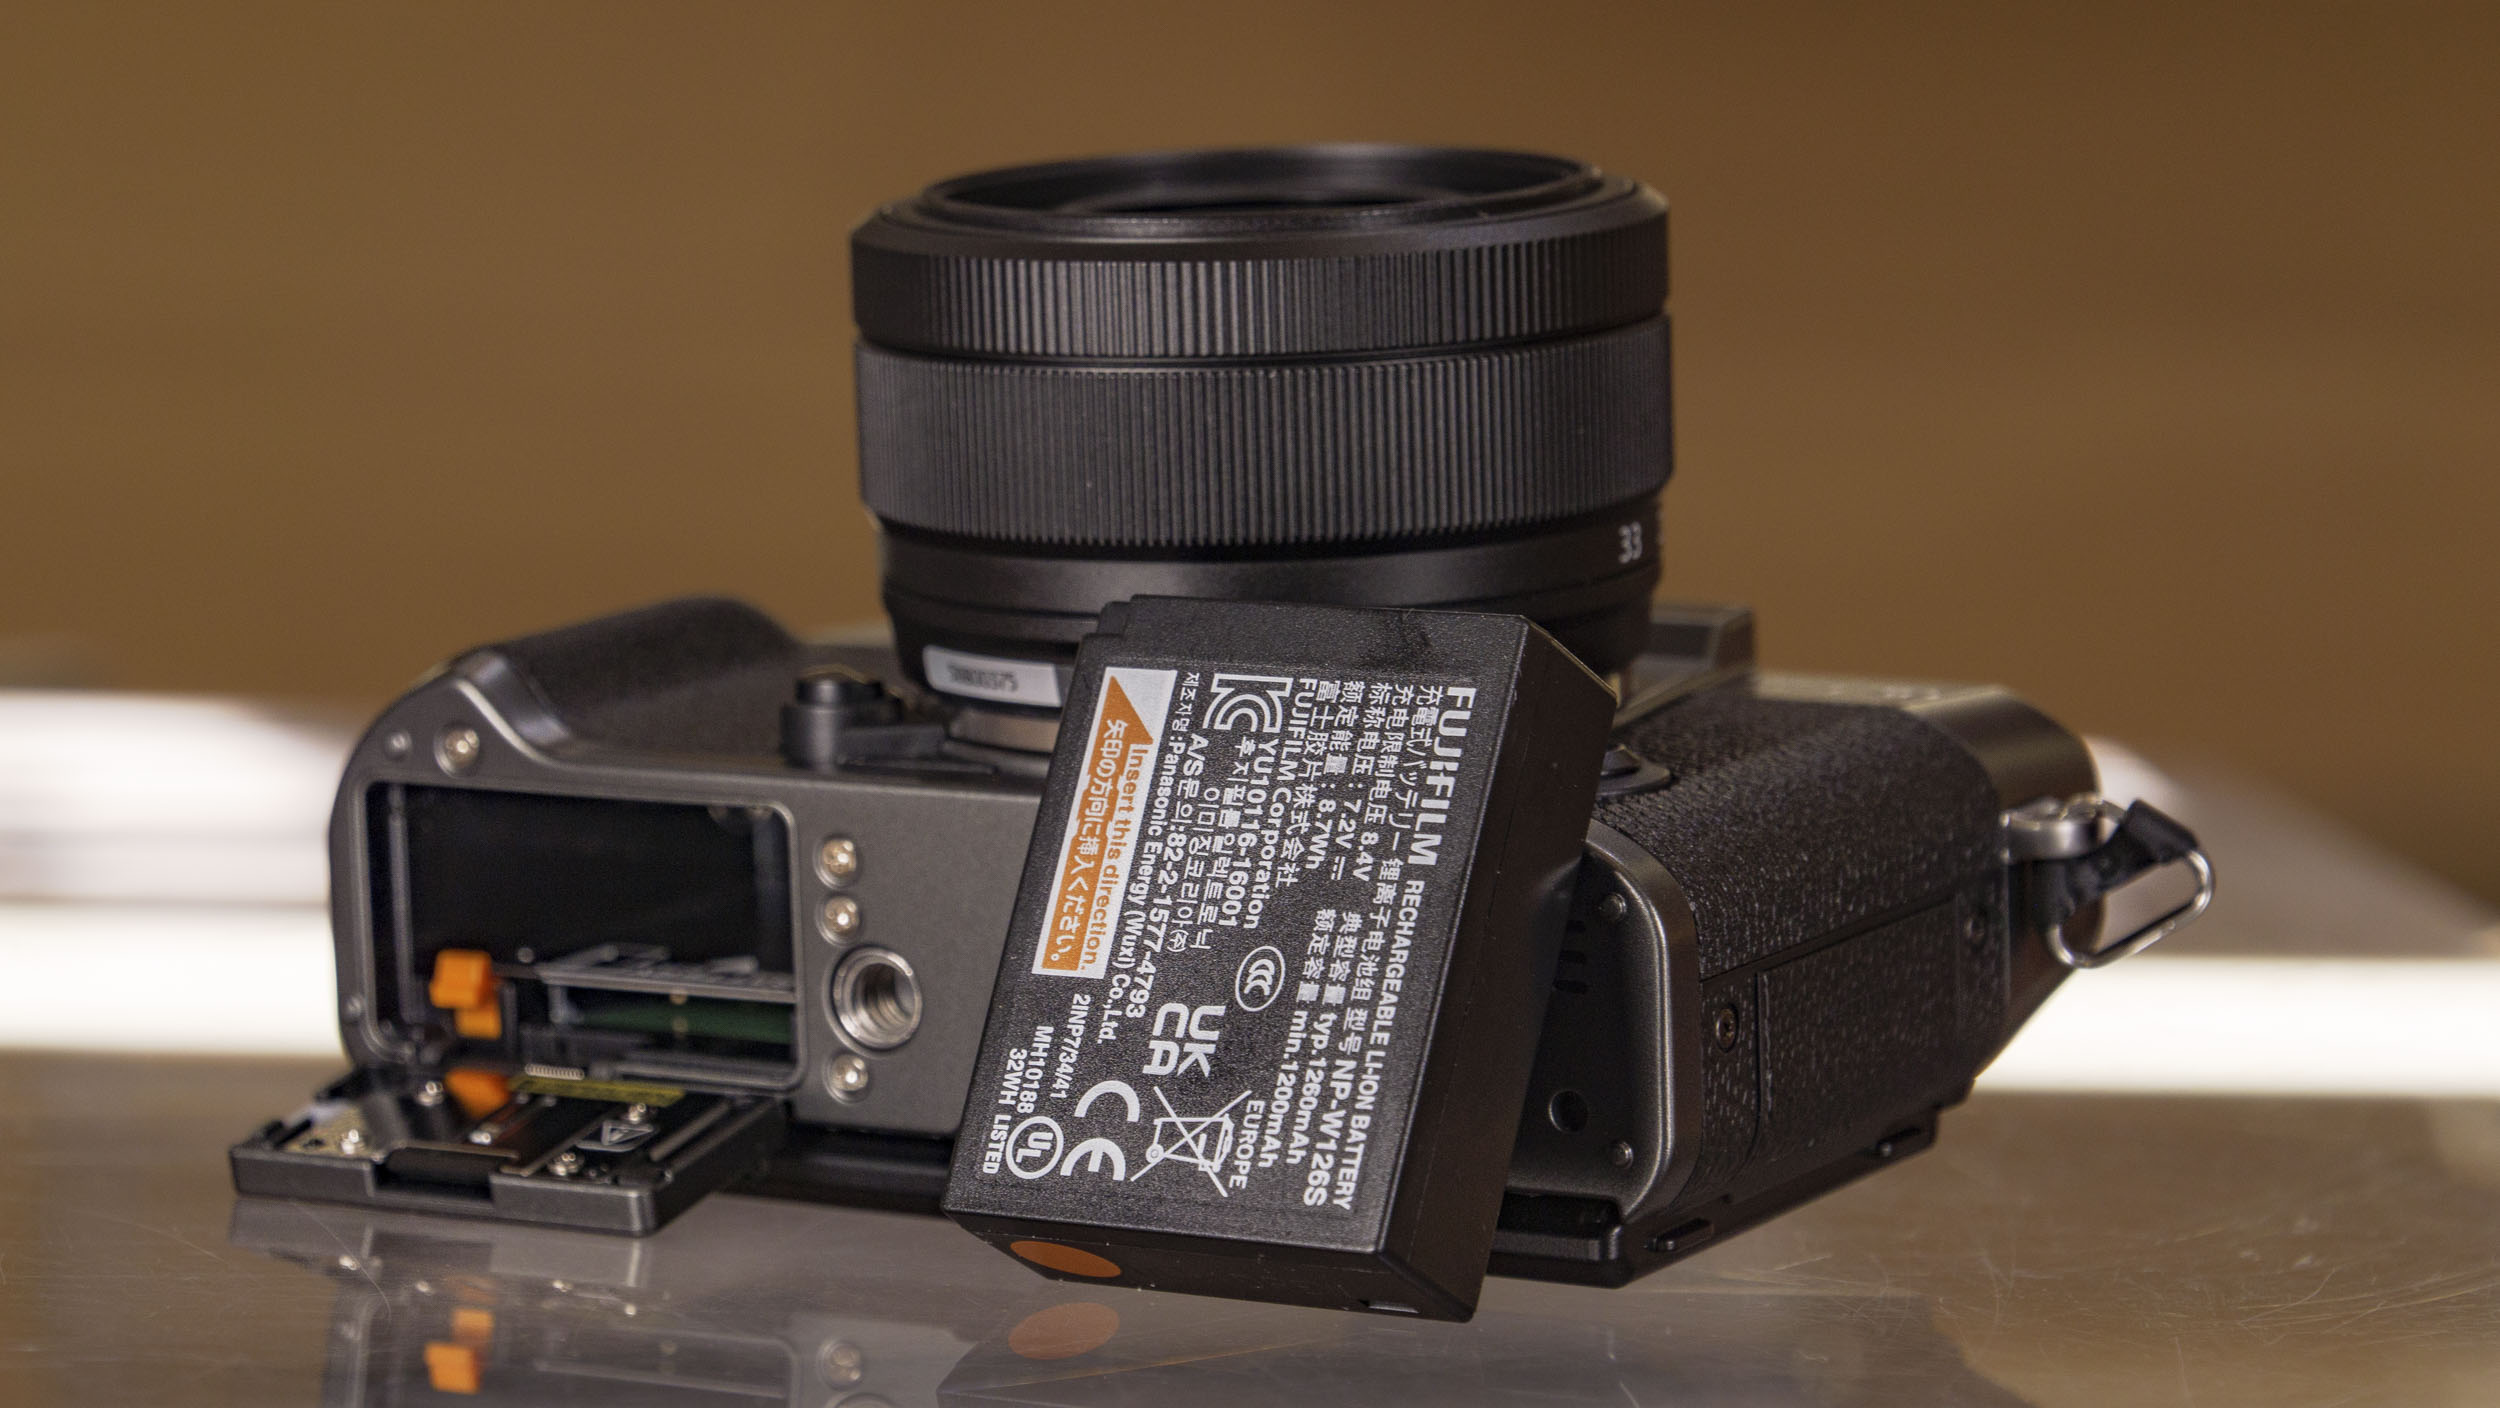
Battery | NP-W126S (same type as in most of Fujifilm's current cameras), 425 shots |
The X-T30 III is a tidy, compact retro package, especially with the new 13-33mm lens – the pair weigh less than most rival cameras without lens attached, and I easily slipped the combo into my jacket pocket when I wasn't using it. The camera is available in three colors and it certainly looks the part, especially in silver.
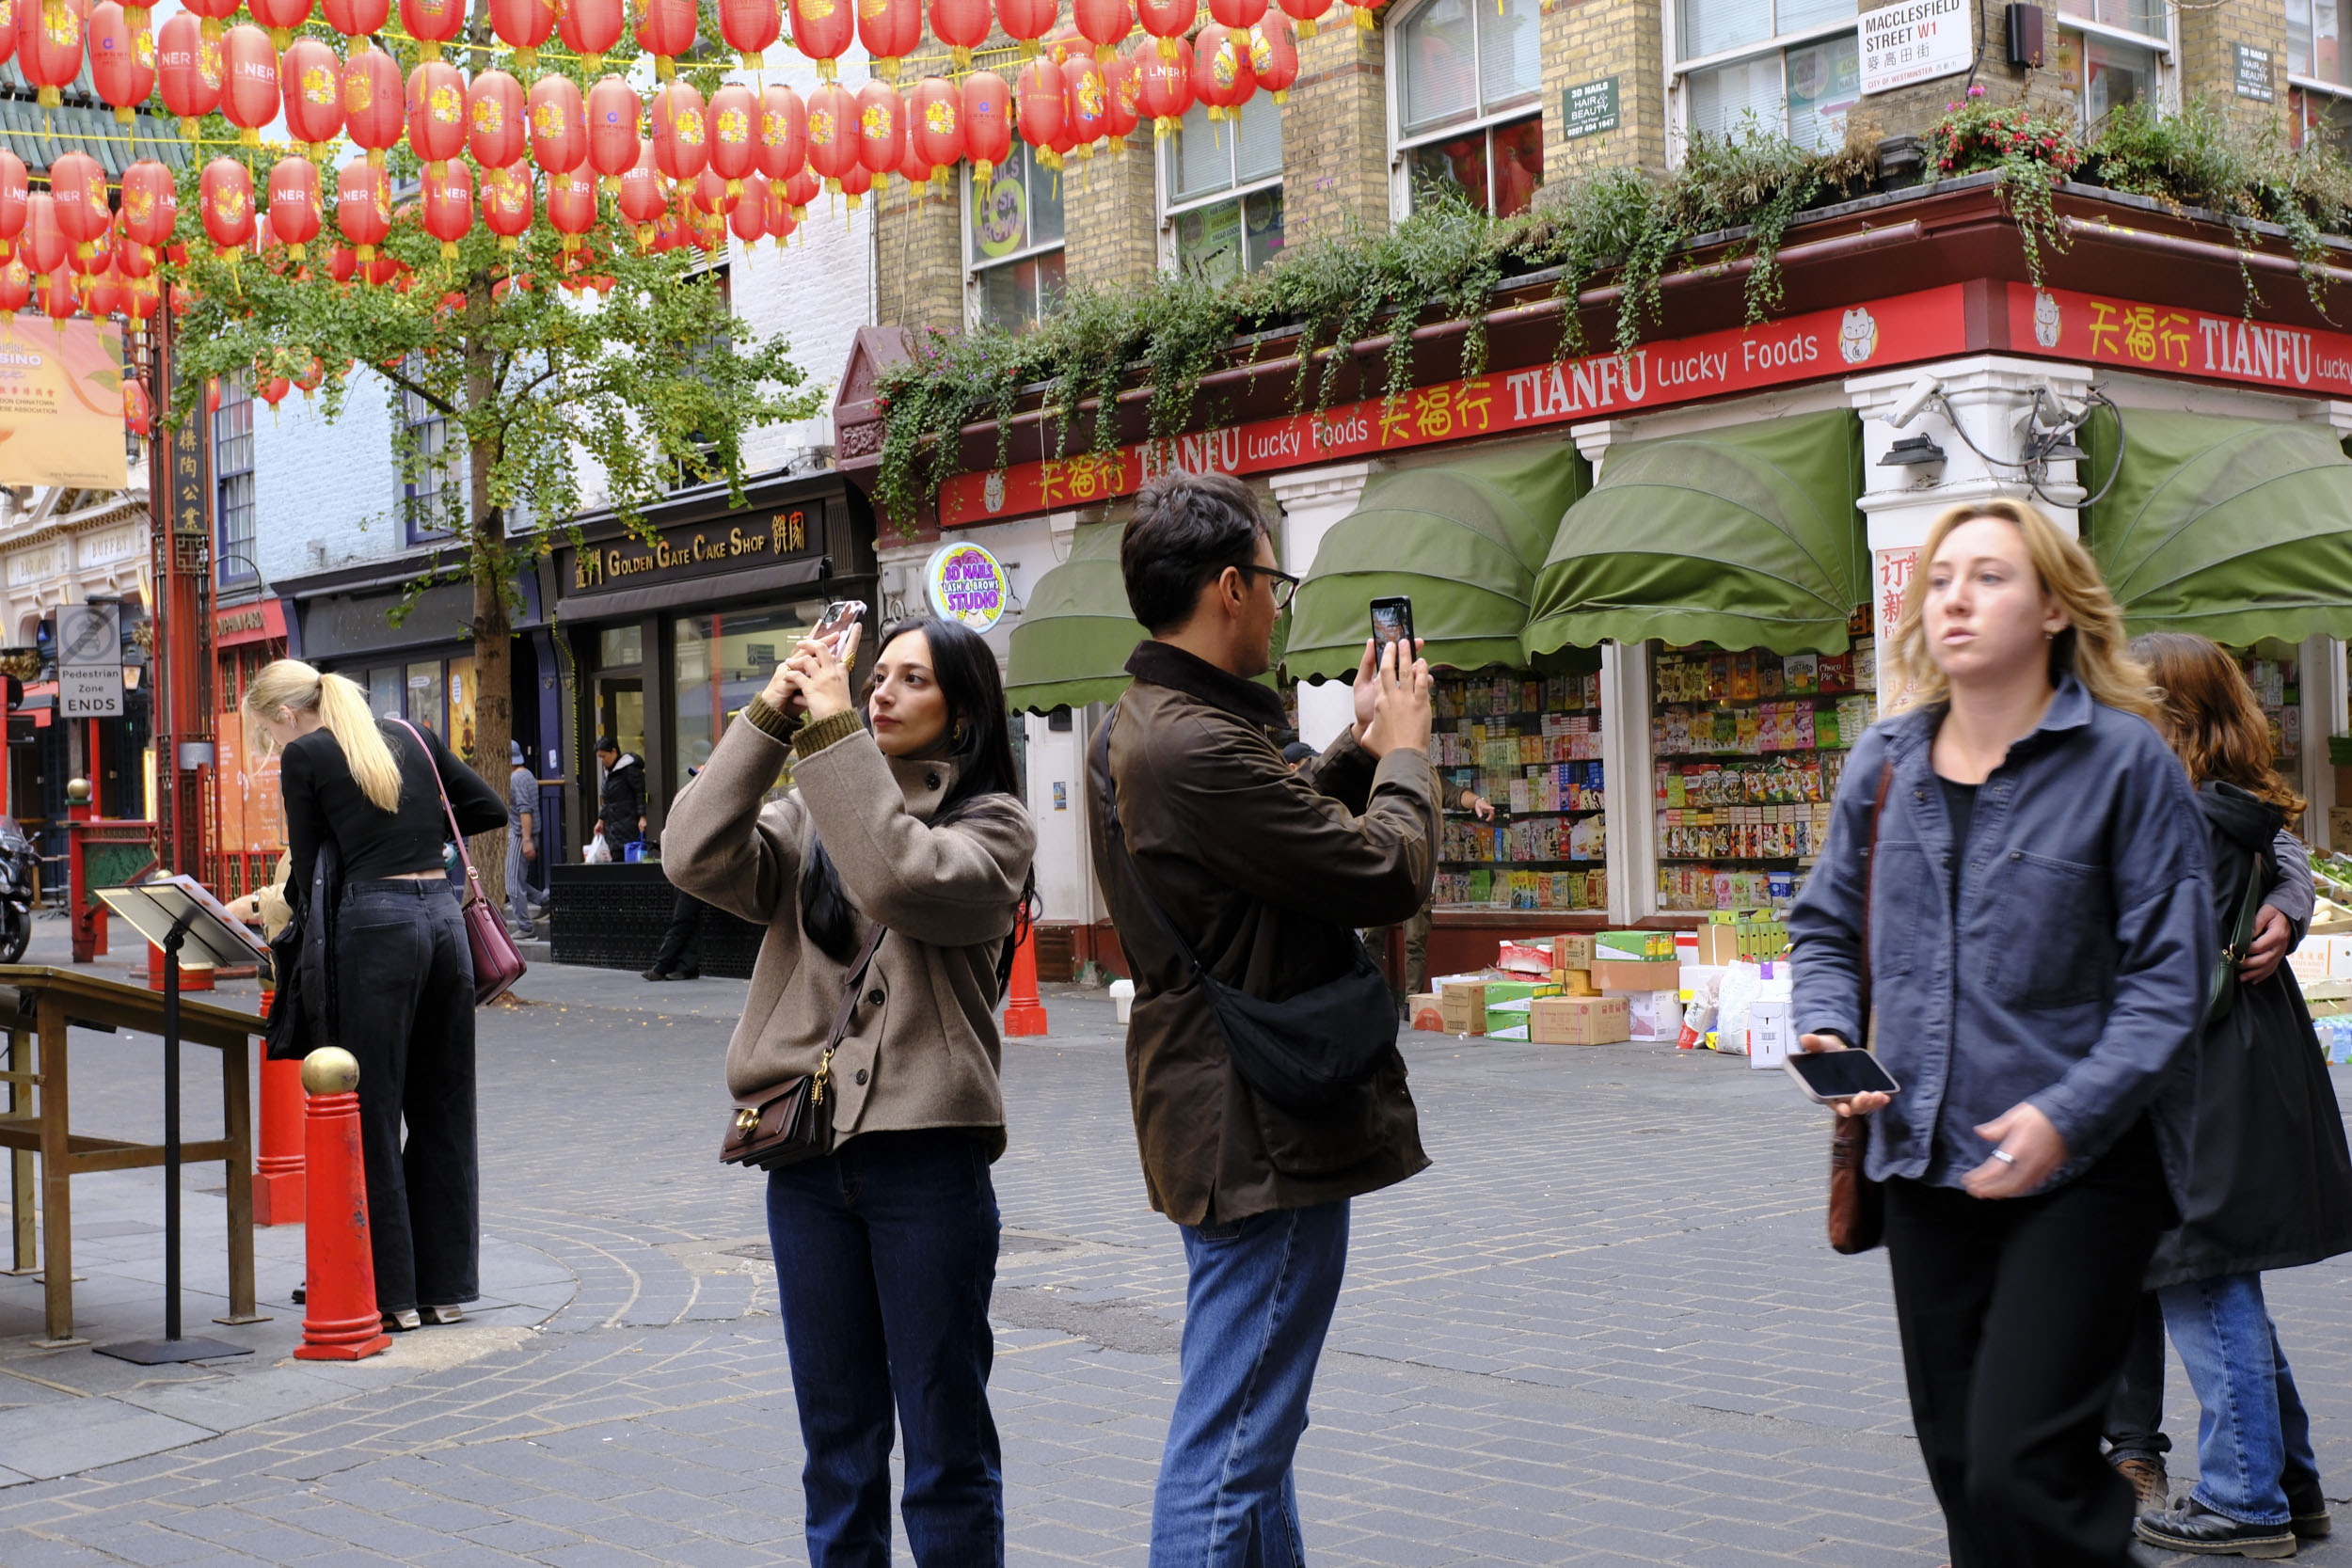
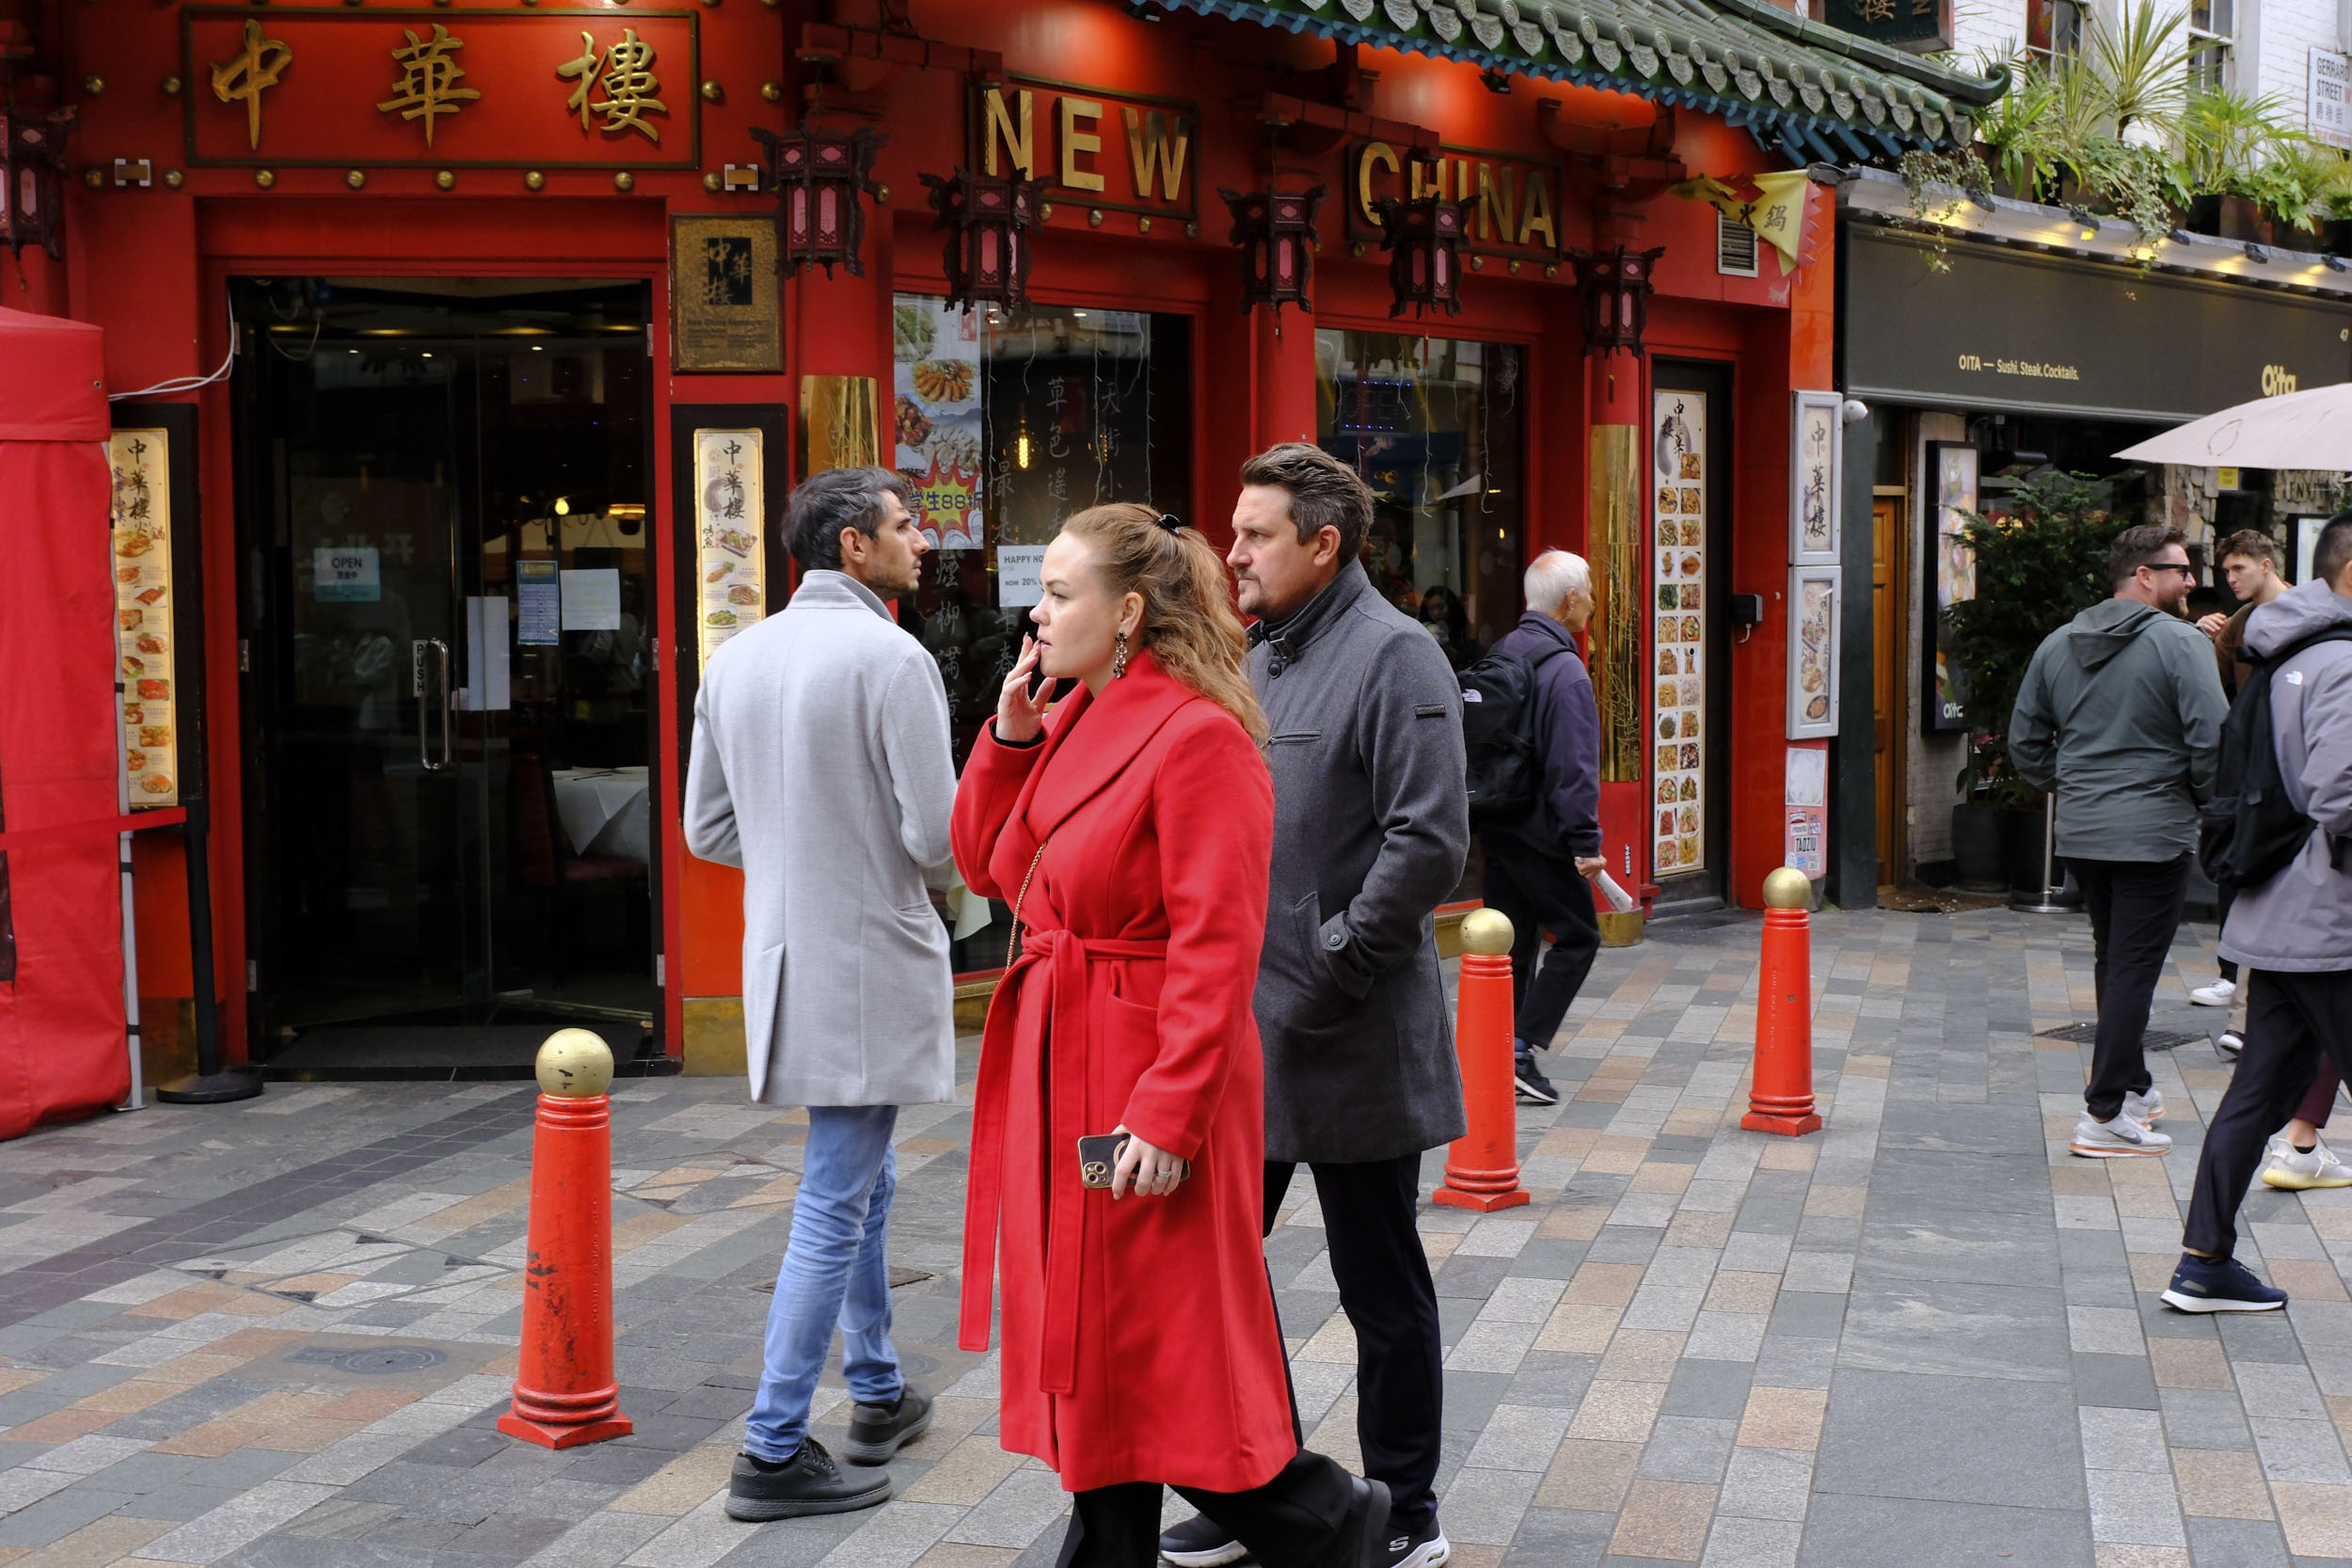
Just like the X-T30 II before it, the new model makes a great travel camera. The retractable design of the 13-33mm lens gives it almost pancake optic proportions, and shooting around the busy city streets of Rome, the setup drew very little attention. Conversely, when I switched to its X-series sibling, the Fujifilm X-H2S, while not exactly a massive camera, got glances from passersby, especially at the major landmarks, where candid street photography can seem almost impossible. Even the X-T5 seems heavyweight by comparison.
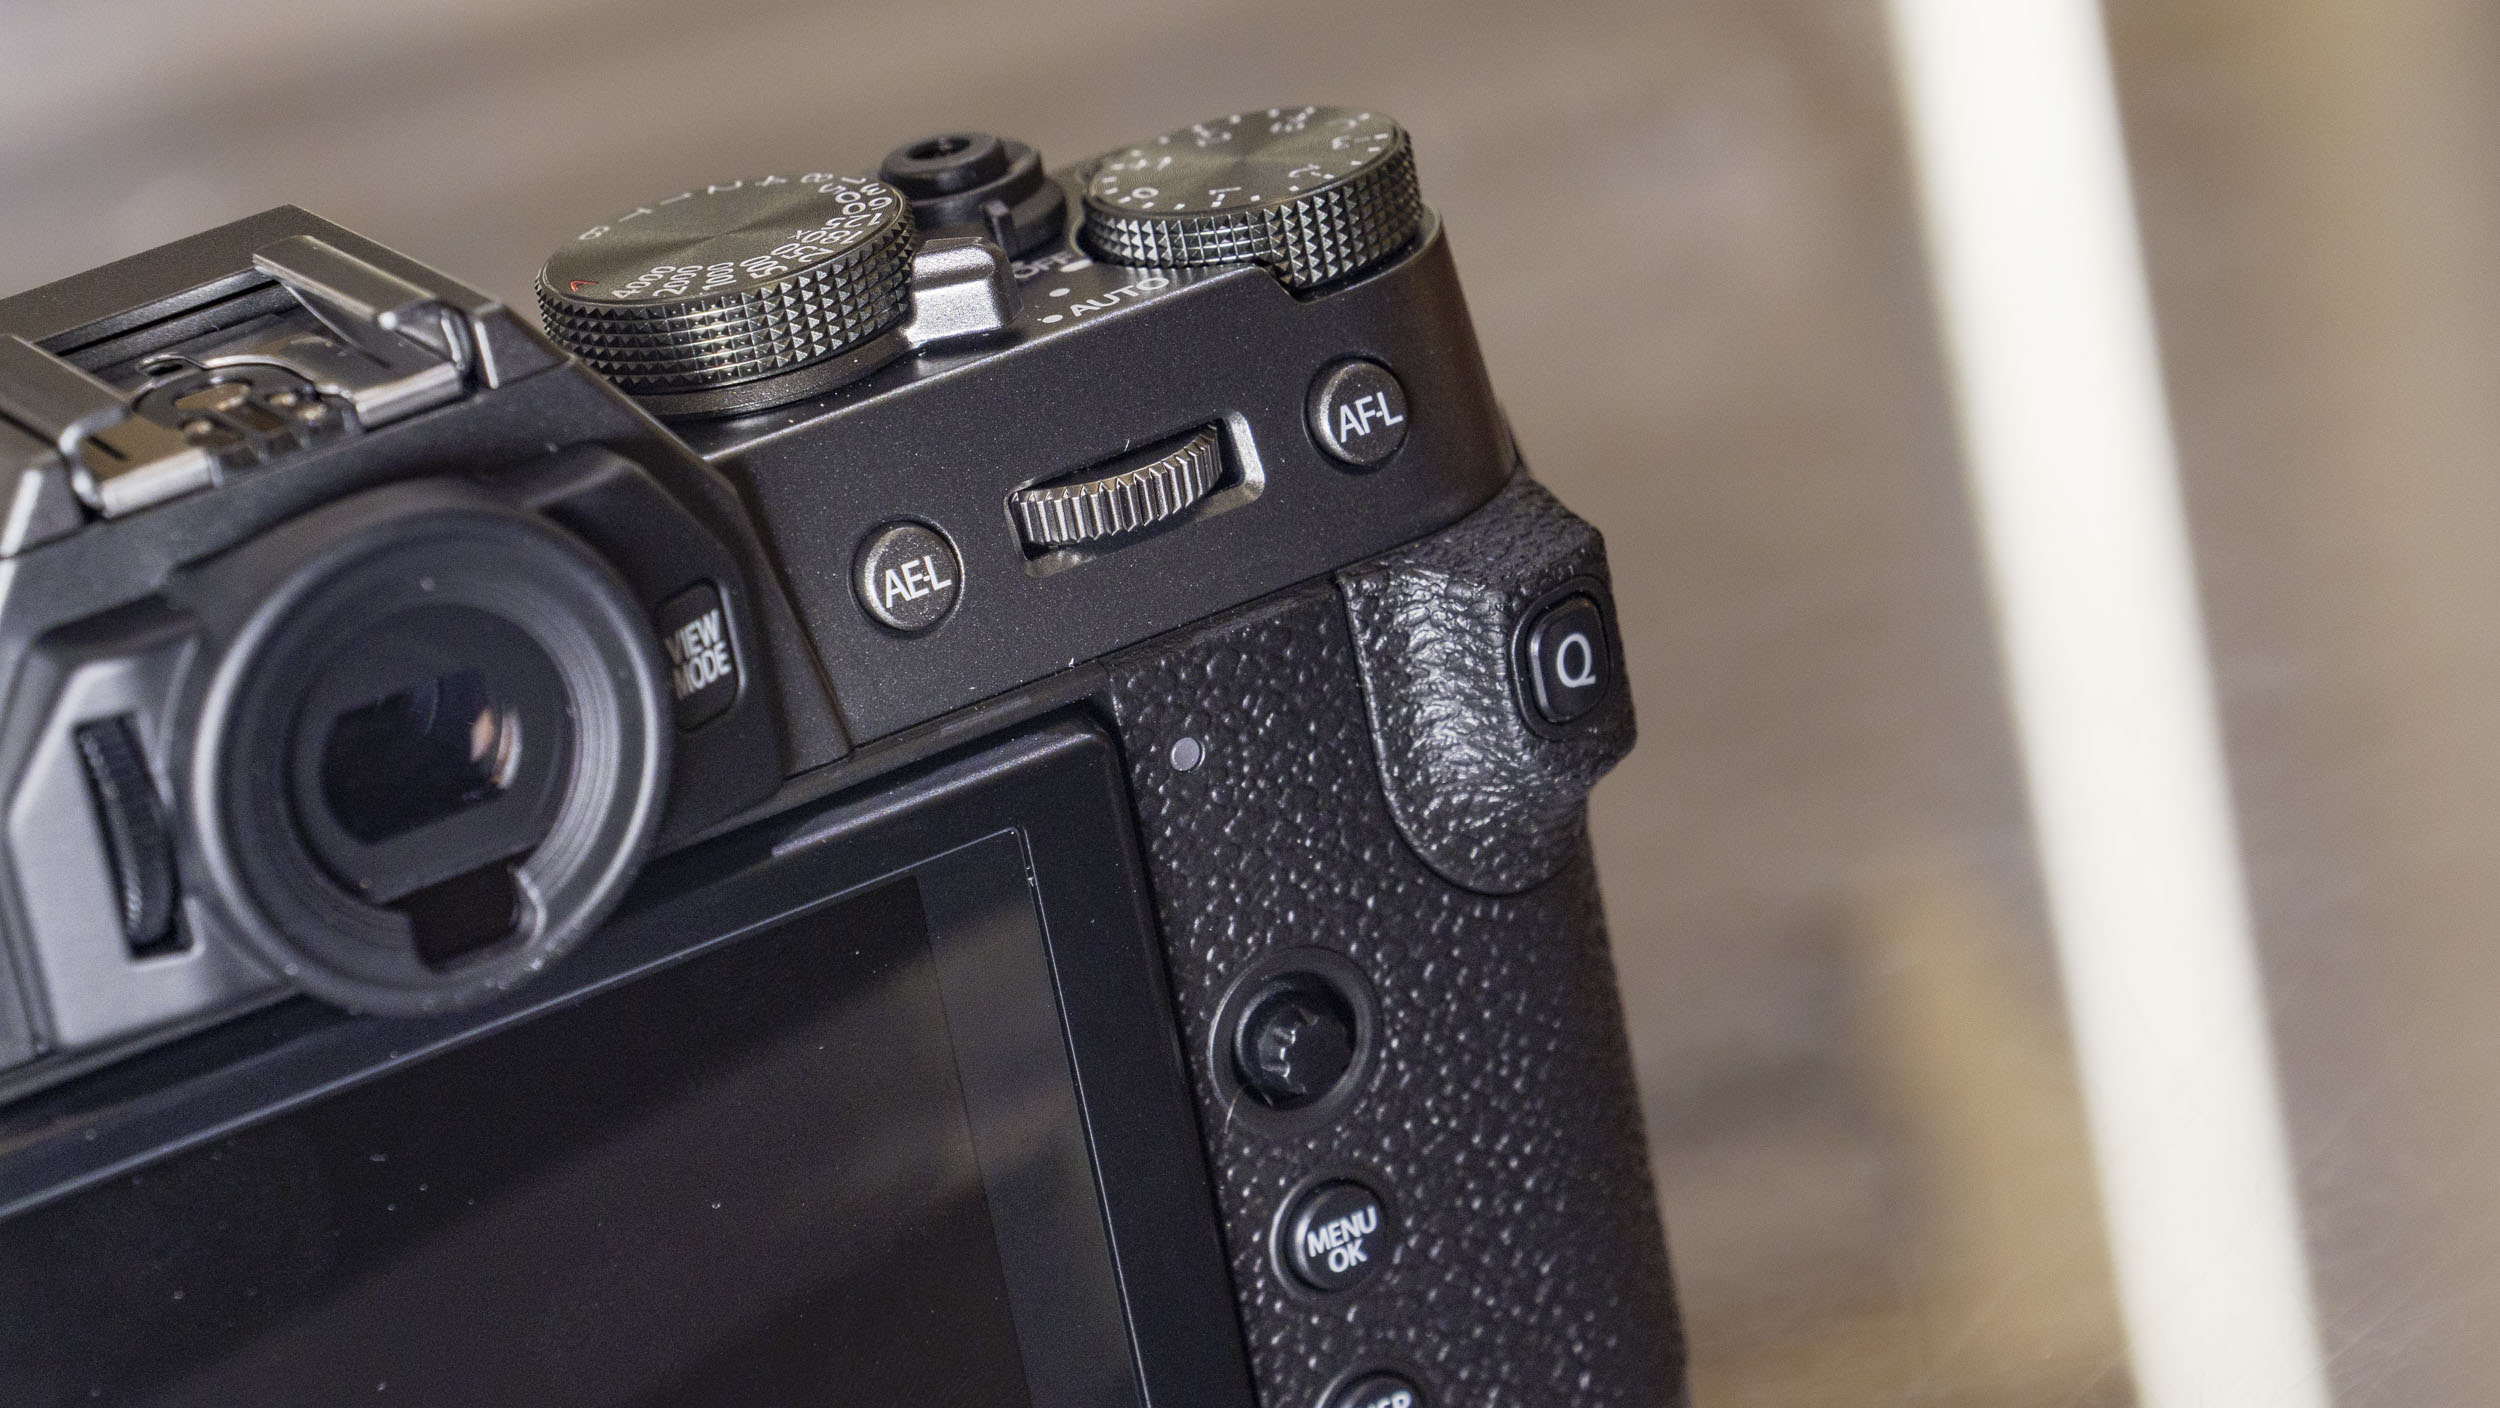
Happily, this doesn’t have a negative impact on the handling experience, and I was still able to reach all of the buttons and controls with my thumbs, while my index finger remained on the shutter release. If you’ve used previous iterations of the camera, or indeed other enthusiast-level Fujifilm X-Series cameras, you should fall right into step with the layout.
The pronounced thumb rest gives a decent grip, and I happily (and securely) held the camera with one hand in both horizontal and vertical formats. I was concerned about the balance I might find when using the wide-aperture primes I’d packed to accompany me on my shoot, namely the Fujinon XF 56mm F1.2 R WR, which is on the bulky side. I needn’t have worried though, as even after several long days of shooting, the setup didn’t seem unduly imbalanced.
There's a quick menu button conveniently placed on that thumb grip, but all too often I found myself pressing it unintentionally. It's not a big drama as you just have to exit the menu, but it's something to be aware of.
One element I’m happy Fujifilm retained from previous models is the pressable control wheels. It’s a smart and sensible application of dual control – you can scroll through a menu and then select the desired item by pressing the wheel. It’s actually something I’ve wished more manufacturers would introduce as I’ve always enjoyed this underrated character of the X-series.
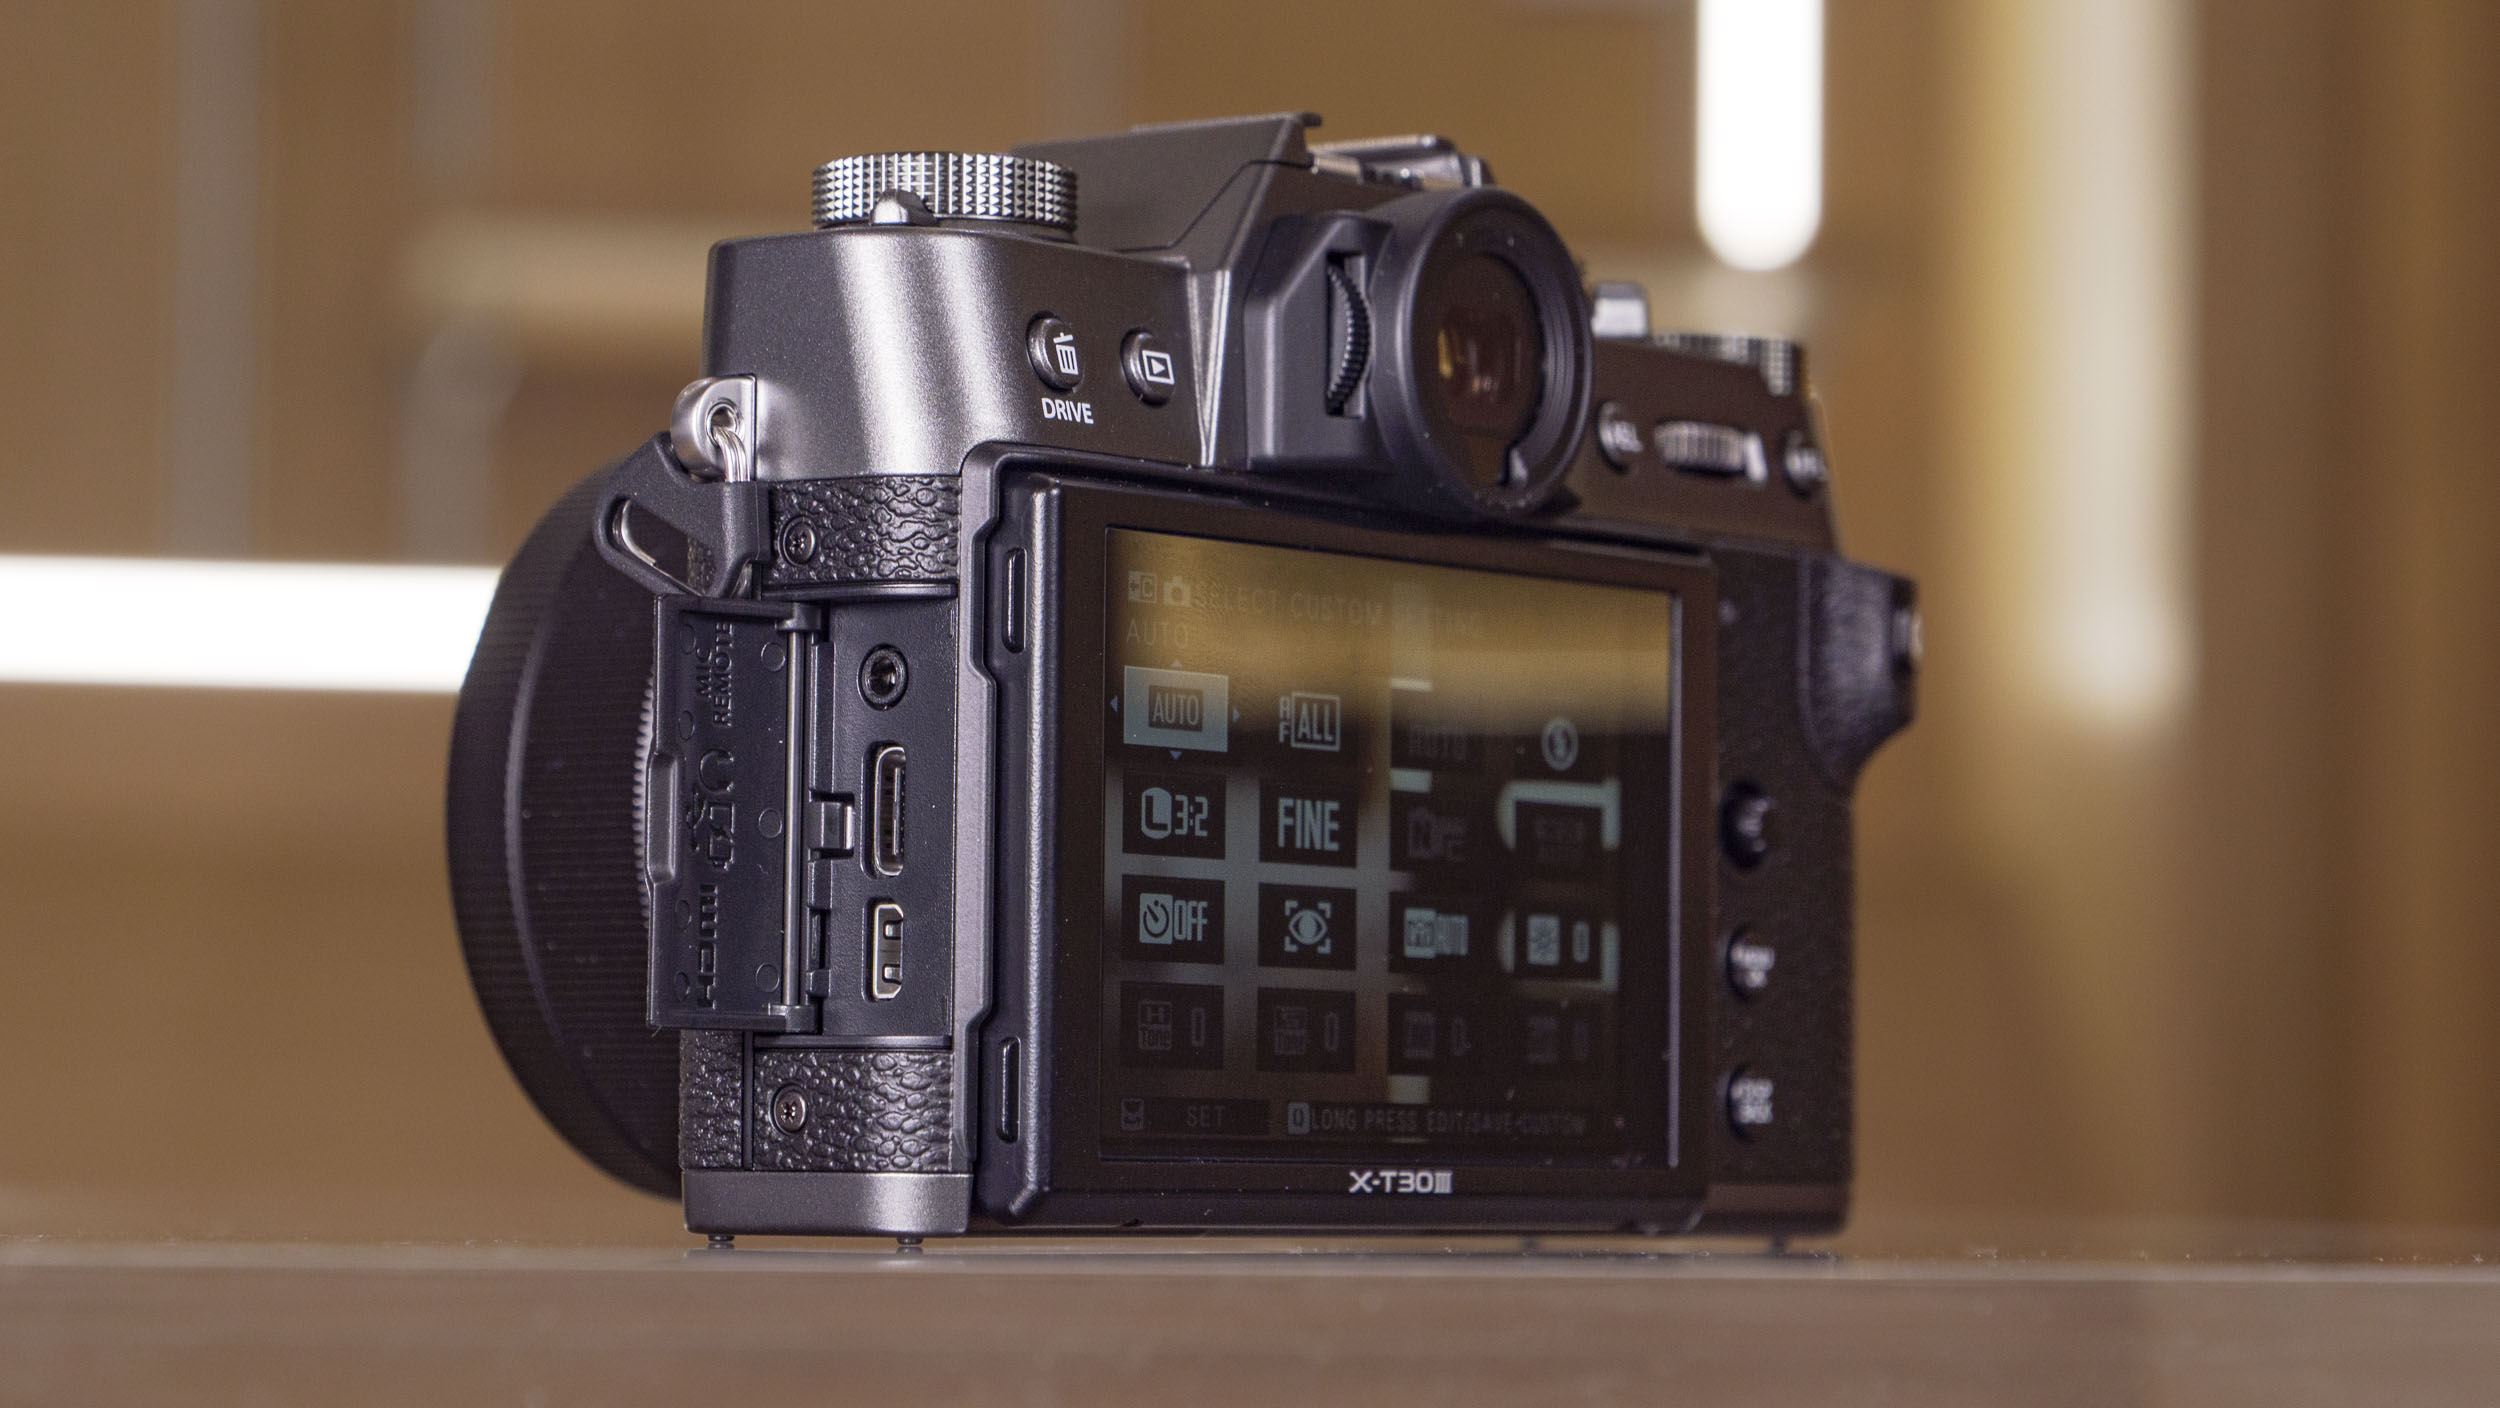
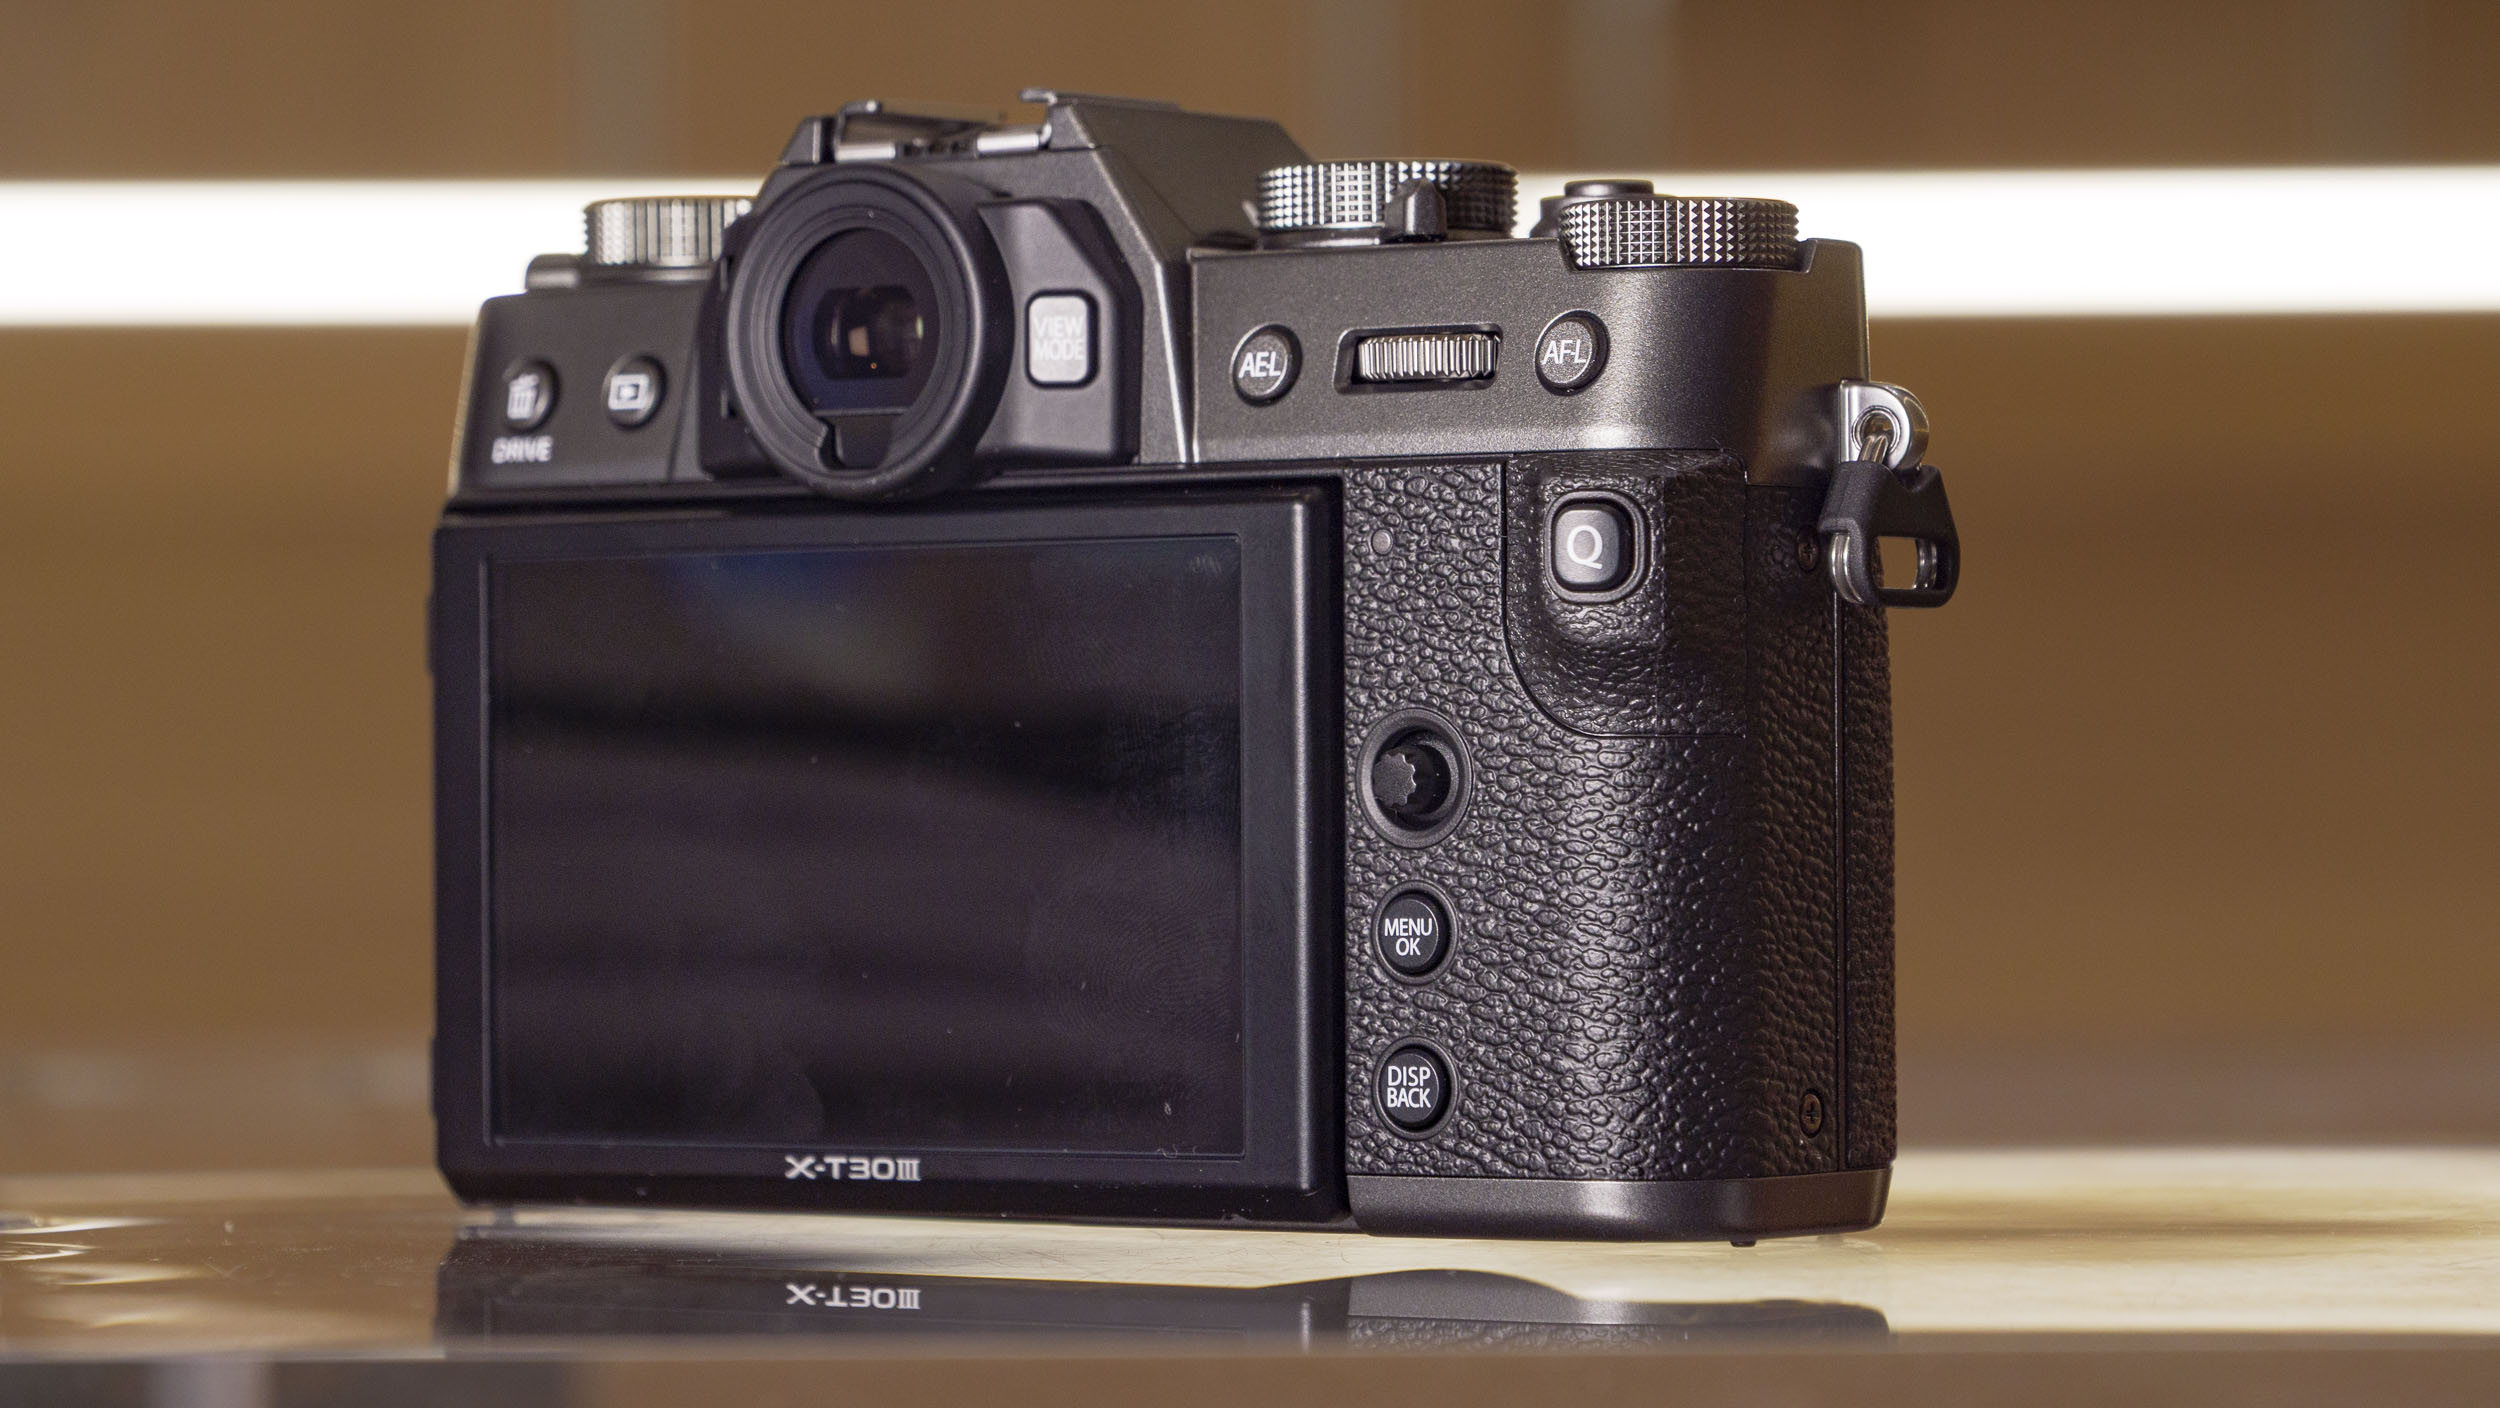
The rear touchscreen is tilt only and not fully vari-angle, which means you won't be able to easily shoot selfies.
I'm personally fine with the tilt design, which is handy for waist-level viewing. Also, the positioning of the USB-C, micro HDMI and mic ports on the side would obstruct a flip around screen, when those ports are in use.
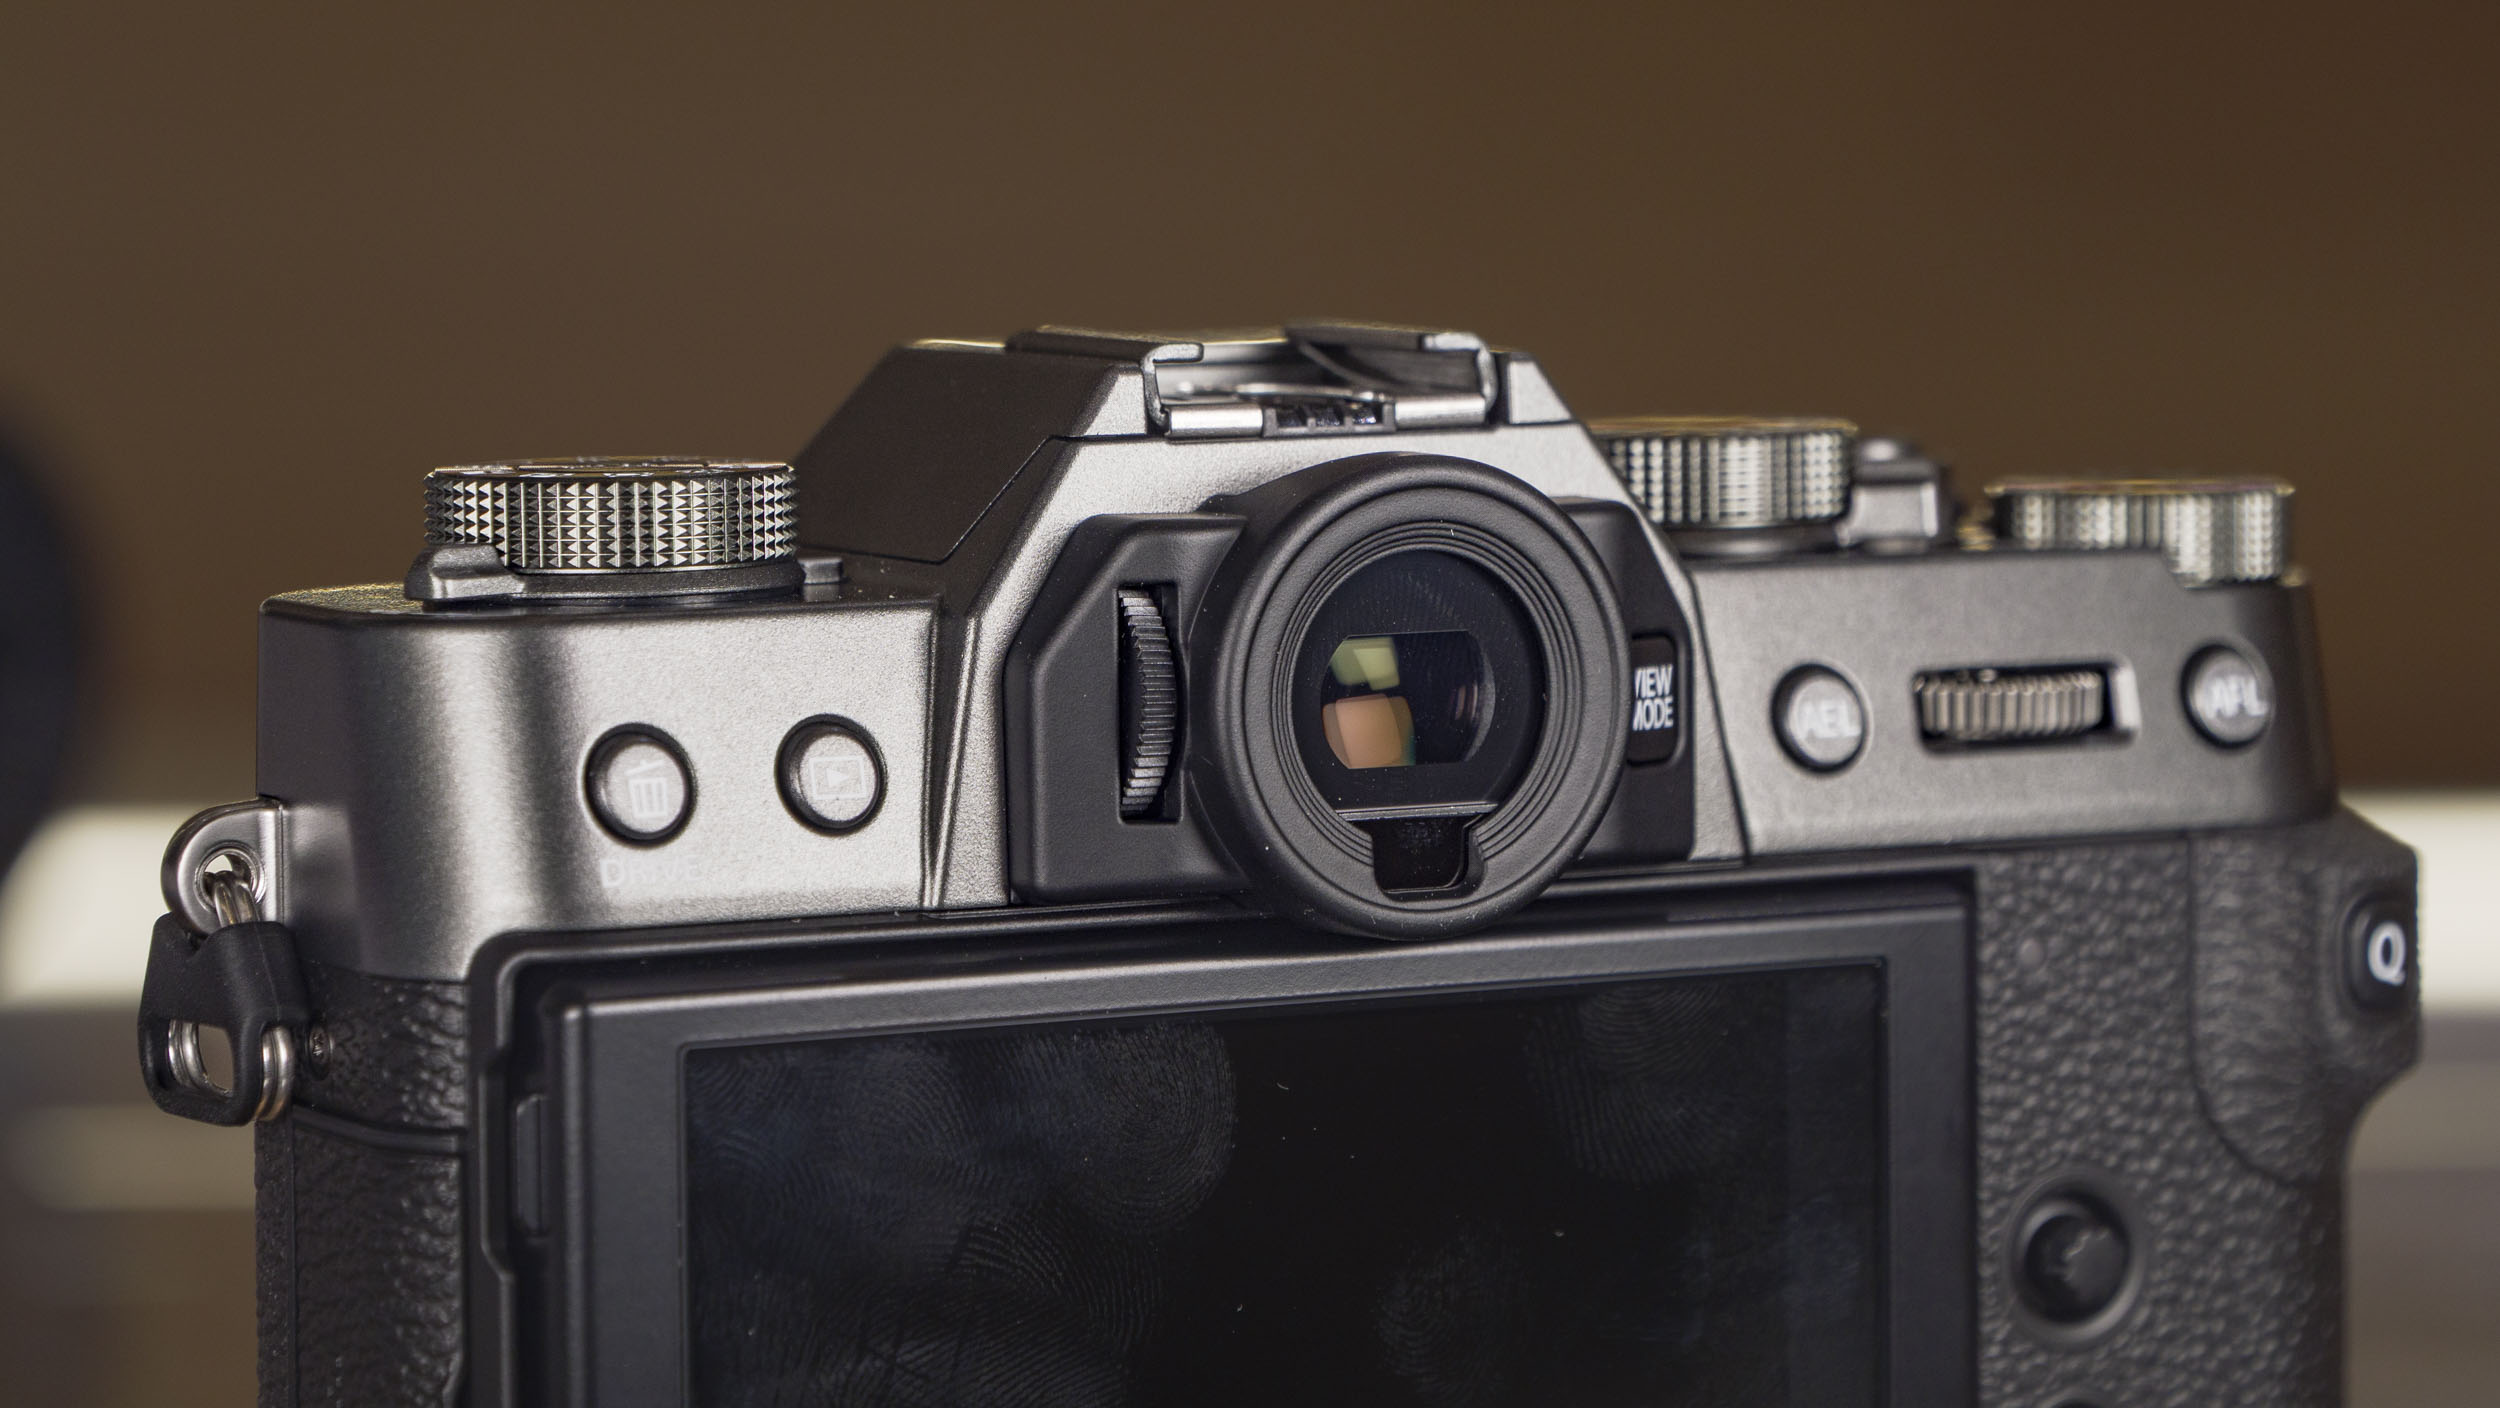
The 2.36m-dot EVF is clear enough for such a small camera – I regularly used it rather than the screen, and it is particularly helpful on bright sunny days for photography.
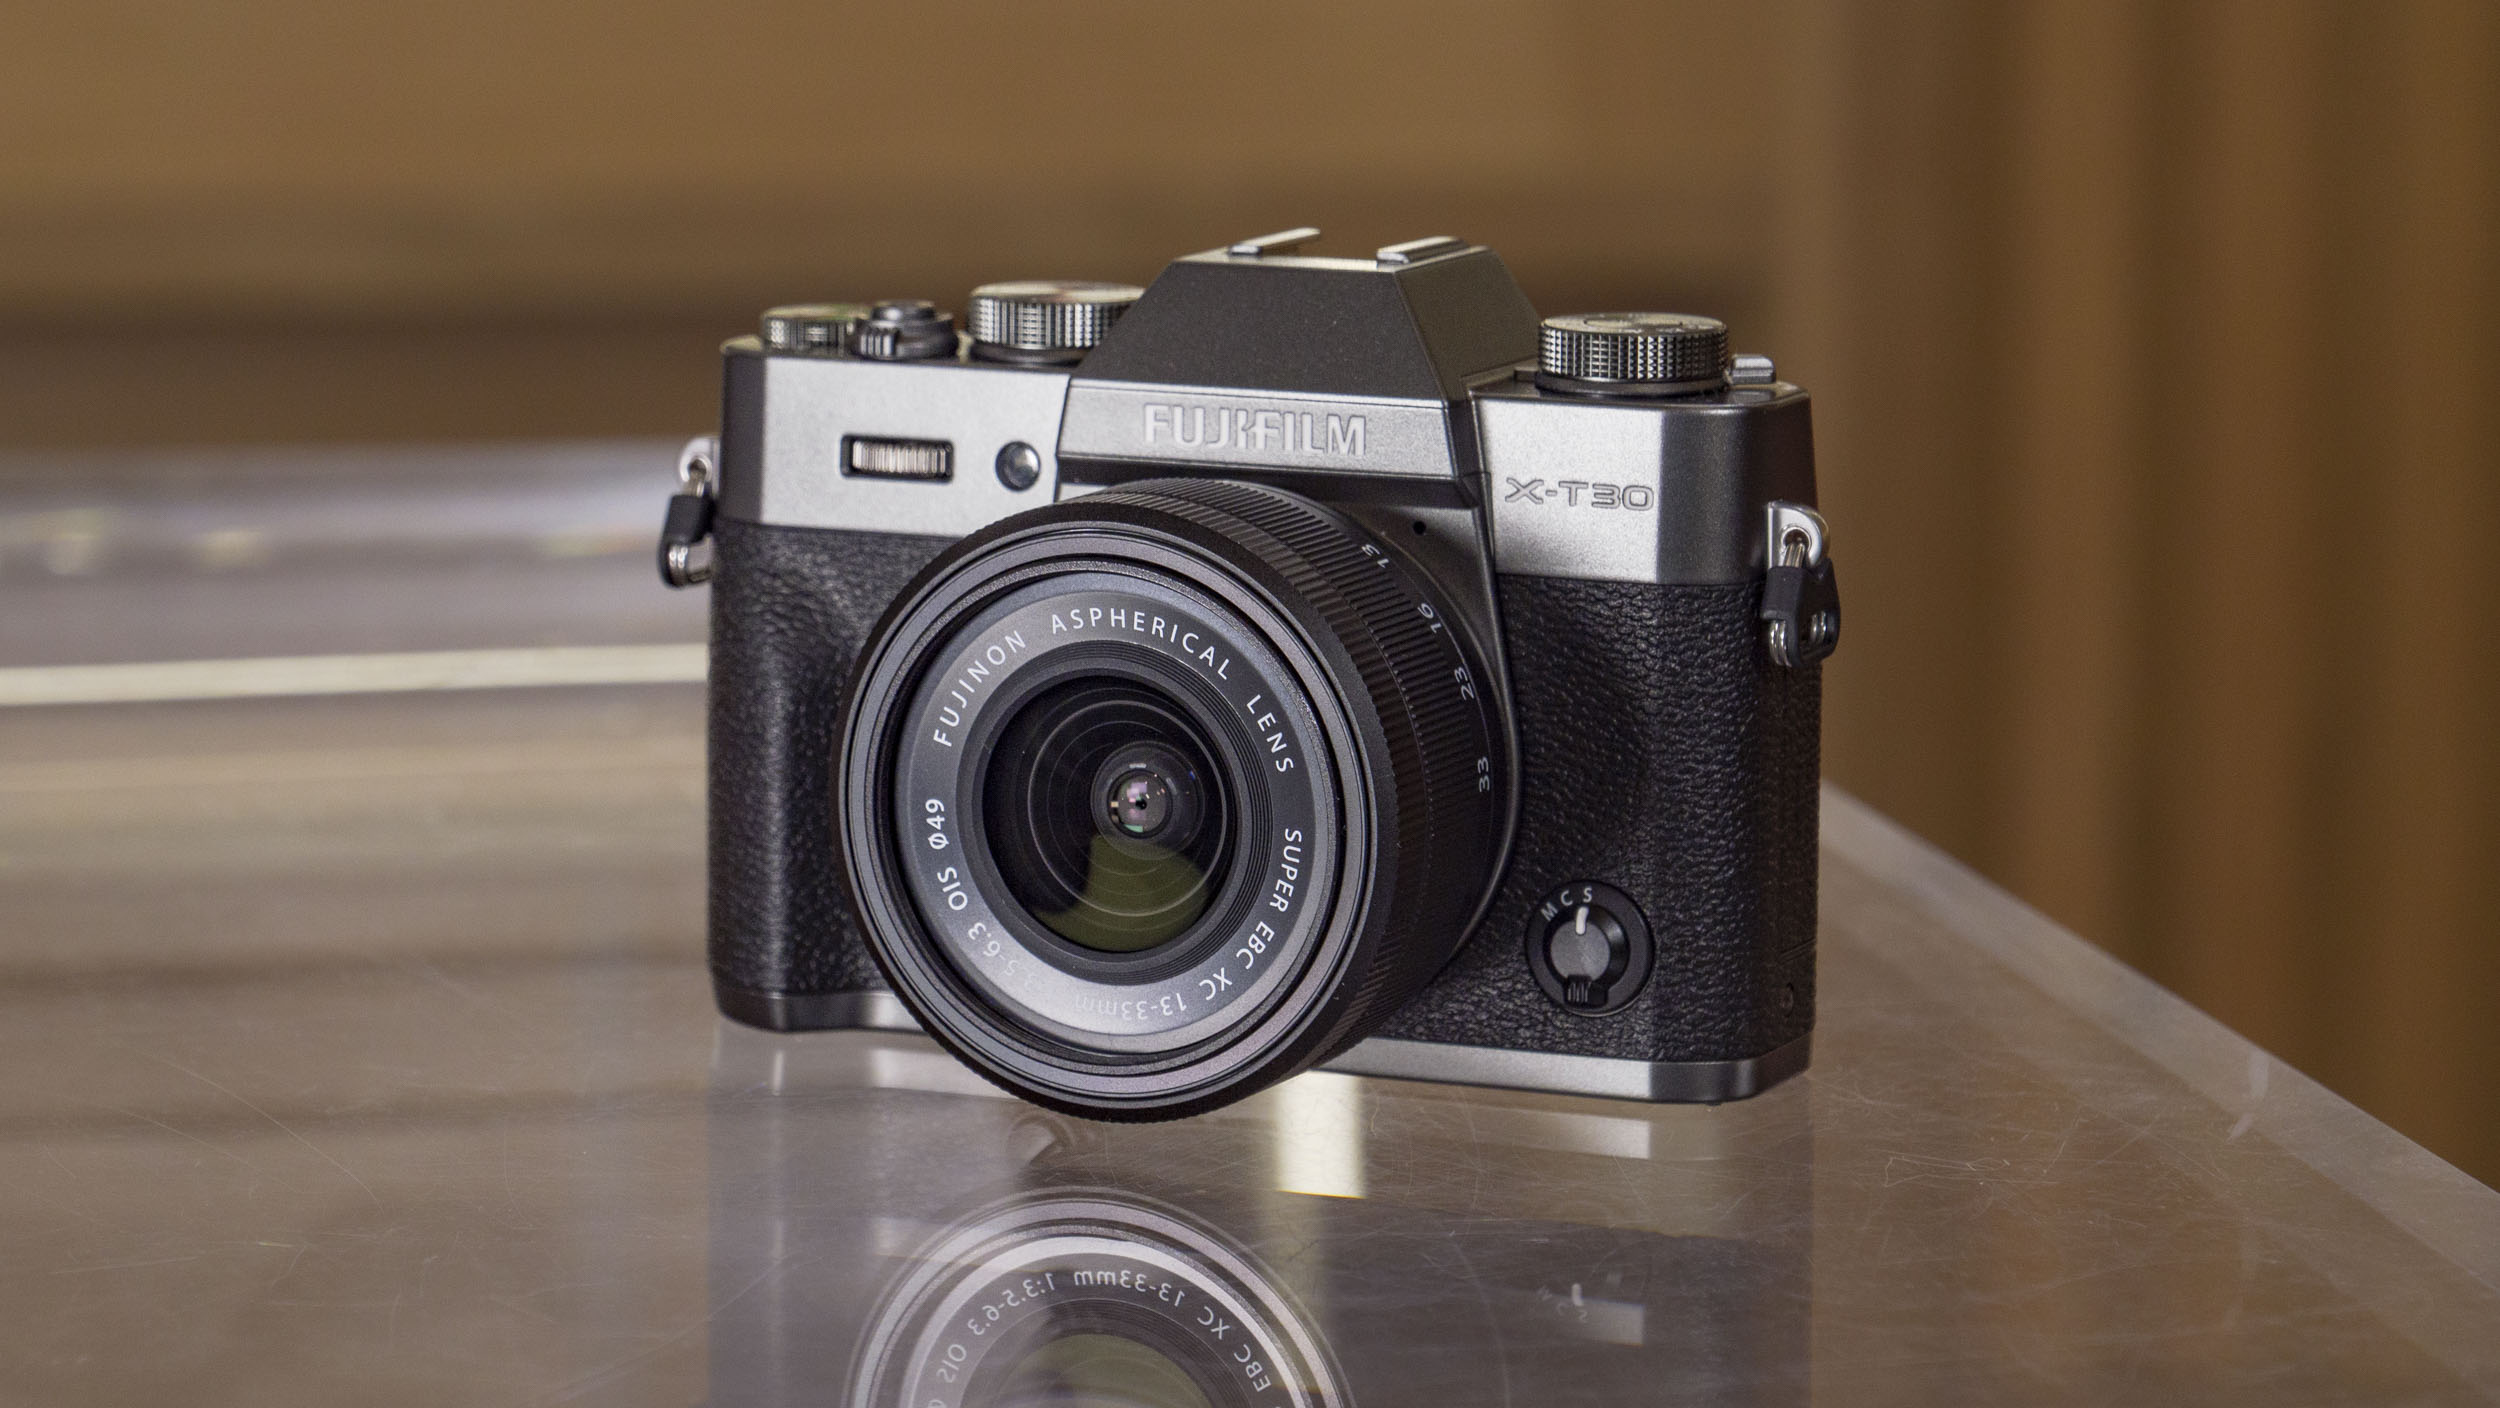
Now, let’s talk about that new Film Simulation dial, which brings the camera in line with Fujifilm’s latest generation of cameras, including the X-T50. It replaces the mode dial which occupied the same space at the left side of the top plate, and now offers direct access to Fuji’s range of film simulations. While I can see the appeal if you regularly like to experiment with color profiles, and bearing in mind that film styles are something of a speciality of Fujfilm cameras, it’s more of a downgrade for advanced photographers.
Personally, I switch exposure mode more often than color profiles, so I'm a bigger fan of the shooting mode dial which is sacrificed. Since I also shoot RAW all of the time, anything I might select using this dial is rendered pointless in the captured image unless I reapply the style in Lightroom – an extra step reintroduced, only later in the production process.
The styles are lovely, and I wonder if Fujifilm created a physical control for them in an effort to make them feel like more of a genuine photographic tool than a gimmick, but I fear it may have had the inverse effect. The dial now becomes the defining feature of the X-T30 III.
There is also a secondary impact on the practical use of the camera body. Inexplicably, once I got started using the X-T30 III, I couldn’t seem to work out how to place it in aperture priority mode, which is my default exposure setting. I test a lot of cameras, so this was an unsettling predicament.
I always like to think I’ve done some reasonable homework on a camera before setting off on a trip with it, but here I was in the darkened streets of the Italian capital at midnight, in the shadow of St Peter’s Basilica, unable to find Av mode. I can’t say that’s ever happened before, at least not since my first week of taking photos. Notably, this was never a problem with the X-T30, X-T30 II, nor any other Fujifilm camera. The addition of the film sim dial is my only culprit.


Until I got my bearings, I resorted to the new auto mode instead which selects shutter speed and aperture based on the scene. The X-T30 III certainly feels designed for beginners.
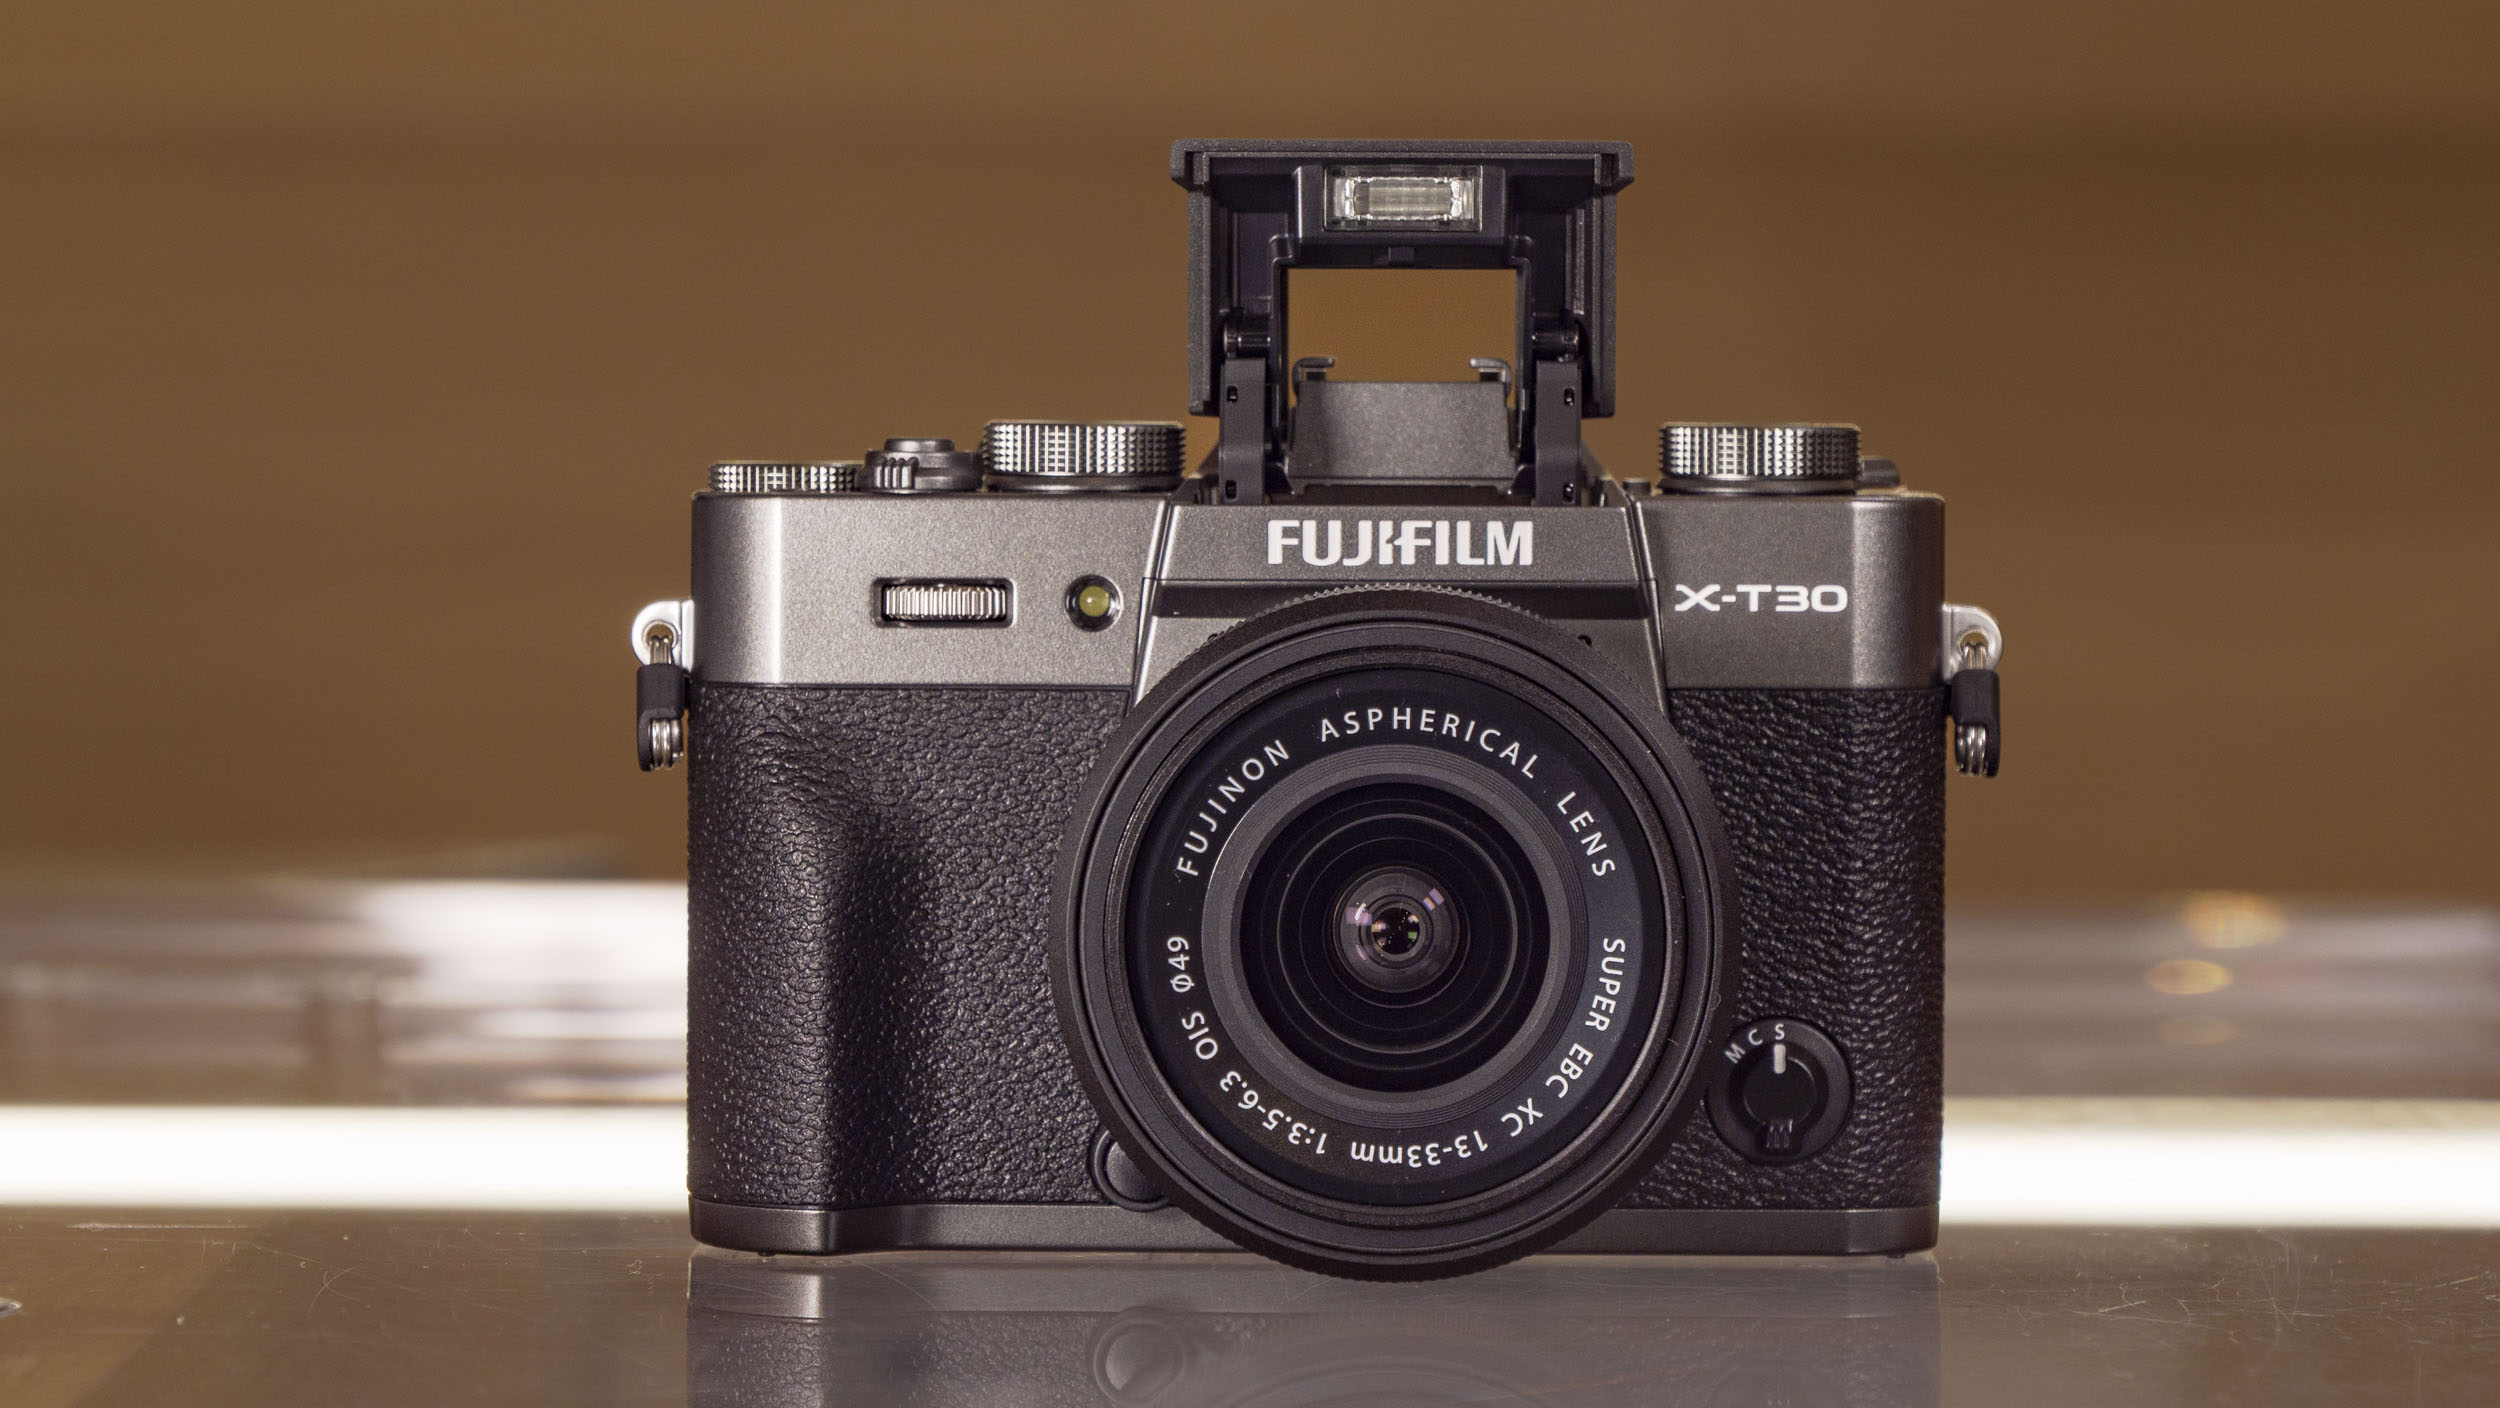
There's a built-in flash, one of only three current beginner models with such a feature. The GN7-rated (ISO 200) flash is handy to have for sure, especially at parties. You only tend to get a built-in flash in beginner cameras which aren't weather sealed, like the X-T30 III, because they usually compromise weather sealing.
Speaking of which, the lightweight design does come with a few compromises. The build quality is a little plasticky, especially coming from a higher-end body like the X-T5. It didn’t especially bother me, considering how much I appreciated the camera’s low weight, but it isn’t a model with which I’d like to find myself stranded outside in a rainstorm.
Packing Fujifilm's latest processor, the X-T30 III is a snappier camera than the X-T30 II. For example, 8fps (mechanical) and 20fps (electronic) burst shooting are sustained for 2x longer, for up to 173 JPEGs. That max speed can be upped to 30fps (electronic) with a 1.25x crop.
I didn’t count the individual frames, but even in RAW mode, the camera felt snappy and punched above its weight with regard to speed. I was able to shoot extended bursts of images, or several sequences in close succession, without the X Processor 5 notably struggling to clear the buffer before I triggered the shutter again.
Fujifilm also says battery life is improved by 10% thanks to the new processor, for up to 425 shots, and across a four-day trip, the two NP-W126S battery packs I had with me were more than enough. Of course, in more extreme temperature conditions, or if I had been exclusively shooting video, it might be a different story. It’s certainly a respectable battery life for a camera at this level, though.
Autofocus receives a boost, too, with Fujifilm's latest subject detection on board, which in addition to people can track animals, birds, cars, insects and more. I was very impressed by the speed with which the camera could snap between close and distant subjects. It also wasn’t easily fooled by tourists and traffic moving between the lens and my intended focal point.
It clearly isn’t a match for the advanced Dual Pixel CMOS AF system found in Canon cameras like the EOS R5 Mark II or EOS R6 Mark III, or even the comparably priced EOS R10, but it’s perfect for everyday photographic needs.


For me, the biggest sacrifice here versus a pricier model such as the X-T50, is in-body image stabilization (IBIS). There's digital image stabilization only, which is certainly better than nothing, but does somewhat limit the possibilities for smooth handheld video footage. The same goes for creative slow-shutter-speed photography.
Given the ultra-lightweight nature of the body, I did find getting sharp images at even moderate shutter speeds a challenge, and I always consider myself to have a steady hand. Perhaps I have been spoiled by seven and eight-stop IBIS systems, but I definitely missed it here. Given the limited aperture range of the kit lens, the optical IS within it struggled to have a meaningful effect once the sun dipped below the horizon.
Ok, so pricier Fujifilm cameras such as the X-T50 and X-T5 boast Fujifilm's latest 40MP sensor for highly detailed photos, but the X-T30 III is no slouch, and still outshines other crop-sensor rivals for detail with its 26MP stills (and 14-bit 'RAF' format RAWs) – these rivals include the 20.9MP Nikon Z50 II, the 24MP Canon EOS R10 and the (older) 24MP Sony A6400.
It’s important not to get too caught up in pixel-counting and the X-T30 III is able to deliver exceptional levels of detail. Shooting in RAW, at base ISO and with a high-quality professional prime lens, the results are exemplary.
This is maintained up to around ISO800, where resolution starts to drop off. By around ISO6400, files have taken on a mushier appearance, and noise is most definitely present. It’s not as good a low-light performance as I’ve seen in some other high-end APS-C cameras, like the Nikon Z fc or Canon EOS R7, but given the target audience and price point, it’s not awful. In fact, up to around ISO4000 the fine grain is actually quite attractive, especially in black and white shots where it lends an almost filmic look.


Having Fujifilm’s film simulations at your fingertips is handy and furthermore includes customizable film recipes, even if that makes shooting-mode changes much more of a hassle. I've shot using various profiles in the galleries above and below, including Velvia (vivid), Reala Ace, Acros (monochrome) and others.
An area where the camera really excels is in its auto white balance system, which is superbly accurate. Combined with Fuji’s renowned color science, the X-T30 III is able to render beautifully naturalistic tones. This was one of my favorite aspects of the original X-T30 (also reviewed in Rome, coincidentally) and revisiting the same locations, I was happy to see the trend had been maintained in its younger sibling.
Video quality is excellent, too – 6.2K video and 4:2:2 10-bit color depth is excellent at this price point, even if in-body image stabilization is missing. The footage looks great straight out of camera, ready to share on socials. It’s a shame the LCD doesn't flip or rotate through 180 degrees, as overall the X-T30 III would make an ideal vlogging camera, but it’s still versatile enough for casual videography or B-roll capture.


I was especially keen to examine the performance of the new 13-33mm lens. This detail matters because most people will buy the camera with the new kit lens, which will spend most of the time on the camera.
As far as kit lenses go, it’s not bad at all and is capable of resolving a reasonable amount of overall detail. Impressively, sharpness is quite consistent across the frame, right out to the edges, even at 13mm. I’ll admit that I wasn’t expecting this and goes to show how far kit optics have come over the past couple of decades. This one is clearly designed to match the quality of the 26MP sensor, which it does admirably.
Don’t expect prime-level quality, but contrast and resolution are good enough for most shooting circumstances.
Attributes | Notes | Rating |
|---|---|---|
Price | The cost is accessible to enthusiasts but you can find more spec for your money elsewhere | 4/5 |
Design | Classically Fujifilm, the retro layout is a joy to use, although the build quality is quite plasticky for the price | 4/5 |
Performance | The lack of IBIS is a problem, but autofocus and speed are up there with the best in class | 4.5/5 |
Image and video quality | The X-T30 III is capable of outstanding images in good light, although it lags behind the competition at higher sensitivities | 4/5 |
You want a super-portable retro camera
Only the X100VI is smaller in the Fujifilm family, but the X-T30 III provides access to the full range of XF interchangeable lenses. The body is almost small enough to fit into a jacket pocket, but expands any existing X-Series ecosystem.
You need speed over absolute image quality
The X-T30 III is a rapid-shooting performer that is also quick to start up. Meanwhile, its fast AF system makes it ideal for street photography and as a backup for wildlife and sports.
You're looking for your first X-Series camera
The X-T30 III is a perfect introduction to the Fujifilm system. It's uncomplicated (mode selection quirks notwithstanding) and the 13-33mm kit lens will cover most of your bases.
You already own the X-T30 II
....or even the original X-T30, perhaps. There isn't really enough of an upgrade here to justify replacing your existing camera. You'd be better off investing in a higher-end model like the X-T5 if you want more features.
You own many heavyweight lenses
While the camera still works well alongside heavier standard primes, telephoto lenses like the XF50-140mm f/2.8 R LM OIS WR or XF 100-400mm f/4.5-5.6 R LM OIS WR will feel greatly unbalanced when mounted to the X-T30 III.
You need to print large format
The 26MP sensor is a little conservative by 2026 standards, and you can find much higher-res cameras for similar money. Equally, while 4K video is available, cameras like the X-H line and single-digit X-T families offer superior quality footage, for larger displays.
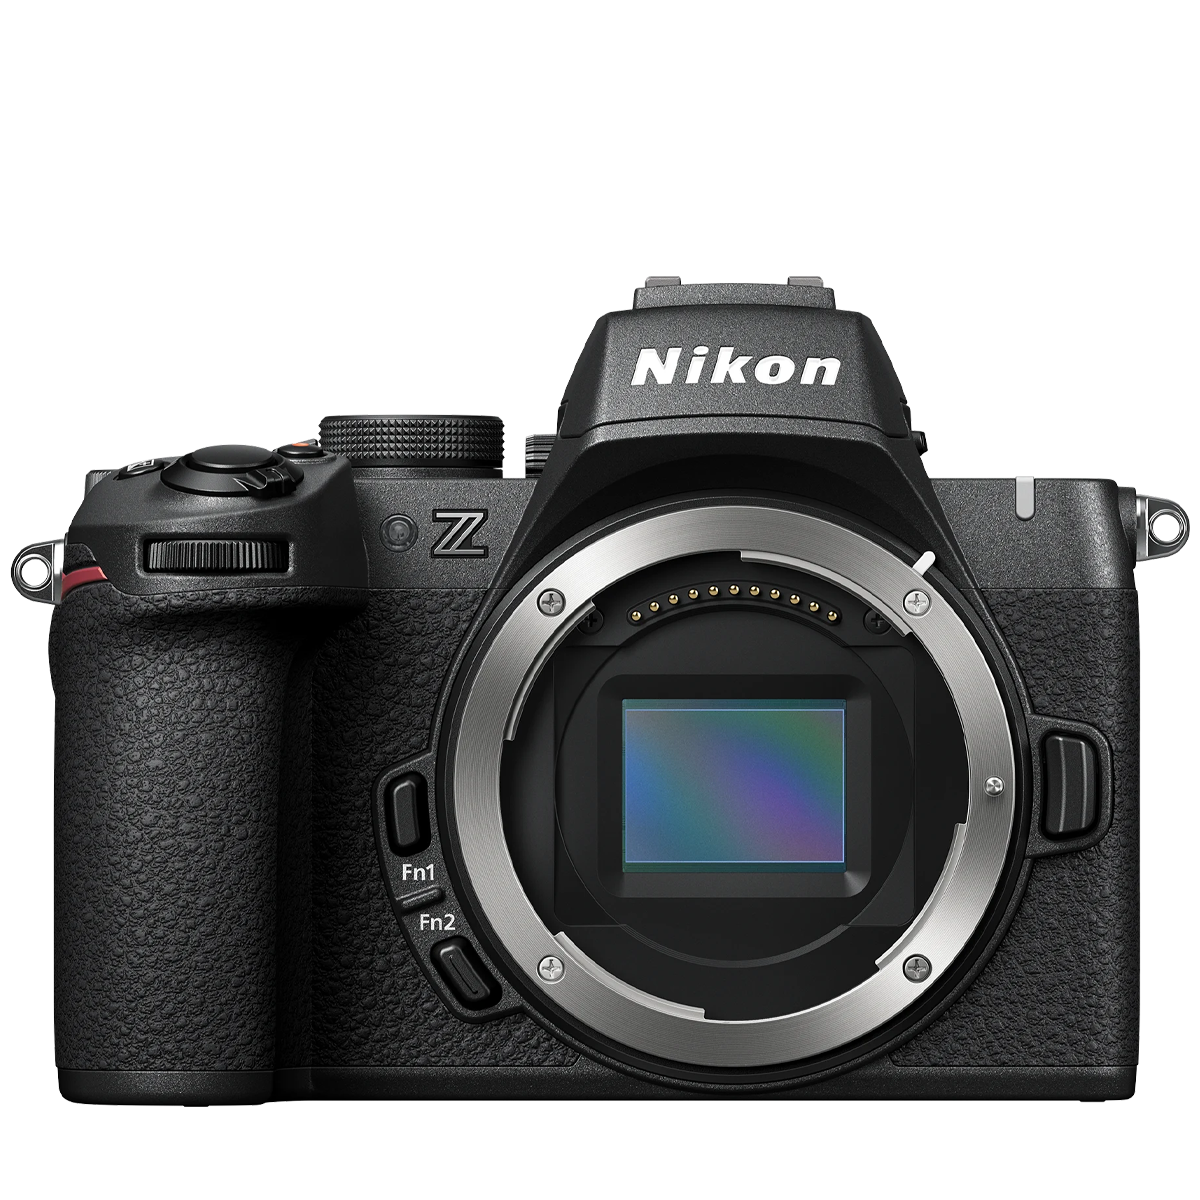
Nikon Z50 II
Available for exactly the same price as the X-T30 III, the Z50 II is a versatile mirrorless camera with Nikon's latest Expeed 7 processor for flagship performance, superb subject-recognition autofocus, and improved video features. Its excellent ergonomics and vari-angle touchscreen make it an easy camera to travel and shoot with, while color profiles can be uploaded from Nikon's app, much like Fujifilm film recipes. With lower-resolution 20.9MP stills and 4K video, the Z50 II can't quite match the X-T30 III for detail.
See my Nikon Z50 II reviewView Deal
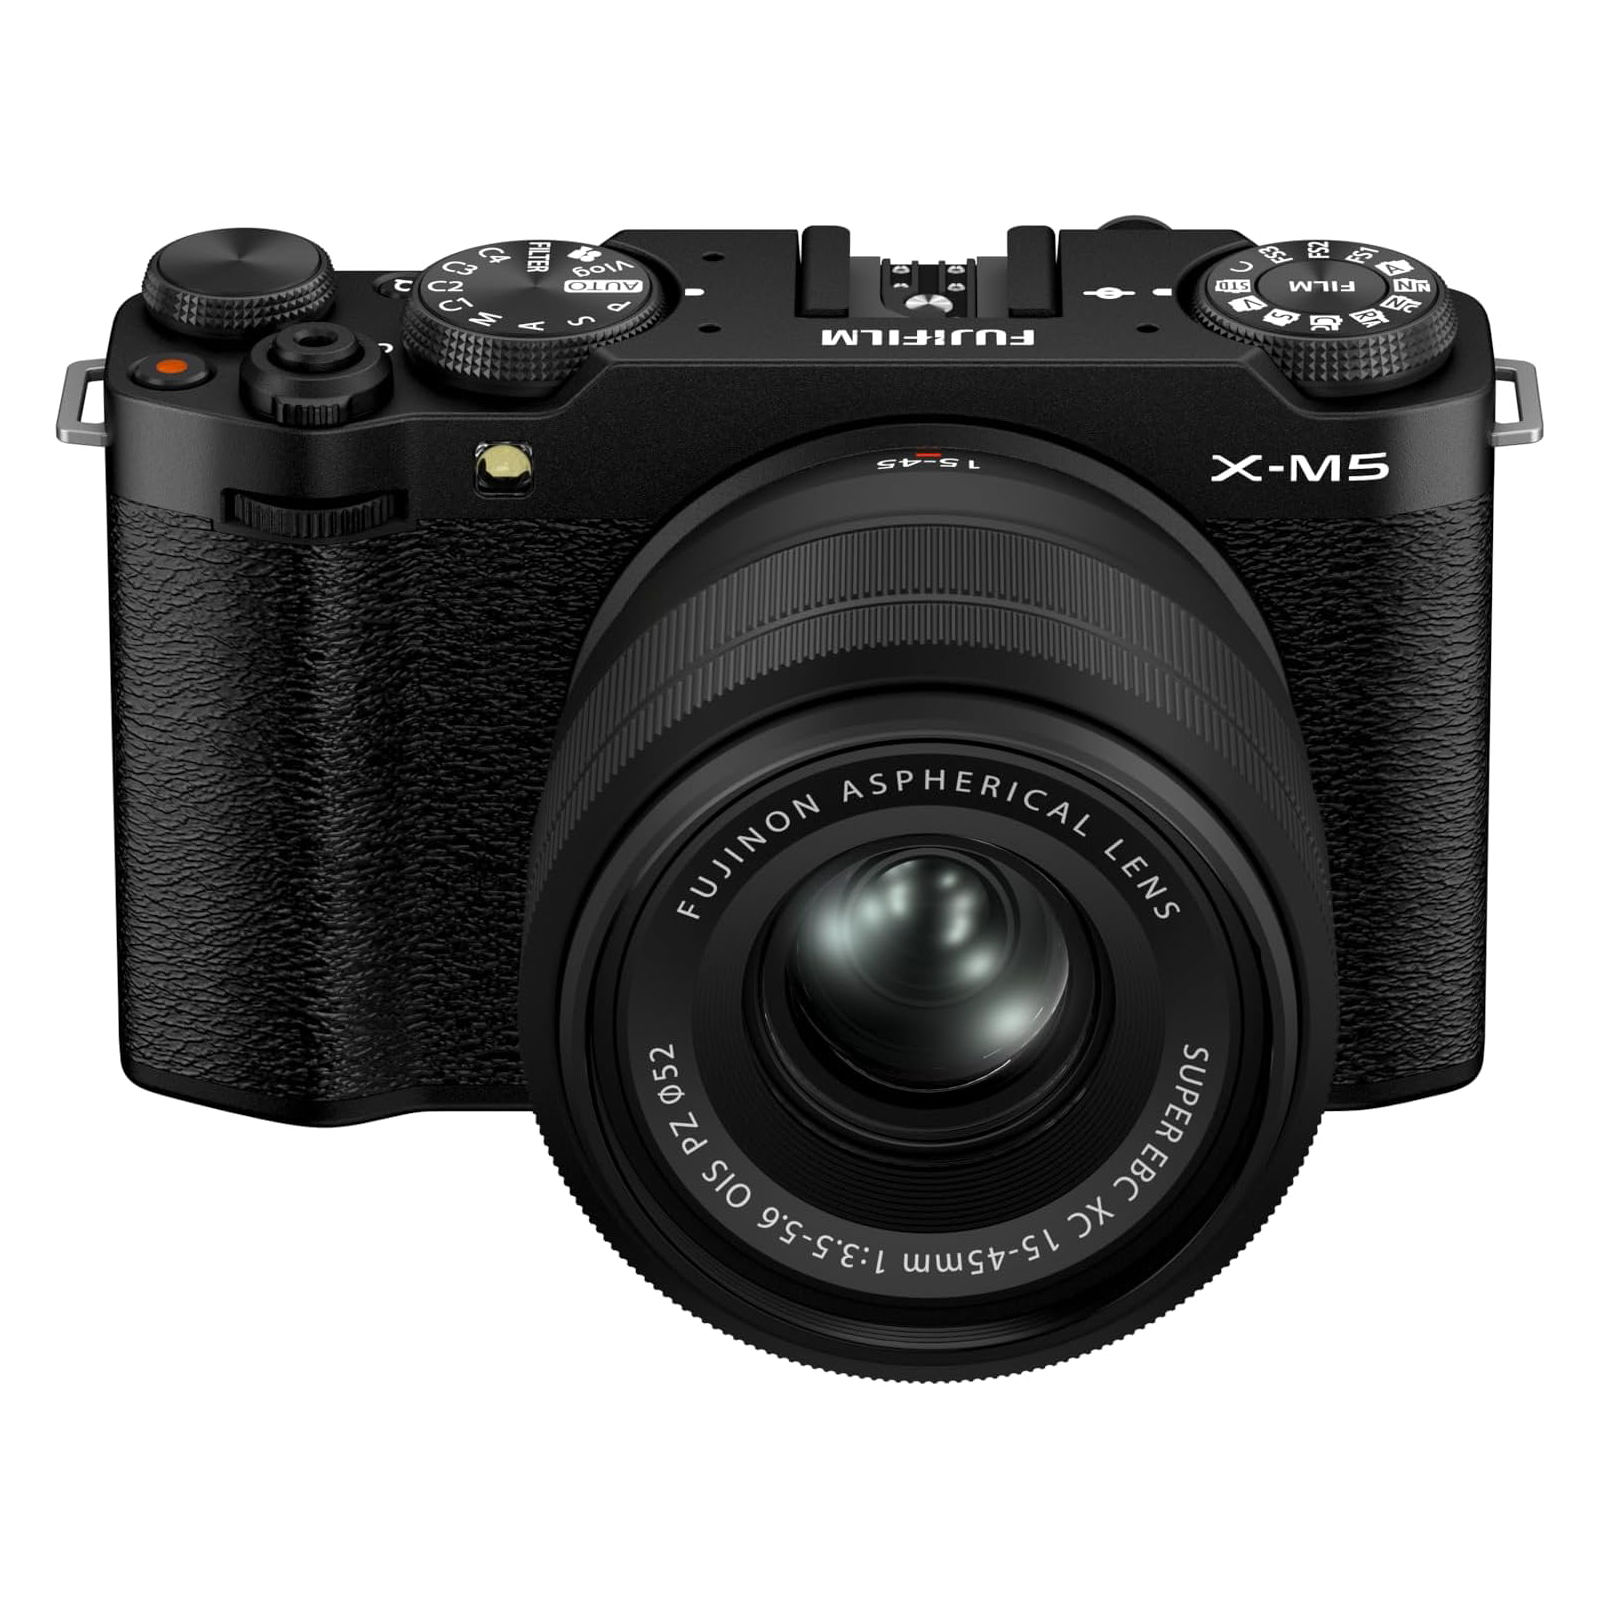
Fujifilm X-M5
Smaller, lighter and cheaper, the X-M5 features the same sensor and processor as the X-T30 III – which likewise means 26MP stills, 6.2K video, 9:16 short movies and film simulations. The major difference is that the X-M5 lacks a viewfinder and has a vari-angle screen, making it the better pick for video.
See our Fujifilm X-M5 reviewView Deal
I took the X-T30 III with me on a multi-day trip to Italy, where I knew I’d be shooting a range of subjects across a spectrum of challenging lighting conditions, inside and out. I made a point of shooting the camera as it would normally be used in practise, but also performed a standard regimen of technical tests.
To assess noise performance, I mounted the camera on a stable support, set Av mode (when I figured out how) and then shot a frame at each ISO setting, from the lowest to the highest. I also kept the camera in automatic white balance mode for the duration of the shoot, but also shot reference images with a custom WB or another preset where I felt it appropriate, so I could compare the camera's color decisions to my own preferences.
I took an X-H2S body along for the ride too, which made a good control camera for quality reference.
I used both the viewfinder and main LCD for composition throughout, and worked with the camera in both auto and manual focus modes at various points. Due to the nature of many of the locations in which I was shooting, I didn’t have much opportunity to thoroughly use the built-in flash – flash photography wasn’t permitted in most of the interior spots.
I used the 13-33mm kit lens extensively, but also switched to the XF56mm F1.2 R WR to see how much the cheaper optic may be limiting the maximum possible performance from the sensor and processor. All images were shot in RAW format and converted in the latest version of Adobe Lightroom, where no noise reduction or sharpening has been applied to the sample shots seen here.
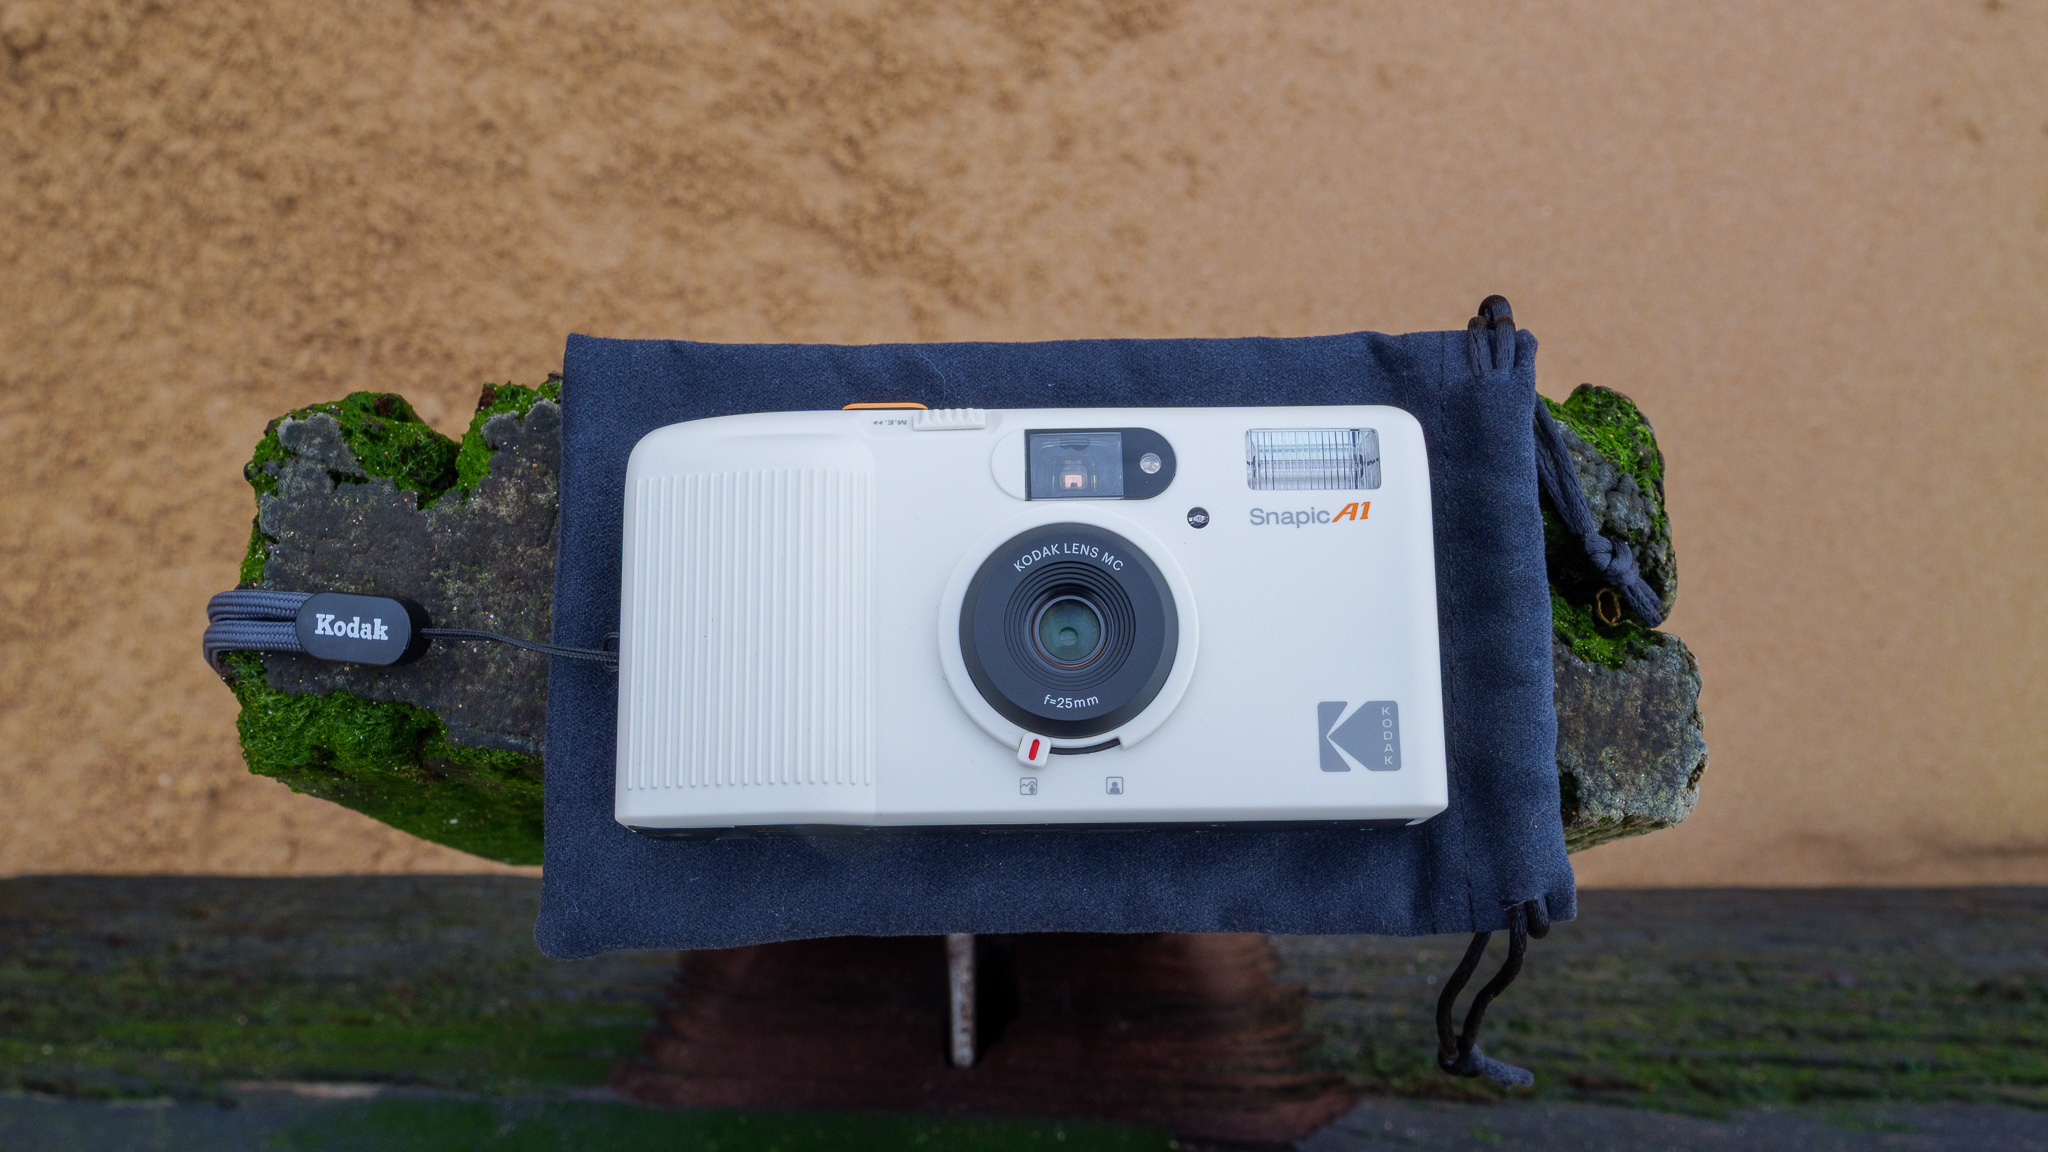
The Kodak Snapic A1 is a 35mm analog film camera designed and manufactured by Hong Kong-based Reto Production – the same company behind other licensed Kodak analog models like the Ektar H35N and Charmera. Priced from just $99, it's one of the more affordable ways to dip your toes into the world of film photography, and it comes loaded with enough retro charm to justify that novelty appeal.
The design is immediately striking. Available in off-white or dark gray, the clean-lined plastic body has just enough Kodak orange on the shutter button and logo to feel authentically branded without going overboard. It's a look that calls to mind the retro-futuristic aesthetic of classic science fiction movies rather than a straightforward throwback, and in my book that's a good thing. It slipped into my jacket pockets with ease, and the included neck strap and protective pouch are welcome additions that more budget-focussed cameras often skip.
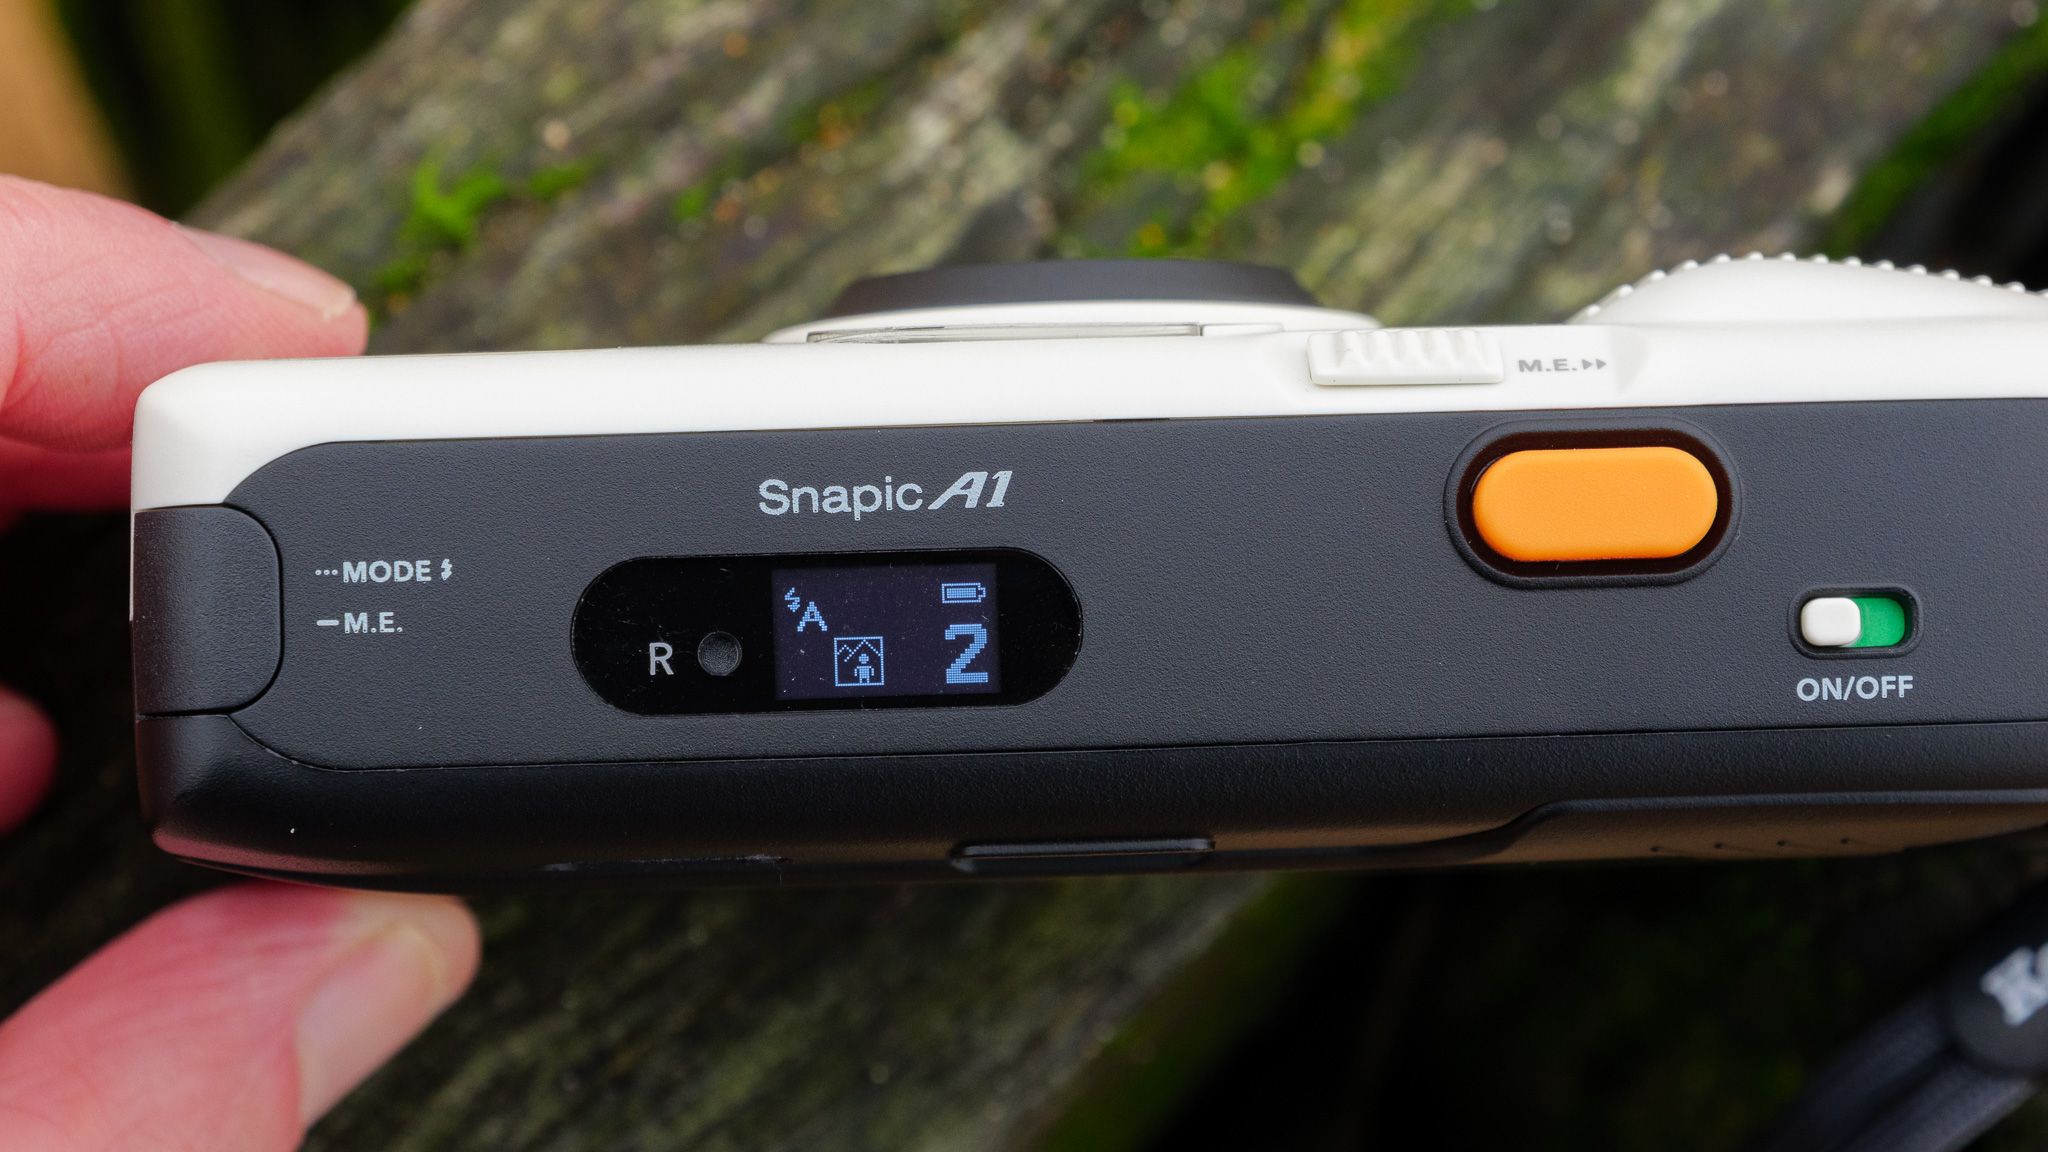
Feature-wise, you get a three-element glass lens at 25mm with a fixed f/9.5 aperture and 1/100s shutter speed. There are two manual focus settings, plus an auto flash with red-eye reduction, automatic film advance and rewind, and a double-exposure shooting mode. A small but practical OLED panel on top displays battery life, remaining exposures, and current settings. It's basic by design, but thoughtfully put together.

In good outdoor light, I found that the Snapic A1 delivers characterful, grainy 35mm shots with that all-important analog look. Vignetting and some chromatic aberration are present, but these feel like features rather than flaws. Indoors, however, the flash struggles; it lacks the reach and power to properly illuminate subjects beyond a few feet, making indoor shots a more hit-or-miss experience, particularly with slower film.
The main practical gripes are minor but worth flagging. The Mode button sits awkwardly on the left edge of the top plate, and it's easy to accidentally trigger it depending on how you hold the camera. There's also no lens cap, which makes the pouch essential rather than optional. And while the price is genuinely affordable for the hardware, film and processing costs ramp up fast. A single 36-exposure roll and a set of digital prints can run close to $40 / £30, meaning the ongoing cost of ownership is considerably higher than buying the camera itself.
Taken as a whole, I think the Kodak Snapic A1 is a fun, well-designed entry point into analog photography – and one of the best new film cameras for the money. It won't satisfy anyone looking for creative control or technical precision, but for casual shooters who want a stylish, pocketable film camera that just works, it hits the mark at a price that's hard to argue with.
The Kodak Snapic A1 is available to buy now, and refreshingly cheap at just $99 / £99 / AU$179.
Also supplied in the box are two handy accessories: a soft microfiber drawstring pouch for keeping the camera protected when not in use, and a corded strap that's long enough to fit around the user's neck or shoulder. Kodak could have shipped this with just a tiny wrist strap, so I was impressed with the extras.
You will, however, need to supply your own batteries (2 x AAA), and there are the added costs of 35mm film, its development and potential printing to consider as well. This can quickly add up: buying a roll of 36-exposure Kodak ColorPlus film and getting some medium-quality digital prints costs me almost £30 in the UK (around $40 / AU$ 57). So, despite the affordability of the hardware, the Snapic A1 isn't a particularly cheap camera to own.
Format: | 35mm |
Lens: | 25mm f/9.5 |
Focus: | 0.5m to infinity (two-stage) |
Flash: | Built in |
Exposure: | Auto |
Battery: | 2x AAA |
Viewfinder: | Optical, direct vision |
Size: | 118 x 62 x 35mm, 120g |
Kodak (or Reto, to be precise) has kept things pleasingly nostalgic with the styling. The camera body is ABS plastic but built to nice sturdy standards, and its clean lines and ivory white front (it's also available in a dark gray color finish), with a couple of flashes of classic Kodak orange on the shutter button and logo, bring to mind the retro-futuristic production design of something like 2001: A Space Odyssey. It's not just another 1950s or 60s-esque camera, and I really like that.
At under 120g and just 118 x 62 x 35mm in size, the camera is genuinely pocket-sized and I found it very easy to bring along to social events and out on hikes. There's no lens cap to protect the glass front element, which makes the included protective pouch all the more valuable.
While the Snapic A1 is fairly bare-bones in terms of features and functions, it does have some interesting design touches. By flicking a switch underneath the lens, for instance, I could toggle between close-up (0.5 to 1.5m) and far-off (1.5m to infinity) focus. And, up on top, there's an OLED panel that provides at-a-glance info on remaining exposures, battery life and the current flash and focus settings. It's monochrome and tiny, but easy to read and perfectly equipped for its job.
My main gripe with the design is the placement of the Mode / M.E. button, which sits right on the left edge of the top plate, curving around to the left side of the camera. Often, when I was gripping the camera and about to take a shot, my left forefinger would hit this button and change the shooting mode. Depending on how you hold the camera, this may never become an issue for you, but it forced me to adjust the way I took photos, which I found a little annoying.
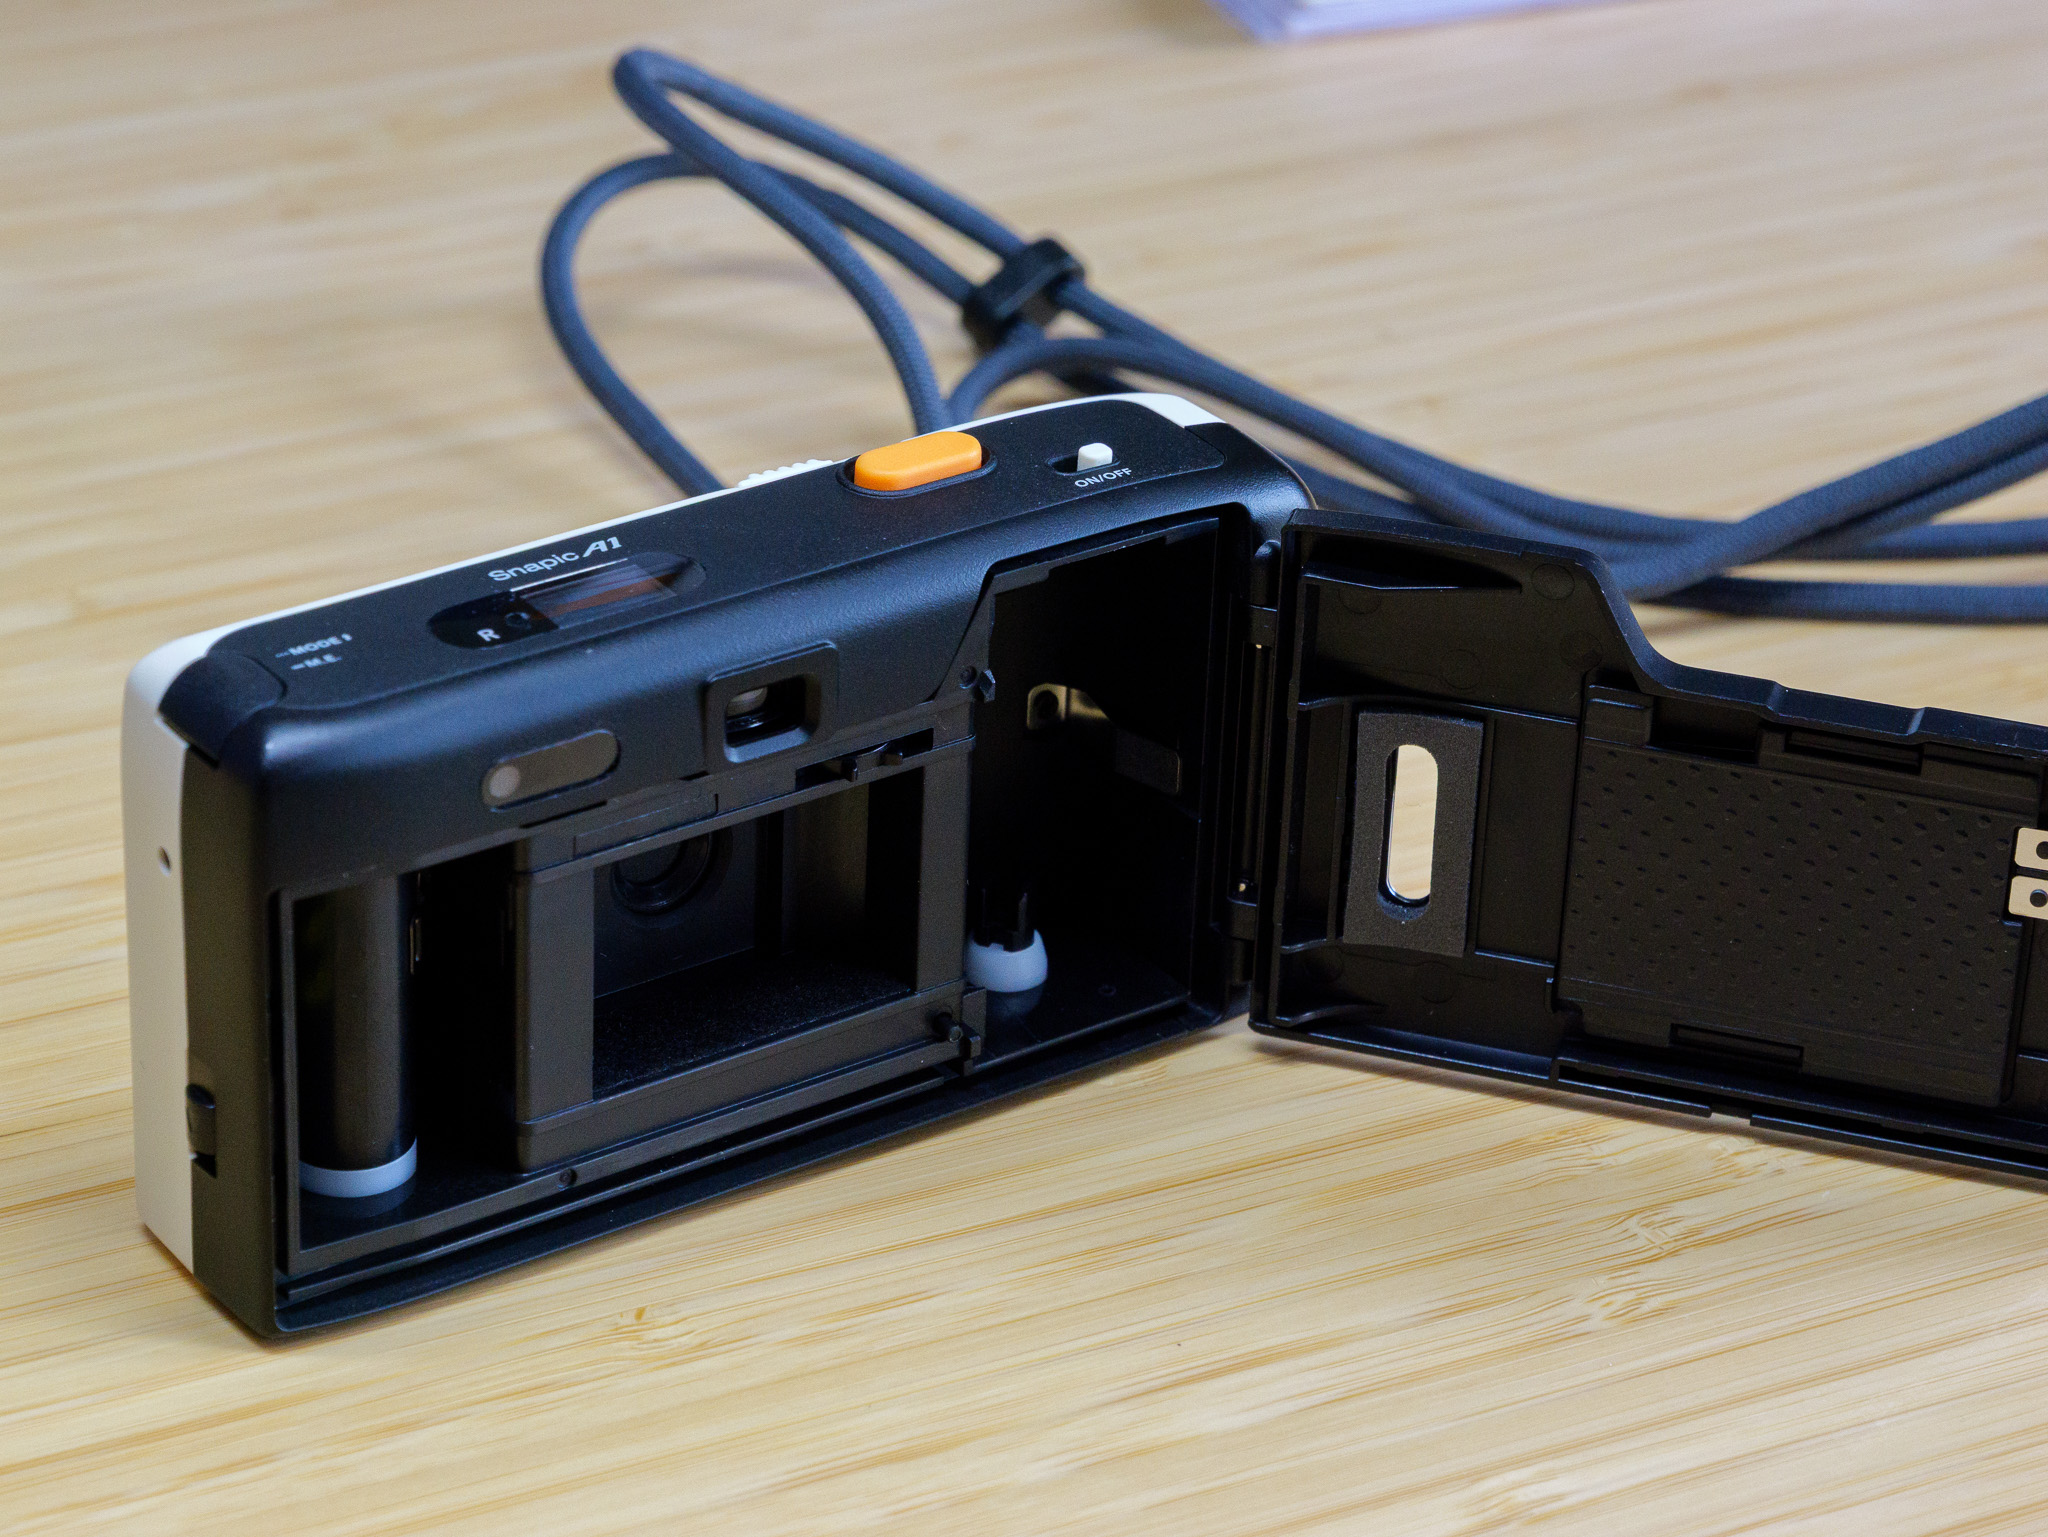
Getting film in and out of the camera is easy thanks to a large, easy to open rear door that provides plenty of room to work. There's a tiny plastic window on the door so that you can instantly see whether or not any film is inside. And, in a nice user-friendly touch, film winds on automatically between shots and will fully rewind once a roll is complete.
Most cheap 35mm cameras use plastic lens elements, but the Kodak Snapic A1 has a three-element glass lens. It has a wide-angle 25mm focal length and a rather narrow fixed aperture of f/9.5, along with a fixed shutter speed of 1/100s.
There's the two-stage manual focus I mentioned above, as well as a flash (which can be set to automatic, on or off, and has a red-eye reduction mode), but other than that there's no way to control your exposures. This is very much a point-and-shoot camera, and while that's not necessarily a bad thing – simplicity is welcome – it does mean you need to know its limits if you want to get the best out of it.

I shot using Kodak ColorPlus 200 speed film, with which the camera performs well outdoors in the daytime. I managed to capture some striking snaps that I'm very happy with, and I love the grainy look of those images. Indoors, however, I found that the flash doesn't have the reach or power to illuminate subjects more than a few feet away. It may fare better with 800 or 1600 speed film, of course, but in my experience my most successful indoor shots were all close-up portraits, where the flash could do its job properly.
Are the Snapic A1's photos "high quality" by today's standards? Not really – if you pull out a 10-year-old smartphone it'll take sharper, cleaner images than these; there's noticeable vignetting around the edges, particularly in the corners, and some chromatic aberration too.


But I don't think quality is ever really the point with a cheap 35mm camera – the look and feel of analog photos can't easily be replicated by digital filters and algorithmic tweaking, and you buy an old-fashioned camera like this for, ironically, the novelty of shooting on film. Yes, its photos aren't noise-free or razor-sharp edge-to-edge, but they have real texture and character.
If you do want to get a little more creative, the Snapic A1 can capture double exposures – just hold down the Mode button to select it, and the OLED panel will make it clear whether you're shooting the first or second exposure.

Battery life feels pretty solid to me. After shooting a 36-exposure roll of film on the camera, the battery indicator still showed as full, and according to Kodak users should be able to shoot around 10 rolls of 24-exposure film on a single pair of AAA alkaline batteries. Your mileage, of course, may vary depending on which batteries you're using and how frugal you are with the flash.

You want a break from digital photography
There's nothing like analog photography – and the Snapic A1 is one of the cheaper, simpler ways to shoot on 35mm film.
You want a compact, stylish novelty
Small, lightweight and stylish, this camera makes for a great talking point at parties, and it's beautifully simple to use.
You're not prepared for ongoing costs
Yes, the camera itself is cheap – but film and processing is very expensive these days, particularly in comparison to digital photography.
You want to learn about analog photography
The stripped back controls mean this is about as point-and-shoot as it gets. If you want to learn more, buy an old SLR or rangefinder.
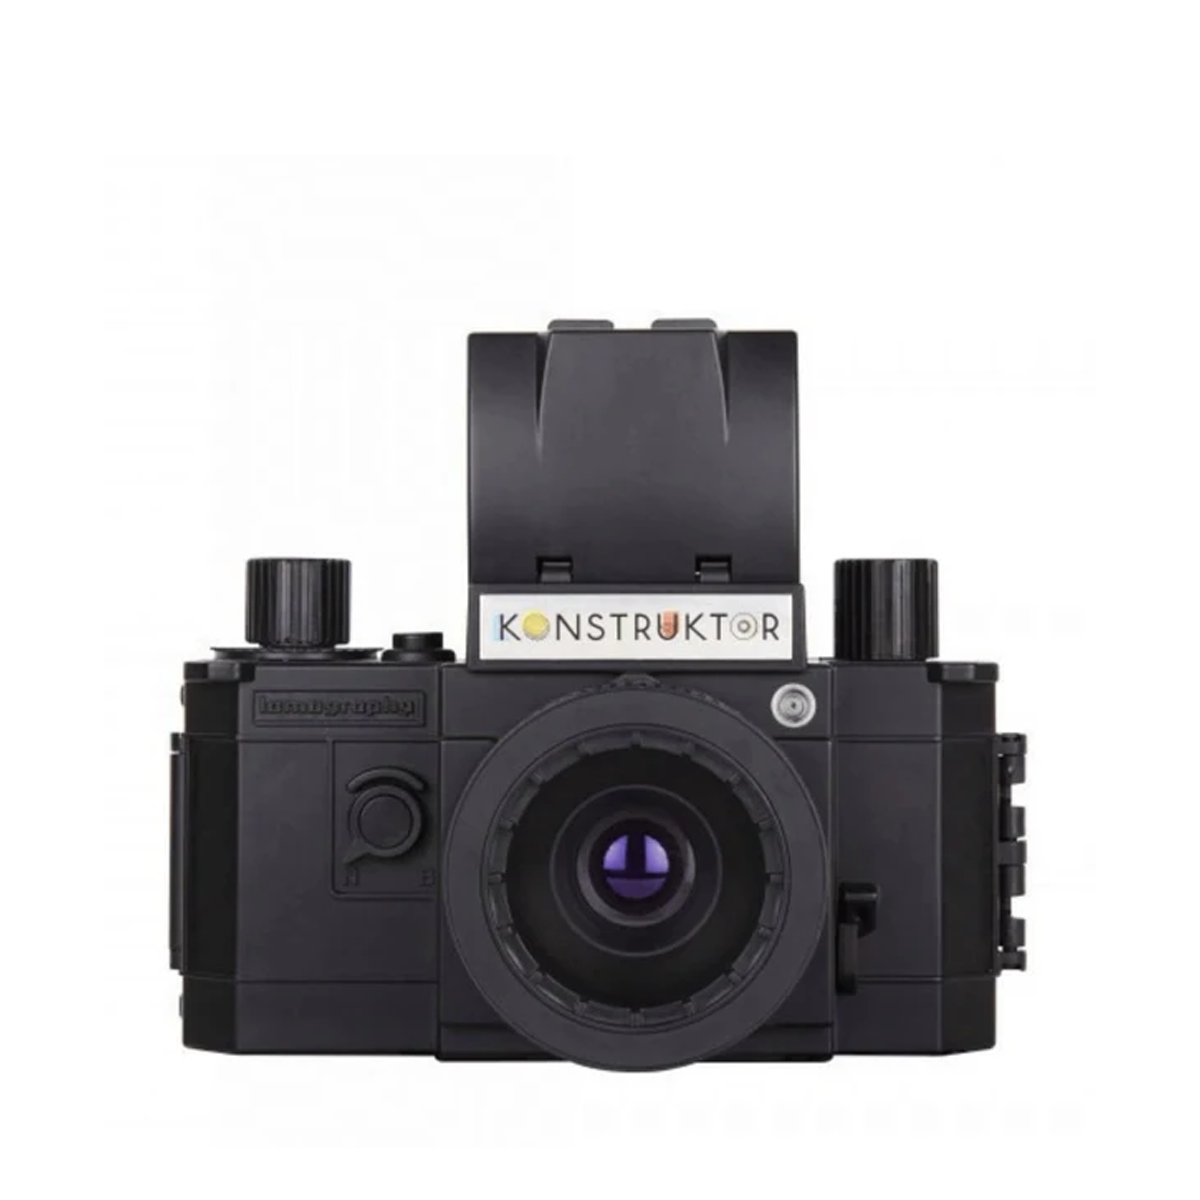
If you like your photography truly hands-on, consider the Lomography Konstruktor F (best film cameras), a plastic 35mm camera that you have to build yourself. It’s cheap to buy, though a little challenging to construct.
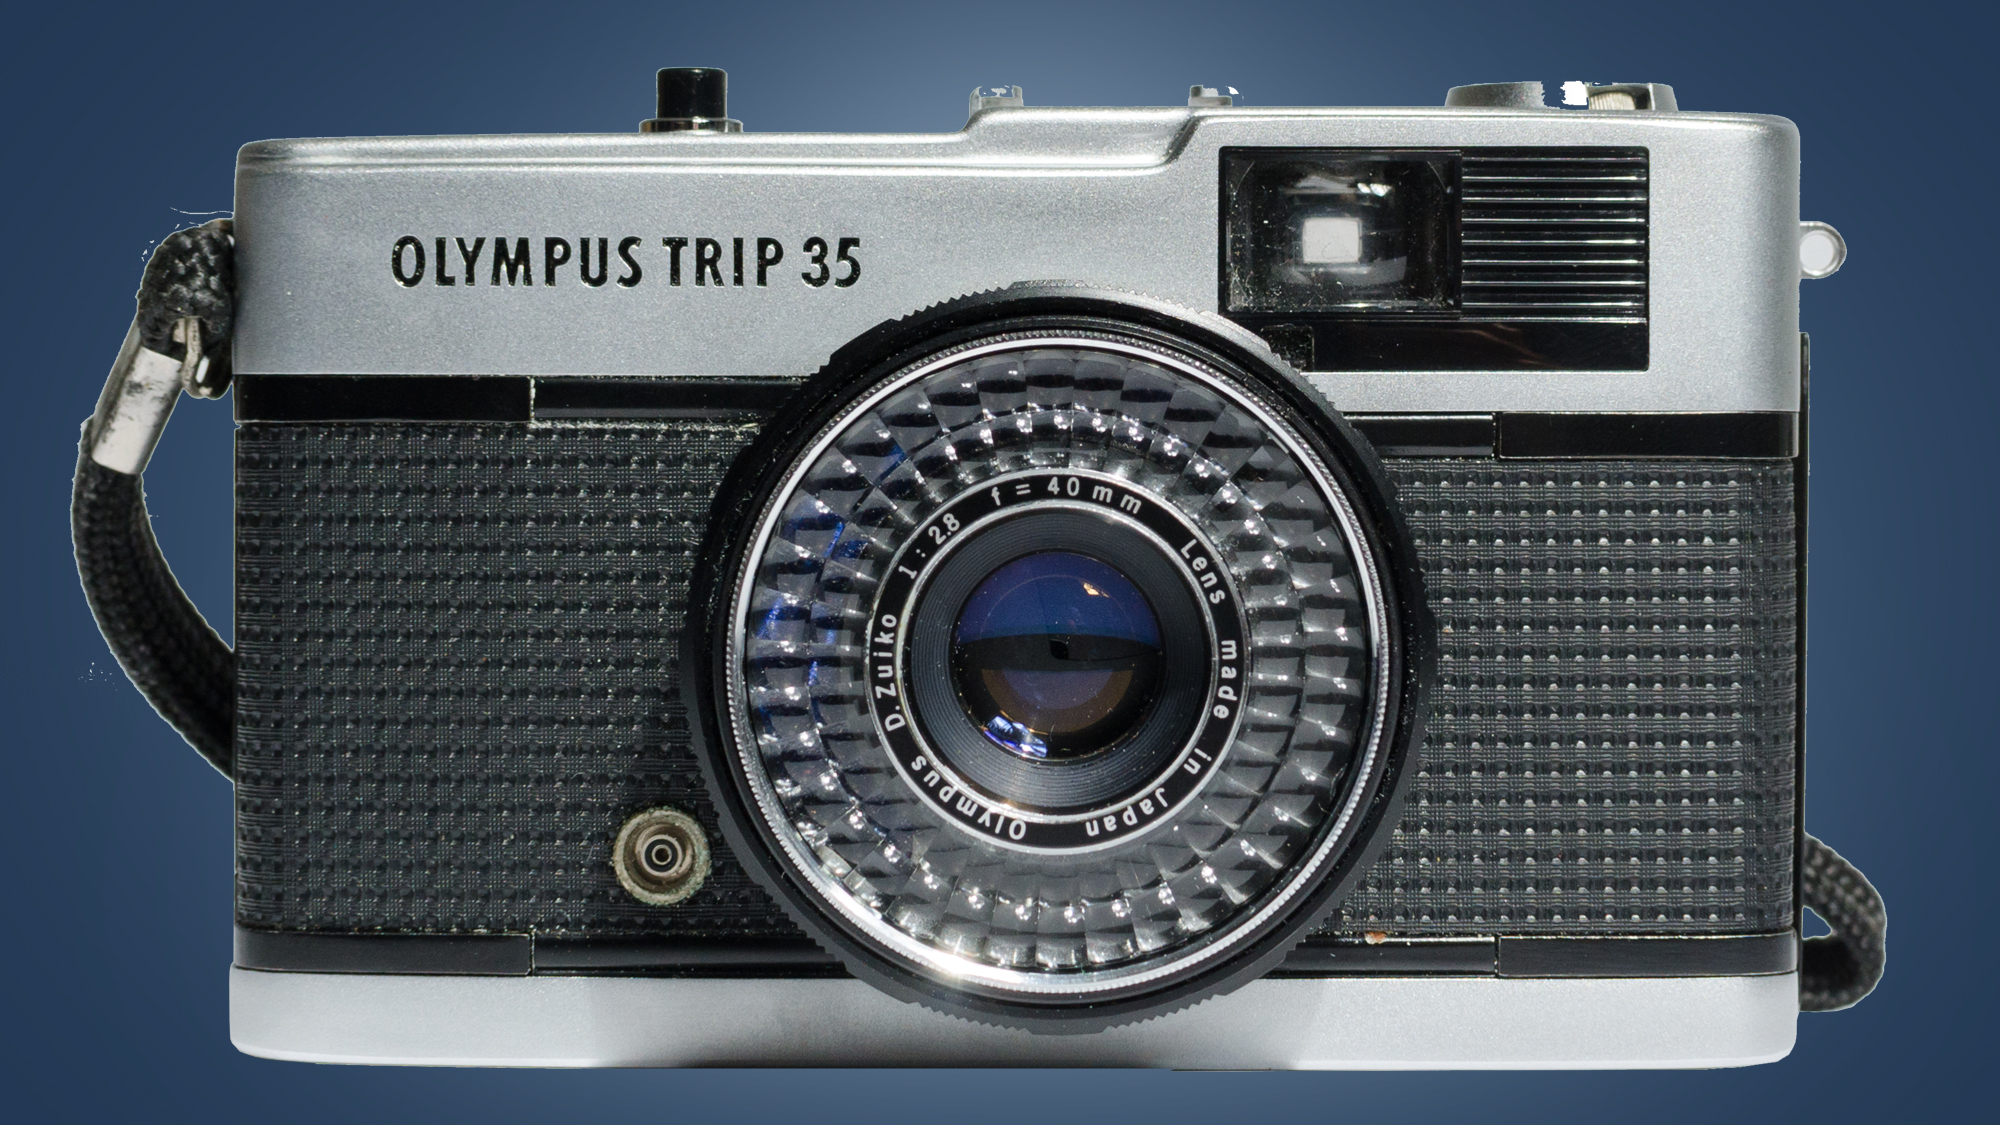
The Olympus Trip 35 (in our best film cameras round-up) is an all-time classic 35mm compact with auto exposure, zone focusing and a selenium metering cell around the lens that requires no batteries. A good used one won’t cost the earth and will give you great results.
Testing a film camera is a much slower process than reviewing a digital camera, because you can't look at the photos right away. In fact, I reviewed the Kodak Snapic A1 (a sample of which was sent to me by a PR rep) over a period of well over a month, taking it with me to various parties, hikes and events and snapping a photo or two until my 36-exposure roll of Kodak ColorPlus 200 film was spent.
I made sure to use the camera in all kinds of conditions – indoors and outdoors, day and night, bright and overcast – testing out the flash and focus controls.
I then sent the film to UK-based online film retailer and developer Analogue Wonderland for processing. They created digital scans for me to download – I opted not to pay extra for physical prints.
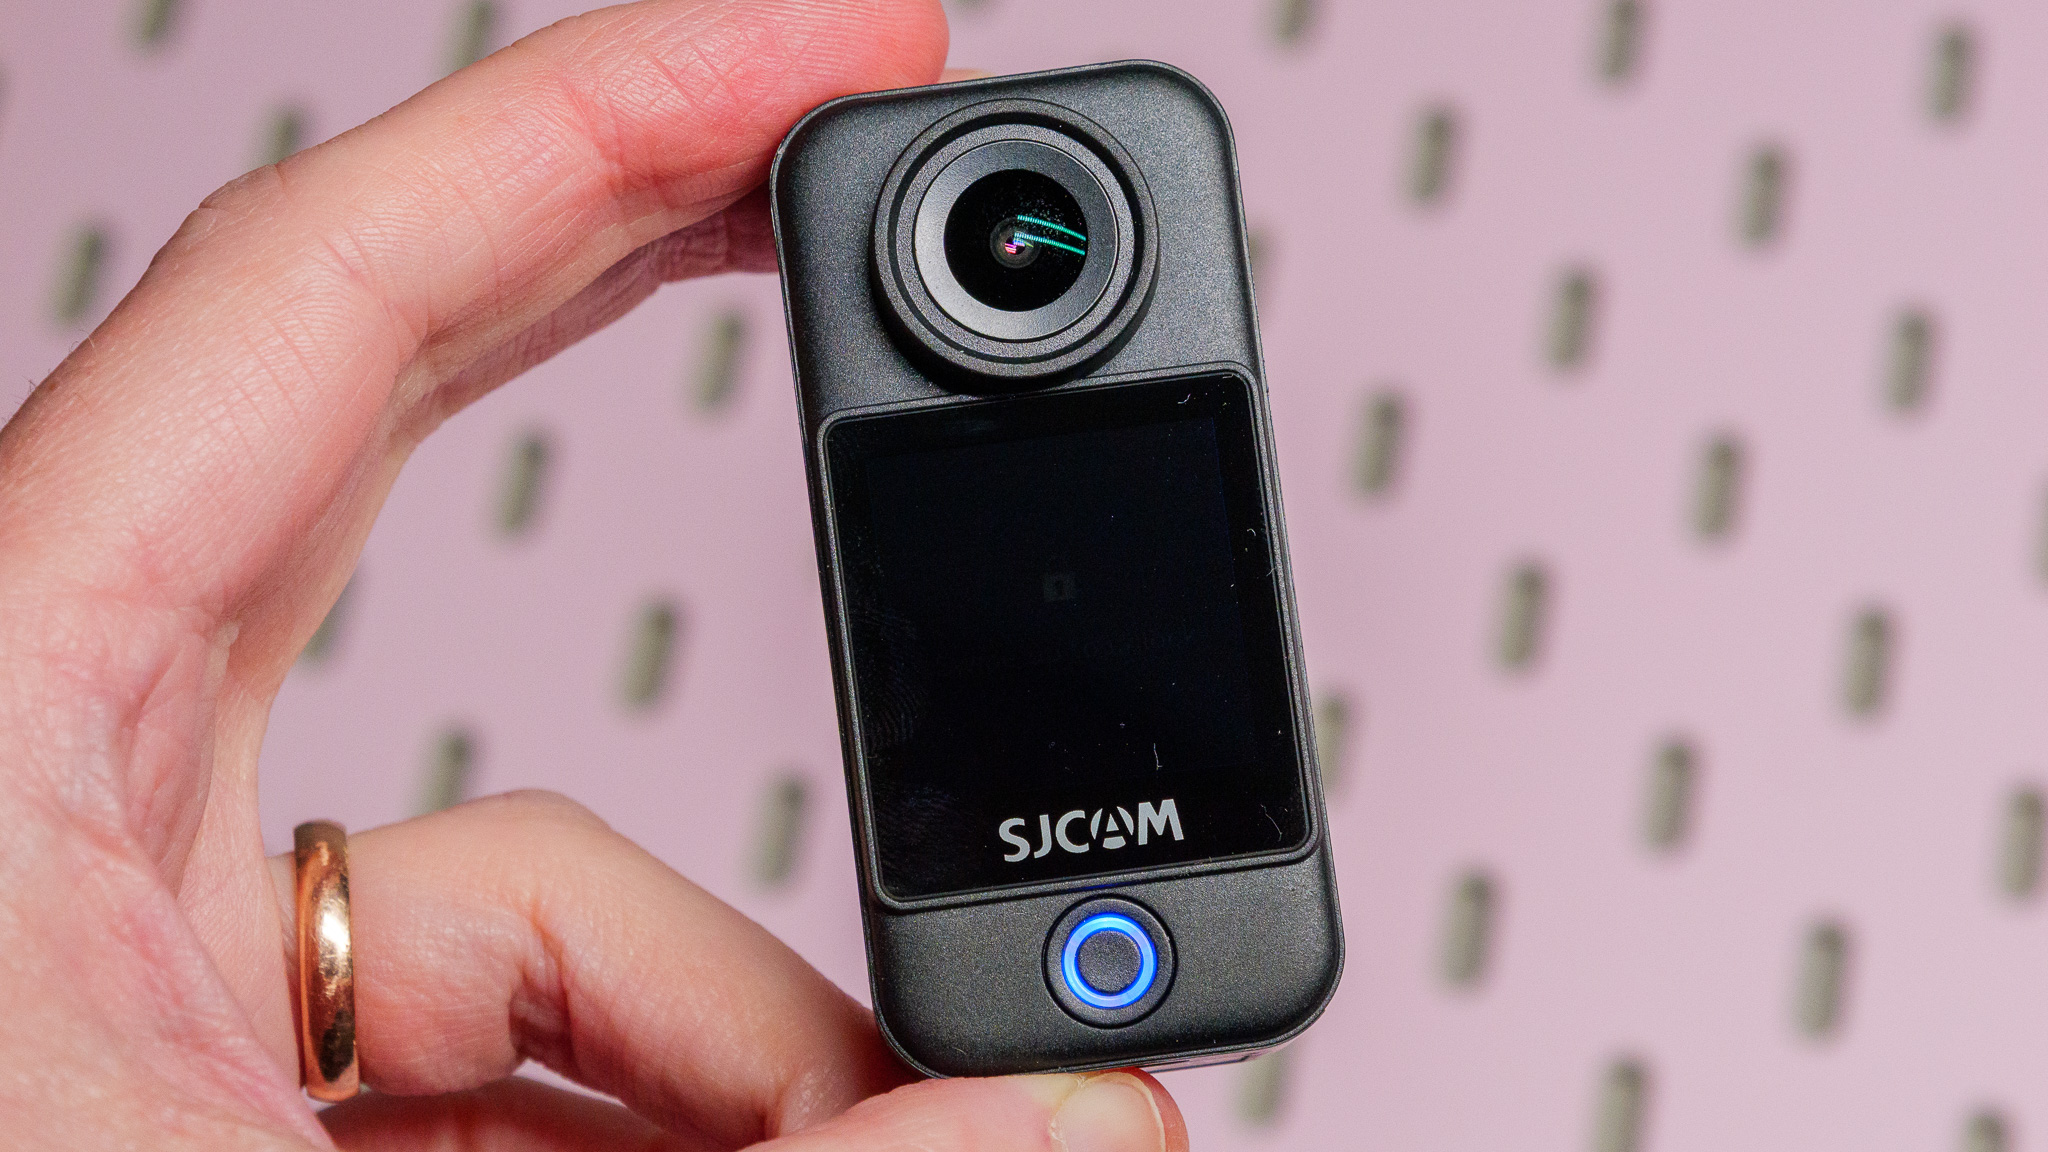
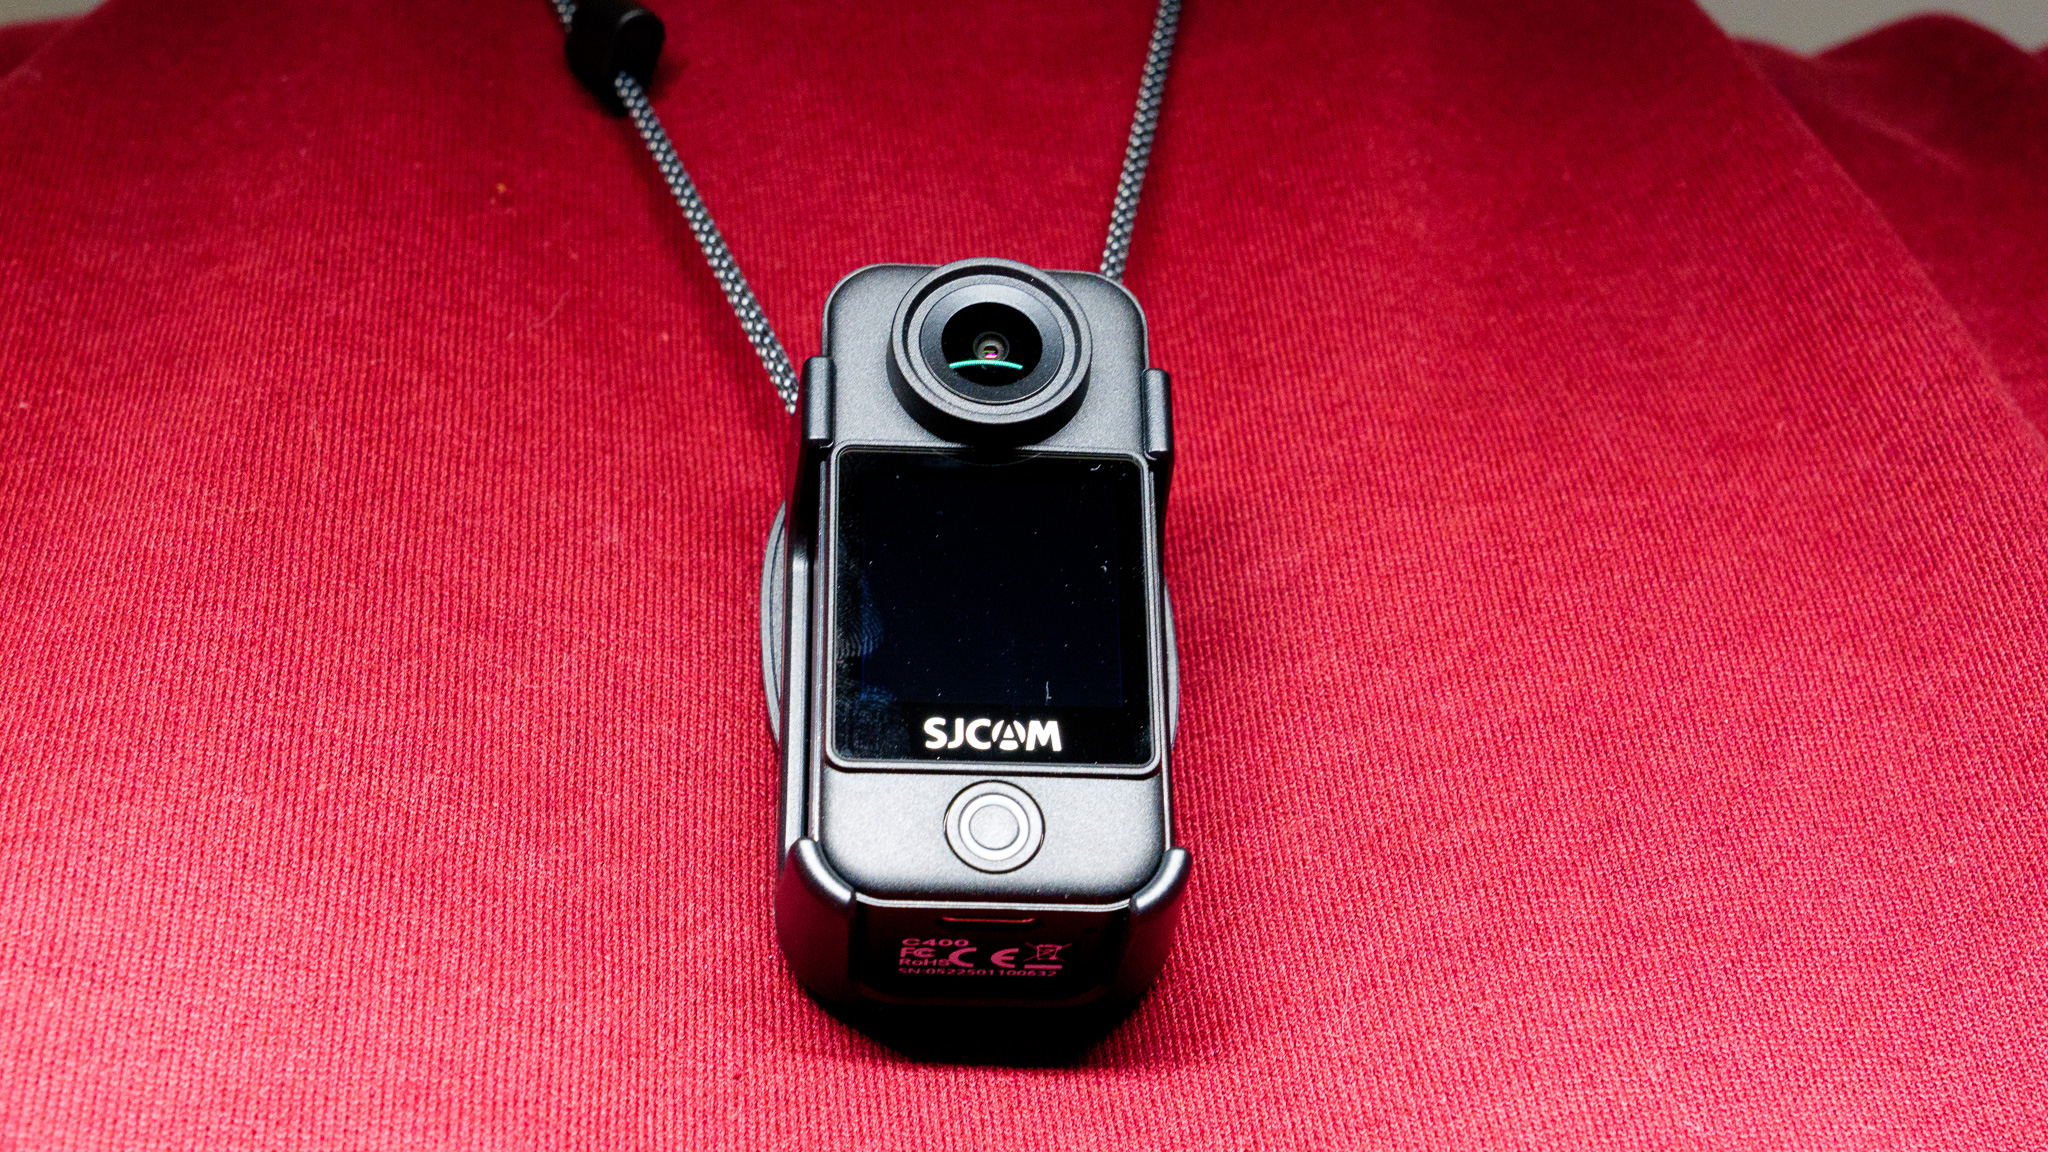
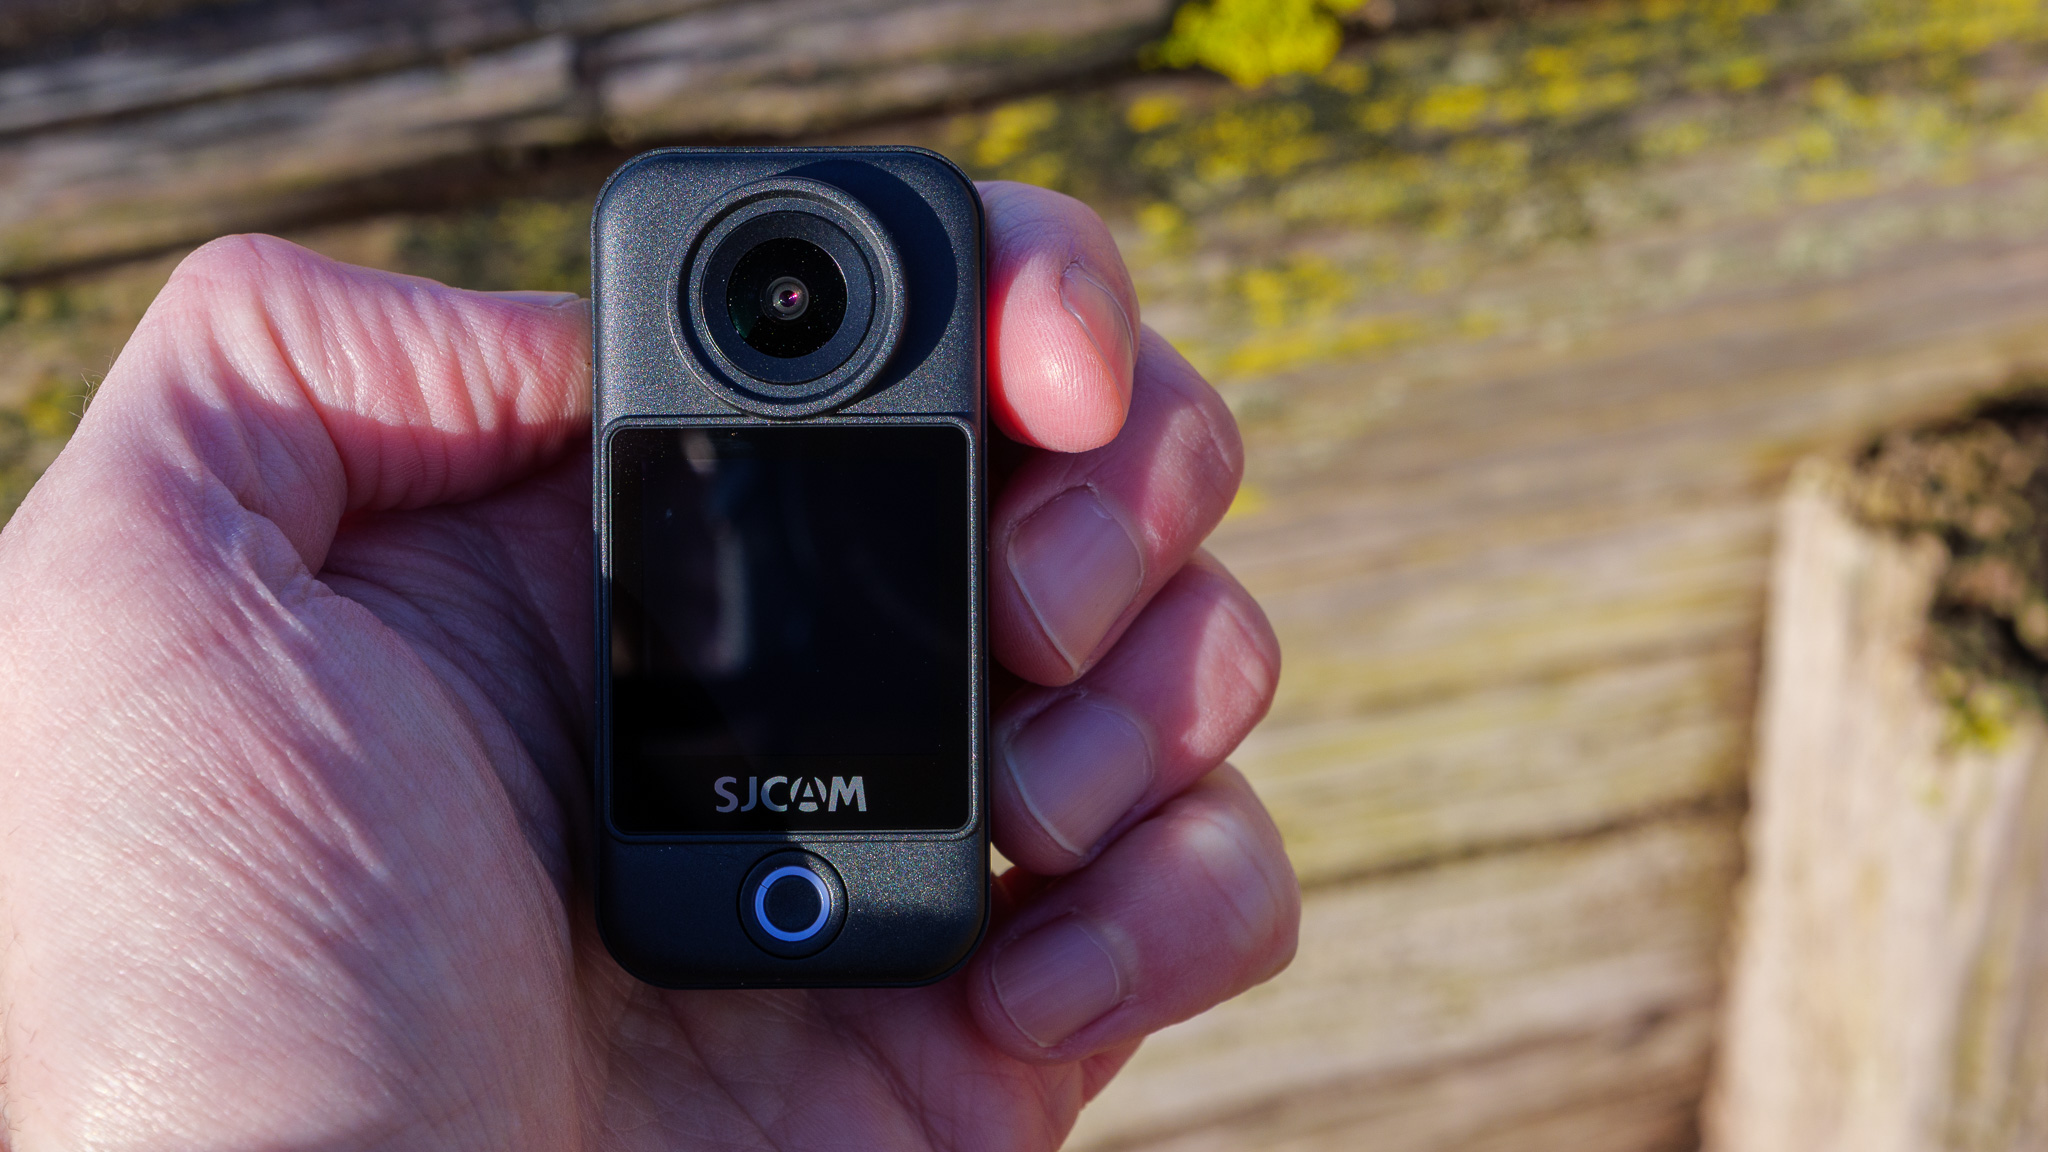
The SJCAM C400 is an ultra-compact action camera that comes with an optional handle accessory, transforming it from a tiny wearable cam into a handheld vlogging setup. Starting at around $160 / £155 (without the handle), it undercuts the latest offerings from DJI and Insta360 by a significant margin — but unfortunately, you get what you pay for.
The camera itself is charmingly small and lightweight, making it easy to wear on a pendant or fix to a hat for POV filming. It includes a built-in touchscreen, which is a huge boon compared to similarly sized rivals like the DJI Osmo Nano or Insta360 Go cameras, which lack this feature.
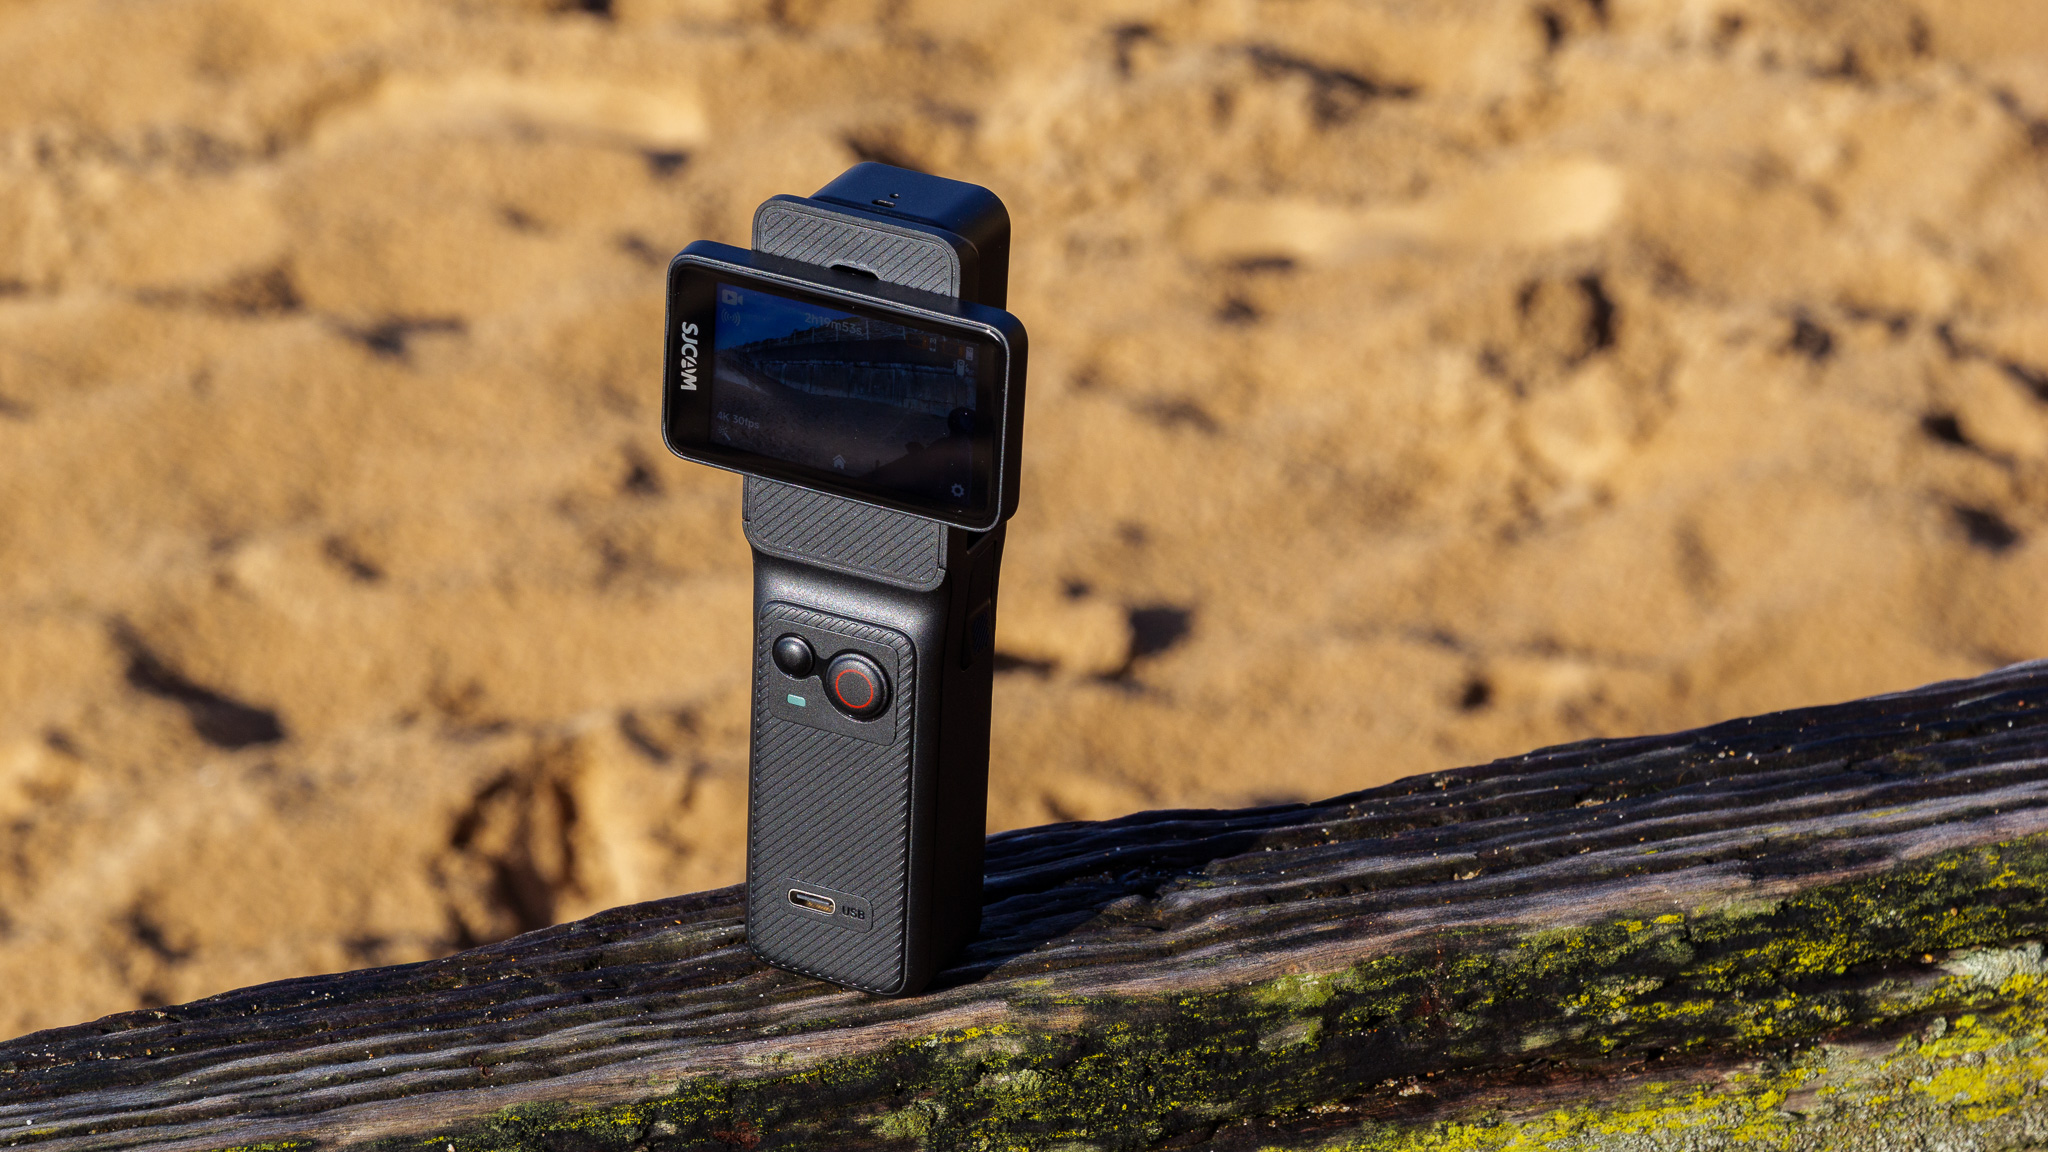
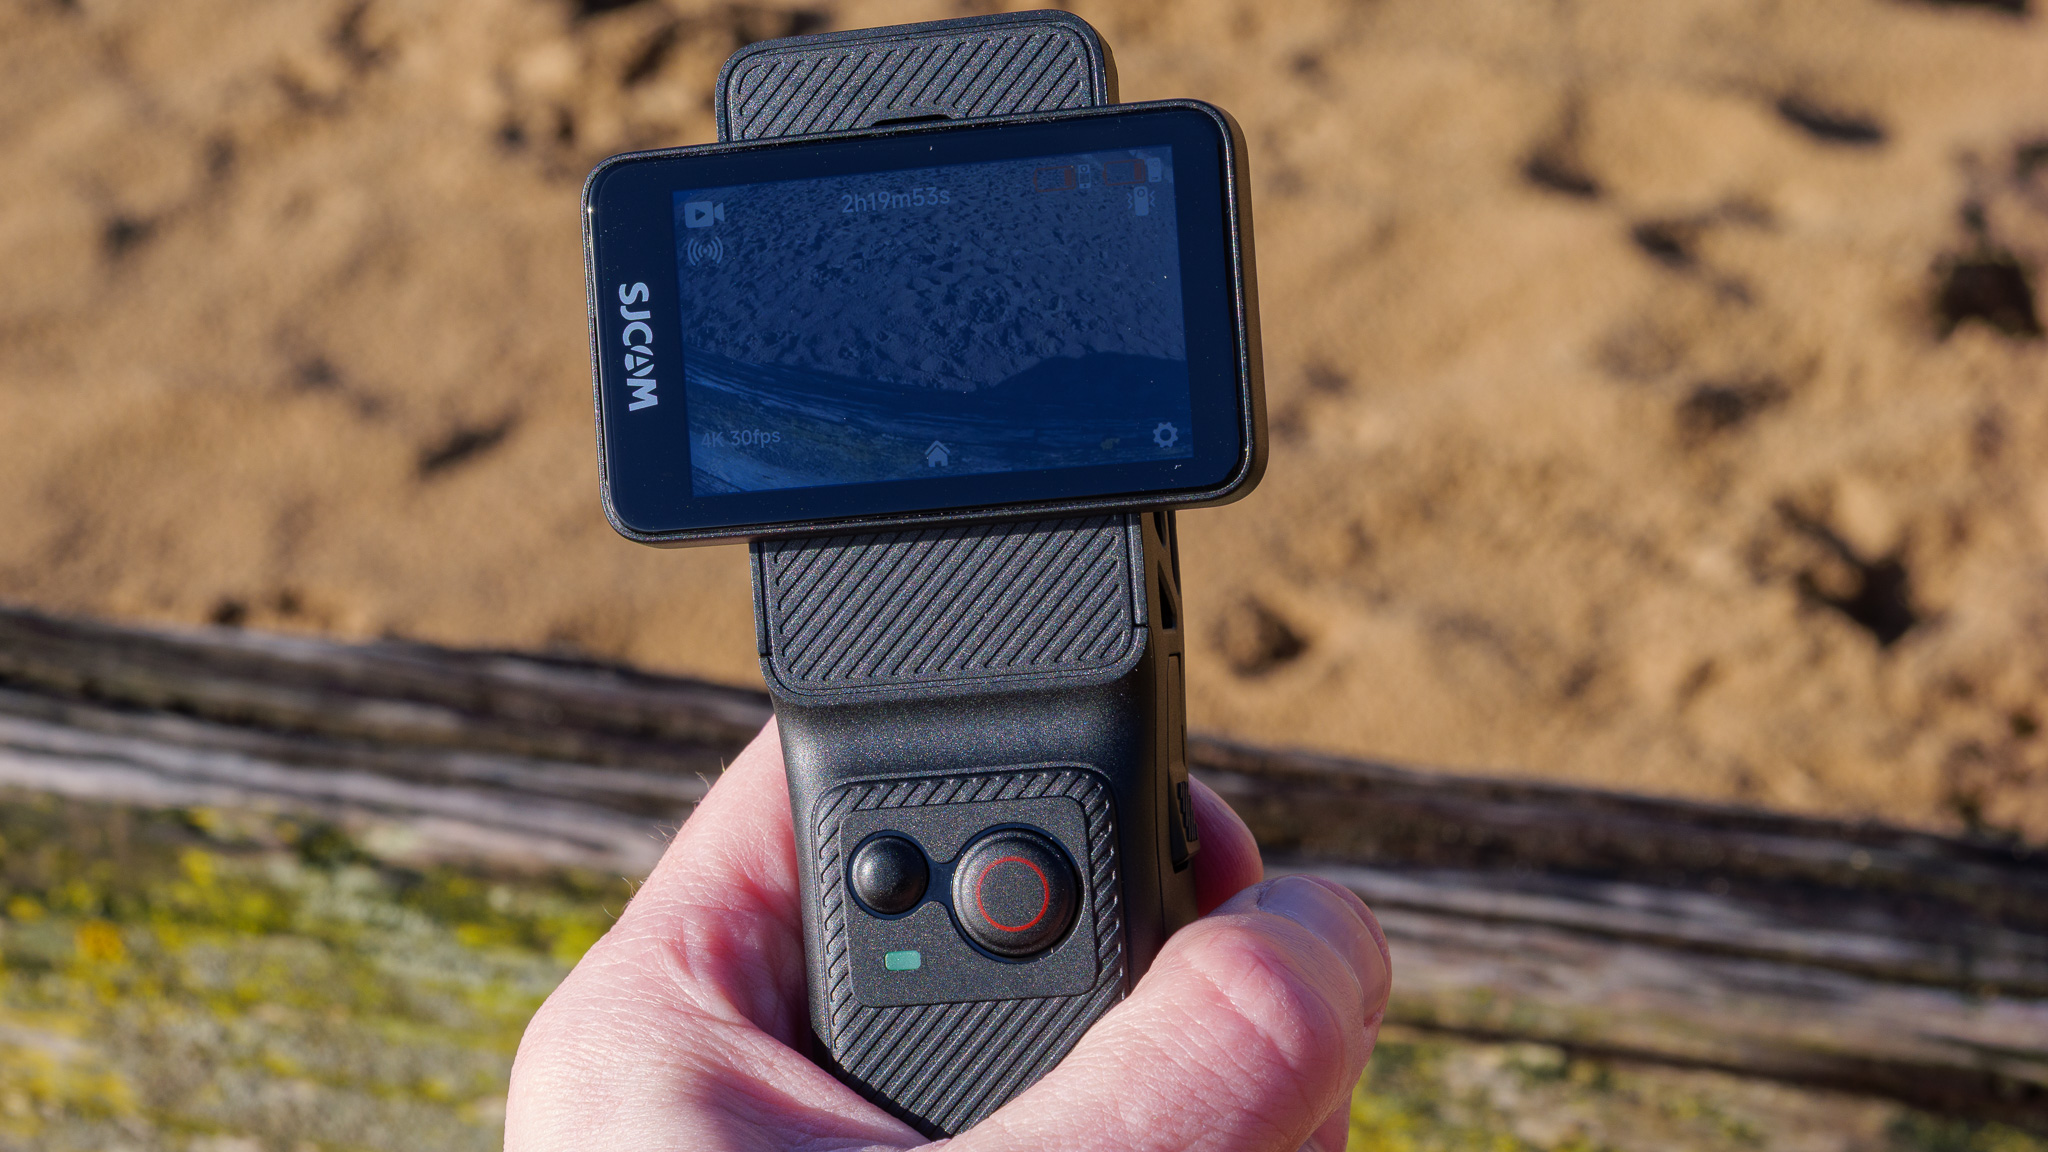
When slotted into the handle, the C400 takes on a whole new character, becoming a comfortable handheld vlogging camera with a rotatable screen that works for both horizontal and vertical content, with the added benefit of an extra battery.
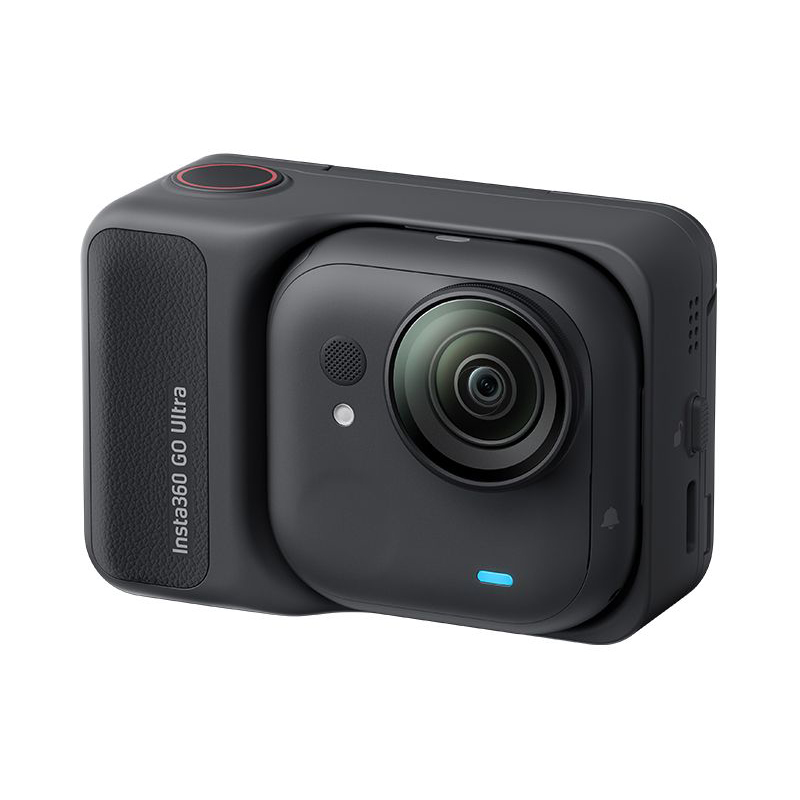
However, image quality is where the C400 seriously stumbles. Despite supporting 4K at 30fps and various video modes, the footage is poor, with an odd combination of over-sharpening and under-detail, plus prominent muddy digital artifacts. Still photos don't fare much better, with detail falling off drastically towards the frame edges. When compared directly to footage from an Insta360 GO Ultra or DJI Osmo Nano, the difference is stark — and it becomes immediately clear why those cameras cost a little more.
Audio quality doesn't help matters. While the built-in microphone copes indoors or in calm conditions, it struggles with wind noise, and there's no option to connect an external mic.
The digital stabilization works, but in an artificial way that draws attention to itself, while enabling horizon leveling drastically reduces resolution. There's also no built-in waterproofing or magnetic mounting — both missed opportunities on a camera this size.
On the plus side, battery life is impressive, with the camera managing around 190 minutes of 4K recording on its own, and much, much longer when docked in the handle. I managed to get 495 minutes of recordings with the handle, in fact.
In short, the C400 offers an appealingly compact form factor and decent battery life at a bargain price, but its poor image and audio quality make it hard to recommend unless budget is your absolute priority. I'd recommend checking out one of my recommended alternatives in my best action cameras and best vlogging camera guides.
The SJCAM C400 is available in three bundles: the C400 Pocket (just the camera with no handle or accessories); the C400 (which includes the handle); and the C400 Vlogging Bundle (which includes the handle, a mini tripod, a pendant mount, a 64GB microSD card and a carry case). Prices vary wildly depending on the bundle and the country you're shopping in, and seem to be fluctuating too, so I would suggest shopping around to ensure you get the best price for whatever package you're after.
In terms of value the camera seems like a bargain in comparison to the latest models from rival companies like DJI and Insta360. But considering its level of performance, I think you should seriously consider spending a little more elsewhere, particularly if you value image quality.
Sensor | 1/2.8-inch CMOS |
Max Resolution | 24MP photos |
Weight | 189g / 7oz (with handle); 54g / 1.9oz (camera only) |
Dimensions | 143.5 x 38.5 x 38.5mm (with handle); 68 x 32 x 25.5mm (camera only) |
Displays | 1.3-inch (camera); 2.29-inch (handle) |
Operating Time | Camera: 190 mins |
Connectivity | Bluetooth, Wi-Fi, USB-C |
Storage | microSD card up to 512GB |
Waterproofing | N/A |
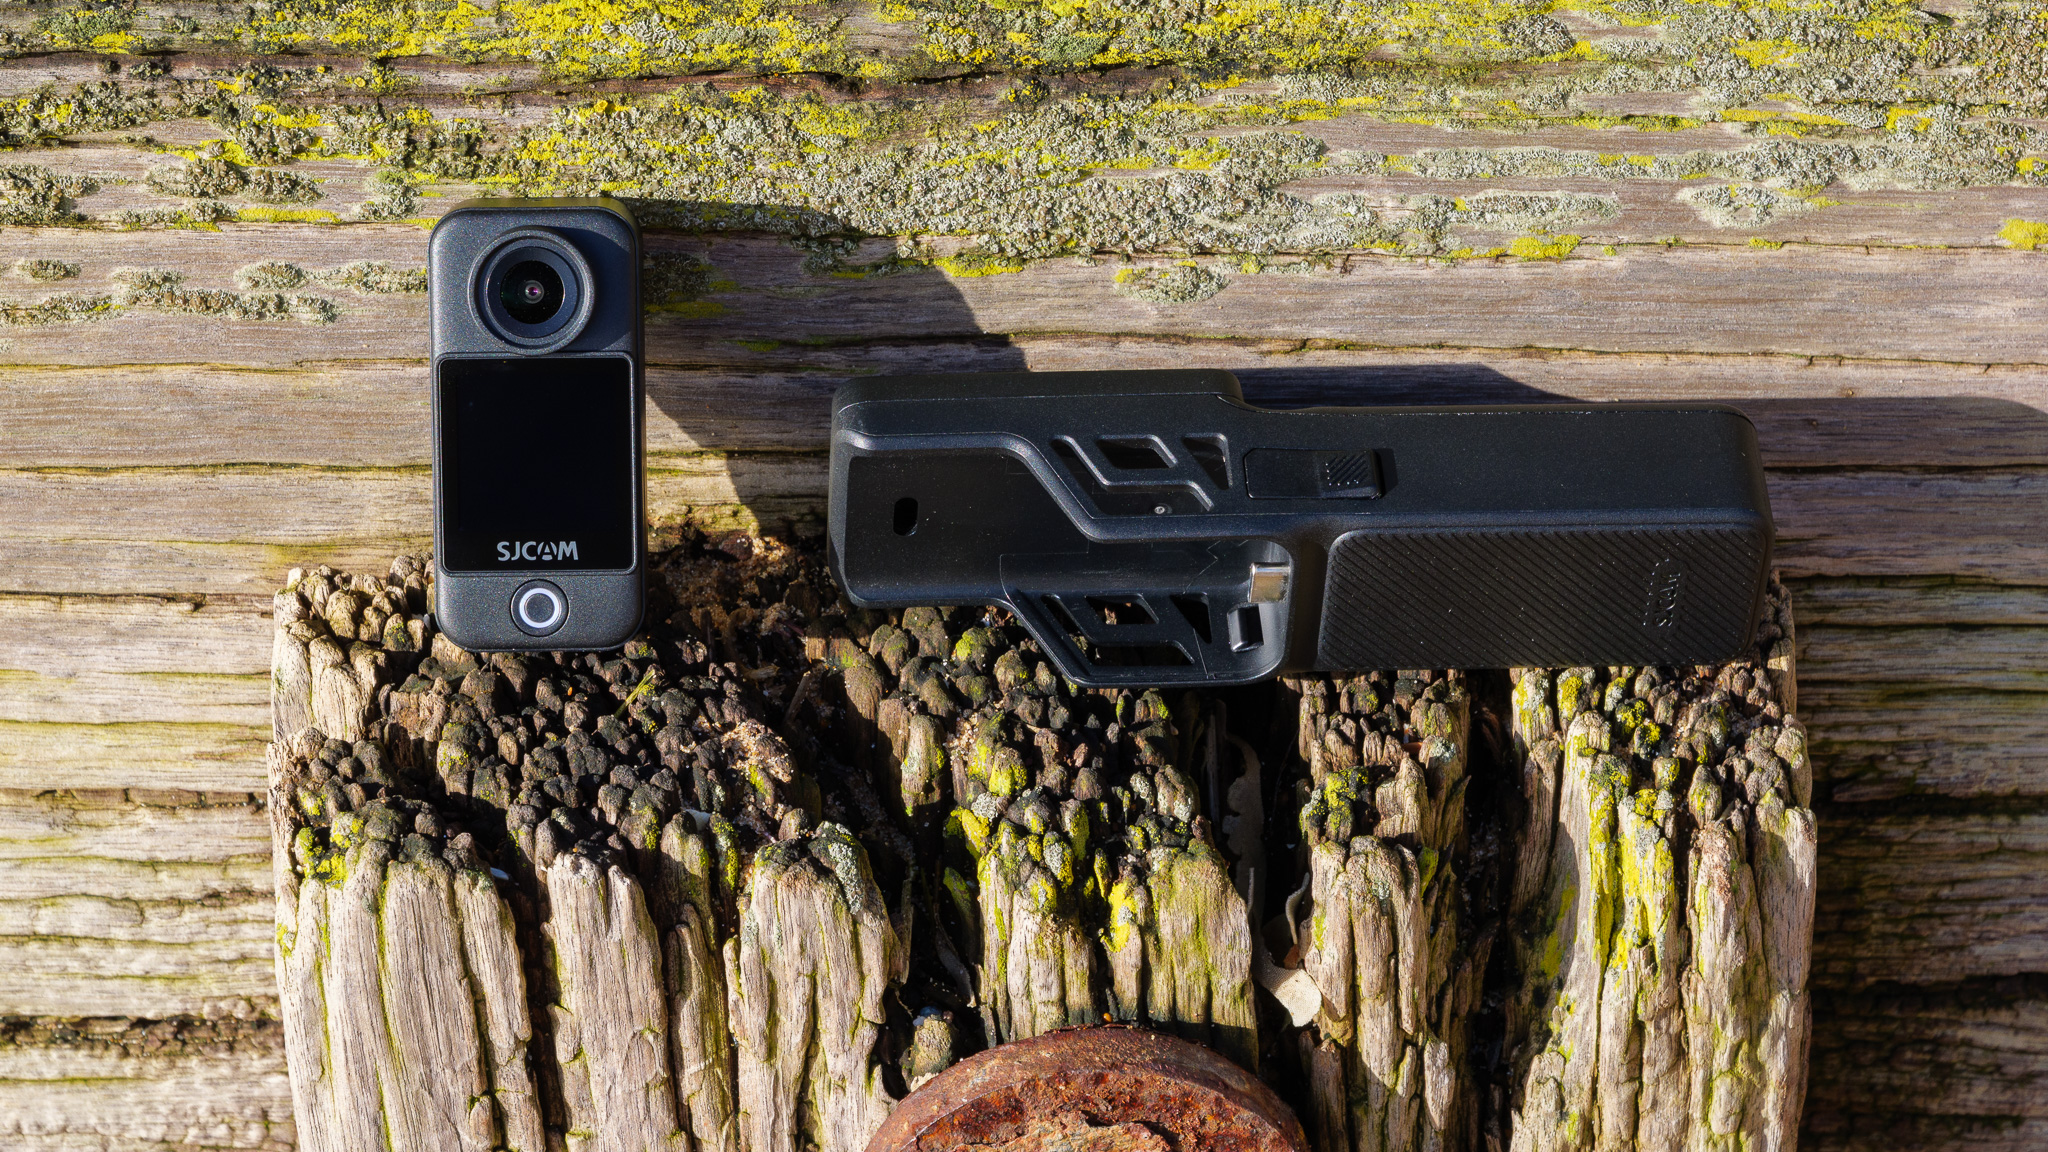
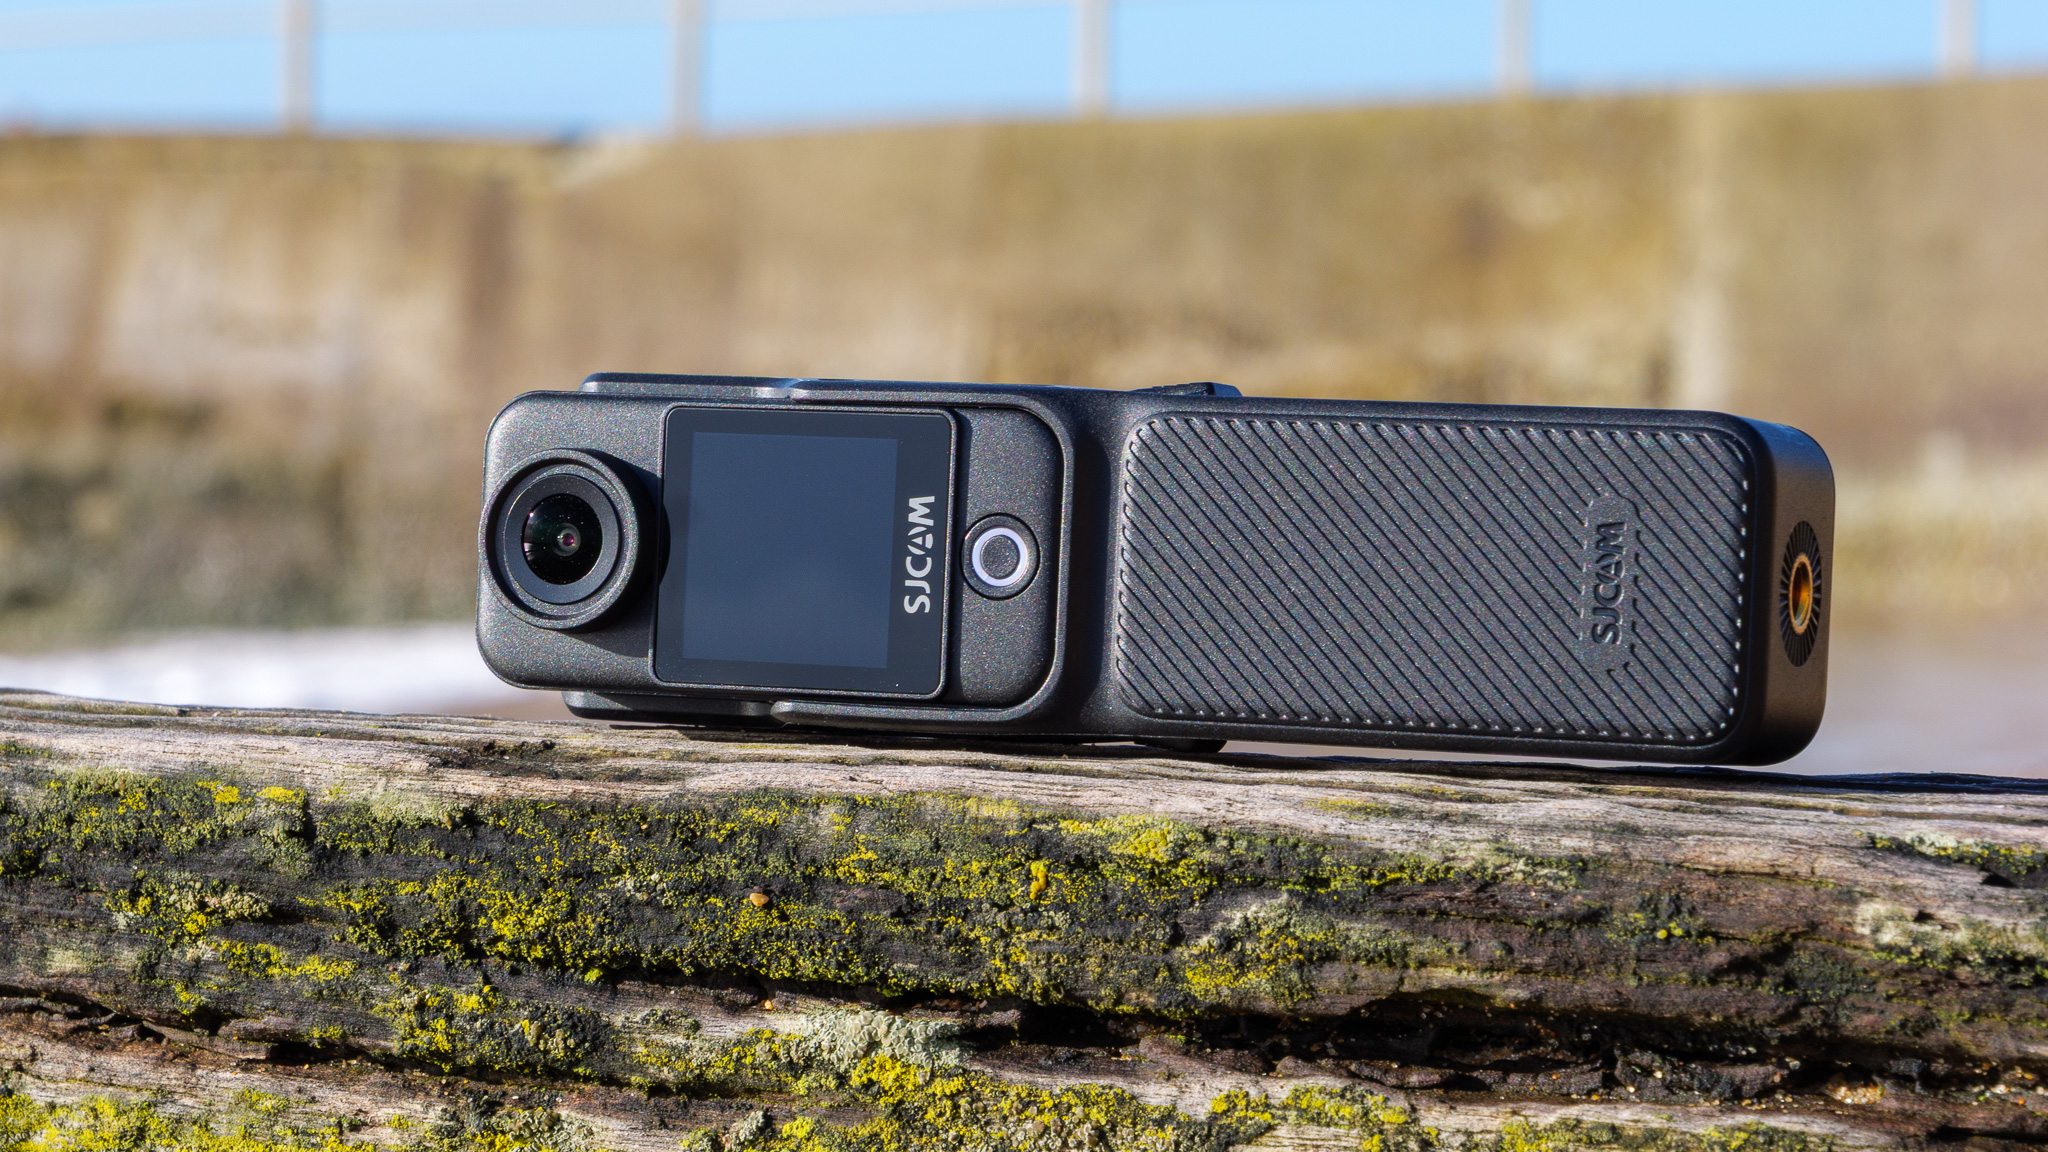
The C400 package I was sent for review has two main components: the C400 camera itself and a handle accessory that incorporates controls, an extra touchscreen, a tripod mounting thread and an additional battery.
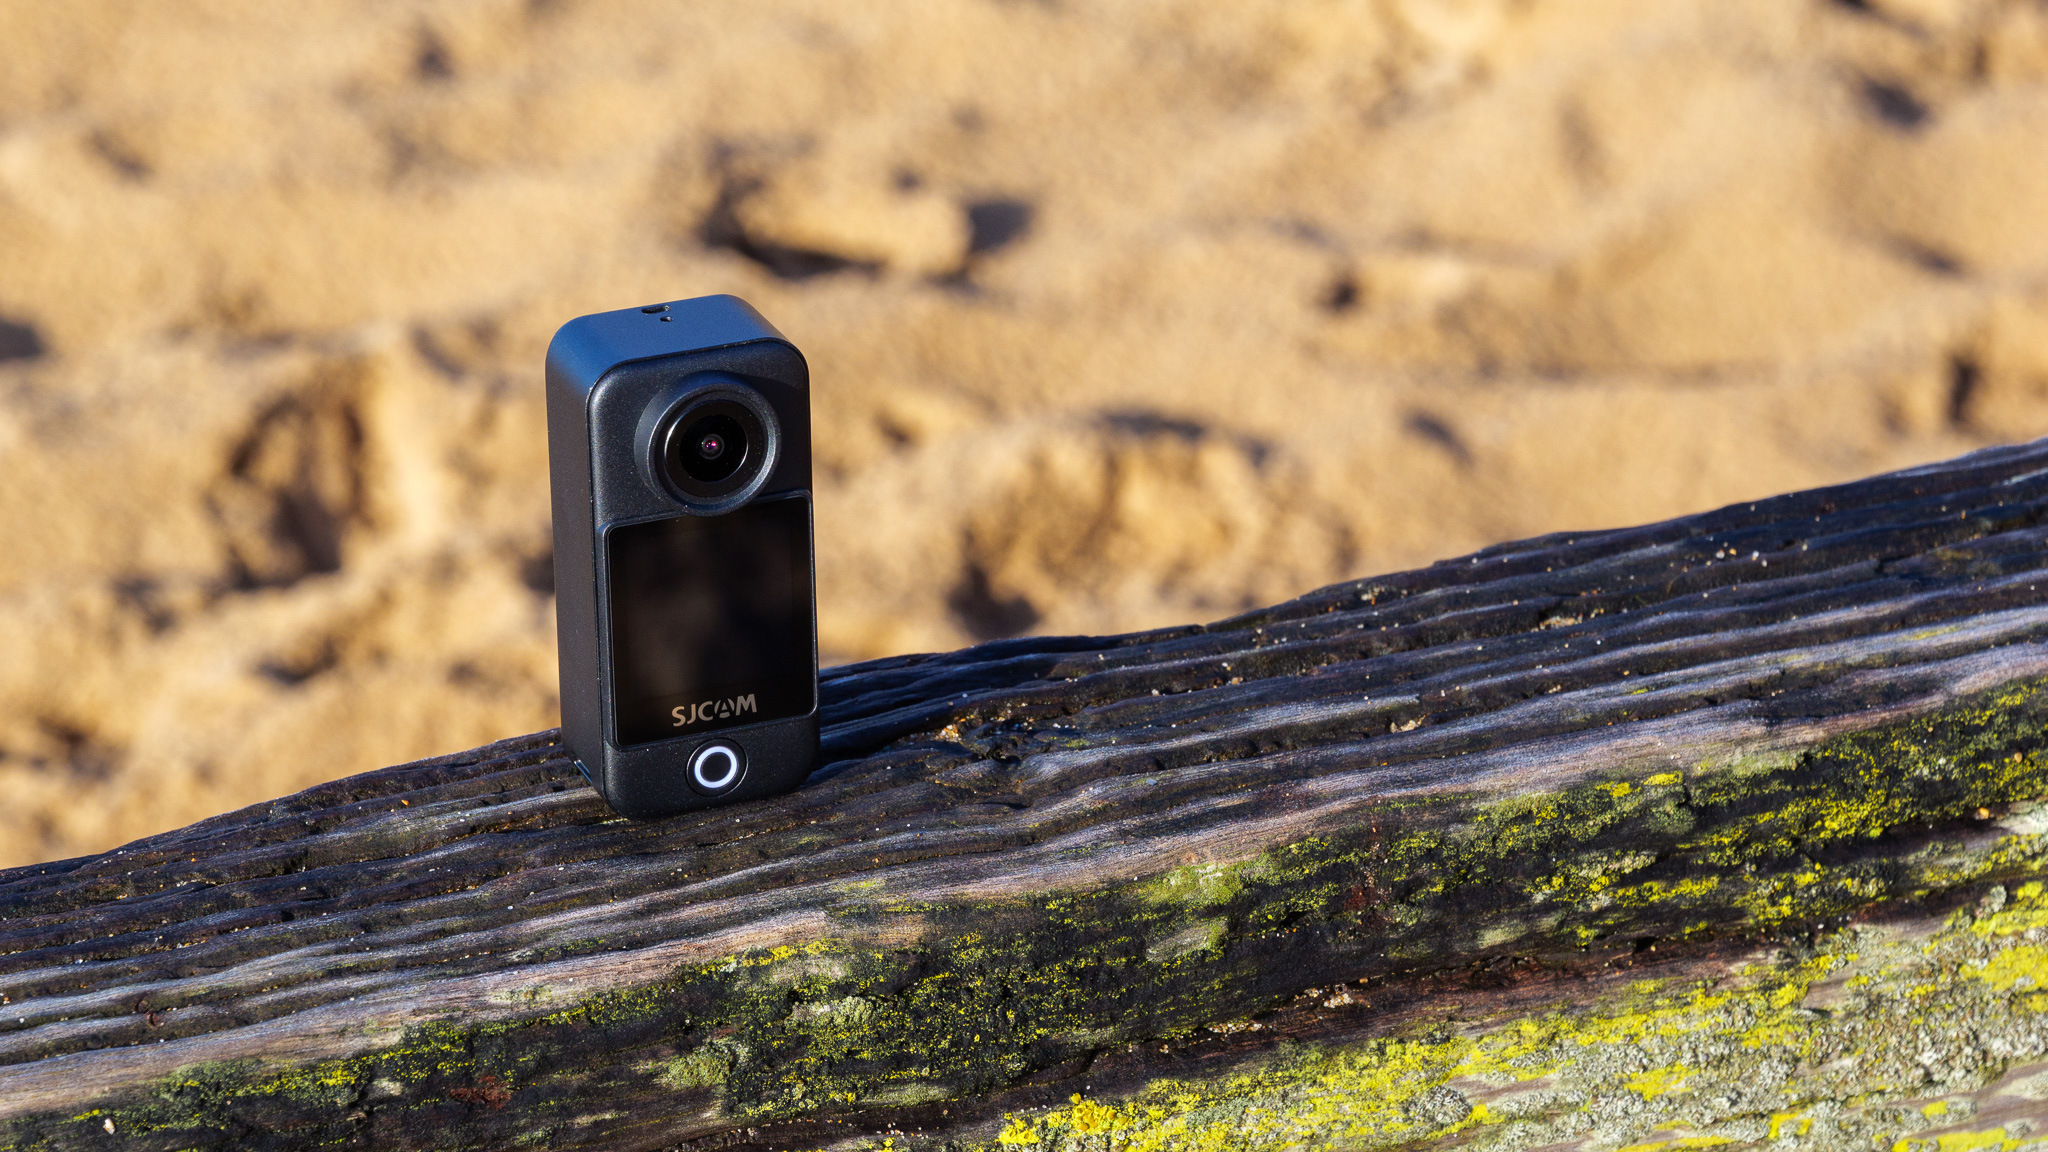
The main C400 camera is charmingly tiny and lightweight, if not quite as small as the DJI Osmo Nano or some of the Insta360 Go editions; if you really must have the tiniest, lightest 4K action cam, the C400 isn't it. Still, for POV filming purposes I found it compact enough to wear on a pendant around my neck, or fixed to my hat, without causing any bother whatsoever.
The camera unit has a small touchscreen (which is a huge boon – you don't get one on the DJI Osmo Nano or Insta360 Go), built-in microphone, microSD card slot for storage, and a tiny button that handles power and shutter duties. Sadly, unlike some rivals, it doesn't include a magnet for fixing it easily to metal surfaces, which is a missed opportunity.
Another missed opportunity is waterproofing, which I'd expect on a small action camera. Sadly, it's not mentioned anywhere on the spec or features sheet, although an optional waterproof case (with a 30m depth rating) is available.
When the C400 is slotted into the handle it takes on a whole new character, transforming from mini cam into a handheld vlogging camera somewhat reminiscent of the DJI Osmo Pocket series. The handle has a pleasingly comfortable design, and its good-sized rotatable screen caters to both horizontal and vertical content, and it also gives recording time a boost with its own supplementary battery.
I preferred using the camera in this arrangement than on its own, due to it being easy to hold and control – even if it clearly lacks the physical gimbal-based stabilization of DJI's Pocket range.
Additionally, it works as a wireless remote control for the camera, with a range of around 30 feet.
A quick word on the companion app: it's pretty good! Once it was installed and I'd established a Wi-Fi link between the C400 and my iPhone, I was able to remotely control the camera and download photos and videos wirelessly. Getting the phone and camera linked up the first time was a bit of a struggle, but once the connection was set up I was able to simply re-connect by scanning a QR code on the camera's screen.


The camera supports 4K video capture at up to 30fps, 2K at up to 60fps, and 1080p at up to 120fps (for slow-motion playback), plus H.264 and H.265 compression, a 'wide dynamic range' mode and a high-bitrate recording option.
Despite selecting all of these in an attempt to see the C400 performing at its best, I found image quality to be disappointingly poor even in good outdoor lighting, and even worse indoors.
You can view my sample video below to get a clearer picture (no pun intended), but the image seems to me to be a curious mix of being simultaneously over-sharpened and under-detailed, with distracting, muddy digital artifacts very prominent.
Still photos didn't impress either, with detail falling off massively towards the edges of the frame – and there's a huge amount of wide-angle distortion that doesn't appear to be correctable outside of post-production manual tweaking.
The two forms of digital image stabilization on offer — general and horizon leveling — do work, but they do so in an artificial way that really draws attention to the fact that they're working. Using horizon leveling also reduces the resolution quite drastically.
When compared to the videos straight out of an Insta360 GO Ultra or DJI Osmo Nano, the difference is stark – and it's immediately clear where that extra money goes.
Audio quality is passable in calm conditions, but as my video illustrates, the built-in microphone doesn't cope well with wind noise at all — and there's no way to connect an external microphone to better capture sound. So vloggers may have to record their audio separately, then sync it in post-production, which is hardly the sort of simplicity you'd hope for.
There's better news on the battery life front, at least, and I was impressed by the C400's stamina. To test it, I set video quality to 4K at 30fps and left the C400 (without its handle) recording. It managed to capture around 190 minutes of footage before the battery died. When docked inside the handle, it of course lasts even longer, and in my test it lasted 495 minutes (over eight hours!) in total.
You want a super-cheap compact action camera
The C400 is about as small and light as action cams come, and much cheaper than new alternatives from DJI and Insta360.
You need a small camera with a screen
The C400 is tiny, but still makes room for a decent-sized touchscreen on its front — something you won't find on pricier rivals.
You’re particular about image quality
The C400's image quality is not its strong point, and if you want to create polished, professional-looking content, you're better off with a DJI or Insta360 alternative.
You want a well-stabilized vlogging camera
Don't confuse this with a DJI Pocket, despite how it looks on its handle. There's only electronic stabilization here, and it's not particularly convincing.
The latest model in the long-running Go series of ultra-compact action cameras, the Ultra is a little larger than some of its predecessors, but makes up for it with its superb 4K 60fps (or 30fps in Active HDR) footage. It's surprisingly capable in low light, and waterproof to boot.
Read our in-depth Insta360 Go Ultra review
Despite being DJI's first serious attempt at an ultra-compact action camera, the Osmo Nano is a waterproof modular marvel with stabilized 4K 60fps video that excels for sports and vlogging, and even supports 10-bit D-Log M. It's pricier than the C400, but still cheap for what it offers.
Read our in-depth DJI Osmo Nano review
I tested the SJCAM C400 for around a week, using it to record videos and photos both handheld and using some of the accessories included with my review sample. The sample was supplied by SJCAM, and included not only the camera and handle, but a waterproof case and range of mounting options such as a magnetic pendant. I tested all its main functions including electronic image stabilization and battery life, before transferring all photos and videos to my iPhone and subsequently MacBook Air for close inspection.
First reviewed February 2026
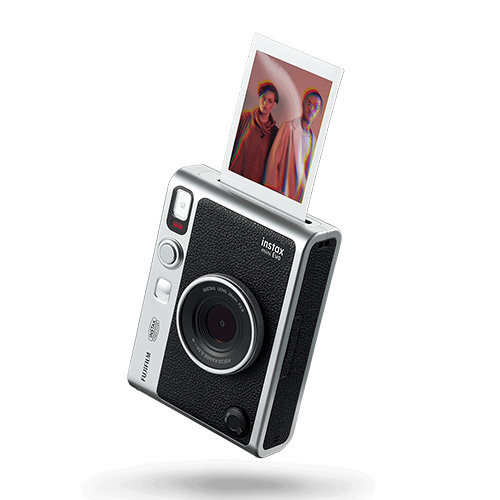
The Fujifilm Instax Mini Evo Cinema takes instant cameras in a new direction, and let me tell you, it’s heaps of fun. It’s a 3-in-1 digital ‘hybrid’ instant camera; being a stills camera, an instant printer and the very first Instax that shoots video.
We know the instant photography part already: the Mini Evo Cinema packs much of the same lo-fi tech as the Mini Evo – 5MP digital photos through a 28mm f/2 lens, which are saved onto micro SD, that you can select in the camera’s gallery or through a companion app to print instantly onto Instax Mini paper. In this case, the printing process uses an analog-style lift and twist lever.
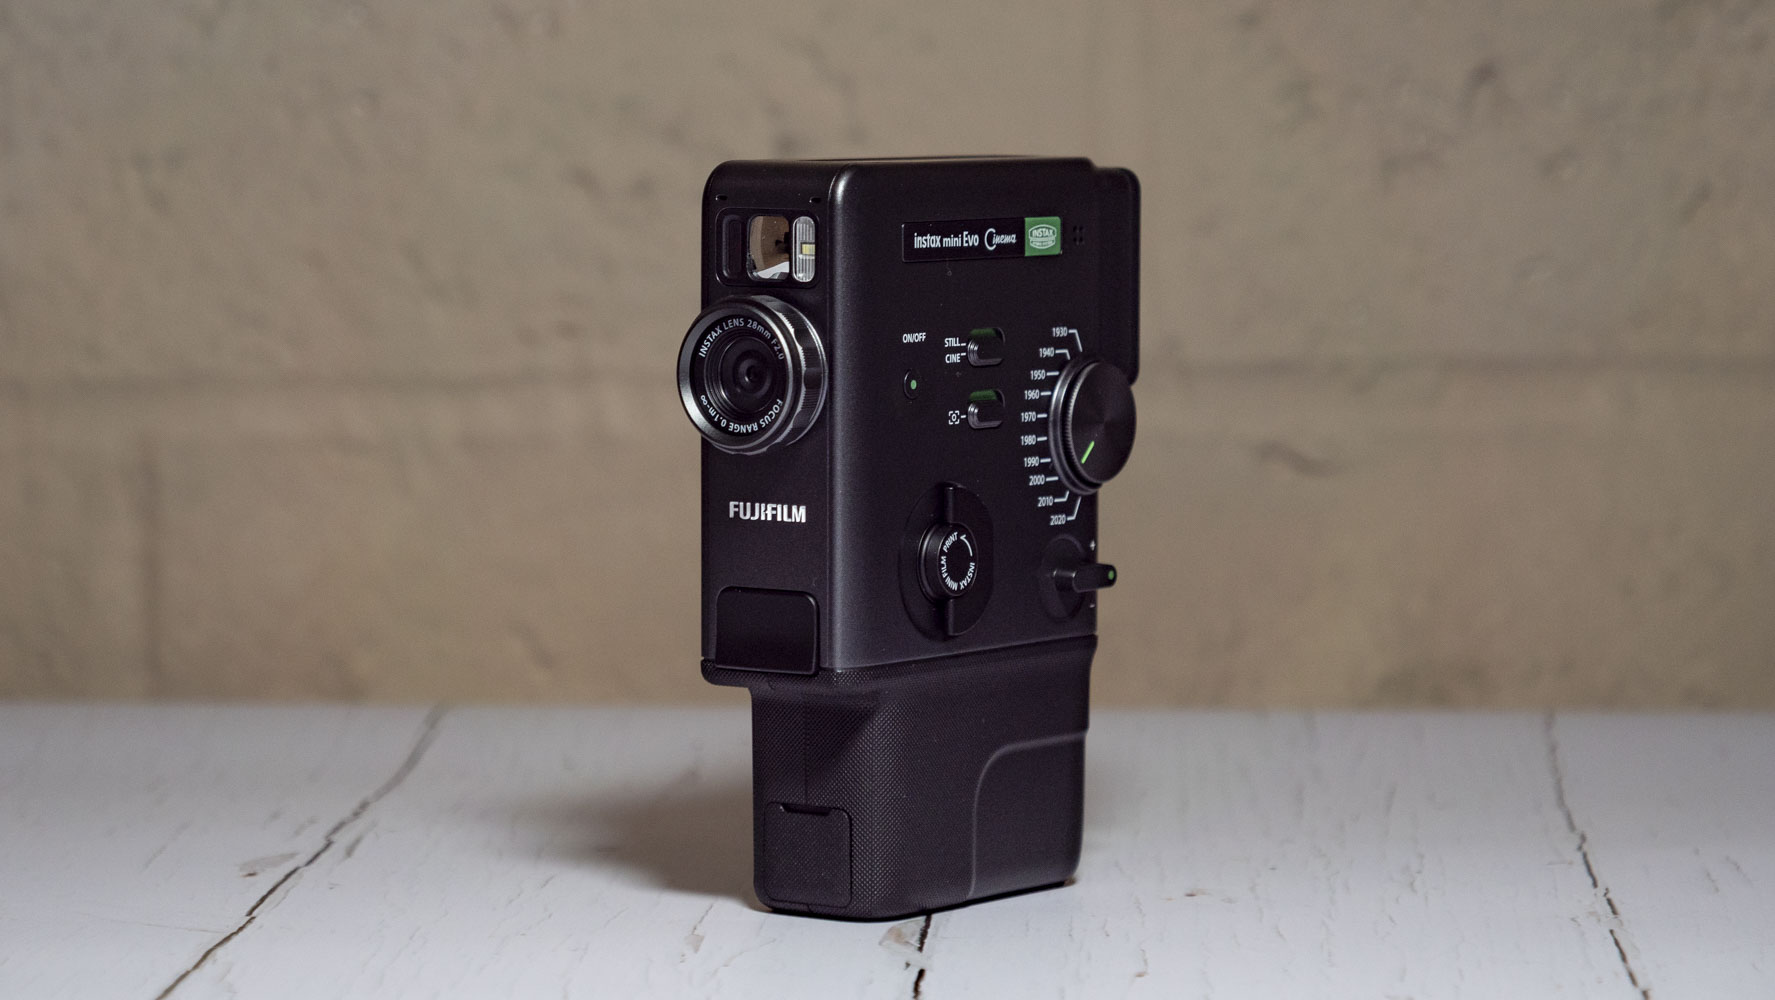
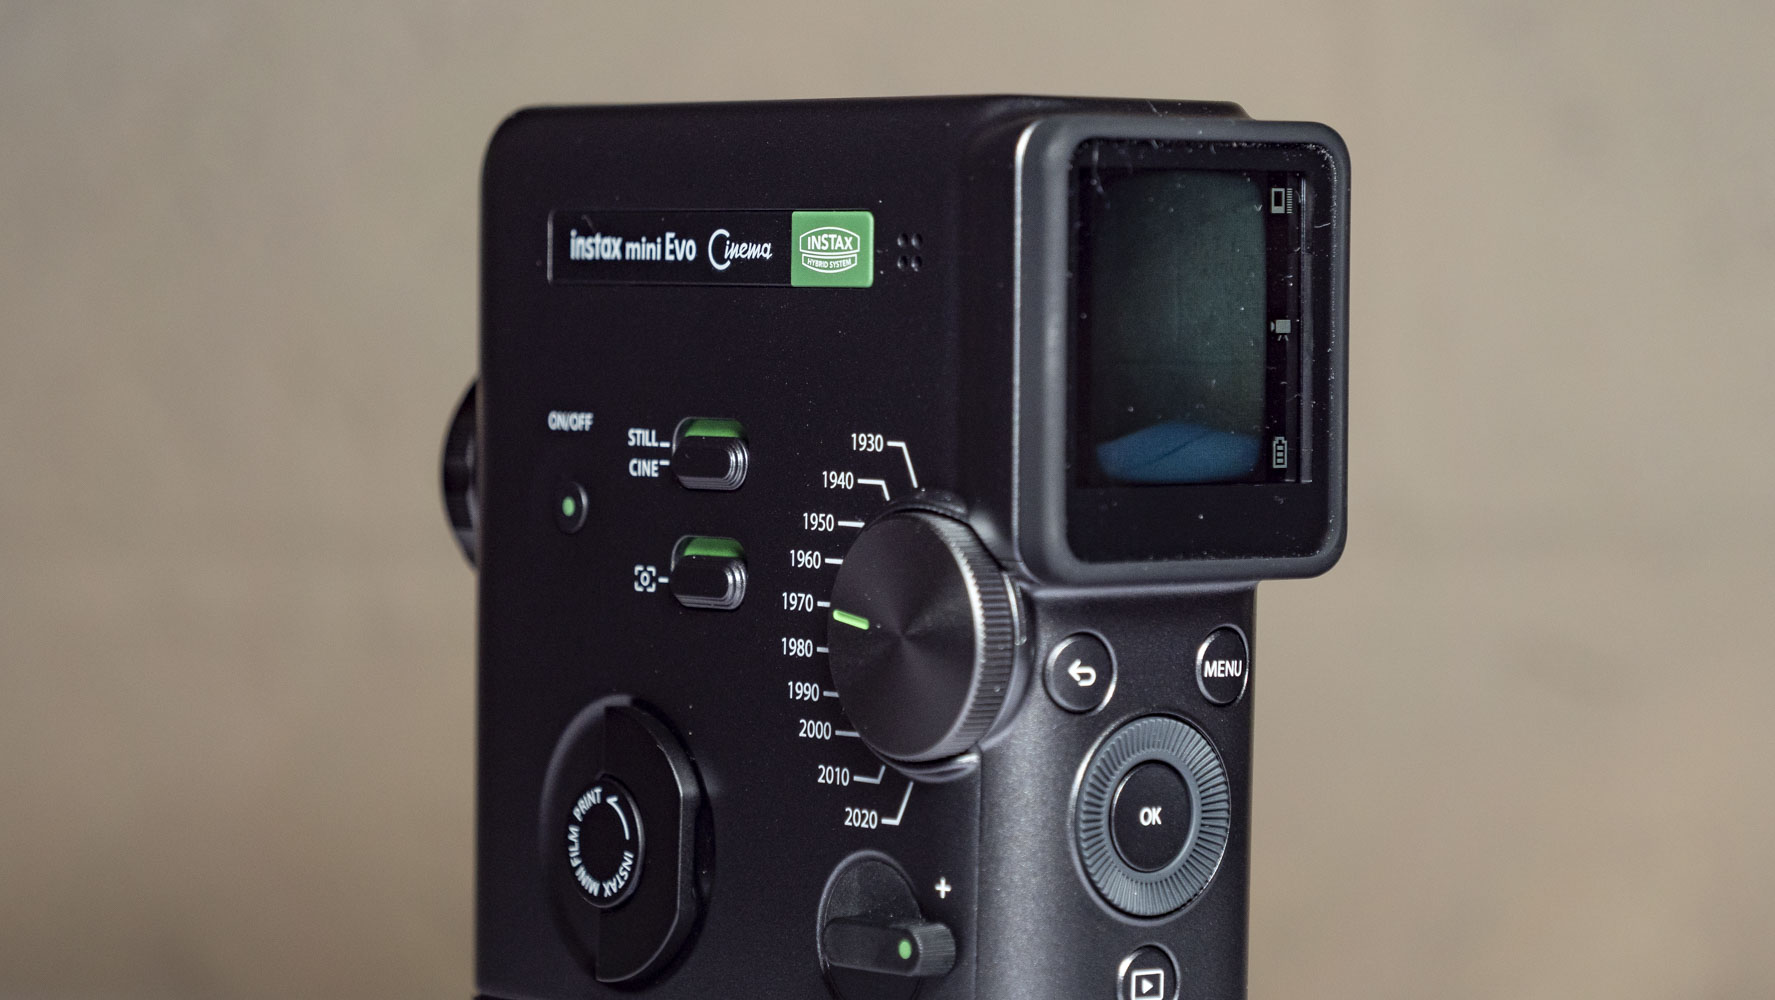
But it’s the camera's design where things get really interesting. This is a nostalgic, slimline Super 8 camera-style body – which is supposedly inspired by Fujifilm’s ‘Fujica Single-8‘ from 1965 – that easily sits in the hand with the shutter button at your trigger finger.
And for me, it’s the video features that drew me in rather than the traditional Instax photography experience, even if each of the three functions seamlessly blend together.
Then there's the main event – the Eras Dial, with a look for every decade spanning the last 100 years. Fujifilm says these looks ‘pay homage to the characteristics, media and playback devices that defined that time’.
Starting with 1930 and running up to 2020, there's a distinct look for each decade, each with a scale of 1-10 for various 'expressions' of each decade, adjusting either the strength or the look of each style. So yes, that makes 100 styles, all of which work for photos and videos.
Fujifilm is no stranger to introducing never-before seen controls in its recent cameras, from the Film Mode in the fun X half to the aspect ratio dial in the serious GFX100RF, it keeps delivering surprising new features, and the Eras Dial, being at one's fingertips, is more than just a novelty.
Even videos can be shared through an Instax Mini print – the Mini Evo Cinema selects a frame from the video (or the user can manually select a frame) and prints it with a QR code for access to that clip through Fujifilm’s servers.
You can also check out and share photos and videos using the free Instax Mini Evo app, including making short video edits from your video clips (which are limited in length to 15 seconds each).
I've made my own video compilations using the Instax Mini Evo app, combining multiple clips into a 30 second montage (which is the maximum length), printed it with a QR code attached, which then seamlessly took me online to that reel. The editor is a little clunky, and the video length limitations are frustrating at times, but it's an OK experience overall.
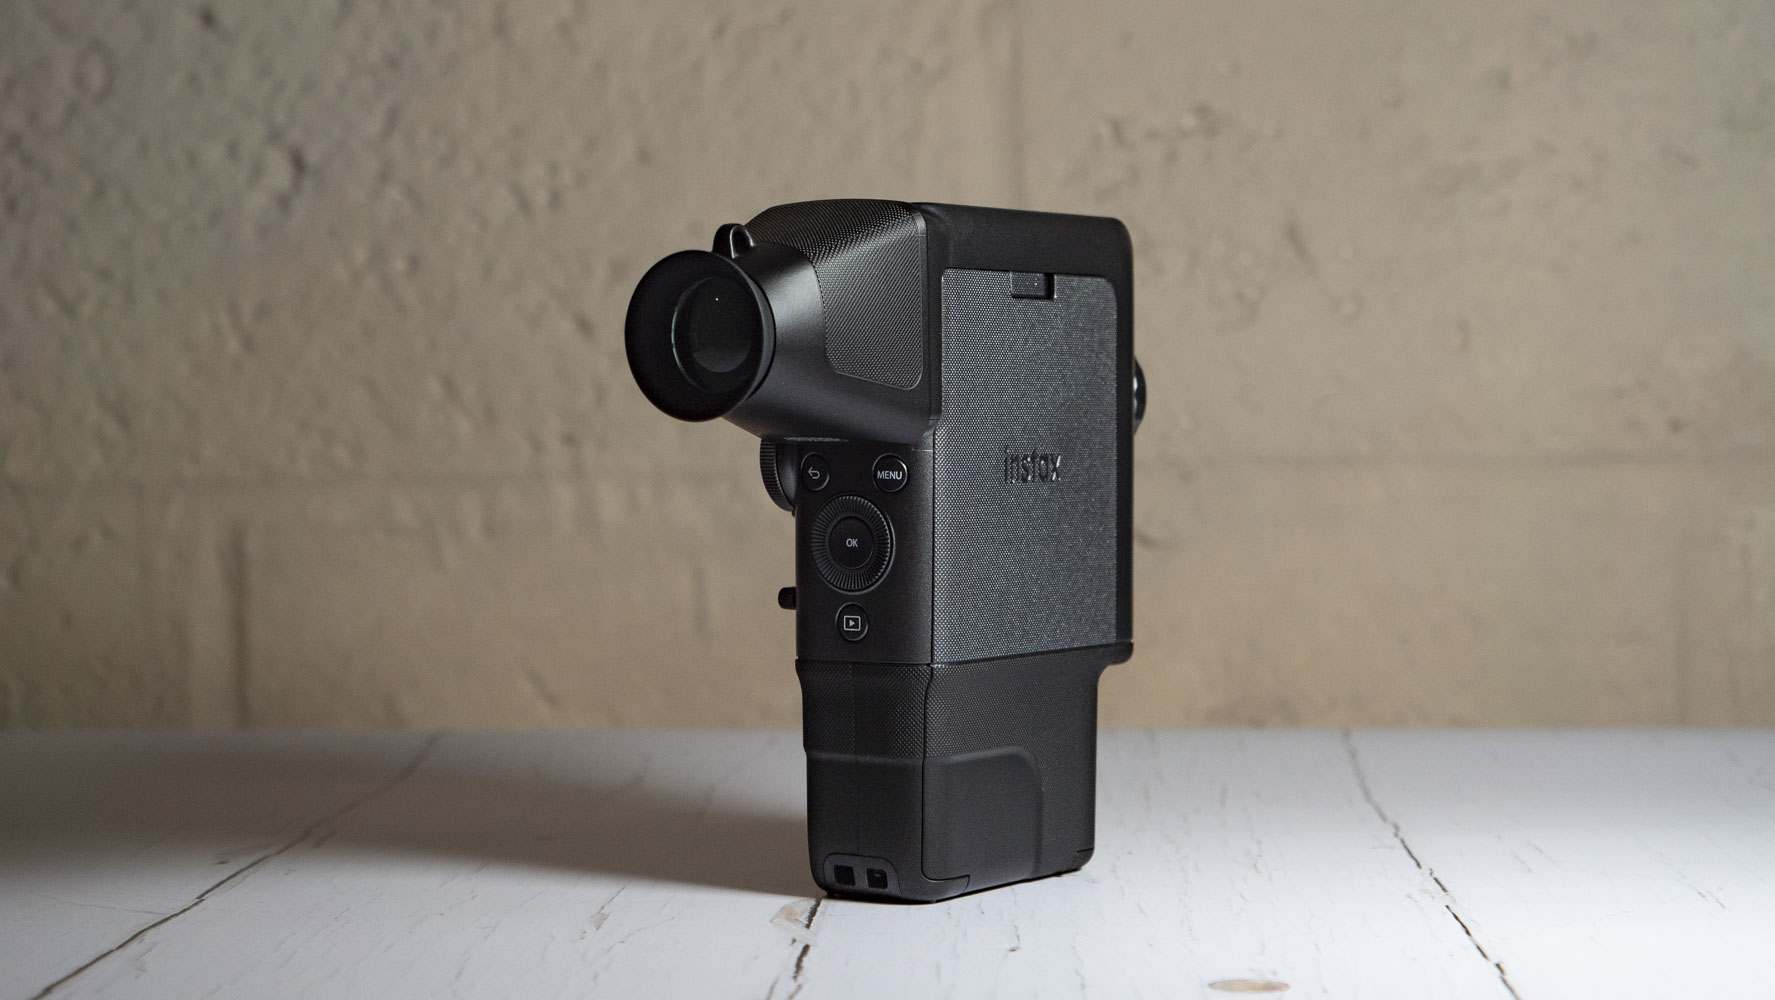
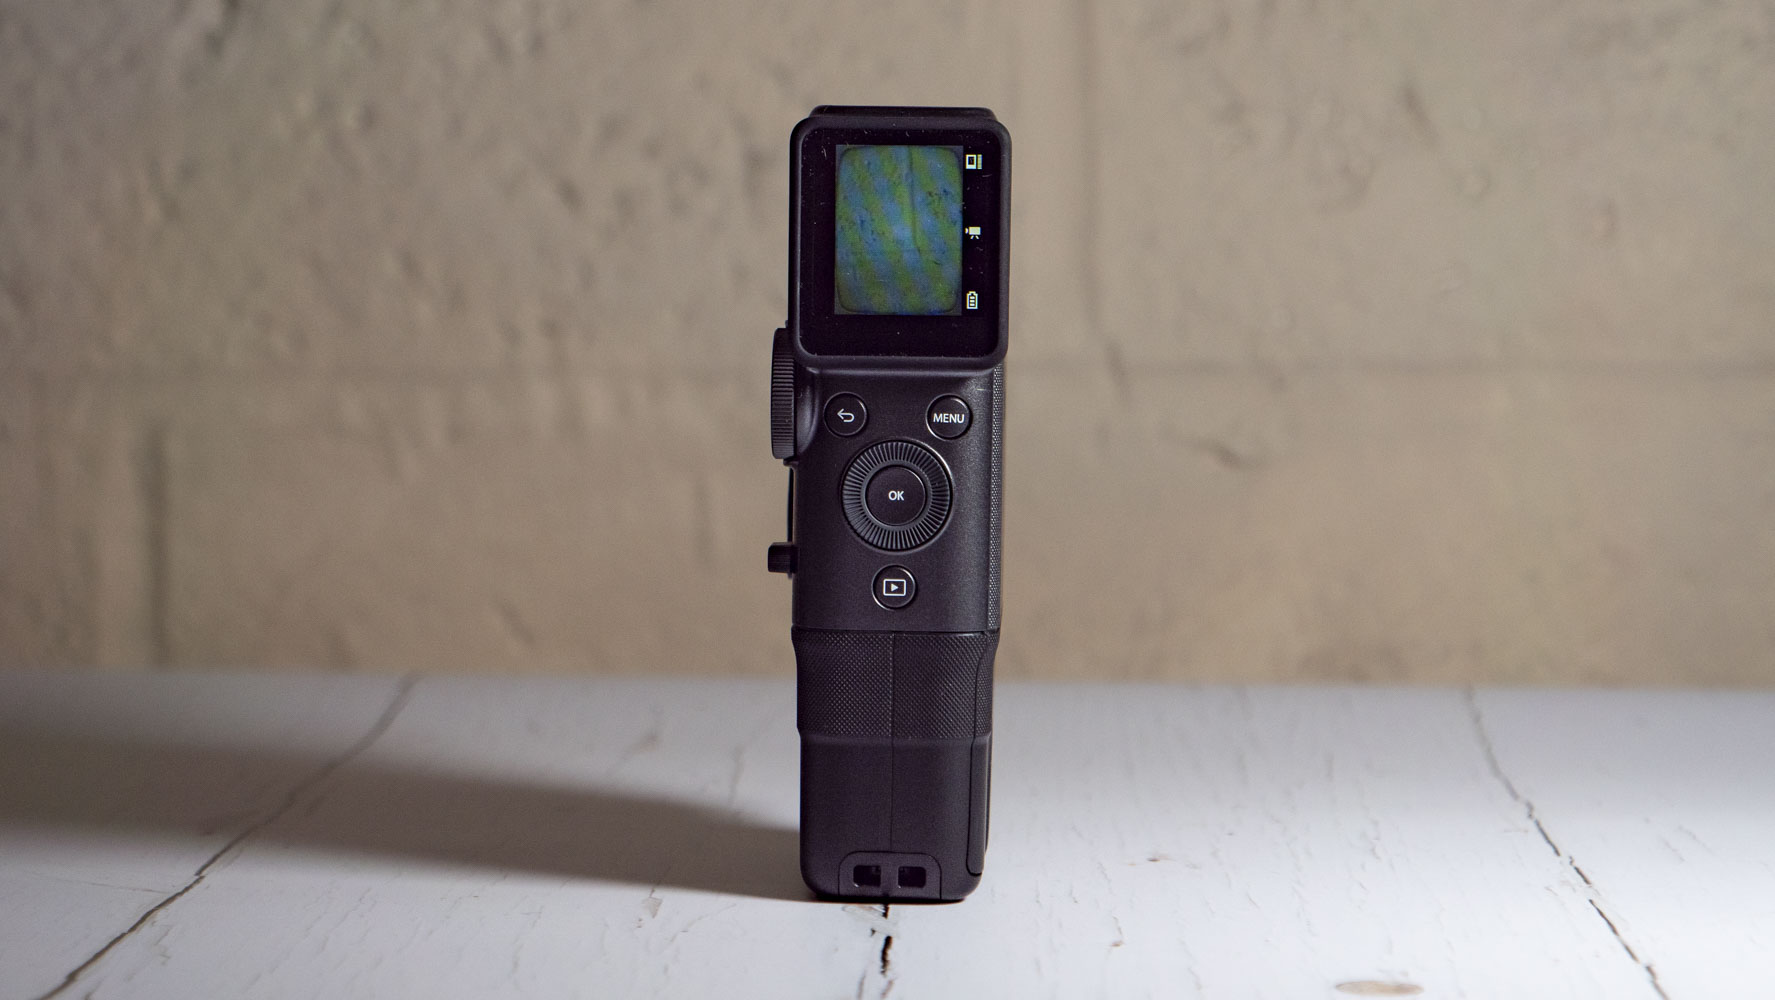
Inside the box, you get the camera, viewfinder eye cup for the 1.5-inch 170k-dot LCD screen (see it in action, below), a grip extension and a strap.
The Mini Evo might look toy-like, but it is in fact a premium-feel product, everything from the grip to the dials, switches and buttons feel solid.
Performance, on the other hand, during my review was pretty sluggish. I've used the camera at a launch event and again during a two week review period, and with both units the Evo Cinema's wheel of death appeared almost every time I recorded a video or switched eras, taking a few seconds to be ready to use again. A little annoying, but arguably in the spirit of retro tech.

I actually think the Mini Evo Cinema is the most intriguing Instax camera to date – it feels like the Instax camera that the digital generation has been waiting for.
Its Super 8-style body is a perfect form to host Instax Mini printing, and the multi-media output makes this feel like a camera that'll keep my interest for much longer than a simple instant photography Instax. This is a proper good times camera.
Technically speaking, this is a poor camera. However, it already feels like the one Instax that appeals to me the most in the many years that I've been testing Fujifilm products.
If I was to sum the Mini Evo up in a single word, it would be fun. Fujifilm is having a real go at making cameras fun again with a string of quirky products, and the Evo Cinema could just top the lot.
The Fujifilm Instax Mini Evo Cinema went on sale globally from January 28 2026, with a price of $419 / £329 / AU$599.
In the box you'll also find the viewfinder attachment, grip extender, strap and USB-C cable. A purpose-made leather case will be available too, for $40 / £35 (about AU$65).
Video | 1080 x 1440 x ('2020' setting only) 600 x 800 for all others |
Photo | 5MP, 1/5-inch sensor |
Format | Instax Mini |
Lens | 28mm f/2 |
Autofocus | Yes |
Screen | Fixed 1.5-inch, 170k dots |
Viewfinder | A clip-on viewfinder is supplied for the screen |
Dimensions | 39.4 mm x 132.5 mm x 100.1 mm (excluding projecting parts) |
Weight | 270g (excluding film pack and recording media) |
Design is easily the strong side of the Evo Cinema – it's a charming, Super 8-style camera with versatile 3-in-1 skills; digital photos, video, and instant printing.
The body is particularly slimline and designed to be held vertically. With a pistol-like grip, your index finger naturally rests on the shutter button, like a trigger. You press it to take photos, or press and hold to shoot video, with a maximum clip length of 15 seconds. You can customize to a single press to record video too, but I preferred the authentic press and hold for video recording, not least of which to avoid accidental recordings.
Fujifilm provides a grip extension with the camera, but honestly I could take or leave it – because it hardly impacts the camera’s handling. What is a useful accessory, however, is the viewfinder eyecup, which comes included. It attaches magnetically and clicks into place over the tiny 1.5-inch LCD screen, which isn’t touch sensitive by the way, enabling a clear view in bright light, but again more for an authentic Super 8-like shooting experience.
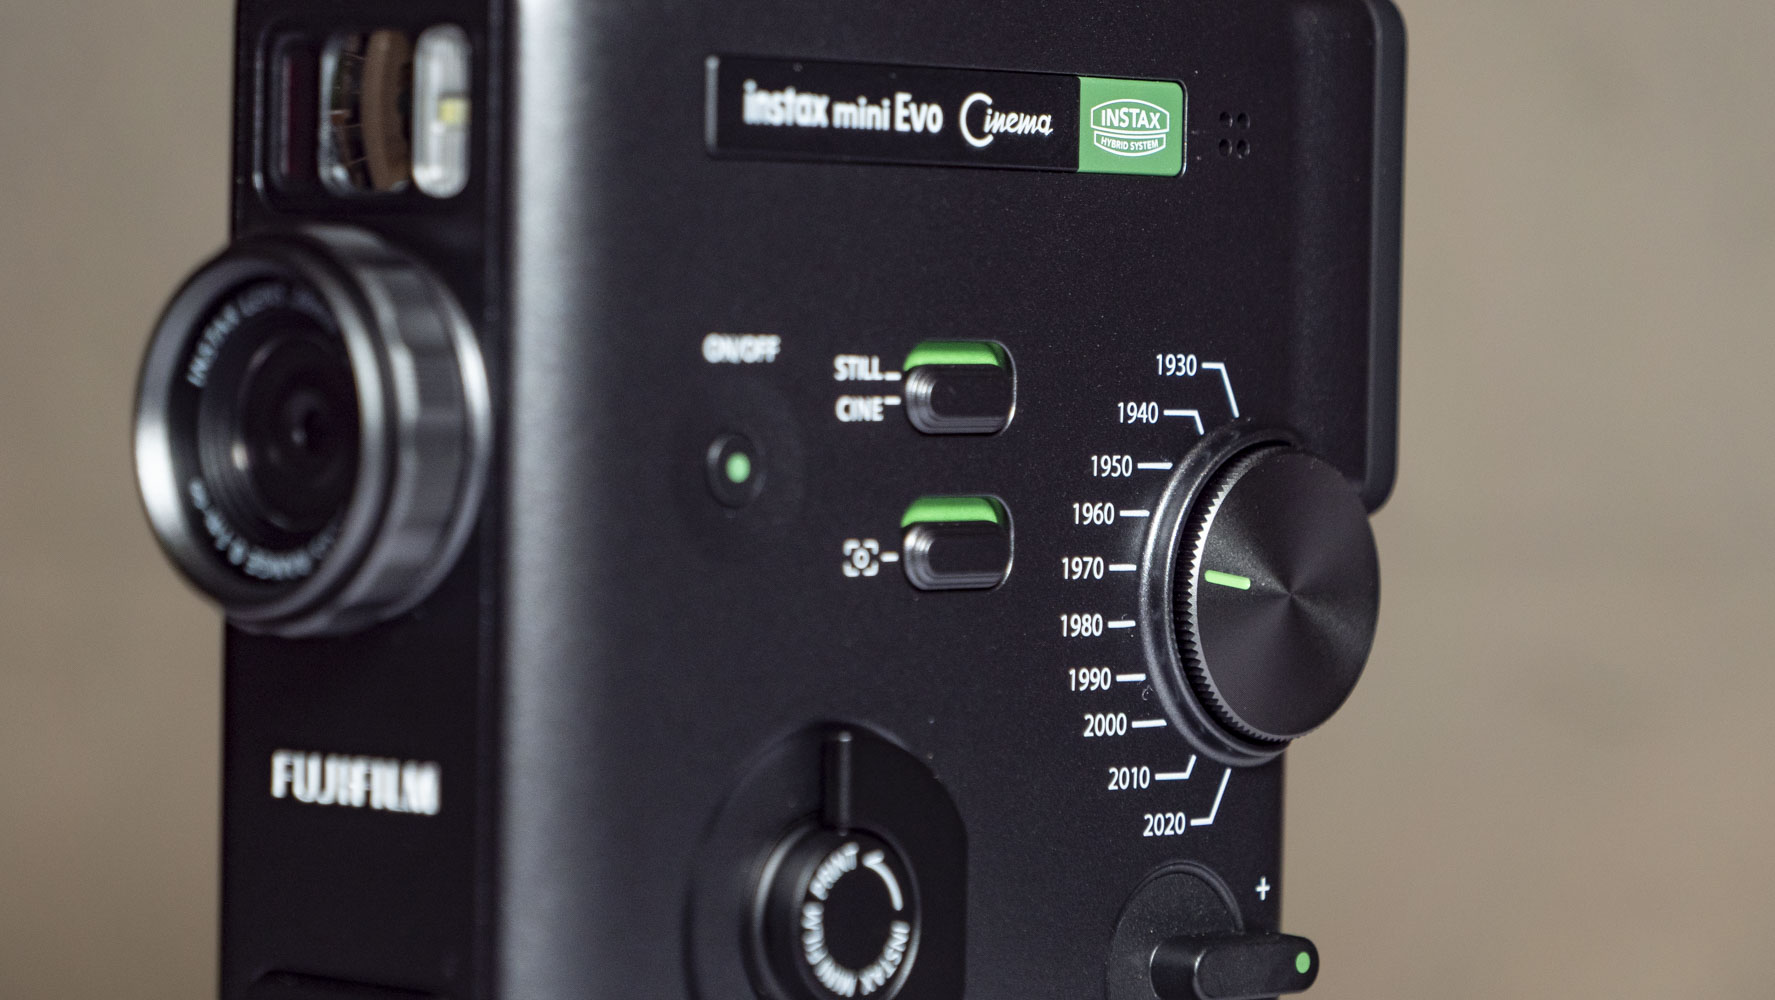
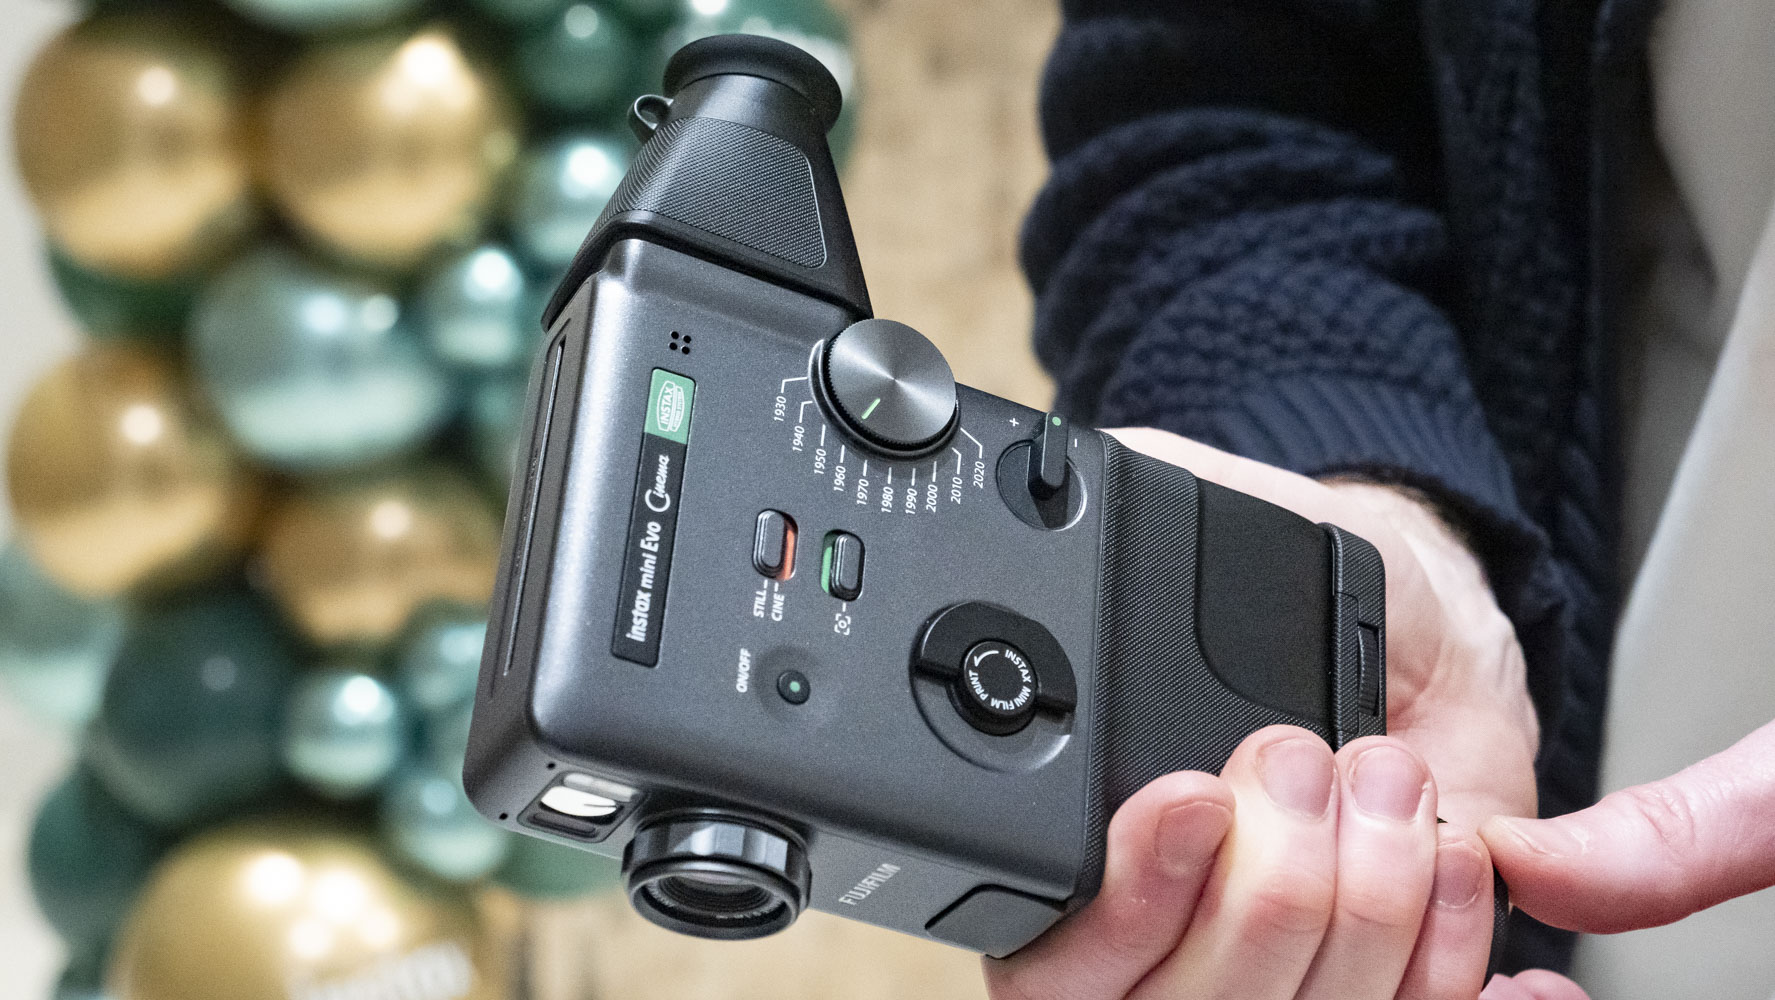
There are several buttons and controls around the camera worth mentioning, one of which is a lift and twist lever used for instant printing – it’s easy to forget that this slim camera can hold a pack of Instax Mini film inside for instant photo prints. A single pack of 10 prints will set you back around $9 dollars or £8 pounds.
Another control is the digital zoom lever – I rarely used this because the Mini Evo Cinema’s image quality is sketchy at best already, but more on this later.
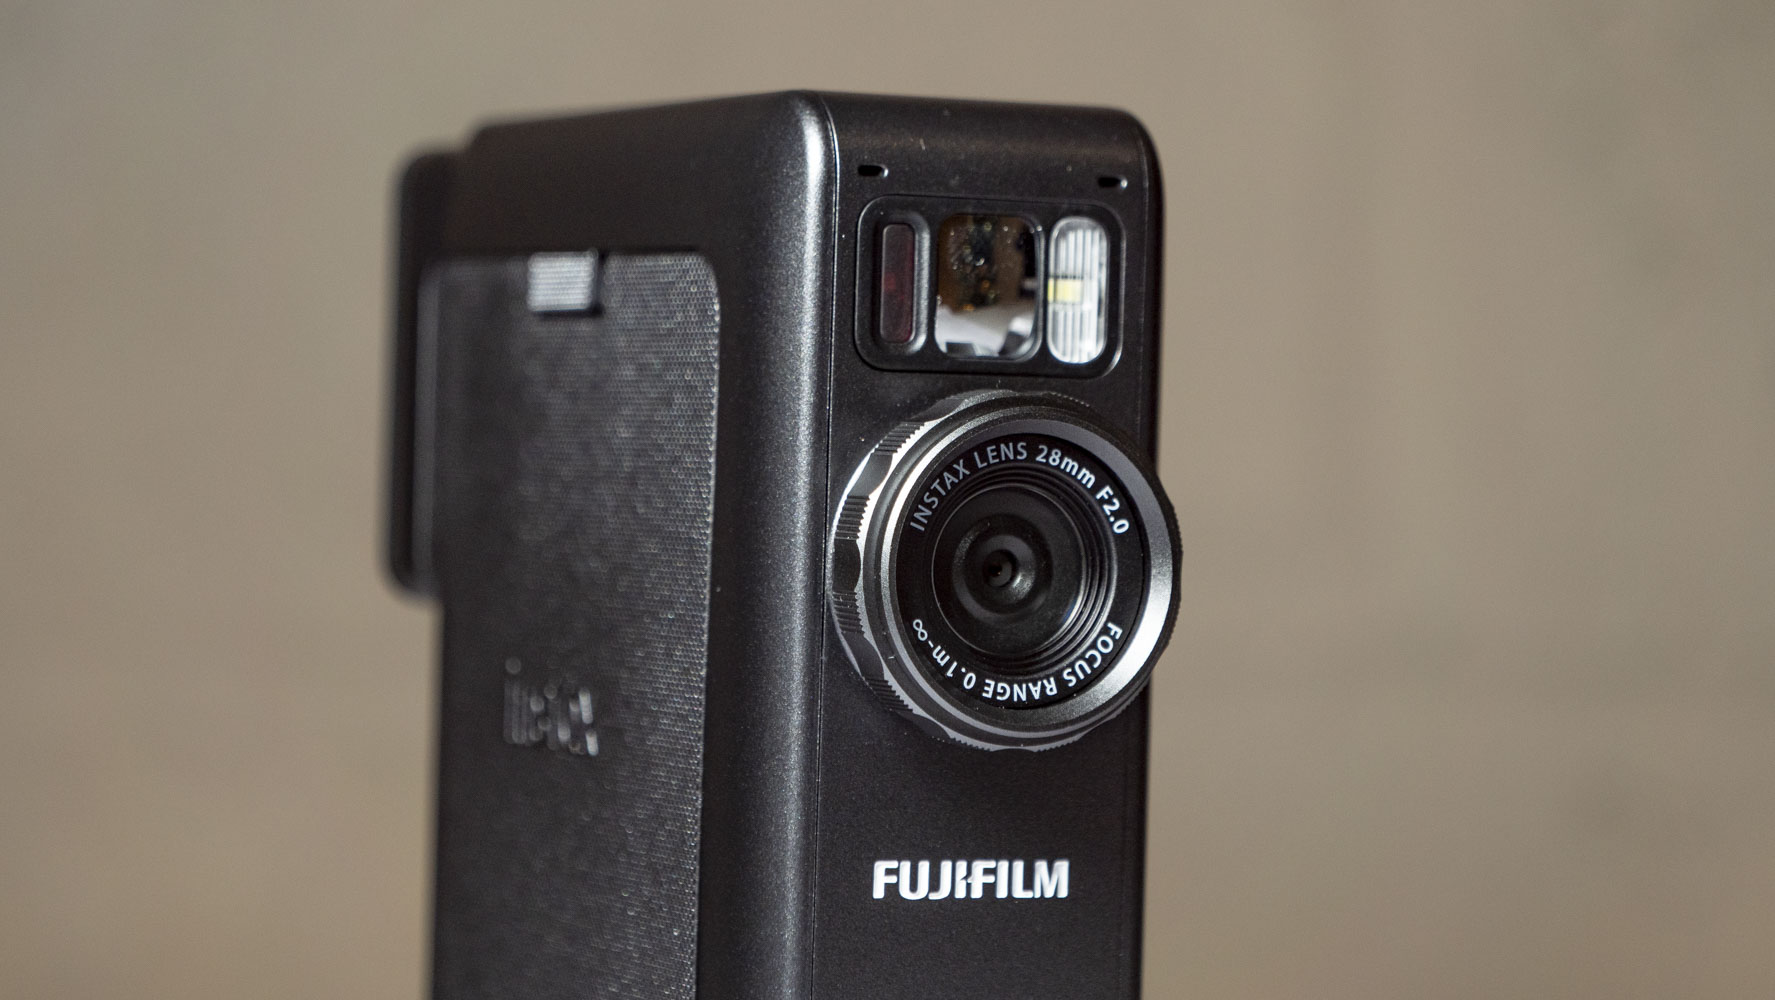
The 28mm f/2 lens is a moderate wide angle optic, with a similar perspective to the main camera on your smartphone, and it has a ring around it which can scroll through color profiles. Above the lens is a selfie mirror which is barely helpful, plus a tiny LED flash light which is useful for indoor party portraits, even if it’s not very powerful.
The Eras Dial starts in the 1930s with a grainy monochrome, the 1990s is the old school handicam look, while 2020 is a crisp quality like today’s smartphones. Gimmicky? Maybe for some, but not for me – this is such a fun feature that I kept coming back to.
It might appear toy-like, but once you get to grips with the Mini Evo, you realise that it's a well-made, well-thought out camera. I really believe Fujifilm has faithfully brought a fabulous concept into life.
On the flipside to design, performance is surely the Mini Evo Cinema's weakness – and in that sense it is fully committed to its retro roots!
Having used the Mini Evo previously, I expected poor image quality, especially since the basic sensor hardware is essentially the same as the original Mini Evo. Put simply, don’t expect excellent photo quality – the camera shoots lo-fi five megapixel JPEG photos through that 28mm lens, which are then saved onto micro SD.
From the camera’s gallery, you can then select which images you’d like to print instantly onto Instax Mini paper, using that analog-style lift and twist lever.
Video quality is equally lo-fi at just HD 720p, unless you have the high-resolution option active specifically for the 2020 Eras Dial setting alone, where video resolution can be doubled to 1440p. A frustrating, needless limitation on quality? Not so – it’s authentic.
I prefer the digital hybrid setup to a fully analog instant camera – where the camera prints immediately on capture, whether it’s a ‘good’ photo or not. With a Mini Evo you pick the shot you like for printing, meaning less wasted prints. Sure, it’s not one for analog purists, but I’d rather not waste my money on throwaway prints.
One frustrating experience using the Mini Evo Cinema is its slow operation. Every time you change a setting, or take a photo or video, a spinny wheel of doom pops up on screen as the camera makes those changes or processes images before it’s ready to operate again. The wait is even longer after recording video clips.
I’ve had two samples of the camera, and had the same issue with both. One time, the camera completely froze up, and the only solution was to leave it be until the battery fully drained. Once I charged it up and turned it back on, all seemed well again.
These issues could be bugs with the current firmware, that could be addressed in the future, but I’d be remiss not to mention them.
In one sense, using the Evo Cinema with all its performance-related issues is frustrating, but then I stop and think about the kind of camera that it is, and I can't help but embrace those flaws.
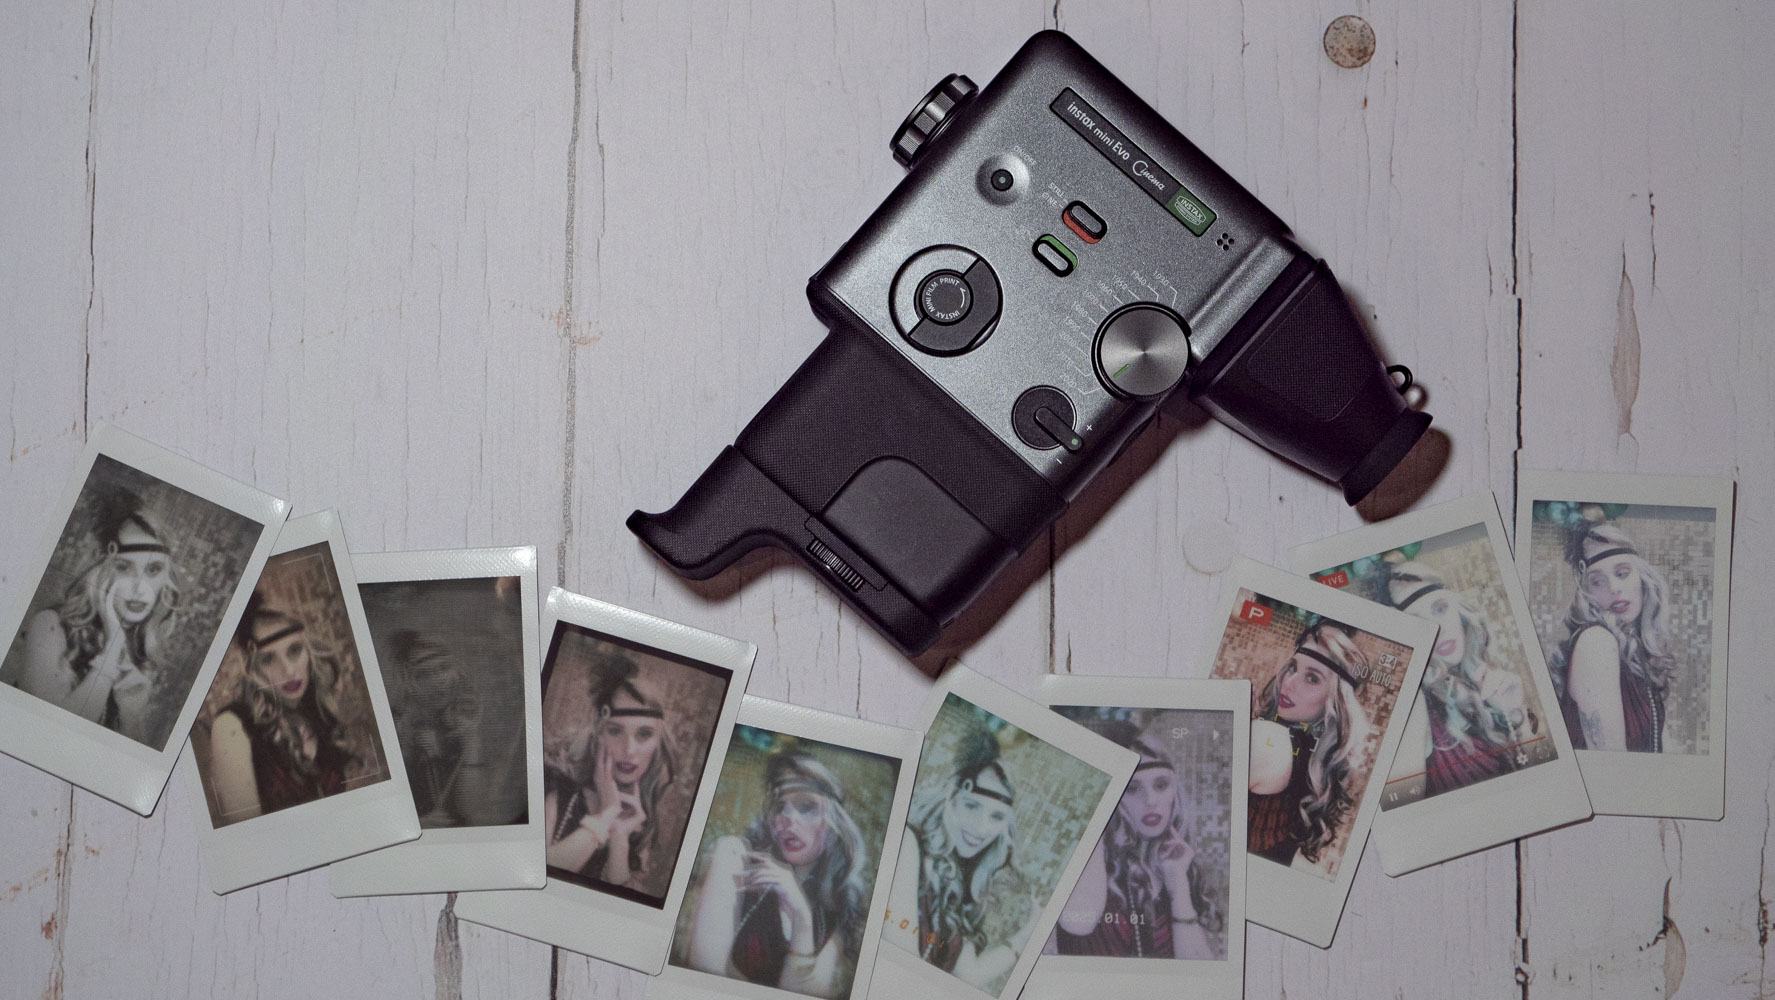
Sample photos – 1930 through to 2020


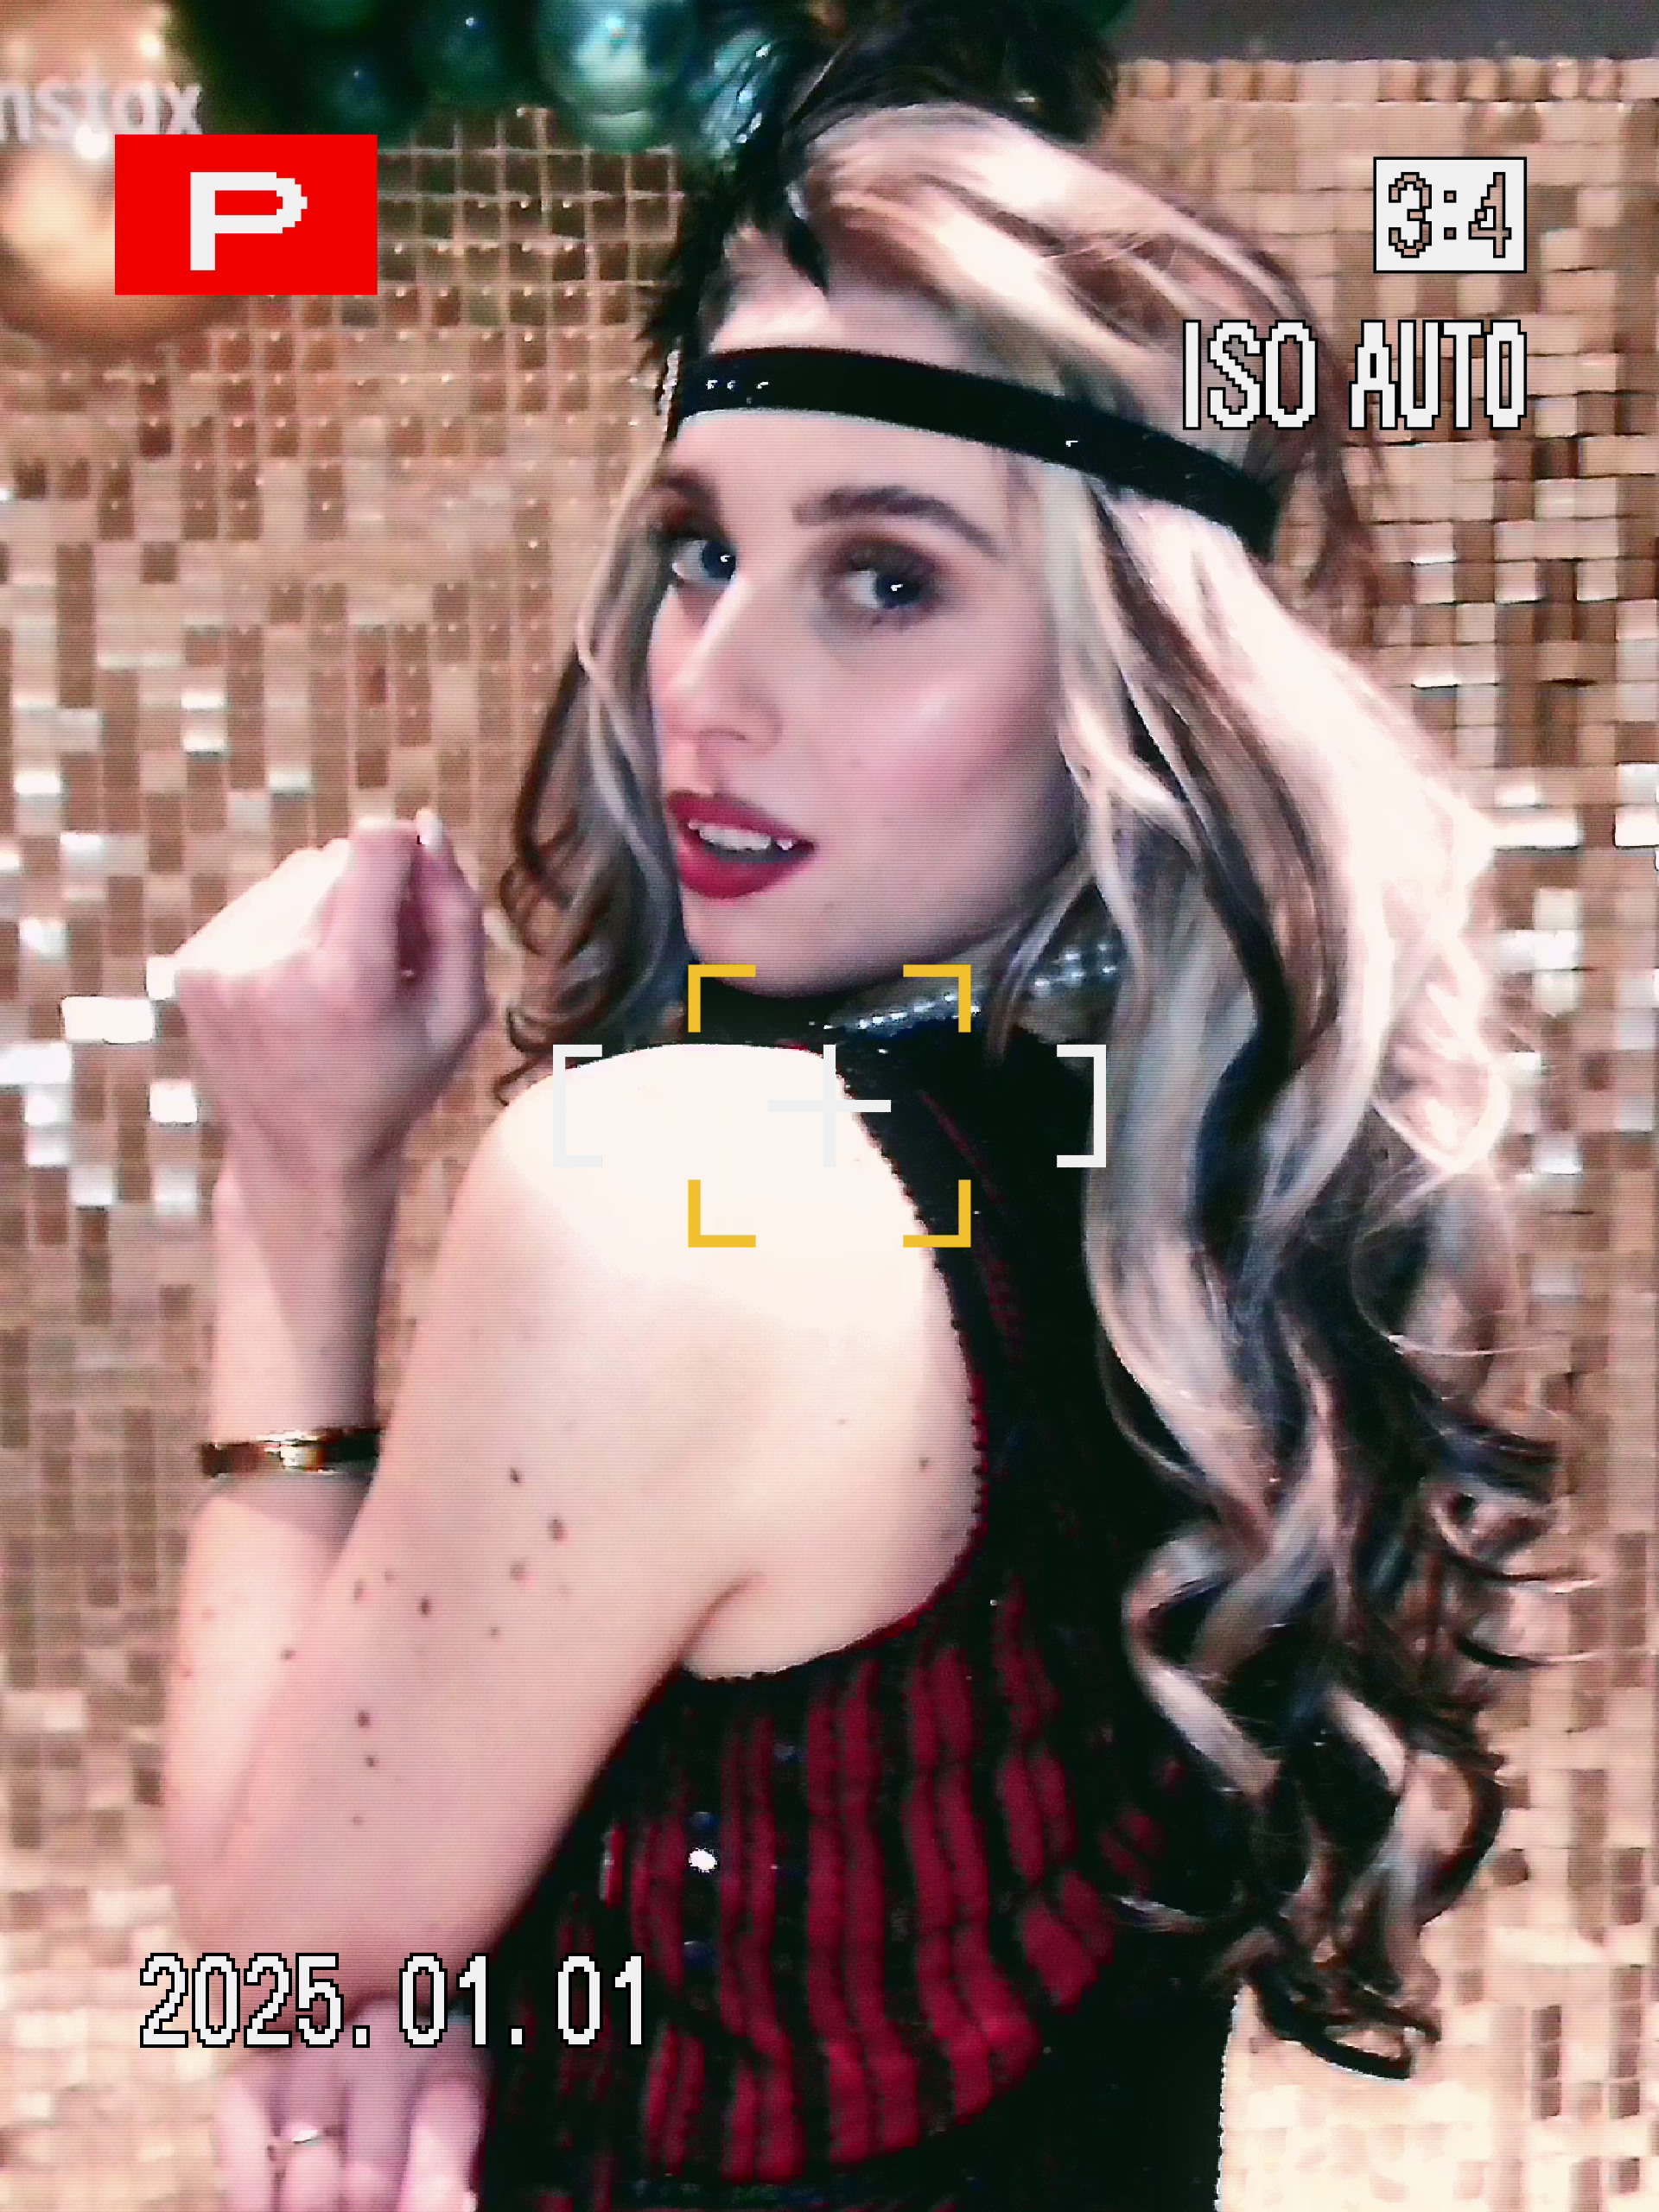


The 10 photos above cover each of the 10 settings in the Eras Dial, from 1930 to 2020. I kept the 'expressions' control to its auto setting rather than experiment with the 10 different looks available for each of the decades on the dial. Stills are recorded as JPEGs onto microSD, at 1920 x 2560 pixels.
I repeated the process for video, capturing each of the 10 Eras Dial looks. The lo-fi video quality is captured at 600 x 800 pixels for every setting except 2020, which is a higher quality 1080 x 1440 pixels.
You want a versatile retro camera
With 3-in-1 skills and well-made Super 8-style body, the Mini Evo Cinema is the retro camera to getView Deal
You love the lo-fi look
With poor quality stills and video but in a range of era-inspired styles, there are plenty of looks to sink your teeth intoView Deal
You're looking for top quality and performance
Images are lo-fi, operation can be slow – this is retro in every senseView Deal
You simply want video or photo
If you're looking for an instant camera only, or on the flipside a video camera only, there are low cost alternativesView Deal
Fujifilm Instax Mini Evo
Think of the Mini Evo as the same photo-making and instant printing camera, only without the video skills or retro Super 8 design. Instead, you have a compact body, and for around half the price.
See our Insta Mini Evo reviewView Deal
Camp Snap CS-8
If the Mini Evo Cinema's video skills appeal and the instant printing less so, then check out the Camp Snap CS-8, another lo-fi Super 8-style digital camera. It focuses on video, plus it costs much less
Read our Camp Snap CS-8 reviewView Deal
I've spent two weeks with the Evo Cinema, which has given me plenty of time to get a feel for how it handles and performs.
At a two hour launch event, I recorded the same video in a studio of a model, using every one of the 10 Eras Dial settings, and repeated that process for photos, printing out each one.
I've since experimented with the various expressions of each decade, taken more photos and videos both indoors and outdoors, in good light and bad.
I've tried the Evo Cinema with and without its viewfinder and grip accessories. The optional case was not supplied to me for the review.
I also made video montages using the basic video editor in the free Mini Evo Cinema app, and printed the QR code for access to those clips.
By: Mathieu Stern
Join the Weird lenses lovers community Here :
►https://www.facebook.com/groups/16981…
For this 10 Small Youtubers List i show you the ones i love to watch, the ones that I admire the work and the creativity.
This is a list of people who actually have ideas and talent, and spend less time reviewing gear and being sponsored by Squarespace … and more time creating awesome art !
1 : ► MrBrynnorth
https://www.youtube.com/channel/UCUmV…
2 : ► Michael Roberts
https://www.youtube.com/channel/UCMFX…
3 : ► Simon von Broich
https://www.youtube.com/channel/UC0Uk…
4 : ► Oliver Astrologo
https://www.youtube.com/watch?v=lcQEq…
5 : ► Tim Kellner
https://www.youtube.com/user/Timtothe…
6 : ► Matthew Vandeputte
https://www.youtube.com/user/MatthewV…
7 : ►Mikevisuals
https://www.youtube.com/watch?v=A34wL…
8 : ► Kyungsik Kim
https://www.youtube.com/watch?v=5zHEN…
9 : ► Cascades de France
https://www.youtube.com/channel/UCu8s…
10: ► Brandon Li
https://www.youtube.com/channel/UC3st…
▲▲ WHERE I GET MY MUSIC ▲▲ AMAZING for YouTubers
►https://goo.gl/R8dSUu
———————————————————————————————
Model : https://www.instagram.com/vanessa_val…
——————————————————————►► Like what i create ? Buy me a coffee!
http://ko-fi.com/mathieustern
►►Find my Color Gradding LUTs here :https://www.mathieustern.com/luts/
Support my experiments on Patreon ► https://goo.gl/eUQ9ZY
———————————————————————————————
▲ WHERE TO FIND ME ▲
►I N S T A G R A M : https://www.instagram.com/mathieustern/
►T W I T E R: http://twitter.com/Mathieustern
►F A C E B O O K : https://goo.gl/gKSJwC
►REDDIT : https://www.reddit.com/r/MathieuStern/
Please support me and my experiments on Patreon :
https://goo.gl/eUQ9ZY
———————————————————————————————
New to my Chanel?? Here are some playlists to get you started.
➜ Best Of – Watch These First : https://goo.gl/pC31Ae
➜ The Weird Lens Challenge : https://goo.gl/F14AmC
➜ The Cheap Weird Lens Reviews : https://goo.gl/4Esi2p
By: Palle Schultz
The features of the Fujifilm X-H1 and my opinion about it.
In this space, the link for the mentioned Nepal video will be, when it becomes public.
Note by Camaras.net: A fantastic overview of this new camera, by somebody who has extensively used it (in the field), and is an excellent photographer and videographer. Big thanks to Palle, for doing this video for the benefit of all parties interested.
Awesome follow up video with examples, Thanks Palle!!
By: Palle Schultz
I collected a bunch of clips from Nepal, that shows the features of the X-H1.
Watch this space for a link to the Nepal movie at the 26th of February
By: Darren Miles
http://www.DarrenMiles.com – Southwest Florida Portrait, Real Estate, Wedding and Family Photographer
GET A GREAT DEAL on the Laowa 7.5mm f/2 Lens from B&H HERE: https://www.bhphotovideo.com/c/produc…
CONCLUSION: So to wrap up this review, we give the Venus optics, compact dreamer, lightweight 7.5mm f/2 lens a 35.5/40 and our Recommended Rating.
THE FINAL WORD: More often than not, wide angle lenses suffer from some inherent issues, weak edge performance, distortion, vignetting, and bad flare performance, well, I’m pleased to report that laowa does a great job with distortion control and edge performance, both seem to be really great as the verticals straight out of camera are in fact pretty straight and the edges look really sharp to my eyes, however, the laowa does suffer from strong vignetting – especially wide open and weak flare performance in brightly lit situations, which again aren’t really strong suits for most wide angle lenses, but they are noticeable in the Laowa – but all in, at just $519 the laowa does in fact offer some really nice benefits for this kind of price – specifically, if you’re a drone operator, video shooter and if you do real estate and landscape photography – sure, you only get manual focus and aperture control, but again, when it’s this wide, big scenes are going to be mostly in focus anyway at or close to infinity on the focus ring. In spite of its shortcomings, the pros, definitely outweigh the cons.