Latest from TechRadar US in Reviews
Polaroid Go Gen 3: Two-minute review
Cards on the table: I love Polaroids. I’m of the right generation to have grown up with these instant-film wonders on holidays and at parties, and I was thrilled when the brand was properly revitalised in 2017 under new ownership. From the early OneStep cameras to more recent efforts like the Polaroid Flip (which I currently own), I’ve used a lot of nu-Polaroid’s offerings, and I was thrilled to try out the Polaroid Go Gen 3.
The Go series are Polaroid’s range of super-small instant cameras. They use their own dedicated ‘Go’ film, producing prints measuring 66.6mm x 53.9mm with an image area of 47mm x 46mm (for context, a full-size I-Type print measures 107mm x 88mm with an image area of 79mm x 77mm). They still have that Polaroid look, that lo-fi charm, that iconic square format. They’re just smaller.
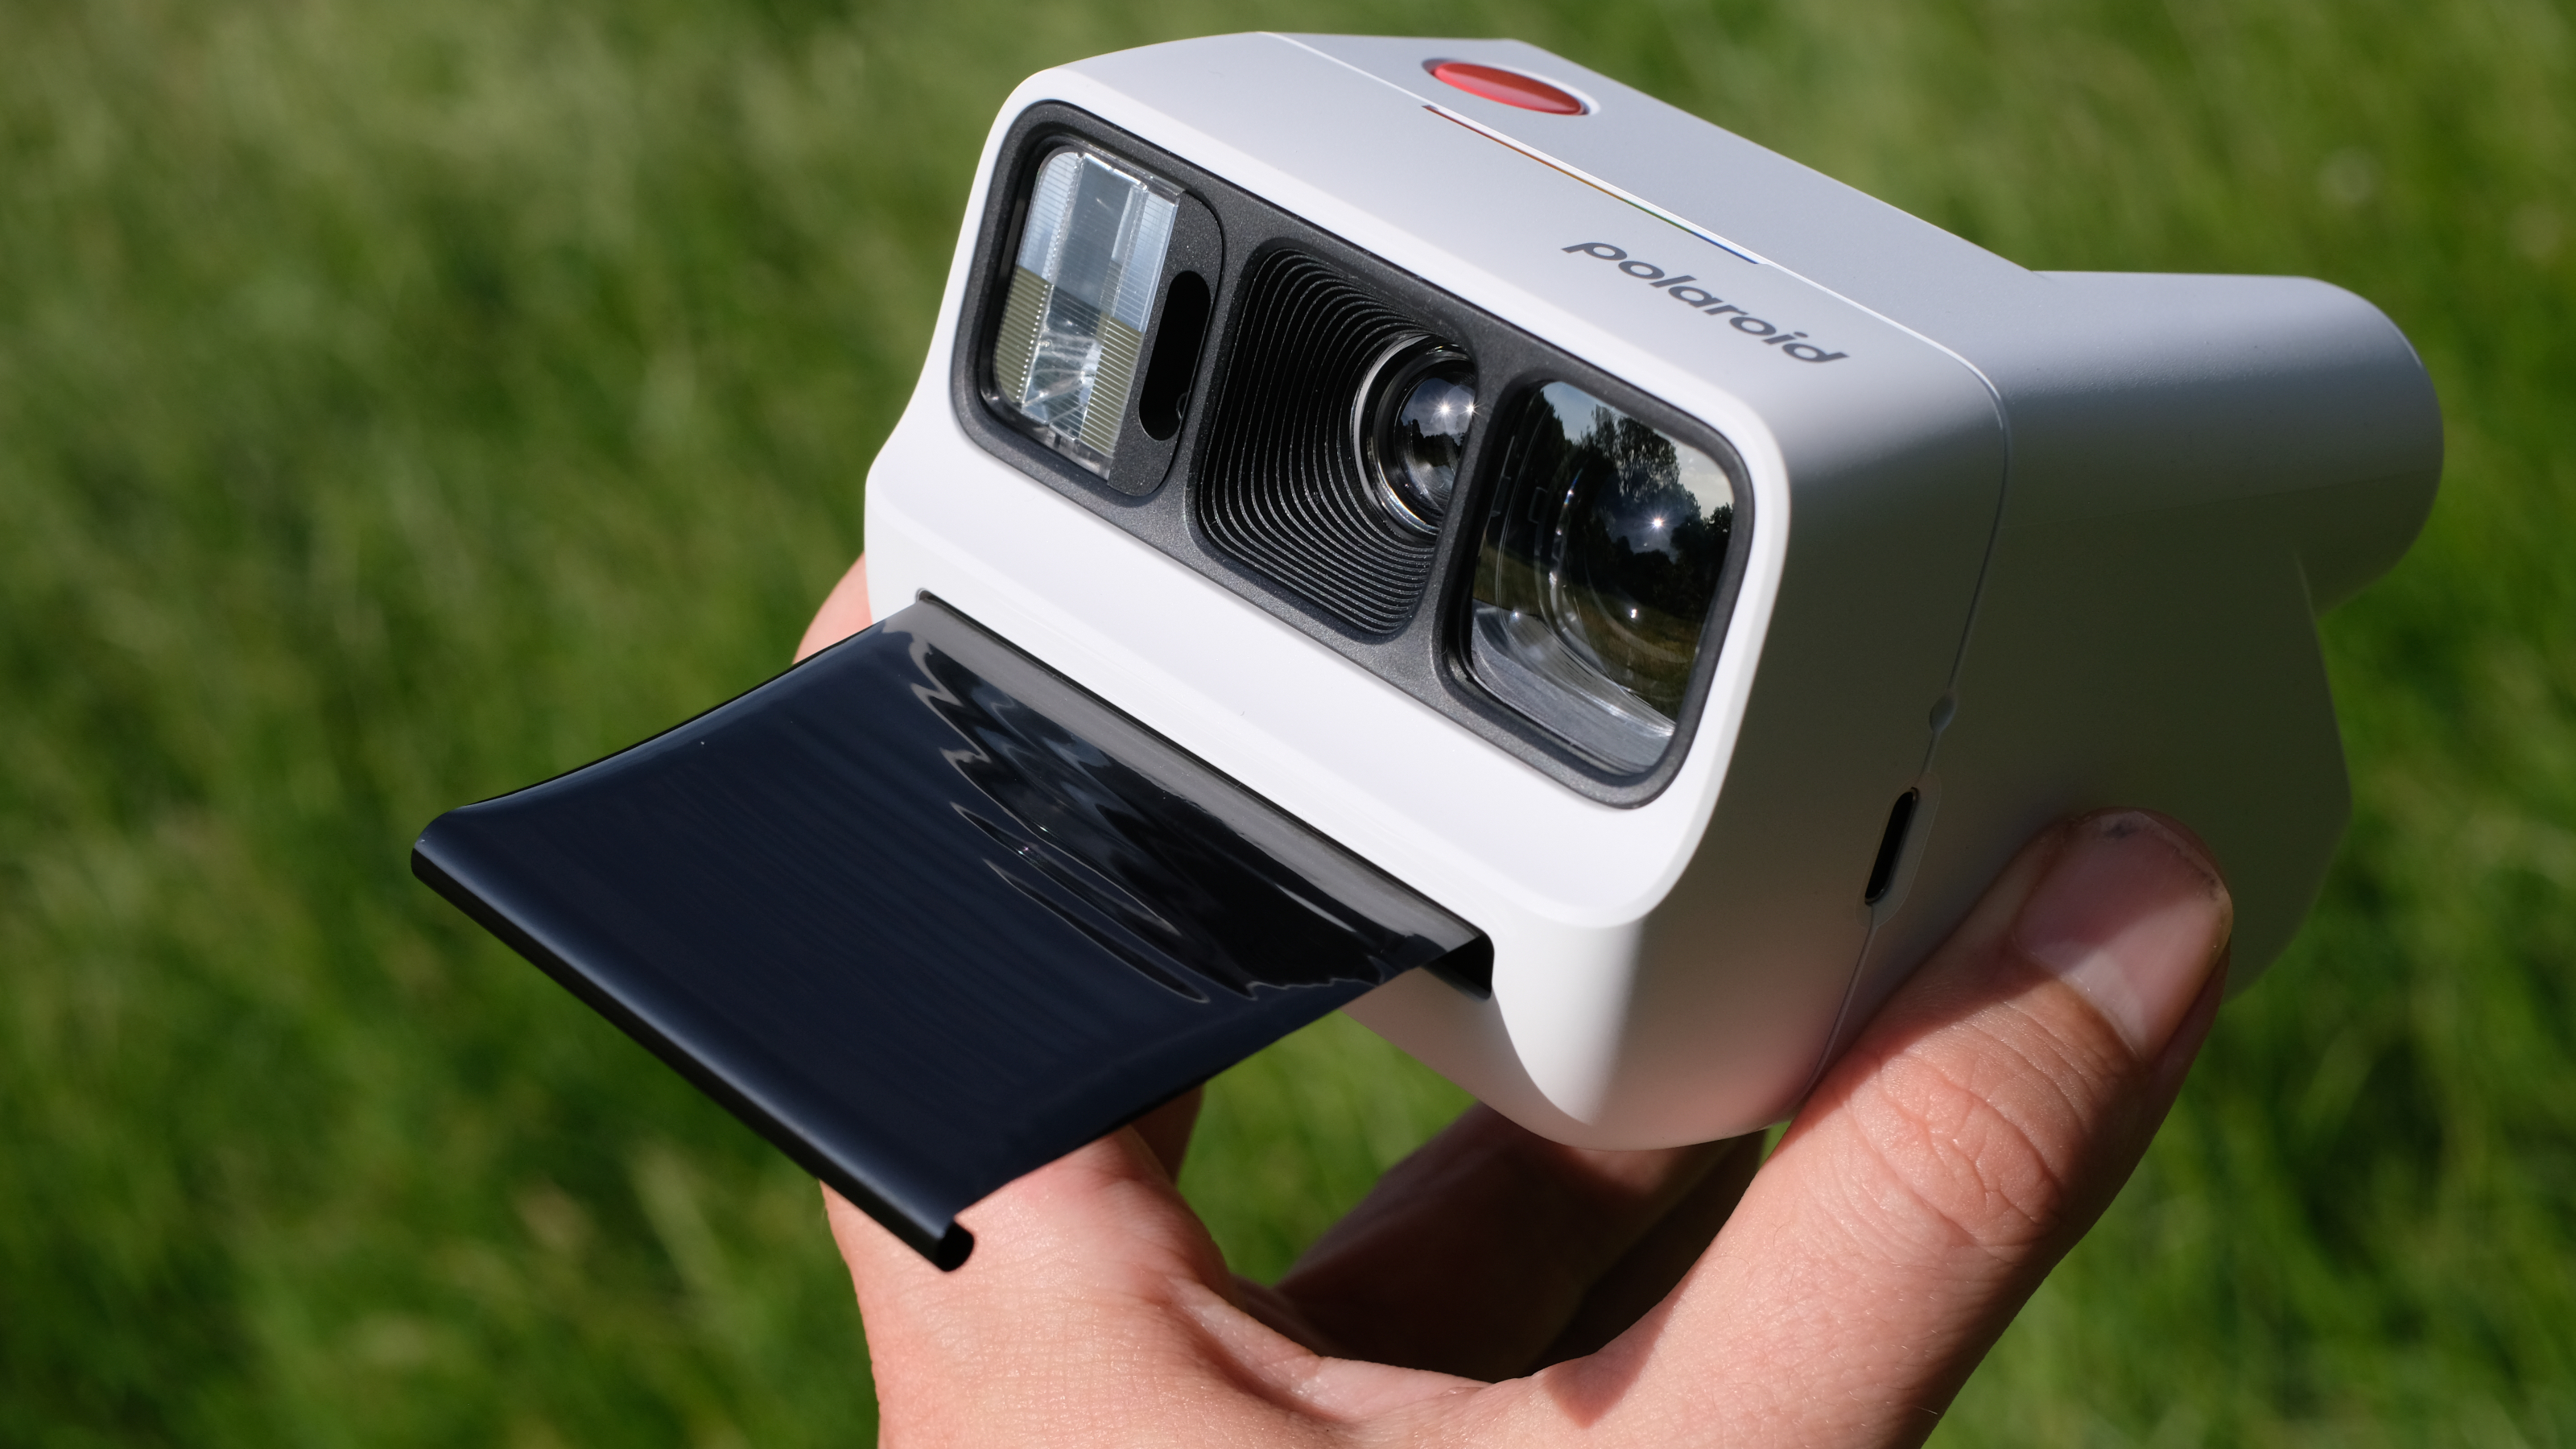
The Go Gen 3 is the smallest camera the series has yet produced. It is clearly pitched at a younger crowd — festival-goers, beach-enjoyers, selfie-takers, and it has a selfie mirror to facilitate this. Its controls are extremely simple; you can’t control settings, you just point and shoot.
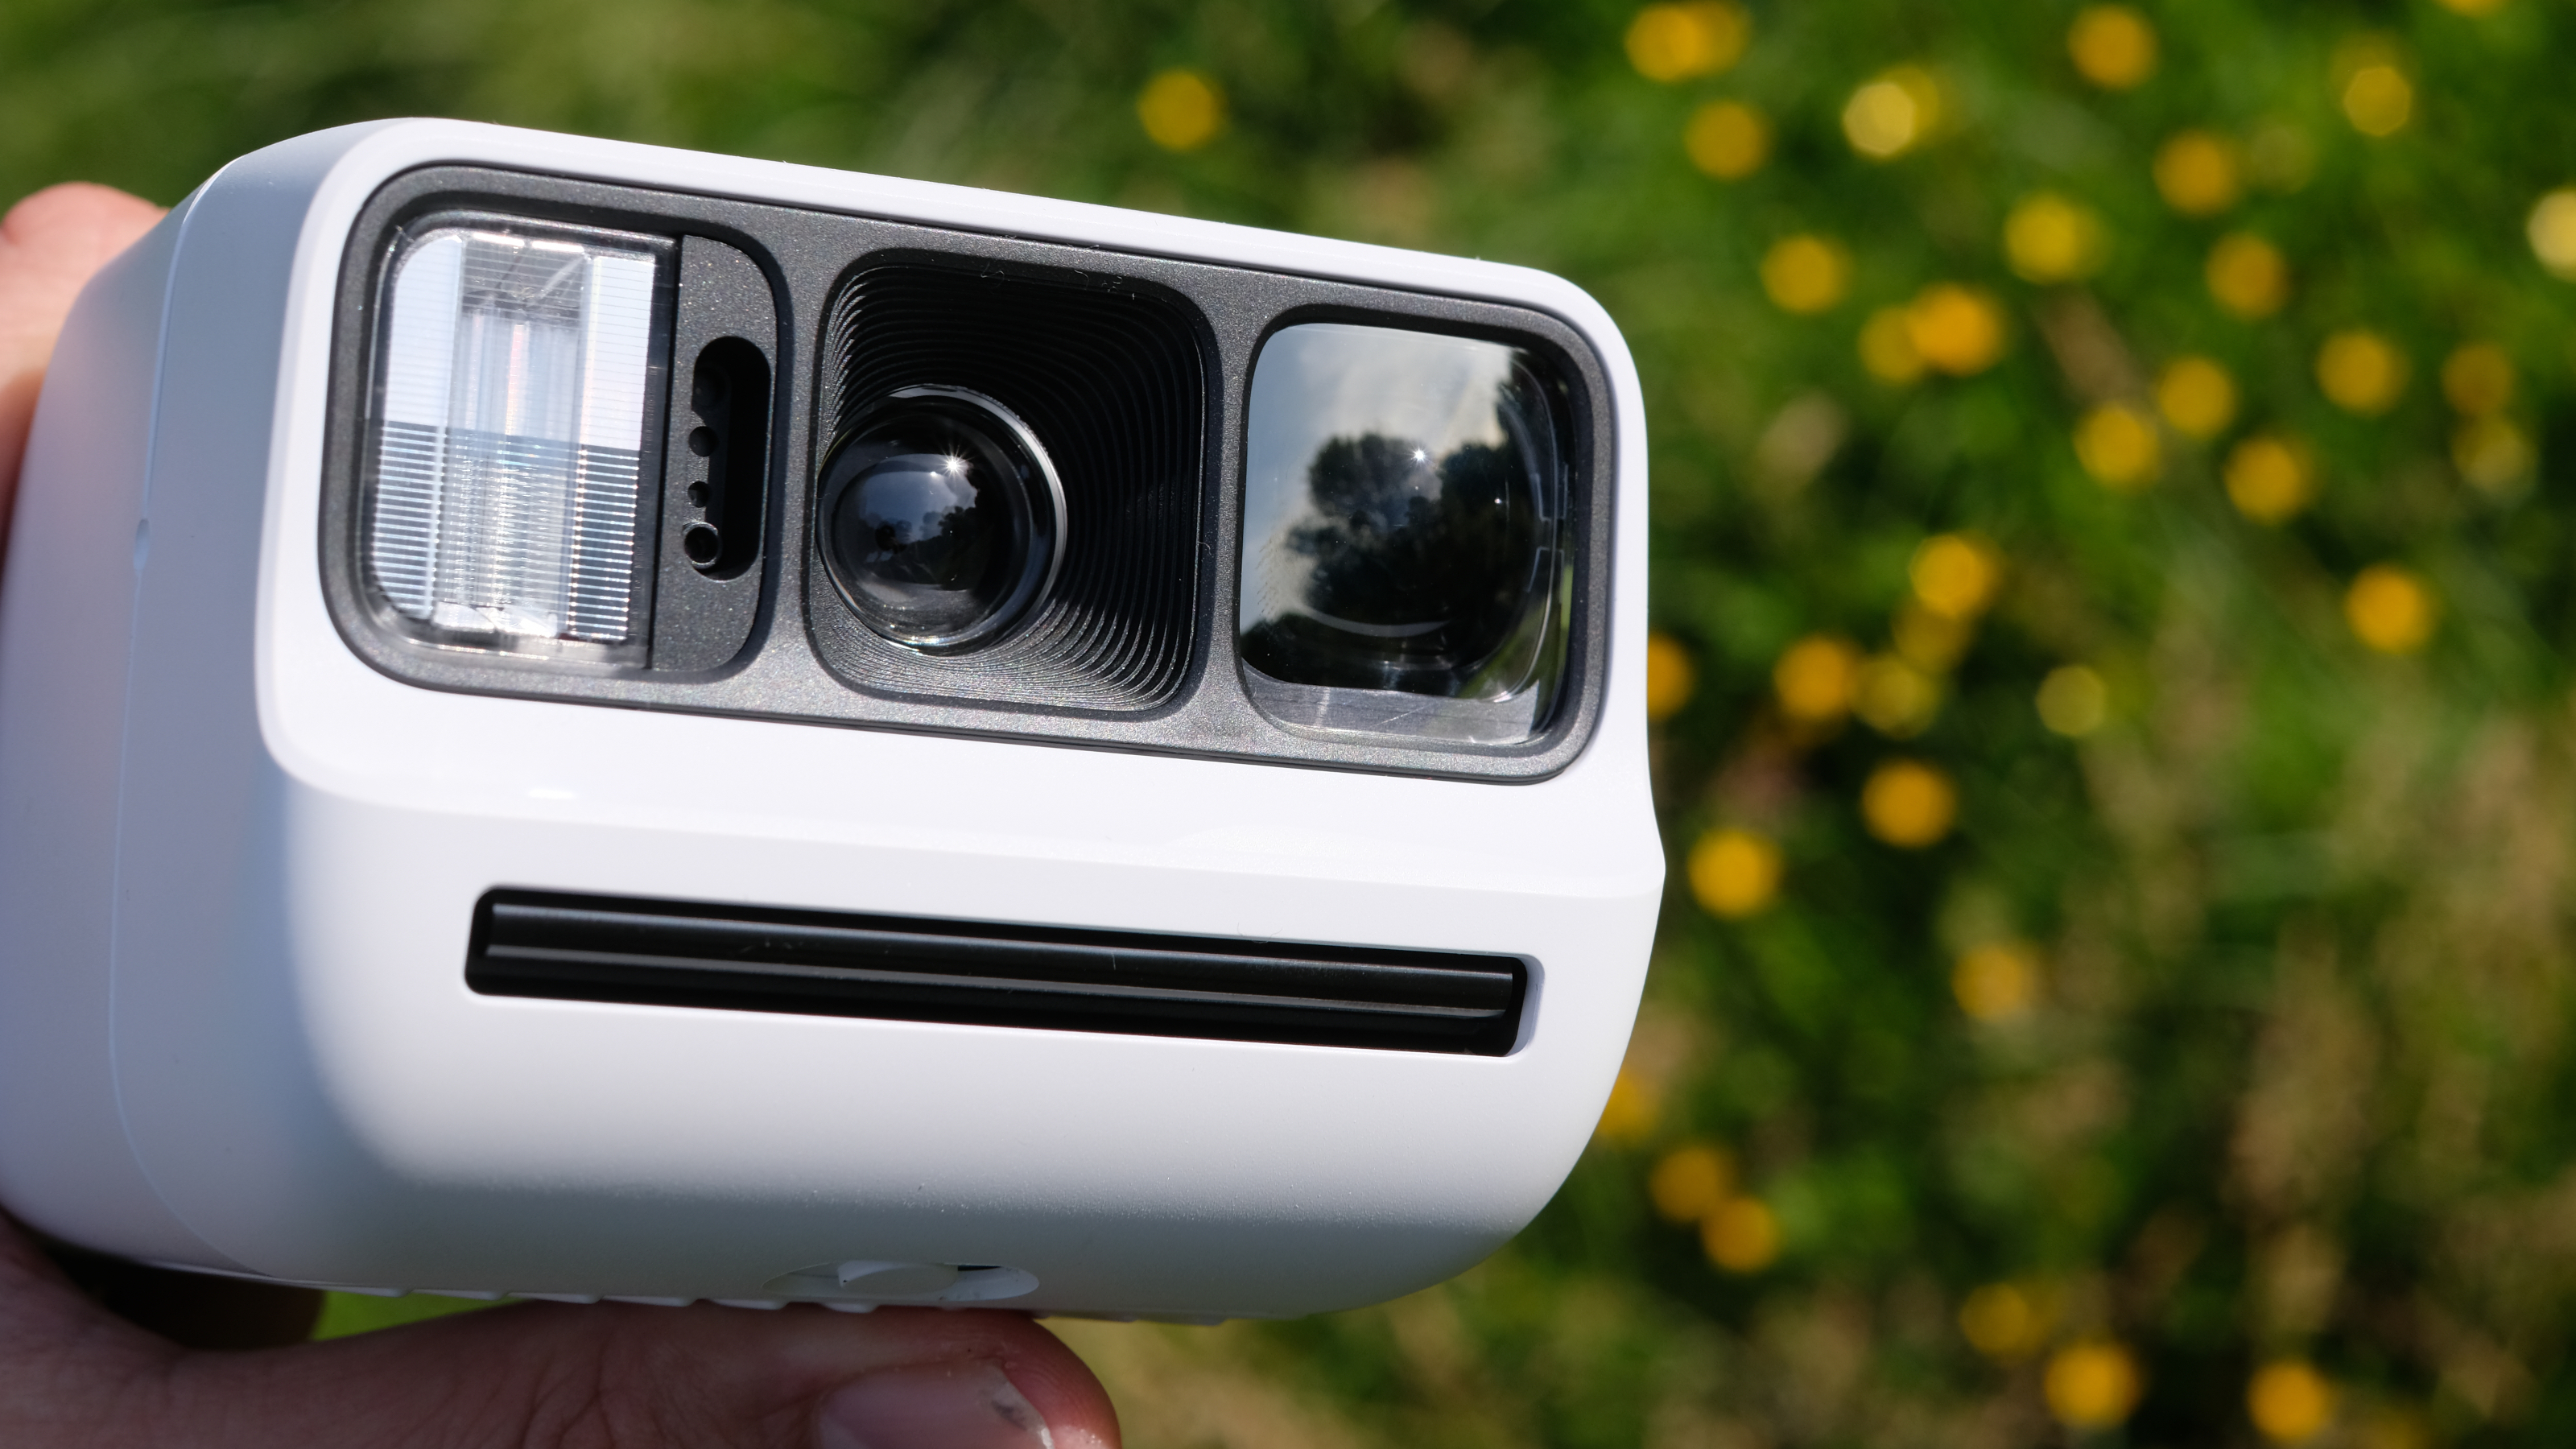
Most of this was also true of previous Go cameras, such as the Go 2, so what exactly is new here? Well, as well as the reduced size, Polaroid has outfitted the Gen 3 with a boosted flash and a redesigned lens sporting a narrower focal length of 63.75mm, compared to 51.1mm on the Gen 2. This gives you a slightly tighter perspective, gets you closer to your subjects, and makes your selfies that little bit more flattering.
So, it's a much simpler offering than the Flip, which has a fancy four-zone focus system and offers full settings control via the Polaroid app. The Polaroid Go Gen 3 does have a shutter speed range of 1/500–1sec and aperture settings of f/14.4 and f/32, but it will be selecting those for you. However, that’s not to say you’re completely without agency. You can turn the flash on and off via the flash control button, which also activates a self-timer mode and a double exposure mode — meaning you can expose the same frame twice for surreal, creative effects.
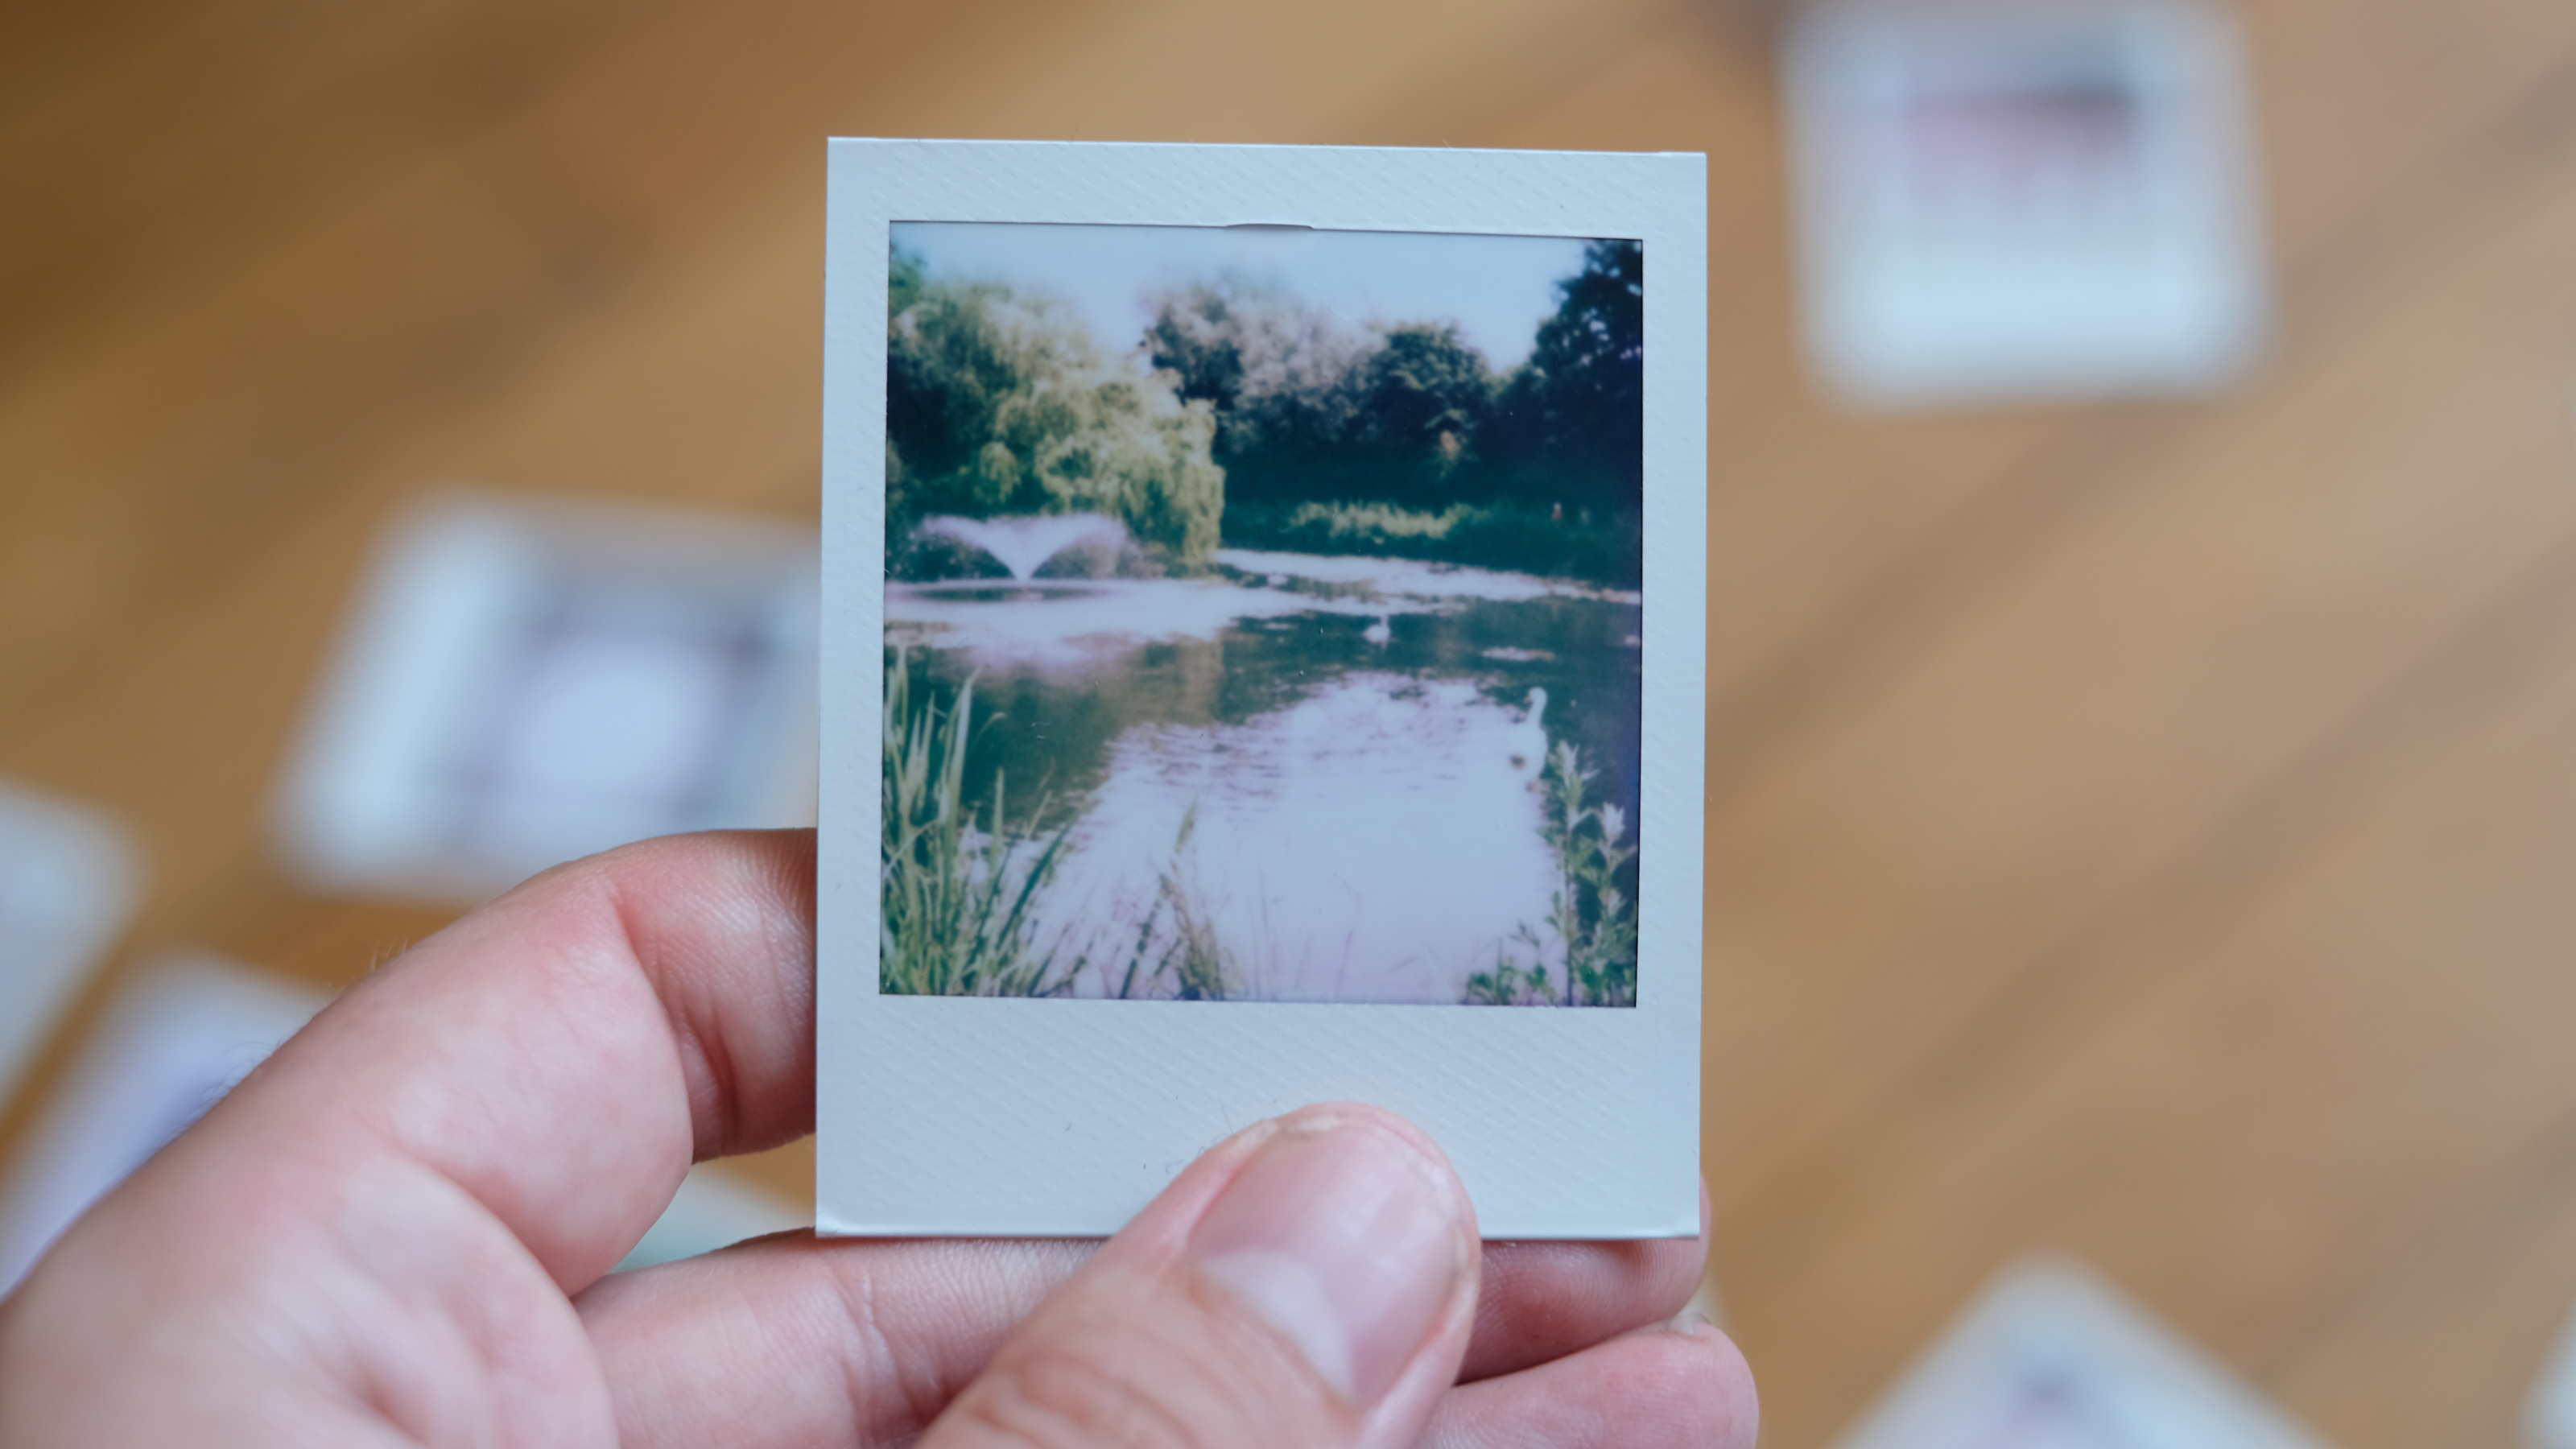
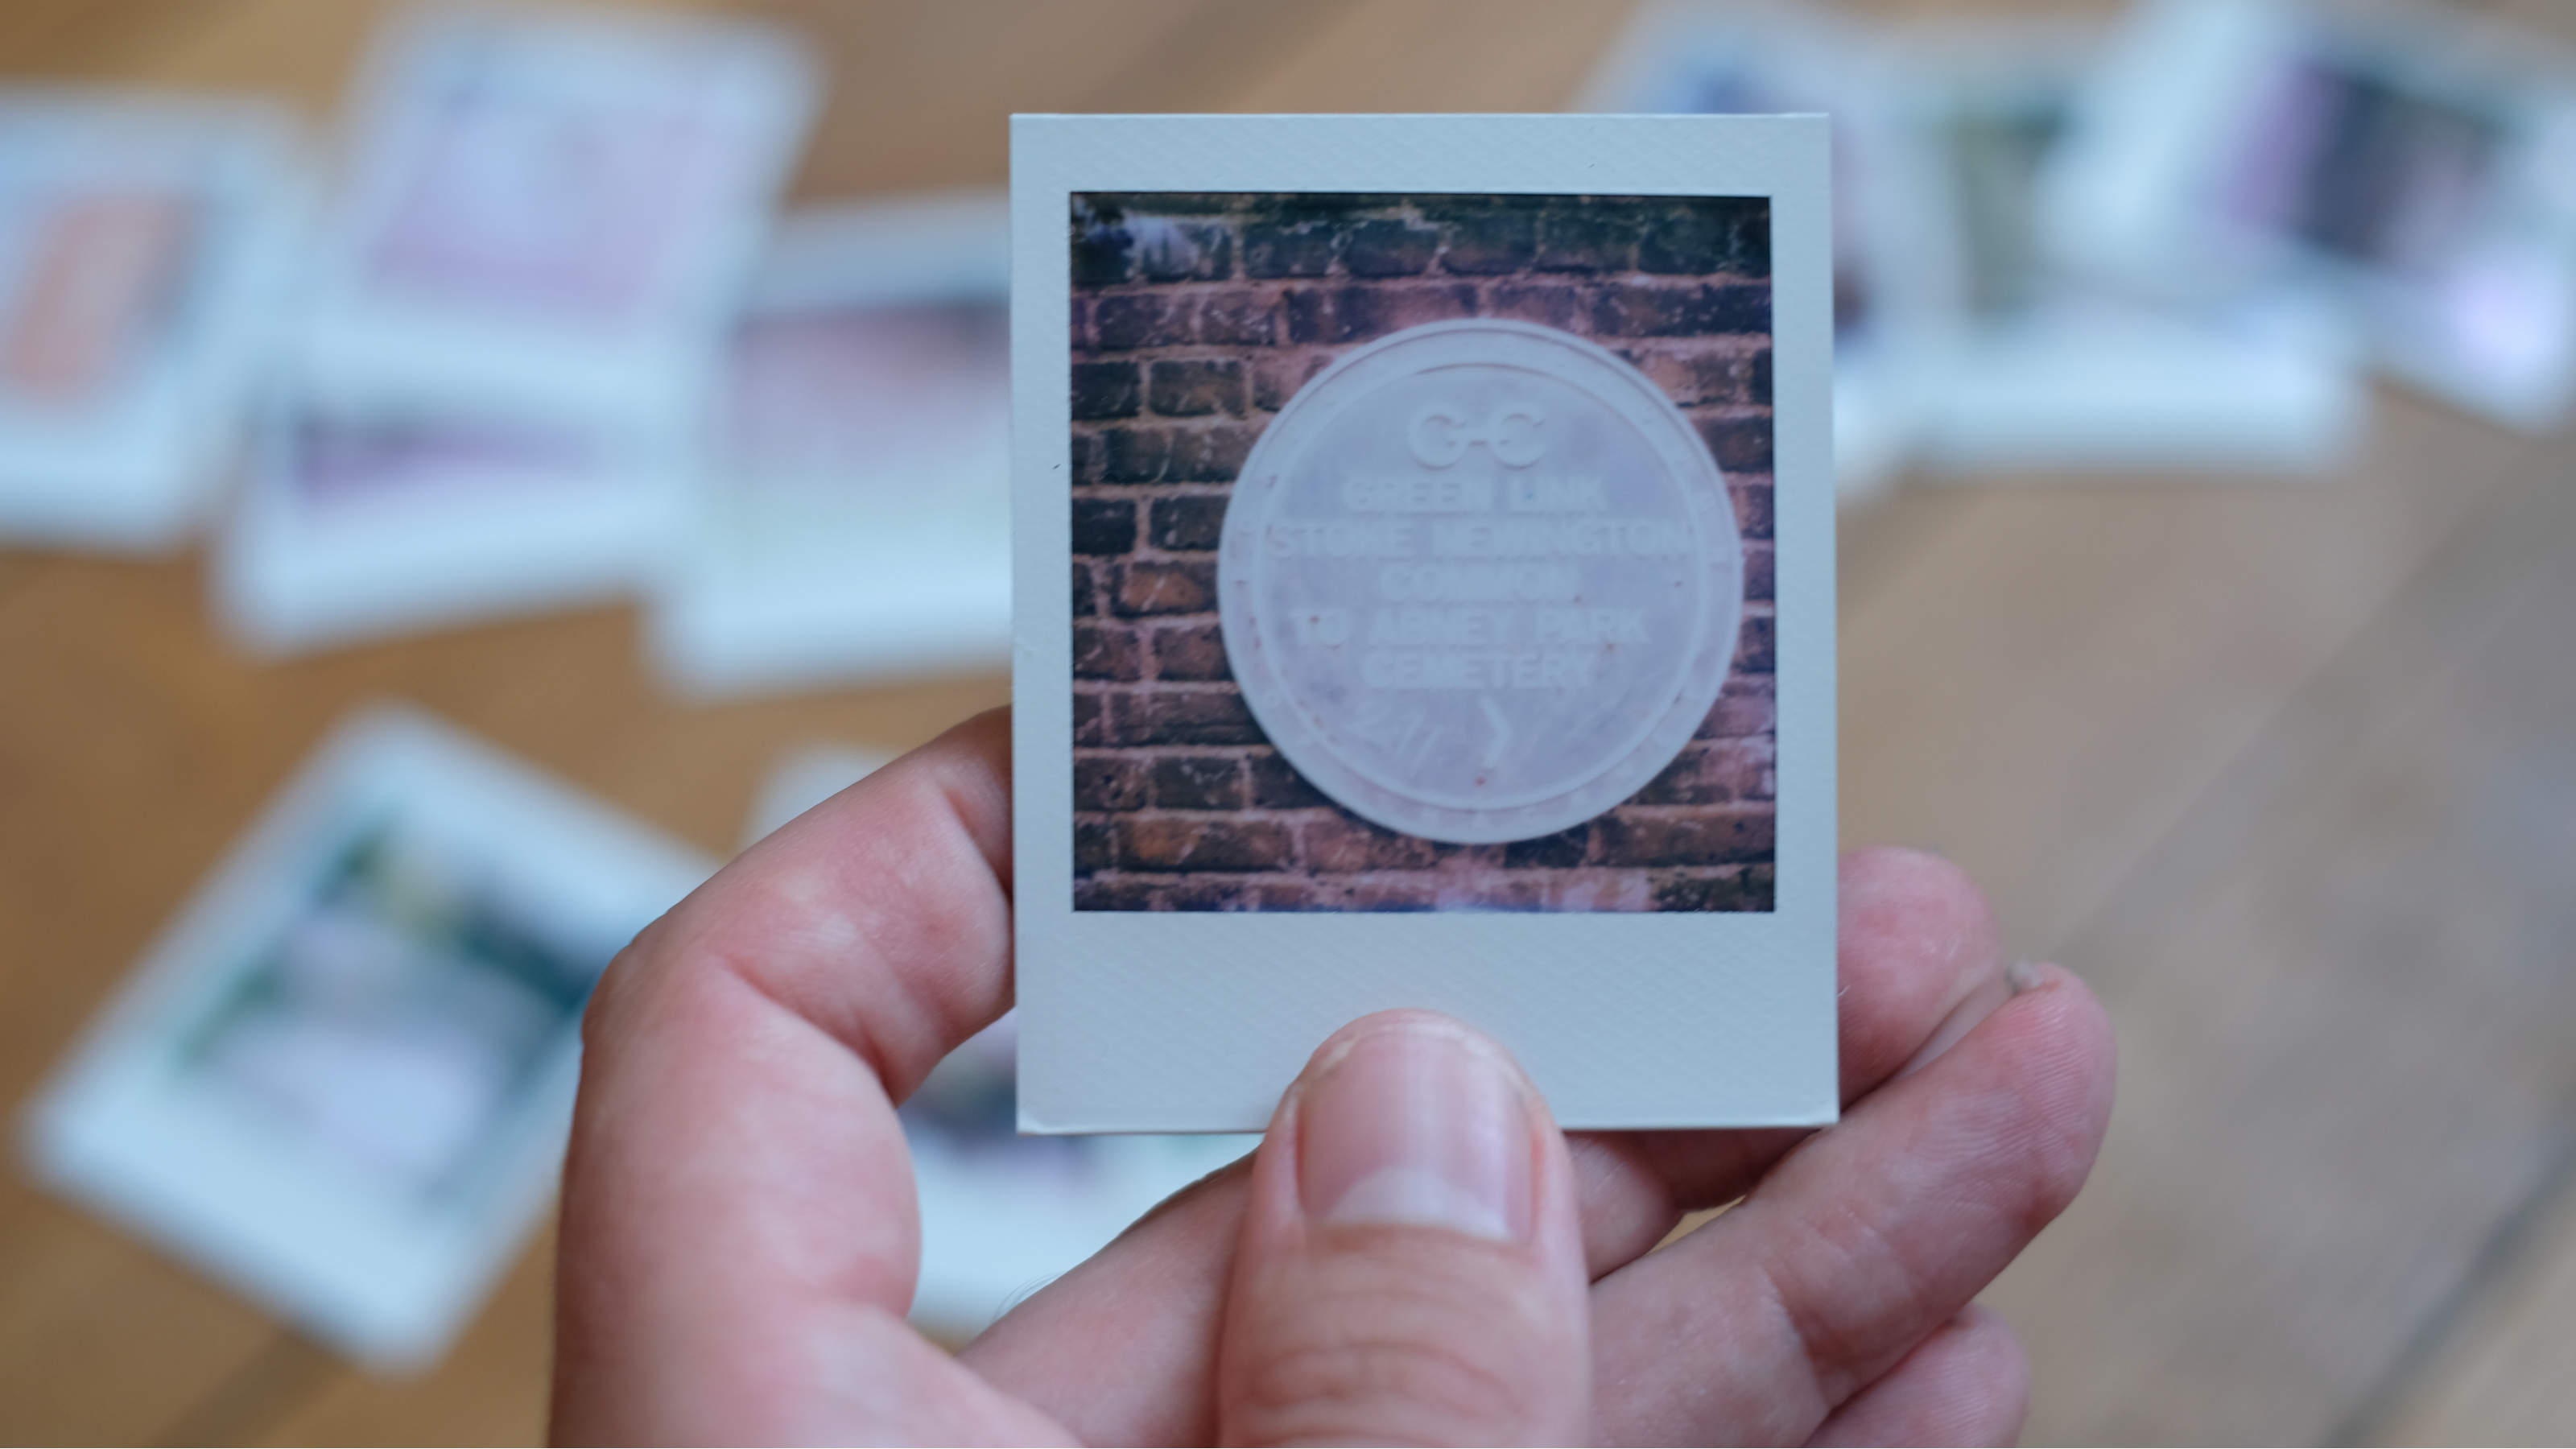
I used the Polaroid Go Gen 3 for about a week, mostly capturing shots on photo walks outdoors, but also making use of the selfie mirror to shoot some self-portraits indoors. I’ve been very impressed with the level of quality those little prints are able to display — when the light’s been right, I’ve found myself absolutely poring over images, appreciating all the subtle details that are conveyed in these tiny prints. Even in the smaller size, you still get the feeling of Polaroid’s signature lo-fi tones.
It’s not perfect. I found ultra-bright sunlight to be a problem, with the prints easily becoming blown out and overexposed on sunny days — which also seem to me like the days you’re most likely to want to use the camera. However, the relative affordability of Go film compared to I-Type makes me much more willing to play, experiment and have fun with the Go Gen 3, and not sweat my mistakes too much. Which as far as I’m concerned, is what instant photography should be all about.
Polaroid Go Gen 3: price and availability
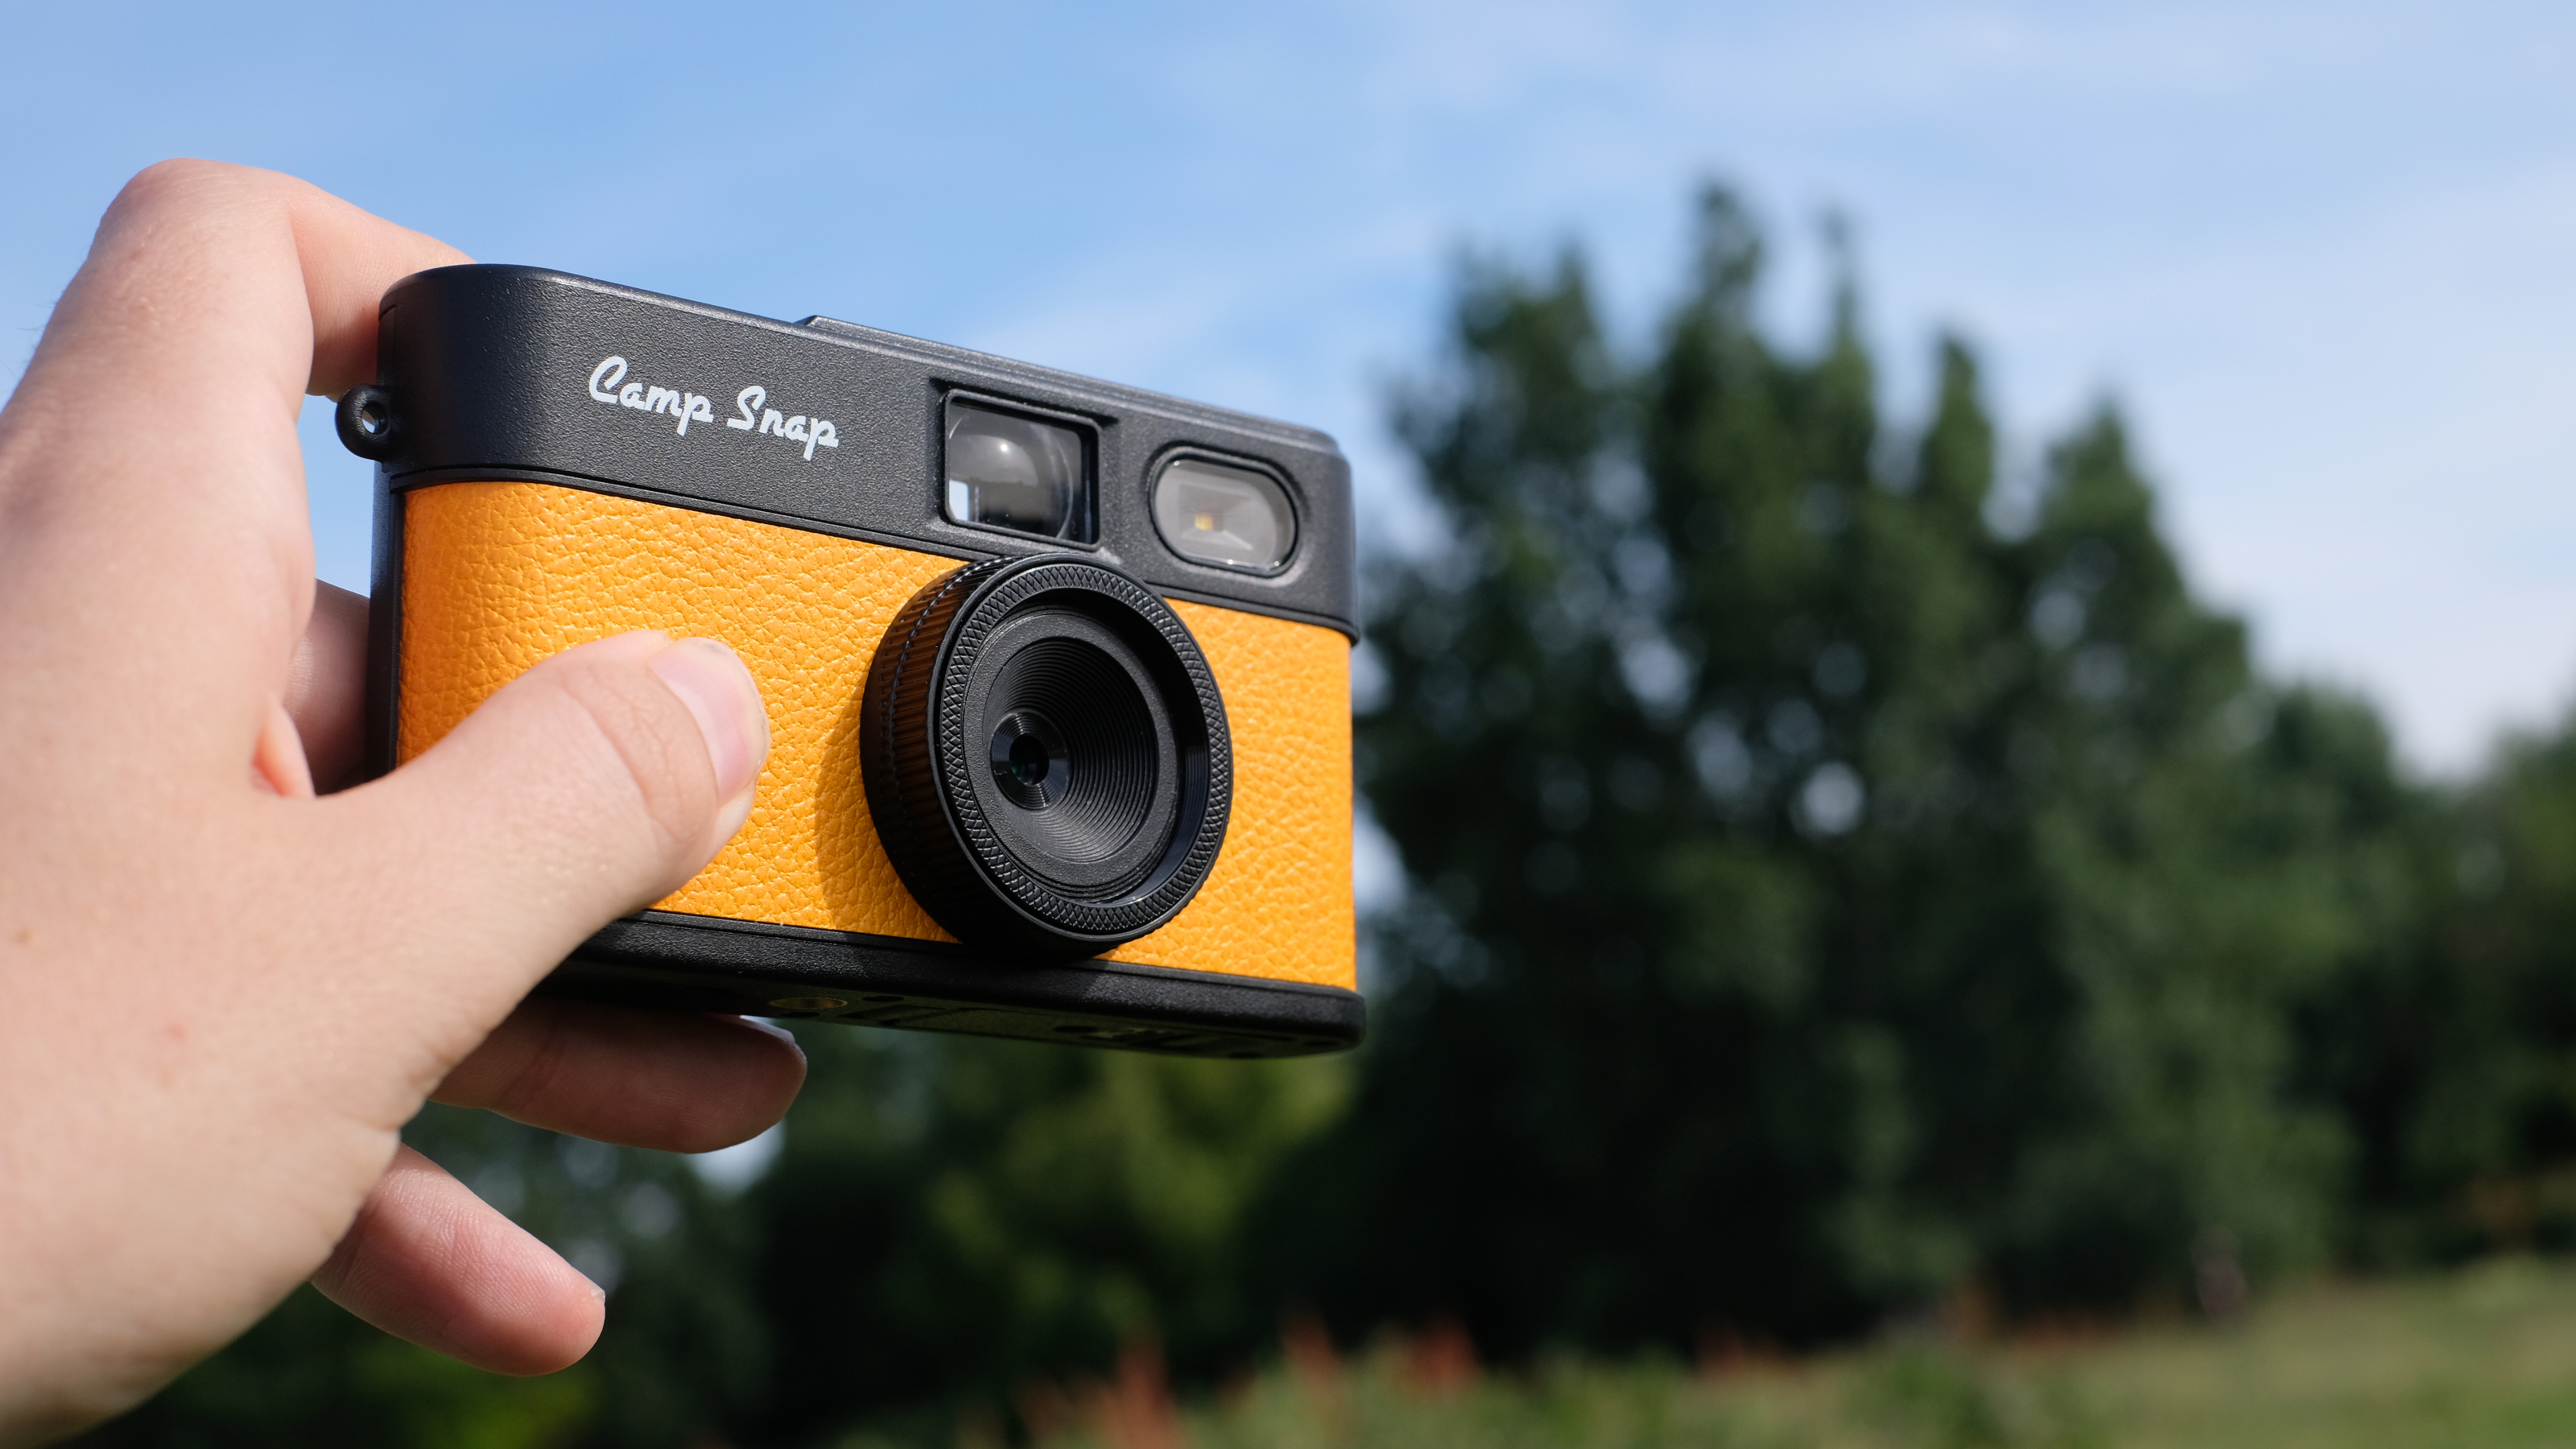
Polaroid has been cannily stalking the Instax market share with the Go series, and part of that has been keeping the cameras nice and cheap. The Go Gen 3 comes at a reasonable launch price of $89.99 / £79.99 / AU$150, which is about the same as the comparable Instax camera, the Instax Mini 13, and similar to cheap lo-fi digital cameras like the Camp Snap.
However, as it’s a film camera, you have ongoing costs to factor in. Polaroid Go cameras use dedicated Polaroid Go film, which costs around $21.99 / £18.99 / AU$39 for a pack of sixteen shots (two cartridges of eight). Again, this is similar to Instax mini, which is slightly cheaper at around $20.99 / £14.99 / AU$34.95 for a pack of twenty.
Happily, it’s much more reasonably priced per shot than full-size I-Type film. As much as I love proper Polaroids, $18.99 / £16.99 / AU$32 for just eight shots is really quite brutal, and makes the experience a bit less fun. You don’t kick yourself for a fluffed Go shot in quite the way you do for a fluffed I-Type shot, and it makes the Polaroid Go Gen 3 a more realistic option for kids and families.
Polaroid Go Gen 3: Design
- Super small, trop mignon, fits in the palm of your hand
- Very simple operation with just three buttons
- No tripod thread, but there are lugs for a strap (and one is supplied)
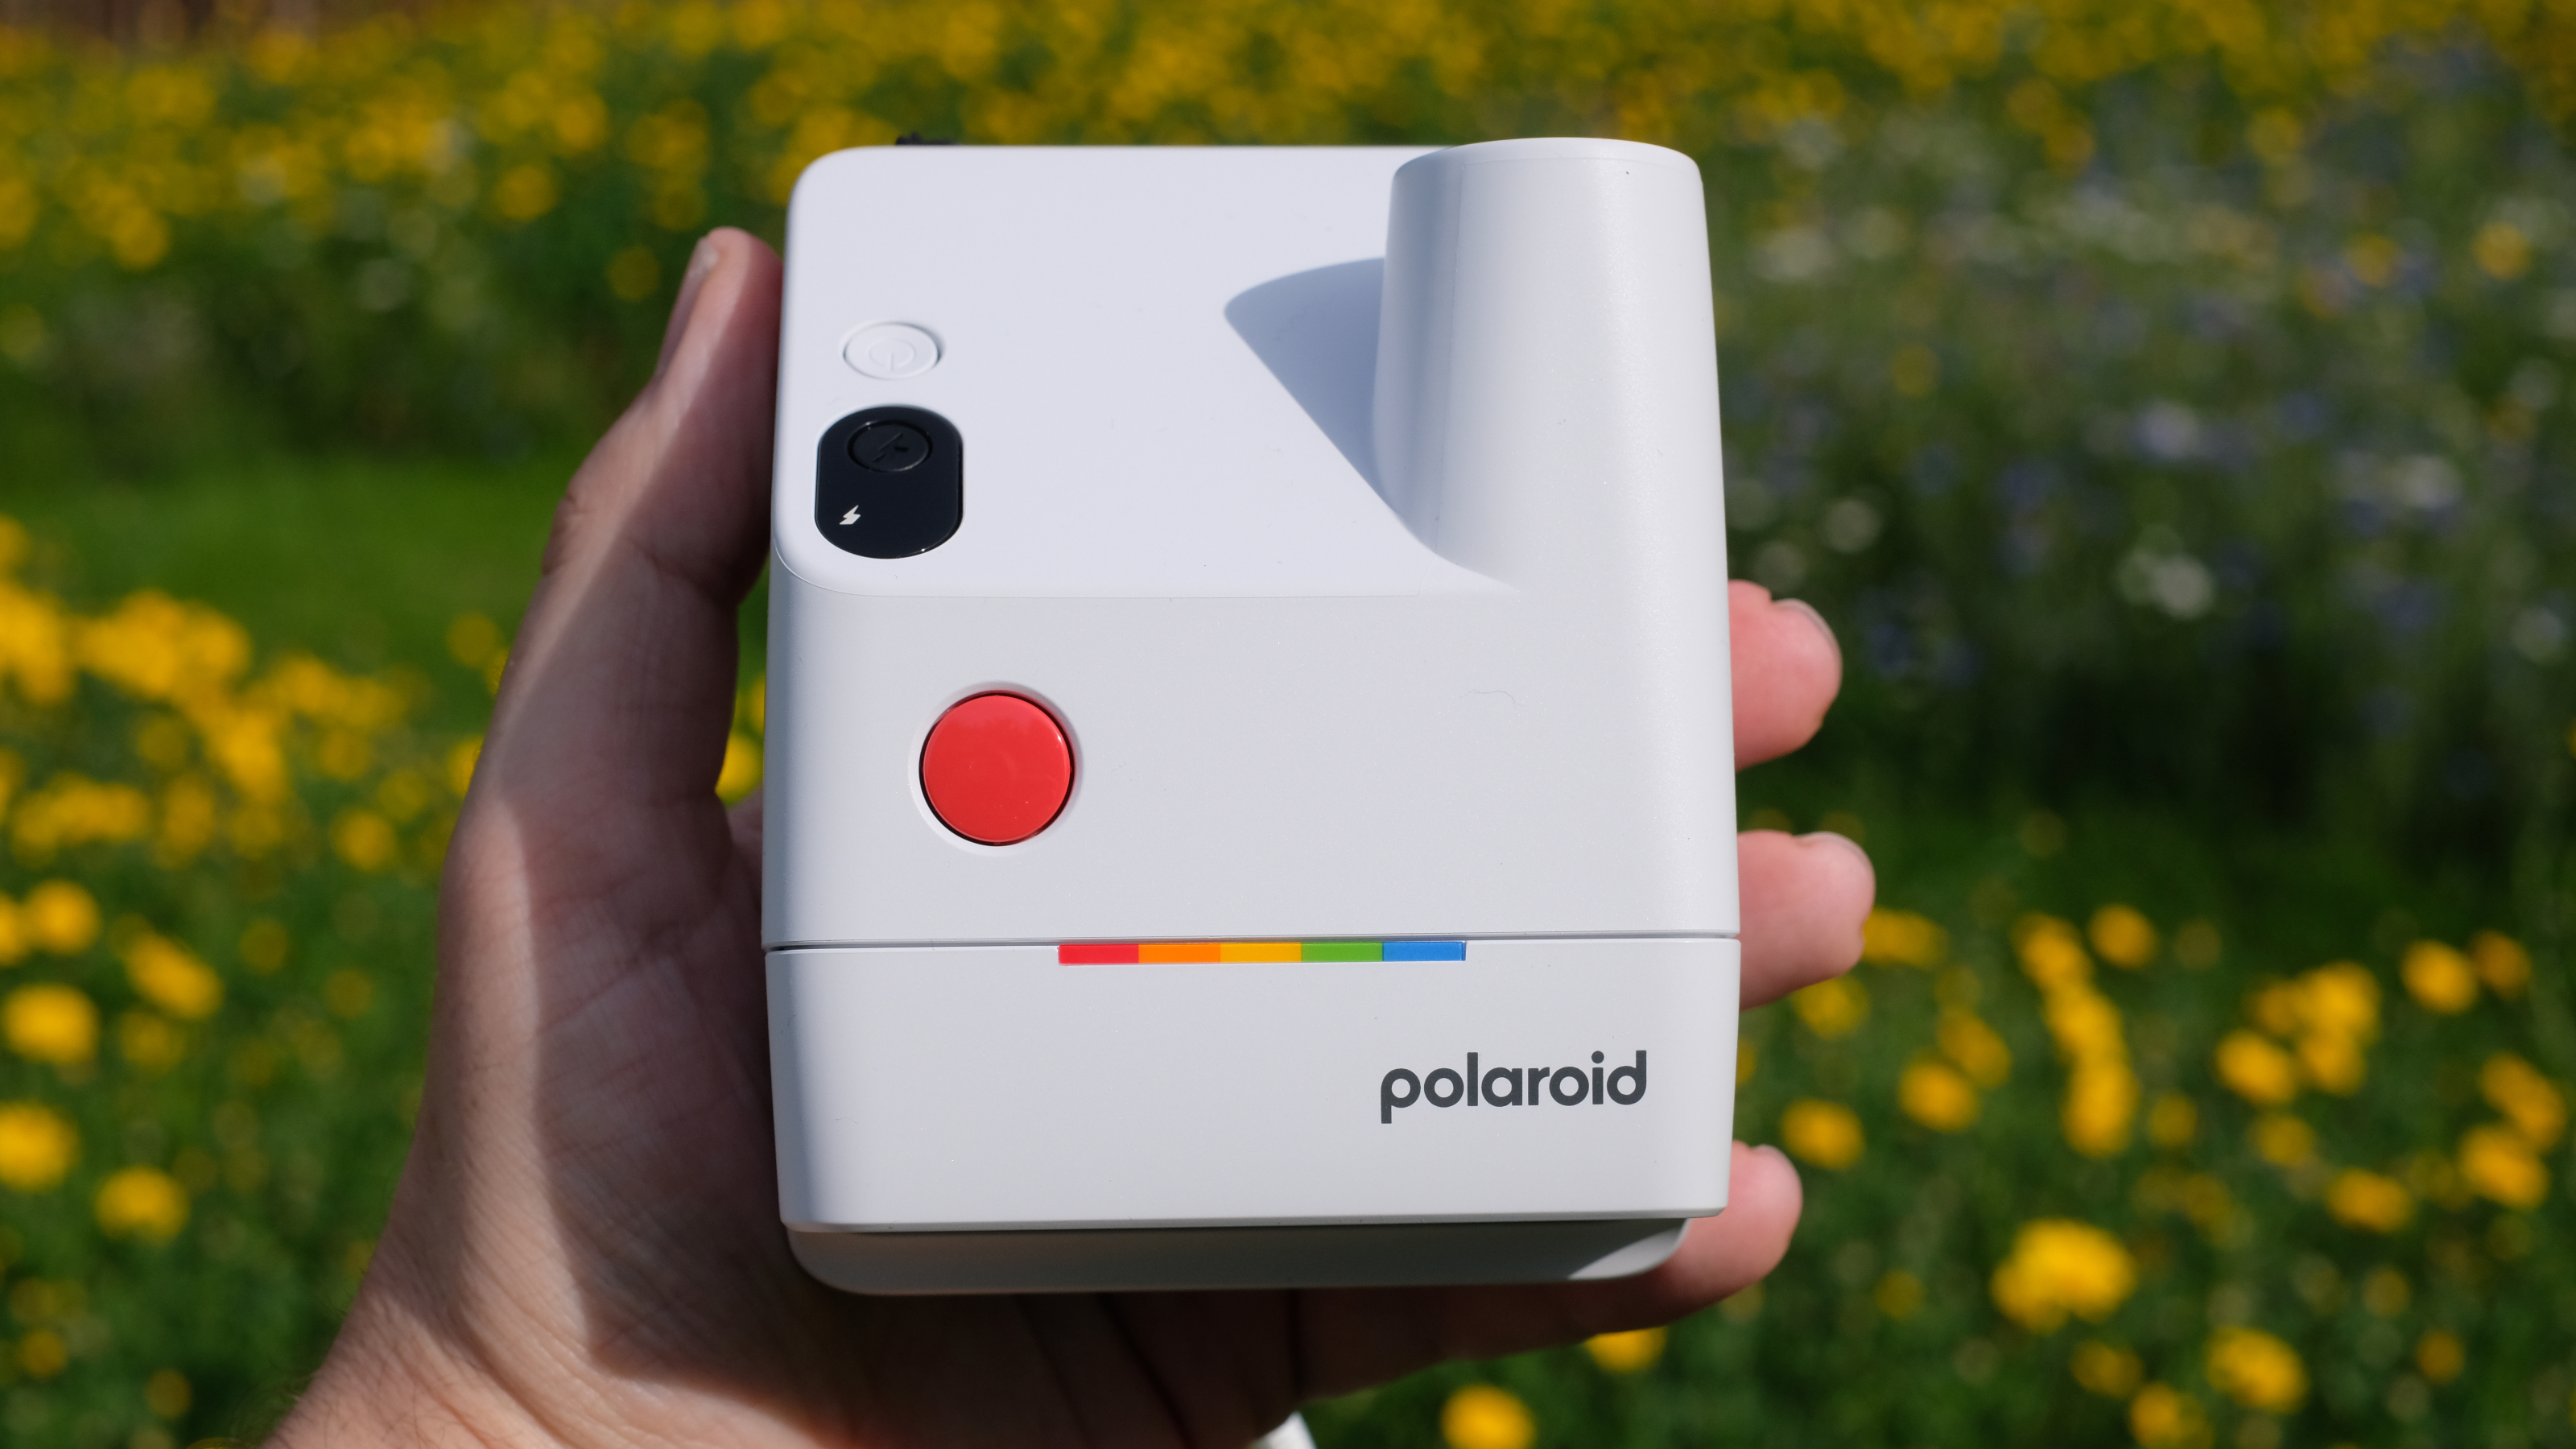
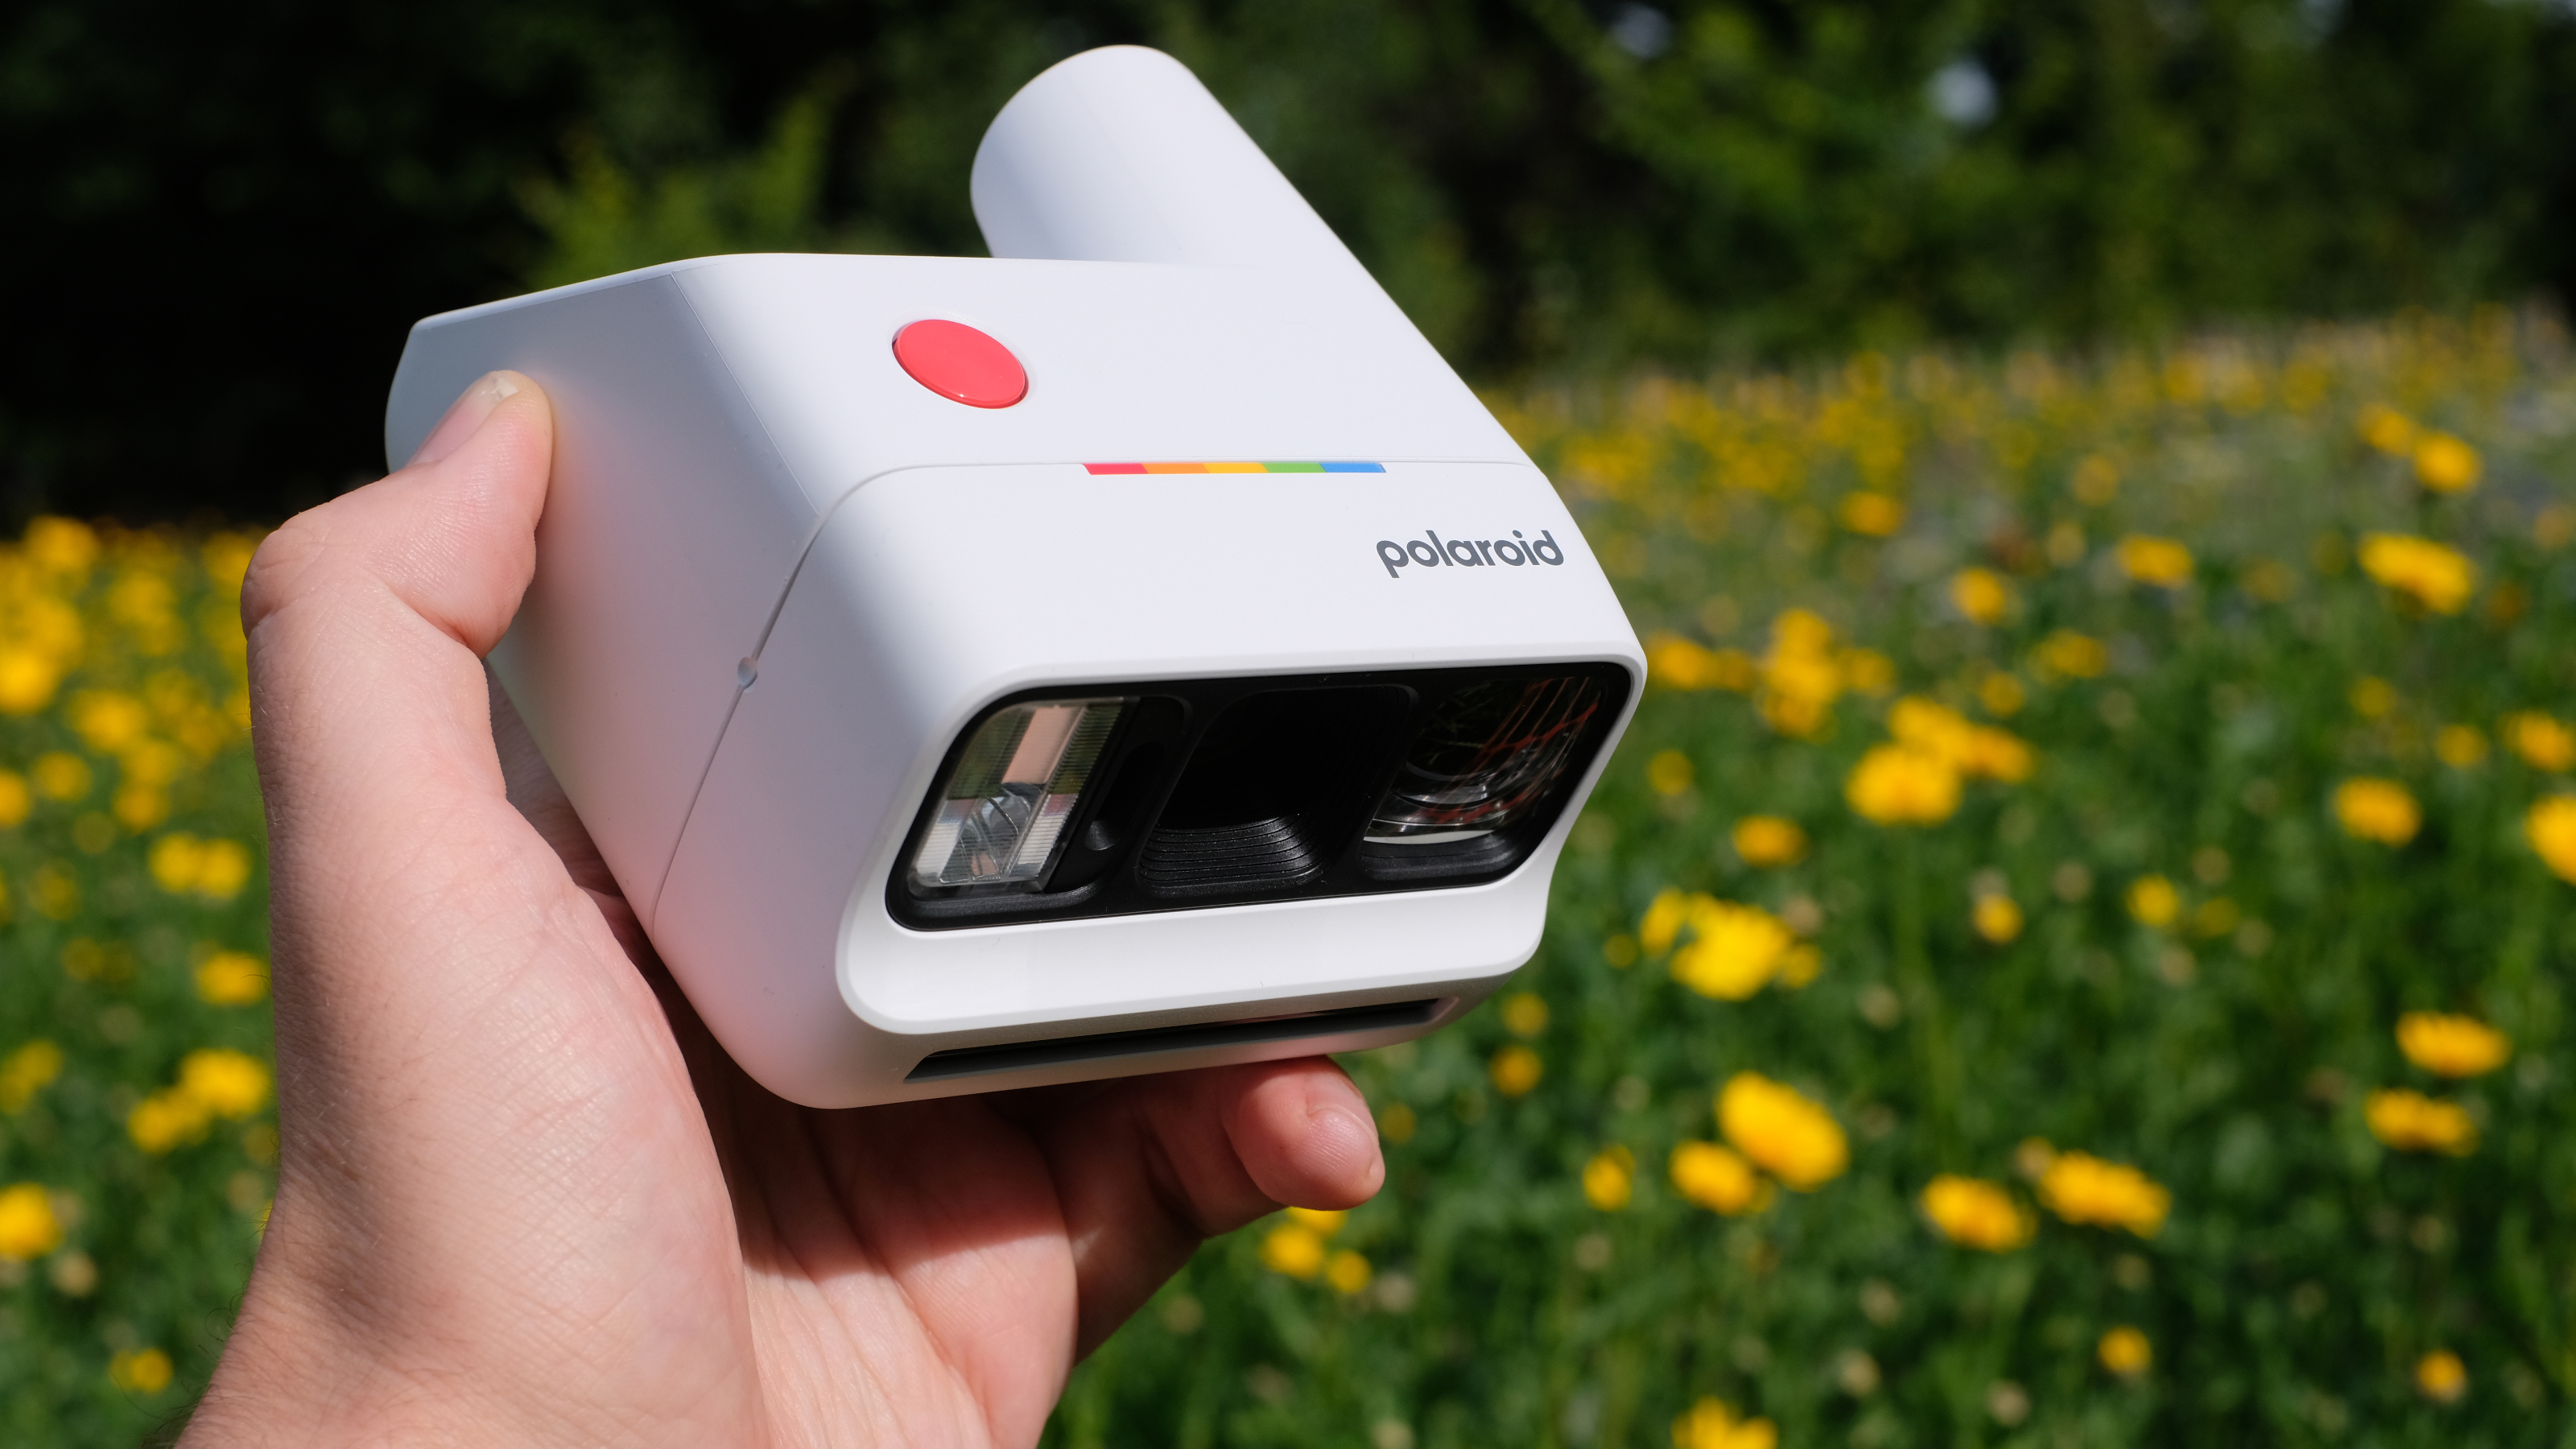
Polaroid Go cameras have always been cute — it’s practically their key USP — and the Go Gen 3 is the cutest yet. The makers call it the world’s smallest instant camera, and I certainly can’t think of a challenger. This thing is tiny, sitting comfortably in the palm of a hand. It measures 106.5 x 83.8 x 64.6 mm and weighs just 8.9oz / 251g.
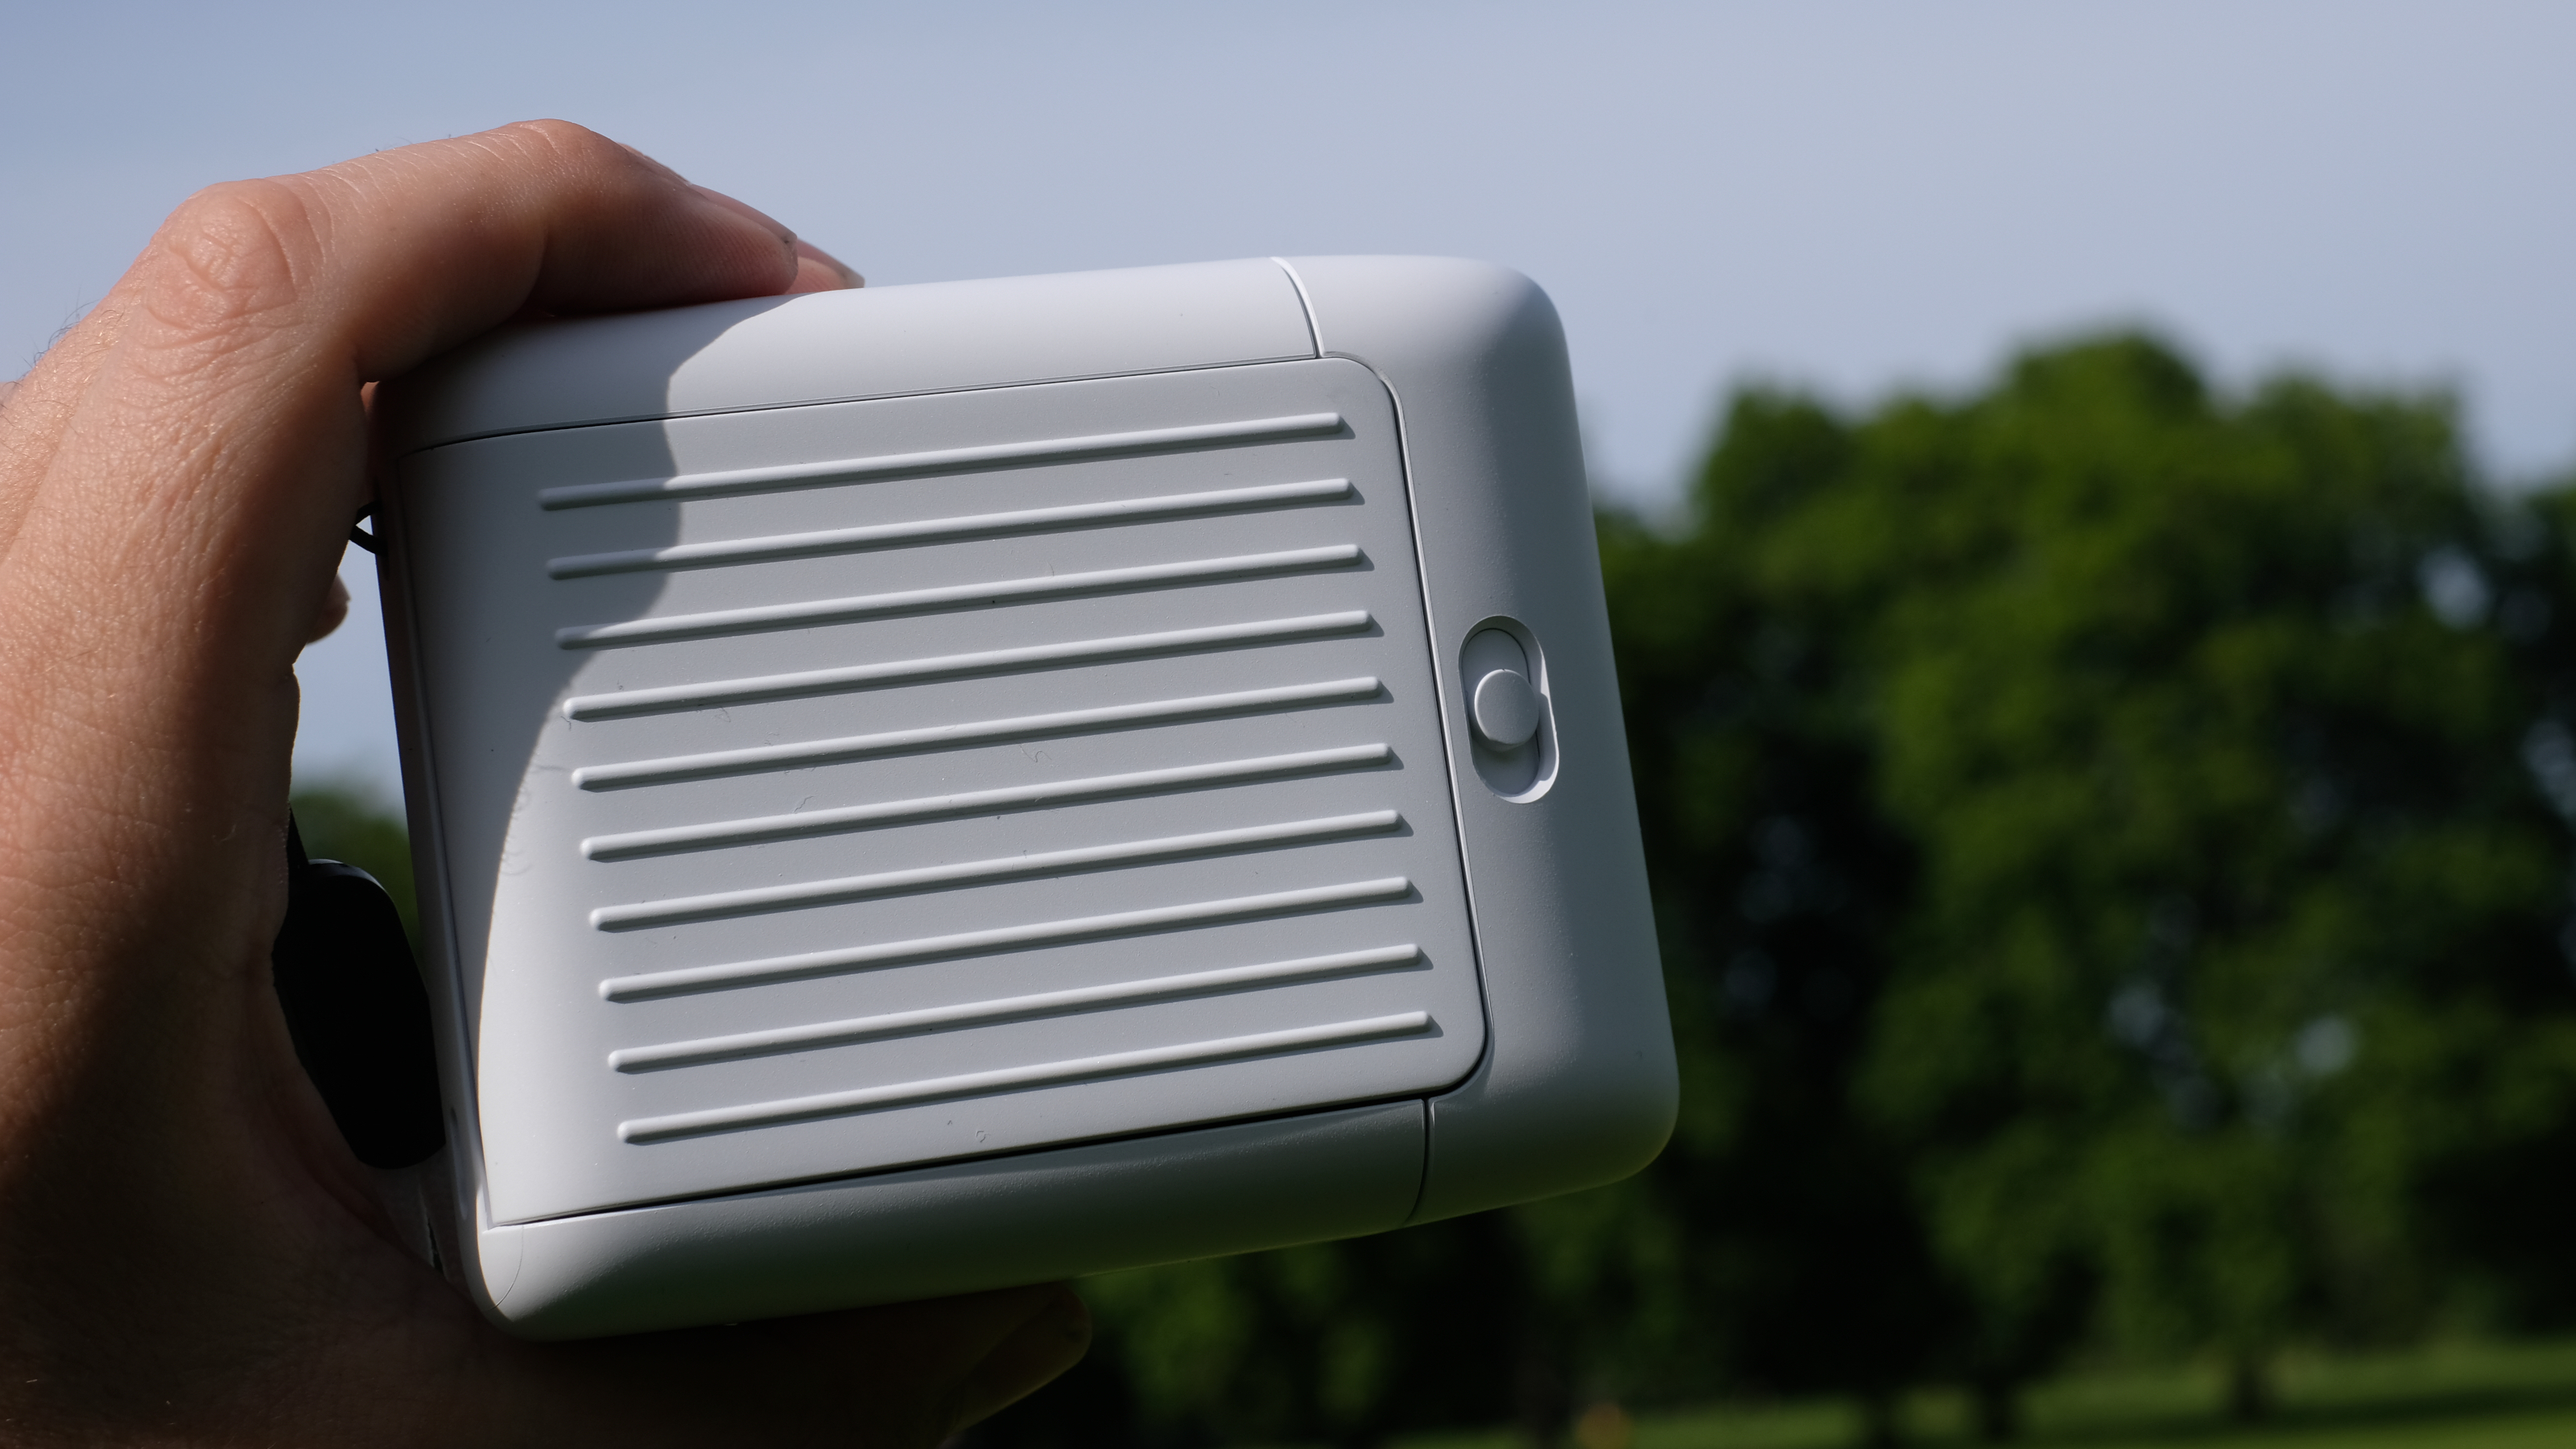
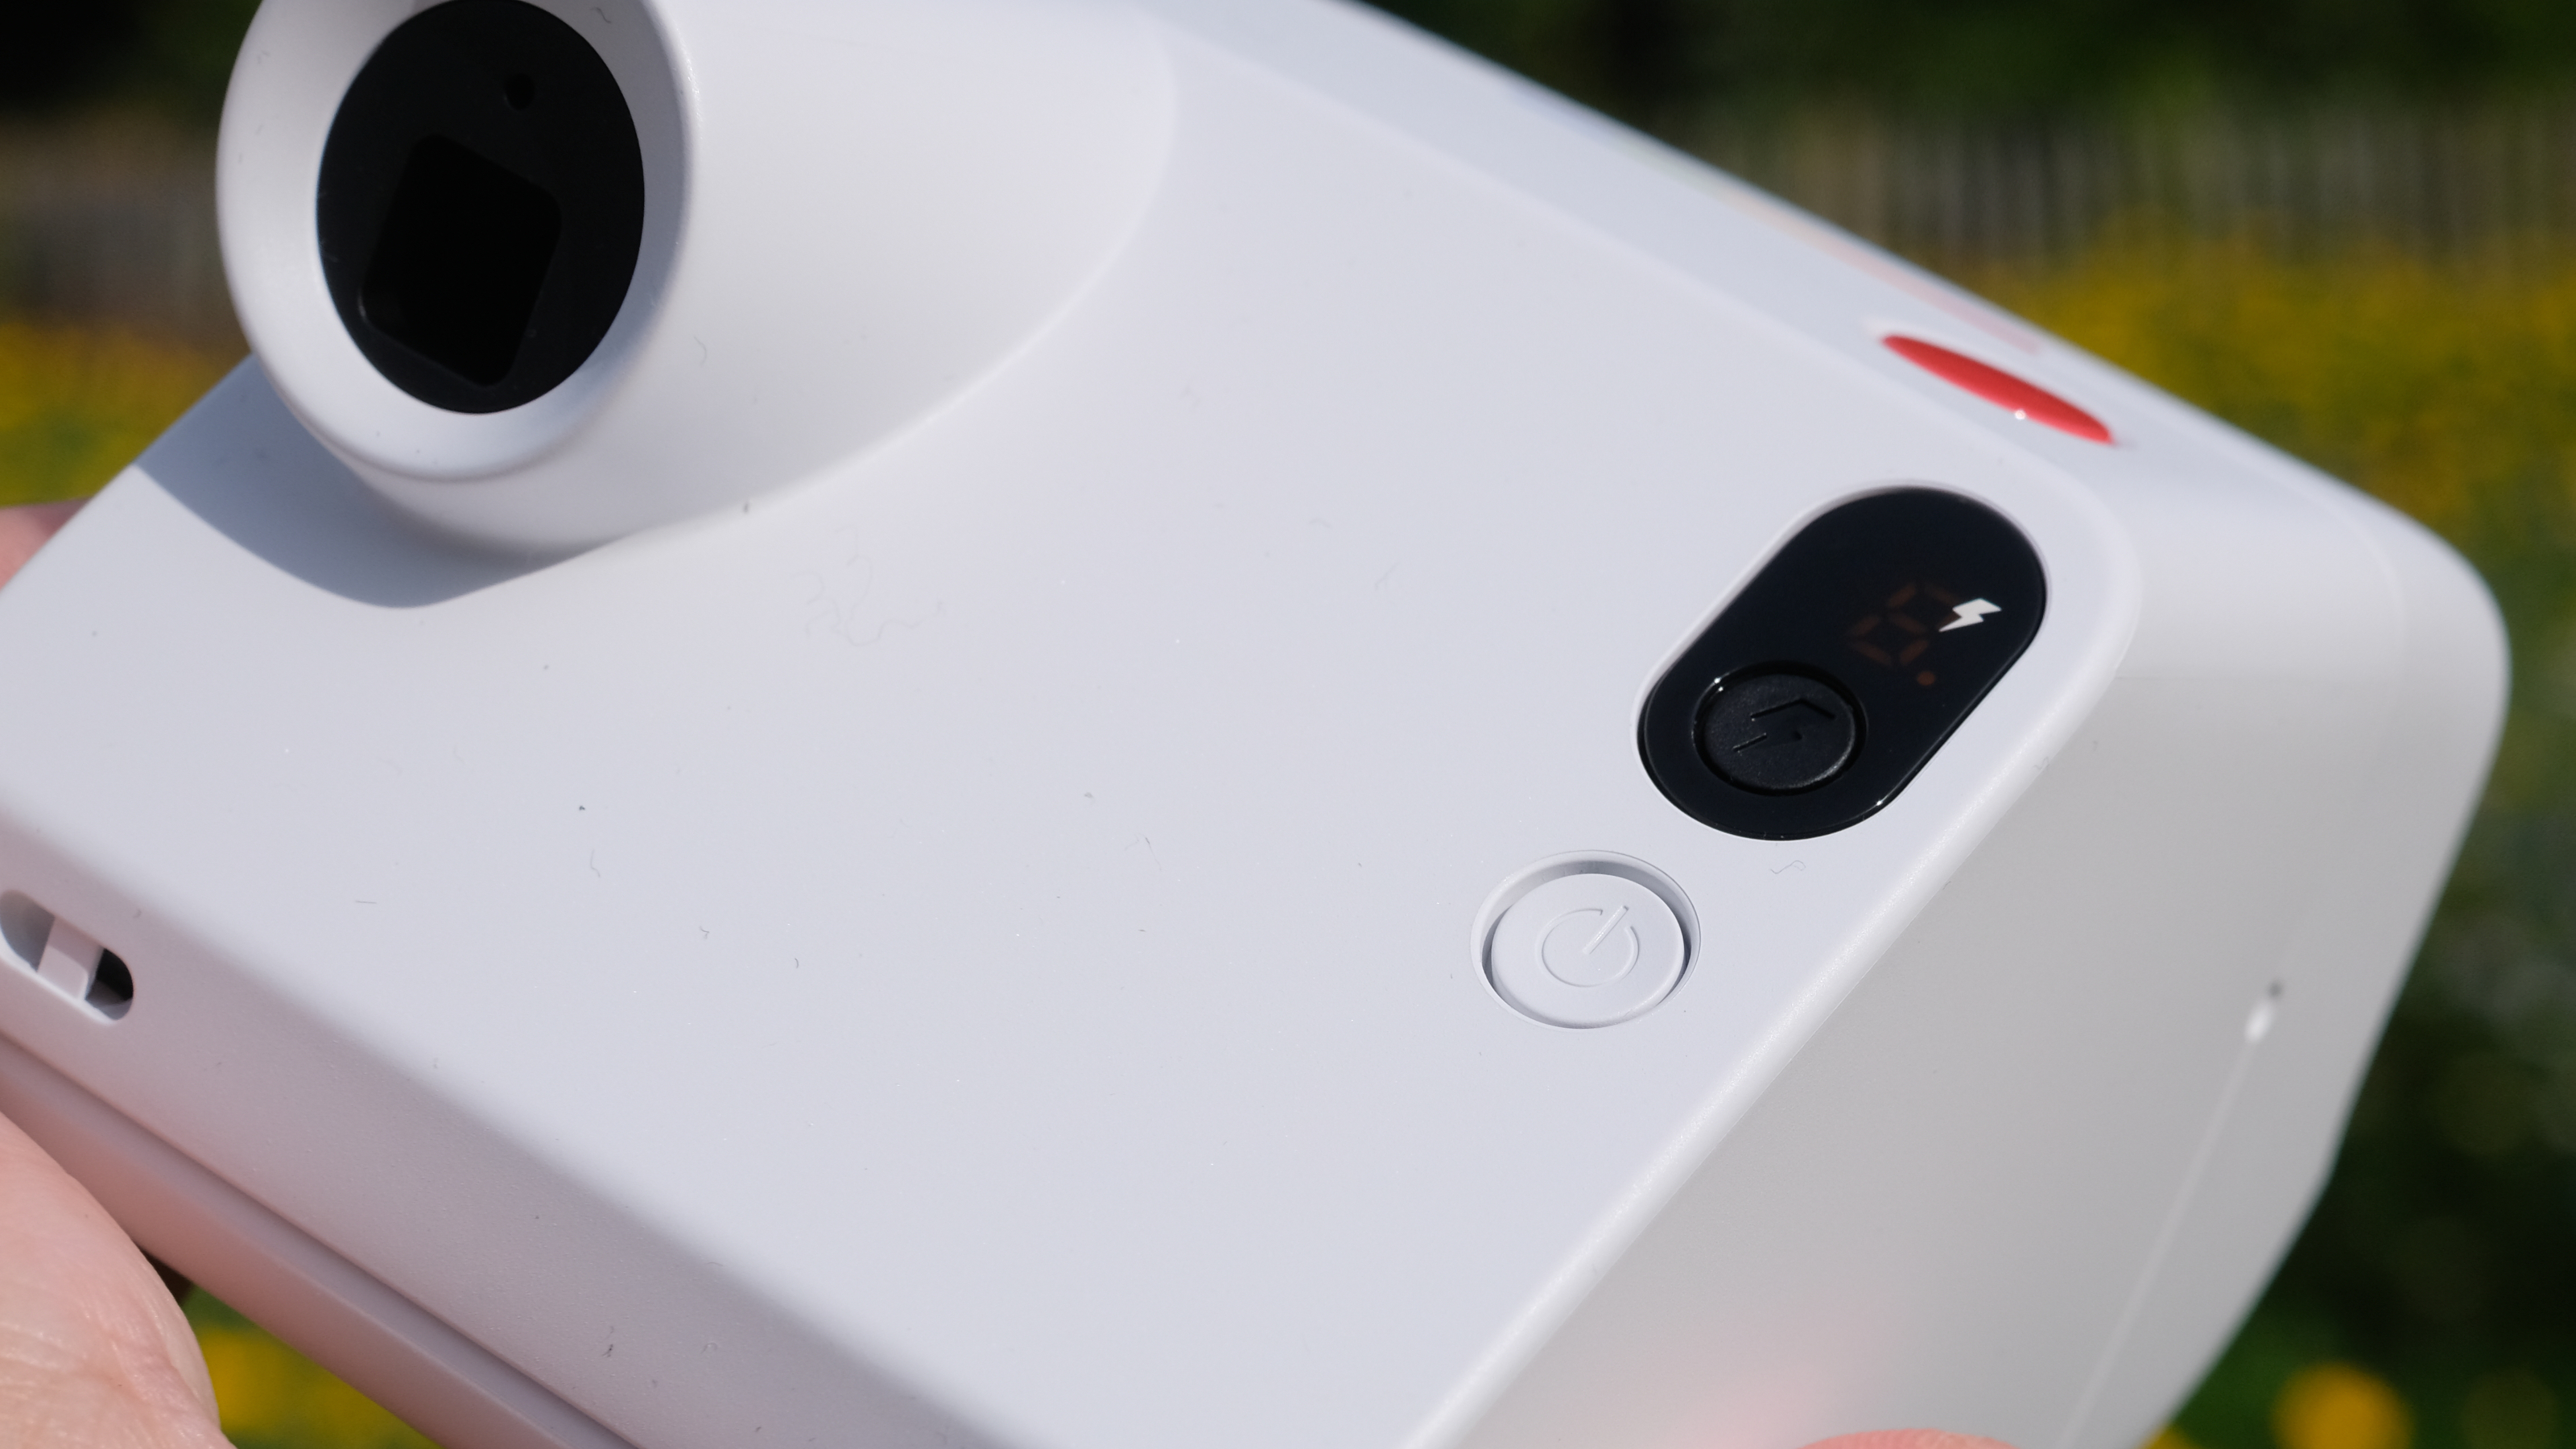
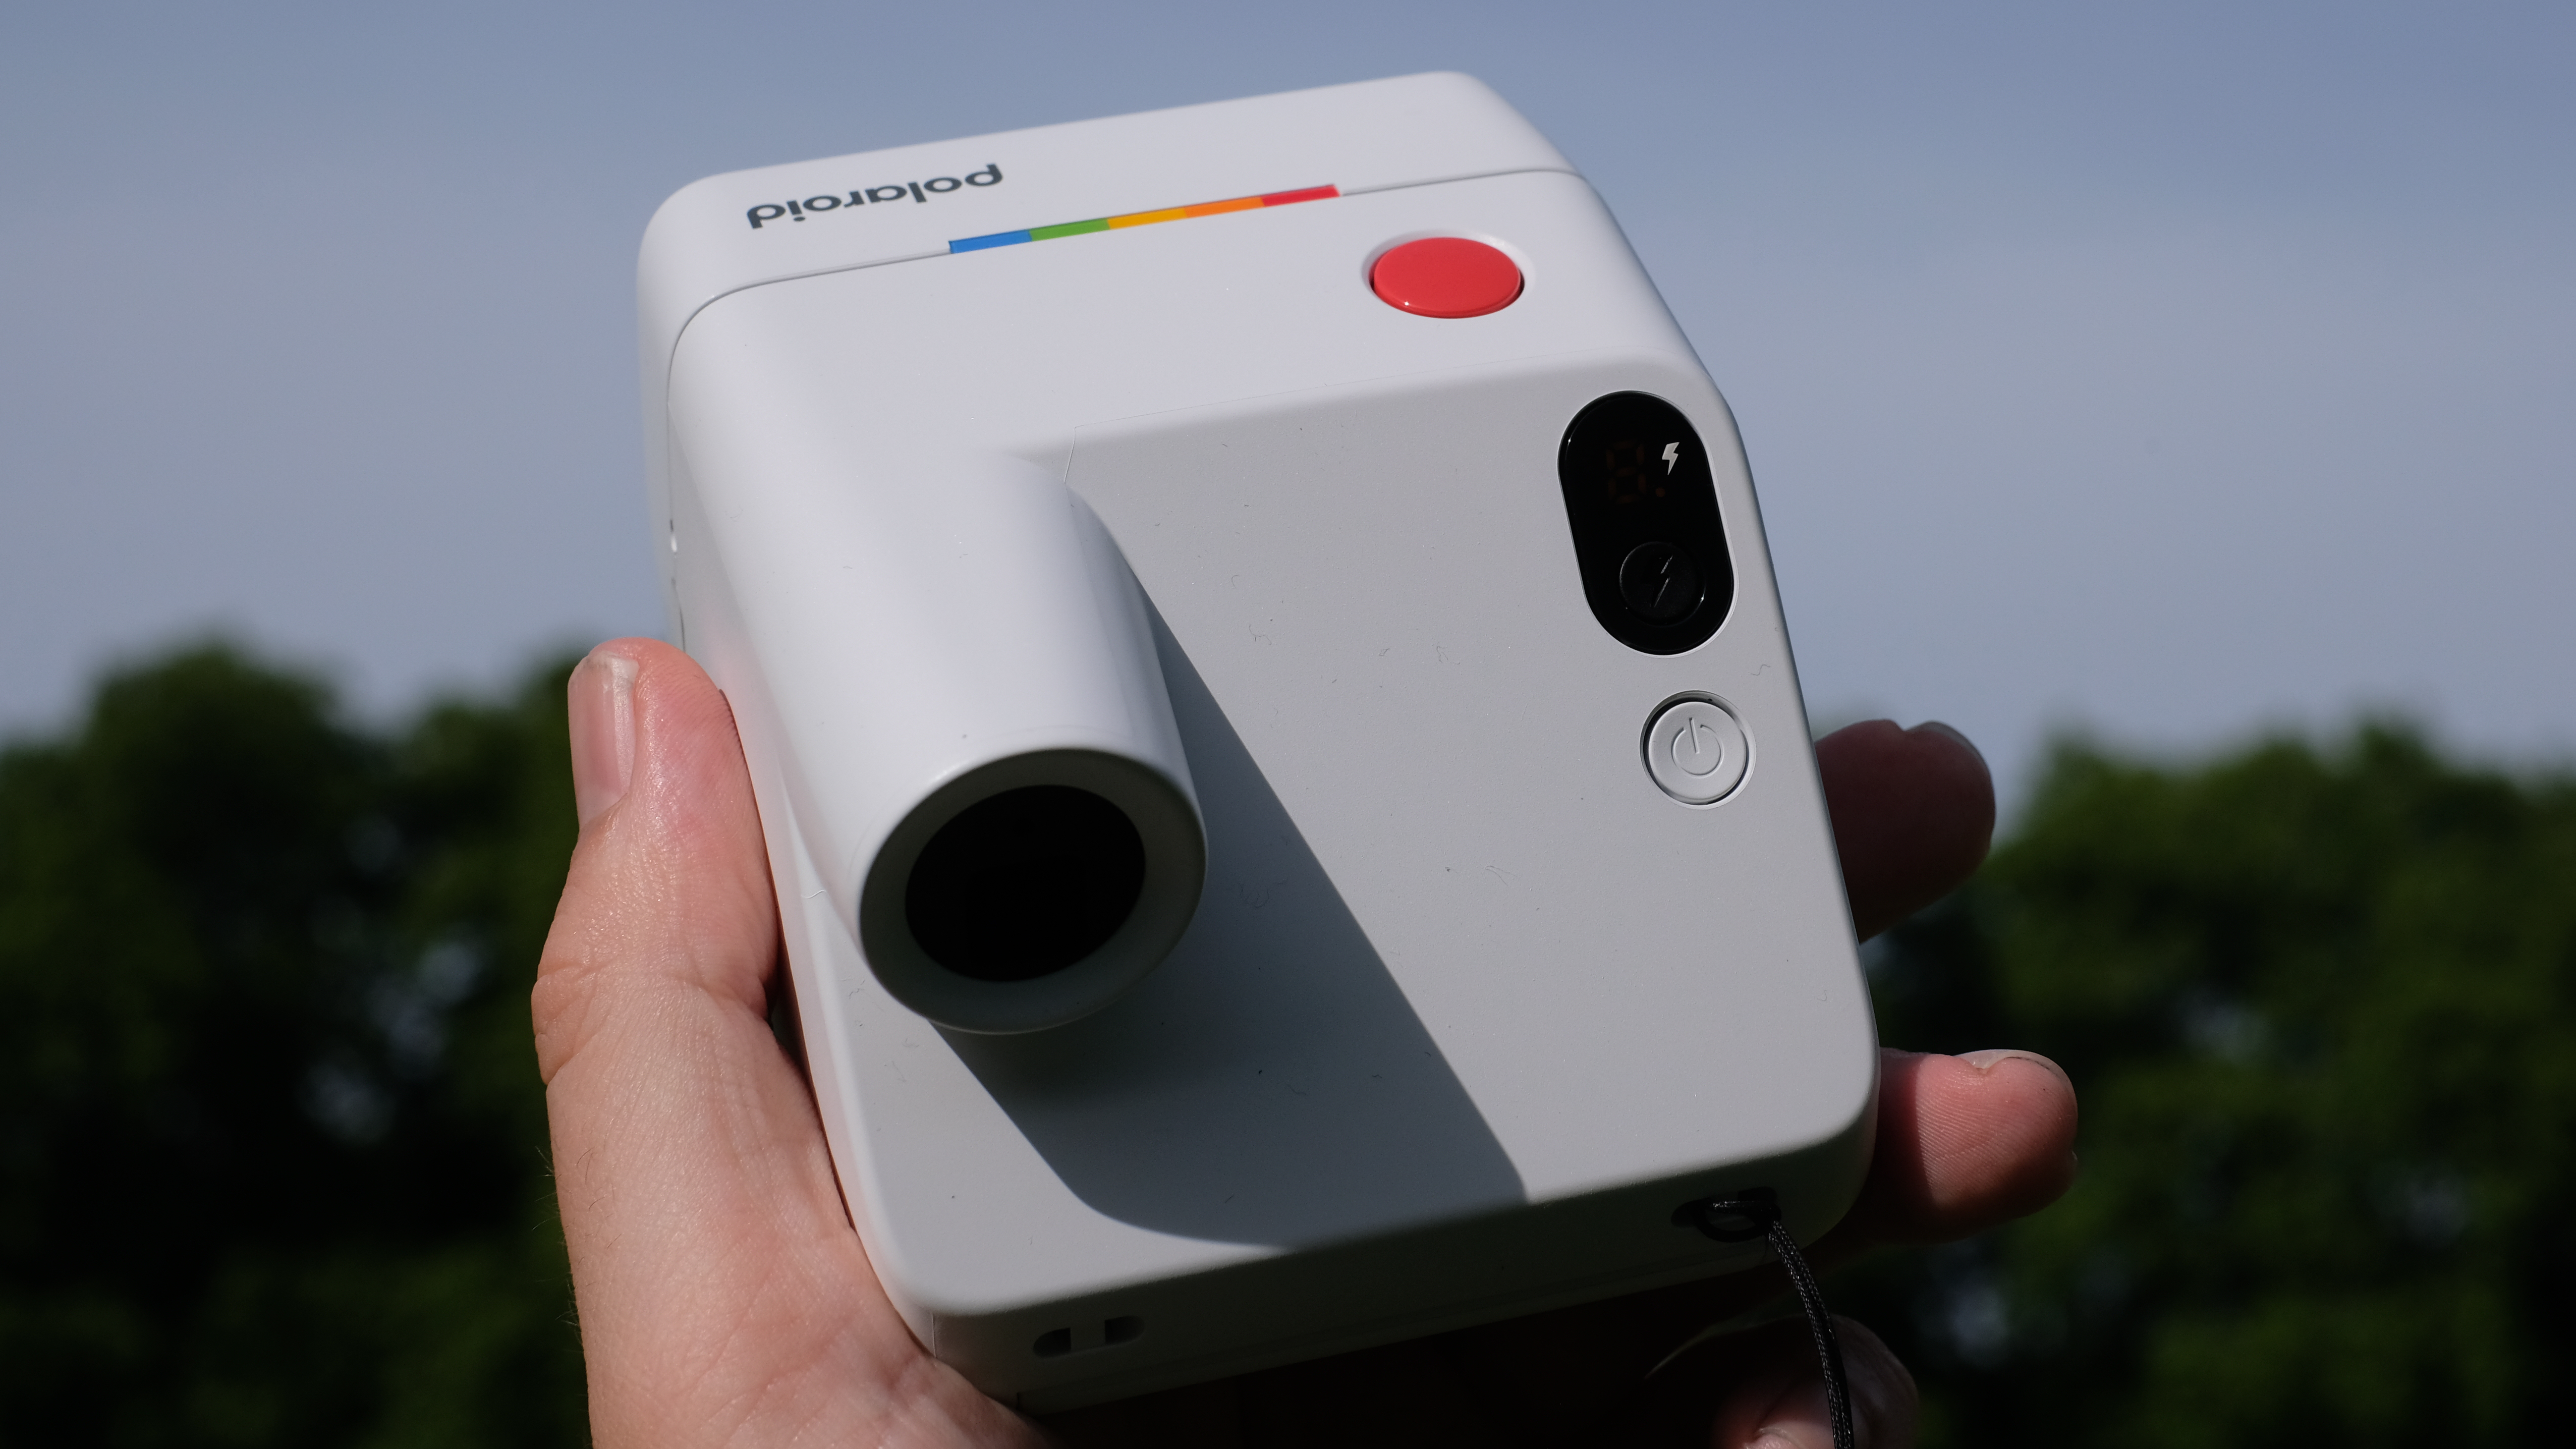
As such, there isn’t a whole lot of room for bells and whistles, and operation of the Polaroid Go Gen 3 is no-frills. There are just three buttons — power, shutter, and flash control, the latter of which also activates self-timer and double-exposure modes. The entire bottom of the camera is taken up by the film door, meaning there’s no tripod screw thread — best find a flat wall if you actually want to use that self-timer. There also isn’t any of the app-based camera-trigger functionality that you get with the likes of the Polaroid Flip, which also means you won’t be capturing long exposures or anything like that.
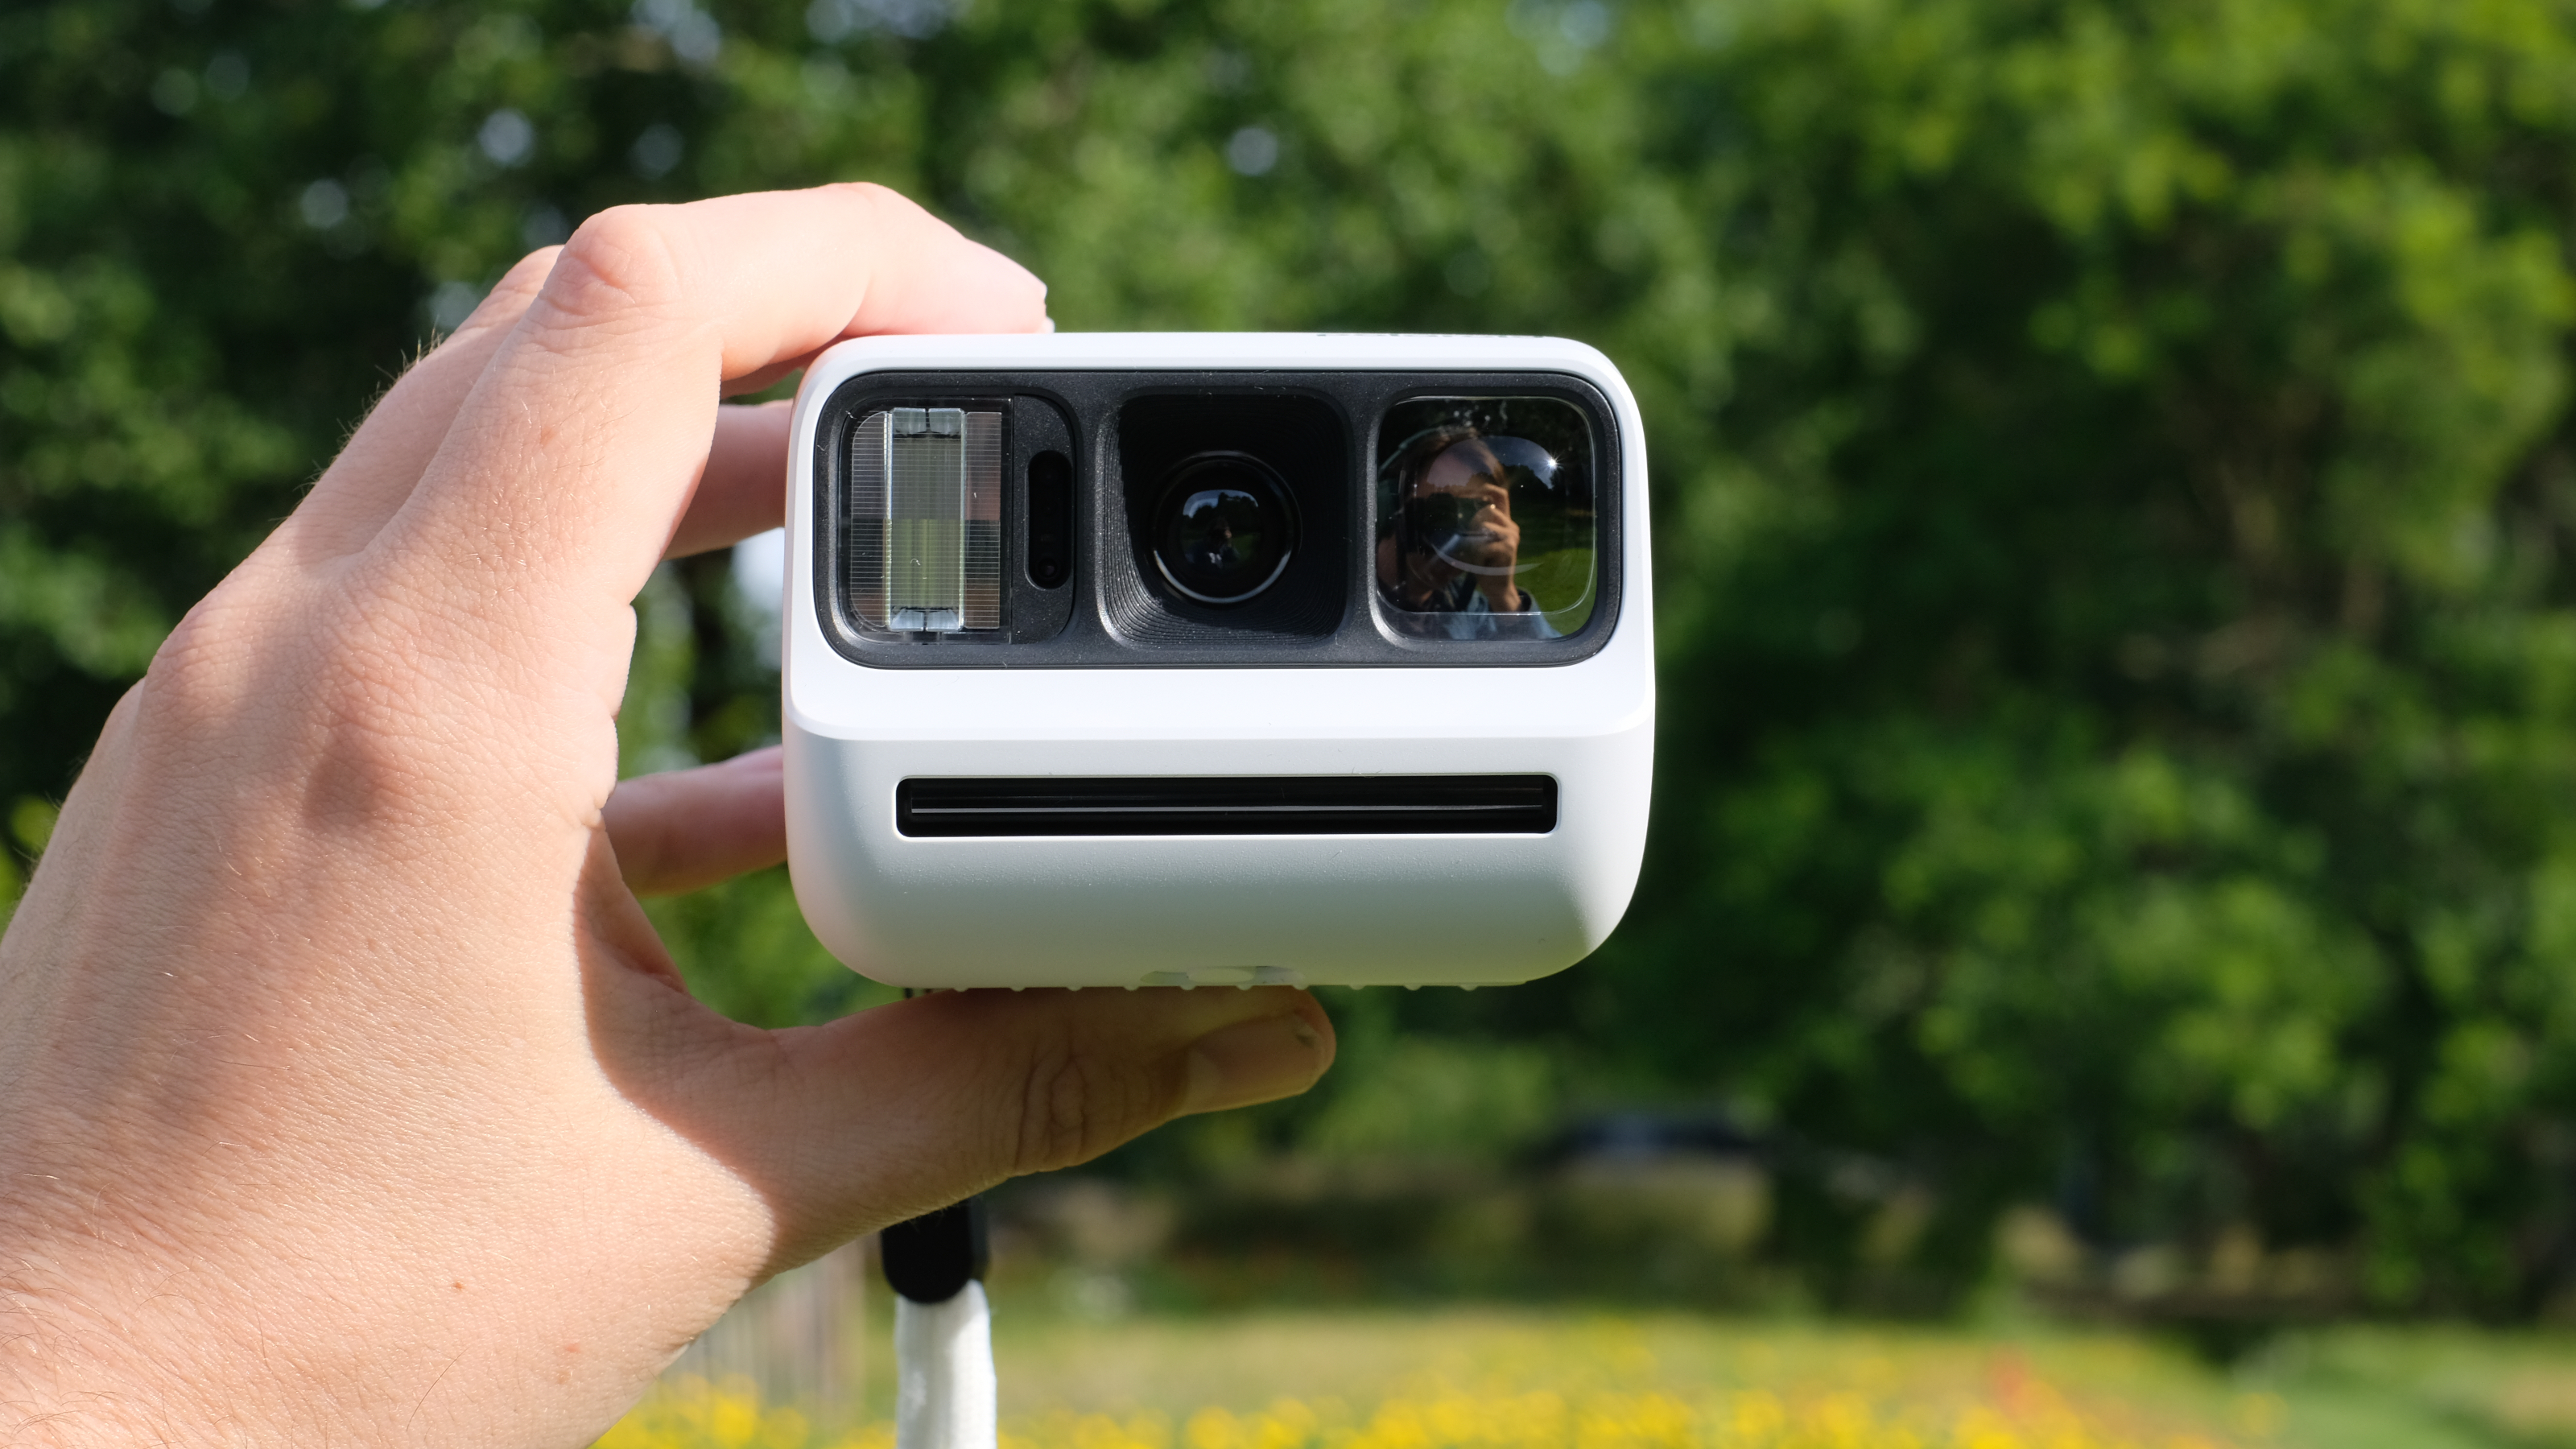
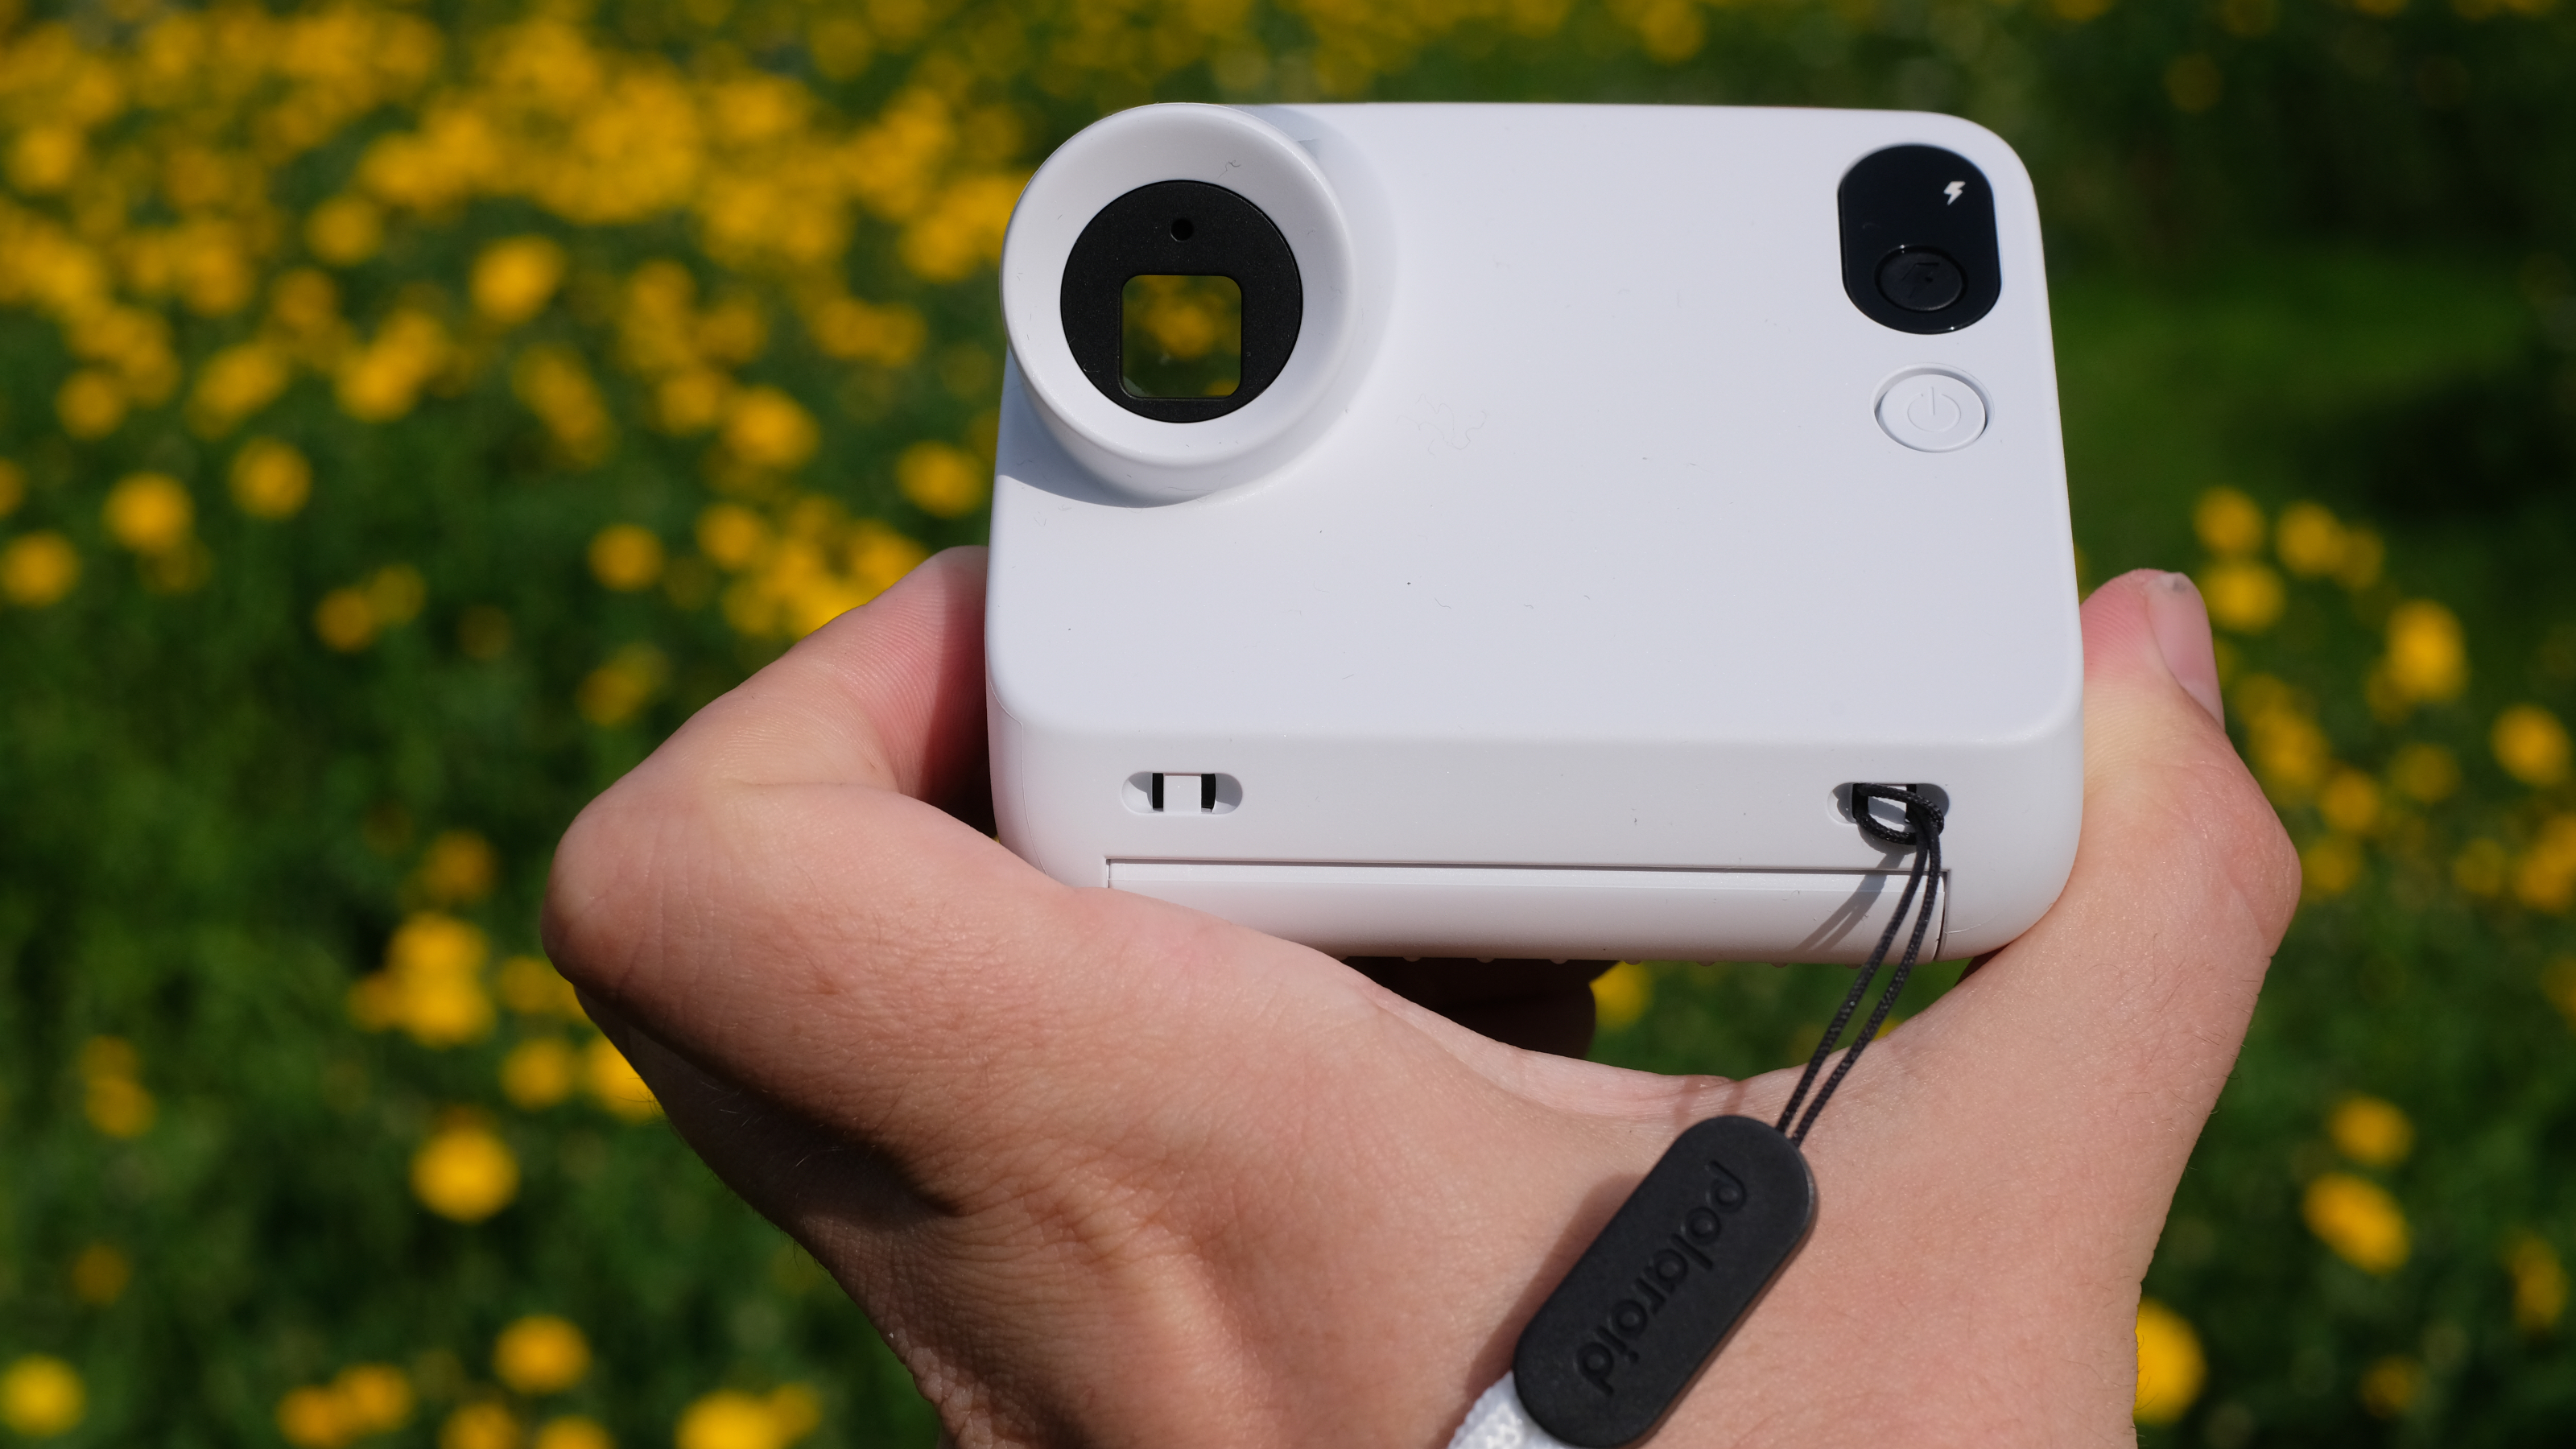
The viewfinder is small but lovely. I really enjoy looking through it; I just love that square frame. It really fires my imagination compositionally, and if I hadn’t been limited by how much film I had on hand, I would have been firing off shots left and right. Flip the camera around, and you’ll see that the front of the viewfinder is reflective. This is the selfie mirror, and I have to say, it works exactly as intended.

On the side, there’s a USB-C port for charging, and at the back are two lugs on the right and left for attaching straps, and a rope-style wrist strap is included in the box. And, well, that’s pretty much it! This is a very simple offering, something that works in its favor as a lo-fi camera for fun, friends and family. It’s a camera so simple a child could use it, something I tested by giving it to a three-year-old, who — with a little coaching — did indeed manage to capture a photo. If you’re looking for a camera with kid-appeal, I can attest that the Go Gen 3 has it in abundance.
It’s available in five stylish colorways: white, black, teal blue, ice blue and purple. As you can see, I had the white version, and as I took it out and about, it did draw a few comments and compliments from passers-by. This is a nice-looking camera.
Polaroid Go Gen 3: Performance
- Lovely detail and tonality in prints, even with small size
- But ultra-bright sun can easily overwhelm images
- Flash is always on, so you need to remember to turn it off every time if you don’t want it
When a Polaroid works, there’s nothing like it. Even in the smaller Go size, I’m really impressed by the level of detail and tonality you can get out of this thing. For me, it beats Instax any day of the week. In good light, with a well-chosen subject, you can make images that absolutely sing, and I genuinely adore some of the shots I’ve captured with this camera.

One thing that really impressed me was the selfie-taking capability. The Polaroid Go Gen 3’s reworked lens and powerful flash are designed to facilitate just that, and using the mirror as a compositional aid, I was able to capture selfie images that were vivid, detailed and true-to-life, the flash comfortably illuminating the scene without blowing it out.

Out in the big wide world, of course, you can and will run into issues. While I was testing the Gen Go 3, we were blessed with several days of glorious sunshine, and in very bright conditions — you know, the exact kind of conditions where you might find yourself saying something like, ‘Darling, it’s lovely out, shall we bring the Polaroid?’ — it’s easy for those little frames to just be overwhelmed.

More than a few of my images were quite significantly bleached by very bright sunlight, even when I remembered to turn the flash off — and you have to do this manually every single time, because the camera will always turn it back on. Even, as I discovered, halfway through a double exposure.

I’m generally a bit wary of double-exposure modes on instant cameras; I feel like most of the time, I’m likely to end up wasting a frame on a blurry, muddled mess. However, the lower cost of the Go film made me much more willing to give it a try than I ever am with my Polaroid Flip, and I ended up with a decent image — though I think it would have been better without that unexpected blast of flash halfway through.


Ultimately, as with any Polaroid camera or indeed any instant camera, the Polaroid Go Gen 3 is solid knockabout fun. You’ll get some images you like, and some that feel like a bit of a waste of film. That’s just the game, and it’s a much easier game to enjoy when the film is more reasonably priced than full-size I-Type.
Polaroid Go Gen 3: Should you buy?
Buy it if...
You want an instant camera to take travelling
With its tiny dimensions and relatively cheap film, the Go Gen 3 is a great option for trips.
You want simple, point-and-shoot operation
The Polaroid Go has minimal controls and is very straightforward to operate.
You want an all-analog experience
No screens, no apps — at the core, the Polaroid Go is just chemicals and light.
Don't buy it if...
You want a high level of image quality.
While I like the look of the little prints, there are limits to what they can manage. Bright sunlight in particular posed a problem.
You don’t want ongoing costs
While Polaroid Go film is cheaper than I-Type, it still represents an ongoing cost that you won’t get with, say, a digital Camp Snap.
How I tested the Polaroid Go Gen 3
- I received a sample camera from the manufacturers, along with some Go film
- I took the camera on several photo excursions, mostly shooting outdoors
- I shot with and without flash, and tested the double-exposure mode
I’ve had the Polaroid Go Gen 3 with me for the past couple of weeks, and I’ve taken it on excursions around London, as well as on a trip to Bradford-upon-Avon. During that time I’ve gone through a double pack of Polaroid Go film, and have tested out the camera in different scenarios and lighting conditions, with a particular focus on seeing how it renders different colors.
I have shot outdoors and indoors, both with and without the flash. I also gave the double-exposure mode a whirl, using it to create a composite image of my own face from different angles. I shot selfies with flash using the selfie mirror as a compositional aid.
First reviewed June 2026
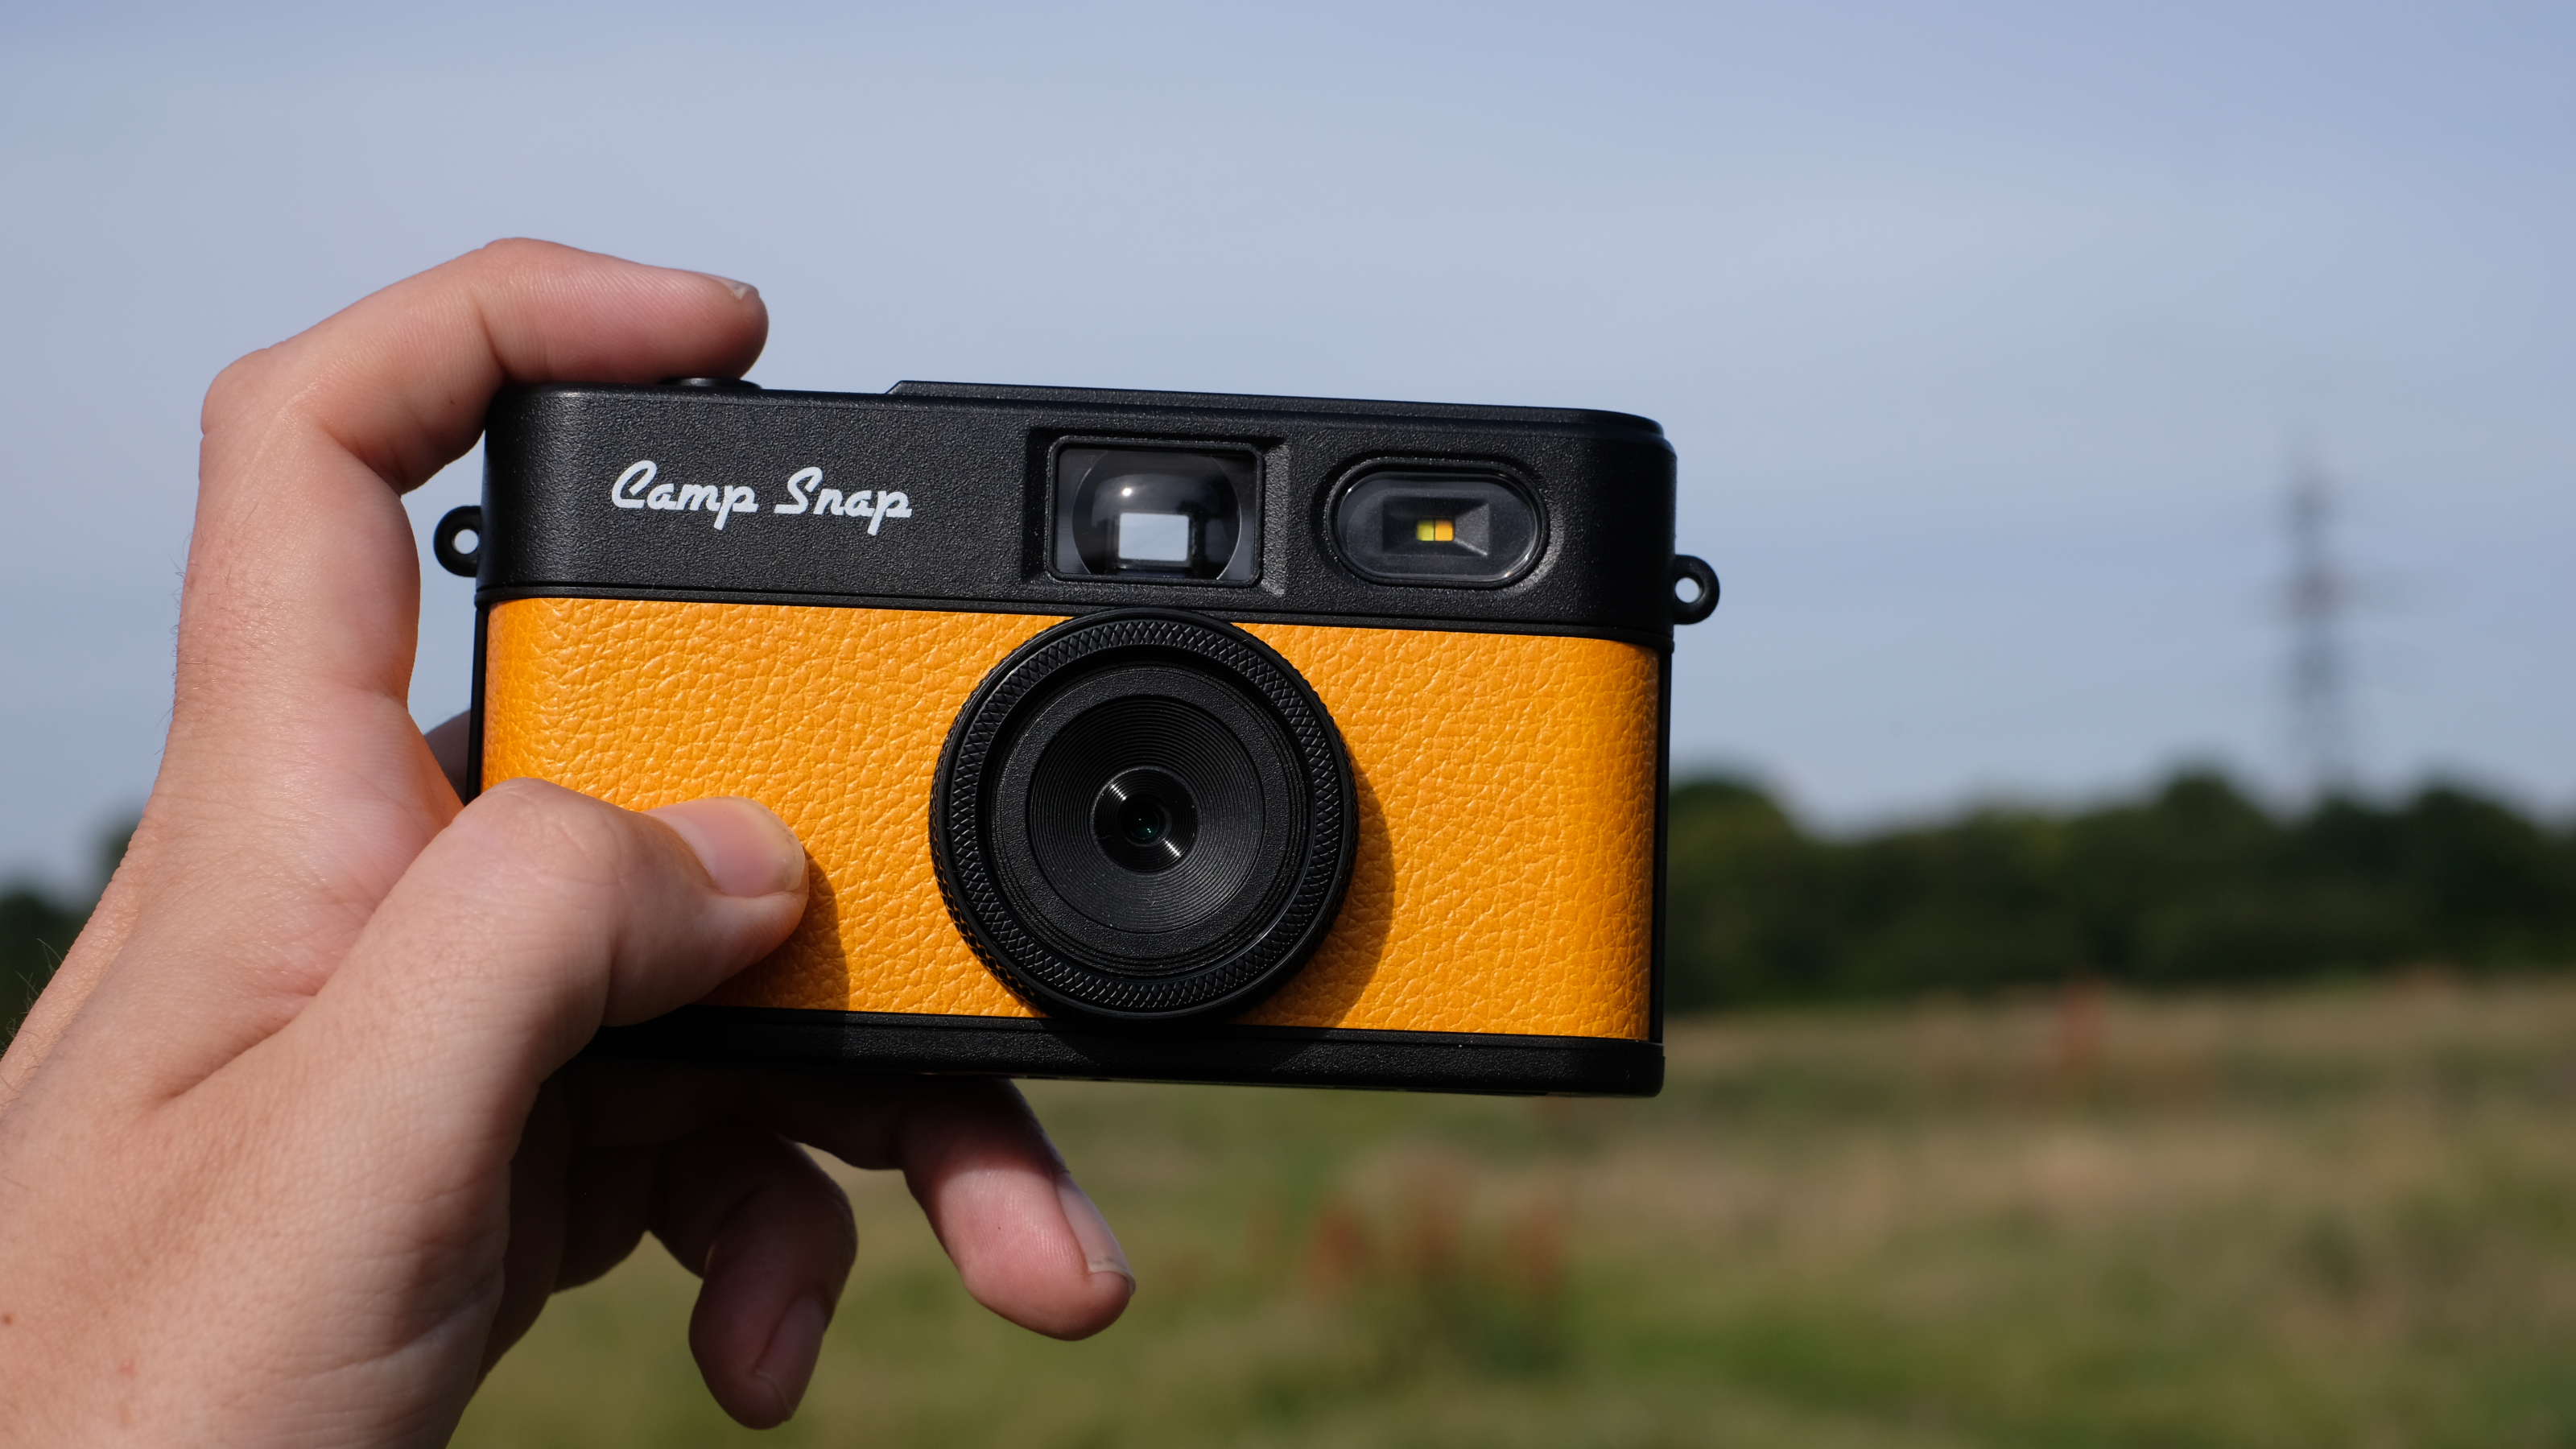
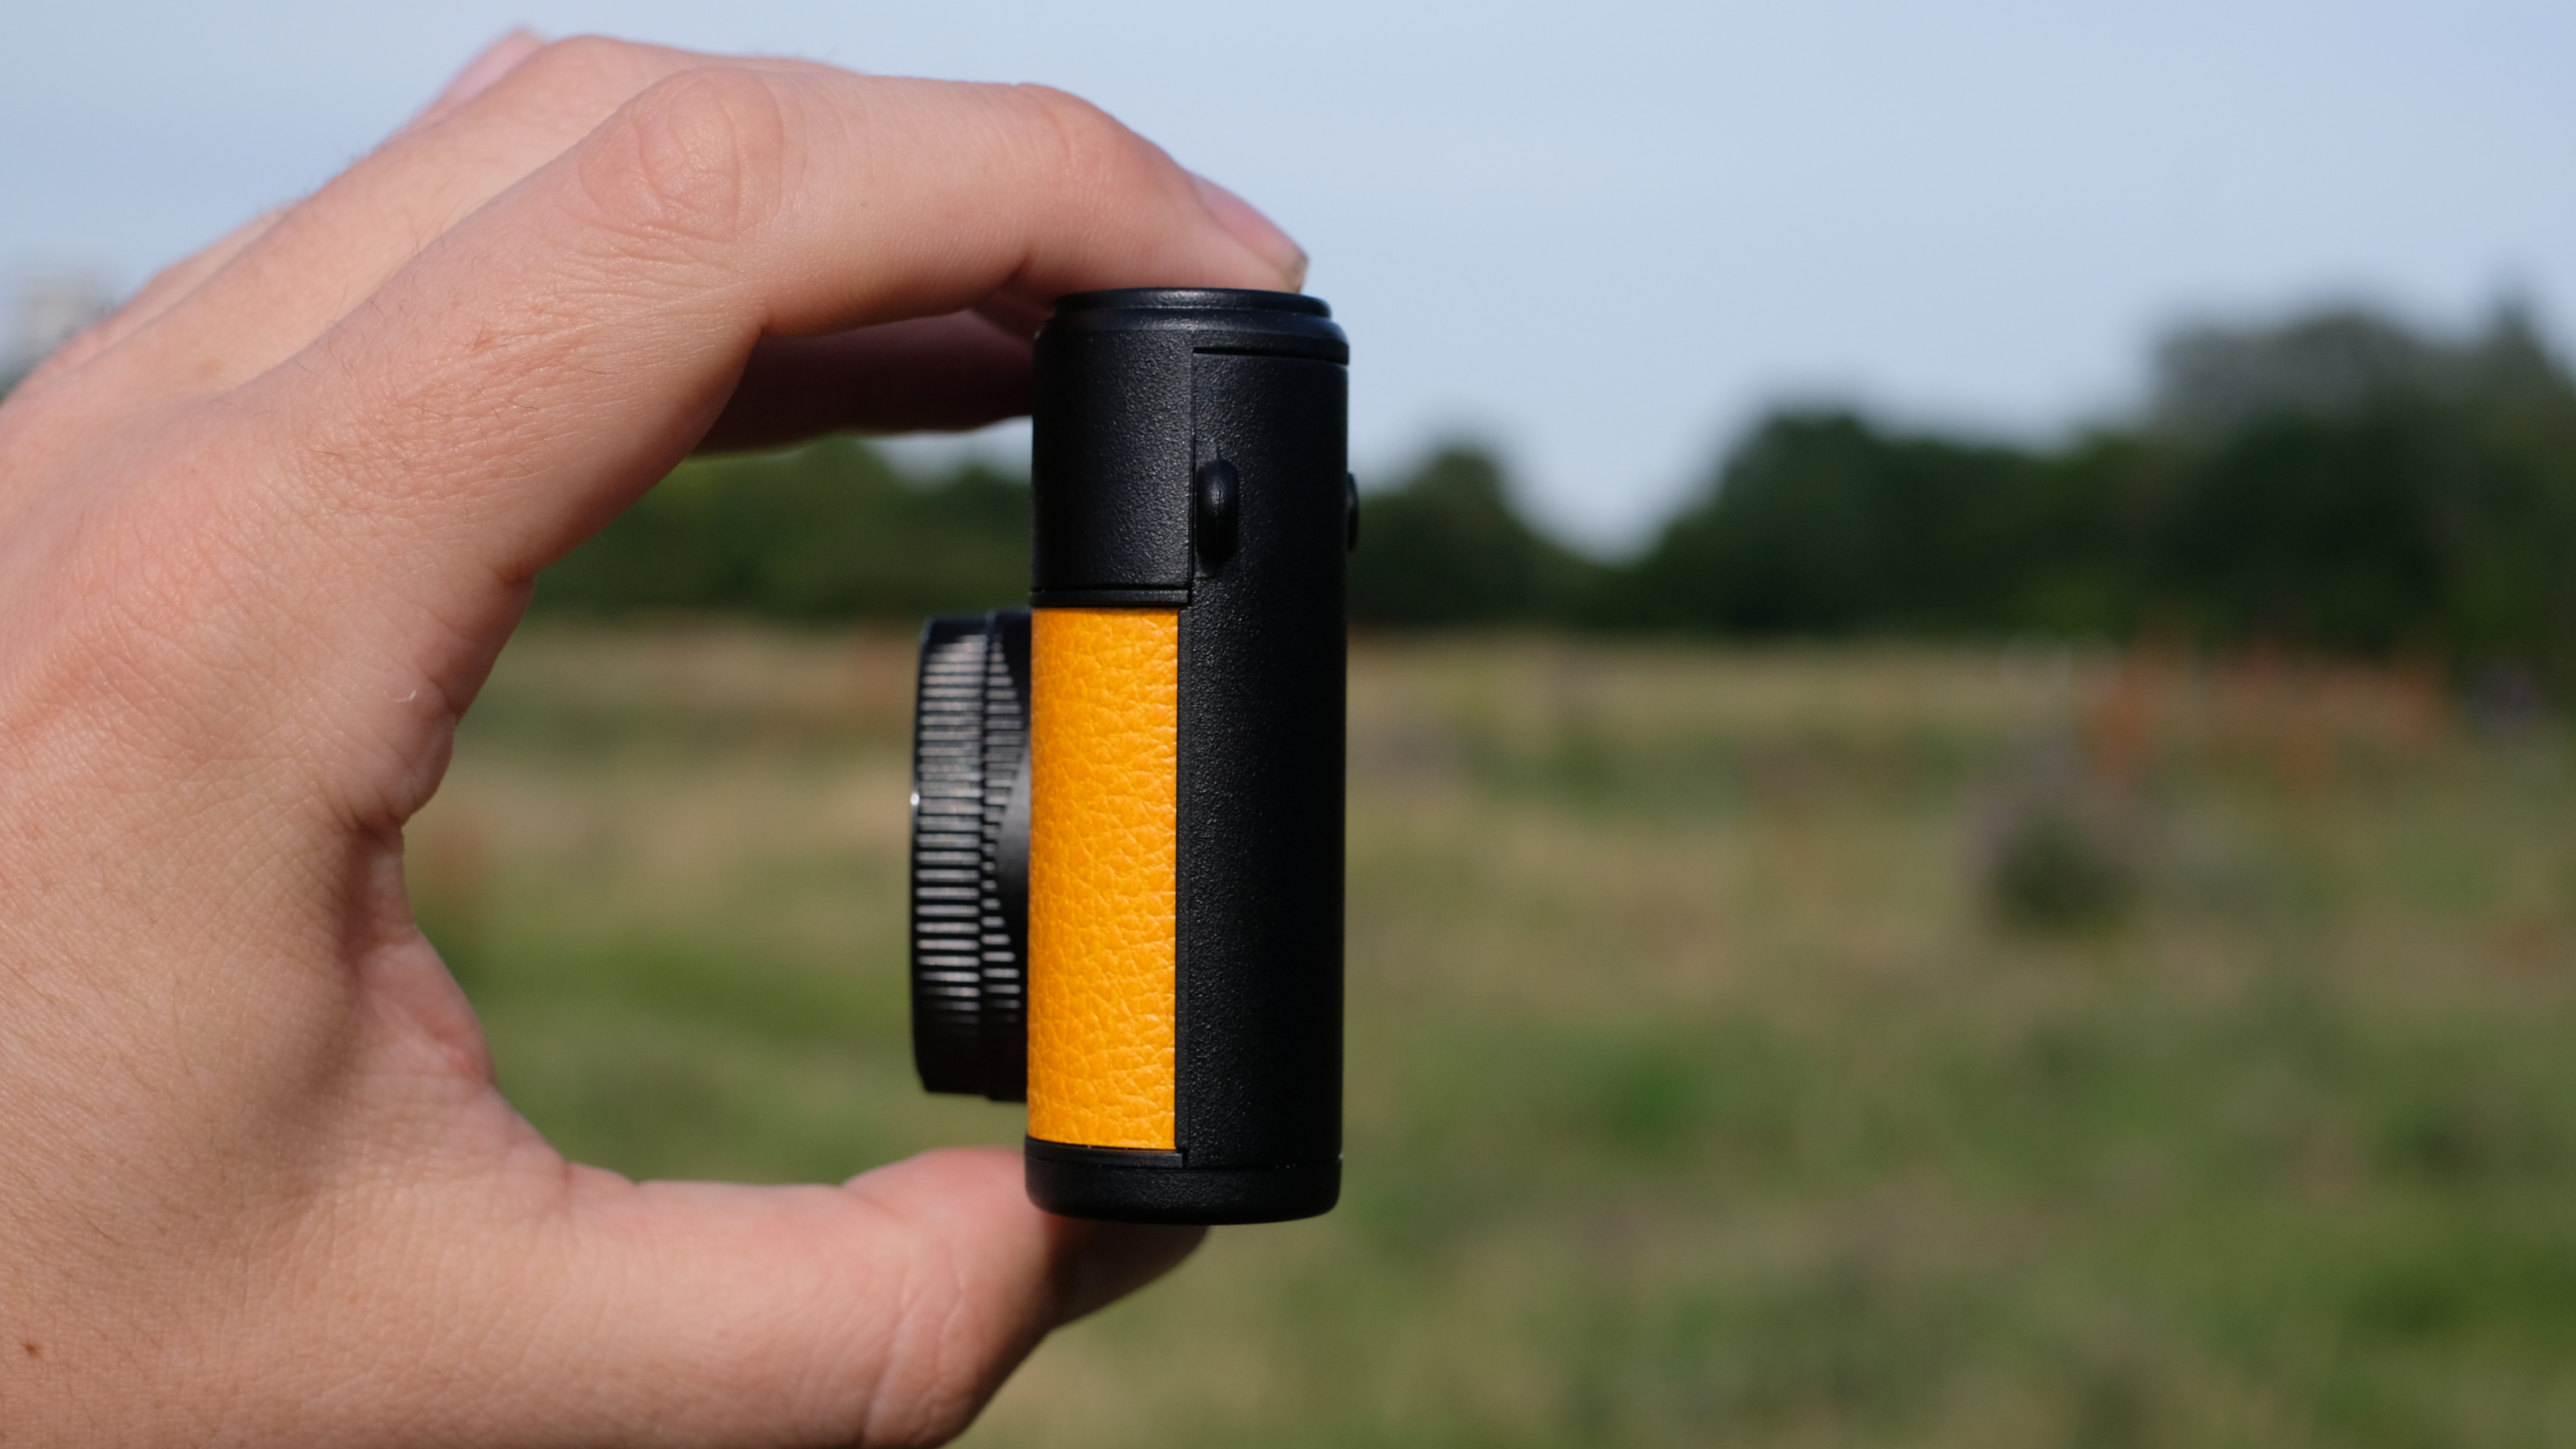
Camp Snap 2: two-minute review
From a simple idea, Camp Snap is building an empire. The concept of an ultra-cheap point-and-shoot digital camera with no screen — meaning you can’t see the photos you take until you download them after the fact — proved to be a massive hit, and the original Camp Snap camera has since been joined by the video-focused Camp Snap CS-8, and the upgraded CS-Pro, which doubles the resolution from 8MP to 16MP. And now, we have the Camp Snap 2.
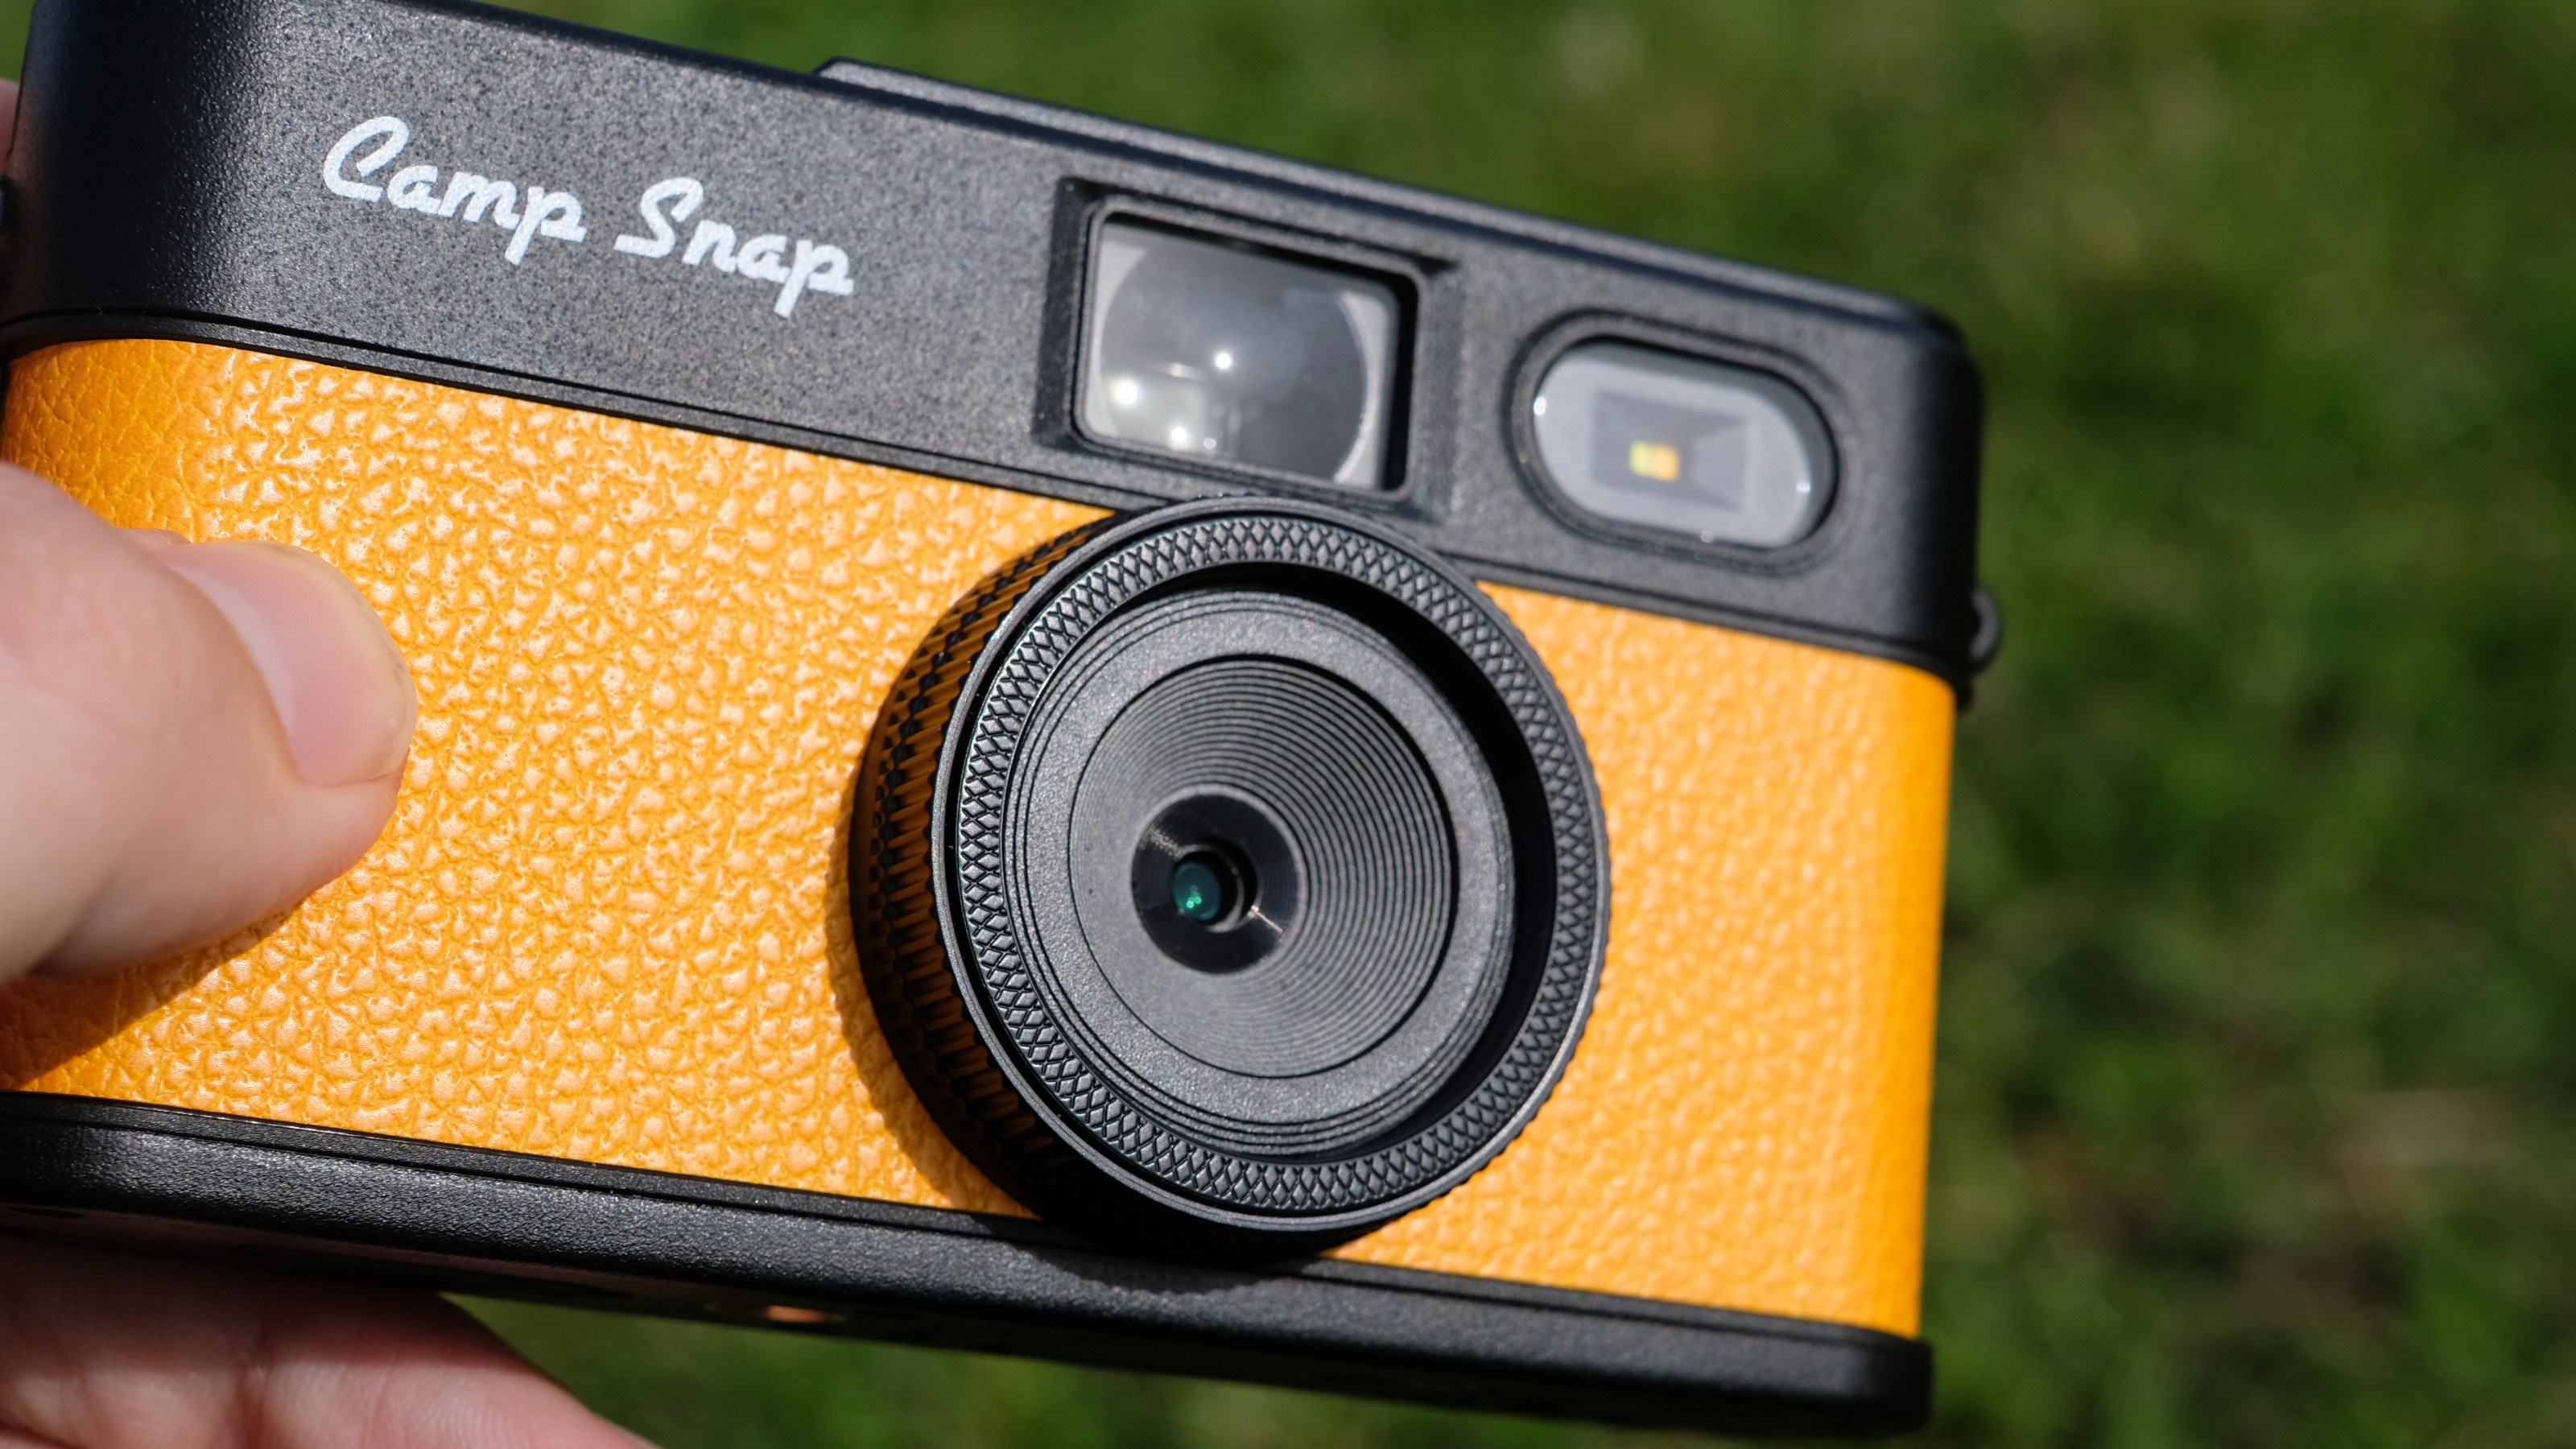
The makers are clearly keen not to mess with success, because the Camp Snap 2 keeps the feel and concept of the original camera very much intact. This new model keeps an 8MP sensor, and it once again has no screen, just a small panel with a running shot counter, a fixed-focus lens, and an LED flash. So, you might ask, what actually is new?
A few things, but the most significant is the new ‘Filters’ button, which allows you to select from a series of vintage-style looks for your images. This was an idea already explored on the CS-Pro, but the Camp Snap 2 ups the ante with six filters rather than the Pro’s somewhat paltry four. While you have to invest some time into learning which filter is which and what they look like (since you can’t check your images mid-shoot), this makes the Camp Snap 2 a more varied and versatile camera to use than the original, adding greater scope for creativity.
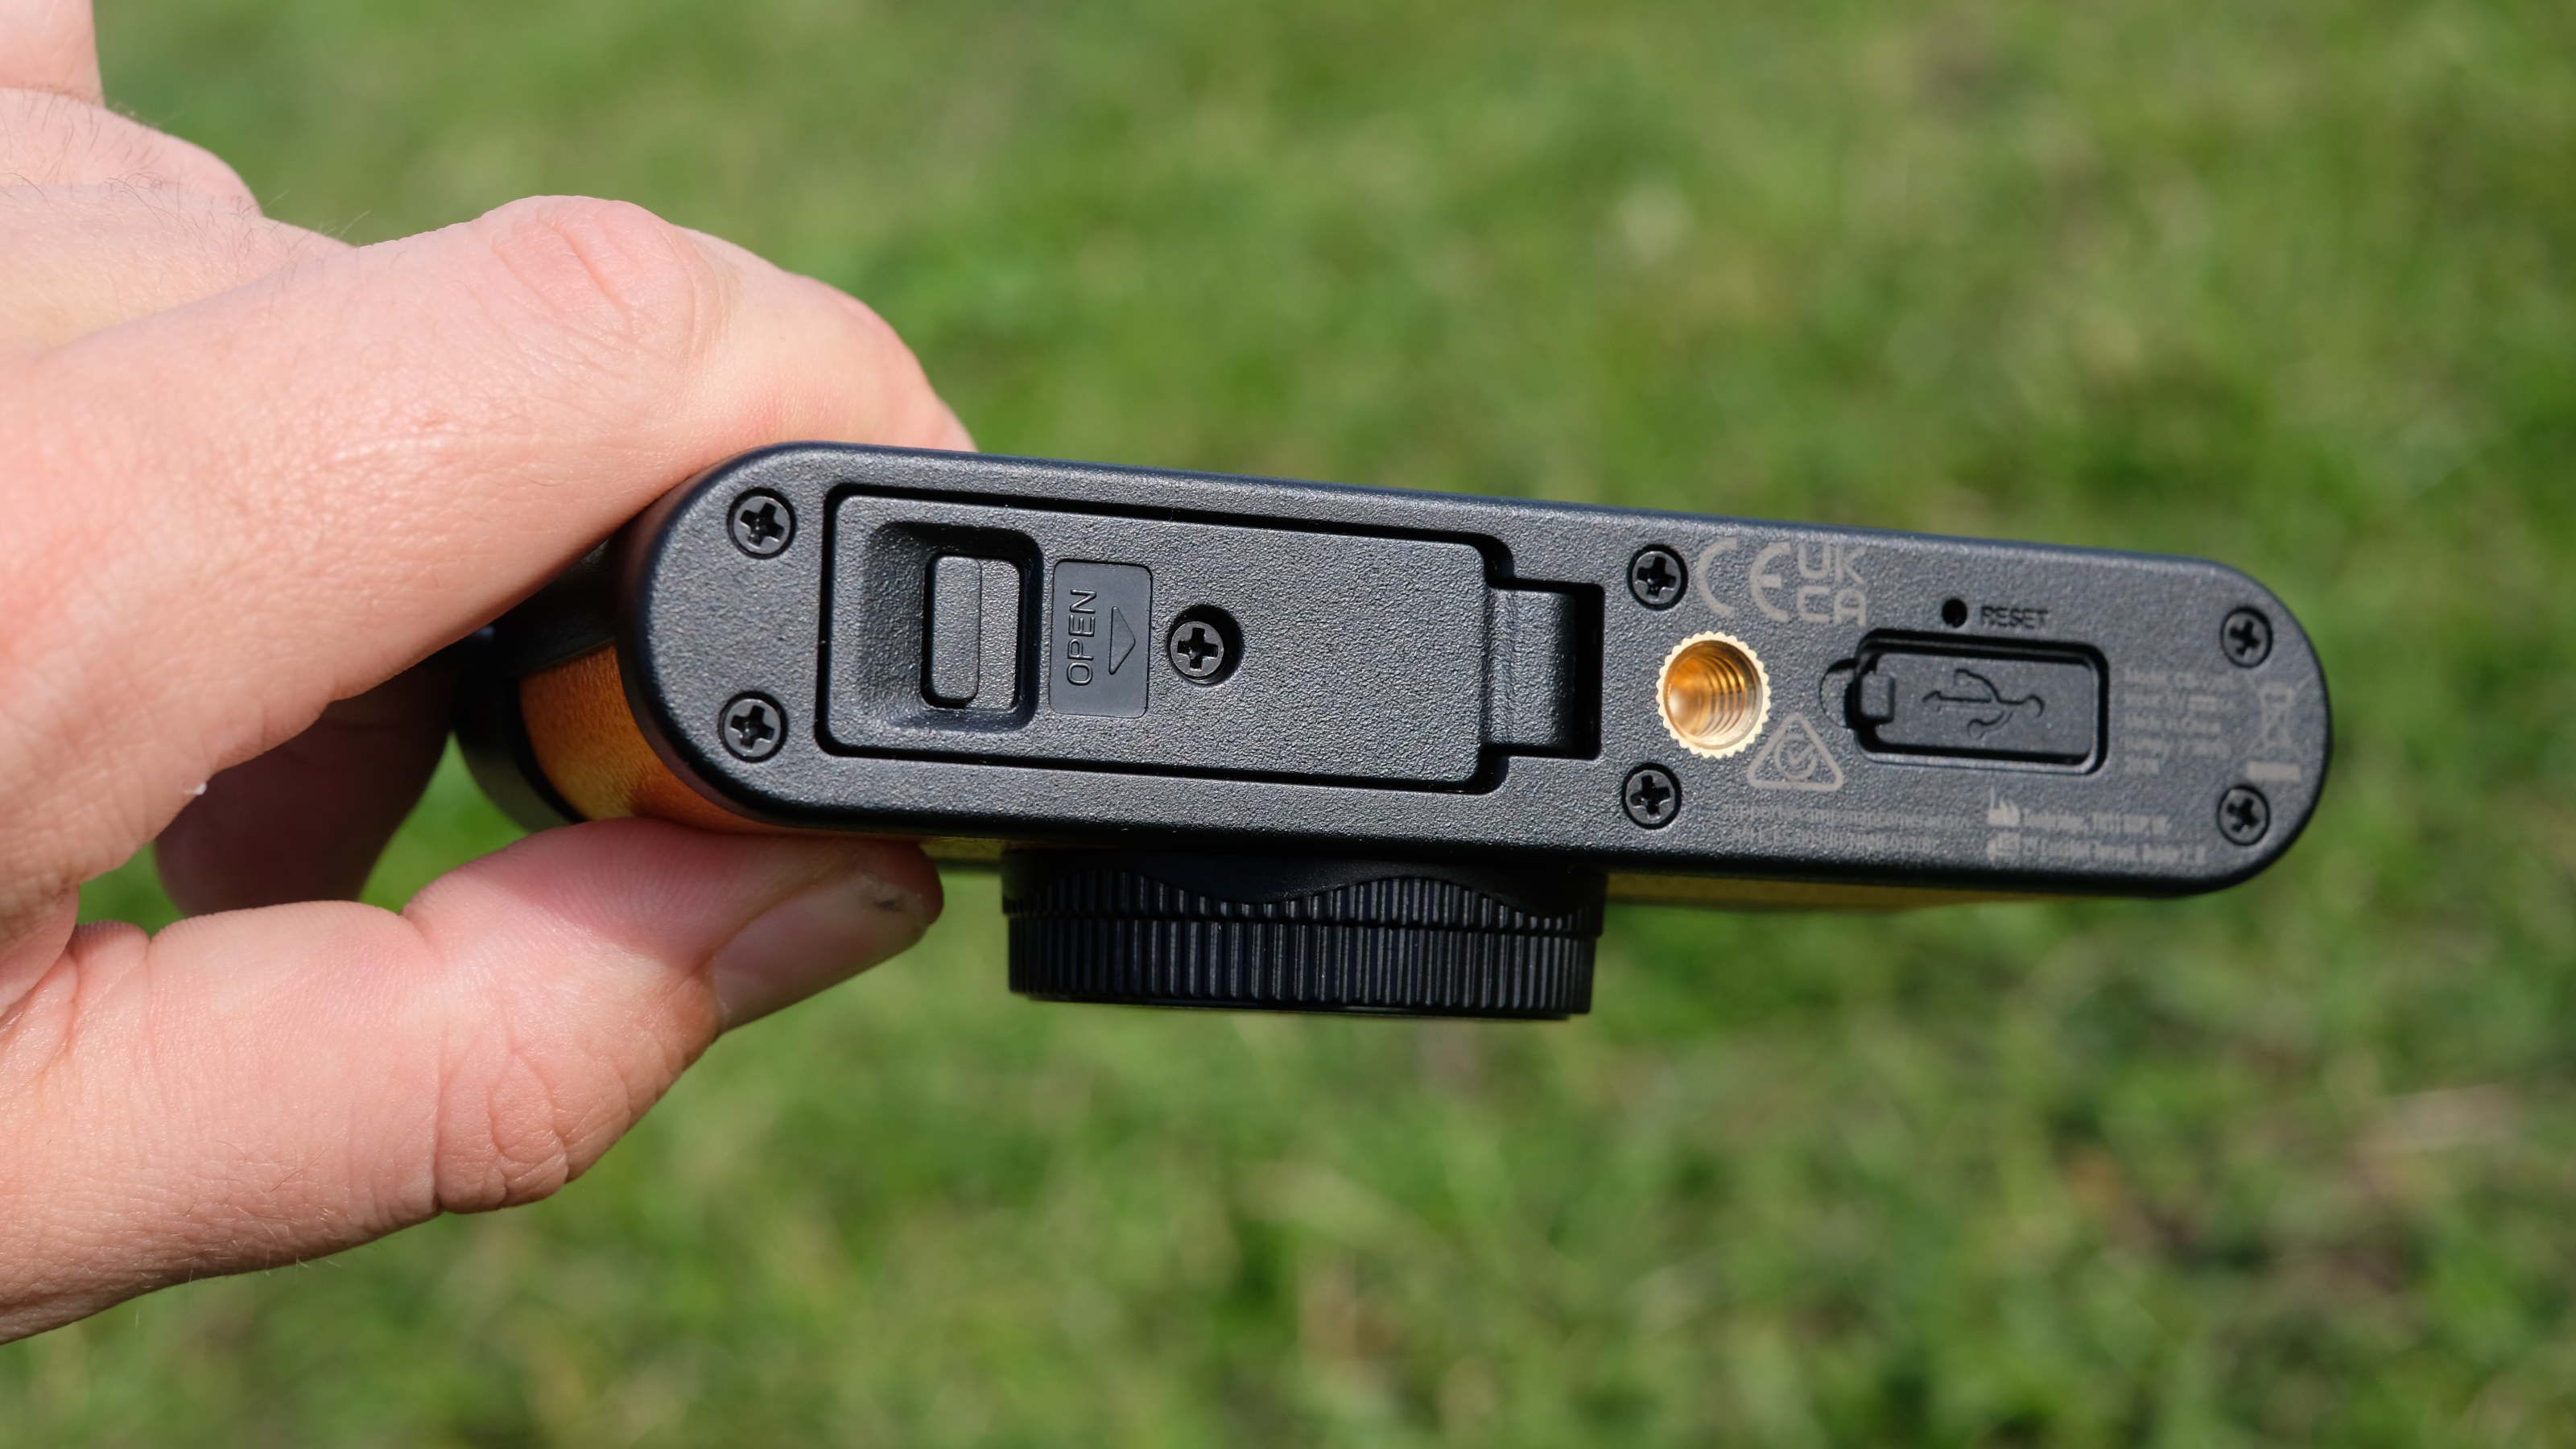
This is an important addition, given that there's little room for creativity elsewhere — the lens is fixed-focus and there’s no settings control. Furthermore, the Camp Snap 2 adds a tripod mount, a 33.5mm filter thread on the lens and lugs to attach a strap (though one isn’t supplied). These additions combine to make the Snap 2 feel a bit more like a proper camera than the original ever did. Its image quality is still no great shakes, but the Camp Snap 2 offers more scope and variety without sacrificing its identity as a camera that basically anyone can use — like the original, it’s very kid-friendly.
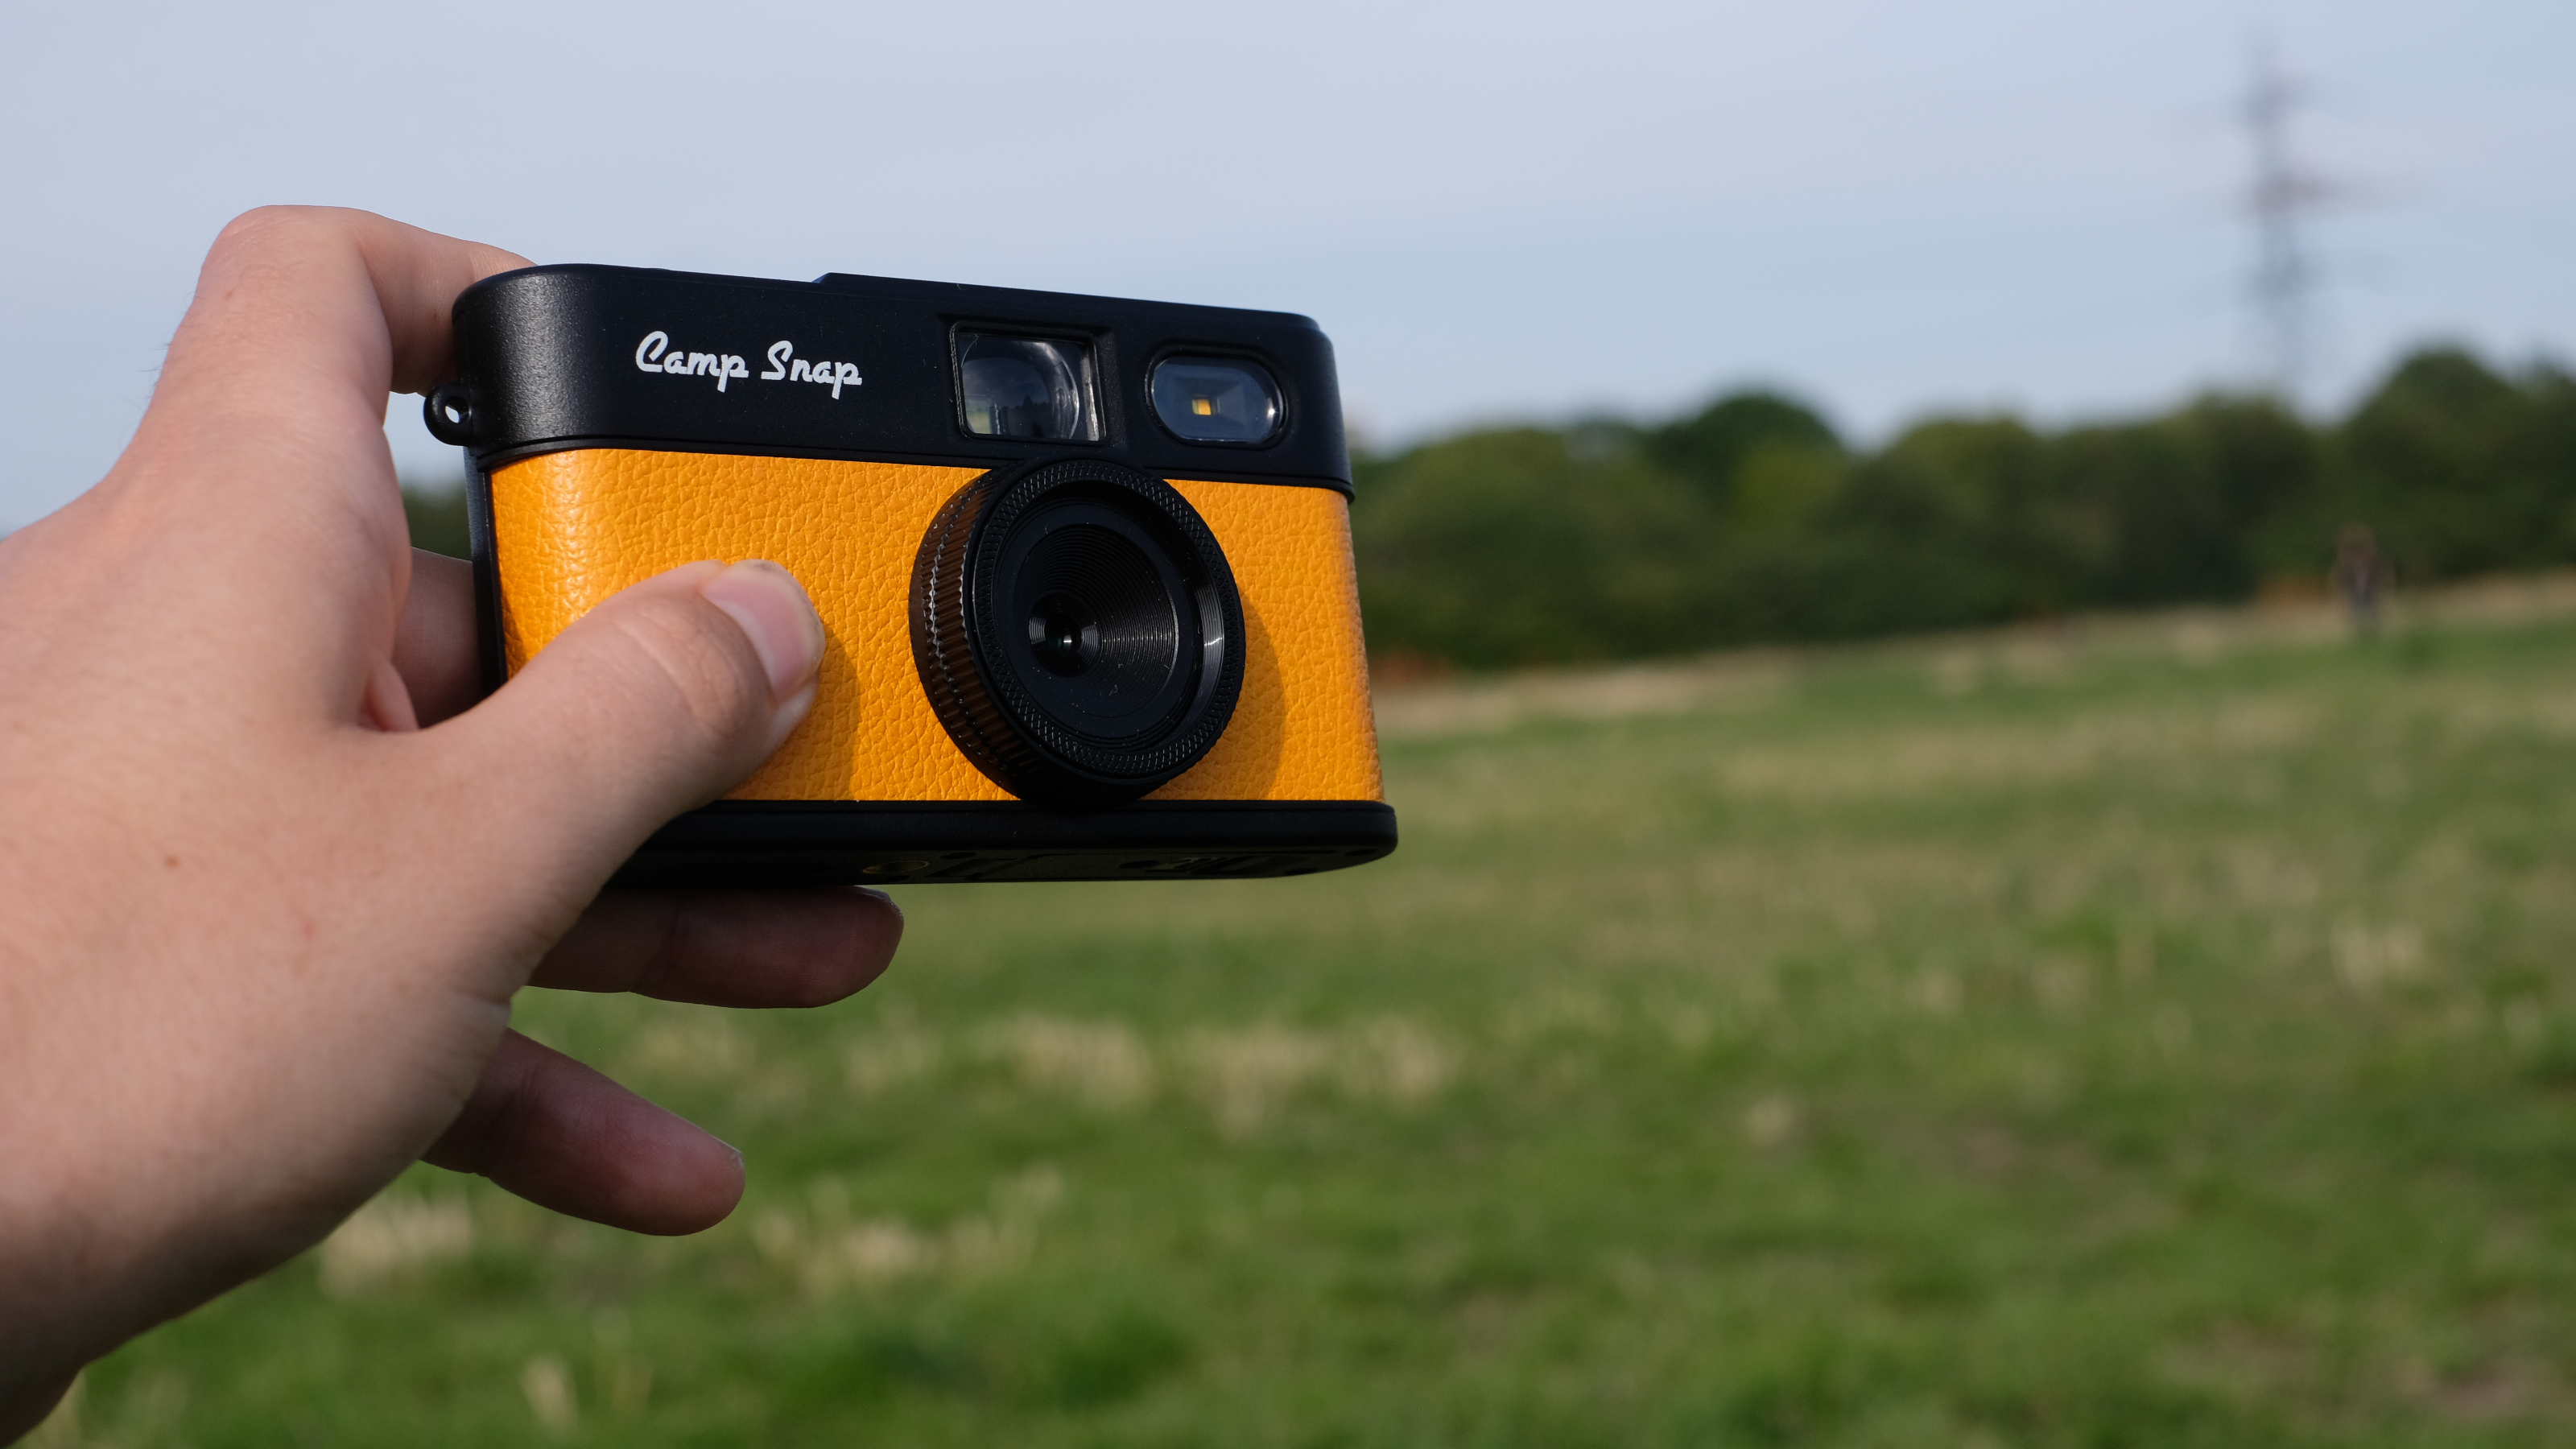
I’ve taken the Camp Snap 2 everywhere with me for a couple of weeks, and I can say that I thoroughly enjoyed it. The newly slimmed-down body makes it easy to slip into a pocket and pull out for quick grab shots here and there, and with no screen, you can’t spend time fussing over them after the fact.
Normally, when a successor camera is this iterative and minor an upgrade, we reviewers tend to say things like 'If you already own the original, save your money.’ But this is a bit of a different situation. Because the Camp Snap 2 is so cheap, I’d say that if you already own, like and use the original Camp Snap — hell yeah, you might as well upgrade. The filter button adds depth and variety, and one of the most irritating features of the previous model — the shutter lag — has mostly been dealt with.
I’d also go so far as to say that for many users, this is probably a better buy than the more expensive CS-Pro. You get a more pocketable camera for a lower price, and for the types of people who are shooting with Camp Snaps, I don’t think an extra 8MP of resolution is all that useful, particularly when the sensor is not especially larger. The main reason you might prefer the Pro is that its filters are more dramatic and distinctive, though there are fewer of them.
So, if you like the original Camp Snap, and like the sound of the Camp Snap 2 — yes, I feel comfortable recommending you buy it too. At this price, why not?
Camp Snap 2: price and availability
Camp Snap hasn't got carried away with its success, and the Camp Snap 2 is still very attractively priced indeed, launching at $69.95 / £53 (around AU$130). This is at about the same level as the original Camp Snap, and comes in way less the CS-Pro, which goes for $99 / £90 (around AU$180).
Snap 2 is currently available from the Camp Snap website, and I expect before long it’ll also make its way to major retailers, the way the original Camp Snap has.
Frankly, this pricing is perfect. For a fun, knockabout digital camera that doesn’t offer much in the way of image quality and is all about the ultra-simple point-and-shoot vibes, nobody should be paying more than this. It’s a camera that pretty much anyone can instantly pick up and use, at a price that lots of people can afford.
Camp Snap 2: design
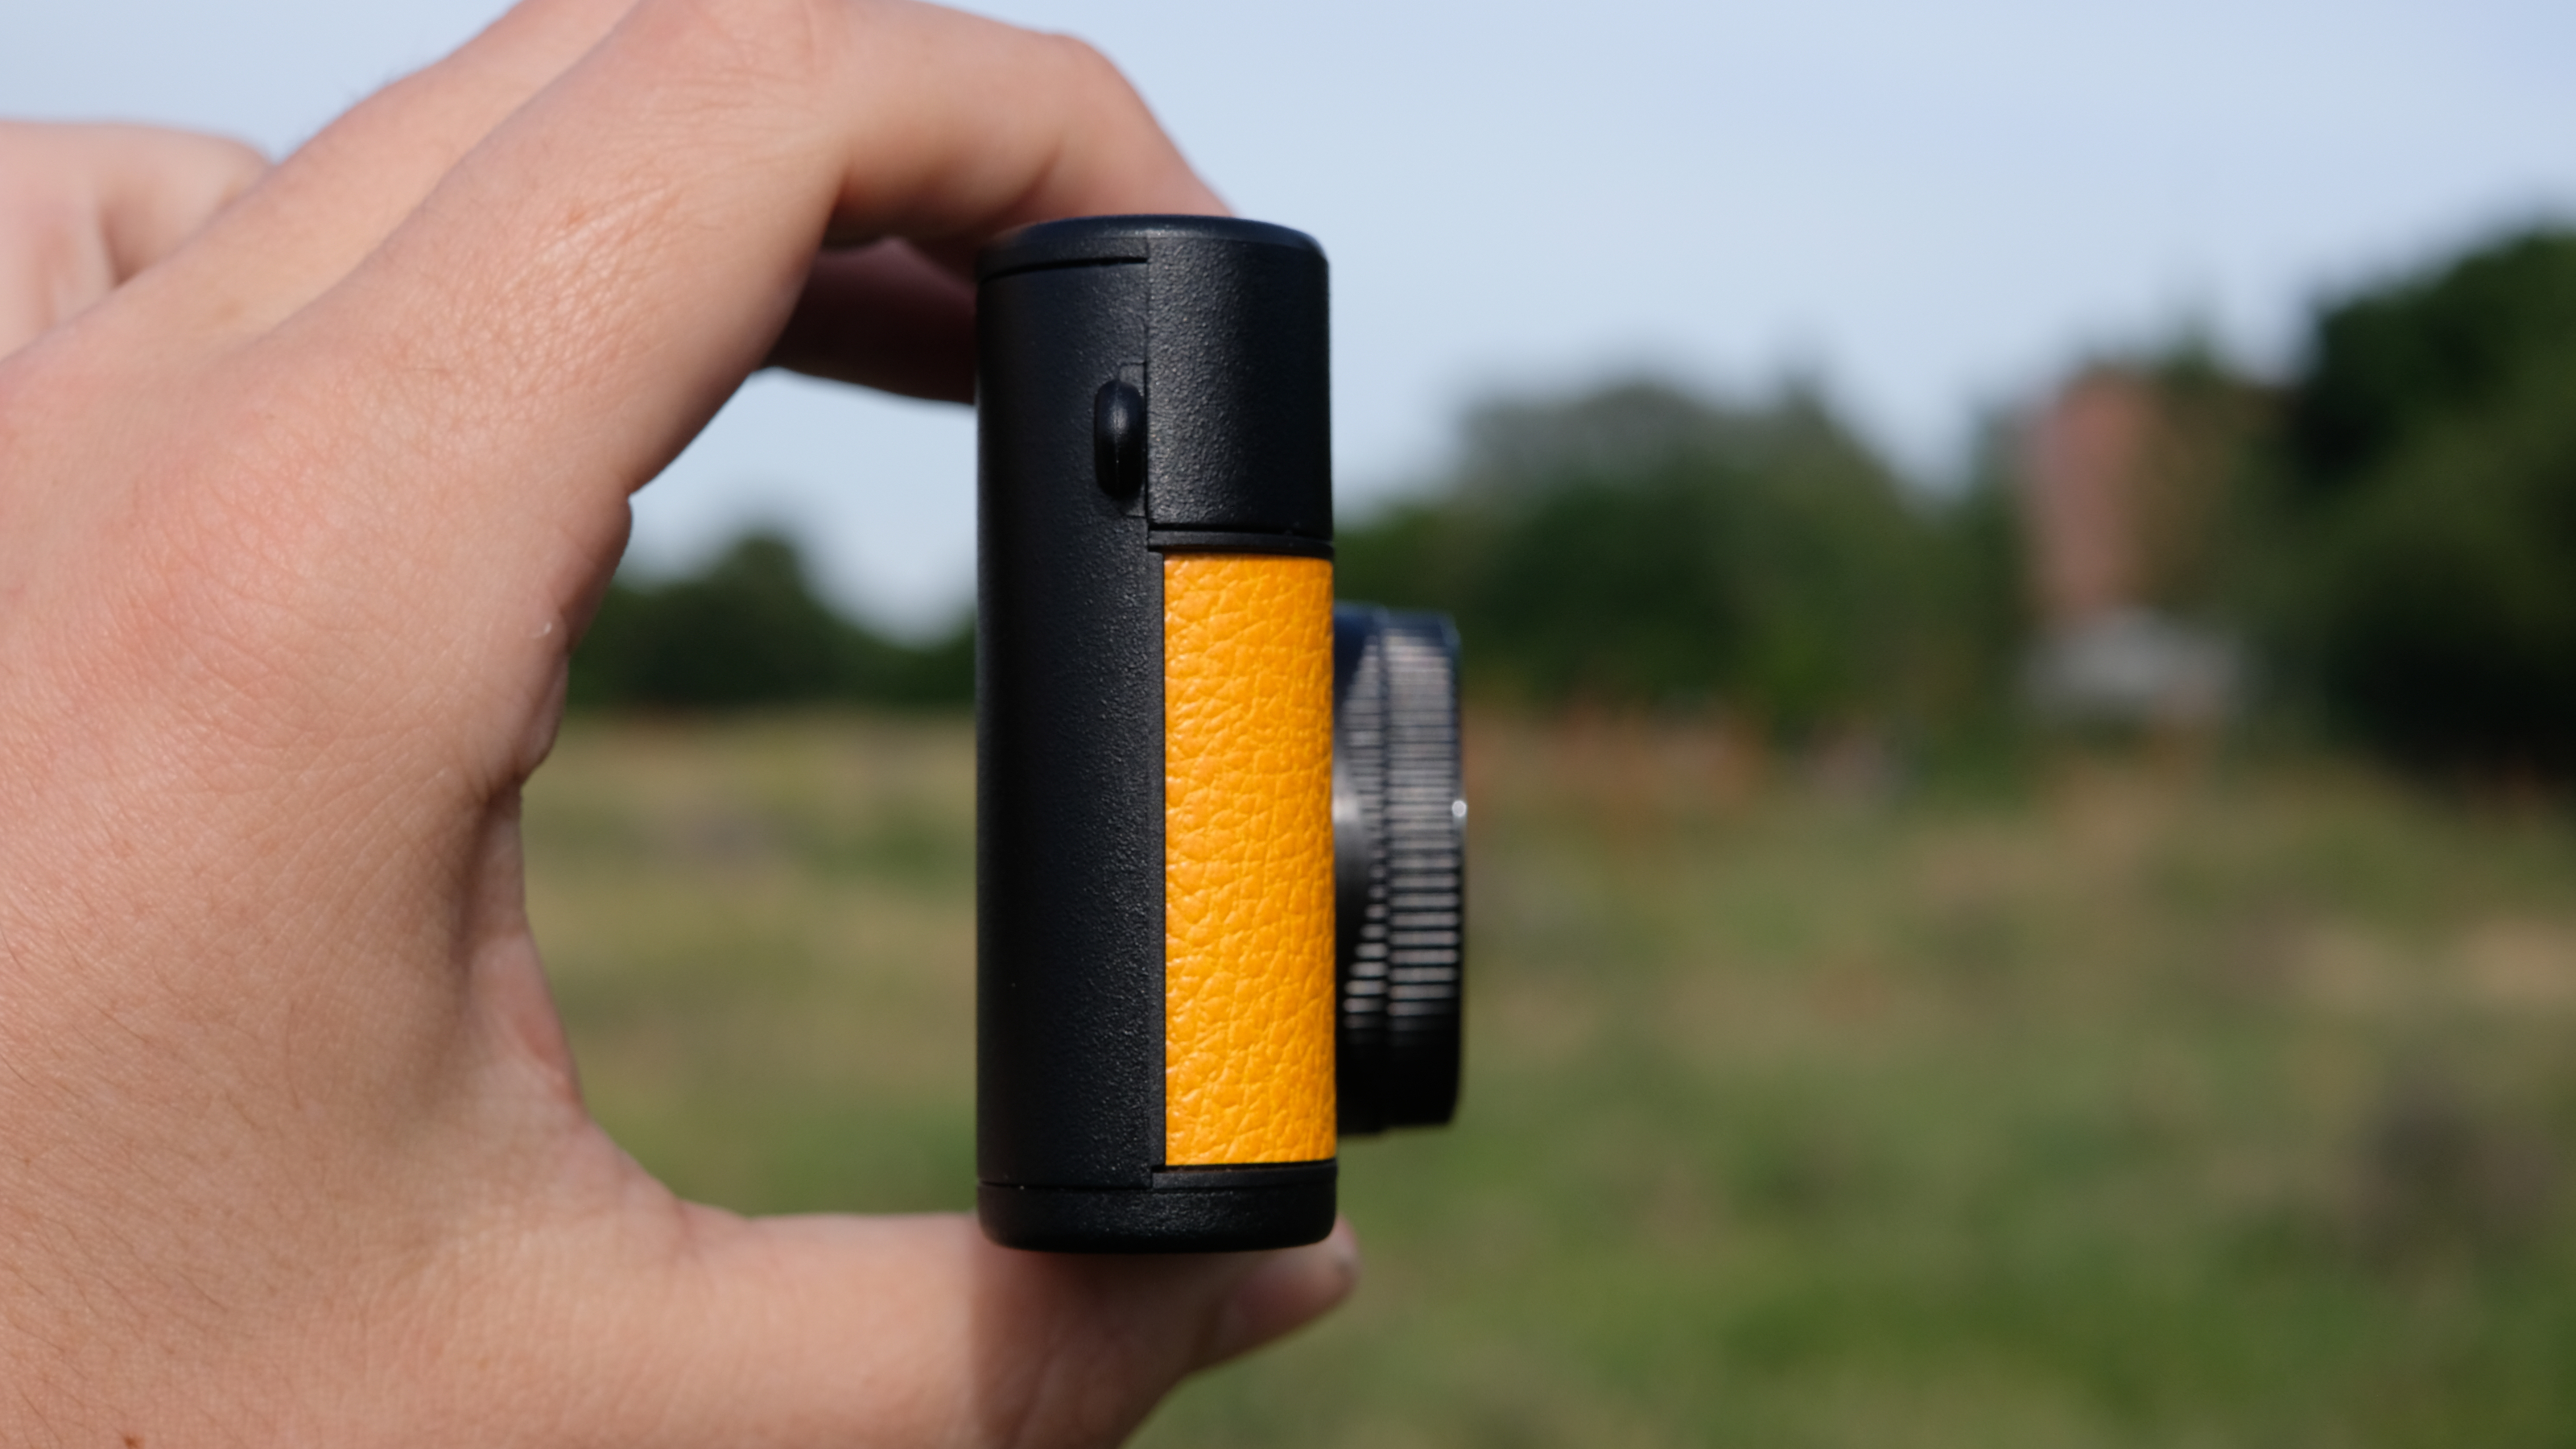
- Even slimmer and lighter than the original, just 3.8z / 108g
- All-plastic build with LED flash and fixed-focus lens
- Point-and-shoot operation, but adds button to switch filters
The original Camp Snap was already slim, but the Camp Snap 2 is even slimmer — around 15% slimmer according to the manufacturers. It is genuinely pocketable in a way that not all cameras that make ‘pocketable’ claims actually are, and at 3.8oz / 108g it’s a true featherweight. The body is all-plastic, of course, but the front has a nice textured surface for a bit of extra grip, and there’s an indentation on the rear panel for your right thumb to rest. On the sides there are lugs for attaching a strap, though no strap is supplied with the camera.
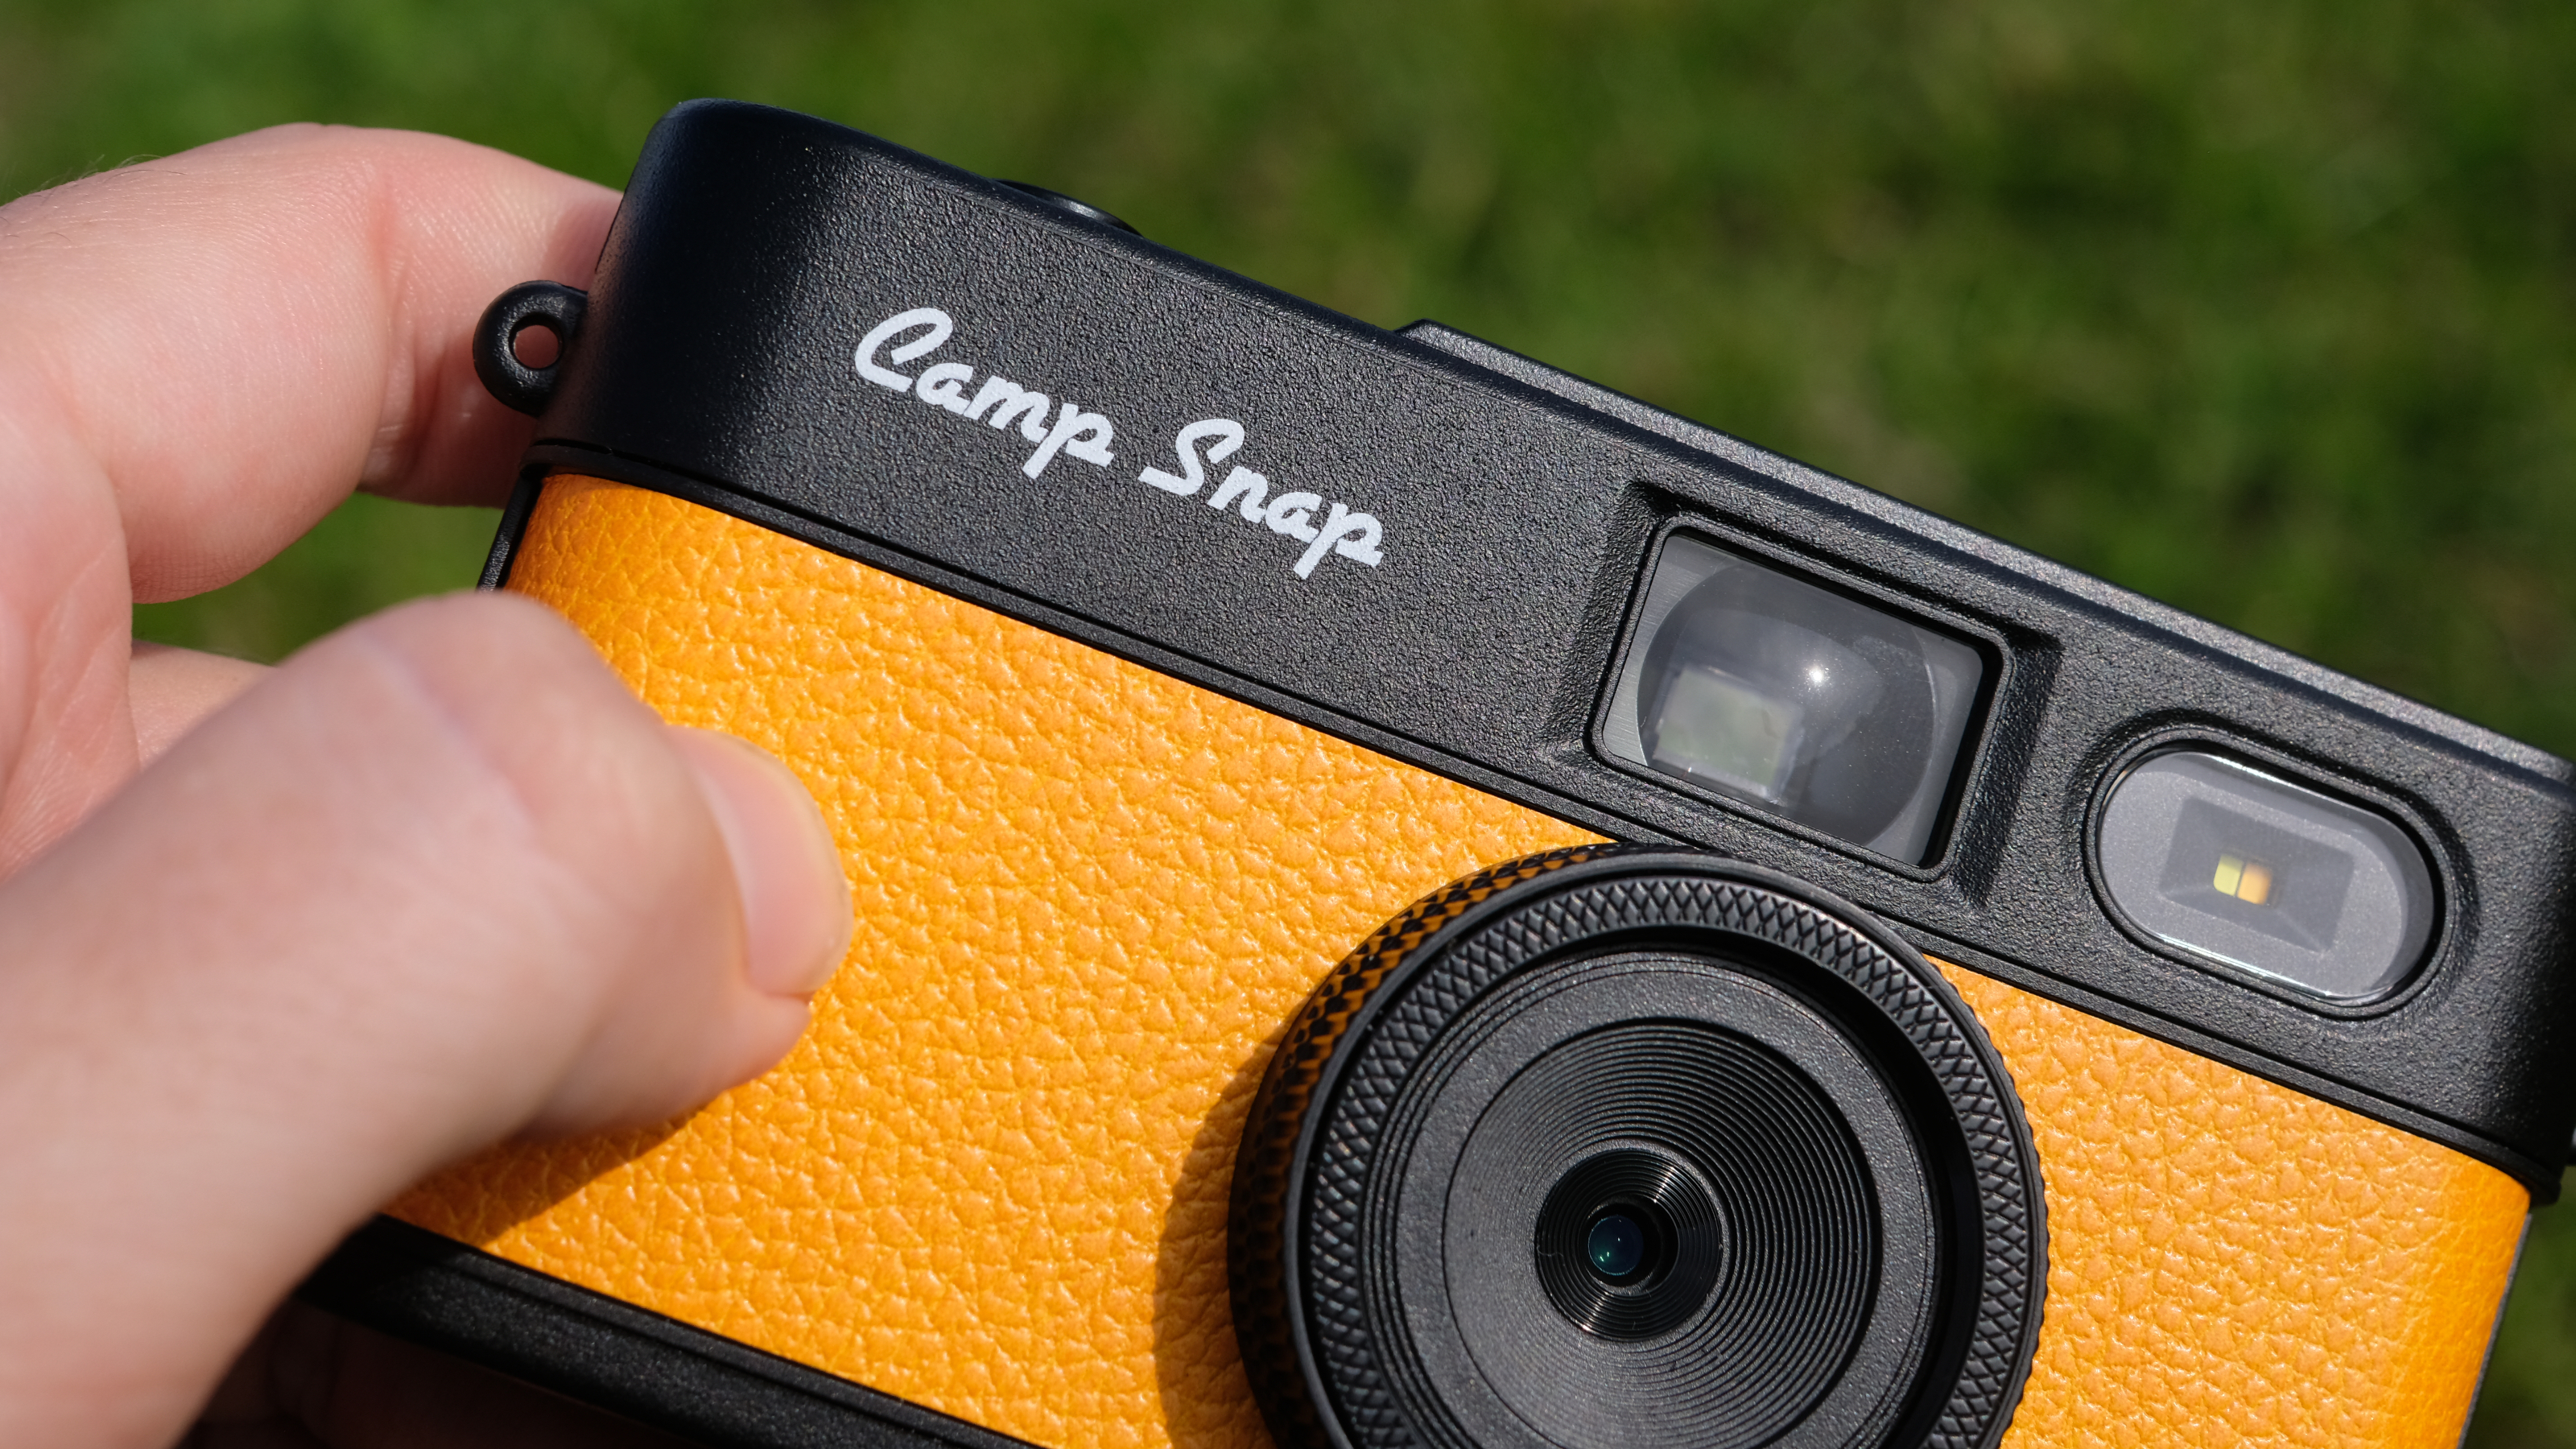
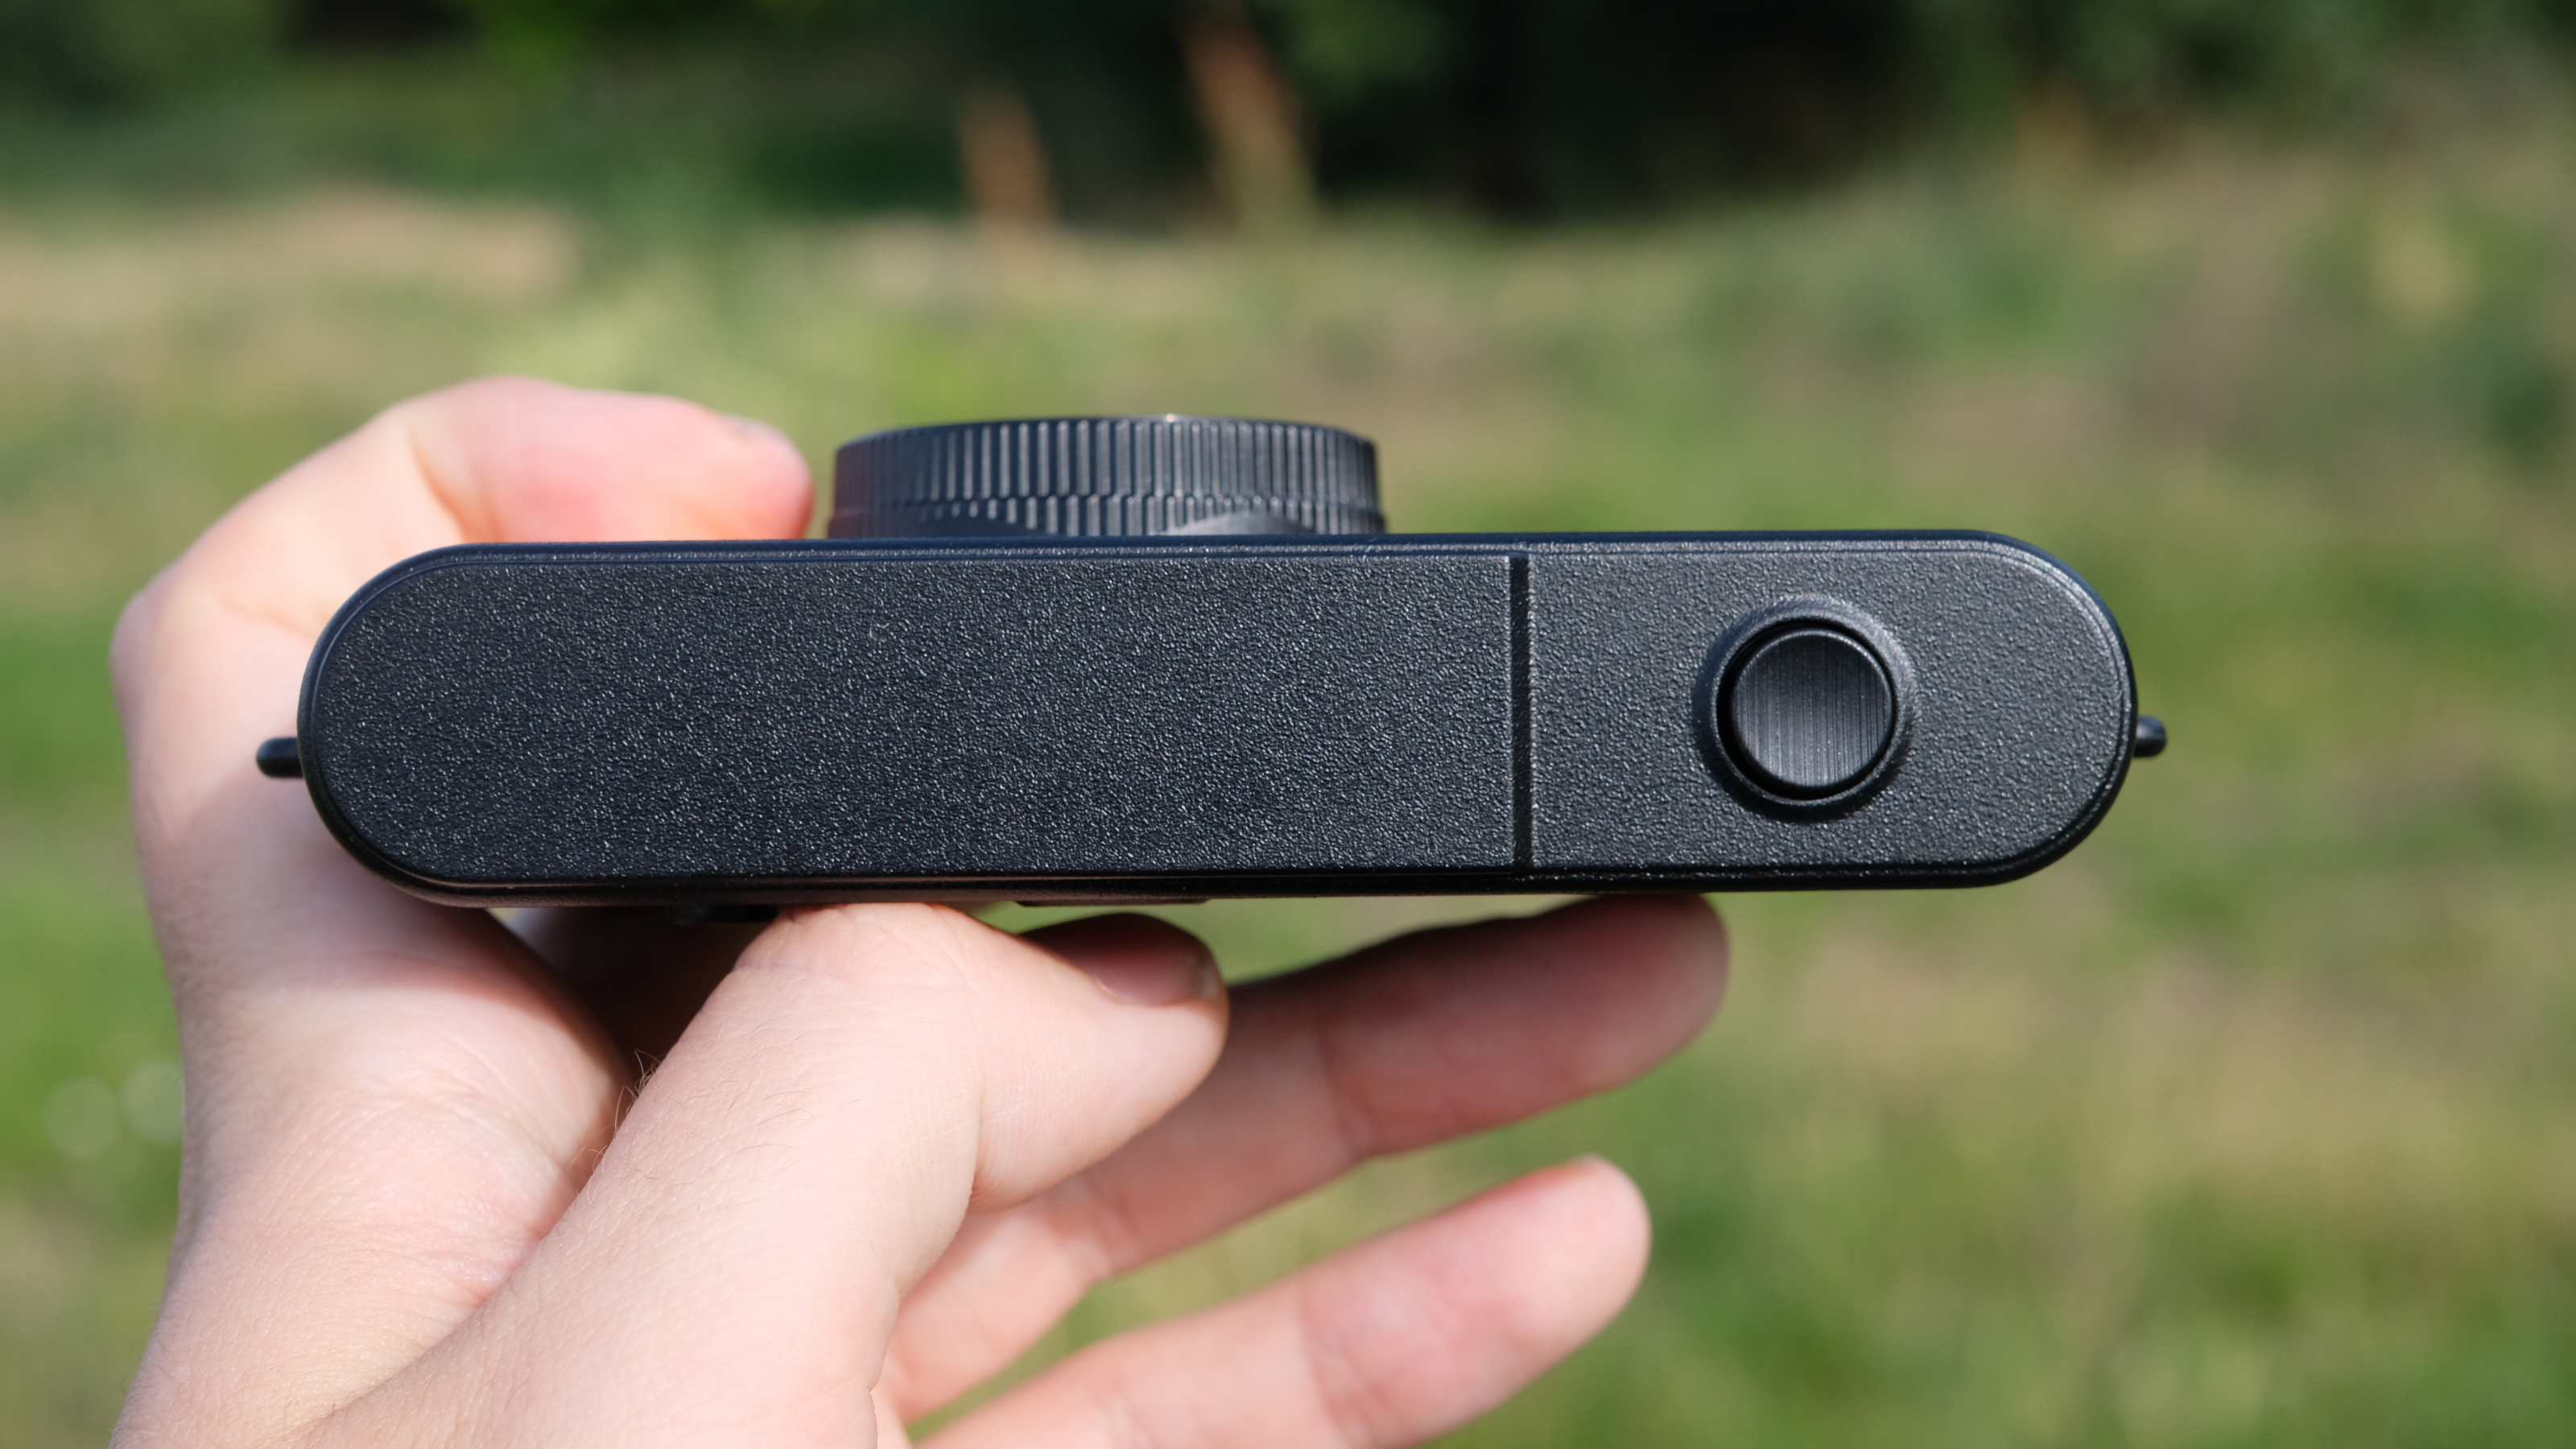
On the top you have just a single button: the shutter. This is of course a point-and-shoot, so you won’t be fiddling with settings dials. On the front you have the LED flash and the fixed wide-angle lens — and, a new addition, a 30.5mm filter thread on the lens. Though this was on the CS-Pro, it wasn’t on the original Camp Snap, and it allows you to attach screw-on filters to imbue your images with specific effects — as one reader suggested, a good fit for the Camp Snap would be a mist filter to enhance the lo-fi, retro feel of images. Camp Snap has also not-so-subtly hinted that Camp Snap-branded filters will be coming in the future.
At the rear you have the simple screen, which displays a shot-counter and lets you know which filter you currently have selected. As well as the aforementioned thumb groove, you also have the power switch, which doubles as a flash toggle, and the tinny speaker that plays the stock ‘shutter release’ sound effect. The viewfinder is a perfectly serviceable optical type — if you’ve ever used an old-school disposable, it’ll be familiar. It’s nothing special but it does the job.
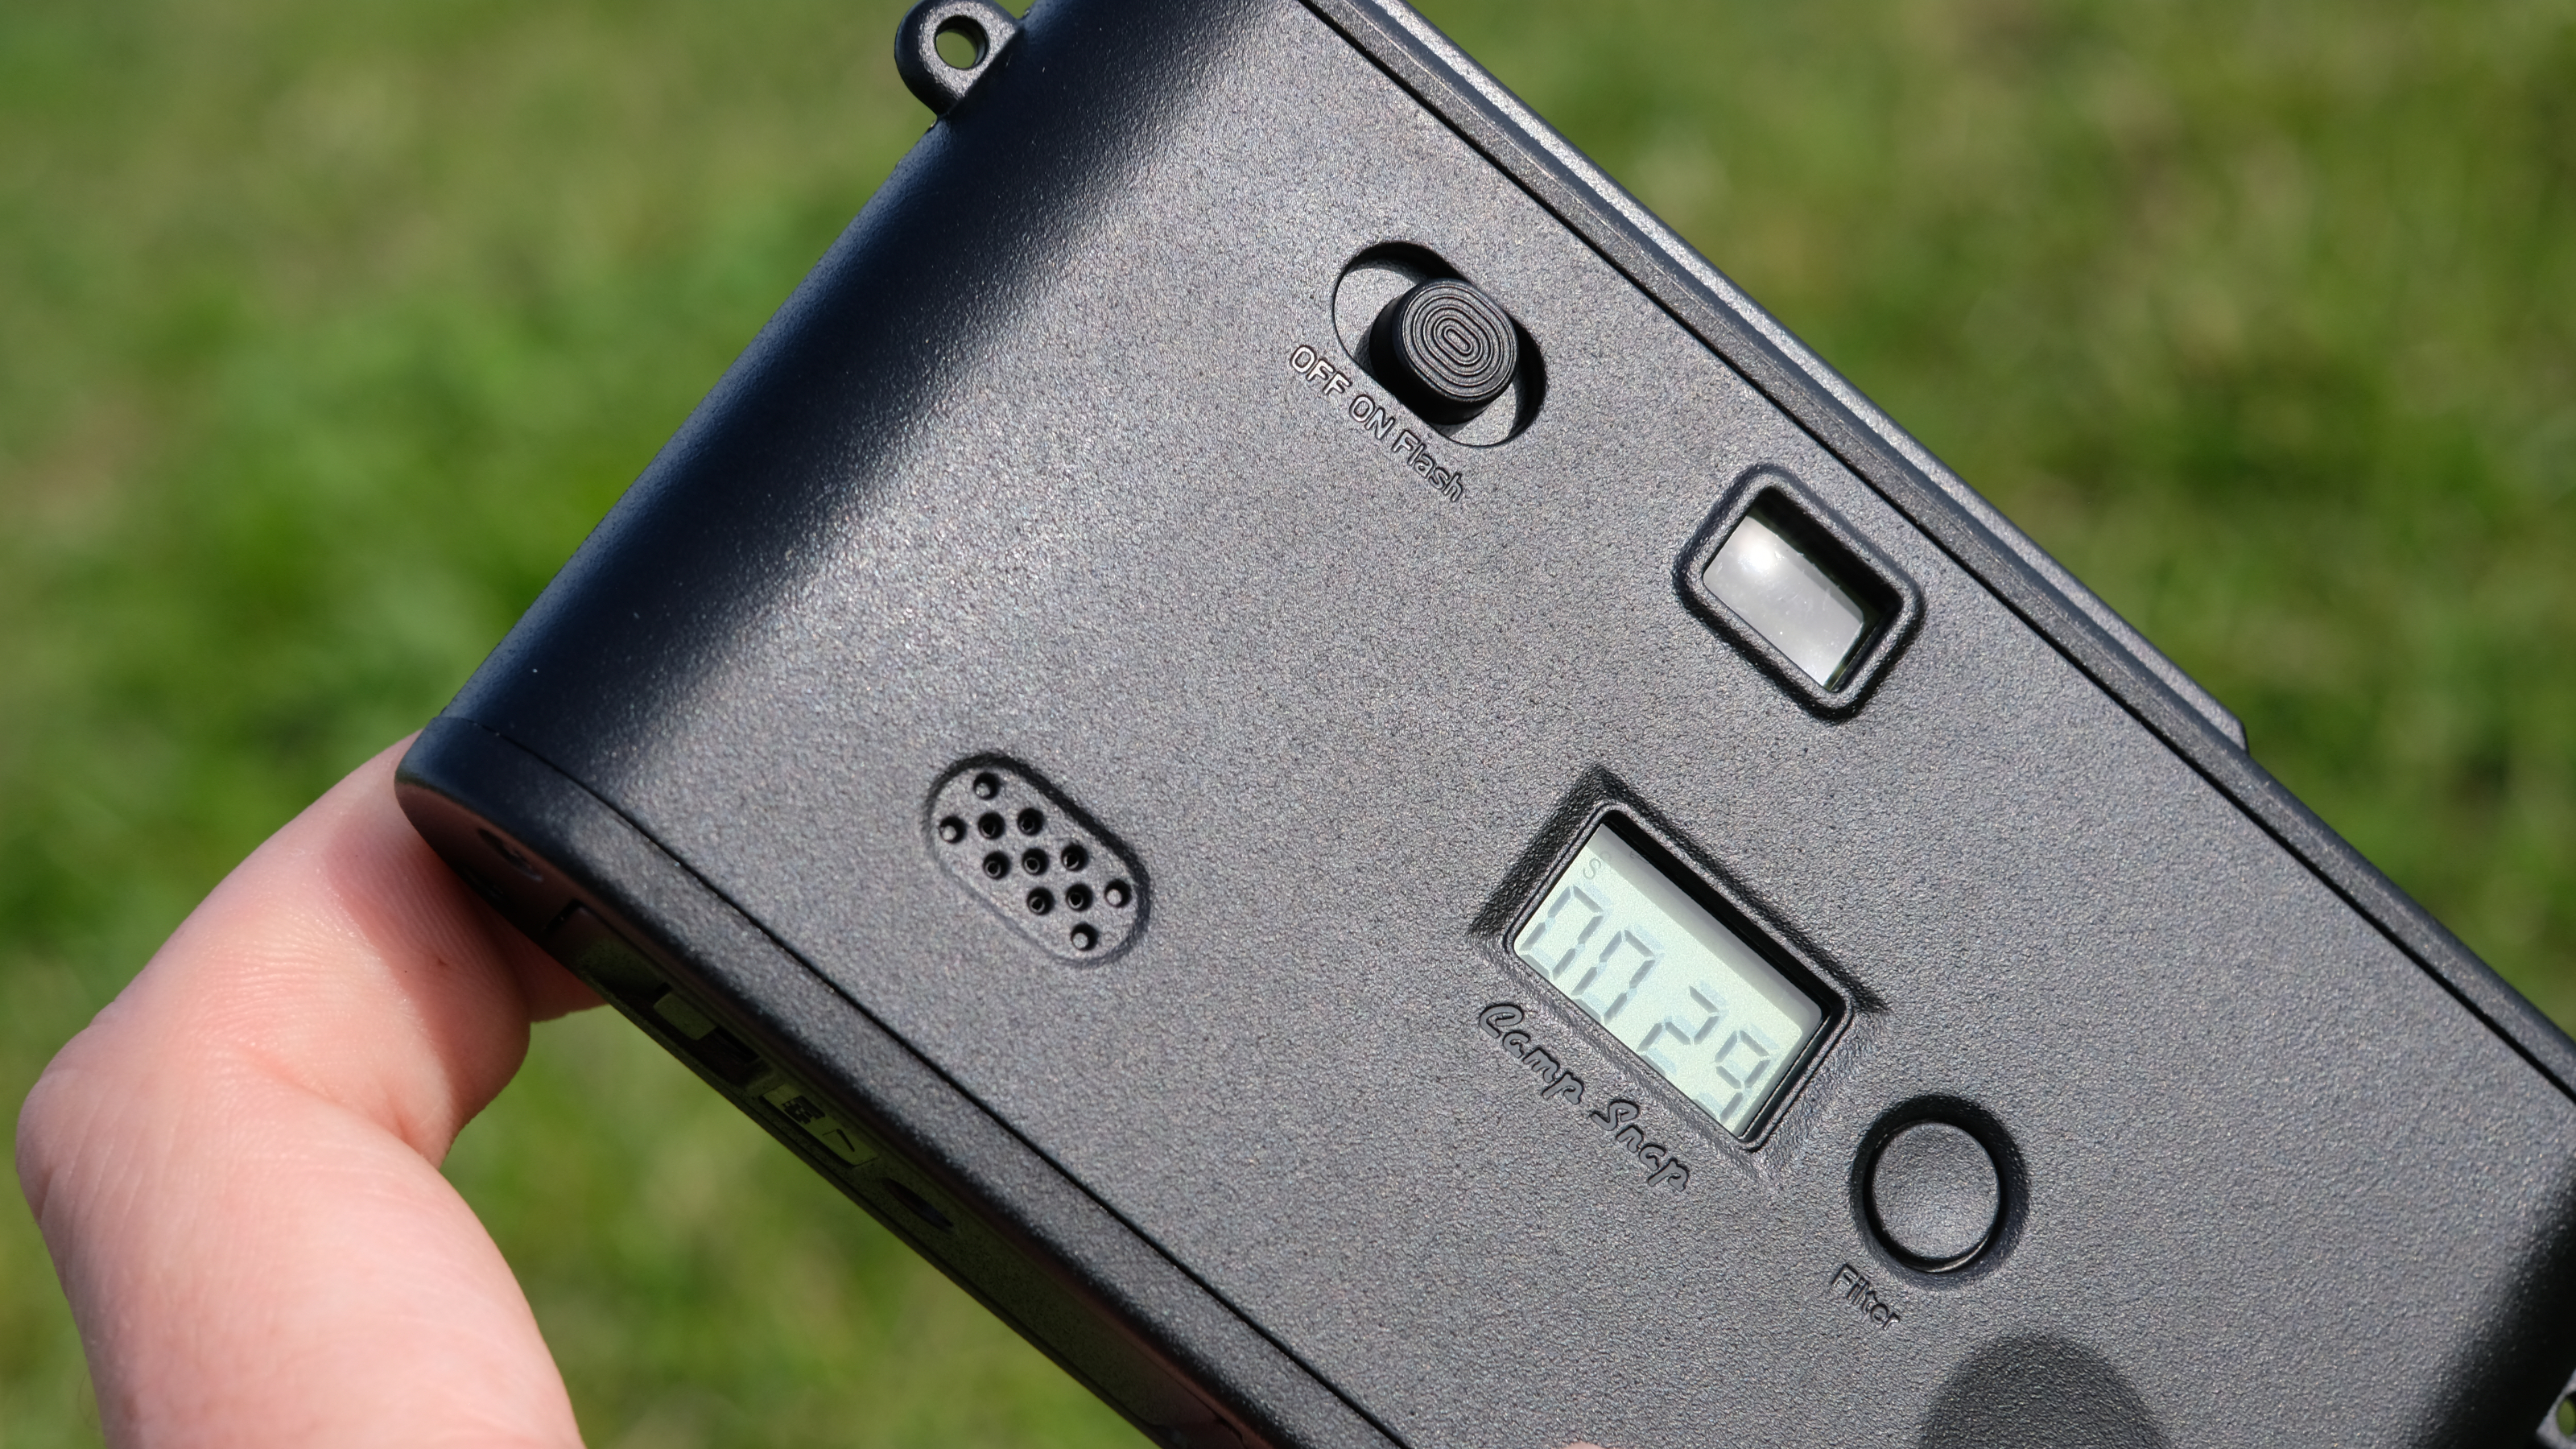
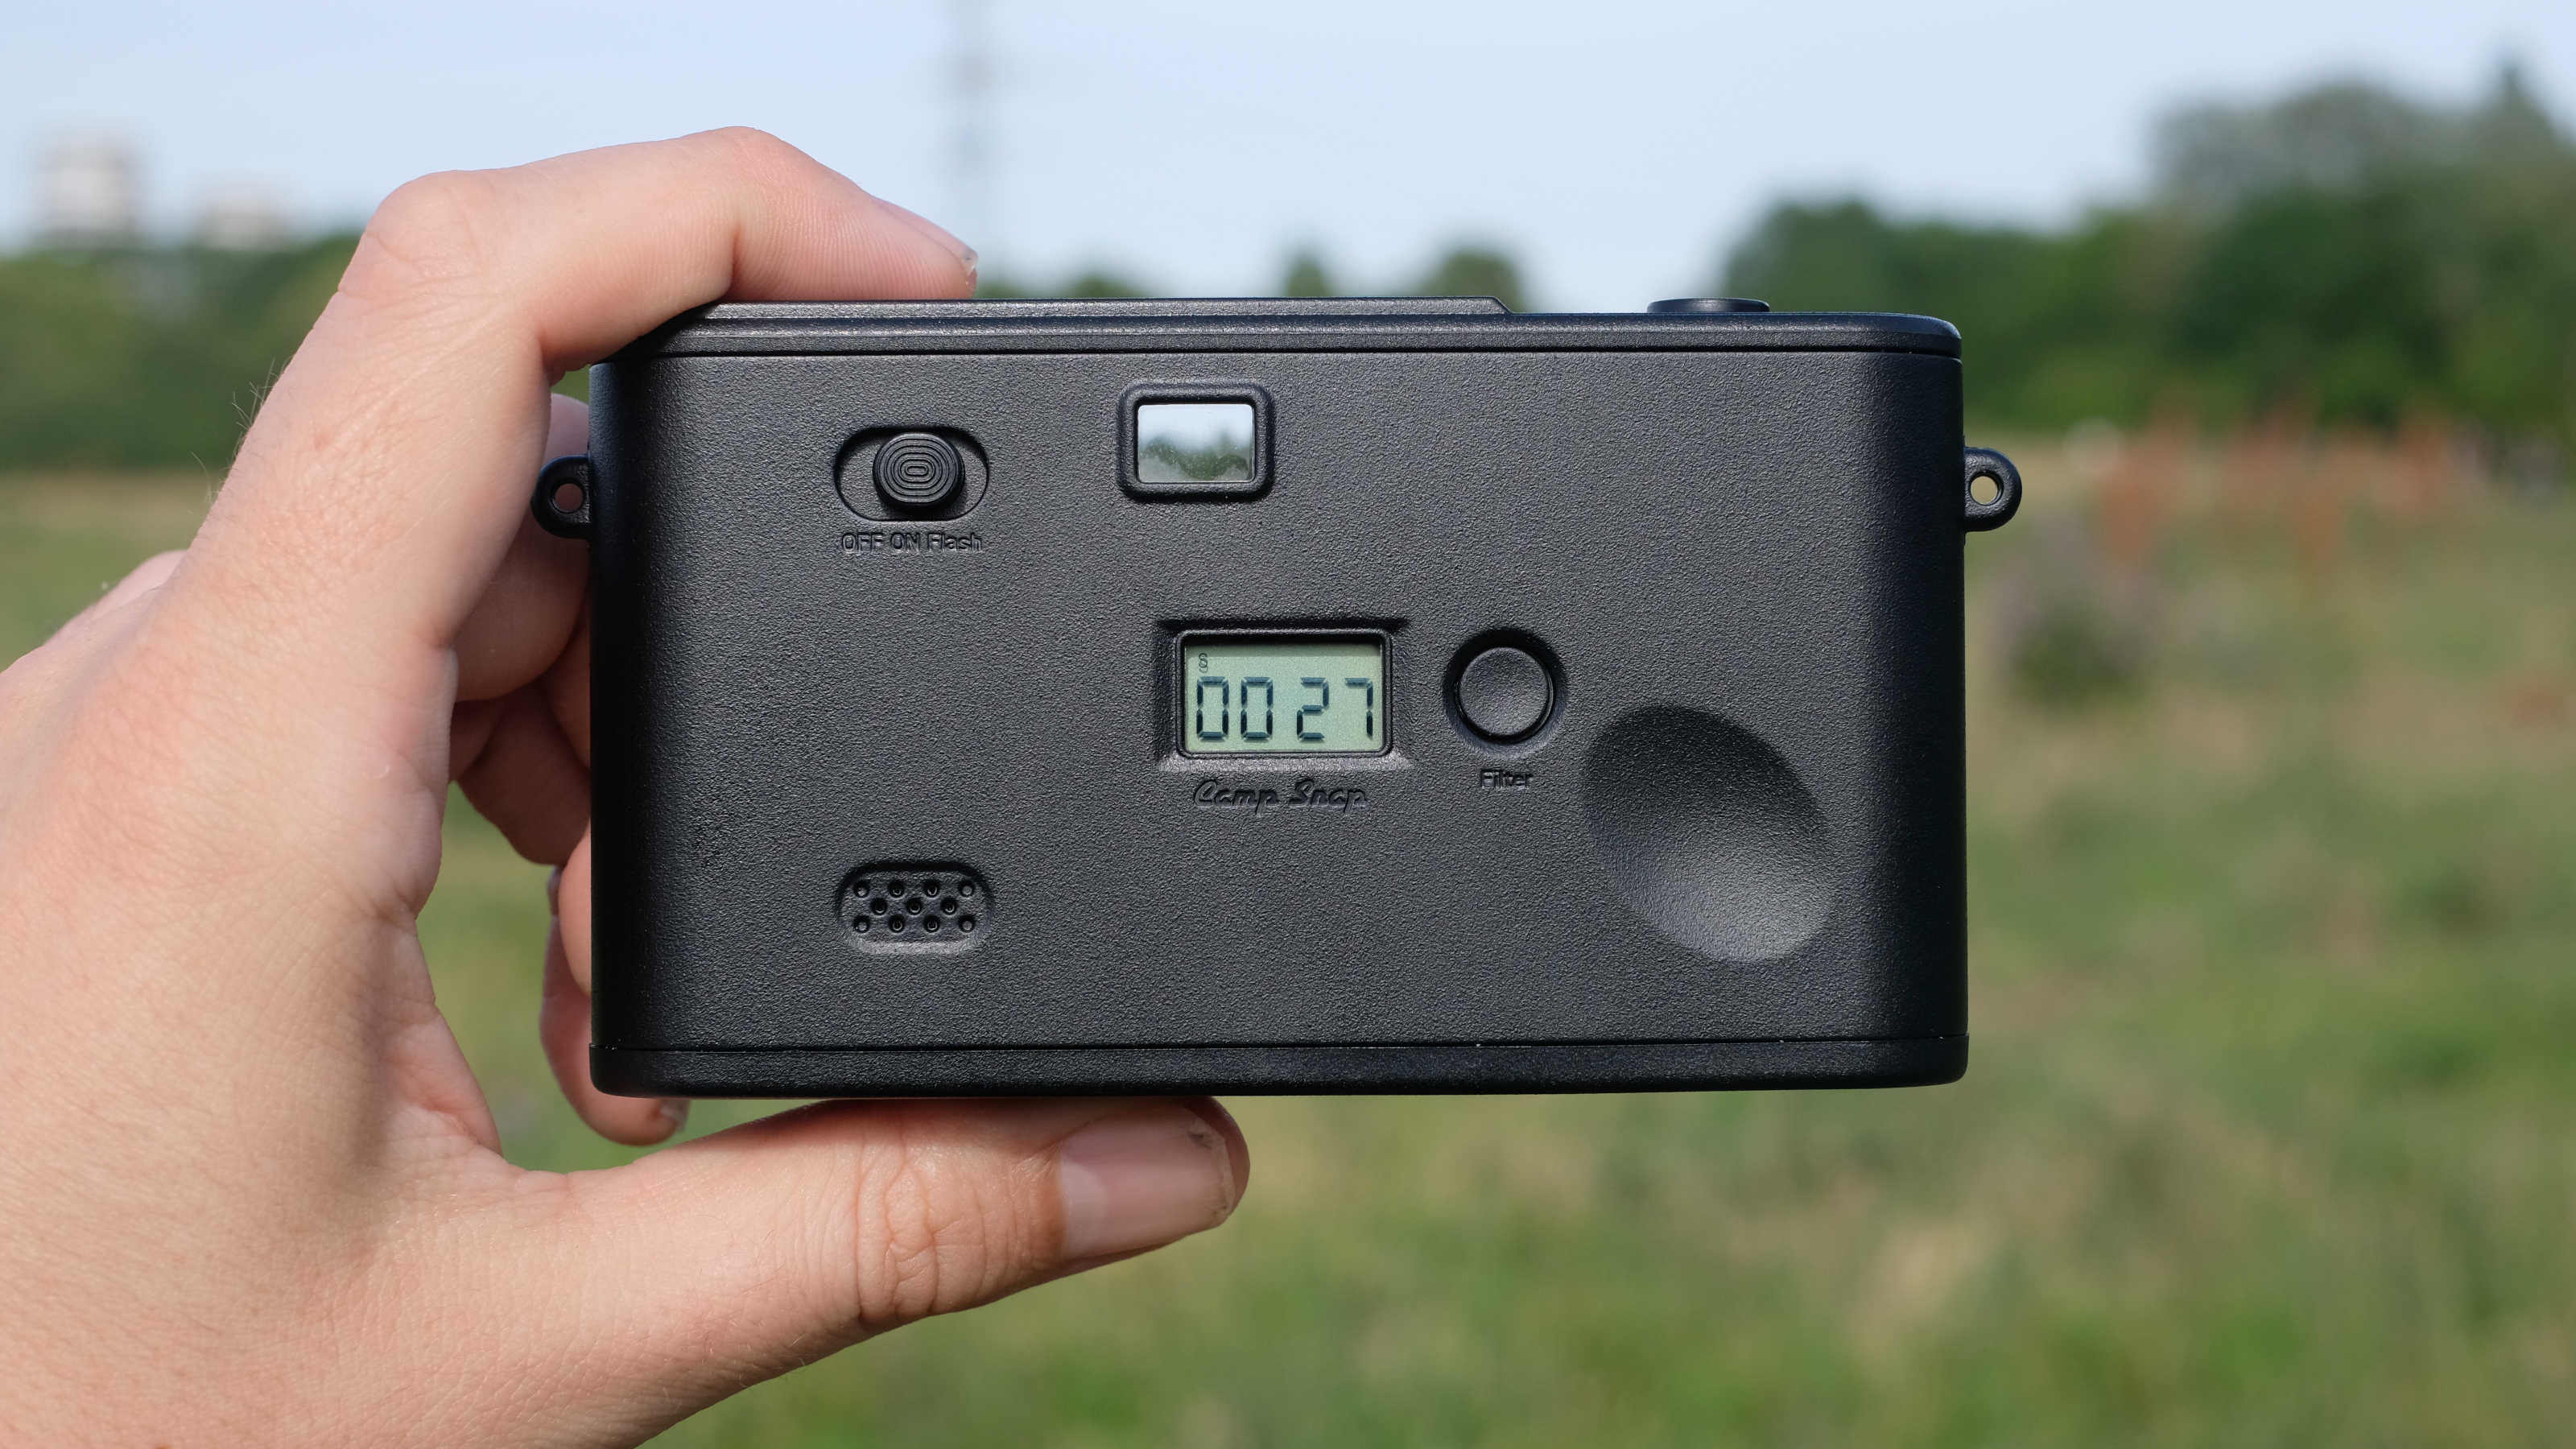
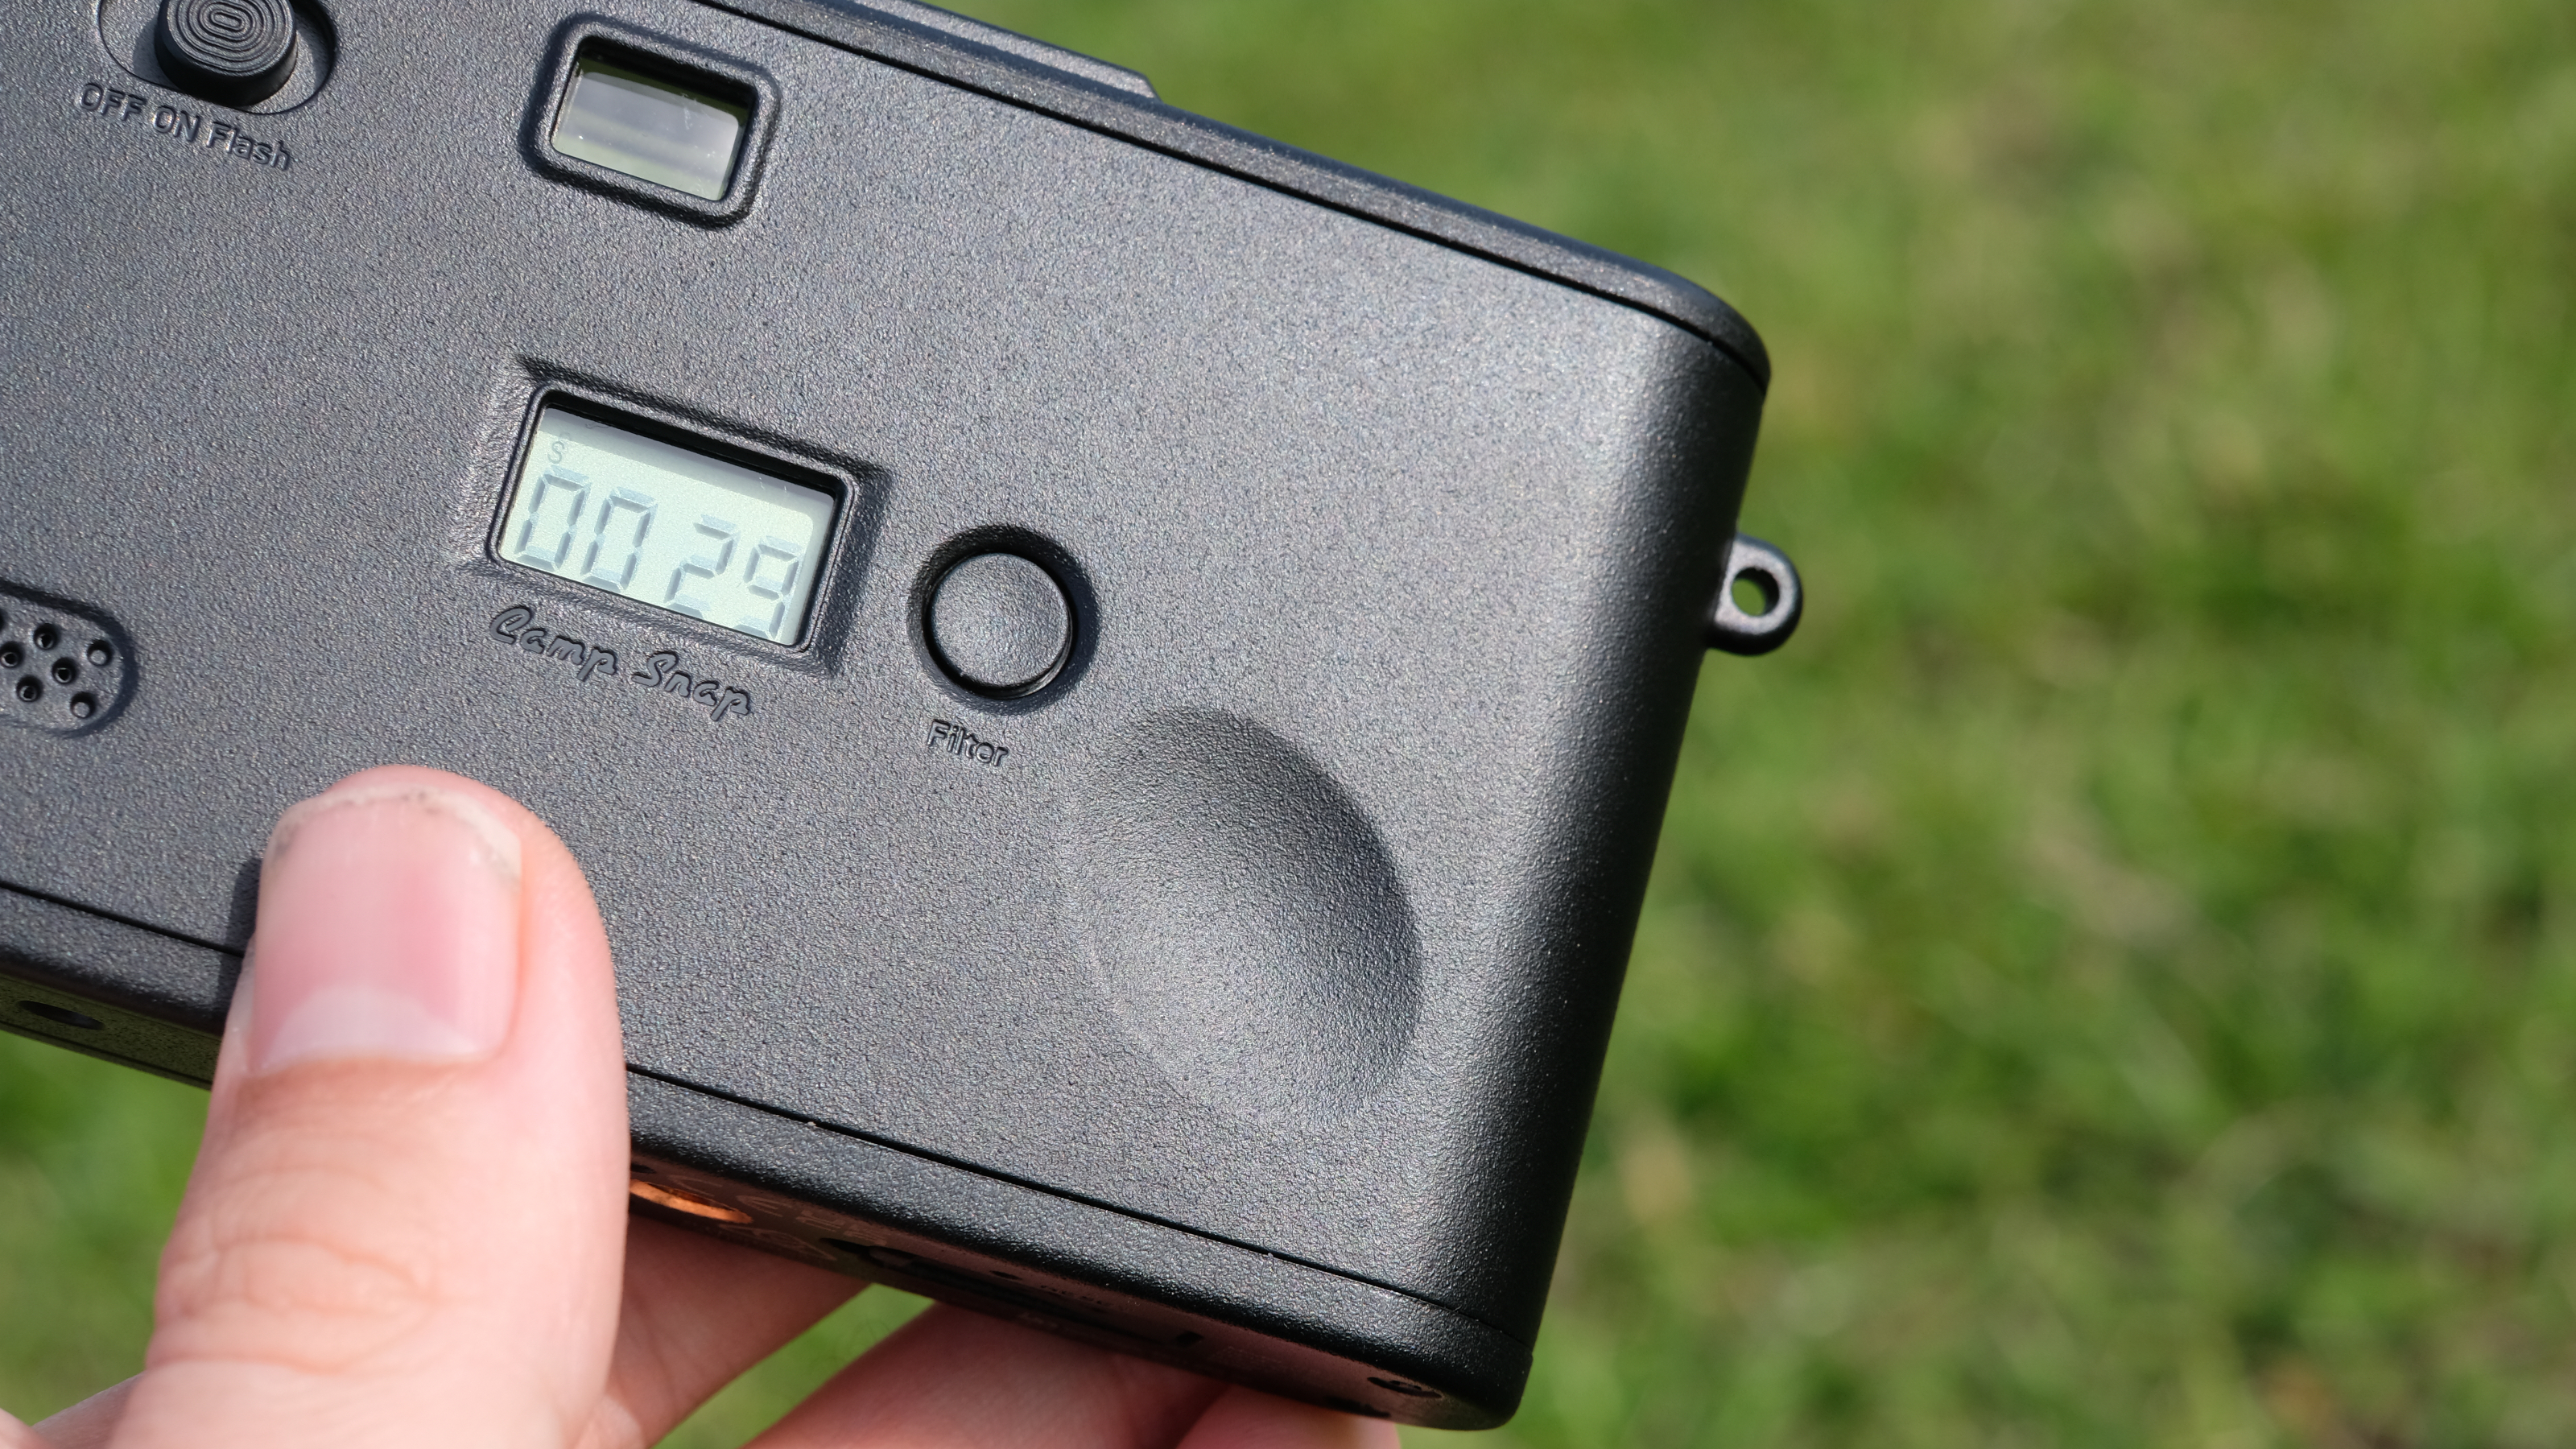
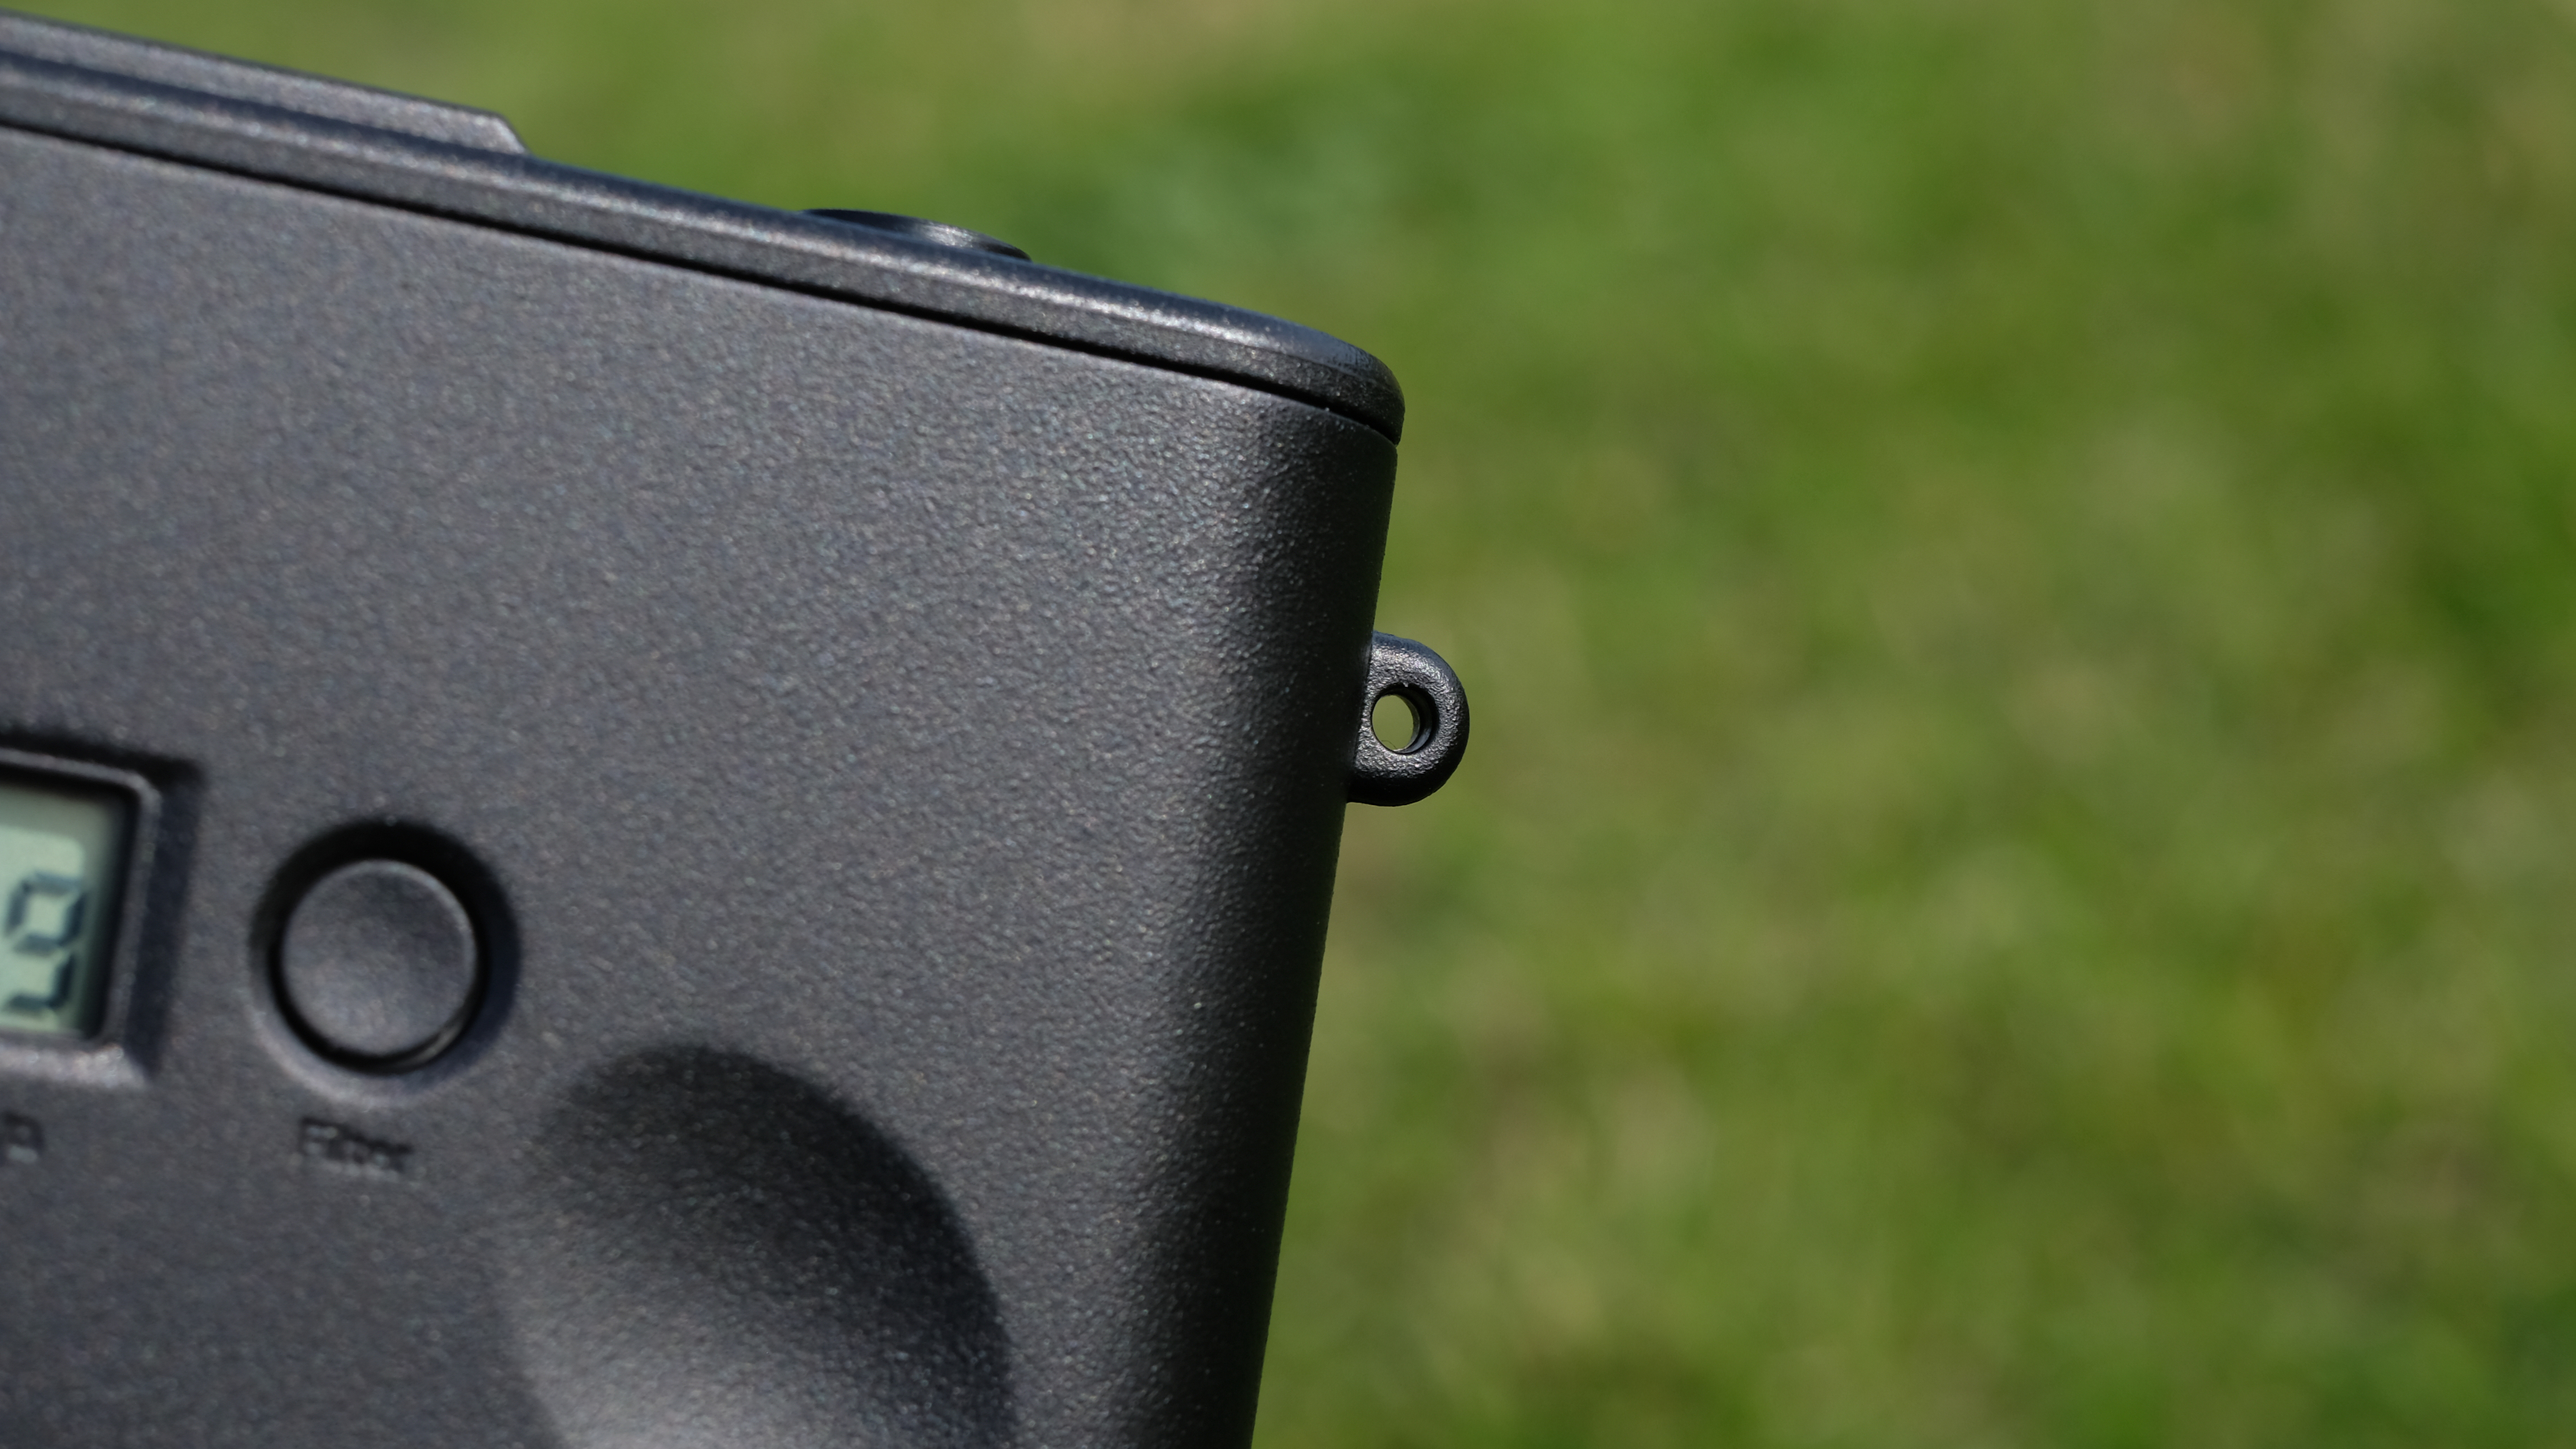
To the right of the screen, there’s the new filter select button. Pressing this button allows you to cycle through the filter selection. It can also be held down for ten seconds to activate ‘Camp Lock’ — which locks the button to make the camera more useable for children (negating a scenario in which they accidentally take all their pictures in black and white). Hold down for ten more seconds to unlock. Also, while testing this, I inadvertently discovered that tapping the filter button twice in quick succession will cause the camera to take two photos. Not sure why, but there you go.
At first it seems like the Camp Snap 2 doesn’t have a battery indicator like the four LEDs on the CS-Pro. In fact, it does, but you could be forgiven for not noticing it. When you boot up the camera, the screen will briefly display a number between 0 and 100, before reverting to your current shot counter. This is, I believe, a percentage-based battery indicator. It’s not exactly advertised, and easy to miss given that your shot counter will likely be a quite similar number, but it is there.
Color-wise, the Camp Snap 2 is available in a selection of standard shades — green, black, white, yellow and brown. However, it can also be bought in a selection of rather stylish translucent ‘jelly’ colorways, evoking the early-millennium trend for translucent tech. I’ll admit that I think these versions are pretty cool, and my partner (who isn’t into cameras) independently showed me them on Instagram because she liked the look of them. I suspect they’ll be very popular.
Camp Snap 2: performance
- Image quality is a bit scuzzy, but it's part of the lo-fi charm
- Operation is very easy, and the shutter lag from the original has been dealt with
- New filters add creative options, but aren't as striking or distinctive as those on the CS-Pro
As mentioned, the Camp Snap 2 uses the same sensor as the original, so raw image quality is identical. You still get 8MP images with limited dynamic range. Blown-out highlights are a fairly common sight, as are muddy and indistinct shadows. In the latter situation, the LED flash can be helpful, though it’s nowhere near as powerful as a proper Xenon flash (which the CS-Pro has).
The new filter dial really does add some welcome creative depth. You have six options — first there’s the Standard (S) look, which produces naturalistic but warm colors. Then you have Vintage 1 to 3 (V1, V2, V3). V1 ups the saturation and has a slight purple tint; V2 is almost identical to Standard, but slightly cooler; V3 has a distinctly sunny yellow cast.
Next, there’s the black & white mode (BW), which delivers decent contrast for striking monochrome. And lastly there’s the interestingly named Analog (A). I was expecting this to be covered in artificial film grain, something that Camp Snap experimented with on the CS8. But in fact, it’s the warmest look of the bunch, with muted colors and a slight magenta cast, and it proved to be my favorite.


I was surprised by how subtle the filters were, especially coming off the back of the CS-Pro, in which they are very striking. Someone looking for a dramatic image effect might come away a little disappointed; V2 in particular is so similar to Standard that I questioned the point of having it. I think in practicality, most users will probably just figure out which is their favorite and stick with it, occasionally switching to BW when the moment calls. I can't exactly picture myself agonizing over whether this pub garden sunset deserves V2 or V3.


One oft-criticized aspect of the original Camp Snap was its shutter lag — the appreciable delay between the user pressing the shutter button and the photo actually being taken. This was significantly improved in the CS-Pro, with a more powerful processor, and in the Camp Snap 2 it seems to have been somewhat improved.
However, I would note that the lag seems to be mostly confined to the cosmetics — the shot counter and the shutter release sound effect. On a few occasions, I pressed the shutter and then heard the MIDI ‘clunk’ half a second after moving the camera away, and chastised myself for missing a shot through impatience. But later, when I reviewed the image, I seemed to have gotten away with it. And I can live with the sound effect being slow if I still have the shot in the bag.
It’s also worth noting that the Camp Snap 2 has a new feature called QuickDraw. After a period of inactivity, the camera sleeps to save power, but you can press the shutter button while it’s in this state, and it will wake and quickly take a picture. Note that I said ‘quickly’, not ‘instantly’ — it does take a moment to bestir itself. I’ve seen a few comments online complaining about shutter lag, and I actually think this is probably what they’re referring to. When the camera was awake, I experienced no real shutter lag issues.
Should I buy the Camp Snap 2?
Buy it if...
You want a camera to take everywhere
Slimmer than ever, the new Camp Snap 2 is genuinely a pocketable camera, so light it’s easy to always have on you.
You want a screen-free experience
Camp Snap’s key selling point, the lack of a rear screen, makes it great for those who want a more immersive, analog-style shooting experience.
You want a bit more creative versatility
While it’s still a point-and-shoot, the new filter selection, tripod mount and filter thread all make the Camp Snap 2 a more versatile camera than its predecessor.
Don't buy it if...
You want an image quality upgrade
The Camp Snap 2 uses the same small 8MP sensor as the original.
You want a fast, responsive camera for action
While the shutter lag has been improved, you still wouldn’t exactly call the Camp Snap 2 a speedster — there’s no burst mode.
How I tested the Camp Snap 2
- I received a loan unit of the Camp Snap 2 for testing
- I have taken it out on a number of photo excursions, as well as to a sporting event and to a concert
- I’ve shot in variable light conditions throughout June, though with mostly very bright and sunny weather
I received a review sample of the Camp Snap 2 from the manufacturers, and had it in my pocket and about my person for a couple of weeks. I took it on excursions around London, as well as on trips south to Bradford-on-Avon, Frome and Bath, during which time I used it to capture more than 100 photos using all of the filters, in a range of weather and lighting conditions.
First reviewed June 2026
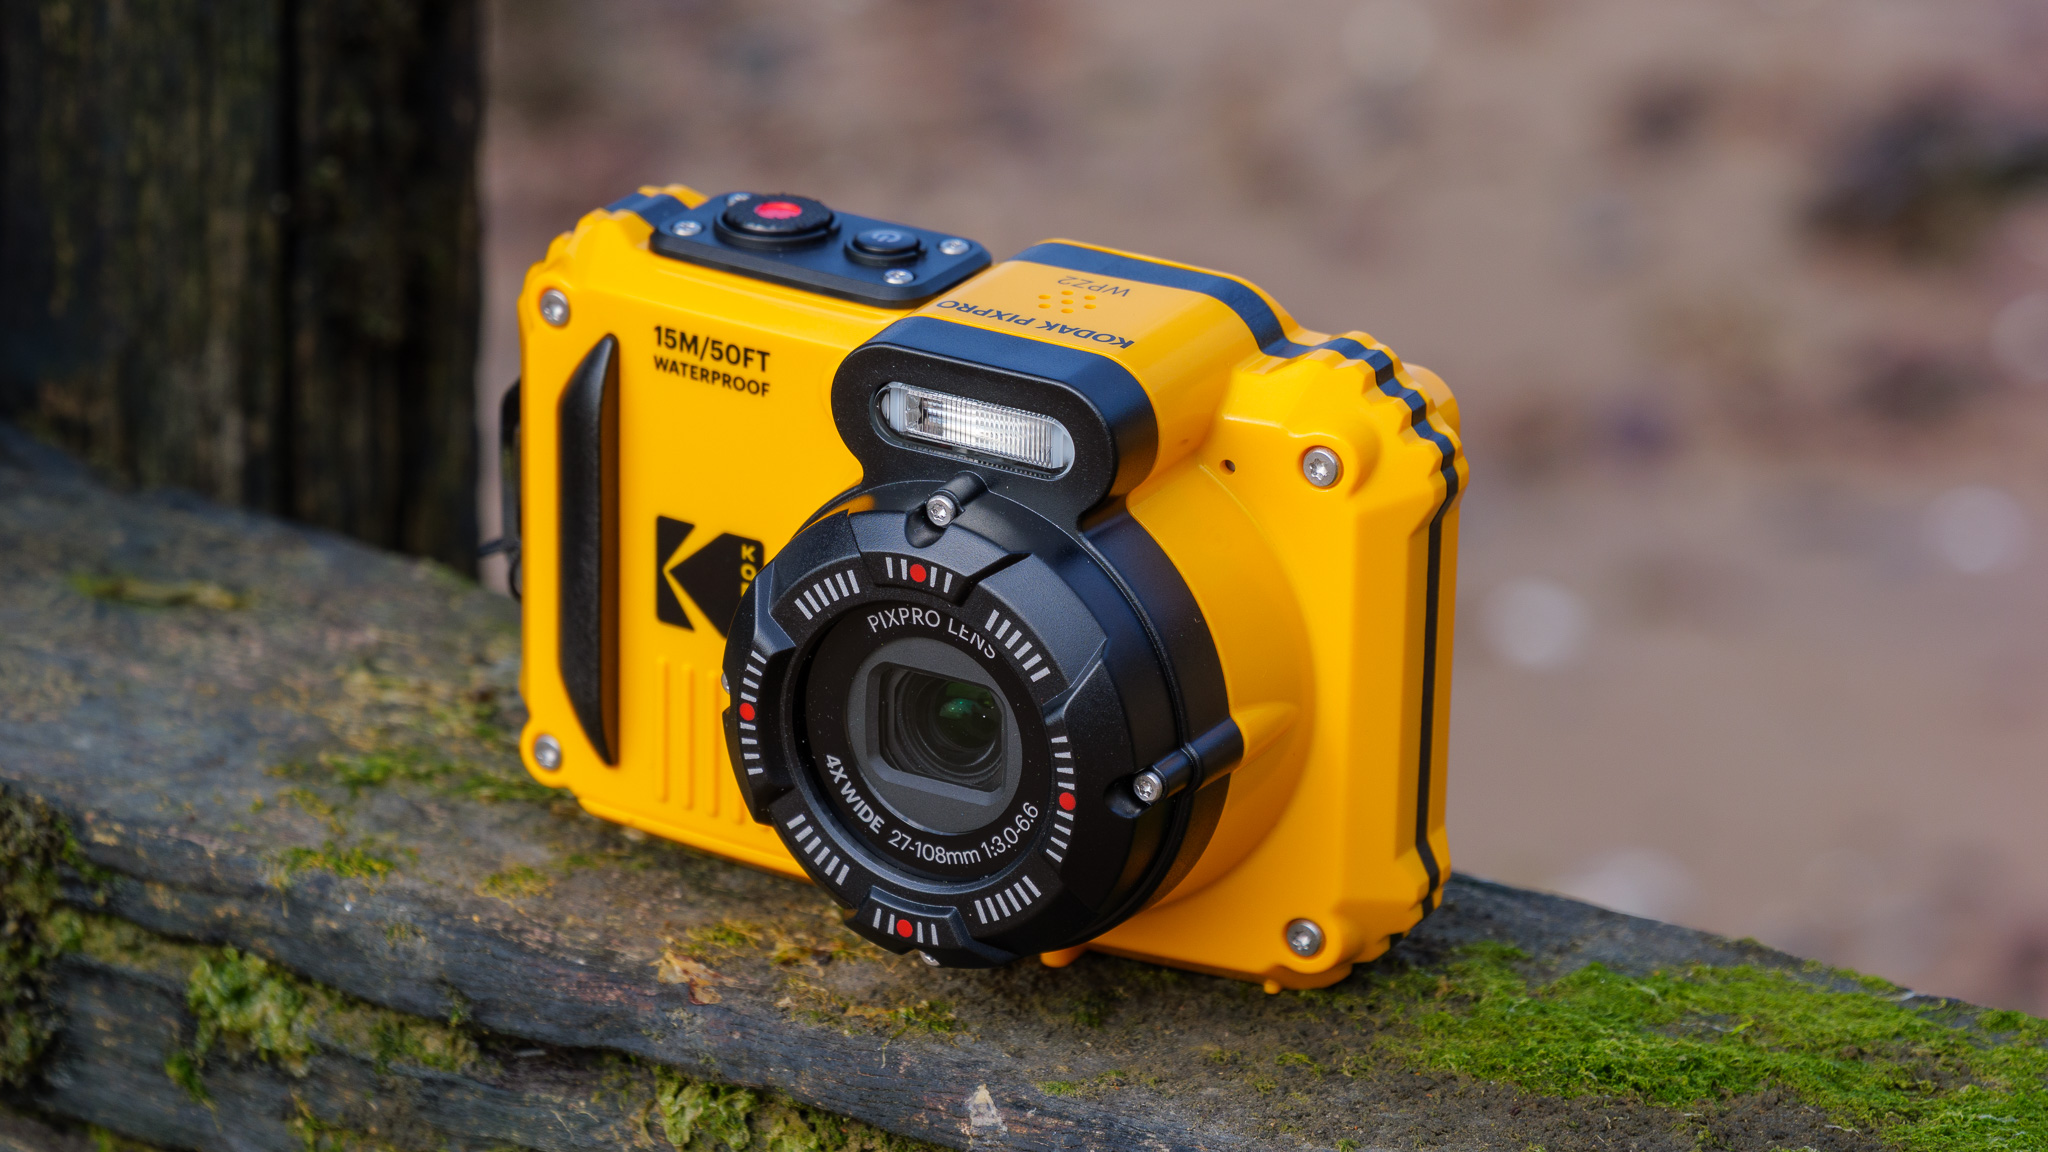
Kodak PixPro WPZ2: One-minute review
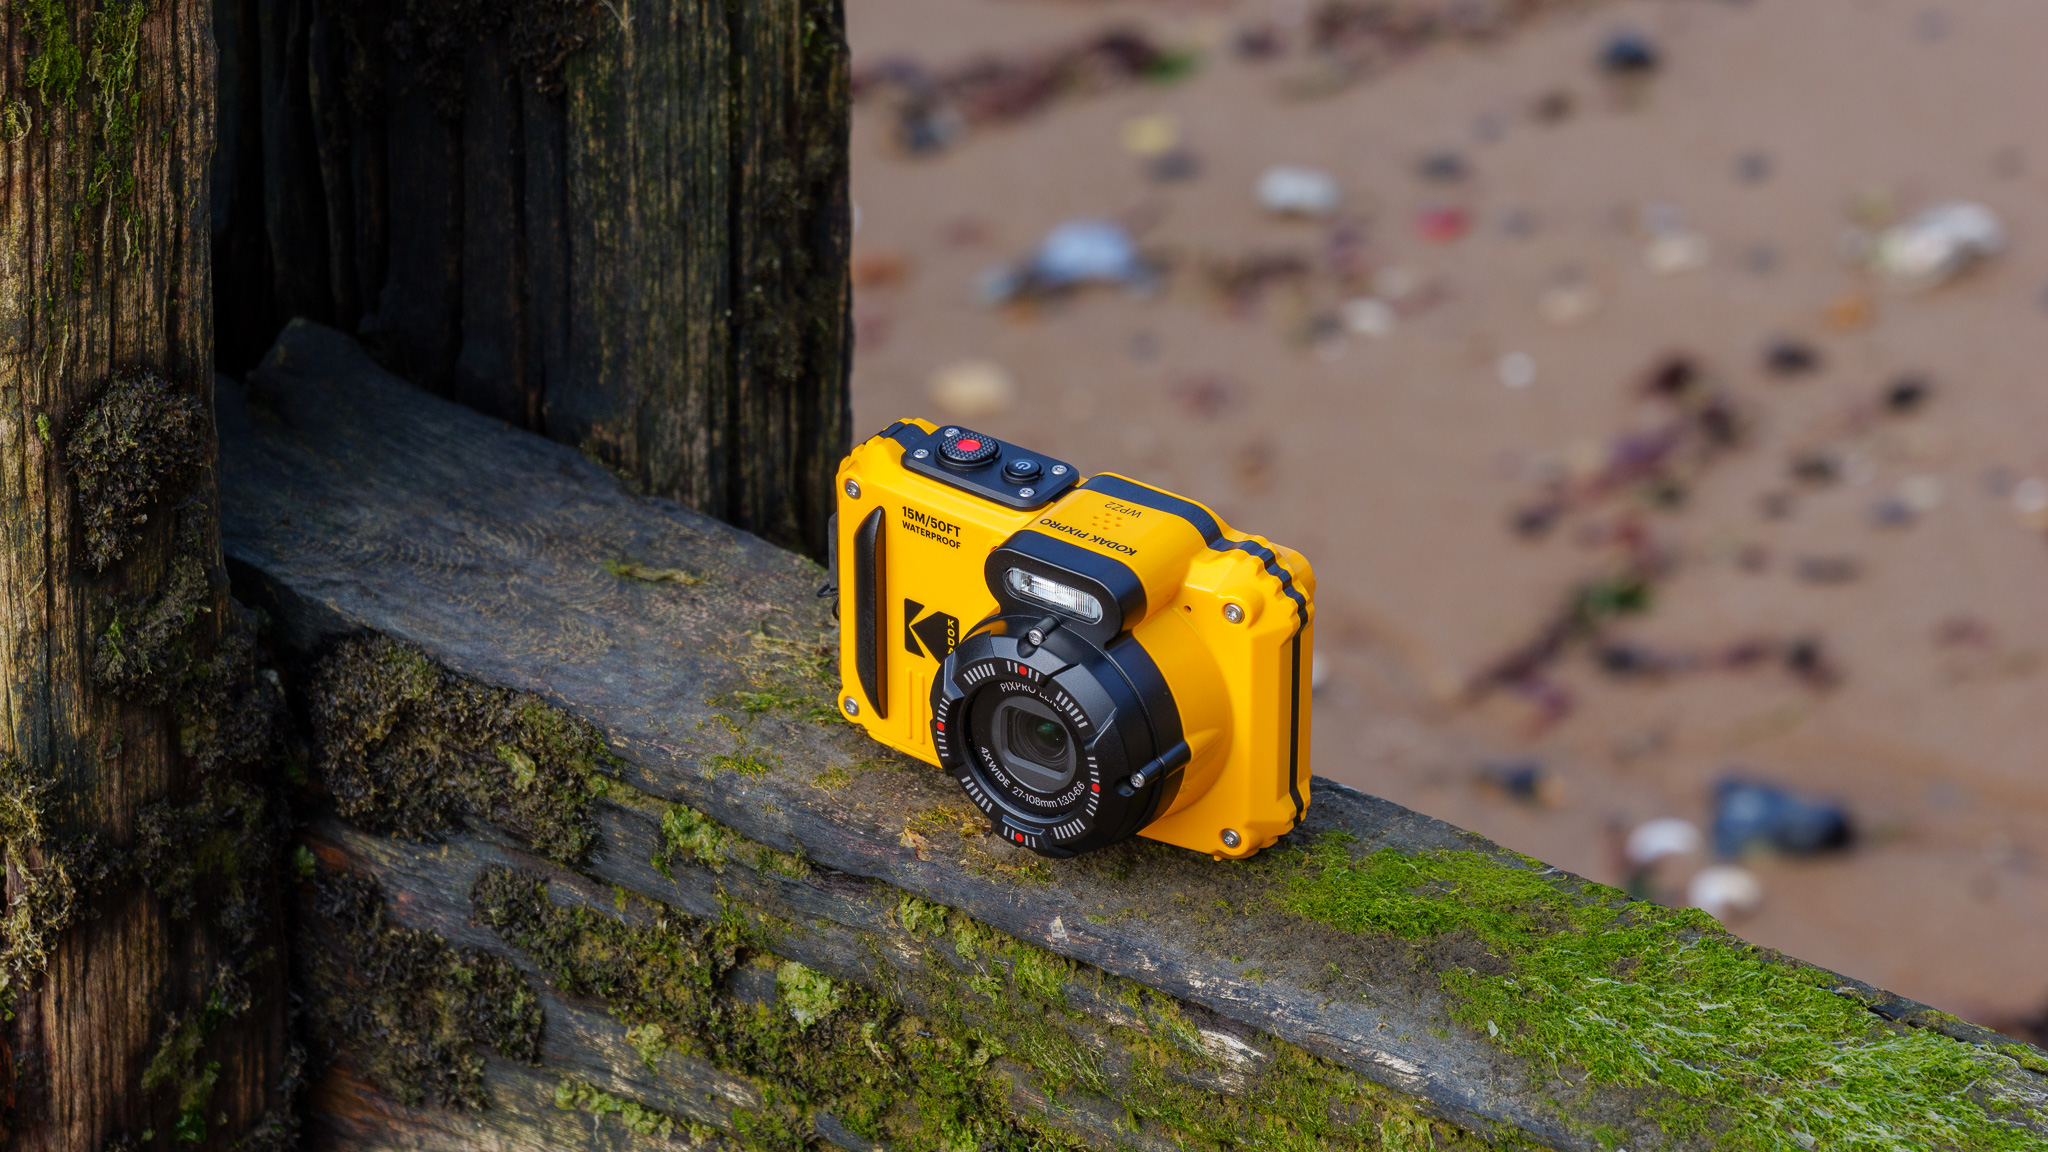
The Kodak PixPro WPZ2 is a budget waterproof camera aimed squarely at adventurers who want to take their photography somewhere a smartphone or regular point-and-shoot can’t follow.
It costs a fraction of what you’d pay for a premium rugged compact like the OM System Tough TG-7, and the trade-offs are exactly what you’d expect at this price: a fairly basic feature set, modest image quality and 1080p/30fps video recording that feels pretty old-school in 2026. But after spending some time with it at my local beach, I found plenty to like.
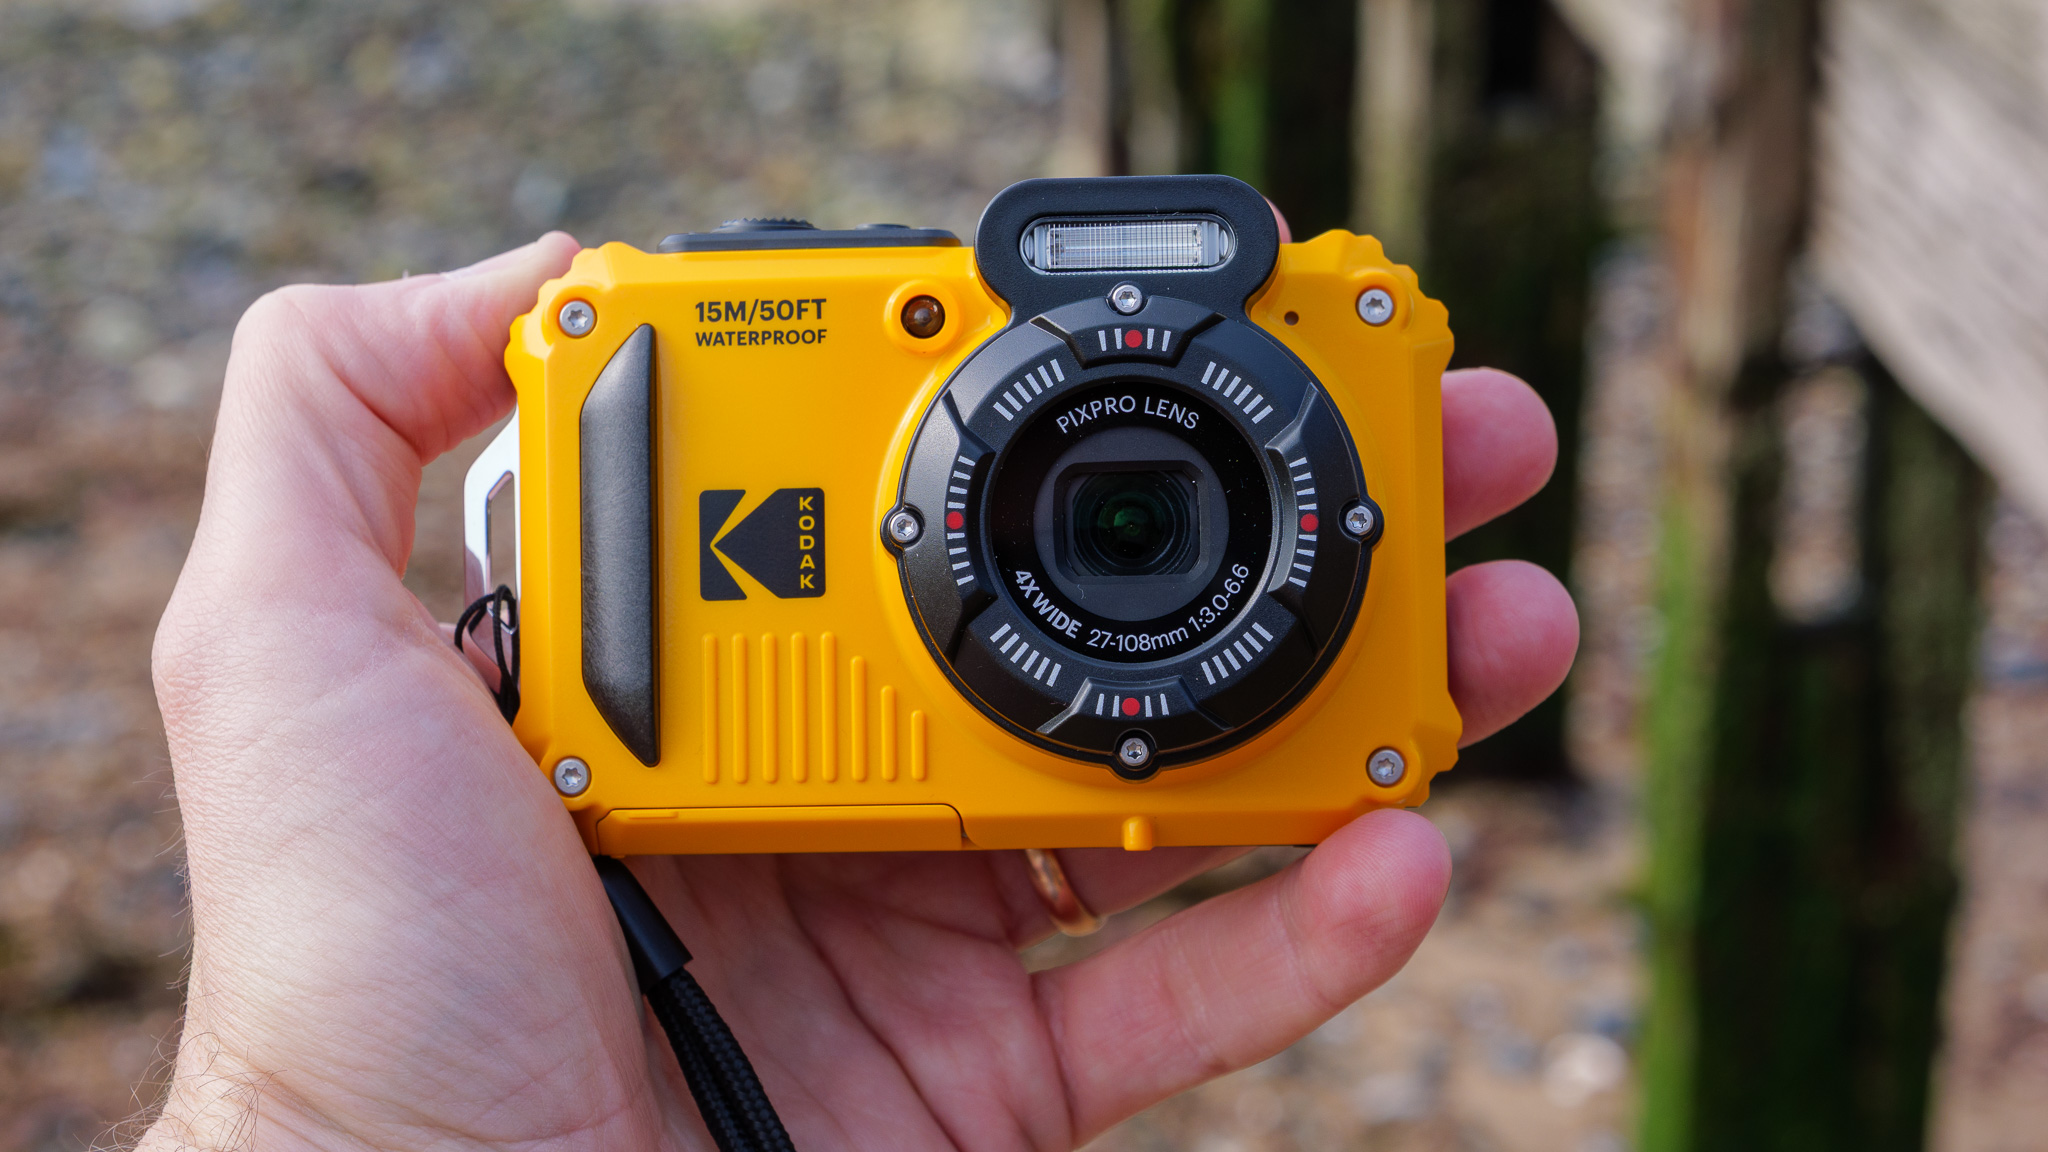
For one, it certainly looks the part. The WPZ2’s yellow-and-black color scheme, chunky G-Shock-esque lens barrel and prominent rivet-like screws on the front give it an appropriately ruggedized aesthetic. It’s also smaller than it looks, and I managed to squeeze it into my jeans pocket, protruding lens barrel and all.
Build quality feels solid, and the double-locking battery and card compartment is a reassuring design choice that should prevent any accidental pop-opens while you’re underwater. I tested it in saltwater rock pools and have no reason to doubt Kodak’s 15m waterproofing claim. There was no lens fogging when transitioning between underwater and above-water shooting, either. One note of caution: the front element doesn’t appear to be noticeably hydrophobic, so water droplets will cling on after submersion. My advice? Pack a microfiber cloth or two.
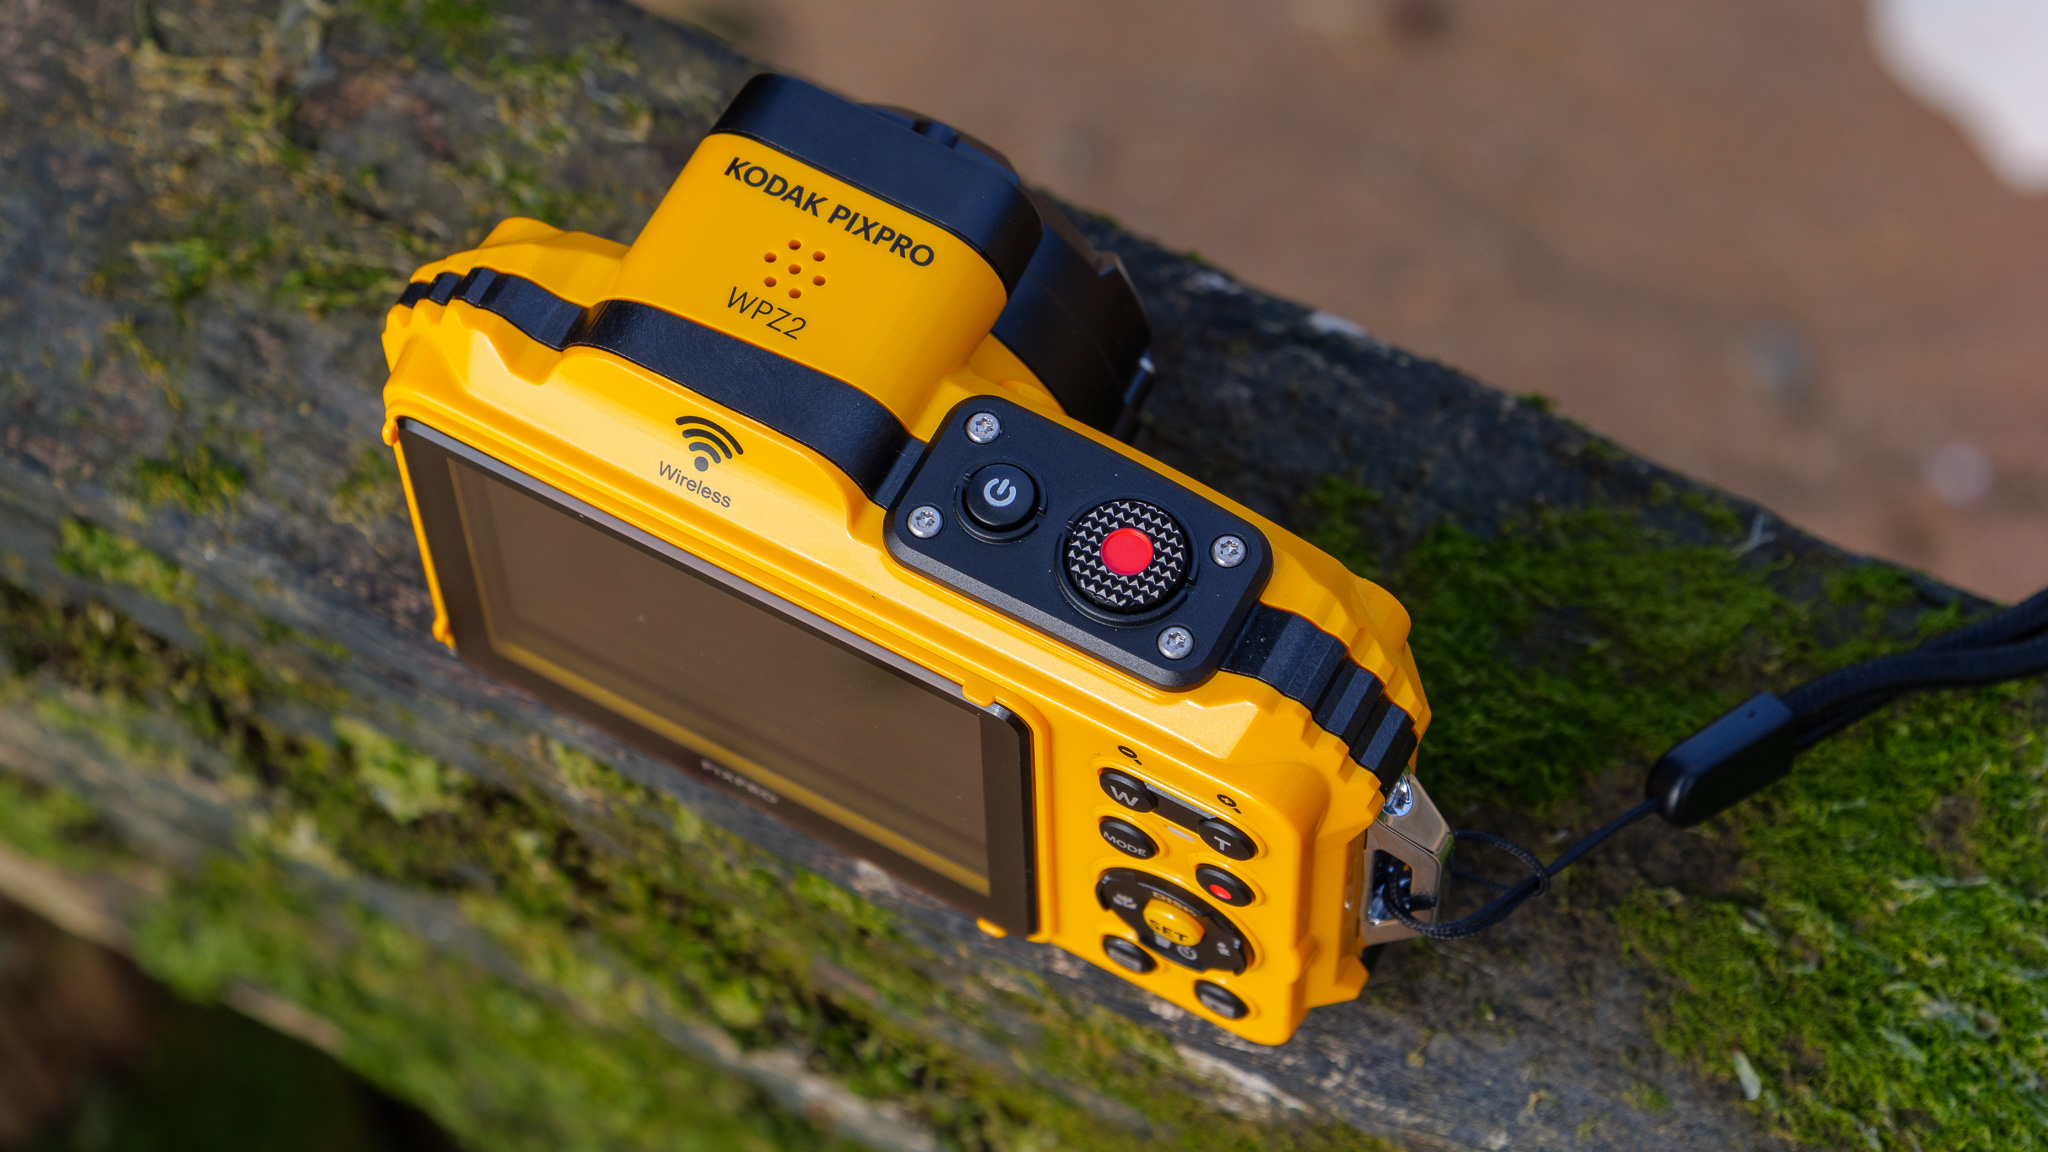
There are some usability niggles, though. The rear screen is small and dim – even at maximum brightness I found it difficult to gauge exposure or compose shots with any confidence. The zoom rocker requires a very firm press to register, which is understandable given the waterproofing demands, but isn’t much fun with wet hands. And getting a microSD card in and out of its deeply-recessed slot in the battery chamber is really fiddly, to the extent anyone with larger fingers is going to struggle.
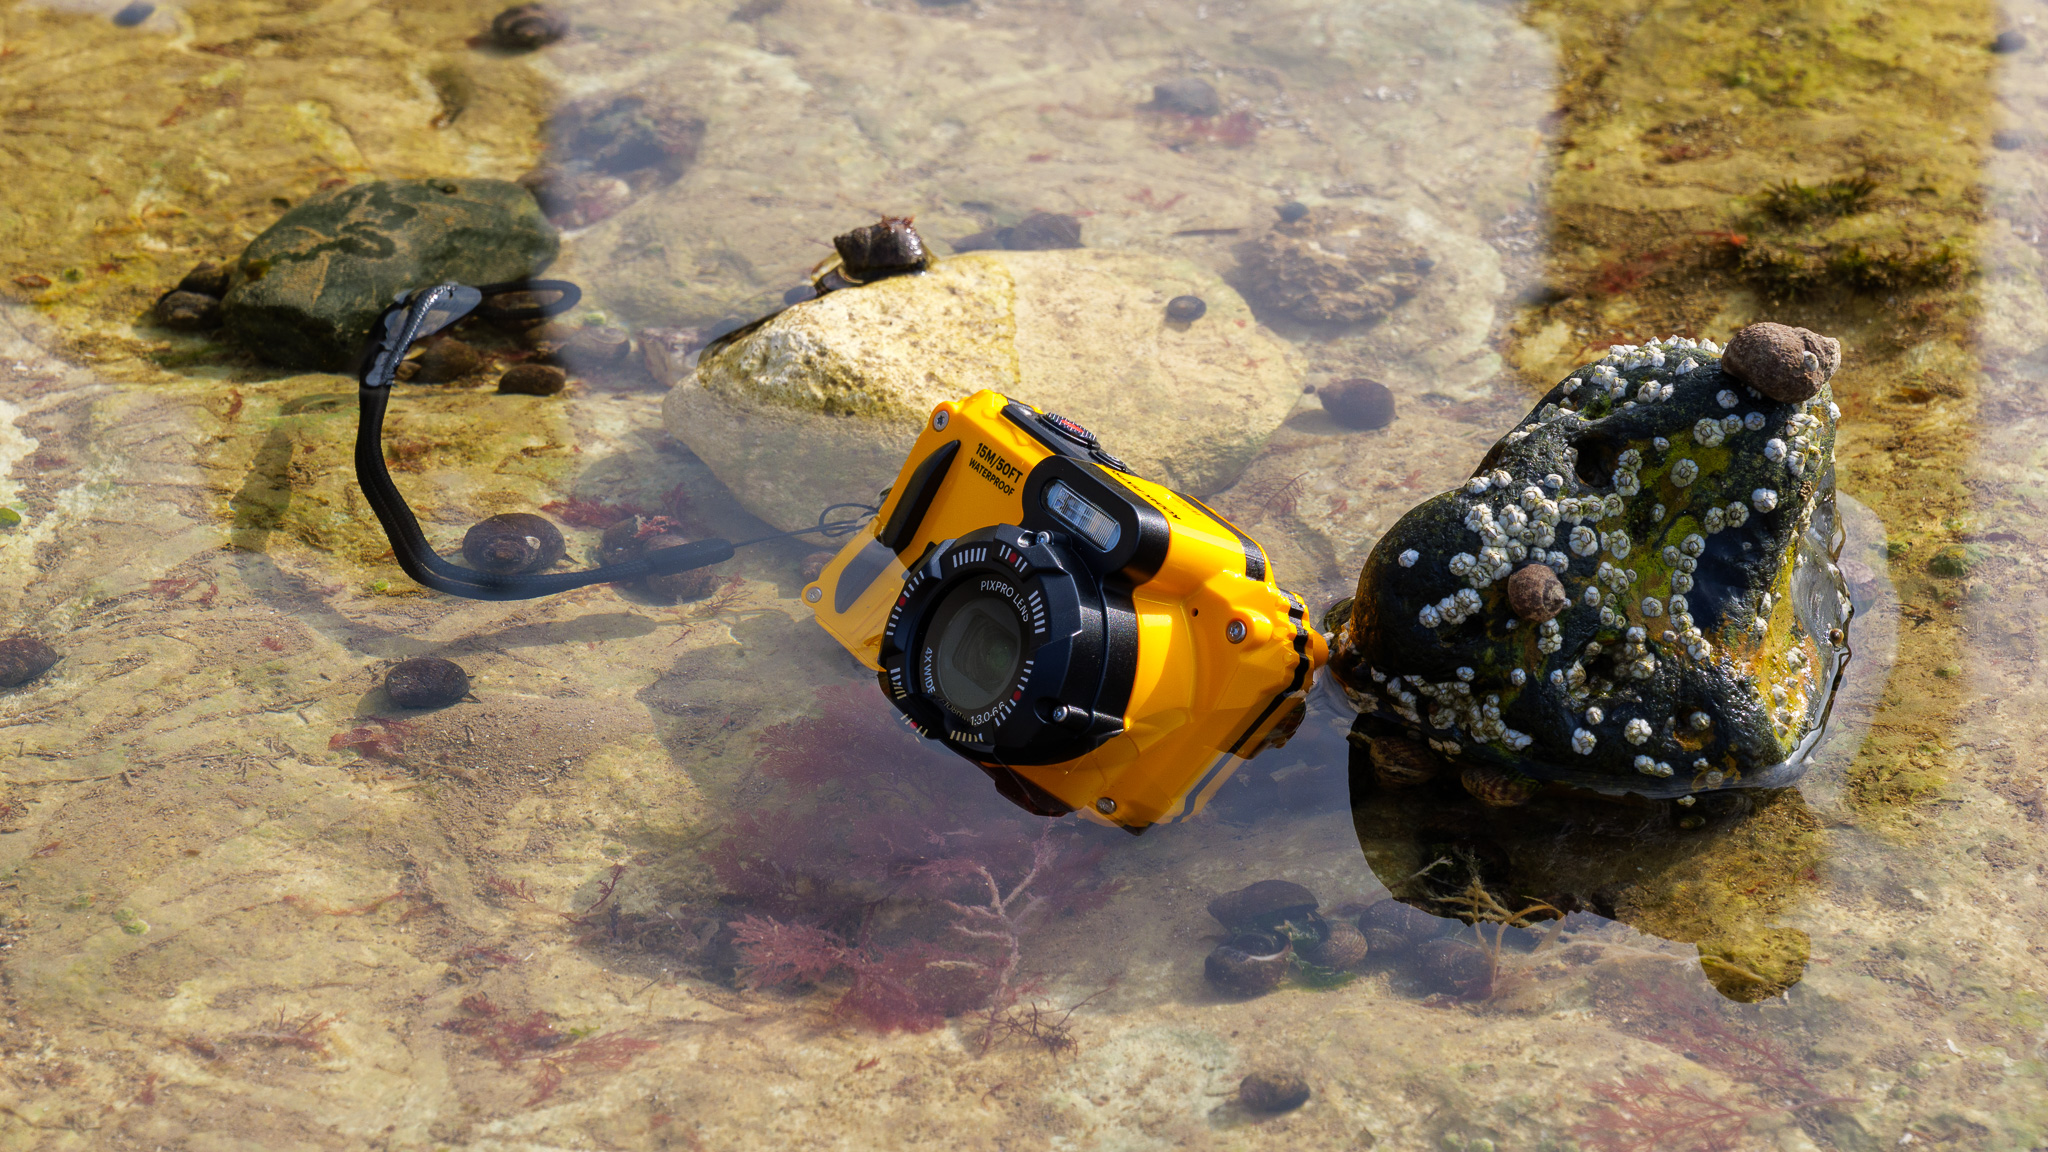
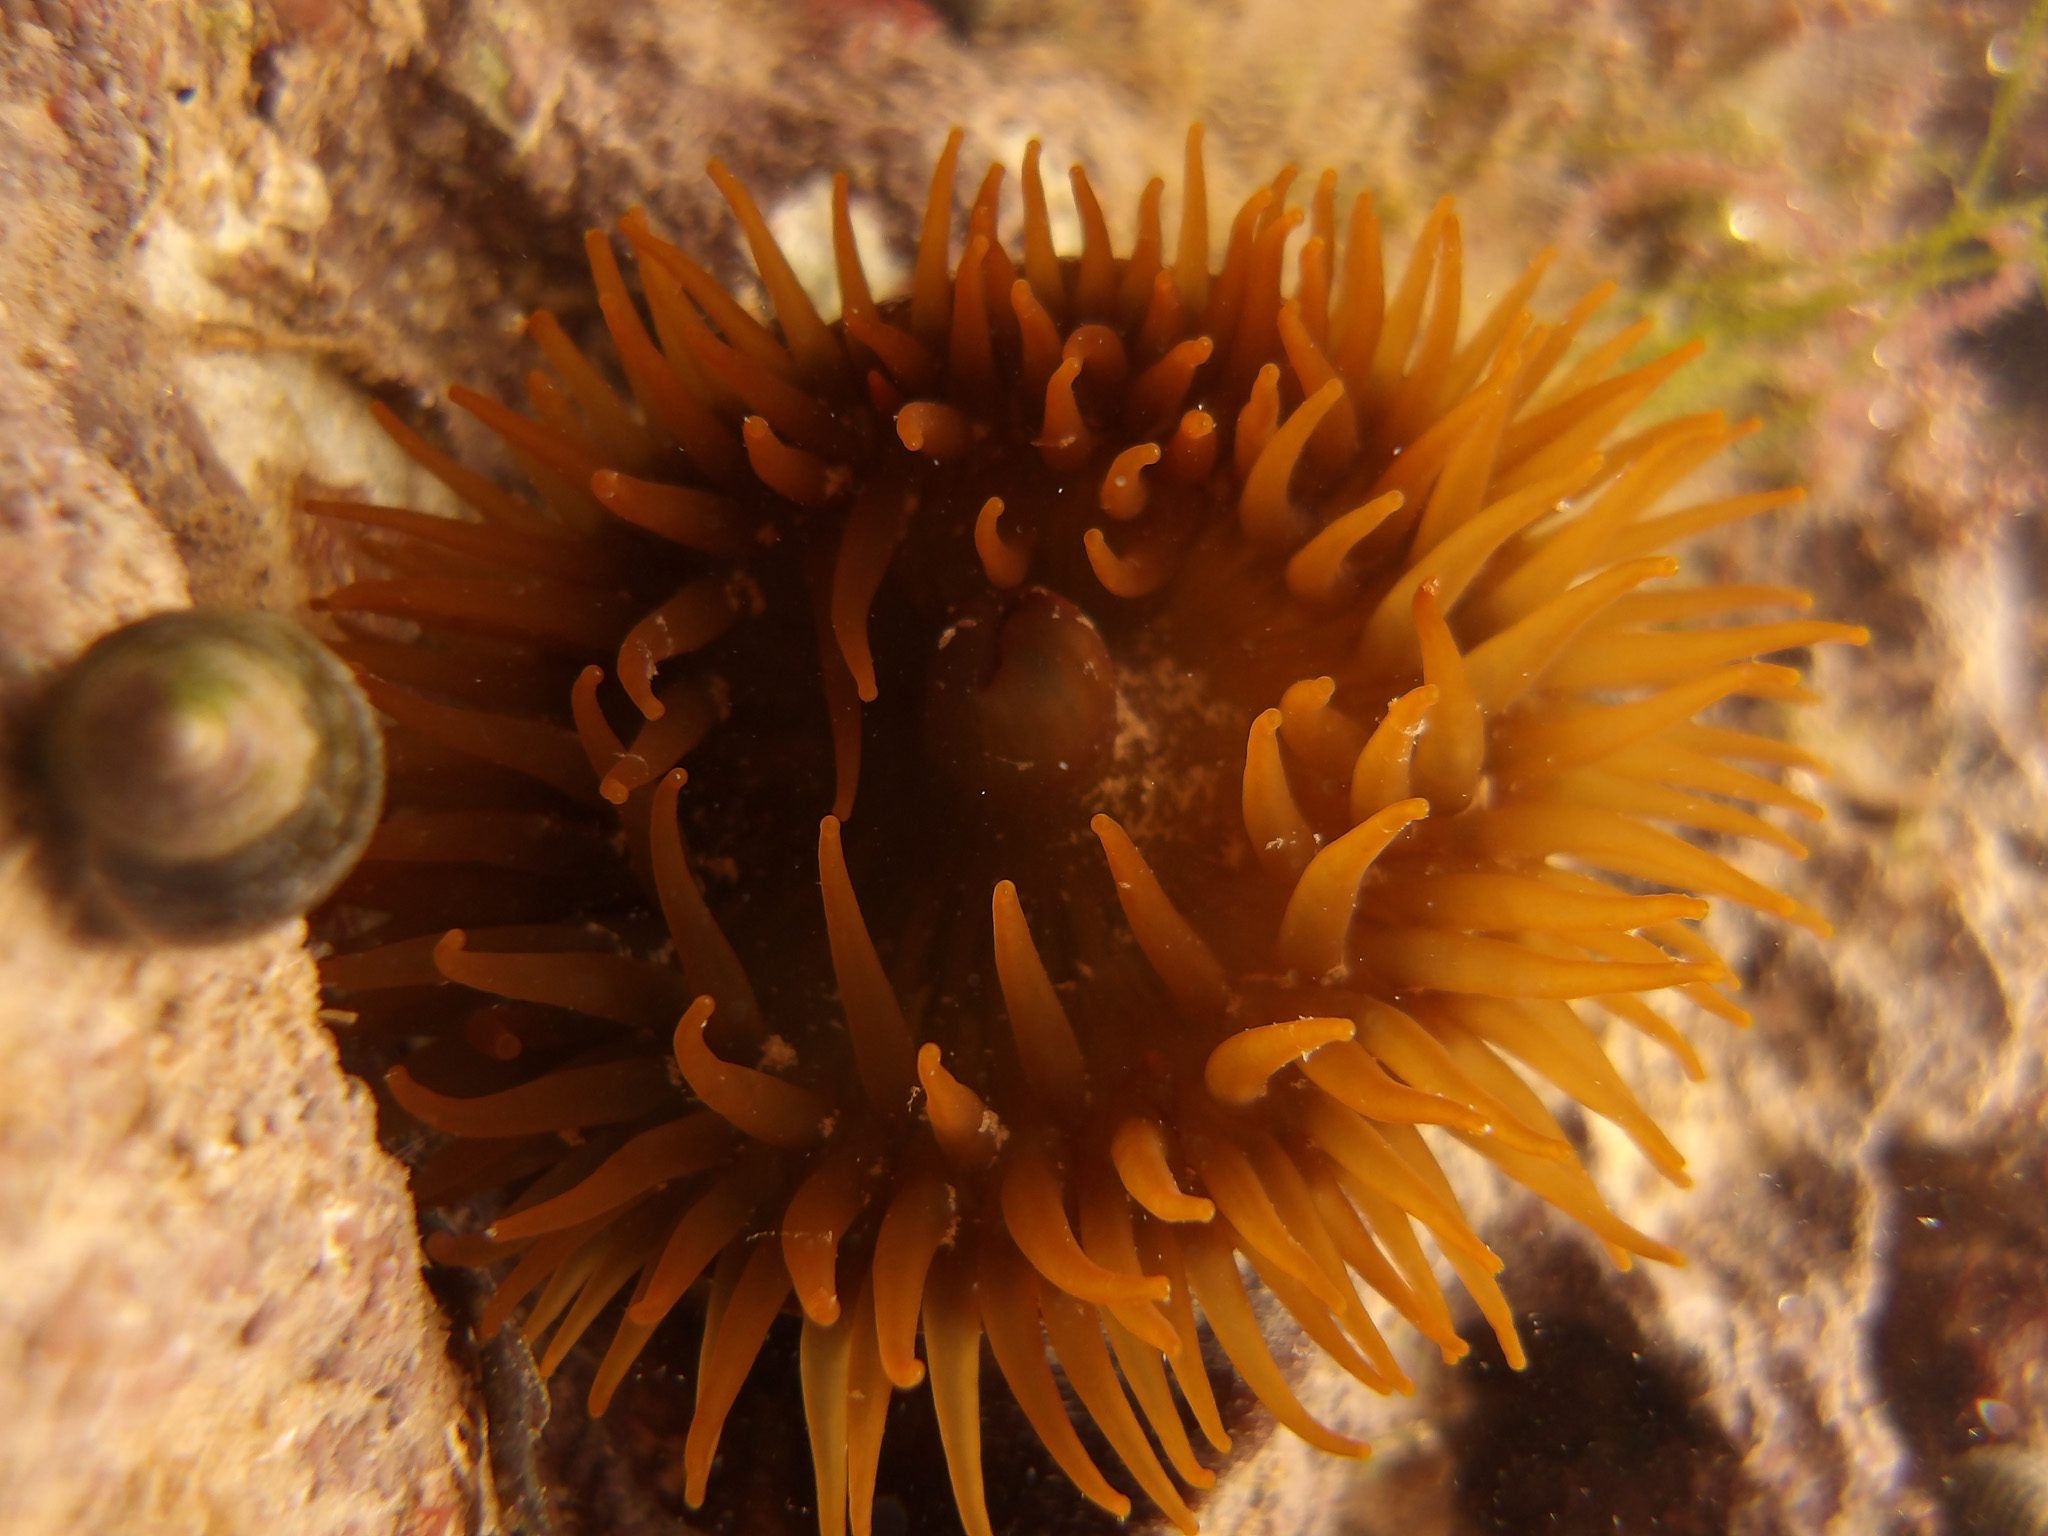
Image quality is in line with what the specs would lead you to expect: JPEGs that lack saturation, contrast and dynamic range, with some over-sharpening and noticeable corner softness. That said, the macro mode produced some impressively sharp results in my testing, with good central detail and pleasing colors.
The 4x optical zoom is a useful range to have, but engage the digital zoom beyond the optical and quality falls straight off a cliff. Low-light shooting is another weak point, though the built-in flash does keep the camera functional after dark.
Video maxes out at 1080p/30fps, which feels like a big limitation in this day and age. My underwater rock pool footage looked fine for casual use, but above-water clips suffered from the same flatness and over-processing that characterizes the still shots.
Battery life is one of the more pleasant surprises. The CIPA-rated 200 shots held up well in real-world use, and USB-C recharging felt reassuringly quick. For a day’s casual shooting, you’re unlikely to run dry.
Oh, and a small bonus if you’re a music fan: the five-note power-on chime is an uncanny dead ringer for the opening of Prince’s “Diamonds and Pearls.” Not a reason to buy, obviously, but I enjoyed it every single time.
The WPZ2 certainly won’t trouble the OM System TG-7 or Ricoh WG-8 in a straight image quality fight. But as an affordable way to get a camera into the water without worrying too much about the consequences, it fits the brief well.
Kodak PixPro WPZ2: Price and availability
- Priced at around $189 / £149 / AU$279
- Available in three color finishes
The Kodak PixPro WPZ2 is available now, priced at $189 / £149 / AU$279, though you may find it slightly cheaper (or pricier) depending on where and when you look. It comes in three colorways (yellow, red and blue) and is widely available through major retailers including Amazon, Best Buy and B&H Photo in the US, and their international equivalents.
As well as the camera and a single battery, the box includes a wrist strap and USB-A to USB-C charging cable. Note that a microSD card is not included, and with only 8MB of space on the camera's internal memory, you'll need one.
At this price it sits well below the premium rugged compact options on the market. The OM System Tough TG-7 commands around $400, so the WPZ2 undercuts it by a significant margin. The more relevant question is whether you’d be better served by choosing a similarly-priced action camera instead — and that probably depends on whether you're primarily shooting photos or video.
Kodak PixPro WPZ2: specs
Type: | Compact camera |
Sensor: | 16.35MP 1/2.3-inch BSI CMOS |
Lens: | 4x optical zoom, 27–108mm, f/2–f/6.6 |
Video: | Up to 1080p/30fps |
Screen: | 2.7-inch LCD |
Waterproofing: | IP67 rating (up to 15m/49ft) |
Shockproofing | Up to 2m/6ft drop distance |
Storage | 8MB internal + microSD card slot (up to 32GB) |
Dimensions: | 103.2 x 66.7 x 52.4mm / 4.06 x 2.62 x 2.06in |
Weight: | 176g / 6.21oz |
Kodak PixPro WPZ2: design
- IP67-rated rugged build
- 176g weight and pocketable size
Pick up the WPZ2 and the first thing that strikes you is how proudly it wears its ruggedness on its sleeve. Where most compact cameras at least try to look sleek, this one leans into the industrial; the visible screws on the faceplate, the thick black grip and the chunky lens housing all read less “camera” and more “piece of heavy equipment.”
The Caterpillar digger-style yellow-and-black colorway I tested reinforces that impression, but red and blue options are available if you’d prefer something that looks a little less like it came straight off the construction site.
Despite its bulk-suggesting aesthetics, the WPZ2 is actually very small and manageable in the hand. It slipped into my jeans pocket without much protest, which is more than you’d expect from something that looks so burly. At 176g / 6.2oz it’s light enough that you’ll almost forget it’s there between shots, too.

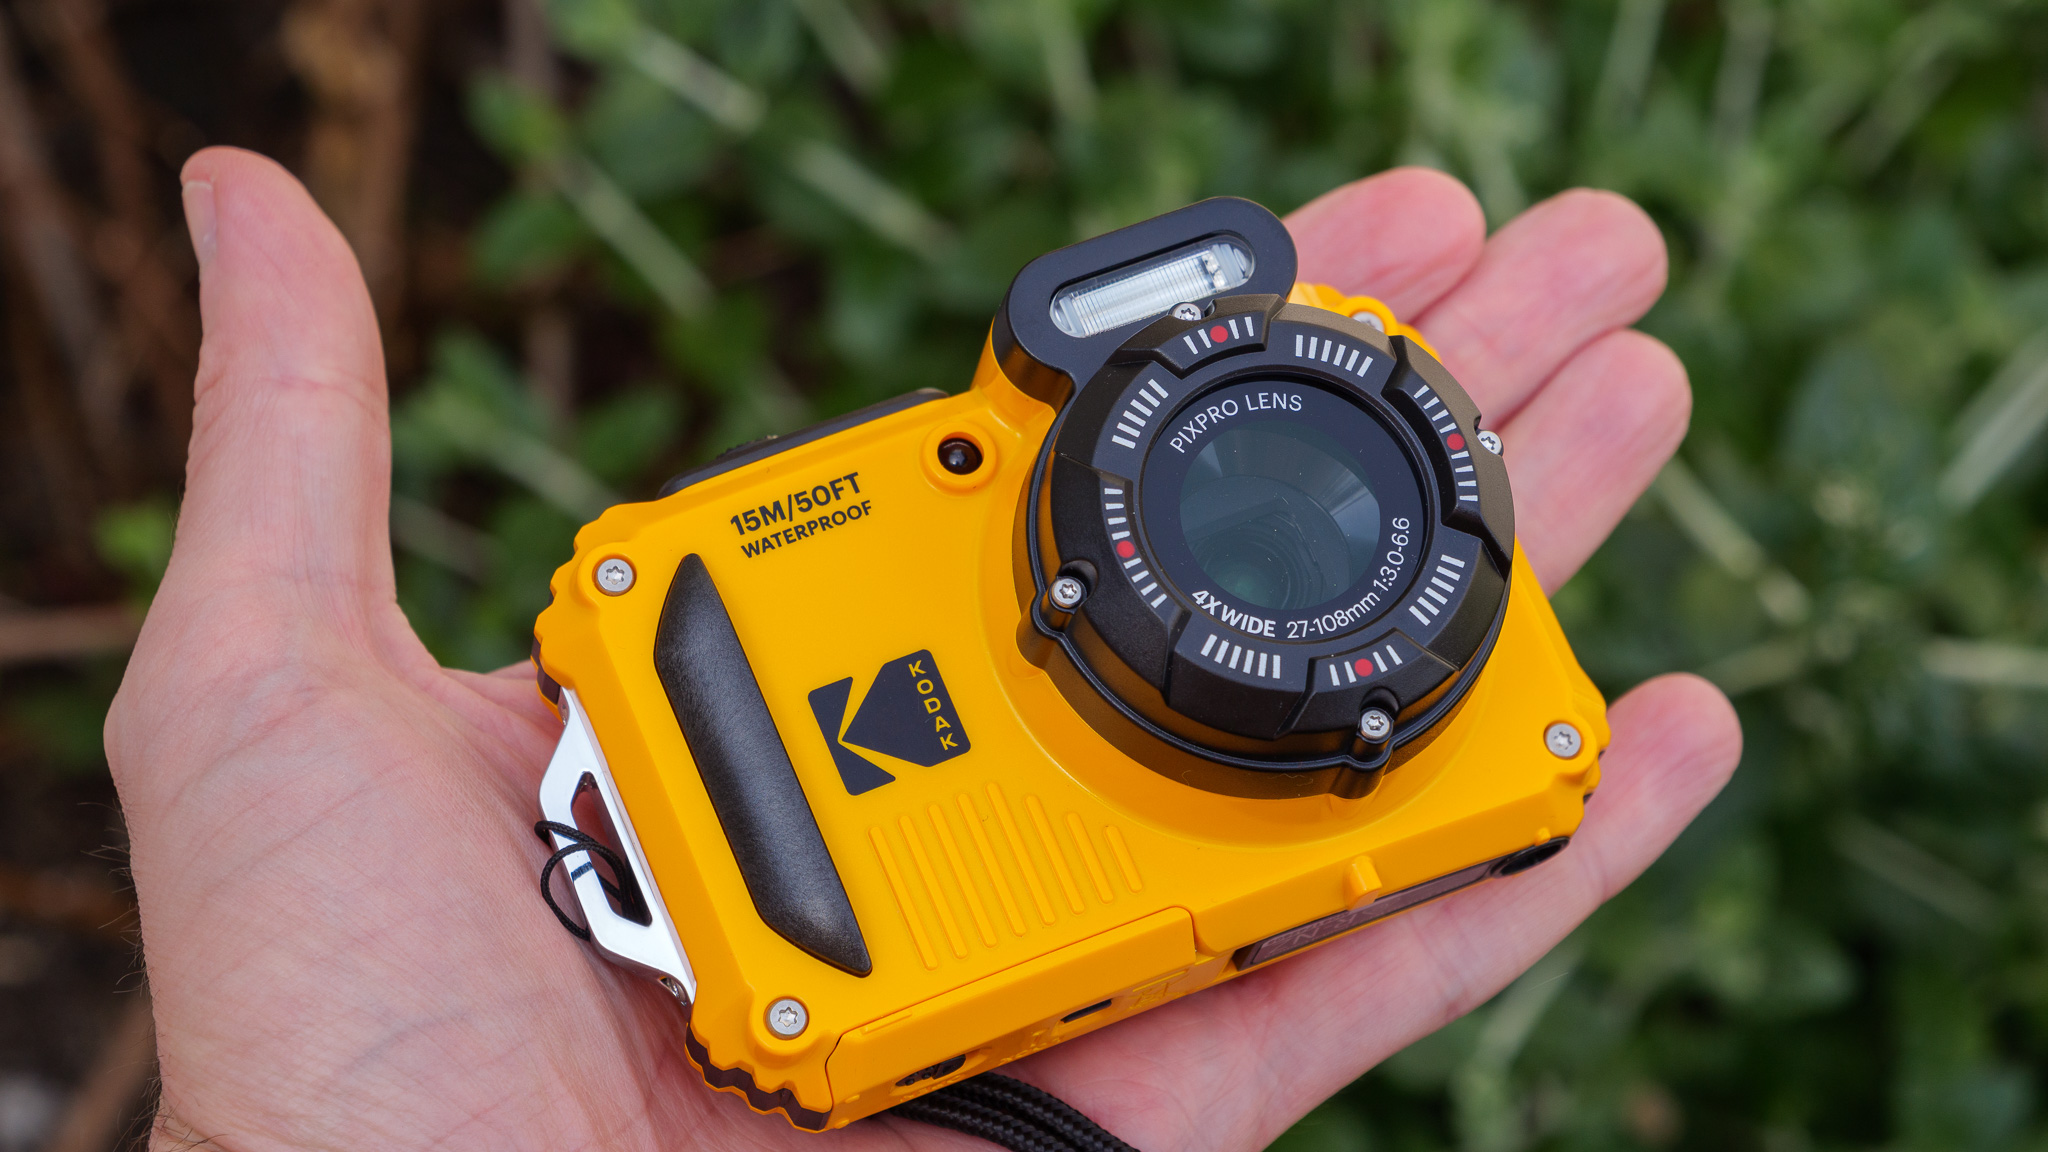

The double-locking mechanism on the battery and card compartment is one of the smarter design decisions here. It takes a deliberate two-step action to open, which inspires confidence that it’s not going anywhere mid-dunk. Less impressive is the microSD slot itself, which sits so deep within that compartment that swapping cards becomes a two-handed exercise in patience. Larger fingers will find it particularly trying.
On the back, the controls are straightforward enough. This is very much a point-and-shoot in its operational philosophy, with no pretensions toward manual control complexity.
The main frustration is the rear LCD, which is both small and insufficiently bright; even cranked to maximum, it struggles in daylight conditions, making exposure assessment and framing more of an educated guess than a precise exercise. The zoom rocker, necessarily stiff to maintain its watertight seal, demands a firmer press than feels natural, which is something I noticed most acutely when my hands were wet.
Kodak PixPro WPZ2: Performance
- Camera performs best in good lighting
- No raw shooting option and video limited to 1080p
- 4x optical zoom
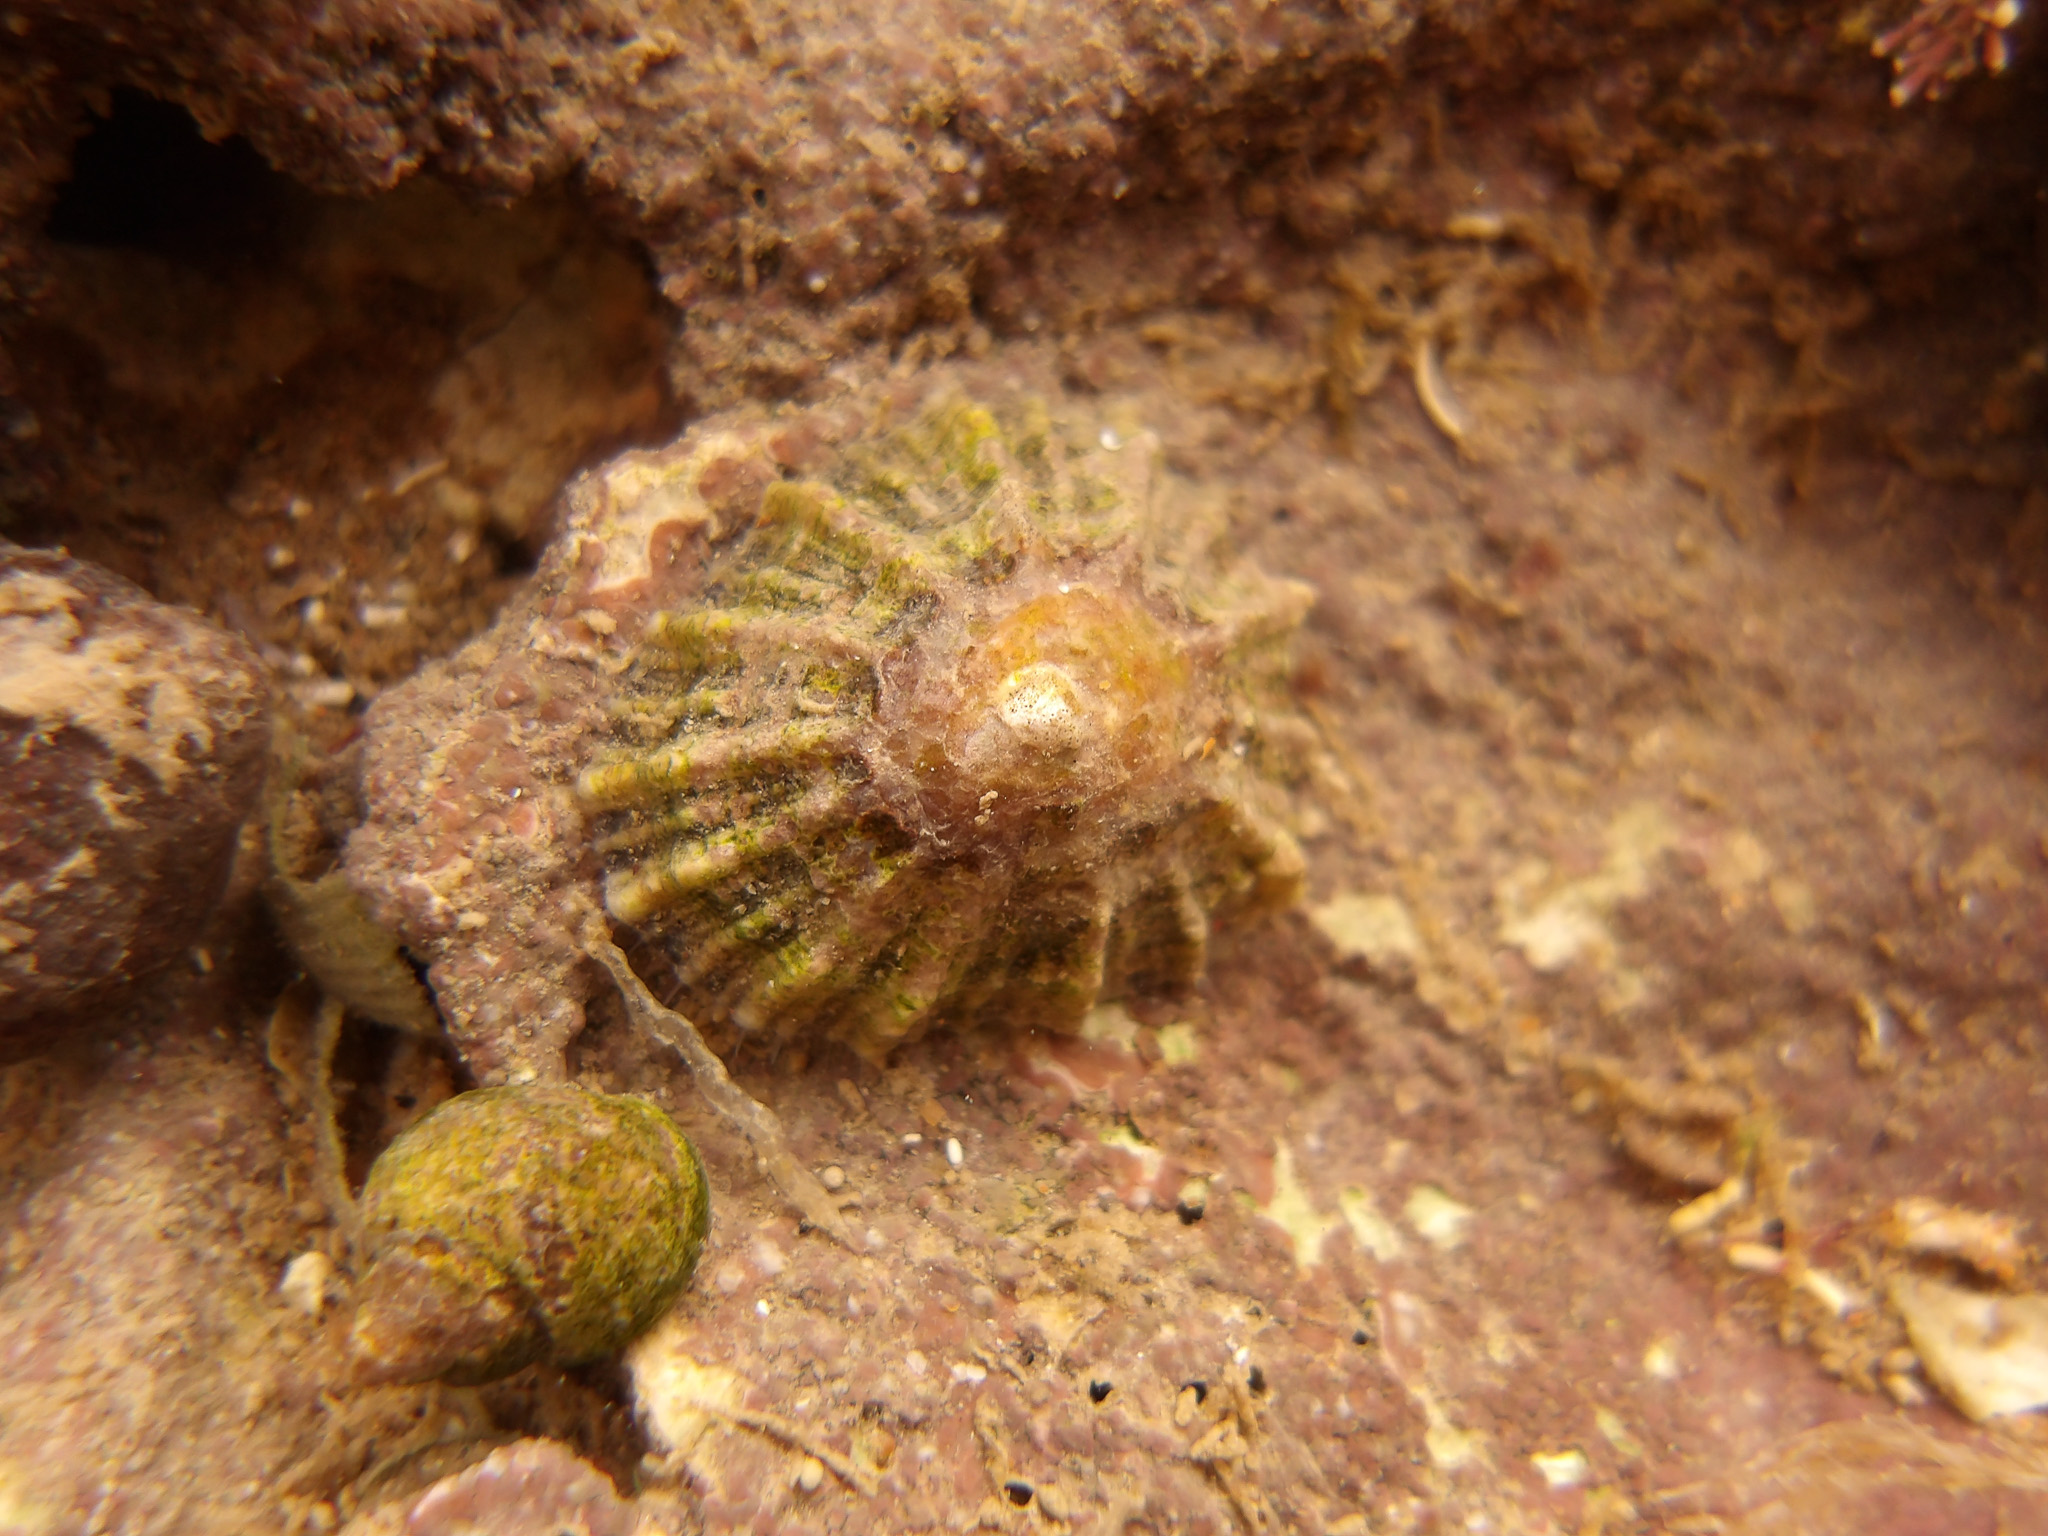
The WPZ2’s natural habitat is somewhere sunny, shallow and wet, and that’s precisely where it performs best. My rock pool testing on a bright day returned some pleasing results, particularly in macro mode, where the camera locked on with decent accuracy (if not much speed) and rendered the finer details of shells, barnacles and seaweed with more sharpness and color fidelity than I was expecting at this price point. Keep the light on your side and you’ll come away with shots you’re happy to share.
Step outside those ideal conditions, though, and the limitations become harder to overlook. The JPEGs have a processed, over-sharpened quality to them, and what the camera gains in apparent edge definition it loses in natural color rendition; images tend toward the flat and undersaturated rather than the vivid. Dynamic range is modest, so high-contrast scenes (bright sky against dark water, for instance) will test it. Corner sharpness drops off noticeably, too, which is worth bearing in mind if you’re framing wide shots.


The 4x optical zoom covers a useful range for a camera of this type, but treat the digital zoom as decorative – image quality deteriorates the moment you engage it, and by the time you reach the maximum combined 24x, you’re looking at something closer to an impressionist painting than a photograph.
Low-light shooting is perhaps the WPZ2’s most significant imaging weakness. Without a flash, the results are soft and noisy, and the camera gives you no shutter speed readout when shooting manually, which makes managing camera shake largely a matter of luck. The flash rescues things for indoor and after-dark shots, but don’t expect miracles.
Video maxes out at 1080p/30fps, a spec that would have felt reasonable a few years ago but stands out as a limitation today, when even mid-range smartphones routinely shoot 4K at 60fps. My underwater footage of the rock pools was perfectly watchable for casual use, but the above-water clips exhibited the same flatness and over-processing that characterises the stills. There’s no optical stabilization either, only digital, so handheld video isn't particularly smooth.
Battery life is one of the more pleasant surprises. The CIPA-rated 200 shots held up well in real-world use, and USB-C charging felt reassuringly quick. For a day’s casual shooting, you’re unlikely to run dry.
Should you buy the Kodak PixPro WPZ2?
Buy it if...
You want an affordable camera that can get wet
The WPZ2 is a fraction of the price of premium waterproof compacts. For rock pooling, snorkeling or kayaking on a budget, it fits the bill.
You need a dedicated camera for water adventures
Most smartphones aren’t waterproof to any meaningful depth. The WPZ2 fills that gap without requiring a bulky housing.
Don't buy it if...
You're precious about image quality
Flat, over-sharpened JPEGs and no raw support mean the WPZ2 struggles to flatter its subjects. Spend more on an OM System Tough TG-7 if image quality is a priority.
You shoot a lot of video
A 1080p/30fps ceiling is unusual. An entry-level GoPro or Insta360 will serve you considerably better for similar money.
Also consider
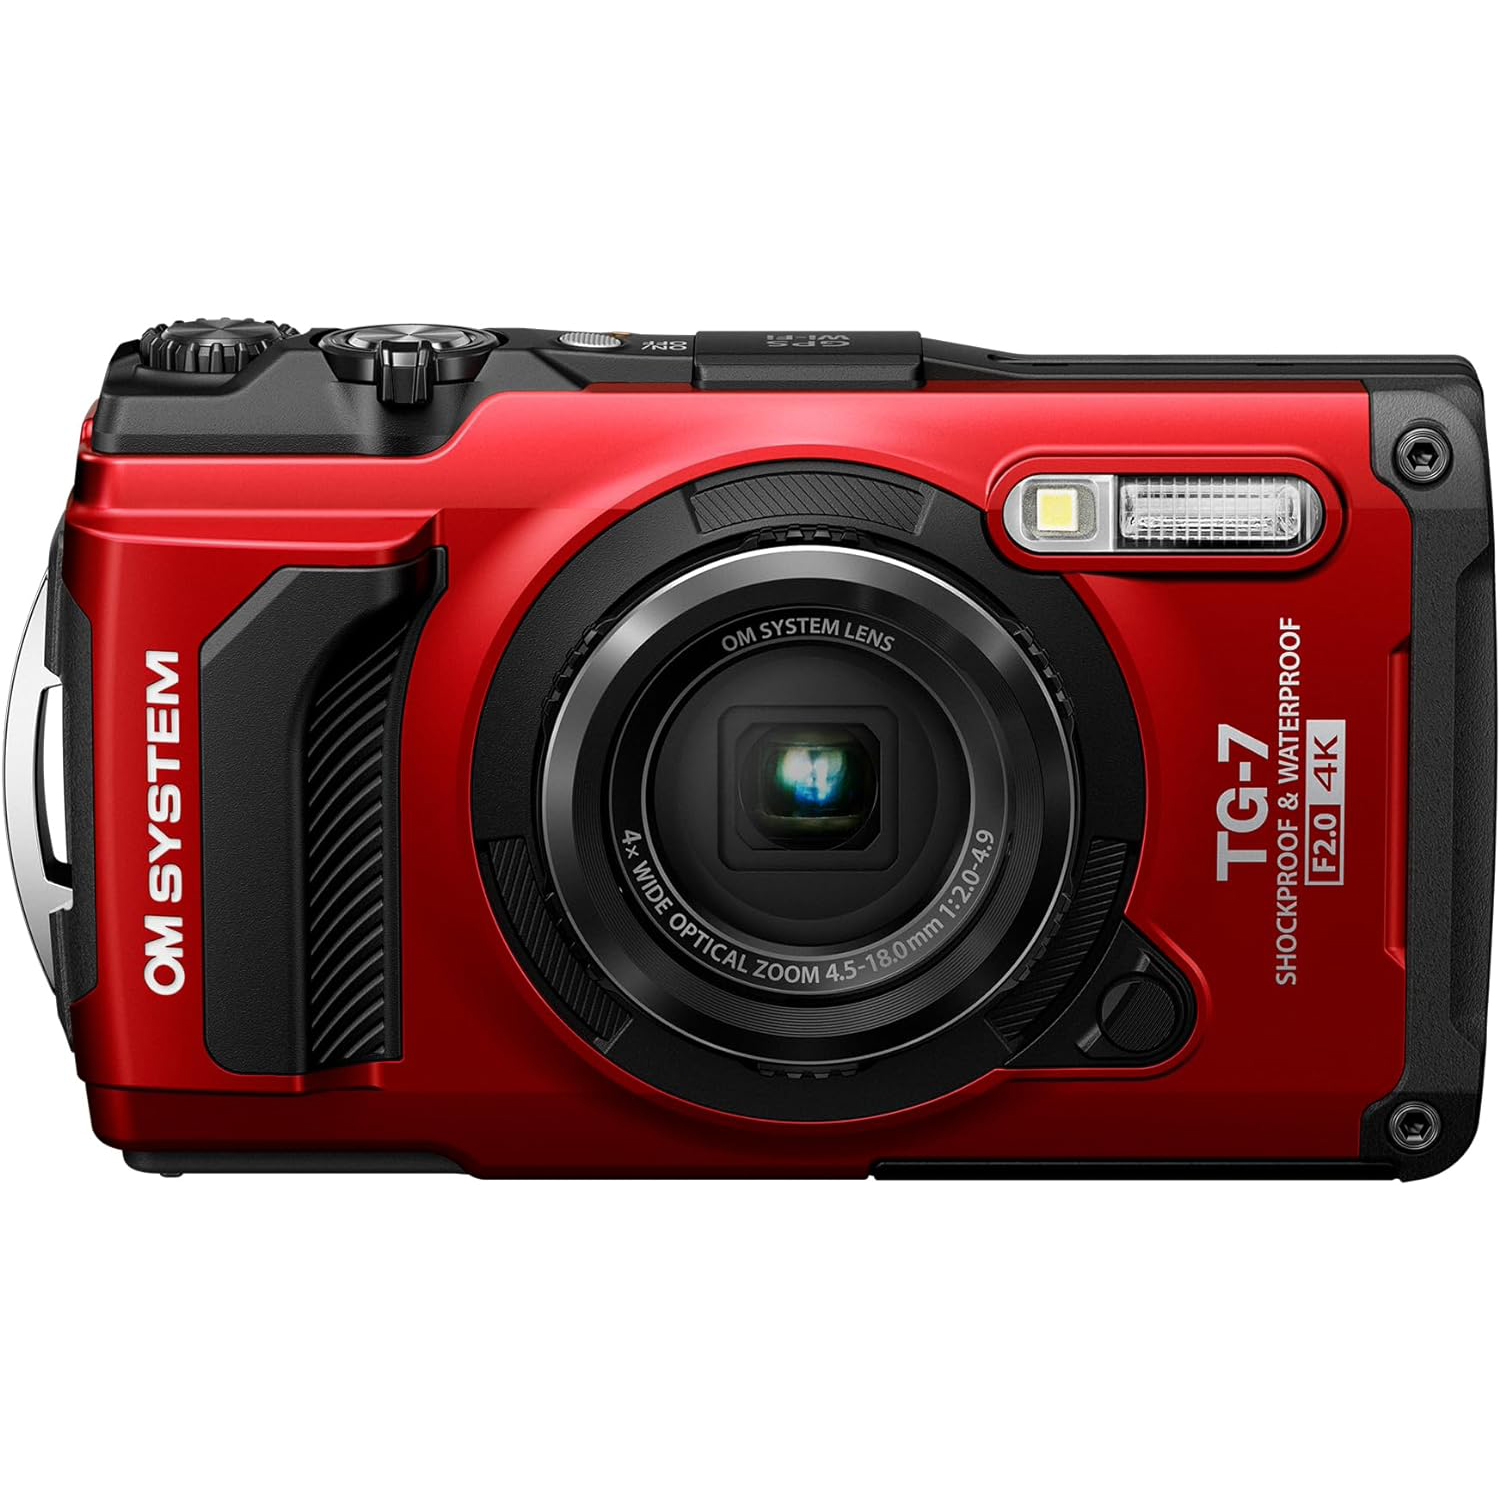
The TG-7 is the go-to waterproof compact for most people, and for good reason. It matches the WPZ2’s 15m waterproofing while adding dust, crush and freeze resistance, plus a 4K video capability and a wide range of shooting modes that make it a considerably more versatile tool. Image quality from its 12MP sensor can’t compete with a modern smartphone, but it outclasses the Kodak in virtually every other respect. You’ll pay roughly twice the price, but the step up in capability is commensurate.
Read our in-depth OM System Tough TG-7
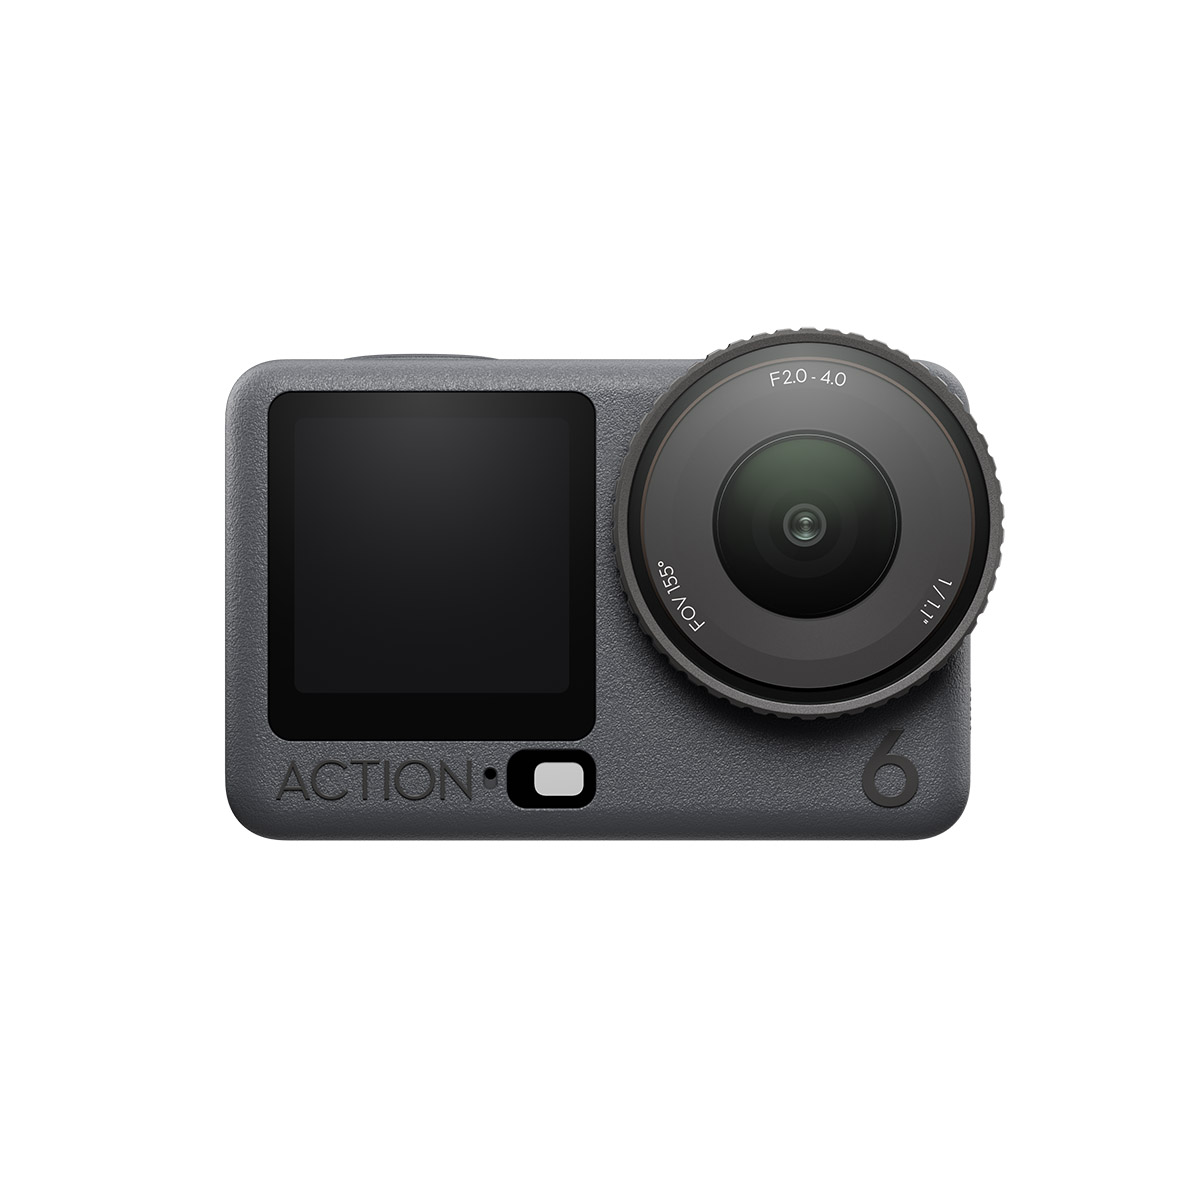
If video is your priority, the Osmo Action 6 is the smarter buy over the WPZ2. Its 1/1.1-inch sensor delivers superb footage in both bright conditions and the kind of low-light environments where the WPZ2 struggles, and it goes deeper thanks to 20m waterproofing. Factor in 4K/120p video, dual OLED screens, strong battery life and an expanding modular accessory system, and you’re looking at a truly pro-capable action camera. It’s a step up in price, but a significant step up in performance.
Read our in-depth DJI Osmo Action 6 review
How I tested the Kodak PixPro WPZ2
- Test sample purchased from Amazon UK
- Tested in and outdoors on English coast
- All images and videos shot at highest quality settings
TechRadar purchased the Kodak PixPro WPZ2 from Amazon UK for my testing purposes.
I tested the camera over several days, using it primarily at a local beach where I shot stills and video in and around saltwater rock pools. This gave me a real-world sense of its waterproofing credentials, image quality in both macro and wider shooting scenarios, and general handling in wet conditions. I also tested it indoors and in lower-light situations to assess flash performance and the limits of its low-light capability.
All sample images and video were shot using the camera’s highest quality settings.
First reviewed June 2026
Panasonic Lumix L10: Two-minute review
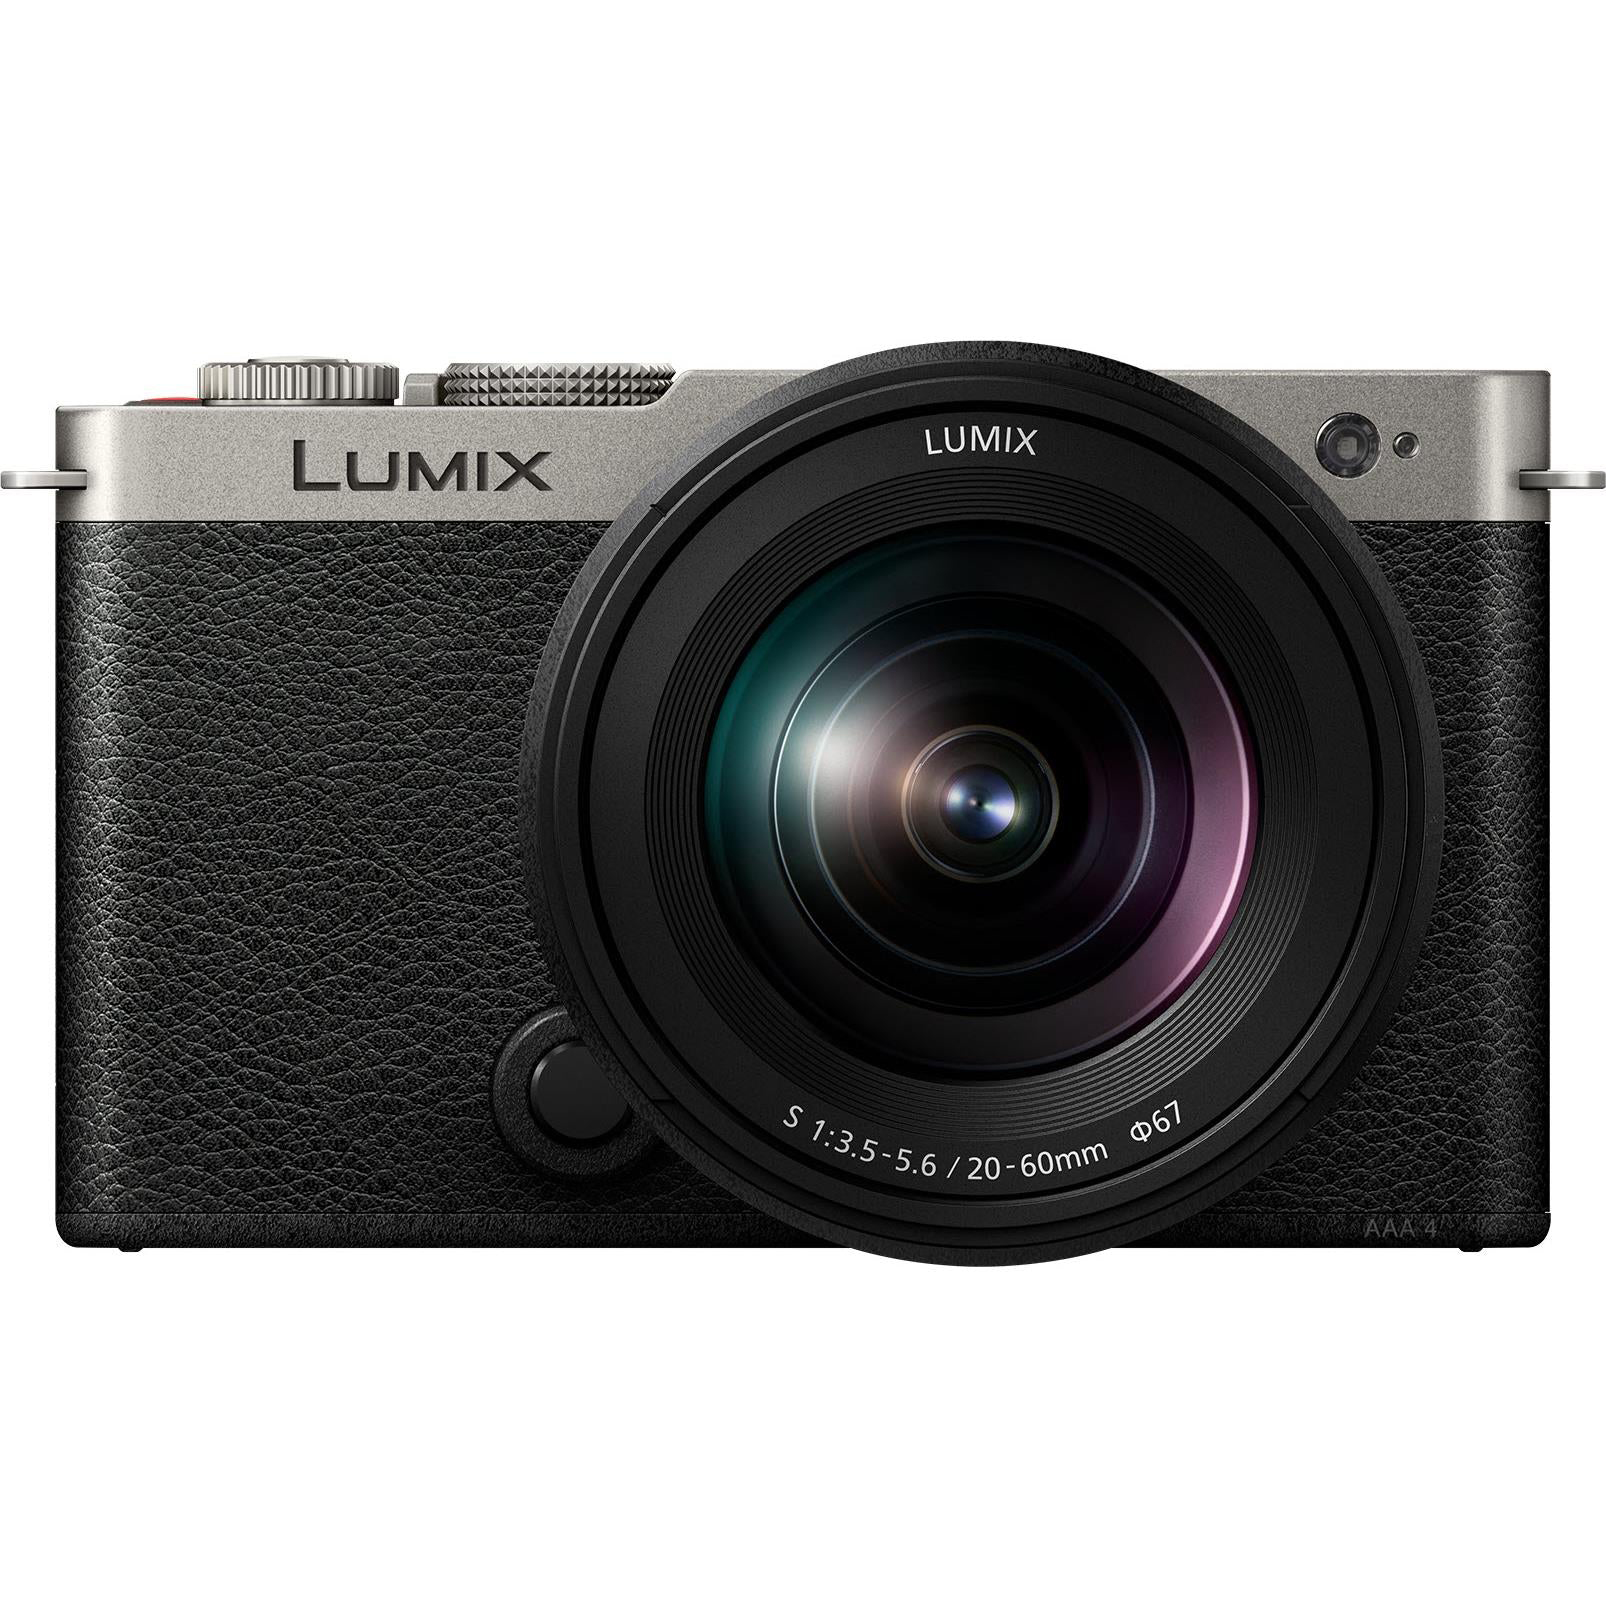
Panasonic marked the 25th anniversary of Lumix cameras by announcing the attractive Lumix L10 premium compact camera. If it looks familiar, that's because its retro design cues are taken directly from the popular LX100 series — the most recent being the Lumix LX100 II from 2018 — while its form factor brings to mind the popular Fujifilm X100VI.
Unlike other recent Lumix compact cameras, such as the ZS300 / TZ300, there are genuine upgrades in the Lumix L10 — it's fitted with Panasonic's latest 26.5MP Micro Four Thirds sensor, processor, and autofocus system, a higher-capacity battery, and it even has a viewfinder!
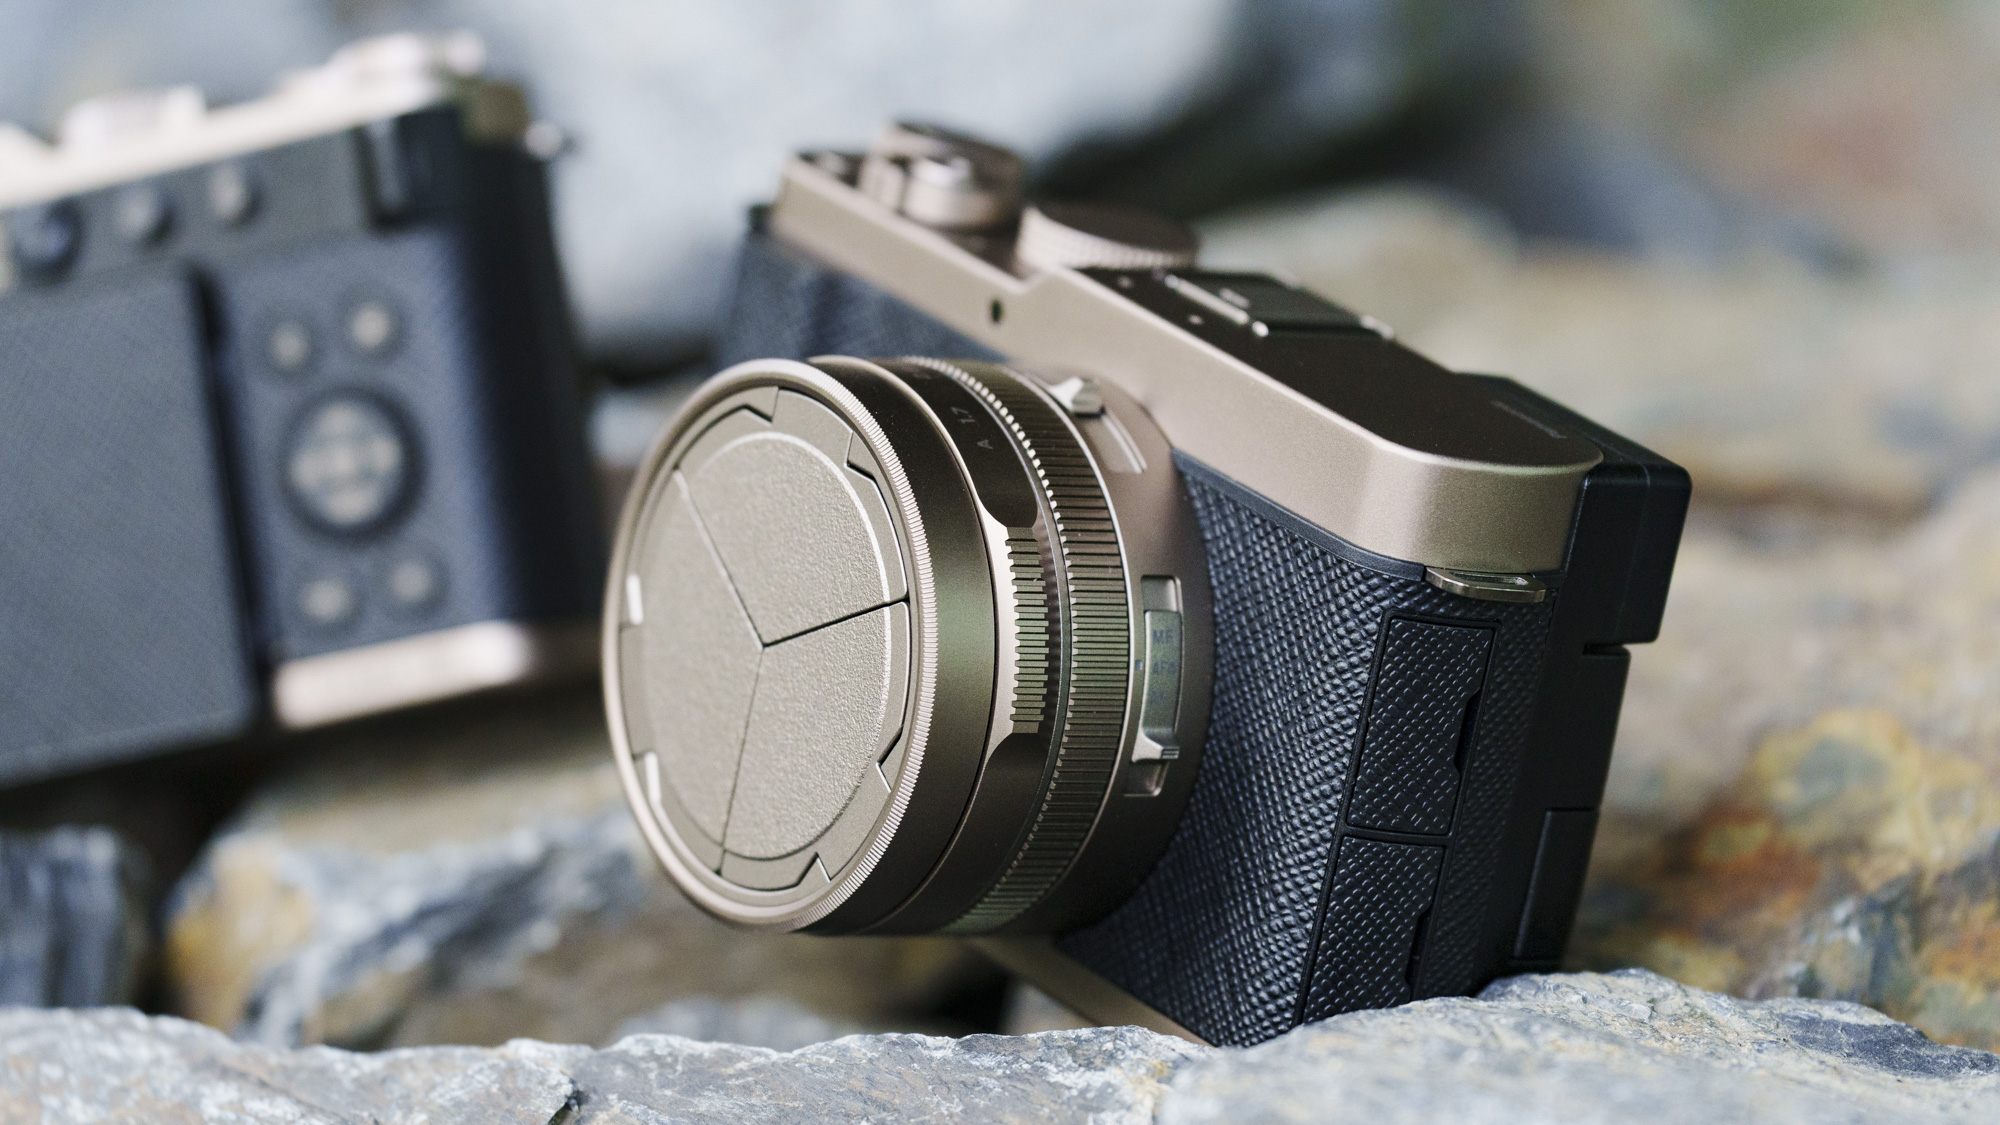
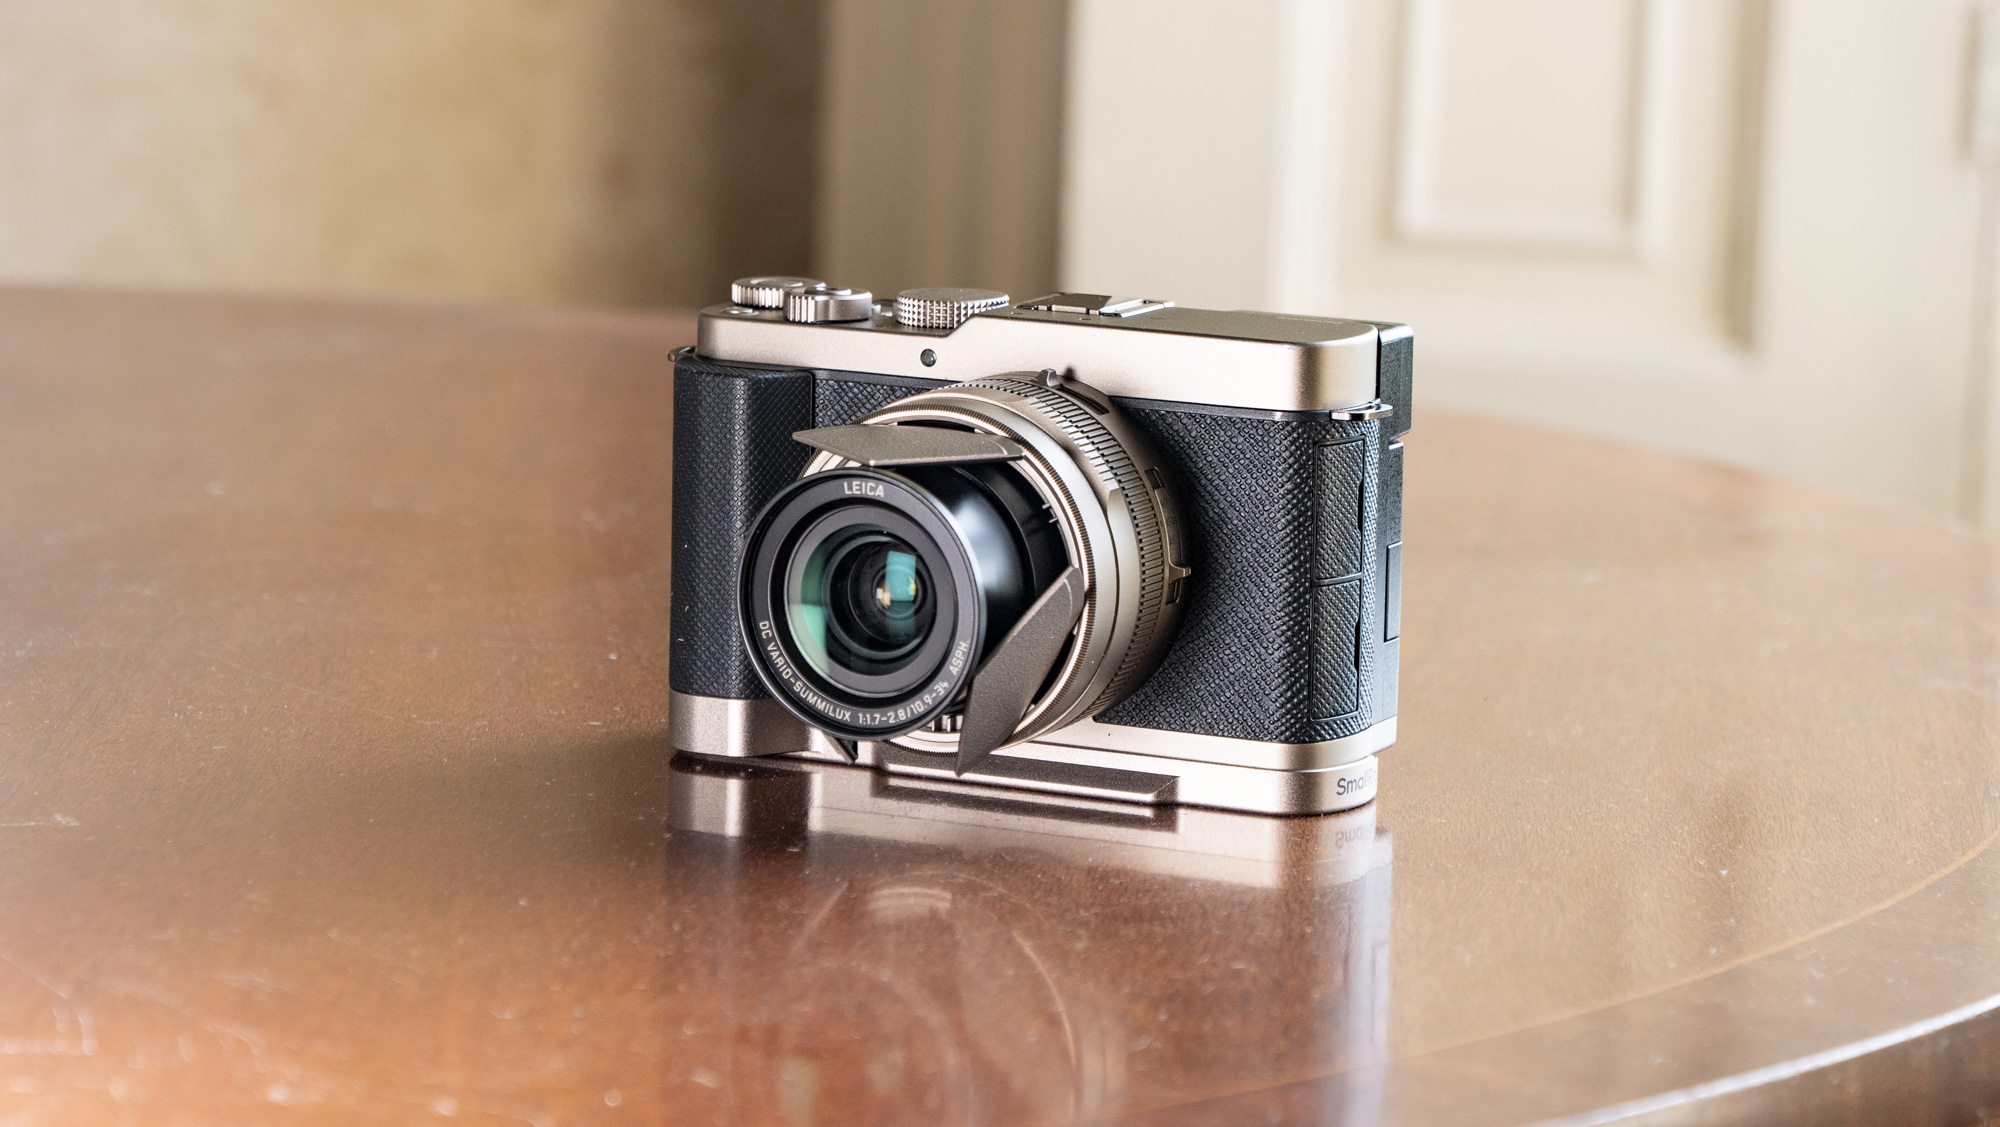
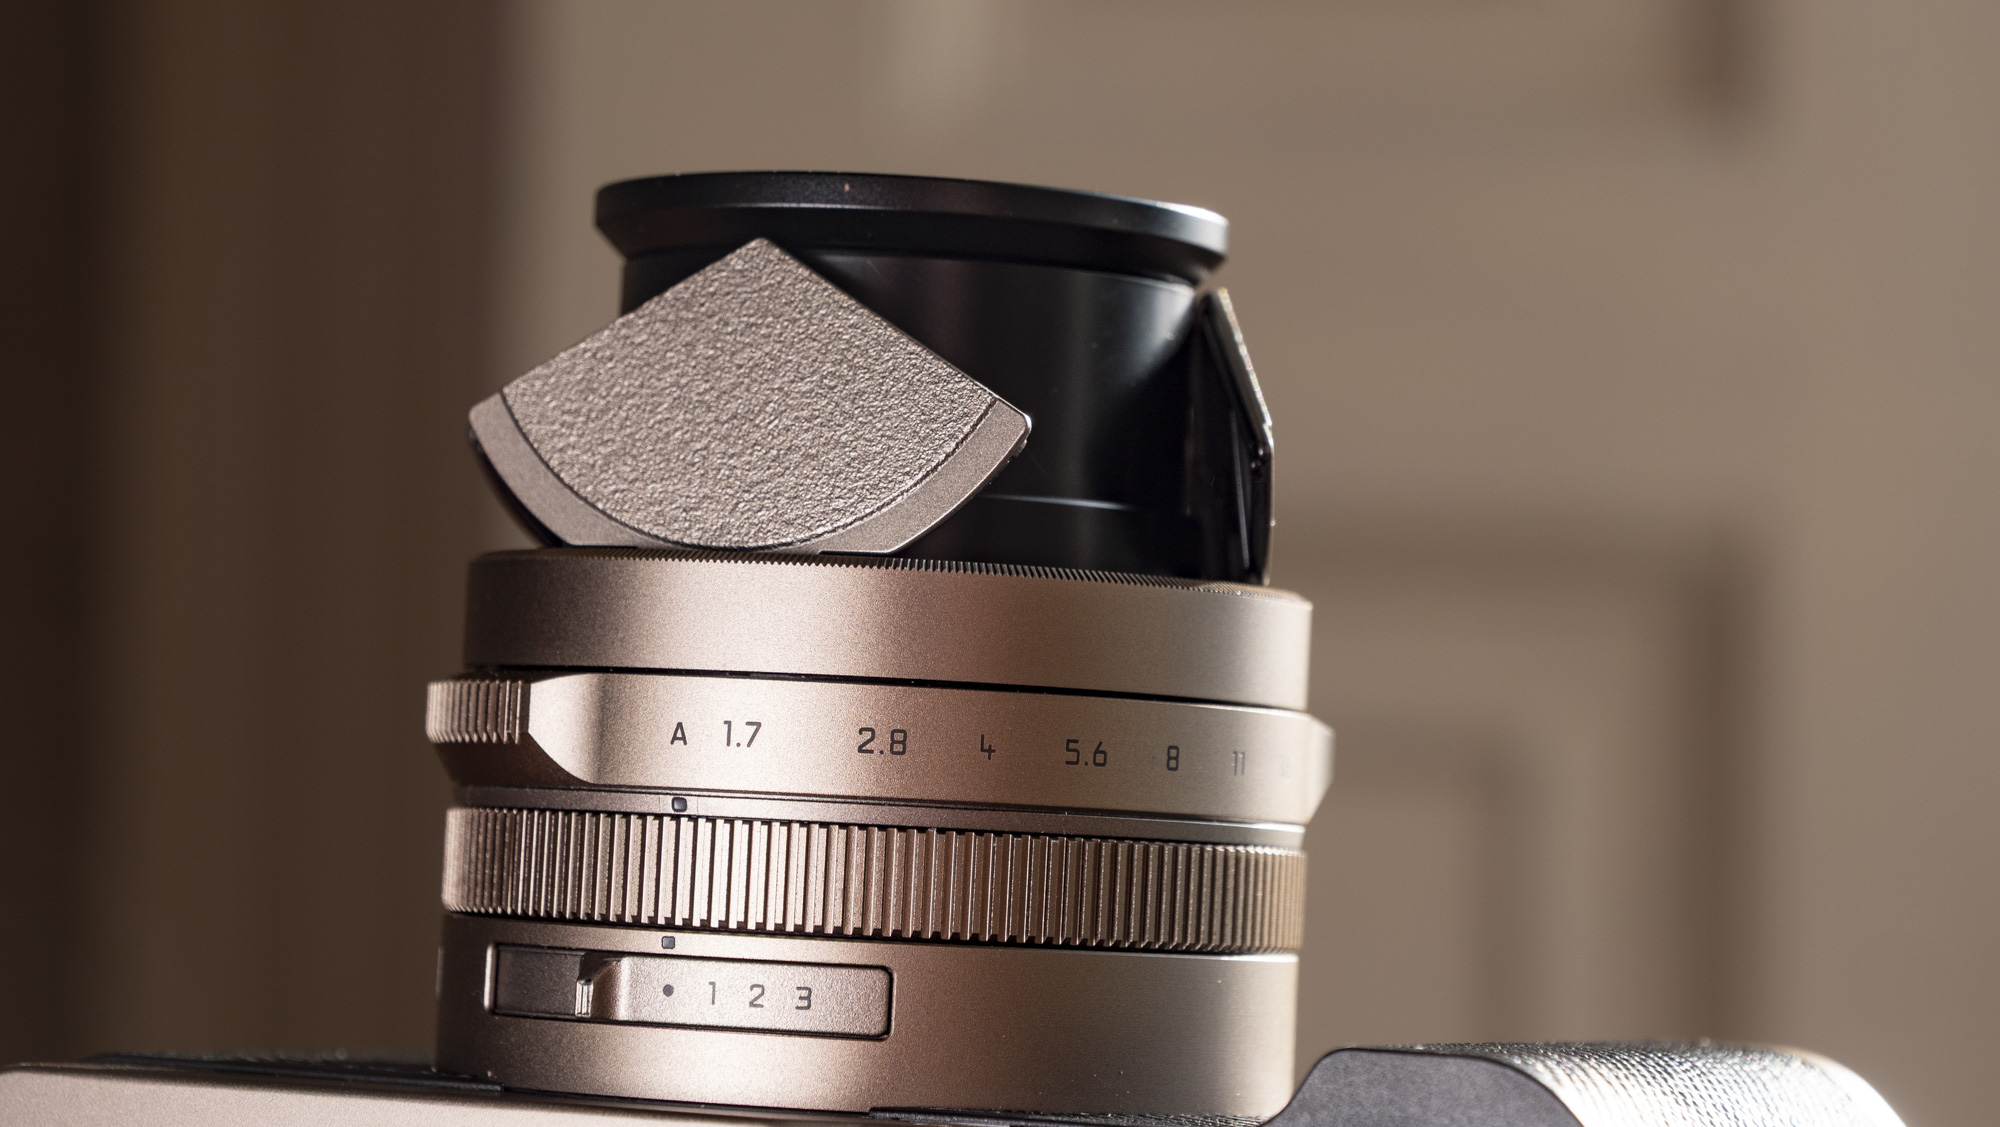
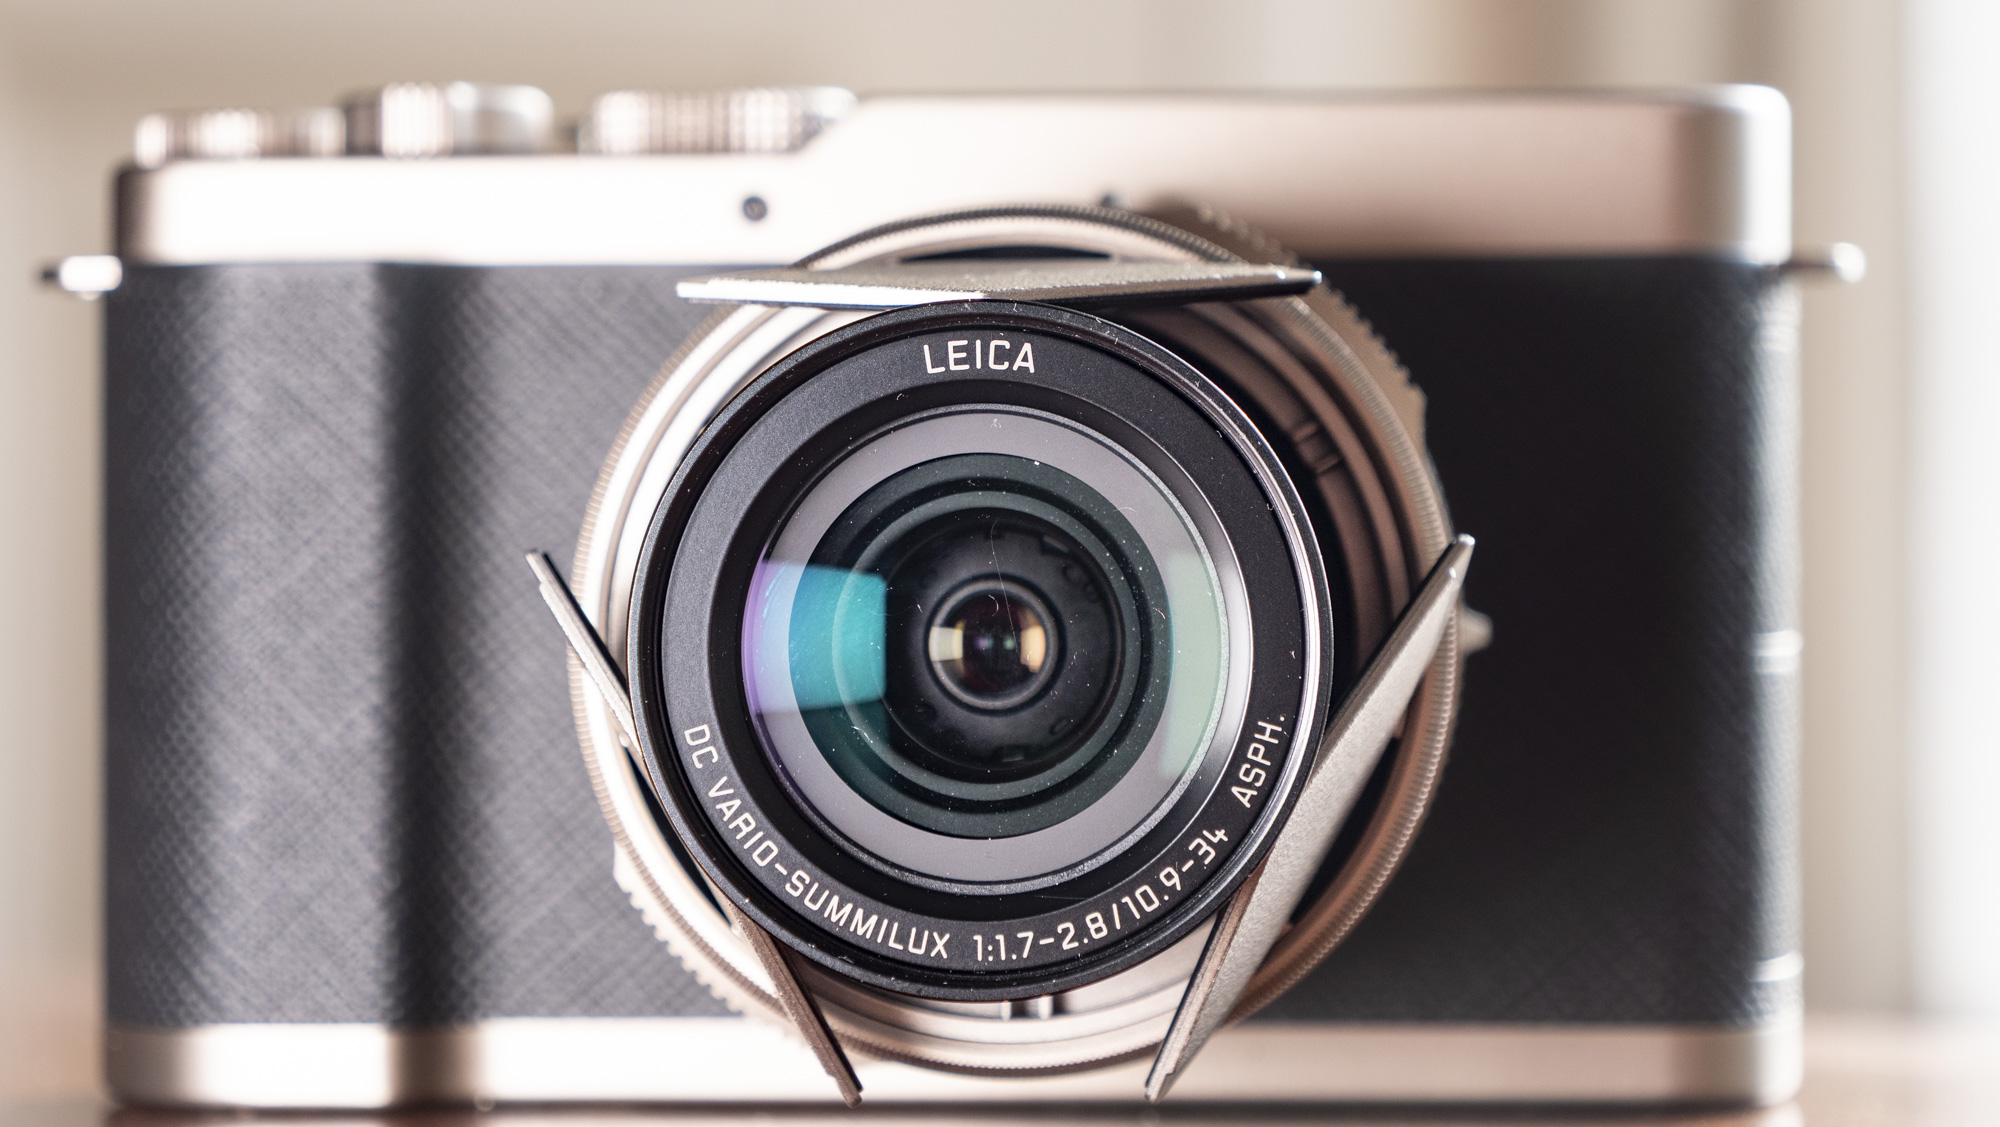
The 24-75mm f/1.7 to f/2.8 Leica Summilux lens with 3cm macro focusing is based on the lens in the LX100 II, with Panasonic saying it's been refined for the L10's higher-specced sensor. How exactly, is unclear, but the user experience is essentially the same, for better or worse; the sharp detail and bright aperture are a major boon, but it's not weather-sealed, and it slows the camera's startup and shut-down time.
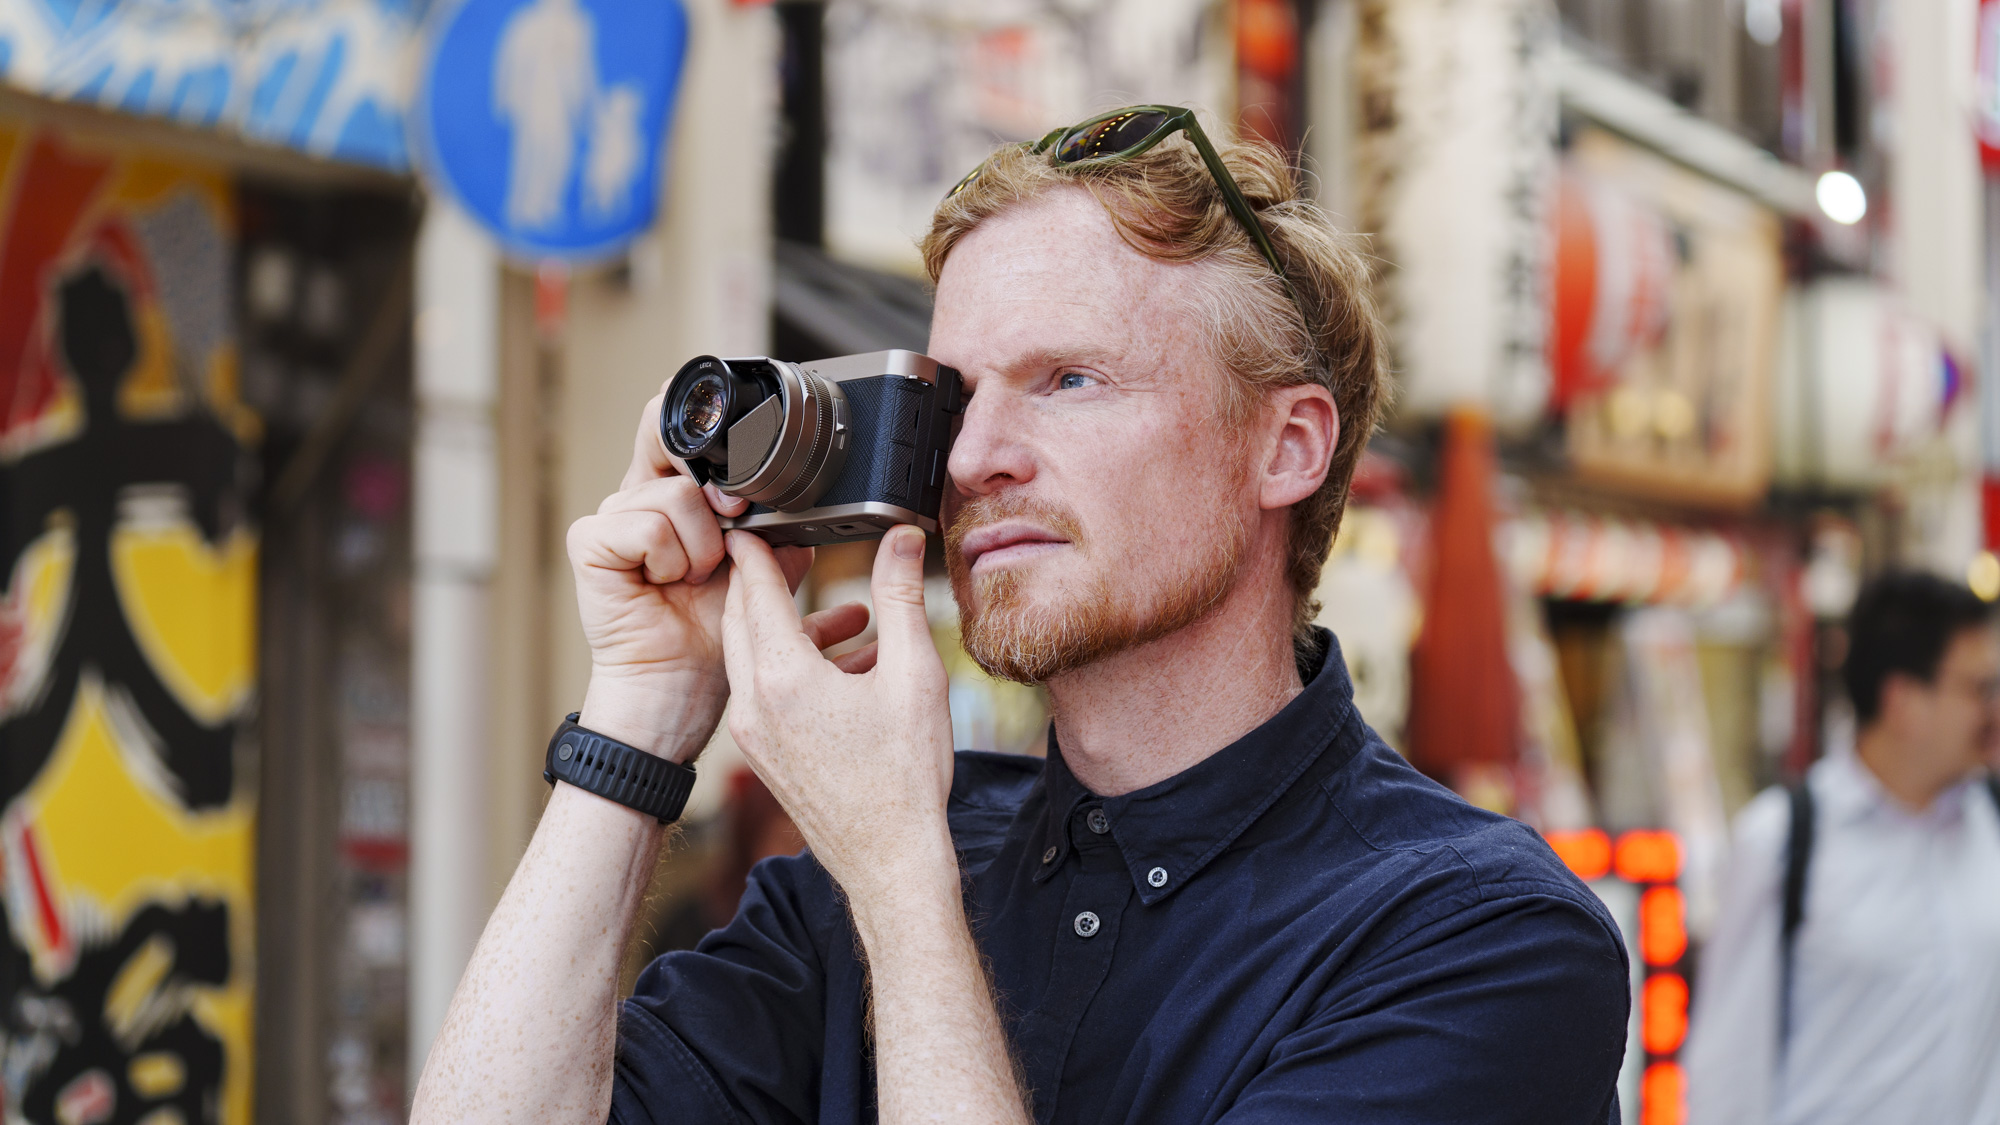
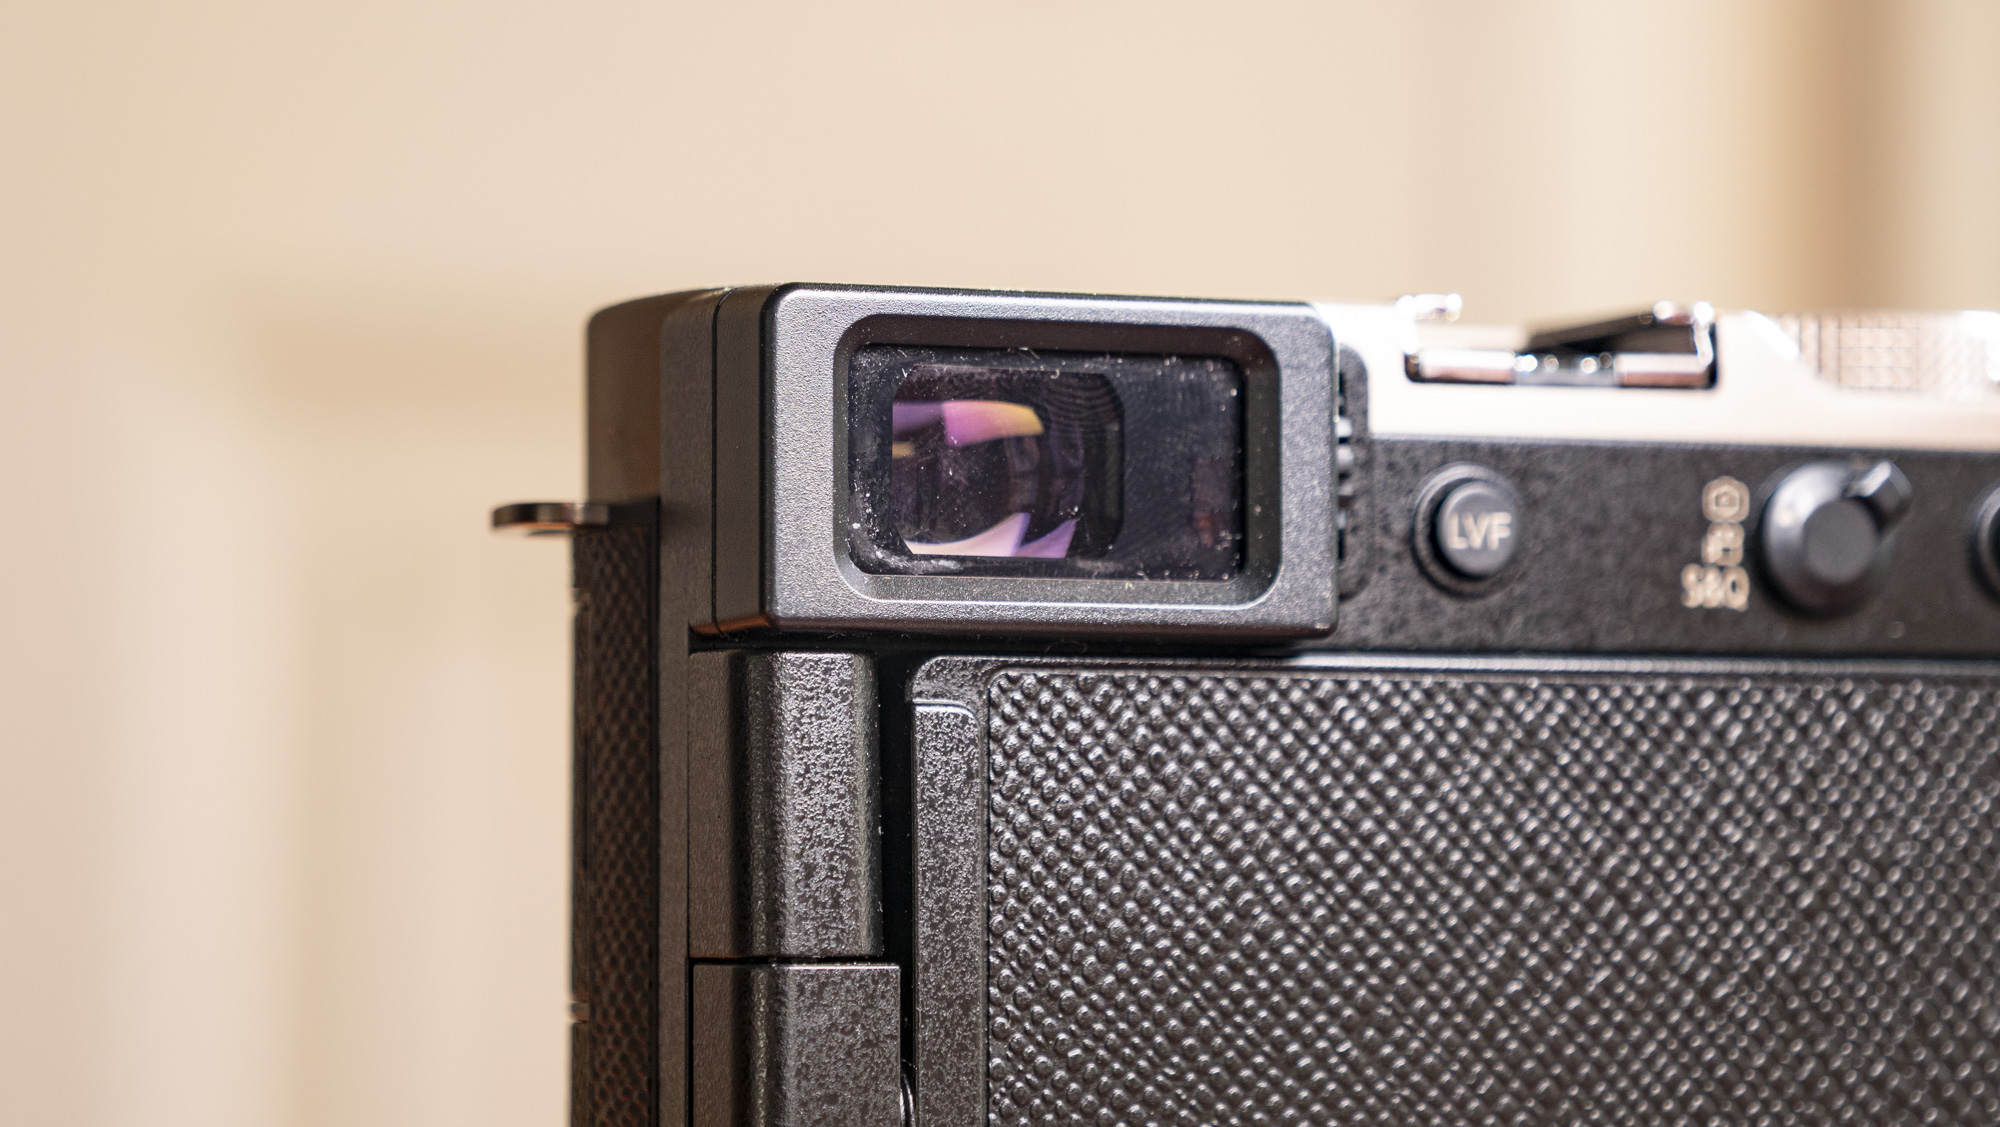
In the hand, the Lumix L10 is a joy to use, and it's quickly become one of my favorite compact cameras. Beyond its charming retro design there's a decent 2.36m-dot OLED viewfinder, a bright 1.84m-dot vari-angle touchscreen, and a proper hotshoe for accessories such as a flash.
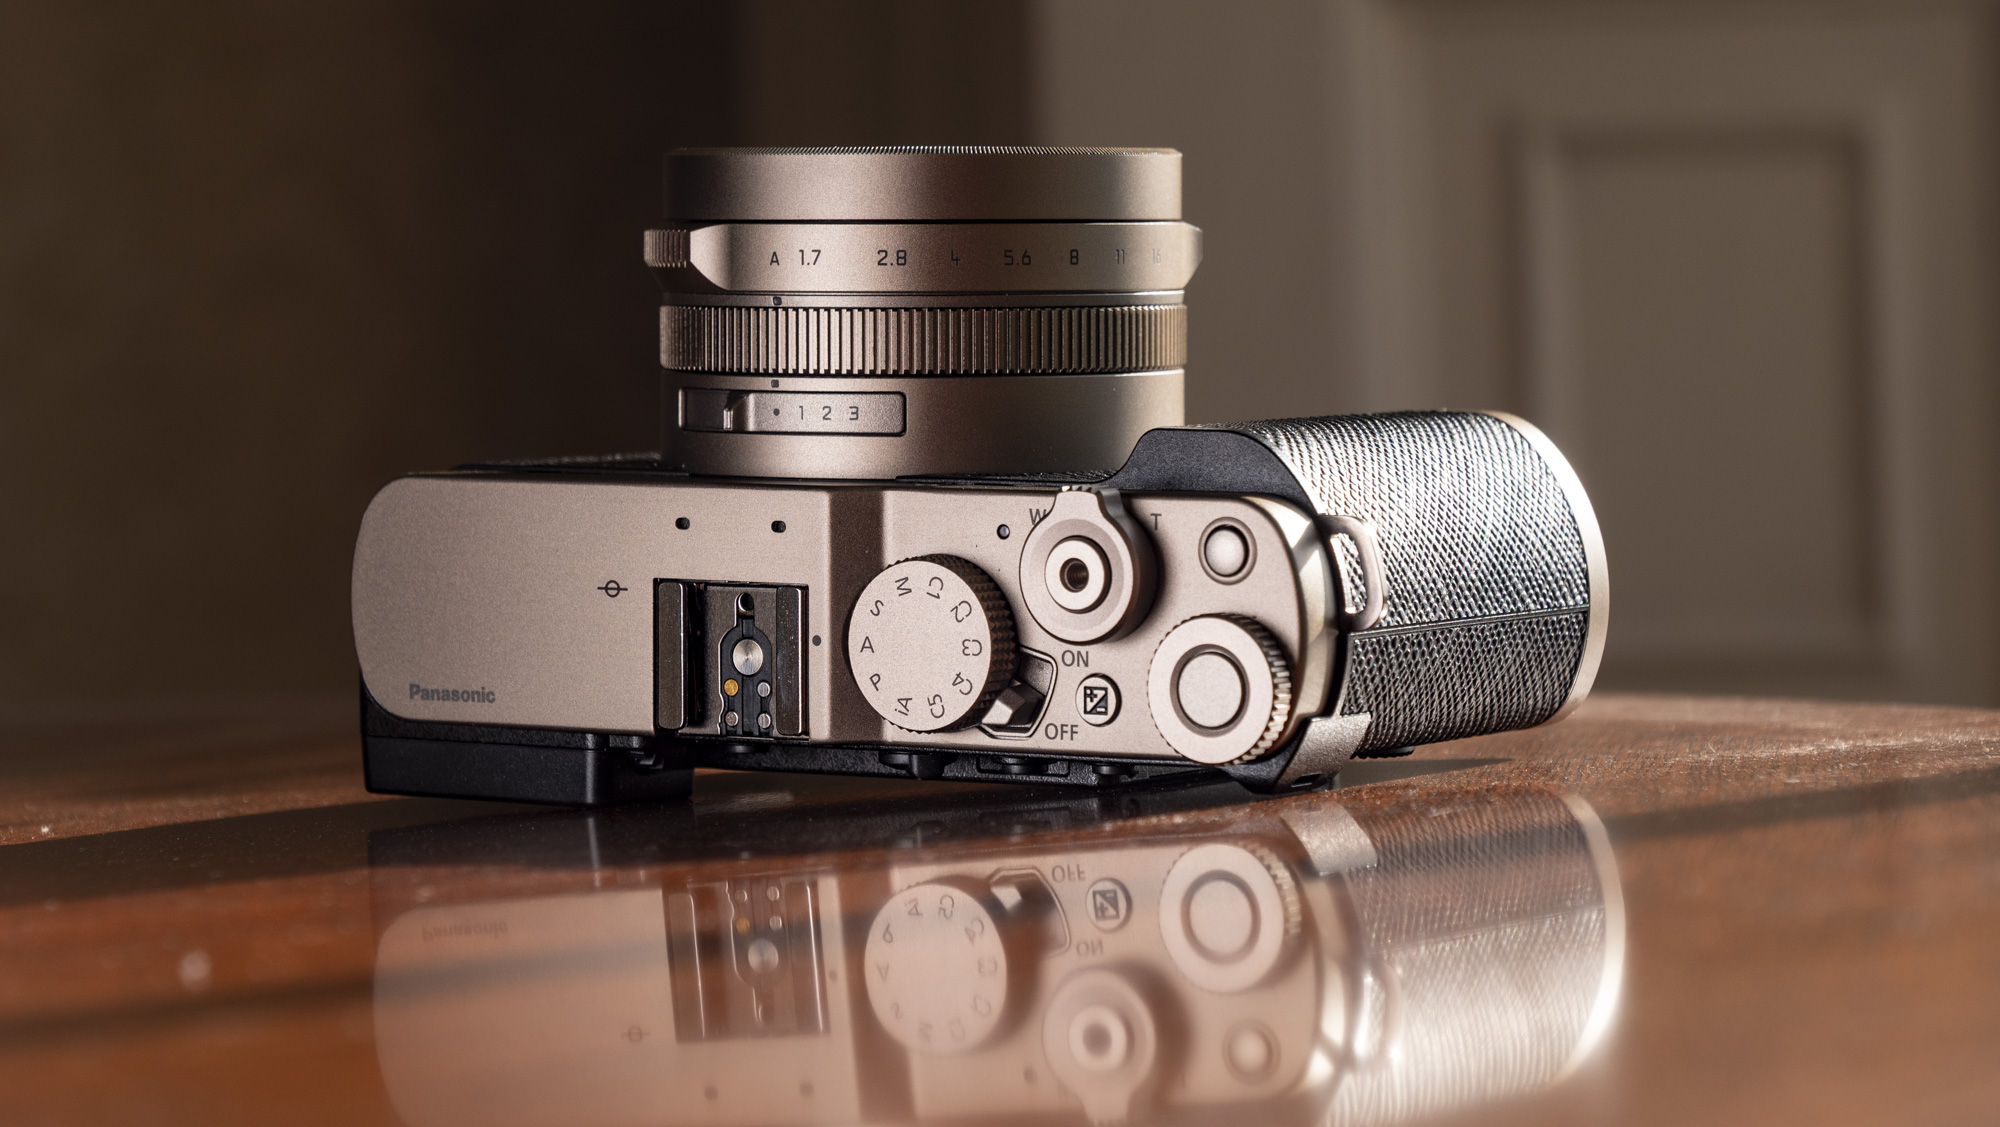
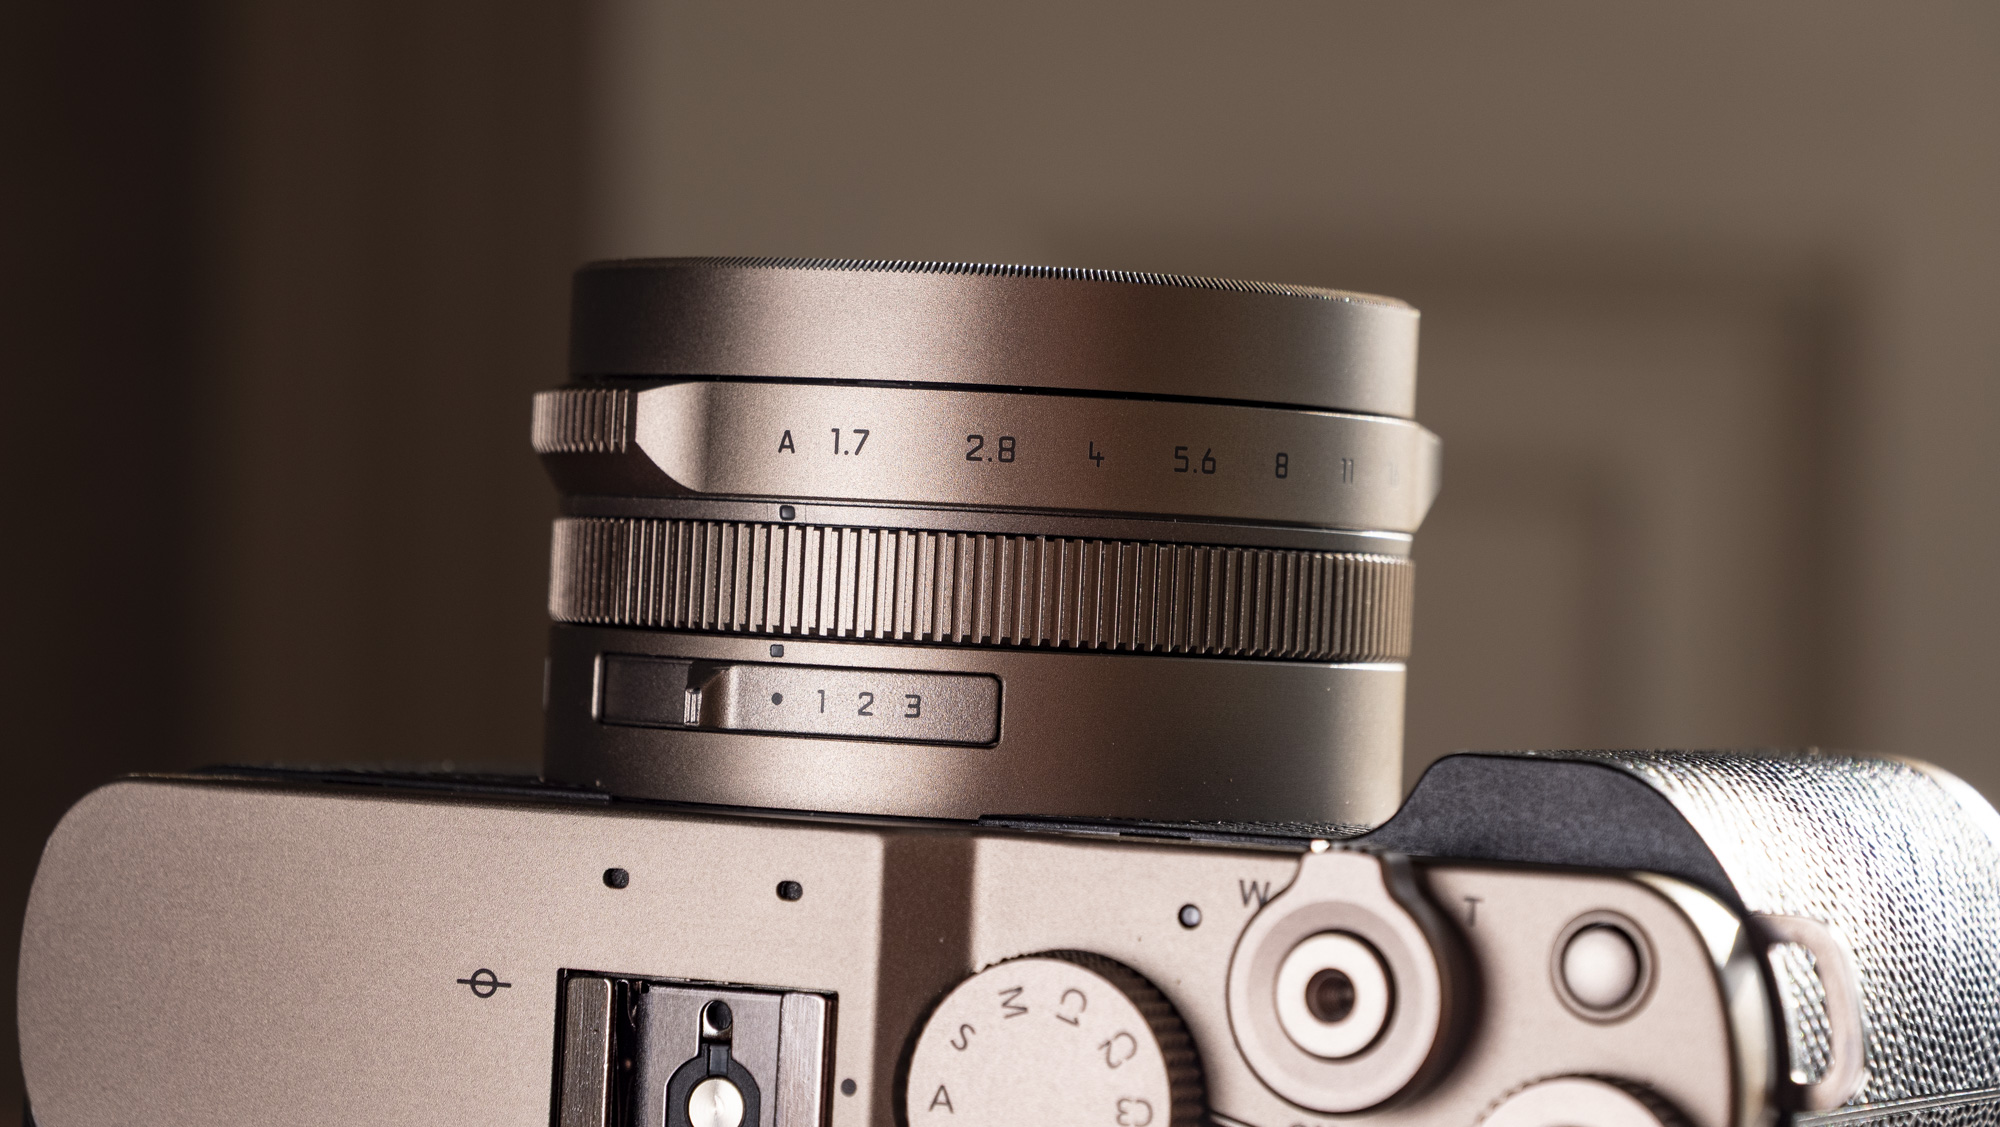
The lens is beautifully crafted, and offers direct aperture control, a zoom ring and a customizable switch, with a choice of functions including a stepped zoom, Real Time LUTs, and aspect ratio selection.
Speaking of aspect ratios, it's a cinch to switch between 4:3, 16:9, 1:1 and 3:2, which aids composition for various outputs including social, but the drawback is that not all of the sensor's pixels are usable because of the imaging circle of the lens. 4:3 stills get you the highest-resolution stills at 20.4MP, while 1:1 is an oddity in that it technically doesn't use all of the pixels that it could (based on the imaging circle of the lens).
If you compare the L10 to the older Lumix LX100 II, the latest model is feature-packed and snappier in operation, while video performance is in another league, with 5.7K recording, Log color profile, and Real Time LUTs downloadable through the Lumix Lab companion app. Lumix Lab, by the way, is one of the best apps around, with new features regularly being added, the latest being raw editing. (You can shoot raw with the L10 without needing editing software such as Lightroom.)
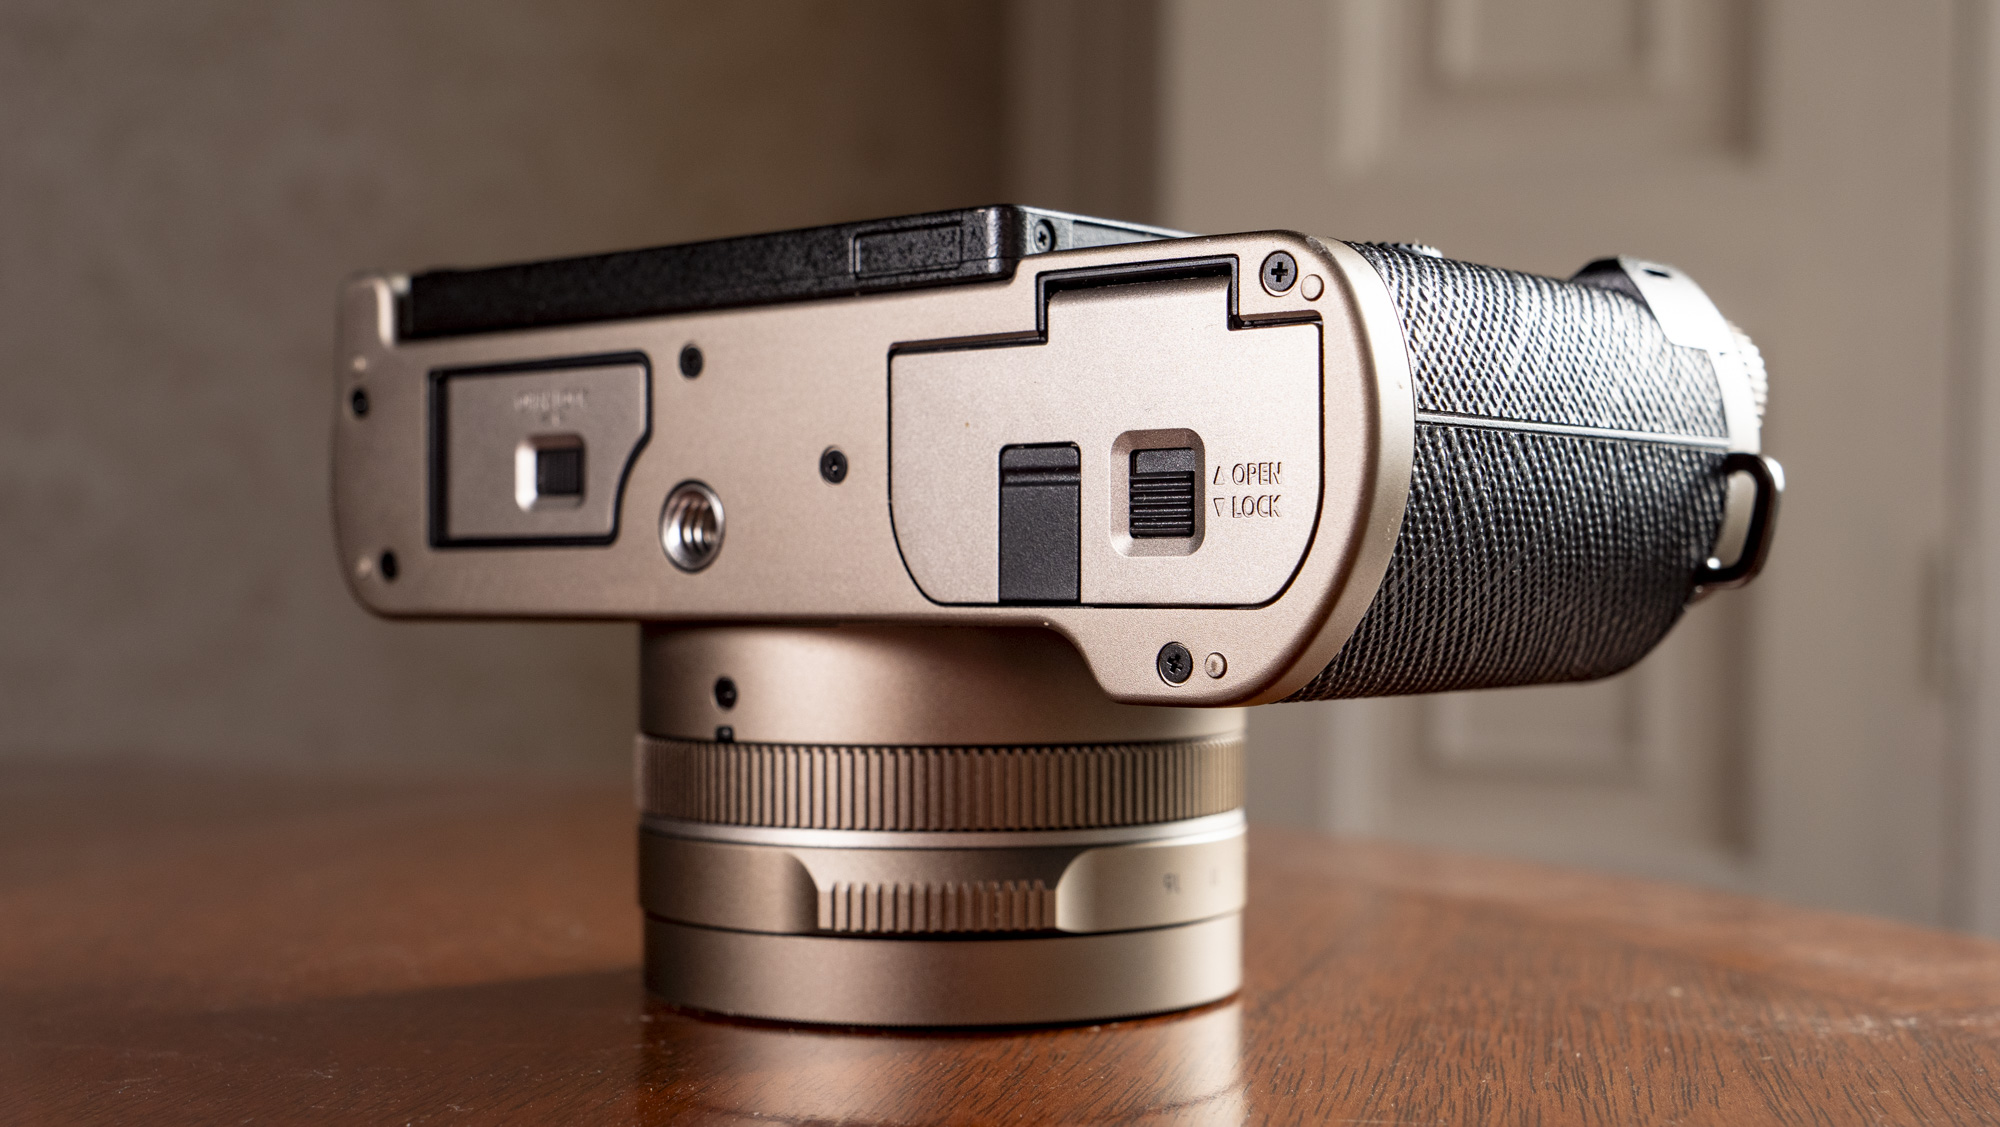
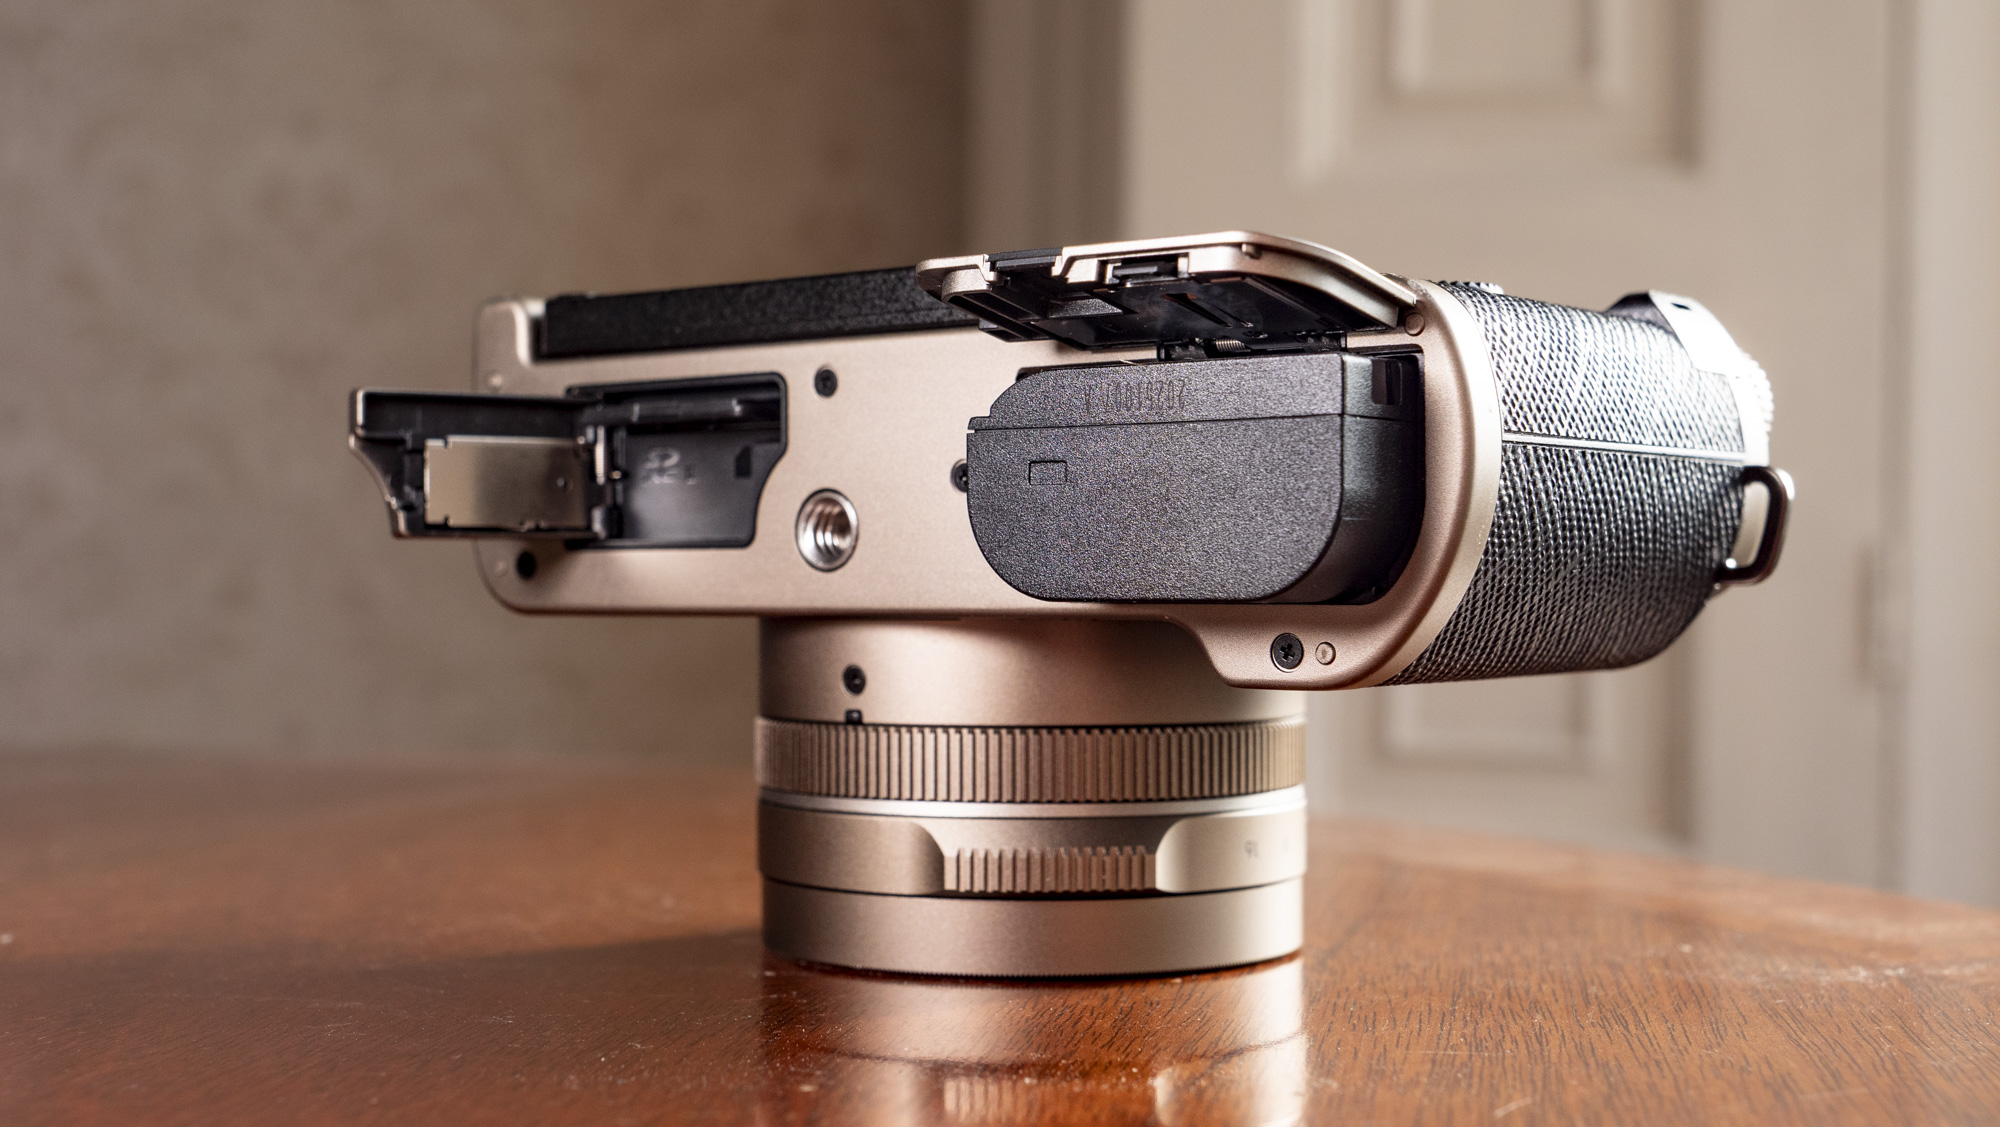
Battery life is better too, with a larger and higher-capacity battery slotted inside the grip. The downside is that the L10 is notably bigger than the LX100 II, which is a real shame if you like your cameras extra-small. That being said, the size and form factor are a good fit in the hand, and already-available extras further improve the camera's handling — I had the excellent the SmallRig thumb grip and hand grip for my review.
Overall, the Lumix L10 is exactly the kind of camera Panasonic fans — and, indeed, any compact camera fan — needed. There's no other model like it with such a heady mix of powerful features, large sensor, versatile 3.1x optical zoom, in an attractive retro body.
I'm not convinced the L10 is totally for me — I like my sensors big and bokeh extra creamy, meaning I'm in the "please Panasonic announce a full-frame Lumix S9 with a viewfinder" camp — but the L10 should be the one for many photographers hoping for a powerful everyday and travel camera that's simply enjoyable to use. The zoom-lens versatility is the real winner.

Panasonic Lumix L10: price and release date
- Announced on May 12 2026 to mark the 25th anniversary of Lumix
- Available in black or silver versions for $1,499 / £1,299 / A$2,599 from June 2026
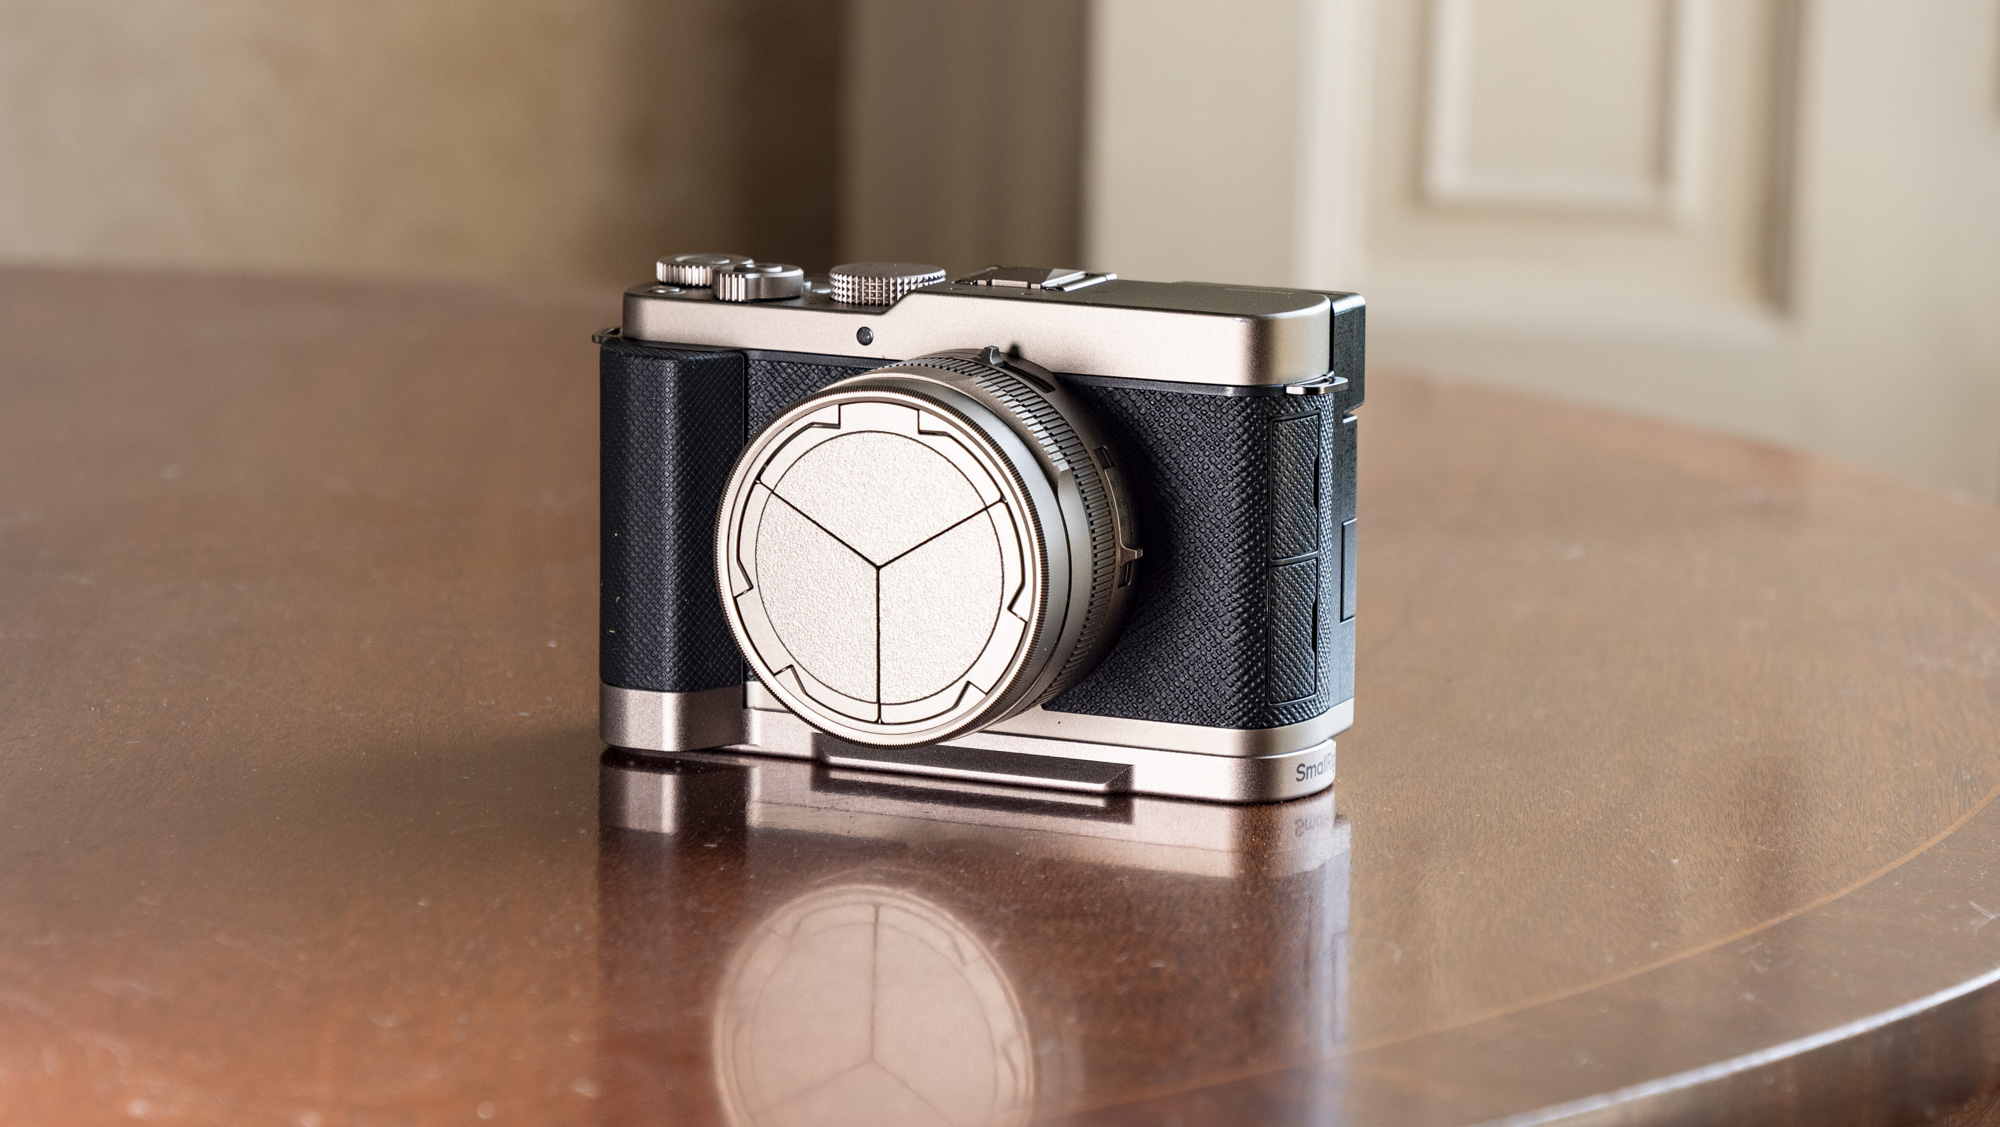
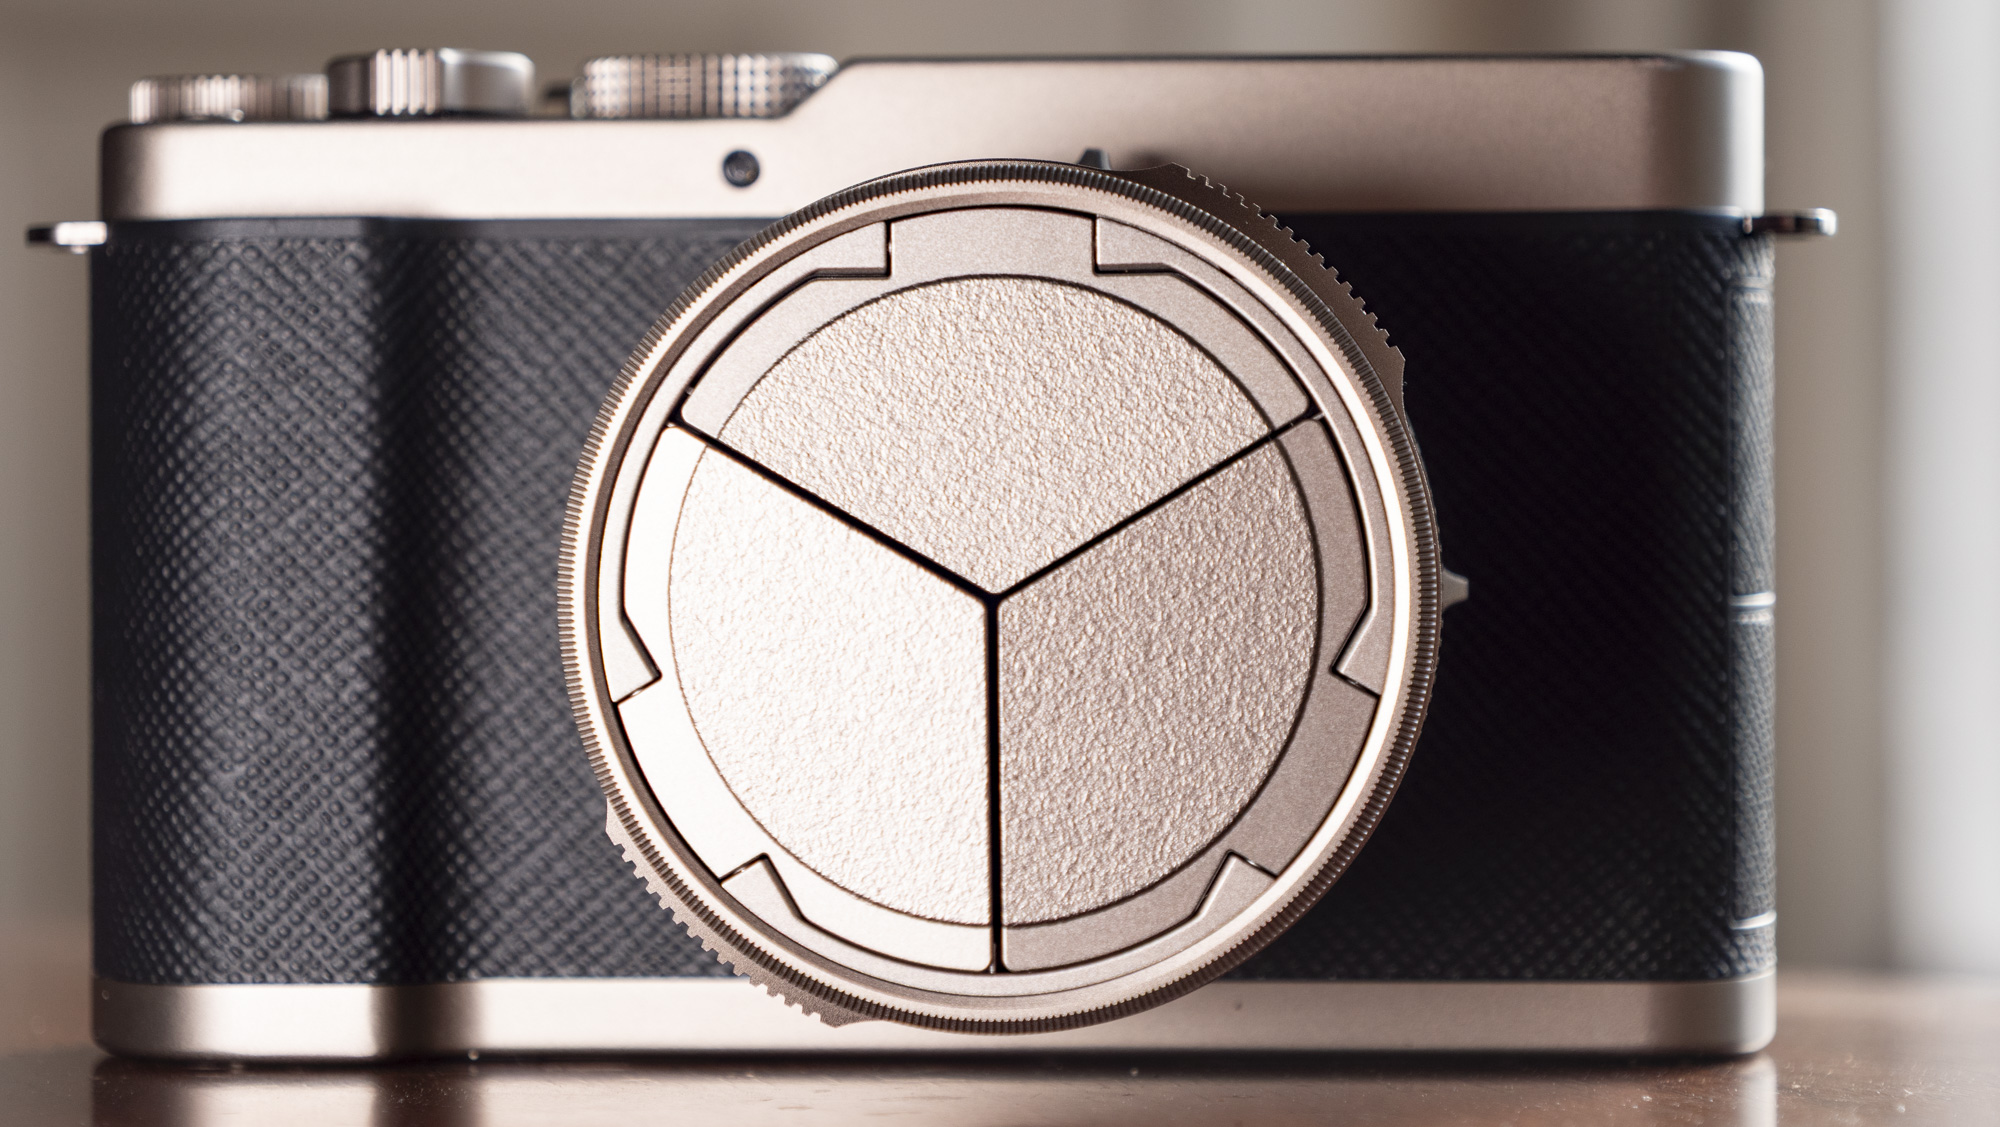
- The Titanium Gold Special Edition (pictured) costs $100 / £100 more and comes with extras, with limited availability from July 2026
The Lumix L10 costs $1,499 / £1,299 / A$2,599, which feels about right for this type of camera, and one with such powerful features, and the current market conditions. That's a full $400 / £300 less than the Fujifilm X100VI, which has a fixed lens, but which overall feels a little more premium.
If it's a purely compact package you're looking for, then another option is picking up a full-frame Lumix S9, which body-only costs hundreds less. Add the tiny new 40mm F2 or the collapsible kit zoom lens, and the package is around the same price as the Lumix L10. You'll miss out on a viewfinder, but you will have an L-mount camera with a powerful full-frame sensor, and a wider choice of colors.
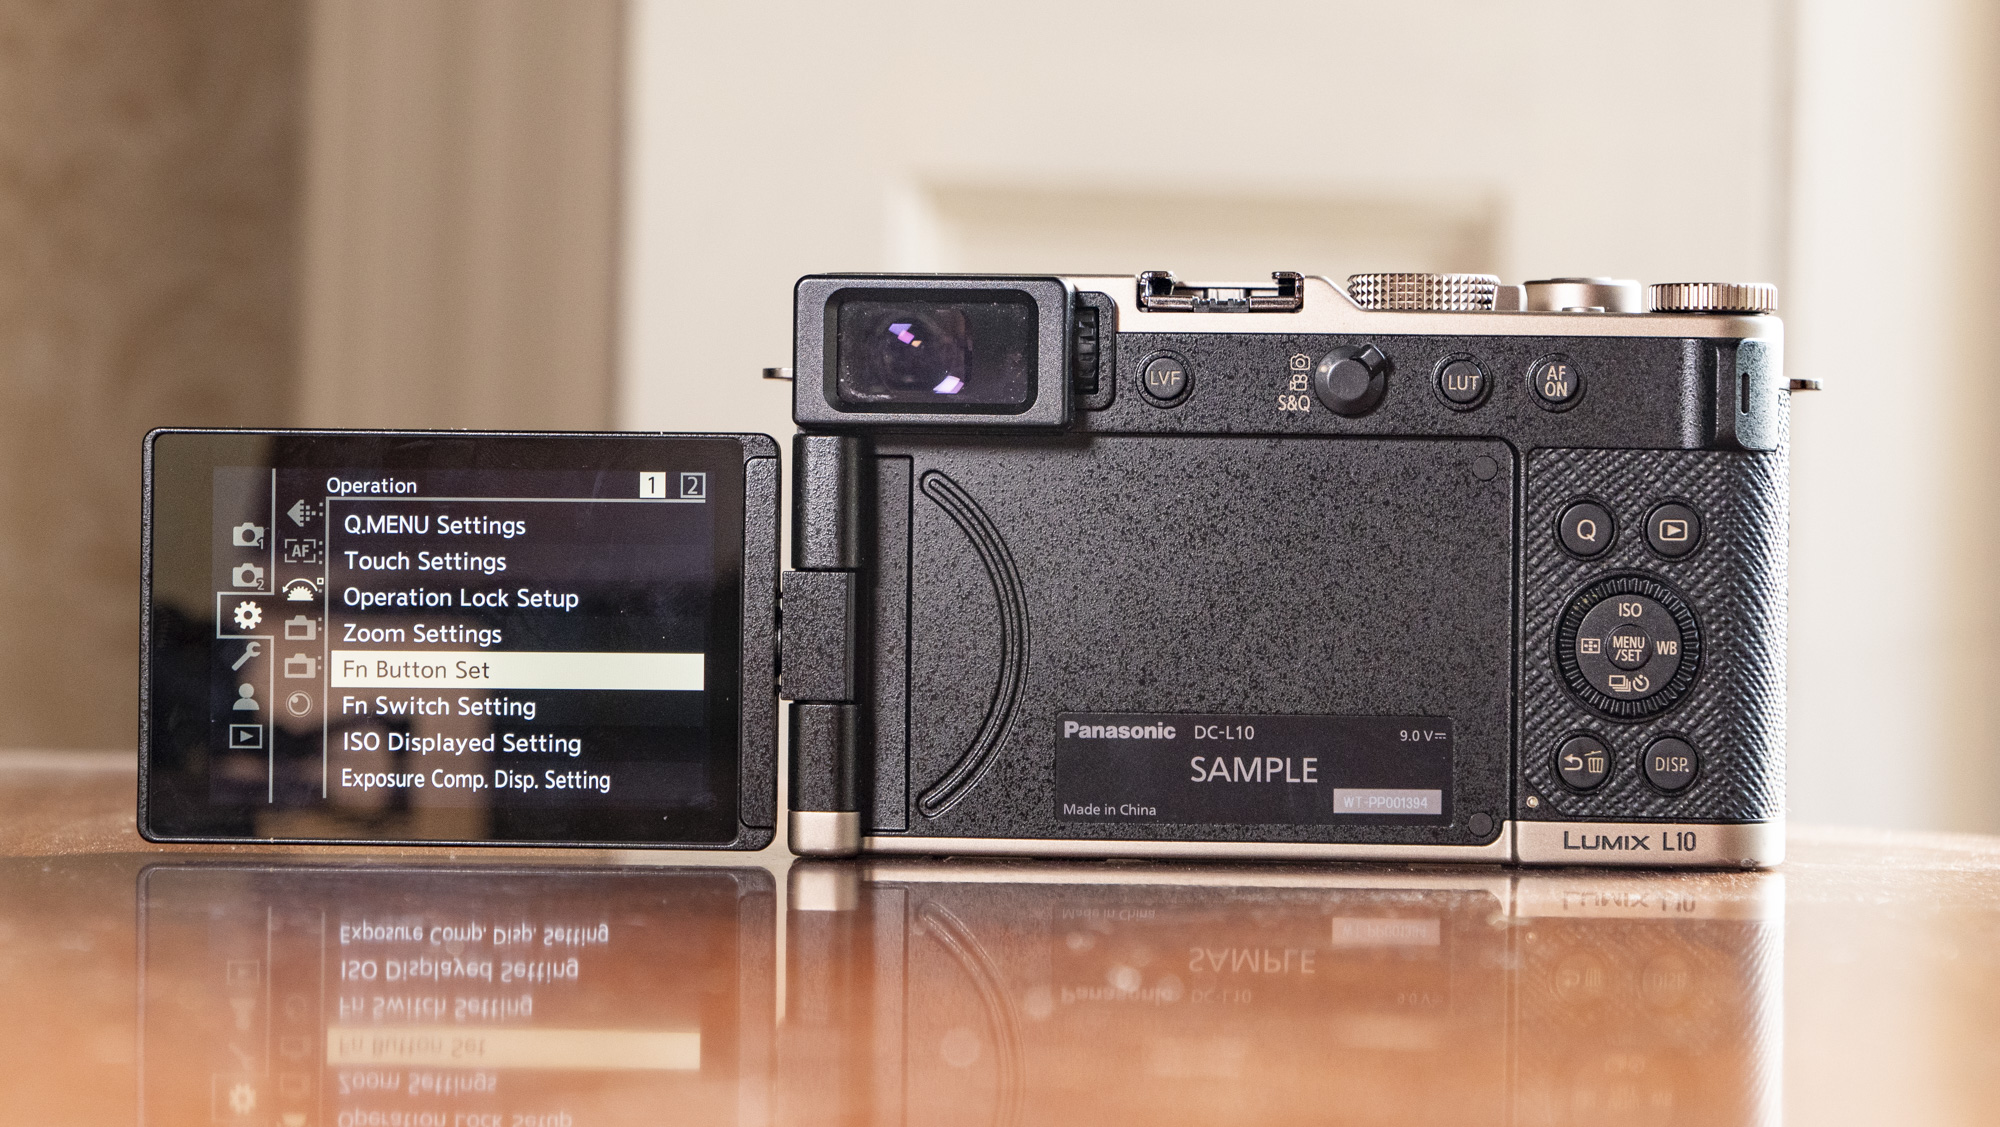
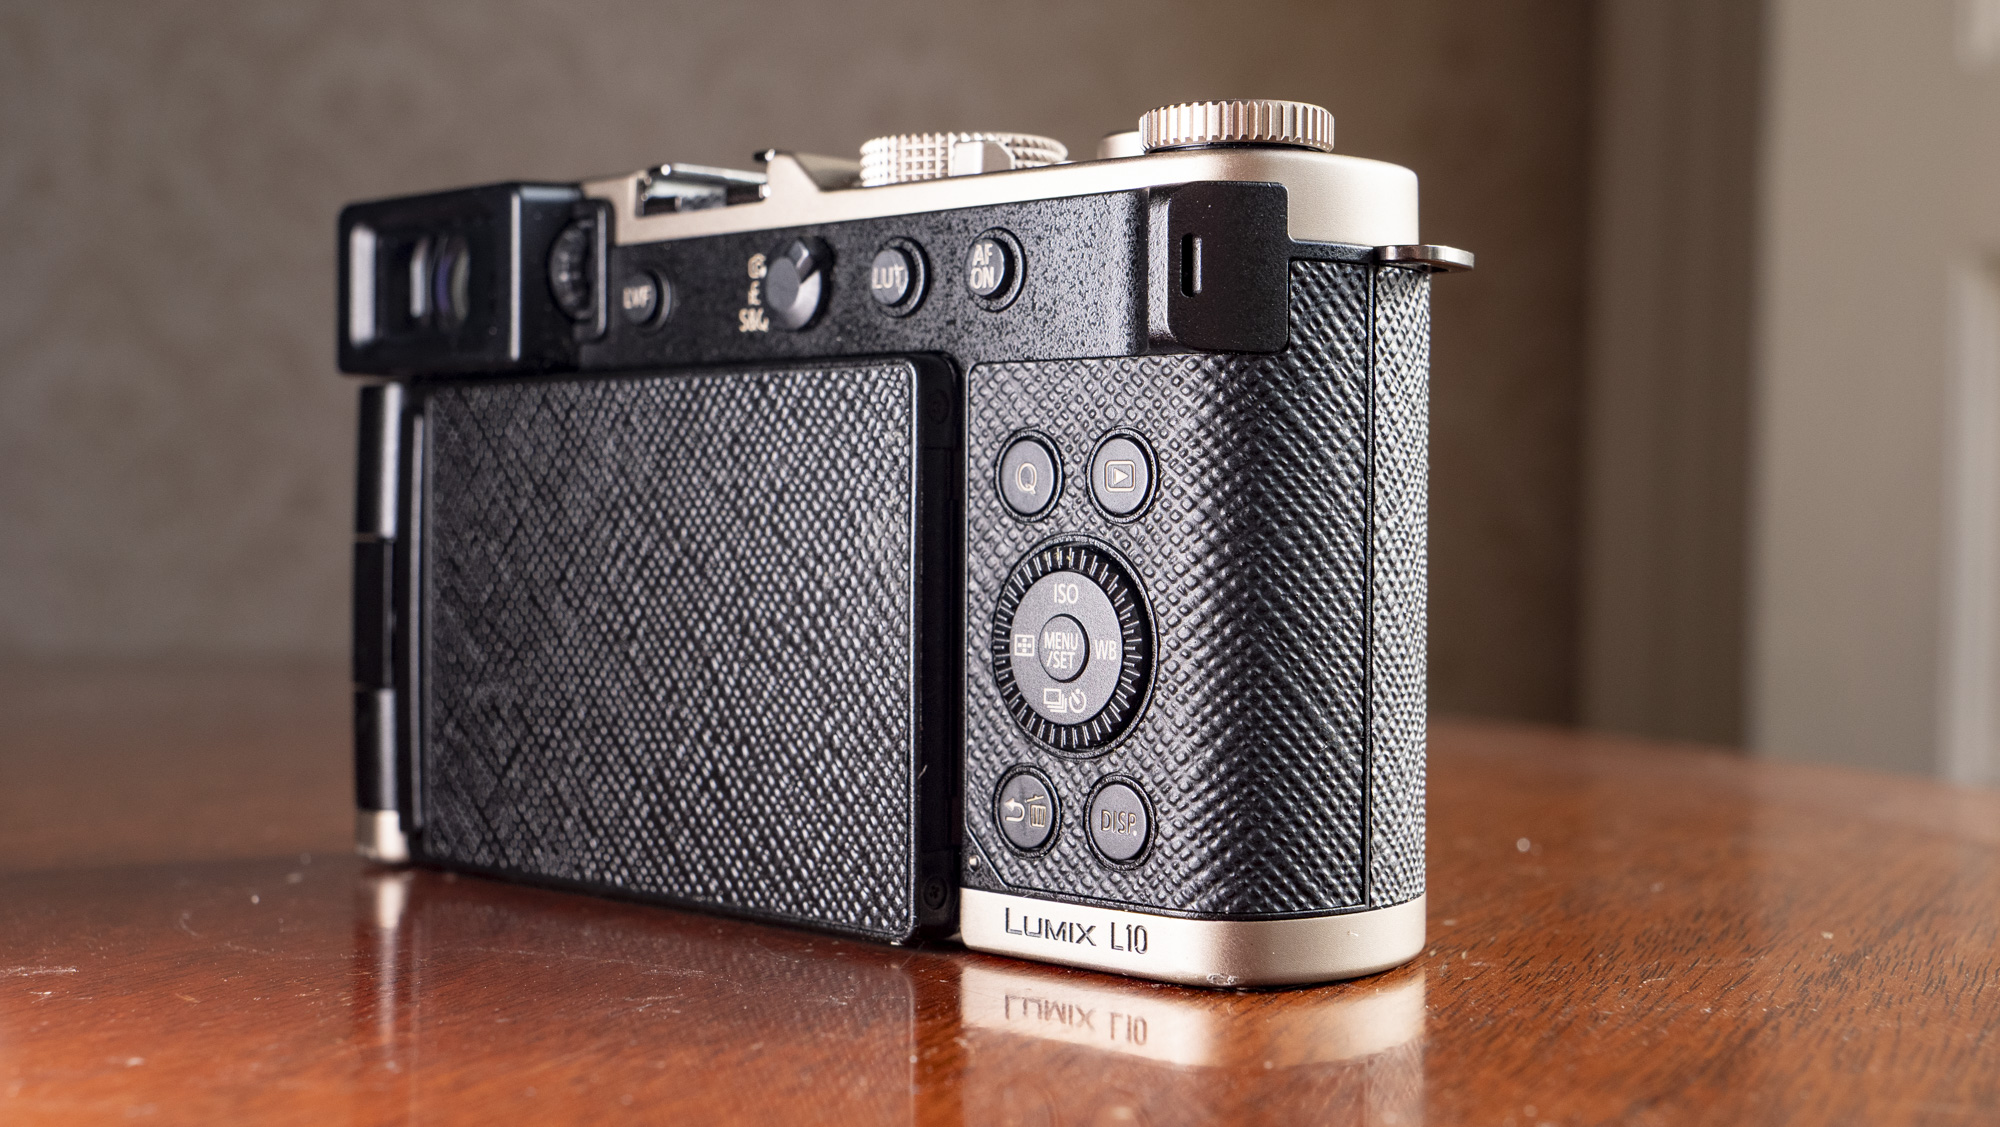
The Lumix L10 pictured throughout this review is the Titanium Gold Special Edition, which costs an additional $100 / £100, and is available through select outlets, namely Panasonic's store (and it's not available in every region). You're not paying a premium just for the color — the kit also includes a titanium-colored auto lens cap, a Lumix-branded leather strap, and a dedicated L10 lens cloth. The menus of the camera are suitably monotone to match the warm tones of the camera, and the camera model name is etched onto the camera's lower right-hand side on the back.
- Price score: 4/5
Panasonic Lumix L10 specs
Type: | Compact camera |
Lens | Leica DC Vario-Summilux 10.9-34mm (24-75mm equivalent), F1.7-2.8 |
Sensor: | 26.5MP Micro Four Thirds (20.4MP effective) |
Video: | 5.6K up to 60p / 5.2K 30p open gate / 4K up to 120p / FHD up to 240p |
ISO range: | ISO 50-25,600 |
Burst shooting | Approx 11fps mechanical, up to 30fps electronic |
LCD: | 3-inch articulated, 1.84m dots |
Viewfinder: | 2.36m-dot, OLED EVF. 0.39in, 0.74x magnification |
Memory: | 1x UHS-II SD |
Battery | DMW-BLK22 rated to approx 420 shots |
Dimensions | 5.01 x 2.91 x 2.64 inches / 127.1 x 73.9 x 66.9mm |
Weight: | 1.12lbs / 508g with battery, SD card and hotshoe cover |
Panasonic Lumix L10: design
- The prettiest Lumix in years, available in silver, black or a limited-edition Titanium Gold
- Roughly the same design as the Lumix L100 II, which also has a 24-75mm f/1.7-f/2.8 lens, but overall it's bigger
- There's a flip-out touchscreen and a handy EVF
Design-wise, the Lumix L10 is very much the spiritual successor to the Lumix L100 II, which remains a popular and versatile everyday camera for keen photographers.
And if it ain't broke, don't fix it; there's essentially the same control layout, 24-75mm f/1.7-f/2.8 lens, vari-angle 1.84m-dot touchscreen and 2.36m-dot EVF, and every part works perfectly well for casual photo and video use.
One key difference is the size and weight of the 2026 model — the L10 is noticably bigger and a little heavier than the L100 II, with a strikingly similar profile to the Fujifilm X100 VI.
A chief reason for the larger body is that the L10 is fitted with a larger battery — the same kind used in Panasonic's mirrorless bodies such as the Lumix GH7. Of course, a bigger battery means better battery life, and it's also better able to support more powerful features.
The actual difference in battery life isn't so much as you might imagine, though; the L10 runs for up to 420 shots compared to the L100 II's 350 shots. However, the L10 also packs better-quality video, and video capture is more demanding of power.
The lens is a defining feature of the camera — it's a versatile 24-75mm optic which is improved from the Lumix 100 II's, although Panasonic hasn't made clear how, besides describing it as being fine-tuned for the L10. It's impressively sharp, and the maximum aperture is bright throughout the zoom range, and able to produce reasonable subject and background separation, especially using the telephoto setting.
Macro focusing is down to 3cm, but that's at the wide-angle end of the lens. Zoom in to 75mm and the minimum focus distance is more like 30cm, which is hardly 'macro' — see my comparison photos below to get an idea of how close the camera is able to focus at either end of the zoom range.


The lens still isn't weather-sealed — and users of the LX100 series have reported dust ingress in the lens, so that's very much a possibility with the Lumix L10. And with a slightly plasticky feel in parts, it's a camera that probably needs to be looked after, rather than tossed into a bag or used in extreme conditions.
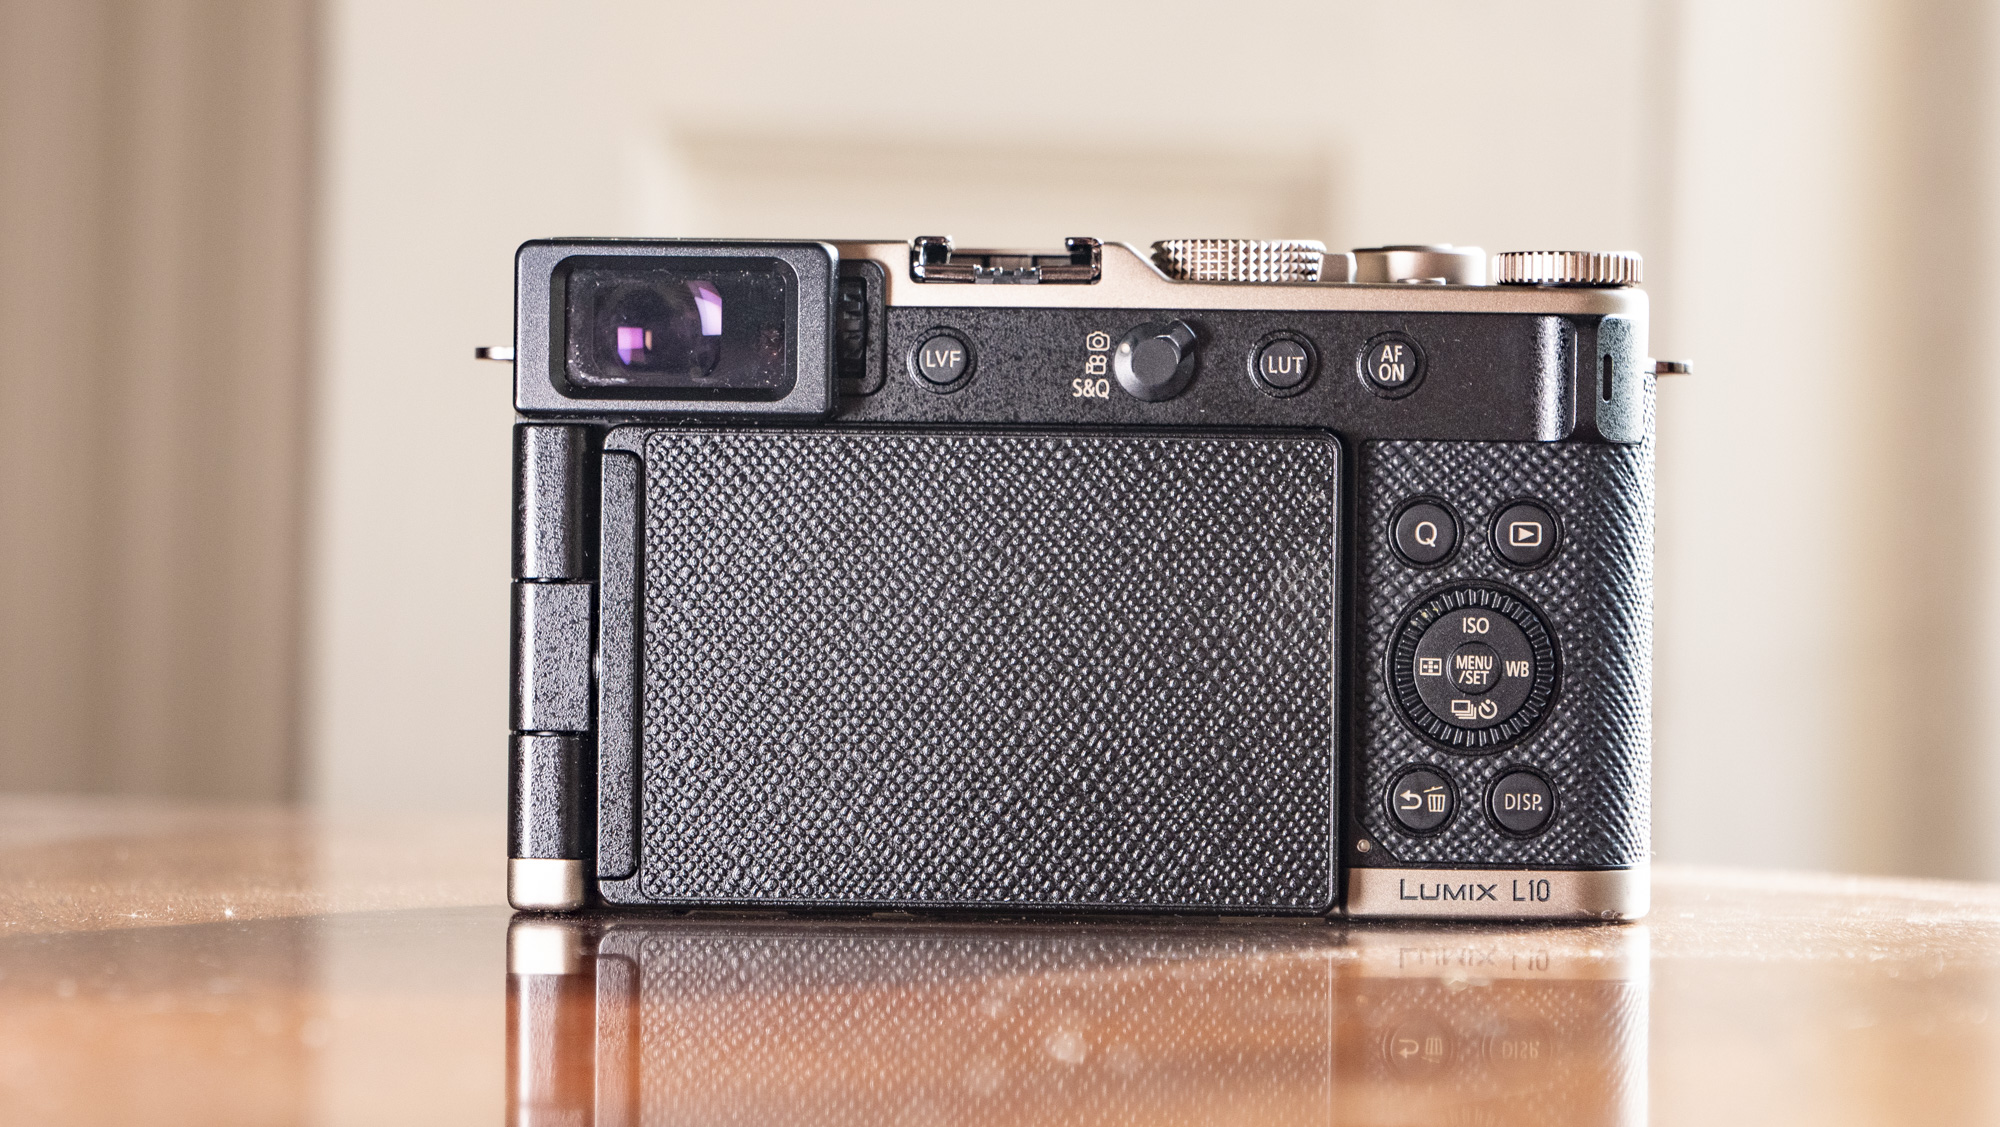
Besides the lack of an AF joystick, there are plenty of external controls at your fingertips, most of which can be customized to taste, and it certainly pays dividends to take the time assigning the L10's custom controls to your regularly used settings.
Take the switch on the lens, which can be used to control anything from aspect ratio to stepped zoom or Real Time LUTs color profiles — that's a handy range of controls.
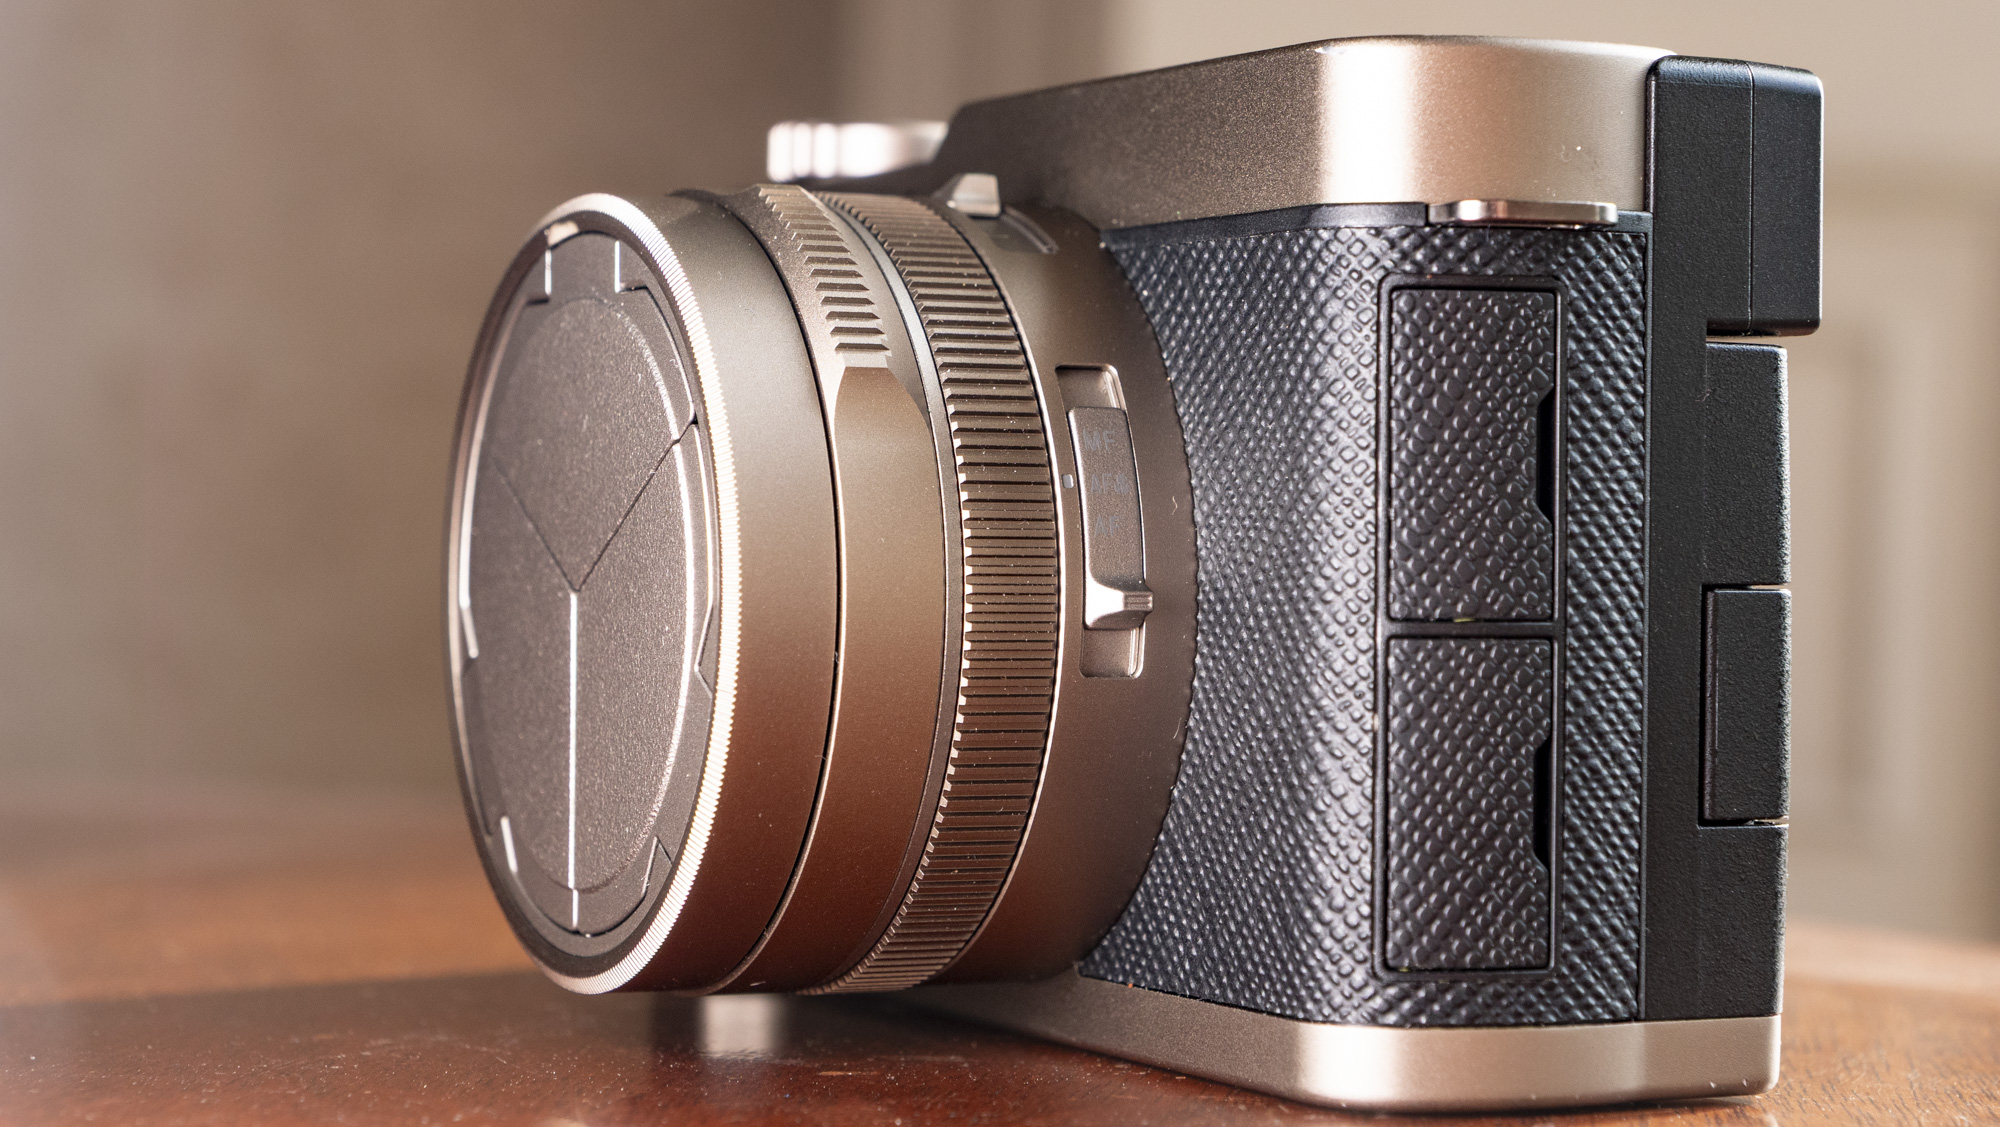
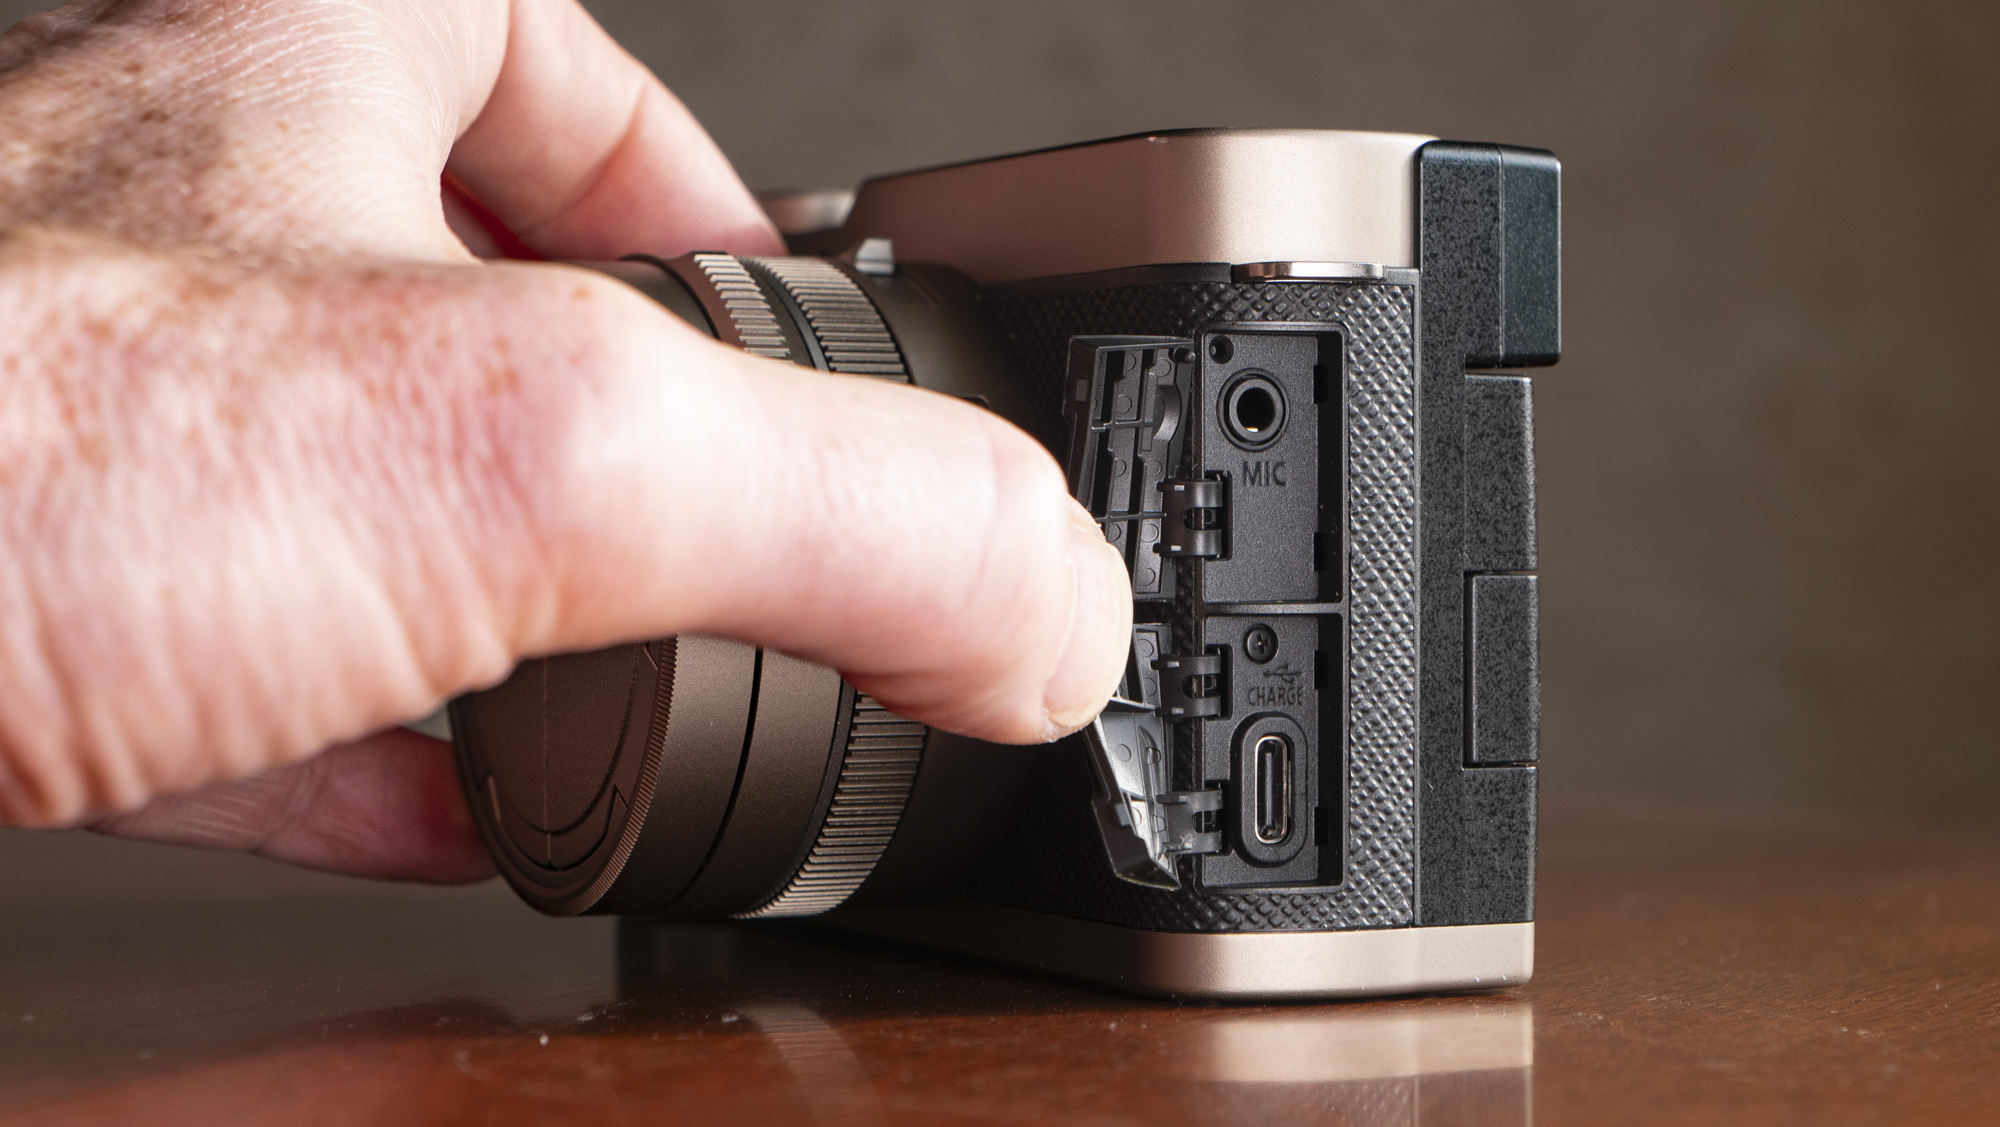
Despite its decent video credentials, the L10 is very much the stills-oriented camera by design. Yes, there's a mic jack, but no headphone or HDMI. The camera can be charged via USB-C.
The rangefinder-style 2.36m-dot OLED viewfinder and 3-inch 1.84m-dot vari-angle screen make viewing and composing images a cinch in just about any scenario — even if both units are a little dated now.
Overall, I have no major complaints about the L10's design. It's highly enjoyable to use, and it's a very attractive camera too, which made me want to use it all the more.
- Design score: 4.5/5
Panasonic Lumix L10: Performance
- Panasonic's latest 26.5MP MFT sensor and processor, but the sensor is not stabilized
- Snappy and reliable hybrid phase-detection autofocus with subject detection
- Startup / power down time is slowed by the lens extension / retraction
The L10 is an altogether different kettle of fish compared to recent Lumix compacts (which were basically re-releases with USB-C added, but, annoyingly, with the viewfinder removed). It's a genuine upgrade from the eight-year-old LX100 II, equipped with Panasonic's latest sensor, processor and autofocus system.
Throughout my three weeks and counting of testing, the camera has never missed a beat; it happily rattles through 11fps burst shooting sequences, and records high-resolution 5.6K video with no lag and minimal rolling-shutter distortion.
Autofocus is snappy and reliable, and includes subject detection for humans and animals (including pose recognition), plus vehicles and more. At times, however, I missed having a joystick for quick and easy manual selection of autofocus points. The camera offers this control through two steps: pressing the autofocus mode option on the D-pad, then pressing down on the D-pad, at which point the pad can be used to shift the autofocus points in play.


If there's one drawback in using the Lumix L10 for everyday and street photography, it's the retractable lens design. From powering up, there's around a two-second wait for the lens to extend before the camera is ready to shoot, and around the same time for it to retract when turning the camera off.
We get the same 26.5MP MFT sensor as used in recent mirrorless cameras such as the Lumix GH7, but with one major difference: the sensor isn't stabilized (the lens is), which can limit the camera's handheld use, especially in low light or for creative long-exposure photography, for which you'll want a support for the camera.
Rival cameras including the Ricoh GR IV and Fujifilm X100VI have in-body image stabilization (IBIS), as do most MFT mirrorless cameras at this sort of price point, including the OM System OM-5 II and Lumix GH series.
Overall, however, there are few cameras that are able to perform as smoothly as the L10 while offering such processor-intensive features — inside that retro body is some serious grunt.
- Performance score: 4.5/5
Panasonic Lumix L10: Image and video quality
- Multi-aspect stills up to 20.4MP, from the 26.5MP sensor
- The lens is sharp and bright
- A wide range of color profiles, including Real Time LUTs


I've had more than enough time with the Lumix L10 to get a feel for its capabilities and image quality, and it's really grown on me.
When I started writing this review, I was ready to table my request for a fixed-lens Lumix with full-frame sensor instead, or a Lumix S9 Mark II with a viewfinder; but I've come to appreciate the versatility of the L10's 24-75mm lens, which I value more than prime-lens image quality for everyday photography (see the range above).
The lens is impressively sharp, and crucially its maximum f/1.7-2.8 aperture is plenty bright. This is a camera that's as comfortable with street photography scenarios as it is for macro photography or portraiture.
Lens distortions are kept to a minimum — there's only an occasional touch of chromatic aberration in out-of-focus areas, and rainbow flare when shooting towards bright sunlight, while sunstars are crisp (check out the gallery below).


The unfortunate drawback to the camera's design is that the imaging circle of the lens cuts into the sensor area, meaning that not all of the sensor's 26.5 megapixels are usable — the maximum photo resolution is 20.4MP.
That's still a big resolution bump from the LX100 II, which had an effective 12MP resolution, but some way behind high-resolution alternatives such as the 40MP Fujifilm X100VI.
The low-light quality of a Micro Four Thirds sensor is also limited compared to larger-sensor alternatives, especially since there's no IBIS which would otherwise enable users to use longer shutter speeds when shooting handheld.


Detail across the aperture range is surprisingly sharp for a zoom lens, and you'll struggle to find a better-equipped compact camera for video at this price point — just what I would expect from a modern-day Lumix.
And then there's the unsung highlight of a photographer's life with a Lumix camera: attractive color profiles and free Real Time LUTs uploads from the always-improving Lumix Lab app.
I've easily paired the L10 with the Lumix Lab app to remotely control the camera and view scenes, and upload Real Time LUTs profiles directly onto the camera (remember there's a switch on the lens which can be assigned as direct access to these profiles). These profiles can be used for photo and video.
Put simply, it's straightforward to get the look you want for photo and video in-camera, minimizing time needed with editing software. I've never been more tempted to save space on my memory cards and shoot JPEG-only.
Panasonic Lumix L10 sample gallery


- Image and video quality score: 4/5
Panasonic Lumix L10: testing scorecard
Attributes | Notes | Rating |
|---|---|---|
Price | An expected price for this type and level of camera, and I'd be surprised if it's discounted any time soon | 4/5 |
Design | Really attractive retro body, equipped with a wide range of controls, EVF and vari-angle touchscreen | 4.5/5 |
Performance | Besides the boot-up time, the camera never missed a beat. I missed in-body stabilization, however | 4.5/5 |
Image and video quality | Stills max out at 20.4MP, and the MFT sensor has the usual low-light quality limitations, but there are stunning Real Time LUTs profiles available | 4/5 |
Should I buy the Panasonic Lumix L10?
Buy it if...
You want a stylish everyday camera for photography
With a retro profile and rangefinder-style viewfinder, the Lumix L10 looks the part like no other recent Panasonic camera.
You'd like a sidekick to your mirrorless Lumix
With a sharp zoom lens, powerful autofocus, decent video performance and the same color profiles, the Lumix L10 is an excellent sidekick to recent Lumix mirrorless cameras.
Don't buy it if...
You know you're focal length
Zoom lens versatility is a key reason to buy the Lumix L10. If you typically shoot using a single focal length, a Ricoh GR or Fujifilm X100 series model could be a better bet.
You want a rugged camera for all conditions
The L10 looks the part and performs brilliantly, but it's not weather sealed and the body feels less premium than an X100 camera, so you'll want to look after it.
Panasonic Lumix L10: also consider
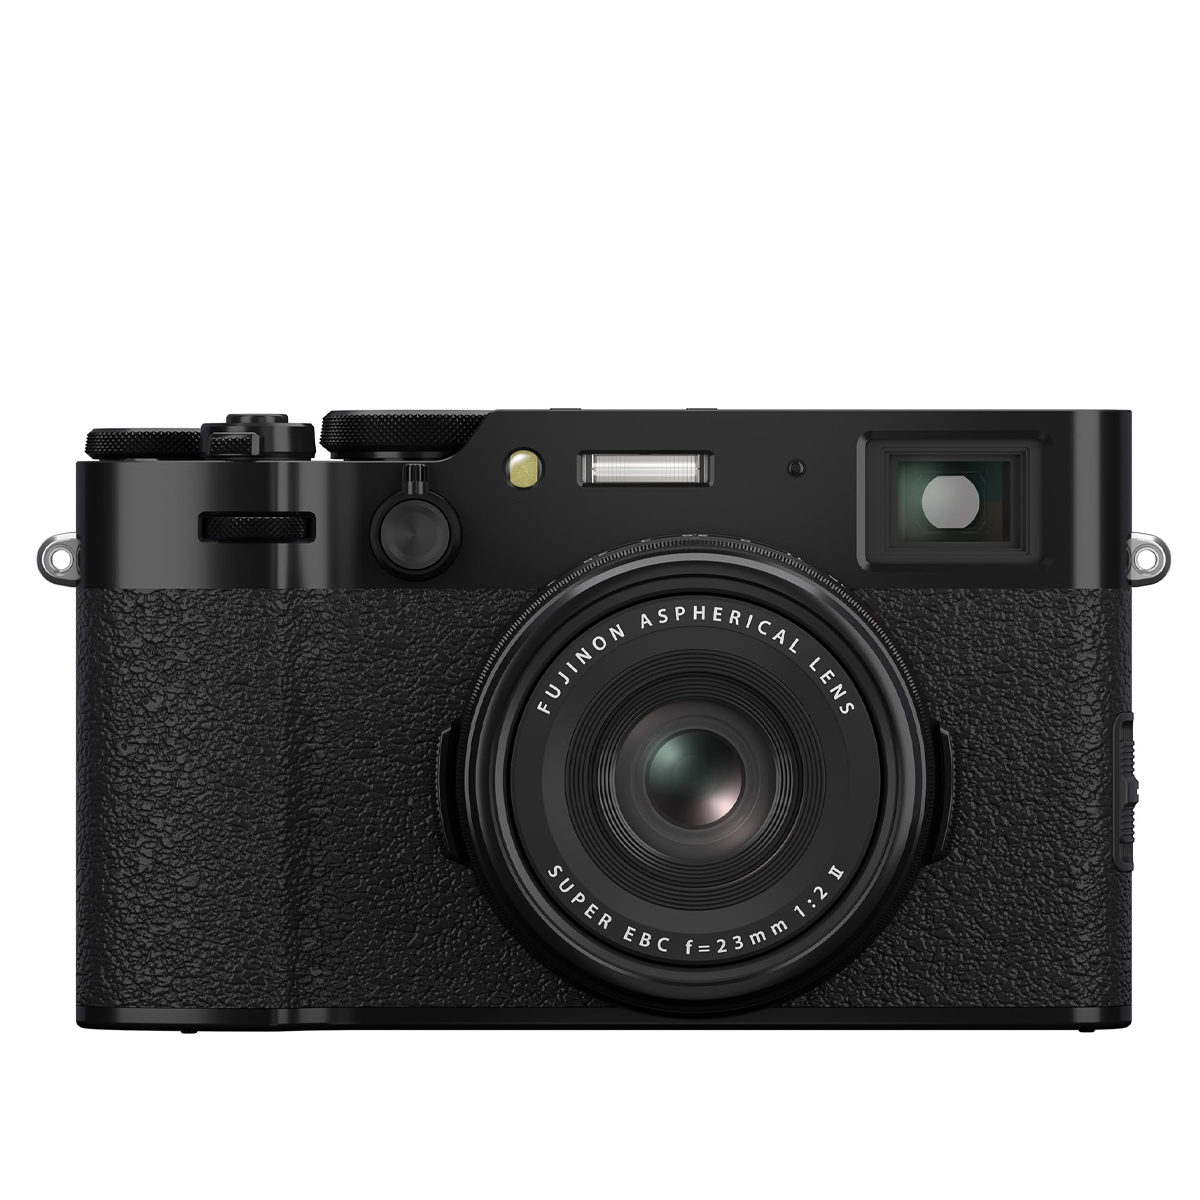
Fujifilm X100VI
A modern day classic — the X100VI is the most preordered camera ever, equipped with a stabilized 40MP APS-C sensor (larger than MFT), fixed 35mm f/2 lens and a hybrid viewfinder. It feels better built and costs around 20-25% more than the Lumix L10, and with that larger sensor and twice the pixels, the X100VI's picture quality has the edge. However, the lens is fixed and less versatile than the L10's zoom.
Read our in-depth Fujifilm X100VI review
Panasonic Lumix S9
If the Lumix L10's compact size appeals, a versatile alternative is the full-frame Lumix S9. You can pick up the 24MP L-mount mirrorless camera with a small kit lens or the new 40mm F2 prime for around the same price as the L10, and it has that larger, stabilized sensor and even-better video skills. However, the Lumix S9 lacks a viewfinder, which can make it less suitable for photography.
Read our in-depth Panasonic Lumix S9 review
How I tested the Panasonic Lumix L10
- I've had the Lumix L10 since its global announcement, meaning 3 weeks and counting at the time of writing
- It's been by my side daily, capturing every day moments and travel scenes
- I've compared image quality at various aperture settings and focal lengths, and experimented with various color profiles
Panasonic handed me the Titanium Gold Special Edition of the Lumix L10 one day ahead of the camera's global announcement, together with the limited edition accessories plus a thumb grip and hand grip made by SmallRig. I've used all of these accessories for my review.
The camera has been slung over my shoulder a lot of the time throughout the three weeks and counting that I've had it, during which time I've been on two trips and also used the camera to capture every day moments, day and night.
I've tried the various aspect ratios, color profiles, video settings and fully tested the lens's capabilities across its various aperture settings and focal lengths, plus its macro focusing skills. I continue to fine tune the camera settings to my own preferences. I've made sure to assess battery life and autofocus performance too.
- First reviewed: June 2026
- Read more about how we test
HoverAir Aqua: One-minute review
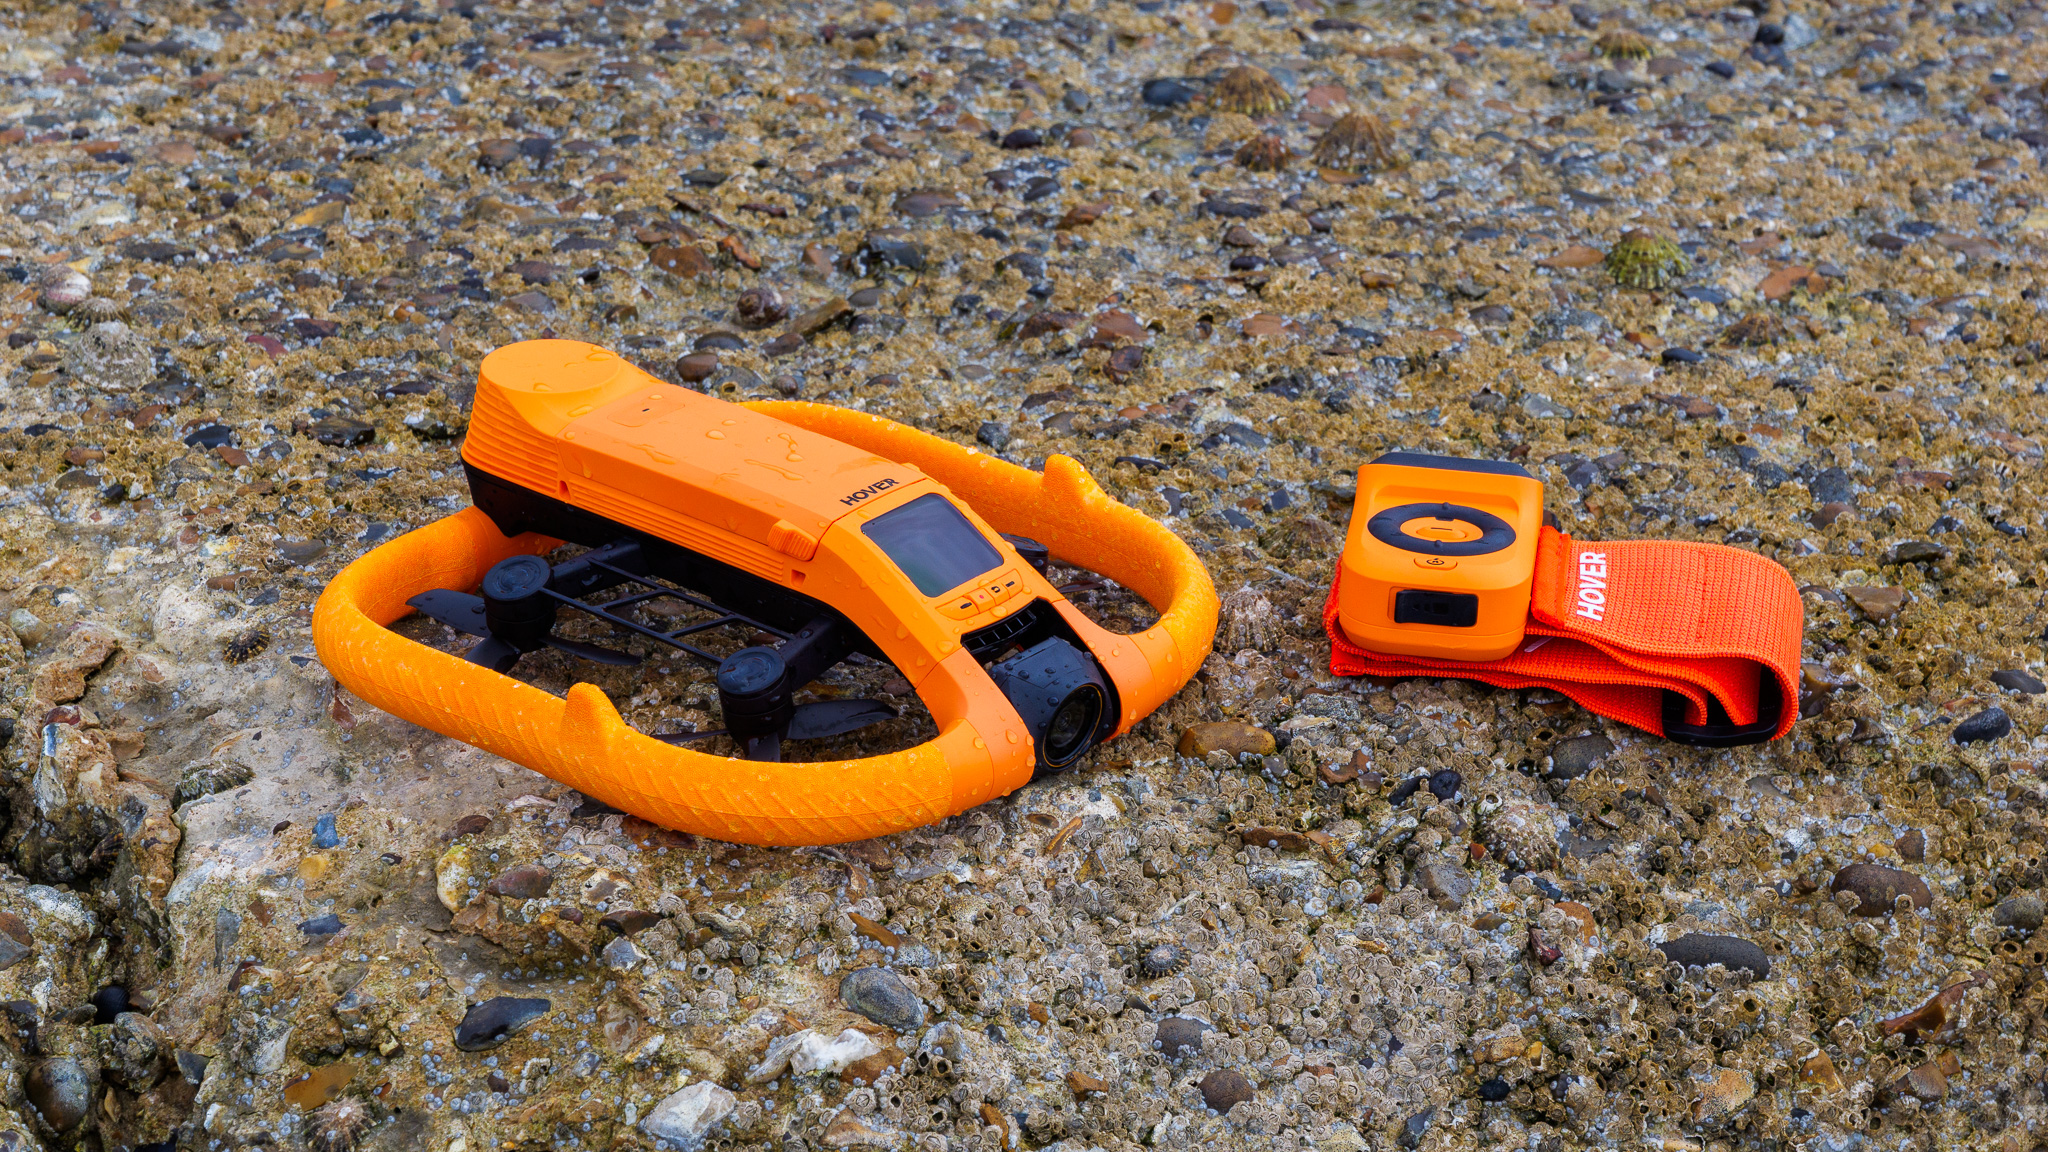
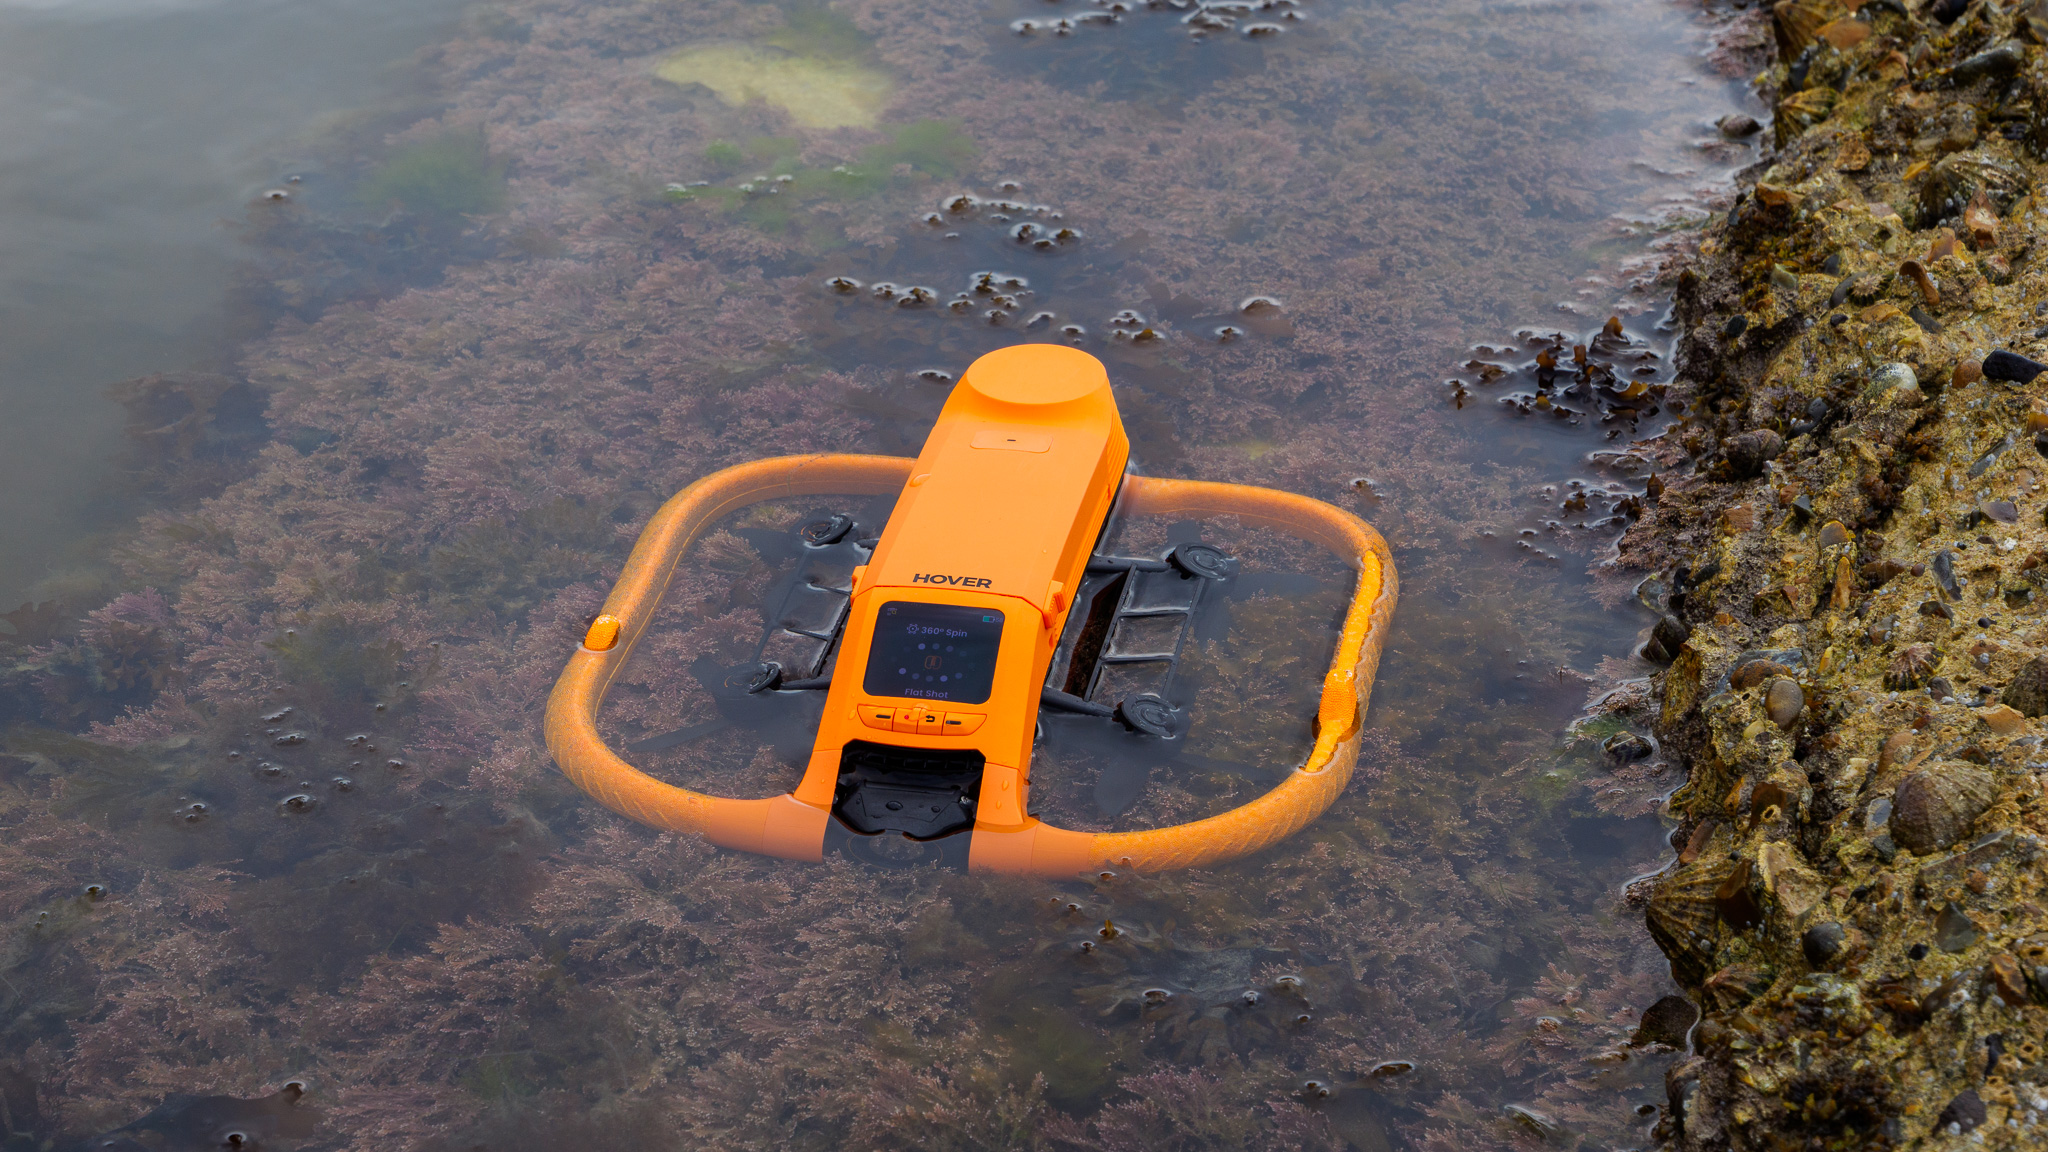
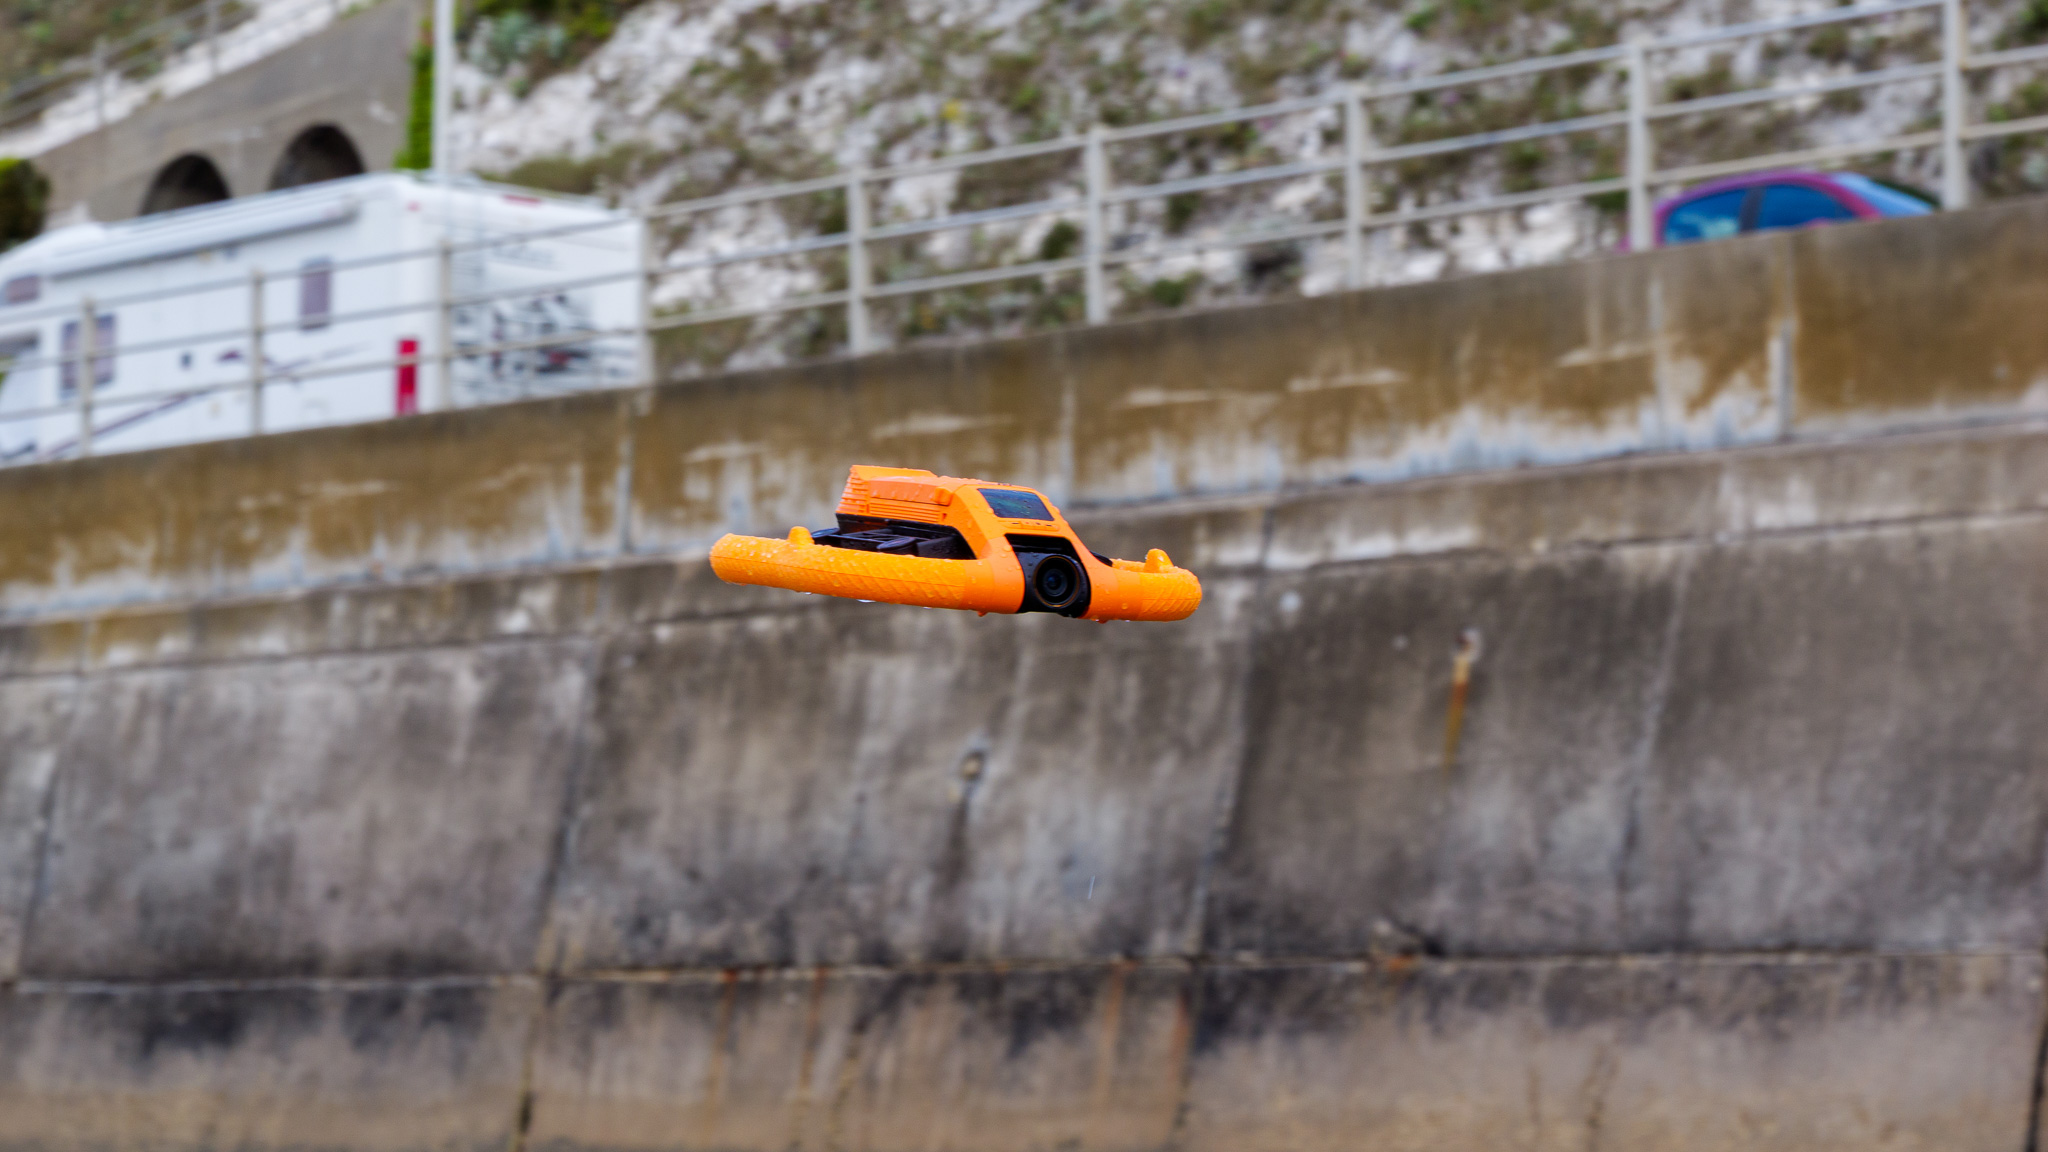
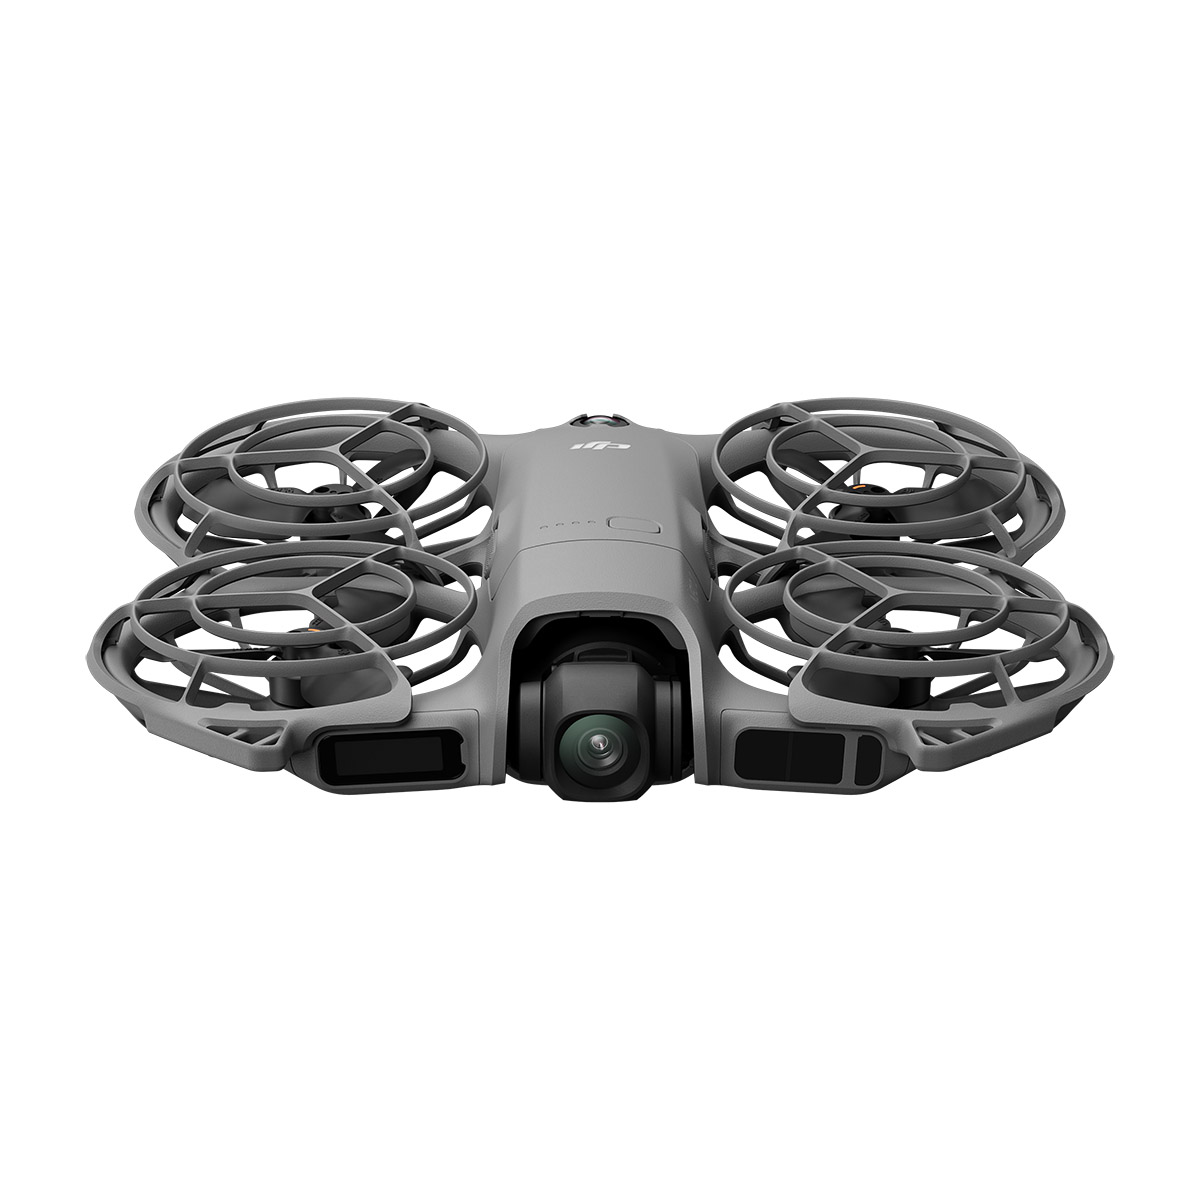
The HoverAir Aqua is a drone unlike anything else on the market right now, and for once that's not marketing hyperbole. Manufacturer Zero Zero Robotics has built the world's first truly waterproof self-flying camera — one that can take off from and land on the surface of the water, and follow you through waves and spray that would destroy most consumer drones. If you're a solo watersports enthusiast who's ever wished you could capture good-quality aerial footage of yourself without hiring a drone operator, the Aqua is literally the only game in town.
That monopoly on novelty is both the Aqua's greatest strength, but also the lens through which you need to evaluate it. Because while the concept itself is undeniably thrilling, my real-world testing revealed a product that feels very much like a v1.0: innovative and impressive in the right conditions, but rough around the edges in ways that its steep asking price make harder to forgive.
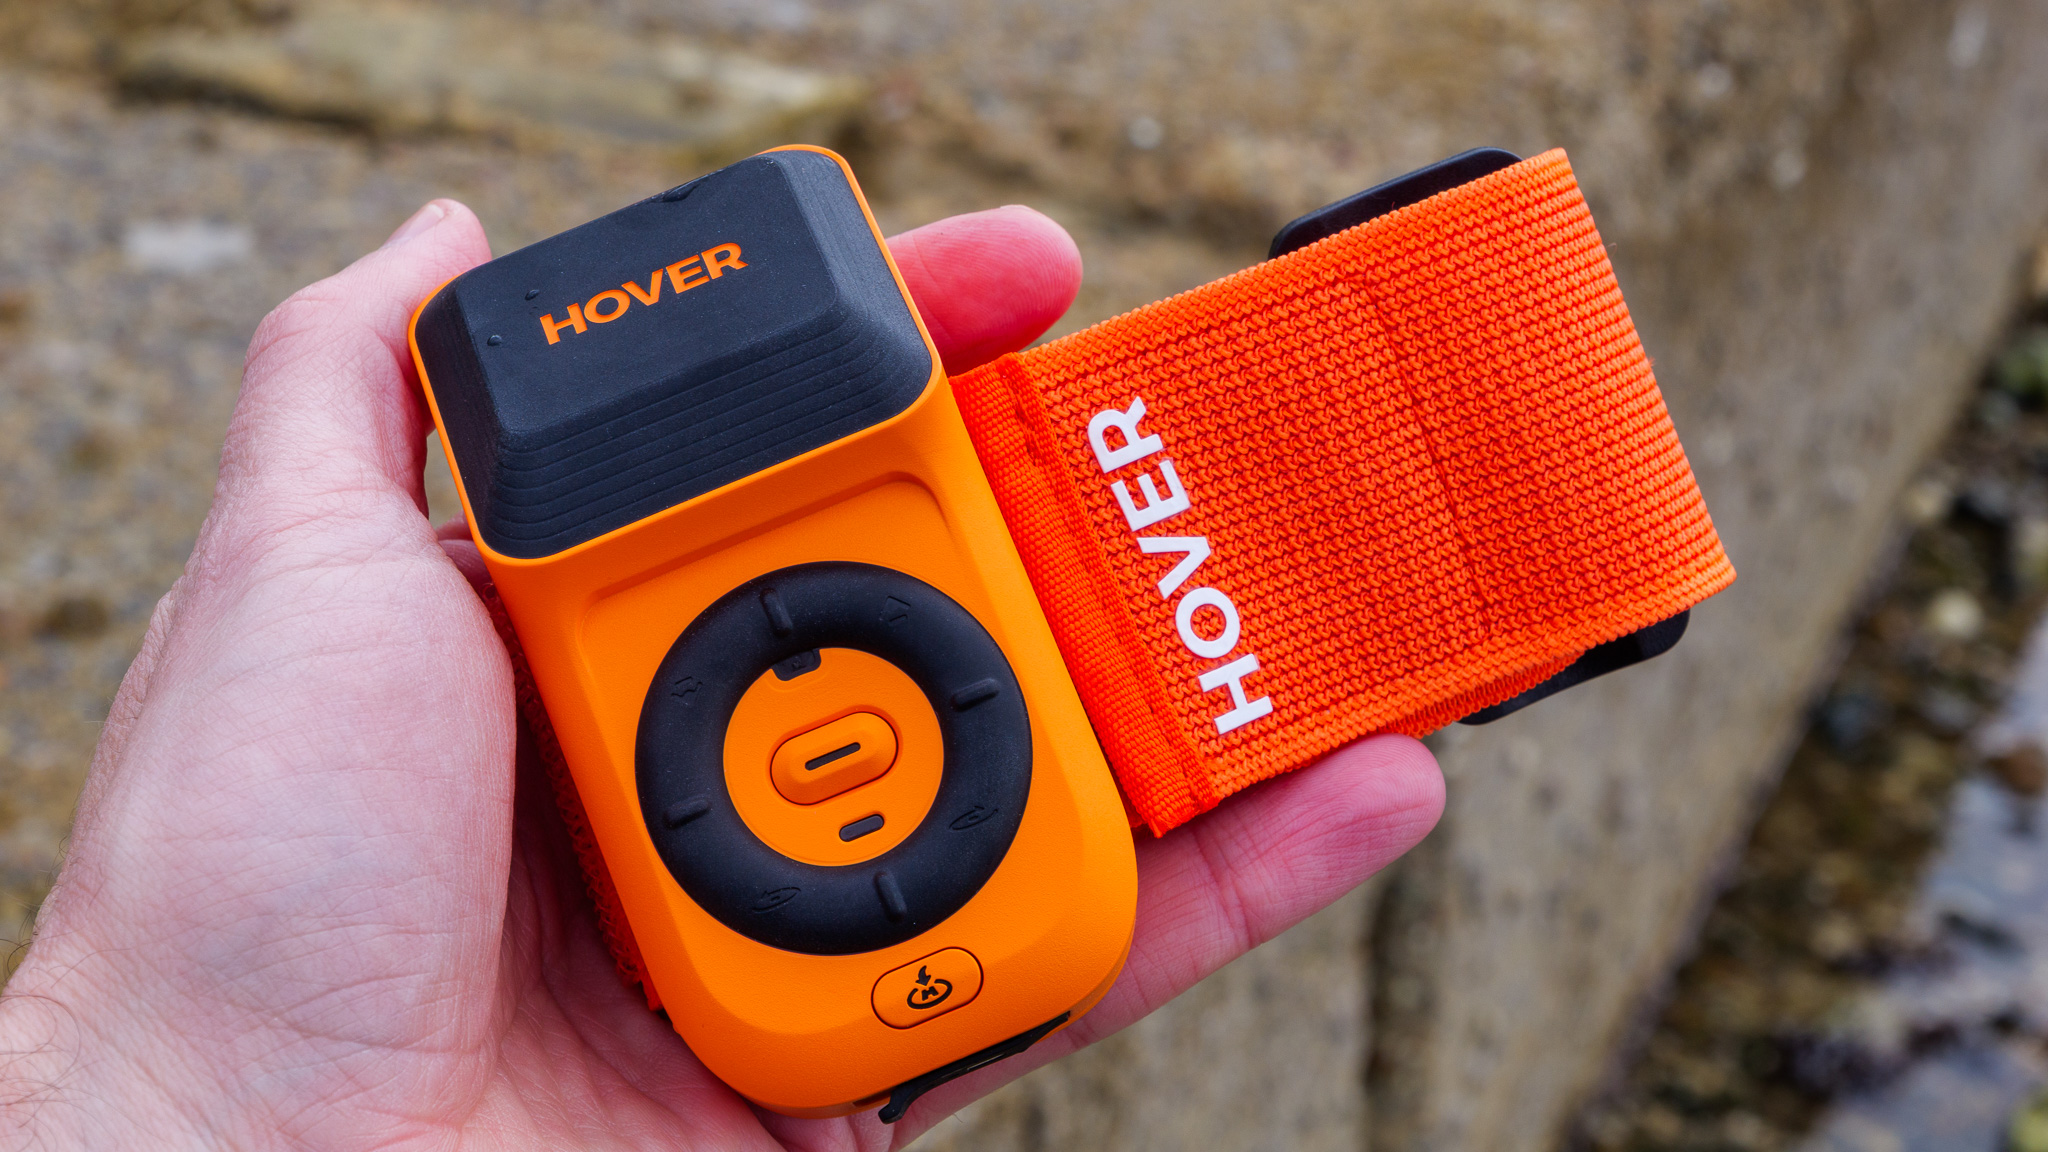
Perhaps the most important thing to understand before buying is how the Aqua's tracking works. Unlike DJI drones that use computer vision to lock onto and frame a subject, the Aqua tracks the Lighthouse, a wearable device you strap to your arm. While this is an eminently sensible solution for an environment where reflections, spray and constantly moving surfaces would confound visual tracking, it has real consequences for your footage: in Orbit mode, for instance, I found my head was consistently cropped out of frame, because the drone is circling the Lighthouse, not me.
There are other niggles too. My review sample suffered from persistent Lighthouse connection drops — reconnecting almost immediately each time, but loudly announcing every single event via an intrusive, irritating voice alert. And one of my best video clips was ruined by a water droplet on the supposedly hydrophobic lens, which feels like a major concern for a drone built around water compatibility.
It's also worth noting that the Aqua's maintenance demands are higher than any non-aquatic drone I've tested: after saltwater sessions, you'll be rinsing, patting dry and checking battery compartments as soon as you get home.
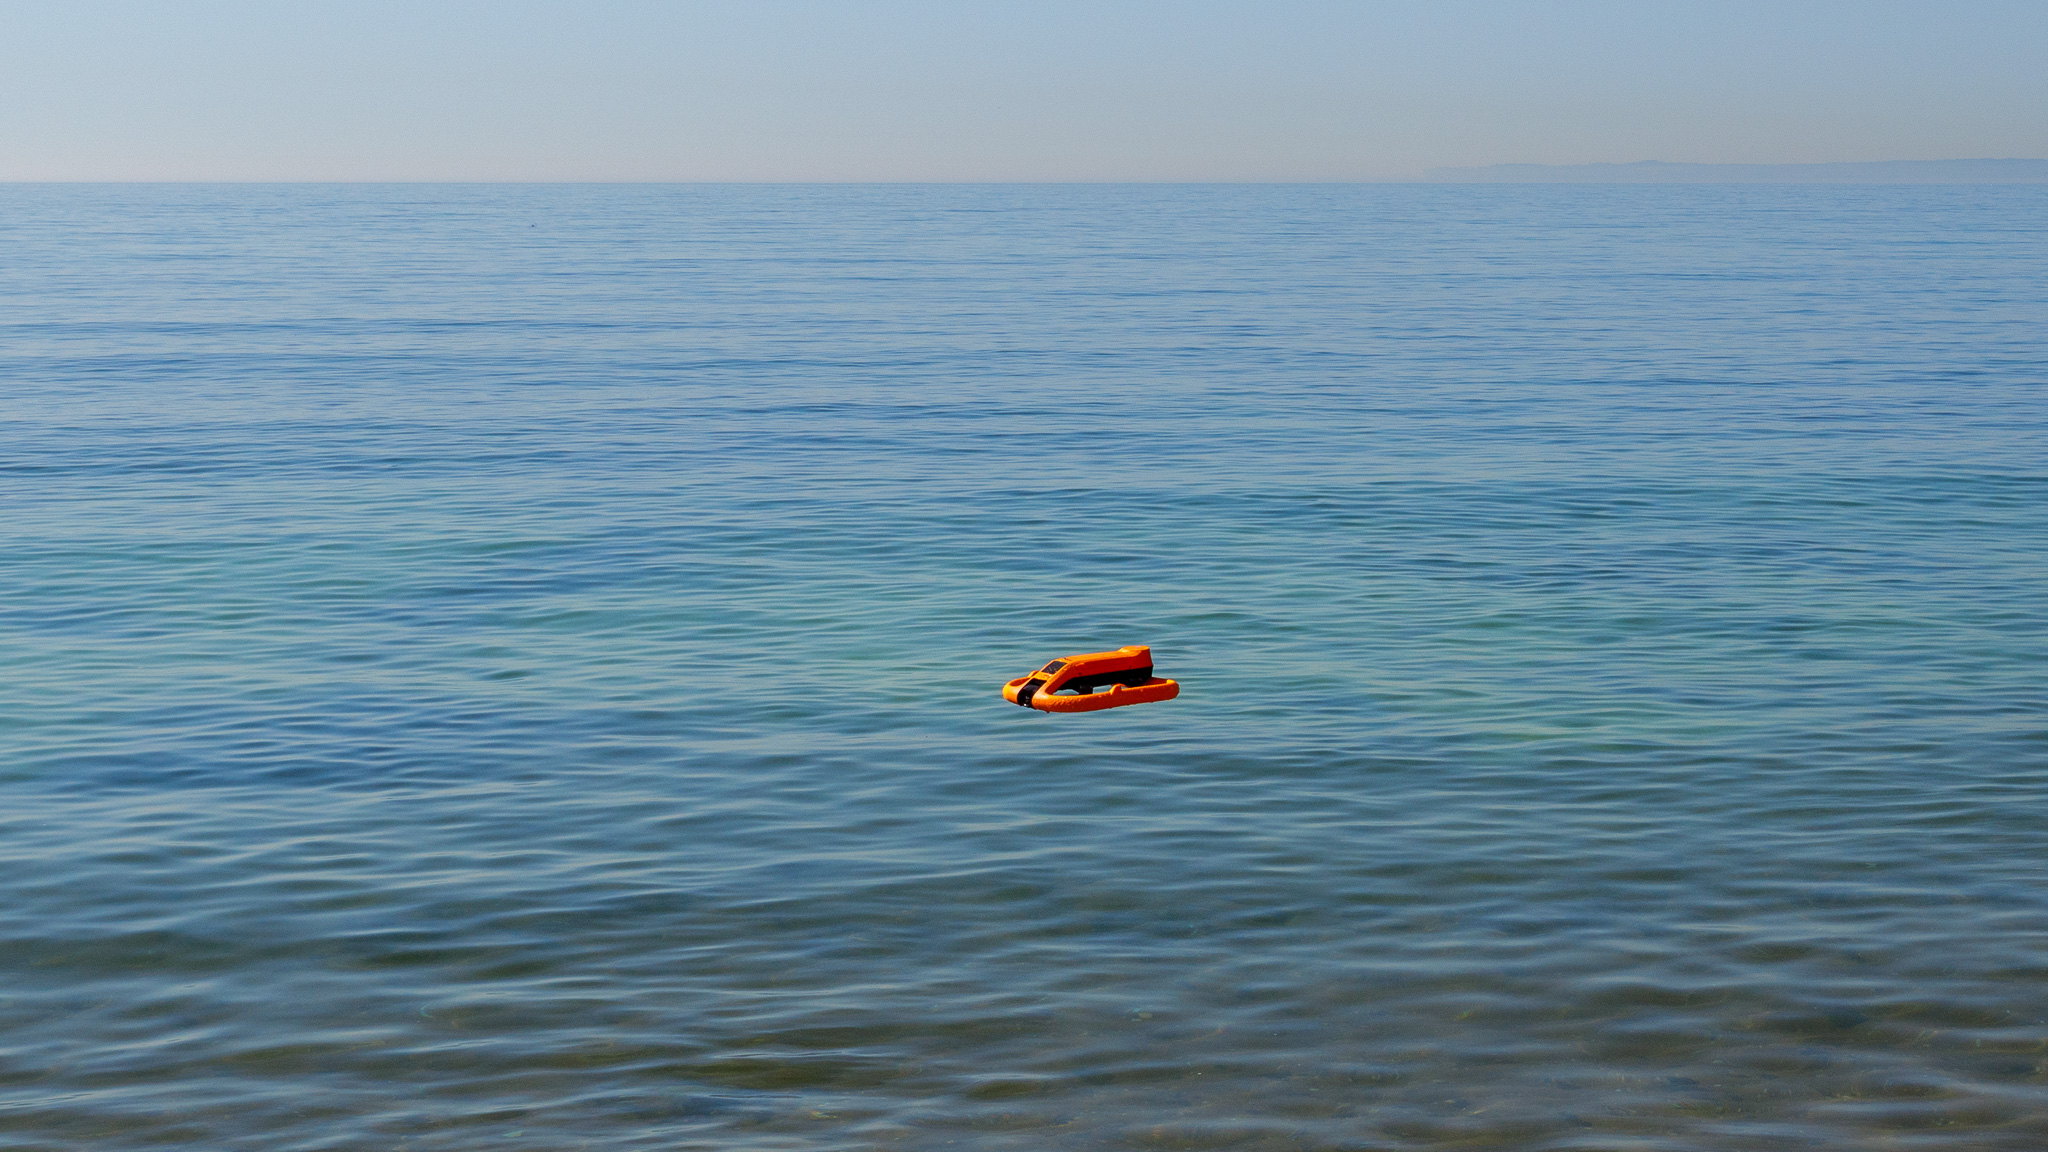
That being said, take it out on a calm sea on a bright morning with your paddleboard, and it does something no other drone can do. For the right user — the solo surfer, kayaker or SUP rider who wants hands-free aerial footage without risking a wrecked drone — the Aqua is really the only viable option on the market.
HoverAir Aqua: Price and release date
- Launched globally on May 28 2026 — except in US
- Priced from $1,299 / £1,129 / AU$1,999
- Fly More Combo available online only
The HoverAir Aqua has had a long road to market, being initially teased in August 2025 ahead of a successful Indiegogo crowdfunding campaign. Nearly a year on, it's now available globally — except in the United States, where it's apparently falling foul of the same regulatory issues that have kept DJI's recent launches off the shelves. So while I've been given US pricing, it's not yet available in buy in the States.
Three bundles are available at launch. The Standard Combo ($1,299 / £1,129 / AU$1,999) covers the basics: the Aqua itself with one battery, a USB-C cable, the Lighthouse wearable with armband, a repair kit, and a single waterproof battery bag. The Basic Combo ($1,399 / £1,219 / AU$2,199) adds a second waterproof bag, an extra smart battery, and a charging hub. Step up to the Fly More Combo ($1,499 / £1,299 / AU$2,986, online only) and you get two additional smart batteries, three waterproof battery bags, a maintenance kit, and the charging hub — the most complete package for anyone planning longer sessions on the water.
Given that the Aqua's 23-minute battery life is on the shorter side for a drone at this price point, those extra batteries in the higher-tier bundles are well worth considering. A single charge isn't going to last a through even a modest paddle session, so building a battery collection from day one makes sense.
At $1,299 / £1,129 / AU$1,999 for the entry-level bundle, the Aqua is a significant investment. It's substantially more expensive than the HoverAir X1 Pro and well above most entry-level drones from DJI. Zero Zero Robotics is clearly pitching this as a premium, specialized product for water sports enthusiasts rather than a mass-market flyer, and the pricing reflects that.
- Price score: 3.5/5
HoverAir Aqua: Specs
Camera: | 12MP 1/1.28-inch CMOS sensor |
Video resolution: | 4K, 2.7K (vertical only), 1080p |
Frame rates: | 100, 60, 50, 48, 30, 25, 24fps |
Flight modes: | 15+ specialized modes |
Beacon range: | Up to 1km |
Wind resistance: | Level 7 (up to 33 knots / 38mph) |
Waterproof rating: | IP67 |
Storage: | 128GB internal (no microSD slot) |
Battery: | 2013mAh, up to 23 minutes flight time |
Charger type: | USB-C / charging hub |
Weight: | 249g / 8.8oz (approx.) |
Dimensions: | 202 x 206 x 64mm |
HoverAir Aqua: Design and build quality
- Non-foldable quadcopter body weighing 249g
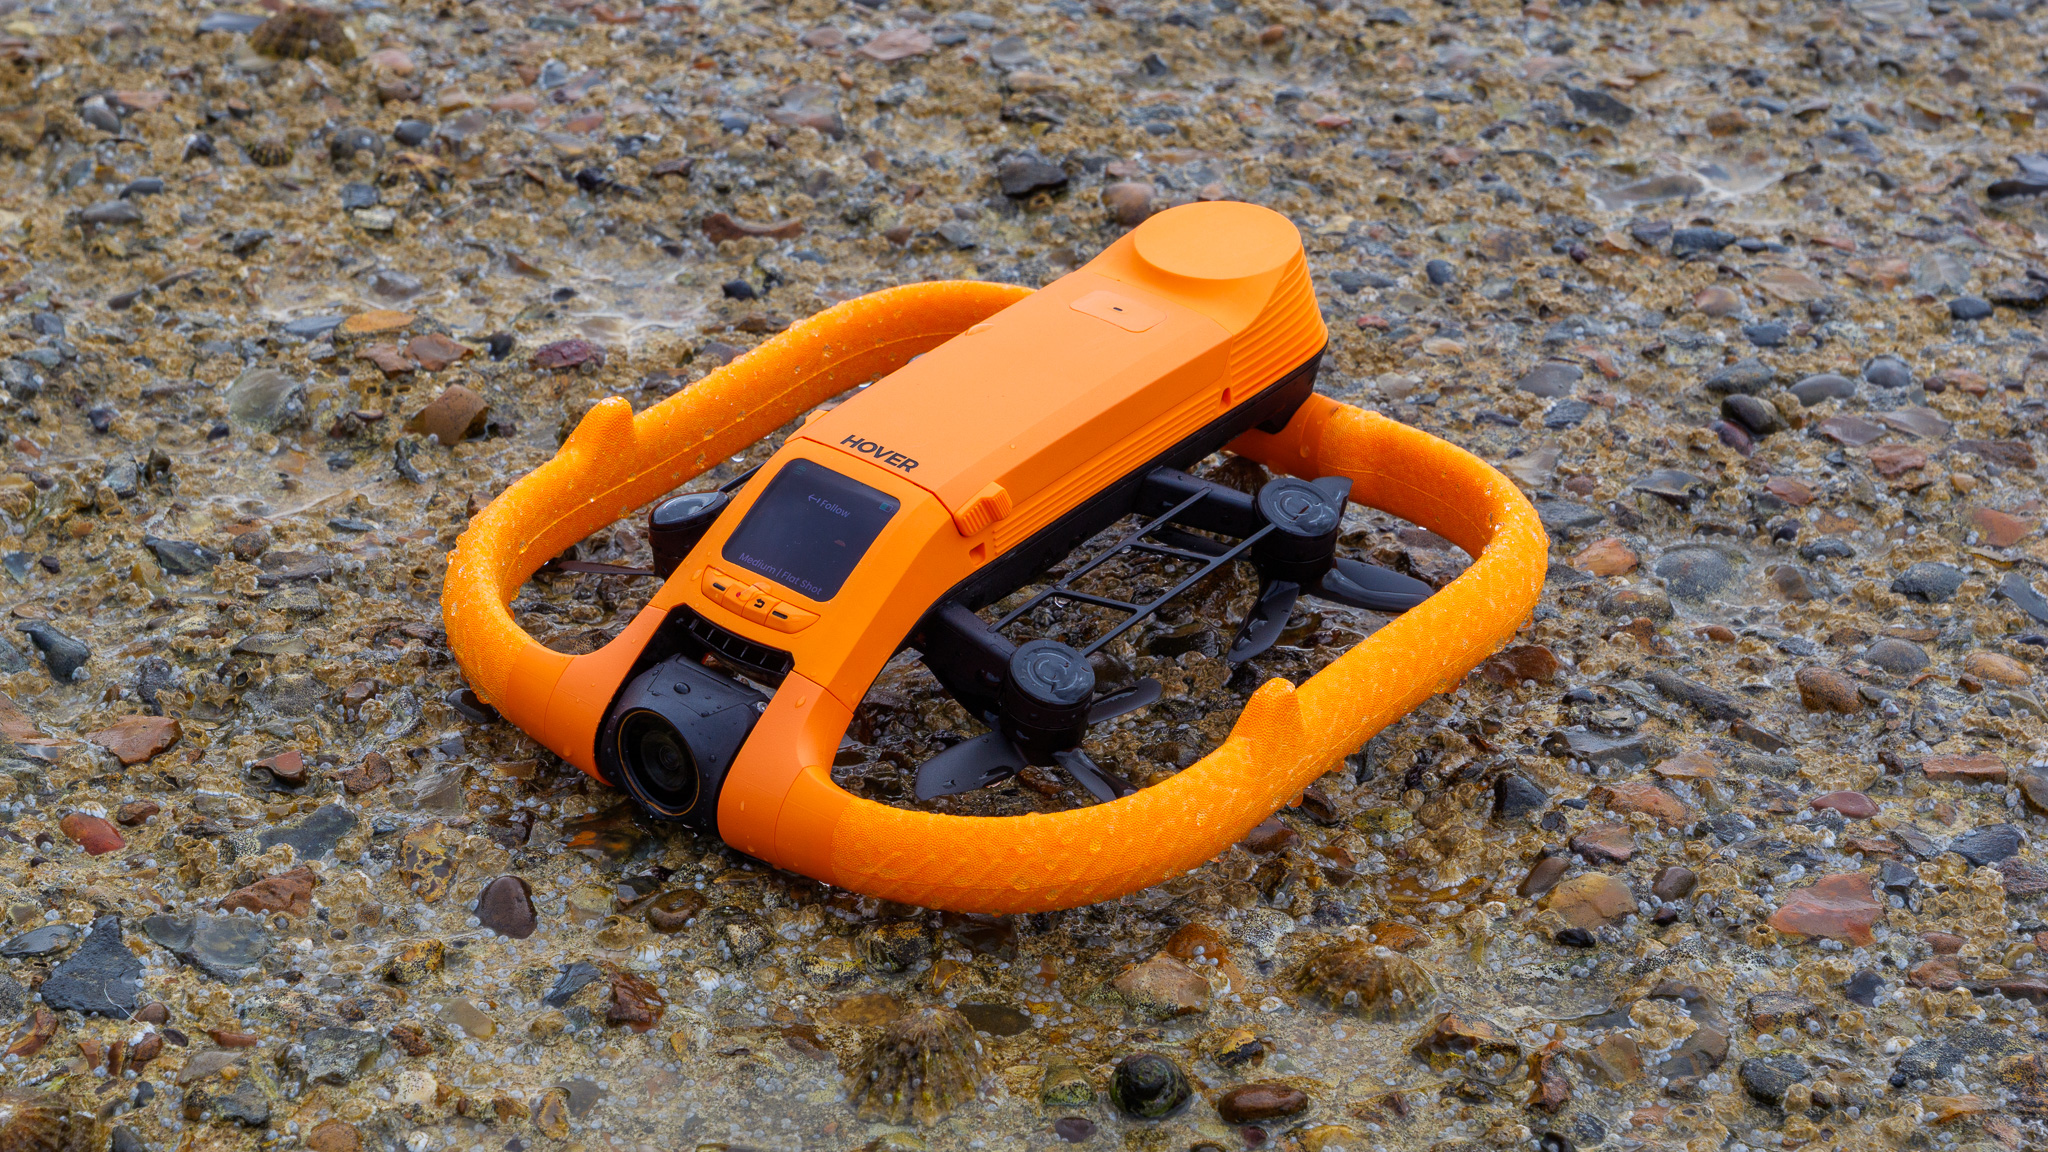
- Striking hot orange finish
- No carrying case included in any bundle
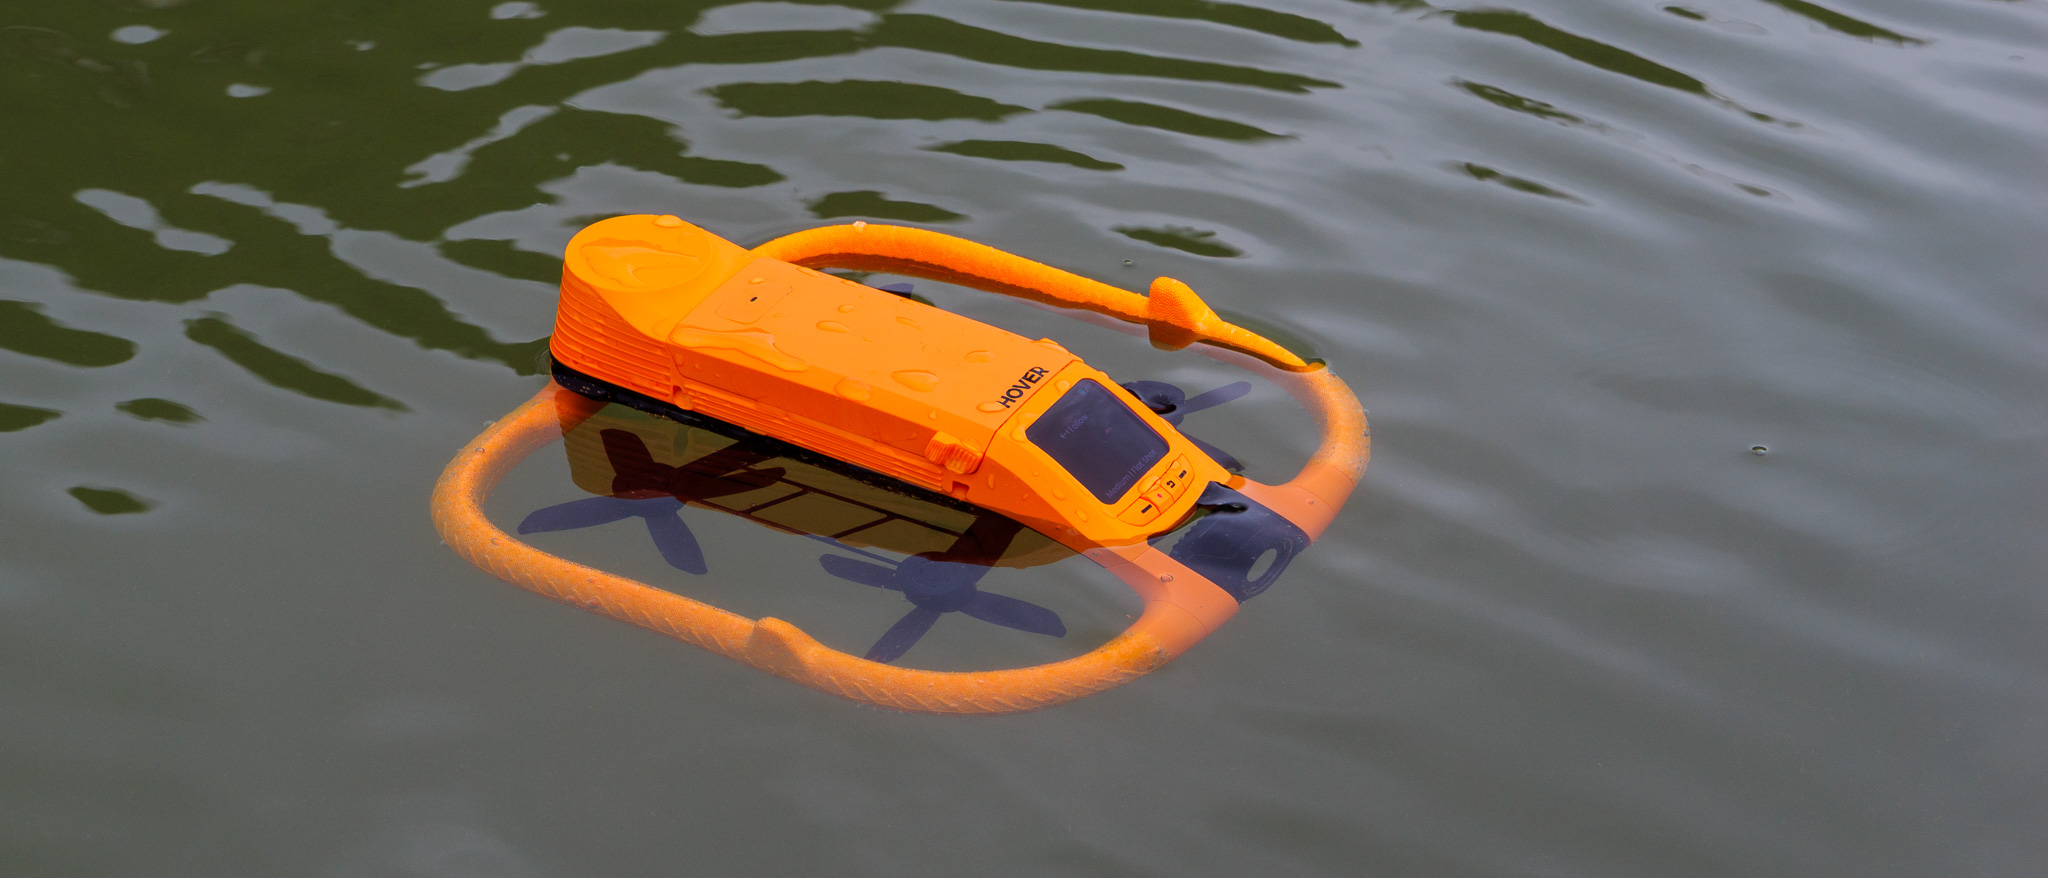
The Aqua cuts a distinctive figure on the beach. Where most consumer drones play it safe with black, grey or white, HoverAir has gone for a vivid hot orange color finish. The color makes the drone easy to spot both in the air and on the water, as well as conjuring up images of life jackets and buoys. It feels entirely appropriate for a water-focused drone.
While folding drones dominate the market, the Aqua is a rigid, non-foldable quadcopter — a deliberate decision by HoverAir to preserve structural integrity and waterproofing. At 202 x 206 x 64mm and 249g, it's lightweight and compact but certainly not pocketable; the non-folding body means it takes up noticeably more bag space than a DJI Lito or Mini would.
Which brings me to the Aqua's most glaring accessory omission: there's no carrying case or pouch included with any of the three bundles. The higher-tier combos include waterproof bags for the batteries, but nothing to protect the drone itself. That leaves the lens and propellers exposed to whatever else is rattling around in your backpack. For a drone pitched at outdoor adventurers, I felt this was a pretty major oversight.
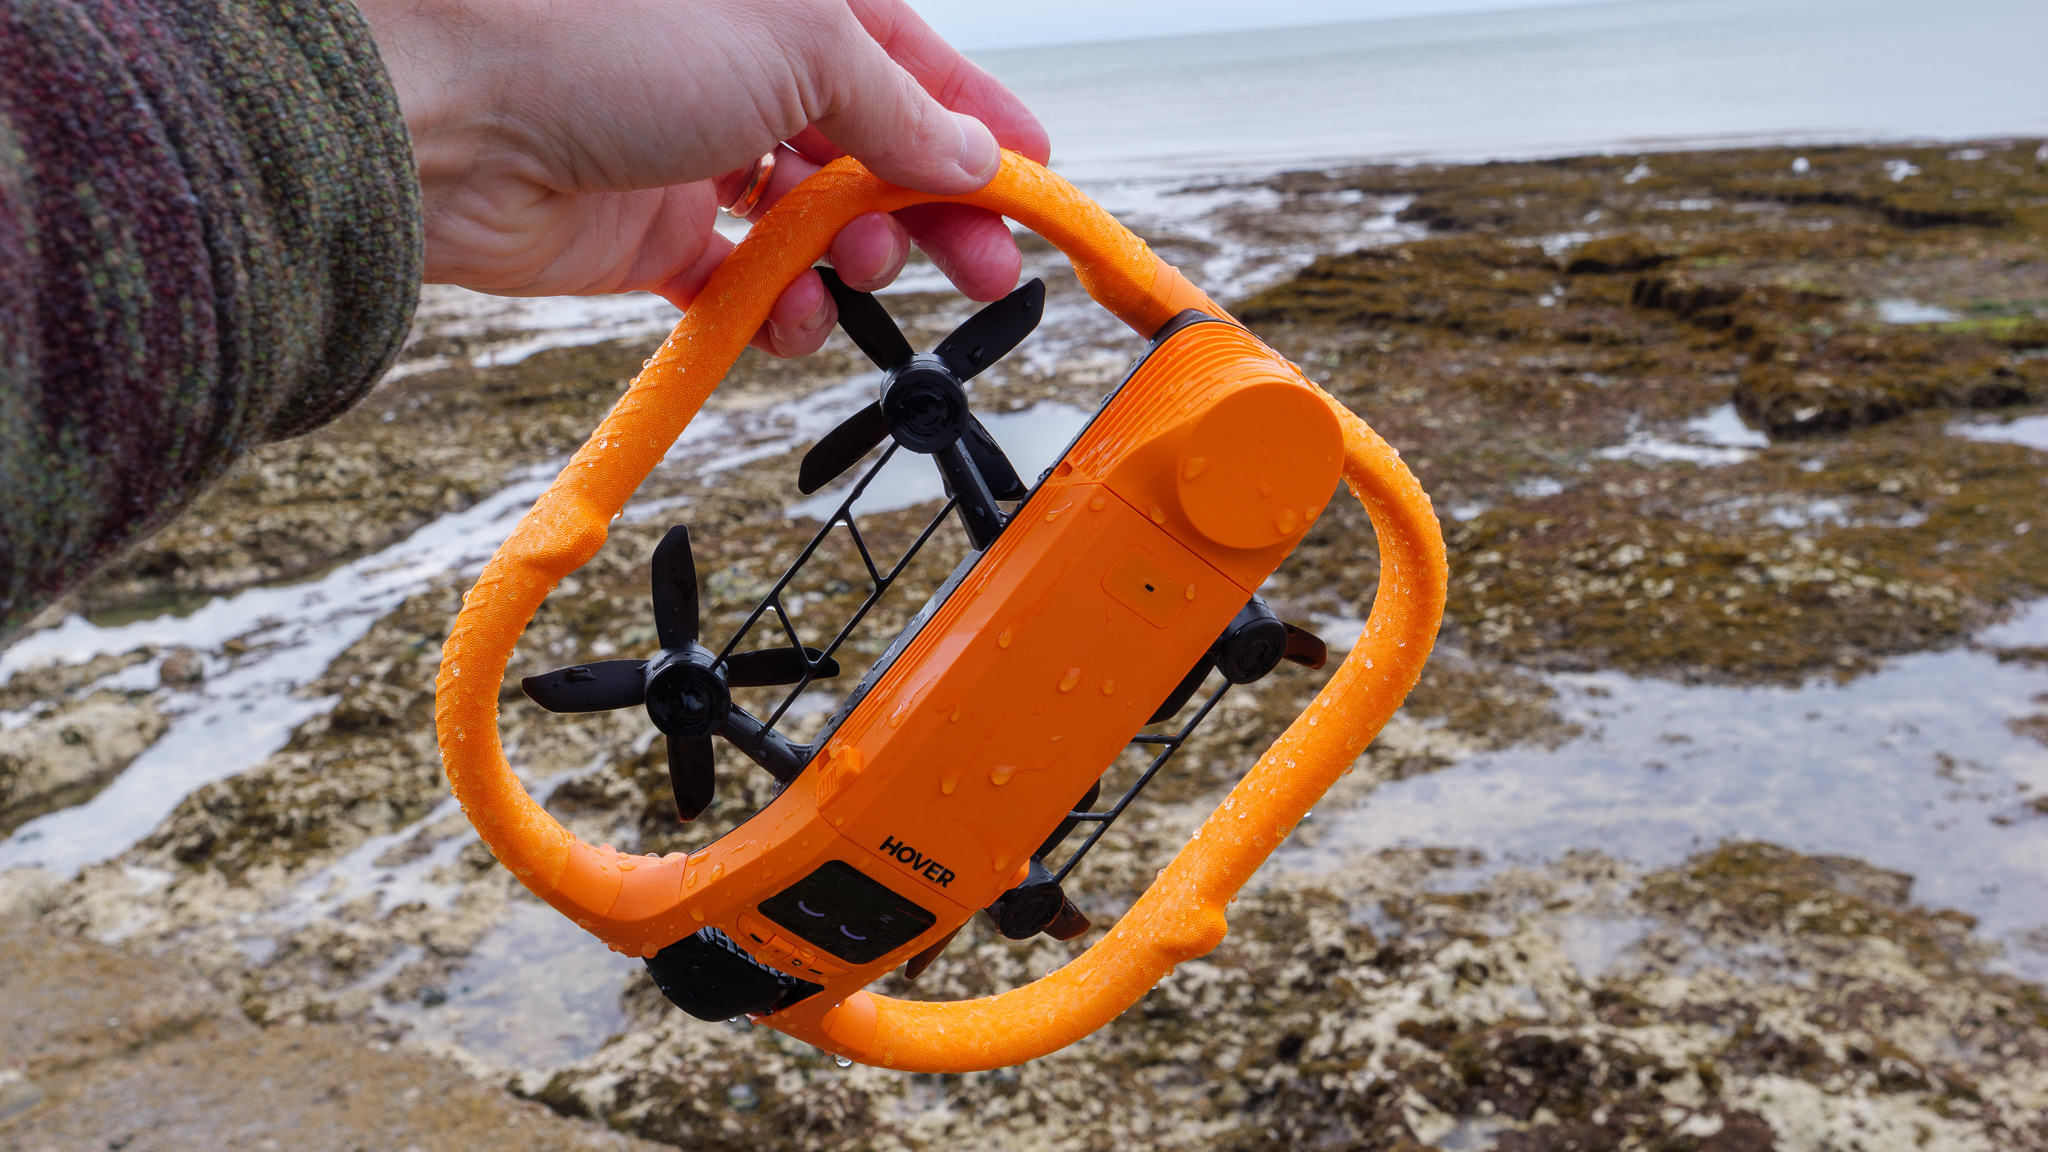
With minimal clearance between the propellers and the underside of the body, the Aqua needs either a flat, hard surface or a dedicated landing pad for land-based launches — I'd strongly recommend picking one up if you ever plan to use it away from the water. You can hand-launch and catch it in the air instead, which is what I did throughout testing, but that's not something I would necessarily recommend to anyone new to drones.
On the front of the drone sits a 1.6-inch AMOLED screen, which lets you switch flight modes and review settings without reaching for your phone. In bright sunlight it's big and bright enough to be legible, and when you're balanced on a paddleboard in the middle of the sea, not having to fumble with a smartphone is a welcome convenience. The Lighthouse wearable is similarly straightforward: a chunky, rubberized device designed to be worn and forgotten while you focus on whatever you're riding.
As mentioned above, the Aqua's maintenance demands are quite extensive. After flying in salt water, the drone needs a thorough rinse in fresh water and a careful pat-down with a clean cloth before its next flight. The battery compartment features a color-coded indicator strip that flags the presence of any moisture before you insert a battery, which is a clever touch, but you'll also need to remember to fully dry your hands before swapping cells on the water. So, owning the Aqua comes with an ongoing upkeep commitment that goes well beyond what you'd expect from a conventional drone.
- Design score: 4/5
HoverAir Aqua: Features and flight performance
- Up to 23 minutes of battery life
- Tracks using Lighthouse unit rather than camera
- No object avoidance tech
The most important thing to understand about how the Aqua flies is also the thing that most sets it apart from conventional follow-me drones. Rather than using computer vision to identify and frame a human subject — the approach DJI takes with its excellent ActiveTrack tech — the Aqua locks onto the Lighthouse wearable.
In a watery environment, where reflective surfaces, spray and constant movement would make visual tracking unreliable, this makes sound engineering sense. In practice, however, it produces some frustrating results. During an Orbit flight — where the drone circles you at a set distance — my head was consistently cropped out of frame, because the drone is orbiting the Lighthouse on my arm rather than centering me as a subject. Anyone who cares about precise, well-composed shots should know that the Aqua will keep you in the frame most of the time, but it won't always frame you the way a human operator would.
So planning your shots is key – and because you can adjust tracking distance and height, you should be able to get the angles and framing you're looking for. It might just take a couple of attempts.
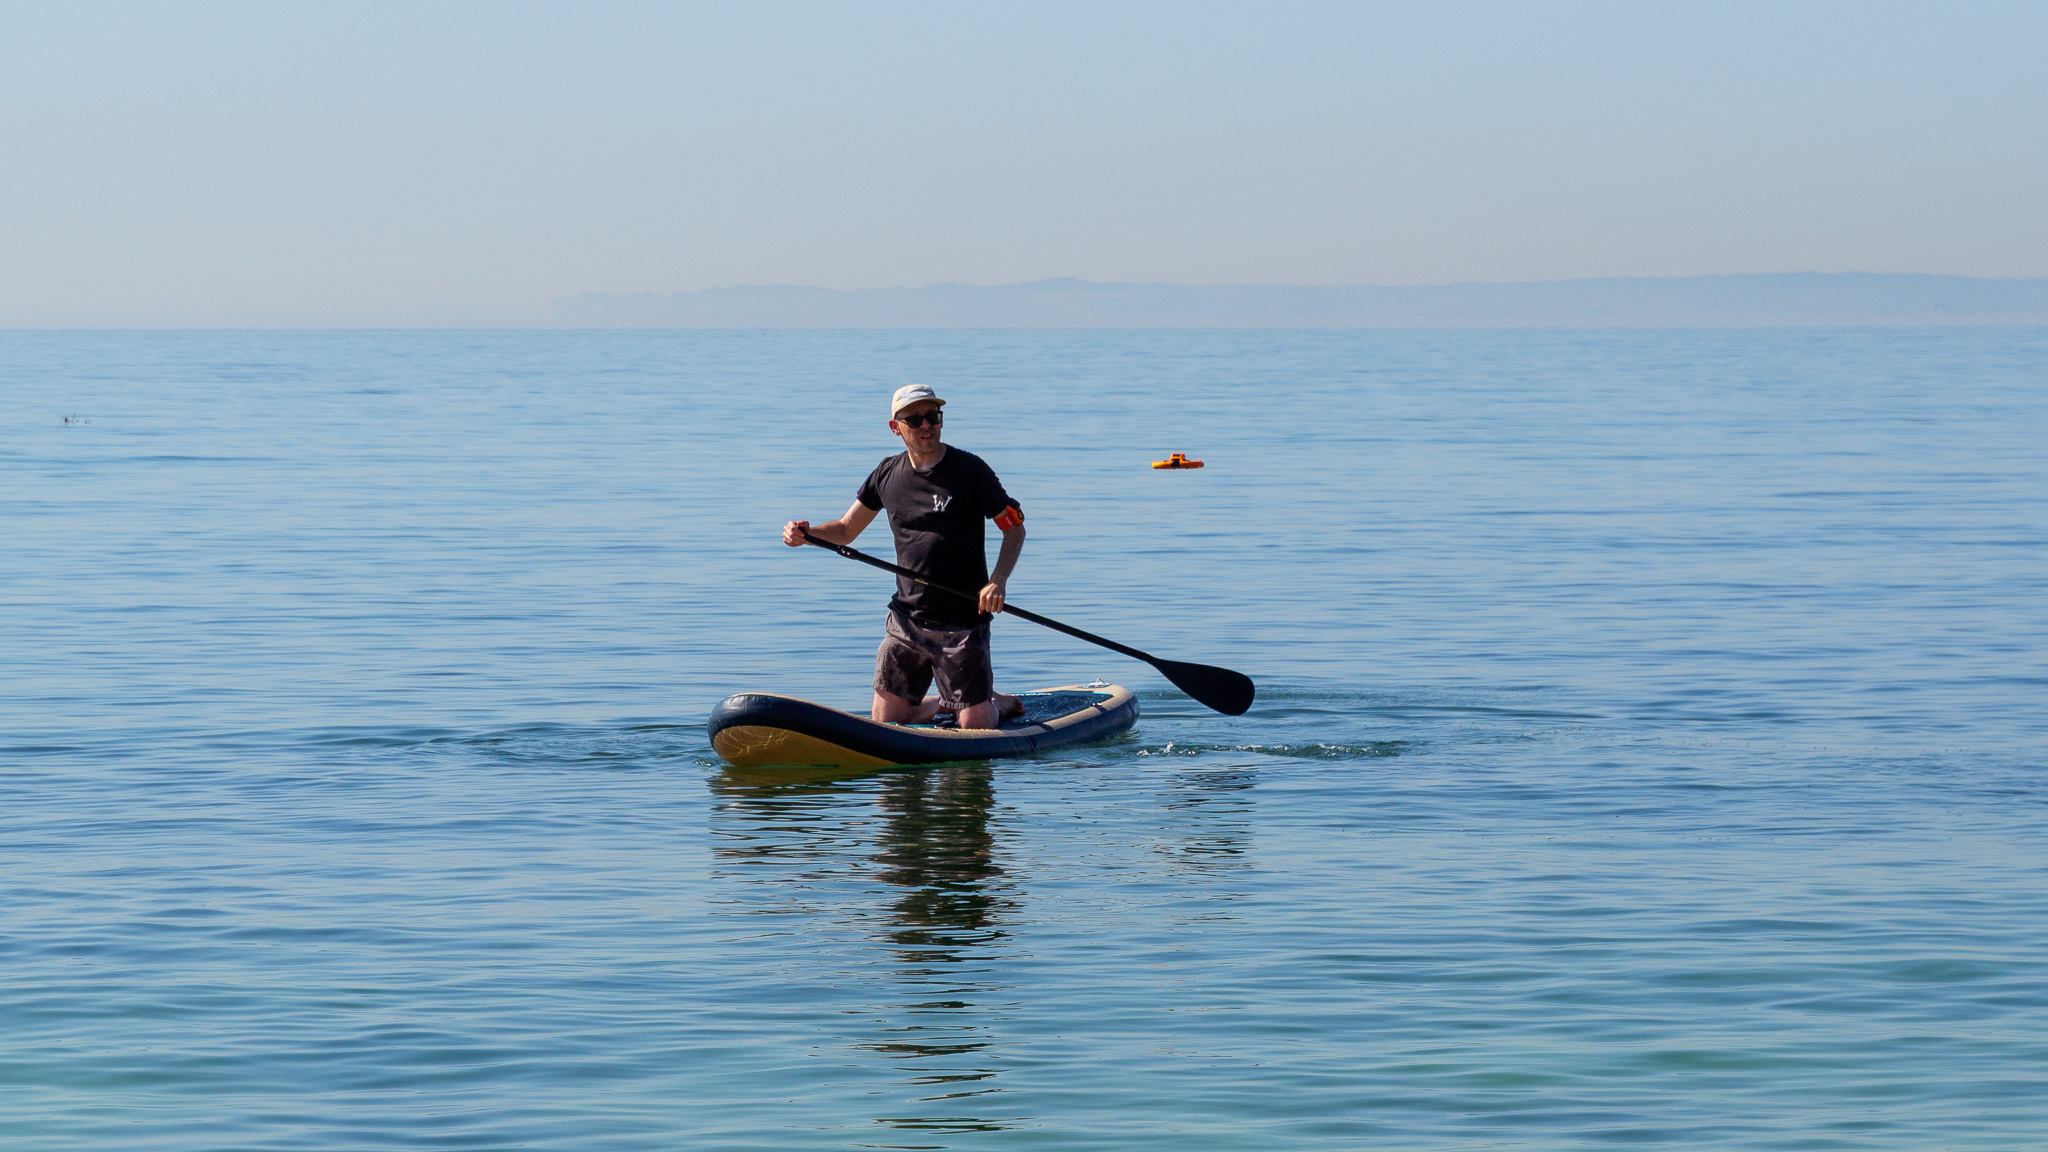
That said, the SUP mode I tested (designed specifically for stand-up paddleboarding) performed very well. With a calm sea, minimal wind and good visibility during a rare UK May heatwave, the Aqua tracked my position reliably and kept pace with me comfortably. The drone can theoretically fly as close as 50cm above the waves, and in calm water it did so confidently.
I'd be keen to test it in choppier conditions, where the claimed Level 7 wind resistance and wave-skimming abilities might face a stiffer challenge, but those aren't the conditions I had available. For now, consider the flight performance assessment here a fair-weather one.
One highlight that absolutely does deliver as promised is the turtle flip: should the Aqua end up upside down on the water, it can right itself and take off again without any intervention. I tested this, and it works exactly as advertised. A small thing perhaps, but a reassuring one.
Less reassuring was the persistent connection instability between the drone and the Lighthouse. On every single flight I conducted, the two devices repeatedly lost and immediately re-established their link. Each dropout triggers an audible robotic voice announcement — both for the disconnect and the reconnect — which quickly becomes maddening. Whether this is a hardware defect specific to my review sample or a wider software issue remains to be seen, but it's something HoverAir will need to address urgently. A drone that narrates its own technical difficulties every few minutes is not a relaxing filming companion.
The Aqua offers three control methods beyond the automated flight modes. The Lighthouse itself handles single-button launches and returns; the HoverAir app provides touchscreen manual control, though with a short effective range and imprecise joystick inputs that make smooth maneuvers difficult; and HOVERAir's Beacon twin-stick controller offers what could well be the most satisfying manual flying experience of the three — but without one, I wasn't able to test it during this review.
Battery life came in slightly under the claimed 23 minutes during real-world use, which is par for the course with drone manufacturers' quoted figures. The more meaningful battery consideration is simply having enough of them: 23 minutes goes quickly when you're mid-session, and the Fly More Combo's three-battery setup feels sensible.
It's also worth noting that, like all HoverAir drones, the Aqua uses ShadowTrack positioning rather than active obstacle avoidance — meaning it won't autonomously fly around objects in its path. On open water that's rarely going to be an issue, but it's worth bearing in mind if you plan to fly it on narrower waterways or on land. Thankfully, the sturdiness of the design and the protected propellers means that minor, lowish speed collisions with trees or fences shouldn't result in a wrecked drone.
- Flight performance score: 4/5
HoverAir Aqua: Image and video quality
- 1/1.28-inch CMOS sensor offering 4K up to 100fps
- H-Log (10-bit) support for post-production grading
- Hydrophobic lens
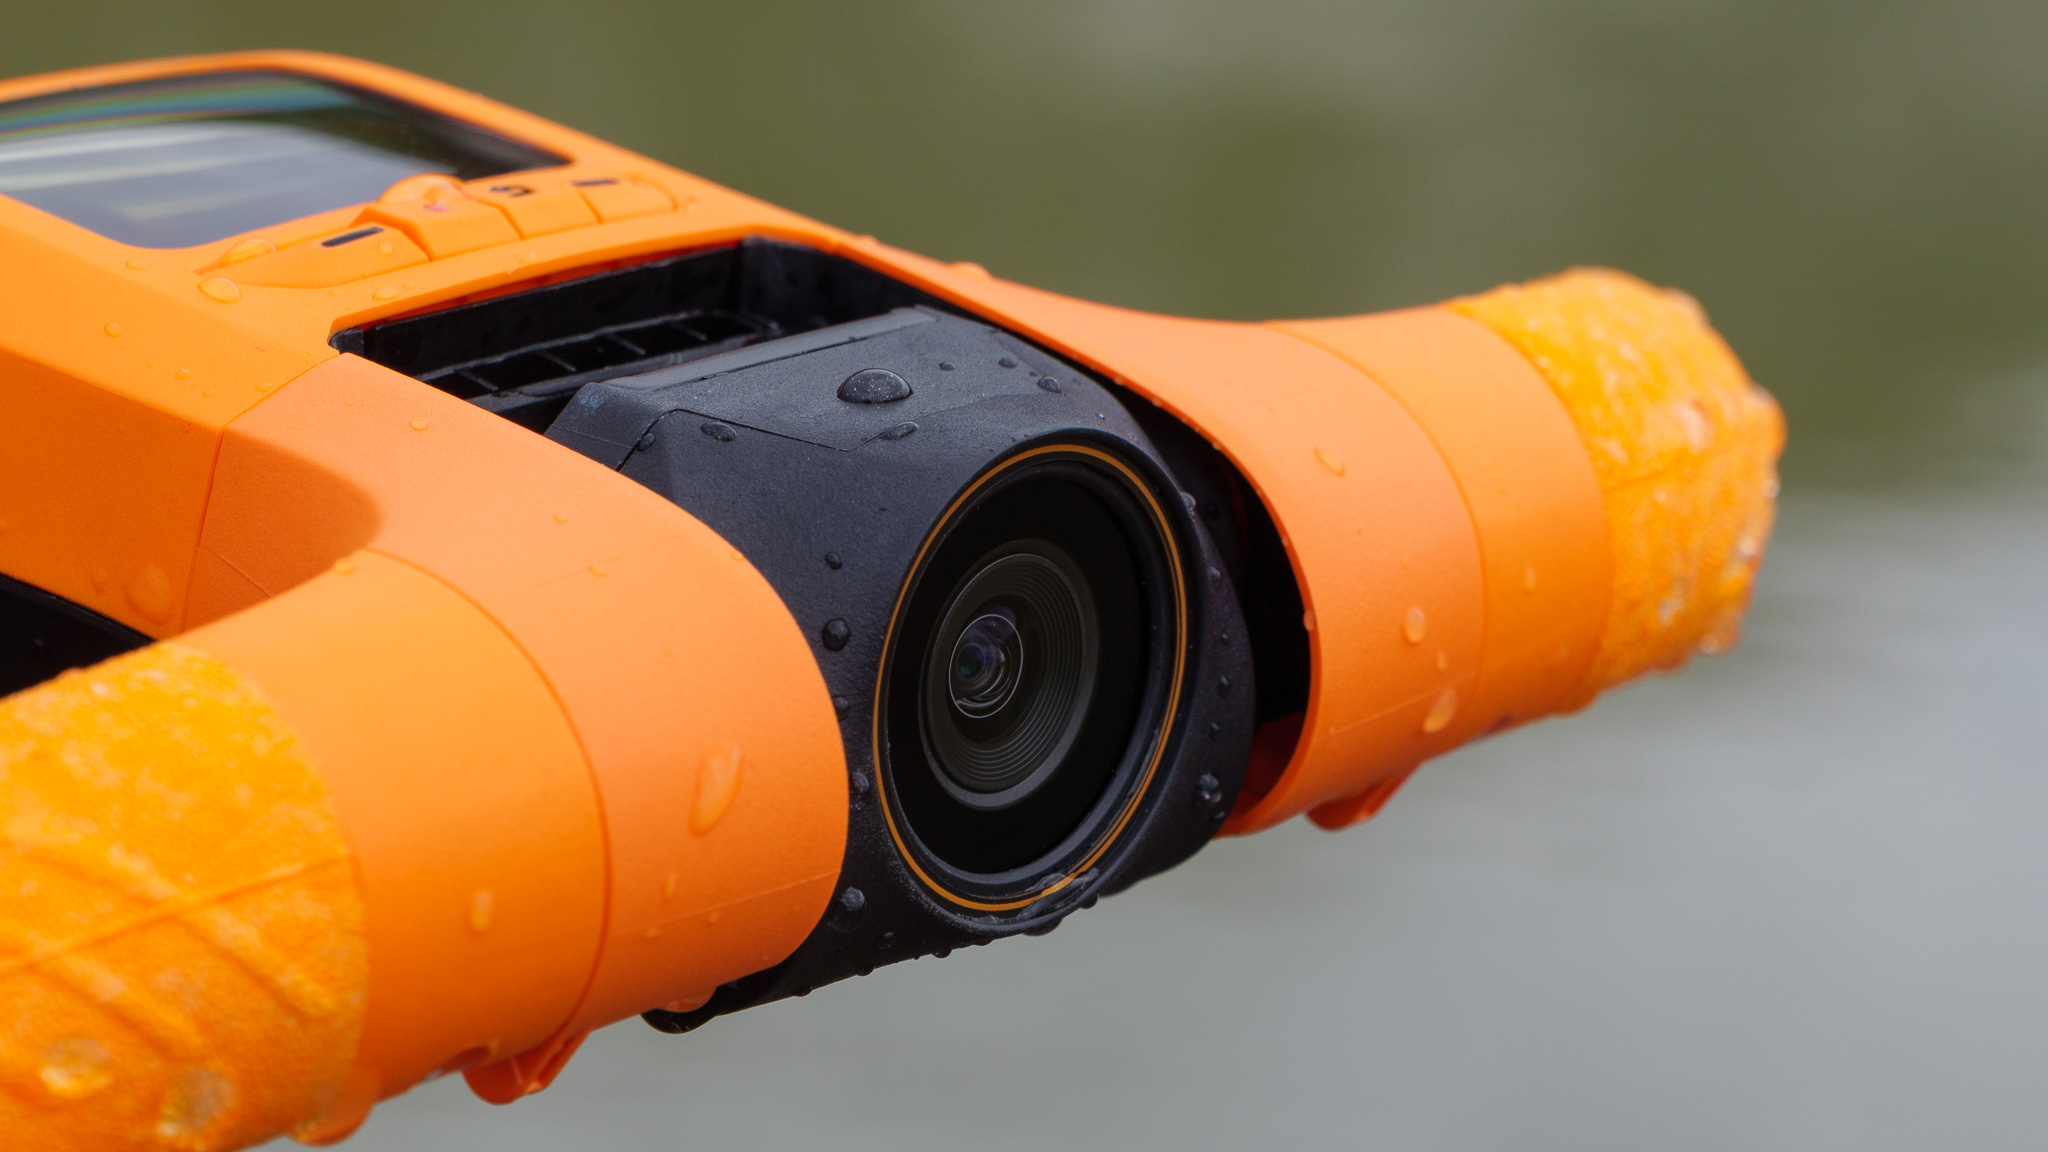
Let's start with the elephant (or should that be whale?) in the room. The Aqua's lens is treated with a hydrophobic coating designed to repel water droplets, which seems to me a vital feature for a drone that launches directly off the surface of the sea. During my testing, a single water droplet on said lens ruined several minutes of otherwise usable footage. For a drone whose entire identity is built around being in and around water, a wet lens is inevitable. This issue alone has the potential to leave users seriously frustrated — even if, as with me, it only happens the one time.
When the lens is clear, the results are encouraging. With a maximum bitrate of 160Mbps (double that of the DJI Neo 2) the Aqua produces clean, detailed 4K footage in good lighting conditions. There are two main shooting options to choose between: the default color profile delivers vibrant, punchy footage at up to 60fps, and is perfectly usable straight out of the drone; the flat H-Log profile, which tops out at 30fps, gives you more latitude in post-production. I graded some H-Log footage and was able to dial back the slightly over-saturated tendencies of the default color science to arrive at something more true-to-life and cinematic. For anyone planning to edit their water sports footage seriously, shooting H-Log is probably the way to go.
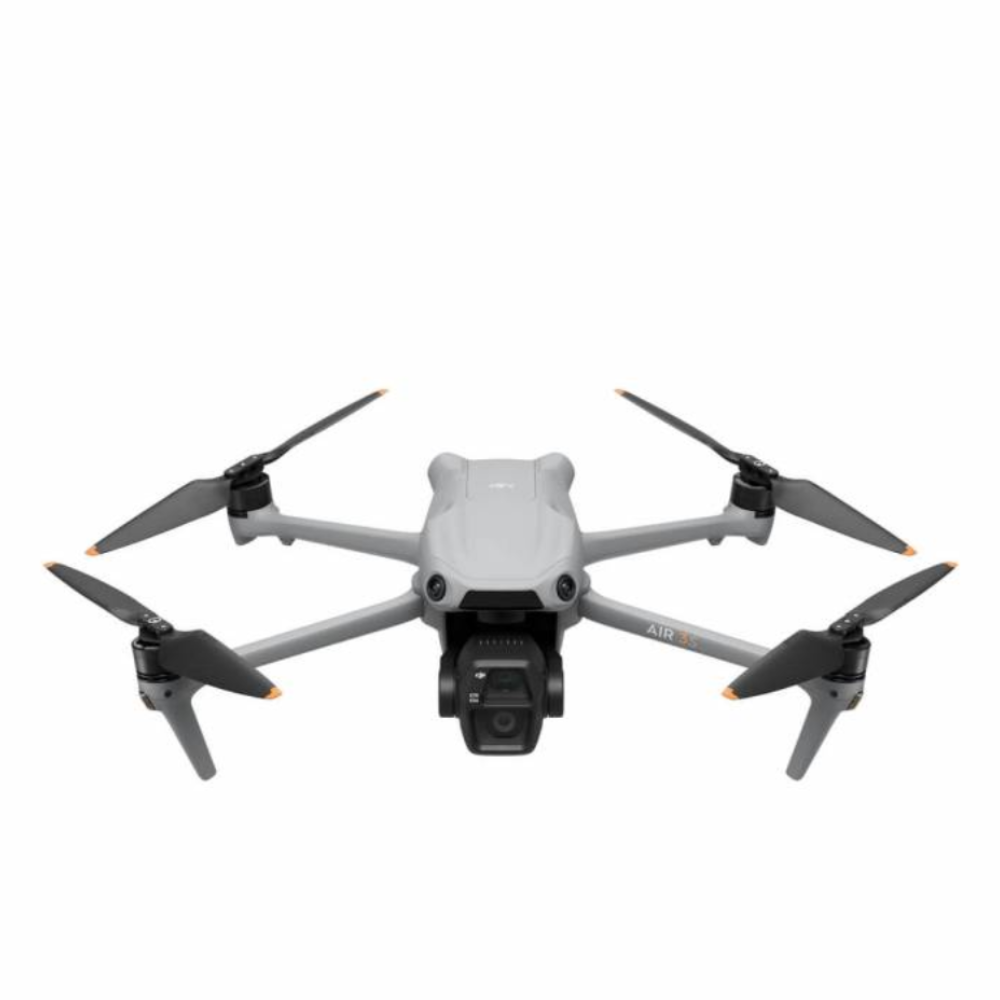
The hardware has its limits, though. The 1/1.28-inch sensor, f/2.55 aperture and single-axis mechanical gimbal mean the Aqua can't compete with the best camera drones on pure image quality — the DJI Air 3S, for instance, produces far superior footage, and costs less.
But that comparison only tells part of the story: the Air 3S would not survive the conditions the Aqua was built for. Judged purely as a water-capable camera, the Aqua has no rivals. Judged as a camera drone in general, it sits firmly in the average tier for its price bracket. The 2x digital zoom is soft, as it tends to be on small sensors, and low-light performance isn't a strong suit given the narrow aperture.
Stills come in at 12MPwith HDR support, plus the ability to shoot in RAW DNG, and are competent if unspectacular — serviceable for social media use, but not the Aqua's primary selling point.
- Image and video quality score: 4/5
HoverAir Aqua: Testing scorecard
Attributes | Notes | Rating |
|---|---|---|
Price | Expensive for its tracking and camera performance. | 3.5/5 |
Design | A robust aquatic design let down by the lack of an included carrying case. | 4/5 |
Features and flight | The Lighthouse tracking system is an ingenious solution to the challenges of flying over water. | 4/5 |
Image and video quality | Solid 4K footage with useful H-Log support, but a water droplet on the supposedly hydrophobic lens ruined one of my best clips. | 4/5 |
Should I buy the HoverAir Aqua?
Buy it if...
You're a solo watersports enthusiast
If you surf, SUP, kayak, wakeboard or foil and you've ever wanted aerial footage of yourself without a dedicated camera operator, the Aqua is the only drone that can safely go where you go.
You already own a conventional drone
The Aqua makes the most sense as a specialist companion to a regular land-based flyer rather than as your only drone. Pair it with a DJI Lito X1 or Mini 5 Pro and you have a capable all-conditions setup.
Don't buy it if...
You want a general-purpose drone
On land, the Aqua is a below-average performer for its price. The DJI Lito X1 delivers better image quality for a fraction of the cost, and handles everyday aerial photography and videography far more capably.
Precise framing matters to you
The Aqua tracks the Lighthouse wearable, not you as a subject. If you need a drone that keeps you centered in the frame the way a human camera operator would, the Aqua isn't the best choice.
HoverAir Aqua: also consider
DJI Air 3S
If your priority is camera performance rather than water compatibility, the Air 3S is where to look. It costs a similar amount to the Aqua's Standard Combo yet delivers near-professional image and video quality that the Aqua simply can't match. For anyone who primarily shoots over land, the Air 3S is the stronger all-round investment. Just don't expect it to survive a touchdown on the surface of the sea.
Read our in-depth DJI Air 3S review
DJI Neo 2
The Neo 2 is the closest thing in concept to the Aqua among conventional drones — a compact, lightweight selfie-style flyer that tracks and films you autonomously without needing a controller. It's considerably smaller and lighter than the Aqua, and a fraction of the price, making it the obvious starting point for anyone drawn to hands-free aerial filming. Just don't take it into the water...
Read our in-depth DJI Neo 2 review
How I tested the HoverAir Aqua
- Tested during SUP session and from dry land
- I tested various control methods and flight modes
- I captured both videos and photos
I was provided with a review sample of the Aqua well ahead of its global launch, which gave me time to test it over several sessions on the UK coast, mainly in hot, sunny conditions that were ideal for getting out on the water, if not entirely representative of the rougher seas and stronger winds that the Aqua may face in the hands of real-world buyers.
My primary test was a SUP session at the beach, during which I flew the Aqua using the SUP automated flight mode and assessed its tracking performance, framing and reliability in a real watersports context. I also flew it over dry land to evaluate its capabilities as a general-purpose drone. I tested the app-based manual controls, though I wasn't able to assess the Beacon twin-stick controller during the review period.
On the camera side, I captured footage using both the default color profile and the flat H-Log setting, grading the latter in post-production using DaVinci Resolve. I also ran through the Aqua's post-flight maintenance routine — including a fresh water rinse and dry-down after saltwater use — to evaluate the ownership demands of an aquatic drone.
- First reviewed: May 2026
- Read more about how we test
Camp Snap CS-Pro: two-minute review
Forget your high-resolution mirrorless camera, your beautiful full-frame sensors — 2026 is the year of the cheap compact camera! Retro-styled, ultra-affordable cameras are back in a big way, following greatly exaggerated rumors of their death at the hands of the smartphone.
The original Camp Snap, released in 2023, was one of the big beneficiaries of this trend. A digital compact costing around $59 / £65, its USP was a feature that it didn't have – a screen. By removing the LCD, the camera evoked the feeling of shooting with an old film disposable — you literally could not see the images you'd taken until you downloaded them onto your computer, just as you couldn't see your images from a disposable until they came back from the development lab.
The Camp Snap CS-Pro, or Camp Snap Pro, is an upgrade of the original, adding a few improvements and gaining a refreshing visual makeover that calls to mind premium compacts like the Fujifilm X100VI. The core concept hasn't changed, though; it's still a screen-free digital compact camera, with a small sensor that's going to produce images that are almost certainly less detailed and high-quality than the ones produced by your phone. But if you're looking for top-notch quality, you are very much missing the point.
The guts of the camera are built around a 1/3.06-inch sensor with 16MP of resolution — double the pixel count of the 8MP original Camp Snap. This sensor is paired with a fixed-focus lens with an equivalent focal length of 22.5mm — nice and wide to fit plenty in the scene — and a fixed aperture of f/2.2. Just as with the original Camp Snap, there's nothing in the way of settings controls; you point, you shoot.
Well, not quite nothing. The CS-Pro adds a dial to its top plate, which provides access to a number of filmic looks. As well as the Standard (STD) look, you also have VTG-1 and VTG-2 ('VTG' meaning 'vintage'), which are stylized color filters that give your image a distinct and decidedly retro-style look. VTG-1 provides an overall warm tone, while VTG-2 pumps up blues and yellows for a hyper-saturated look (think Kodak Ultramax film). Finally, you have the monochrome 'B&W' dial.
So, it's not a reinvention of the Camp Snap wheel. Far from it. Having used the CS-Pro on a few photographic excursions over the past few weeks, I can safely say that if the original Camp Snap wasn't your cup of tea, the CS-Pro won't be either. The resolution upgrade adds a bit of detail and definition, but the small 1/3.06-inch sensor still limits its dynamic range and ability to handle contrasting light situations. It's going to get blown out of the water by even your smartphone, never mind a compact with a proper-sized sensor like the 1-inch chip in the new Panasonic Lumix TZ300 / ZS300.
But again, quality isn't the point. The Camp Snap was a knockabout hit of nostalgic fun for a generation raised on disposable film cameras and cheap digital compacts, and the CS-Pro is all those things too. Once again, the screen-free design serves to create a relaxed shooting experience, and adds a sense of anticipation that recalls the good old days of waiting for your film to come back from the chemist. And if some of your shots turn out to be a bit crap (and they will) — who cares? It's all part of the fun.
I'm glad that Camp Snap didn't let success go to its head and come out with too expensive a camera. By keeping its price to two figures, the CS-Pro sits firmly in the realm of fun, a camera so simple that a child can use it, but with enough retro charm and style to appeal to adults.
Camp Snap CS-Pro: price and availability
The CS-Pro is available from Camp Snap's website. Its initial launch price is $99 / £90 (around AU$180), but discounts are frequent — in the UK, at time of writing, it's currently sitting at £68. This is a little more expensive than the original Camp Snap, but not by much – Camp Snap are clearly aware that affordability is a big part of their camera's USP and aren't messing with it. This was the main mistake I felt the firm made with its Super 8-aping CS-8 video camera — at a starting price of $199 / £152, it was just a bit too expensive for a low-quality camera whose main attraction was its novelty factor.
Even with the slight uptick in price, the CS-Pro is one of the most affordable options in the retro-styled digital compact arena. It's cheaper than the more complex and sophisticated RewindPix, which offers a huge range of film-style filters via its app-based digital darkroom.
Camp Snap CS-Pro: design
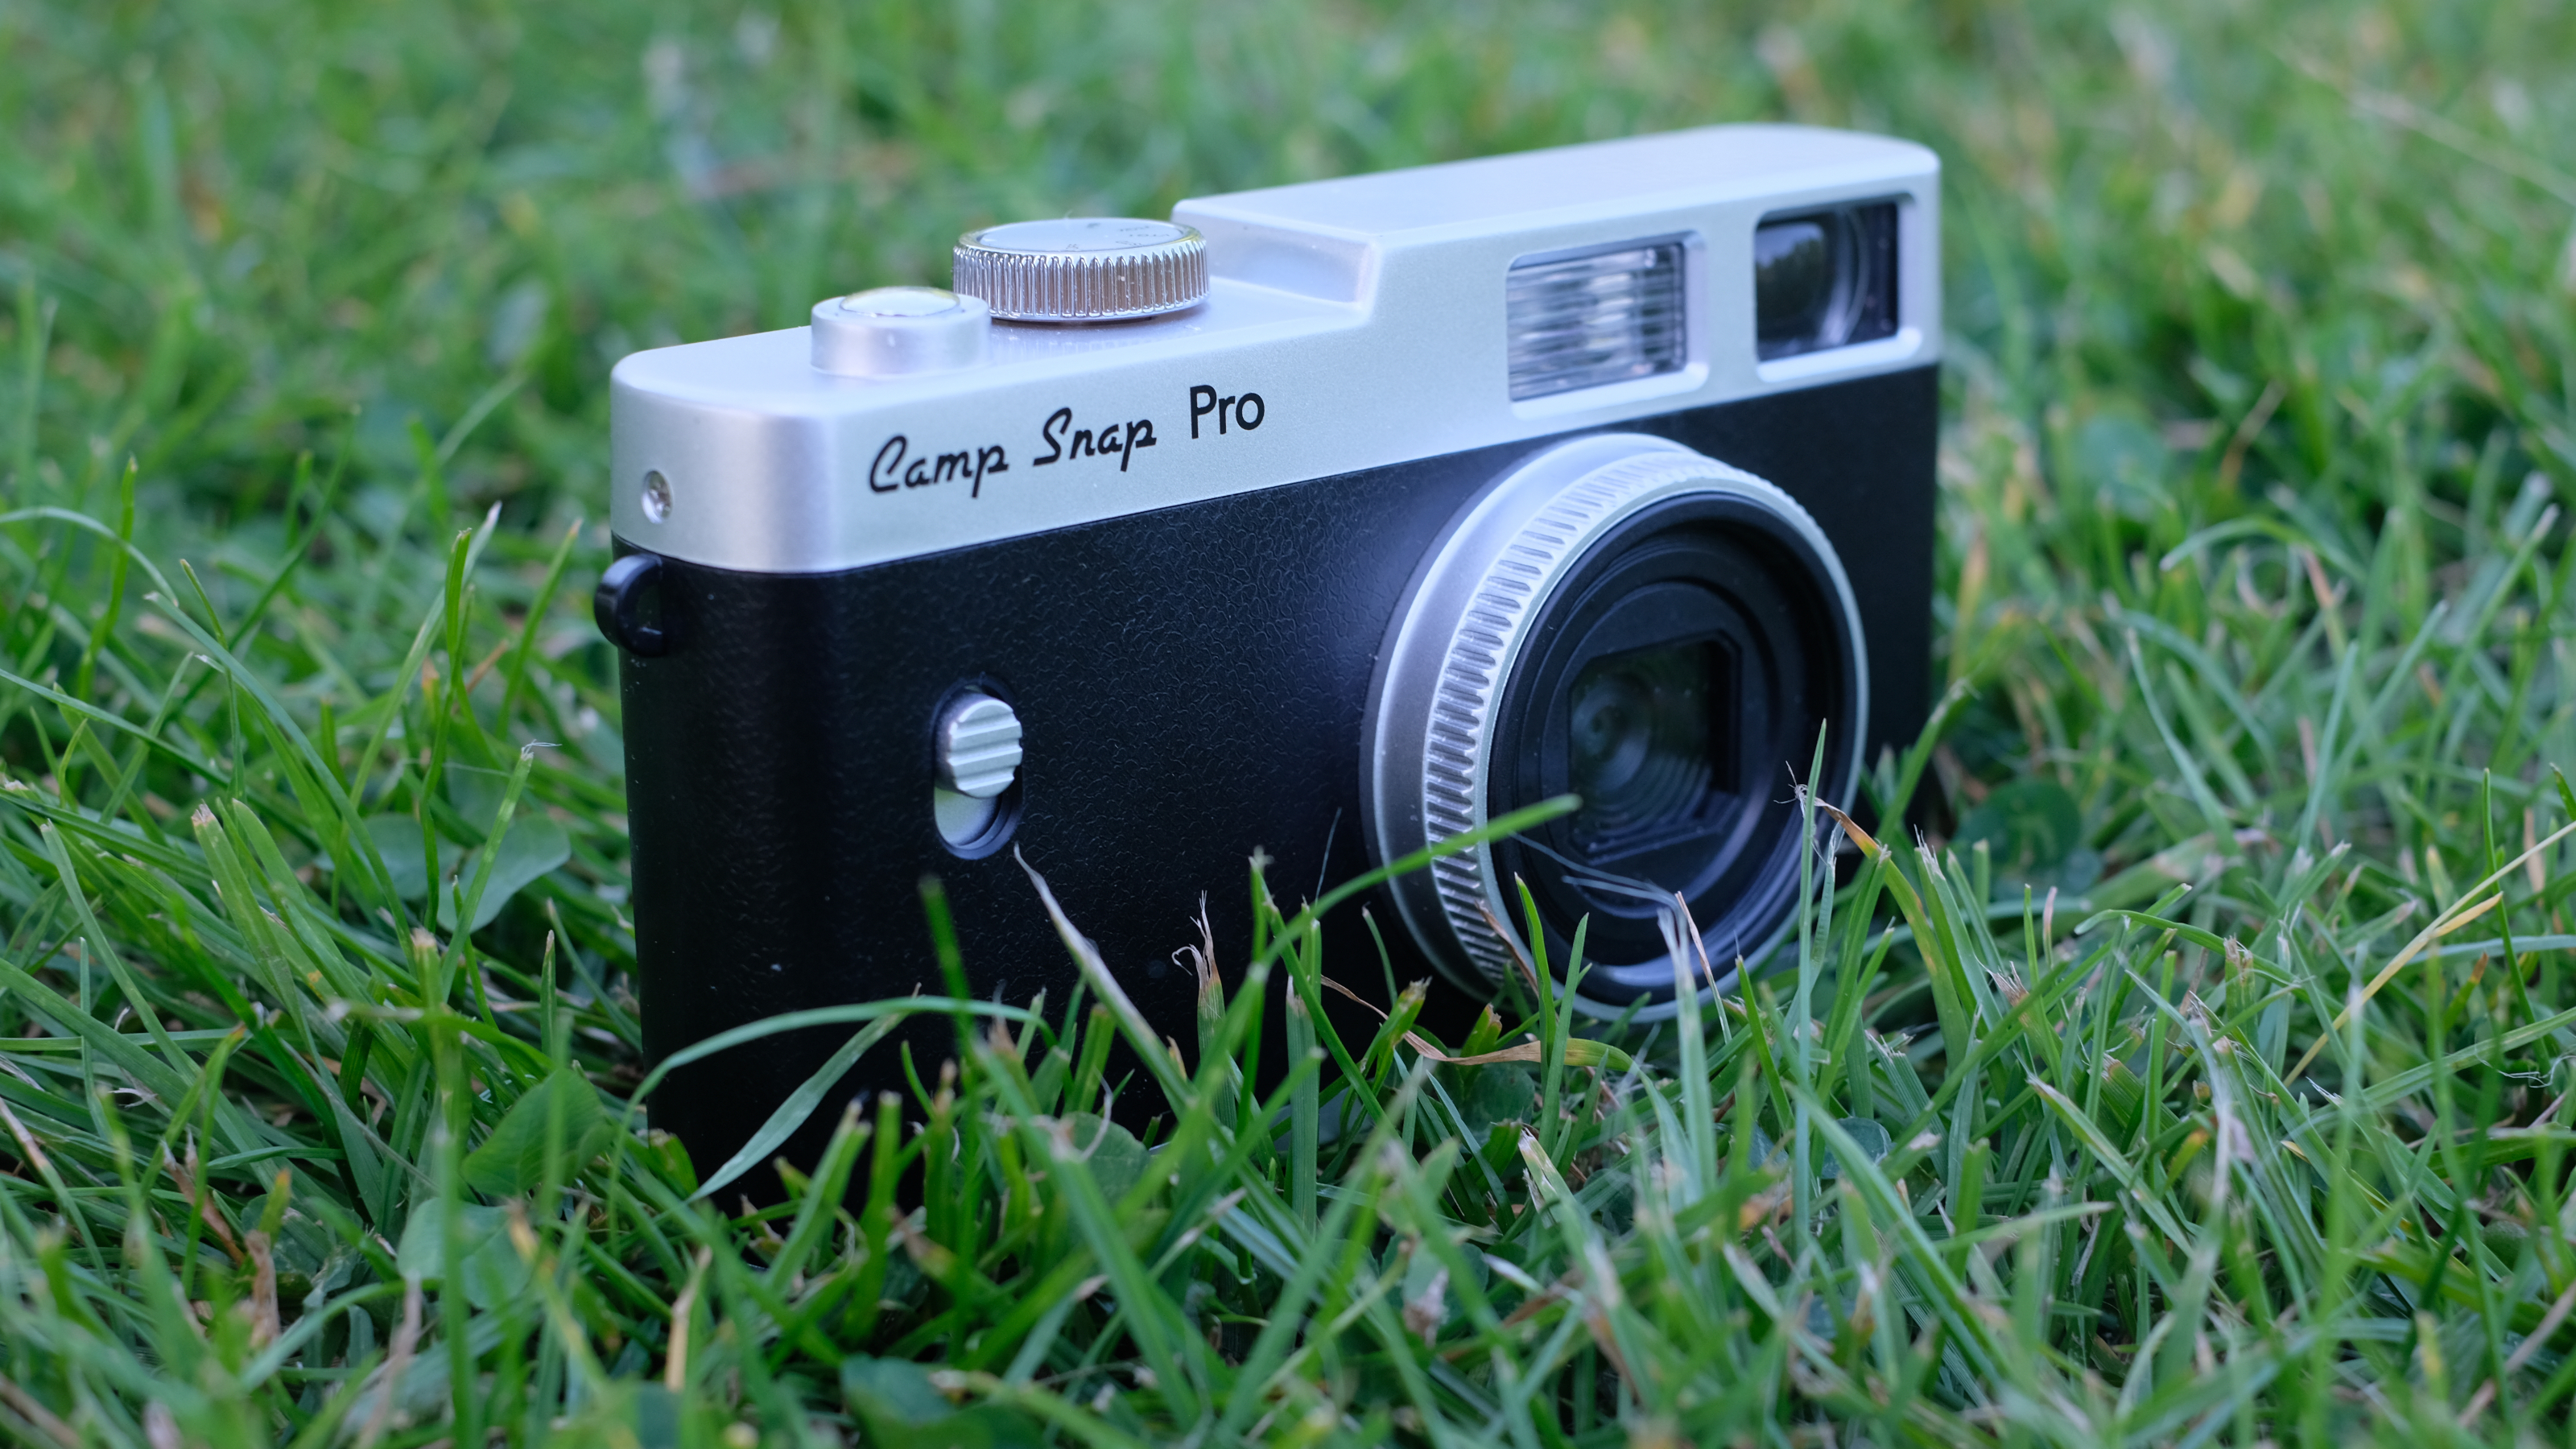
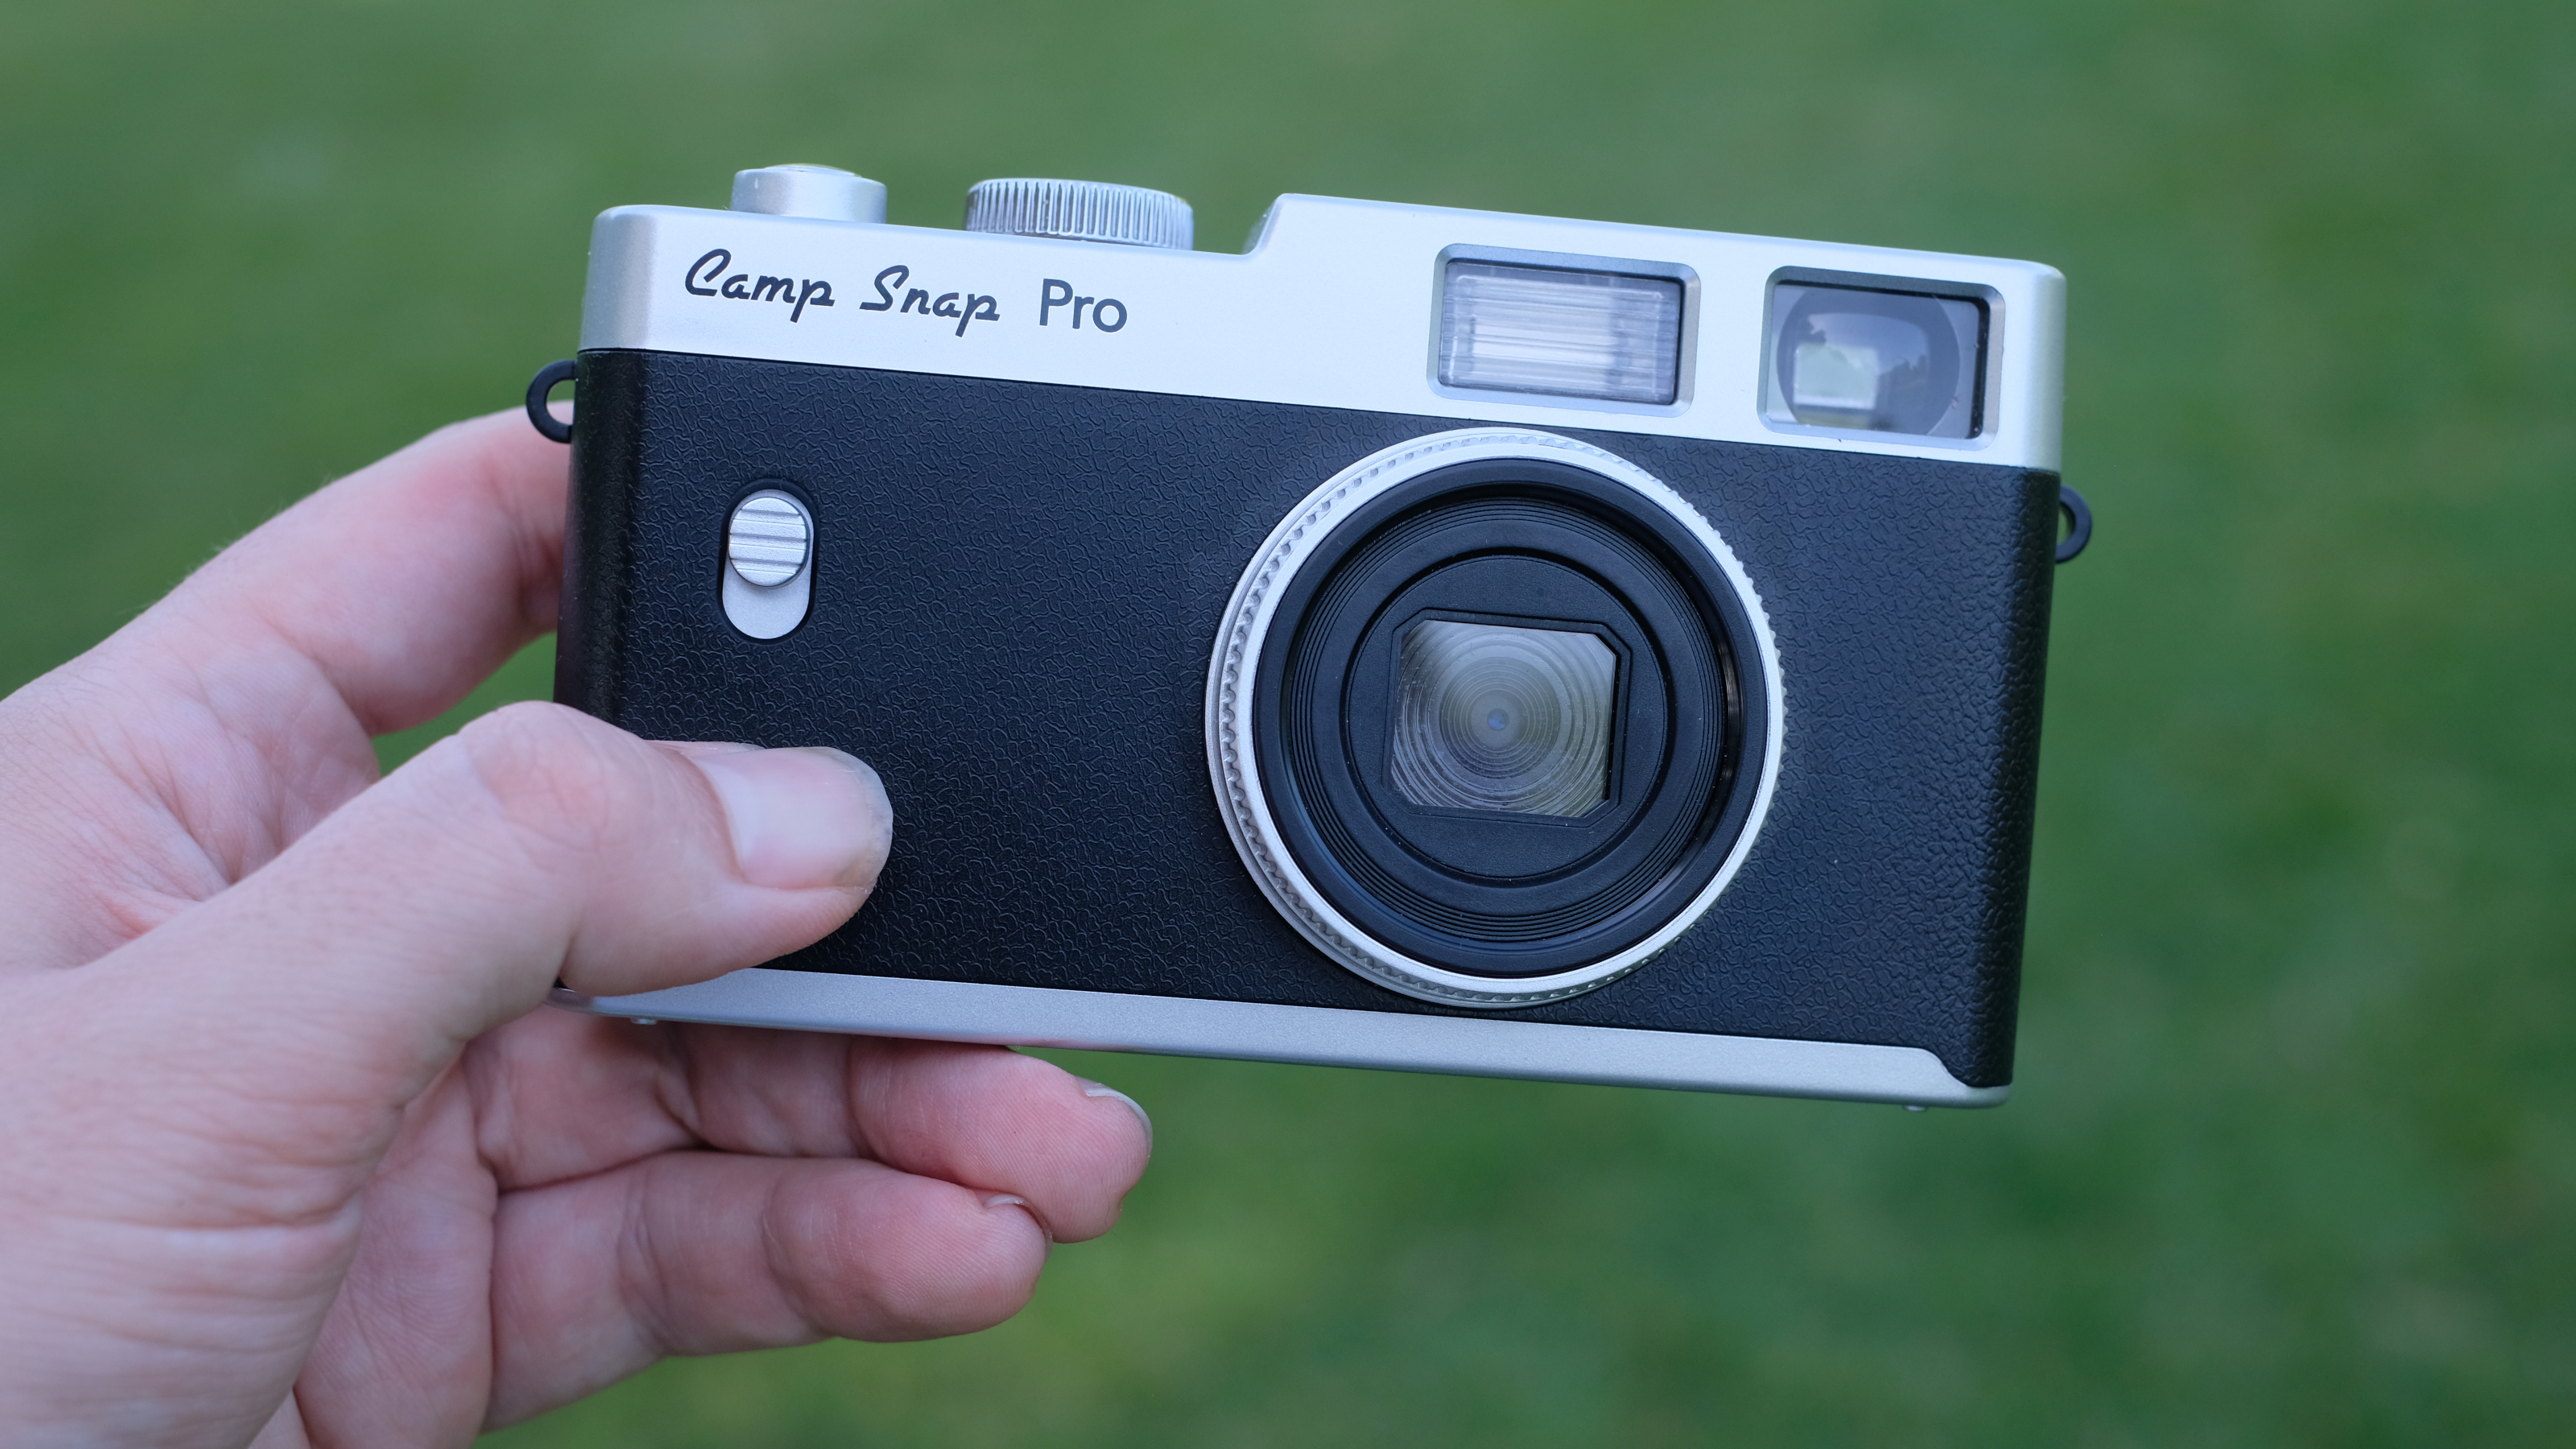
- Styled after popular premium compacts like the Fujifilm X100
- All-plastic build, lightweight and doesn't feel too robust
- Point-and-shoot operation, with dial for selectable retro filters
As mentioned, the Camp Snap CS-Pro looks at first glance a lot like a premium retro compact in the Fujifilm X100 series, with its black body and silver trim. However, if you were to actually hold both cameras side by side, this illusion would fall apart very quickly. Fujifilm's cameras are gorgeous, all-metal things, their build reflecting their four-figure price tags. The CS-Pro, meanwhile, consists of nothing but plastic and more plastic. It feels cheap, because it is cheap, and doesn't even pull the RewindPix's trick of adding internal metal weights for a bit of extra heft.
Interface-wise, on the top plate you have just the shutter button and the dial with the selectable film filters, the latter of which also functions as the on/off switch. On the rear you have a simple LCD panel that provides a running shot counter — useful if you're a forgetful sort and aren't sure when you last offloaded your pictures.
Beside the screen, you may notice two rows of small holes — amusingly, these are actually for a speaker, which plays recorded stock sounds when the camera is turned off and on and when the shutter is fired. These tinny, generic 'clunks' sound like they were downloaded from a website with a name like 'freemidisoundfx.com', and for all I know they probably were. Unnecessary, but harmless — and you can turn them off.
In the bottom corner is a row of four LEDs which serve as battery indicators — and I must say, I've been shooting with the Camp Snap for weeks without charging it once, and my battery level is still very healthy. Camp Snap rates the battery to 500 shots, and I believe it.
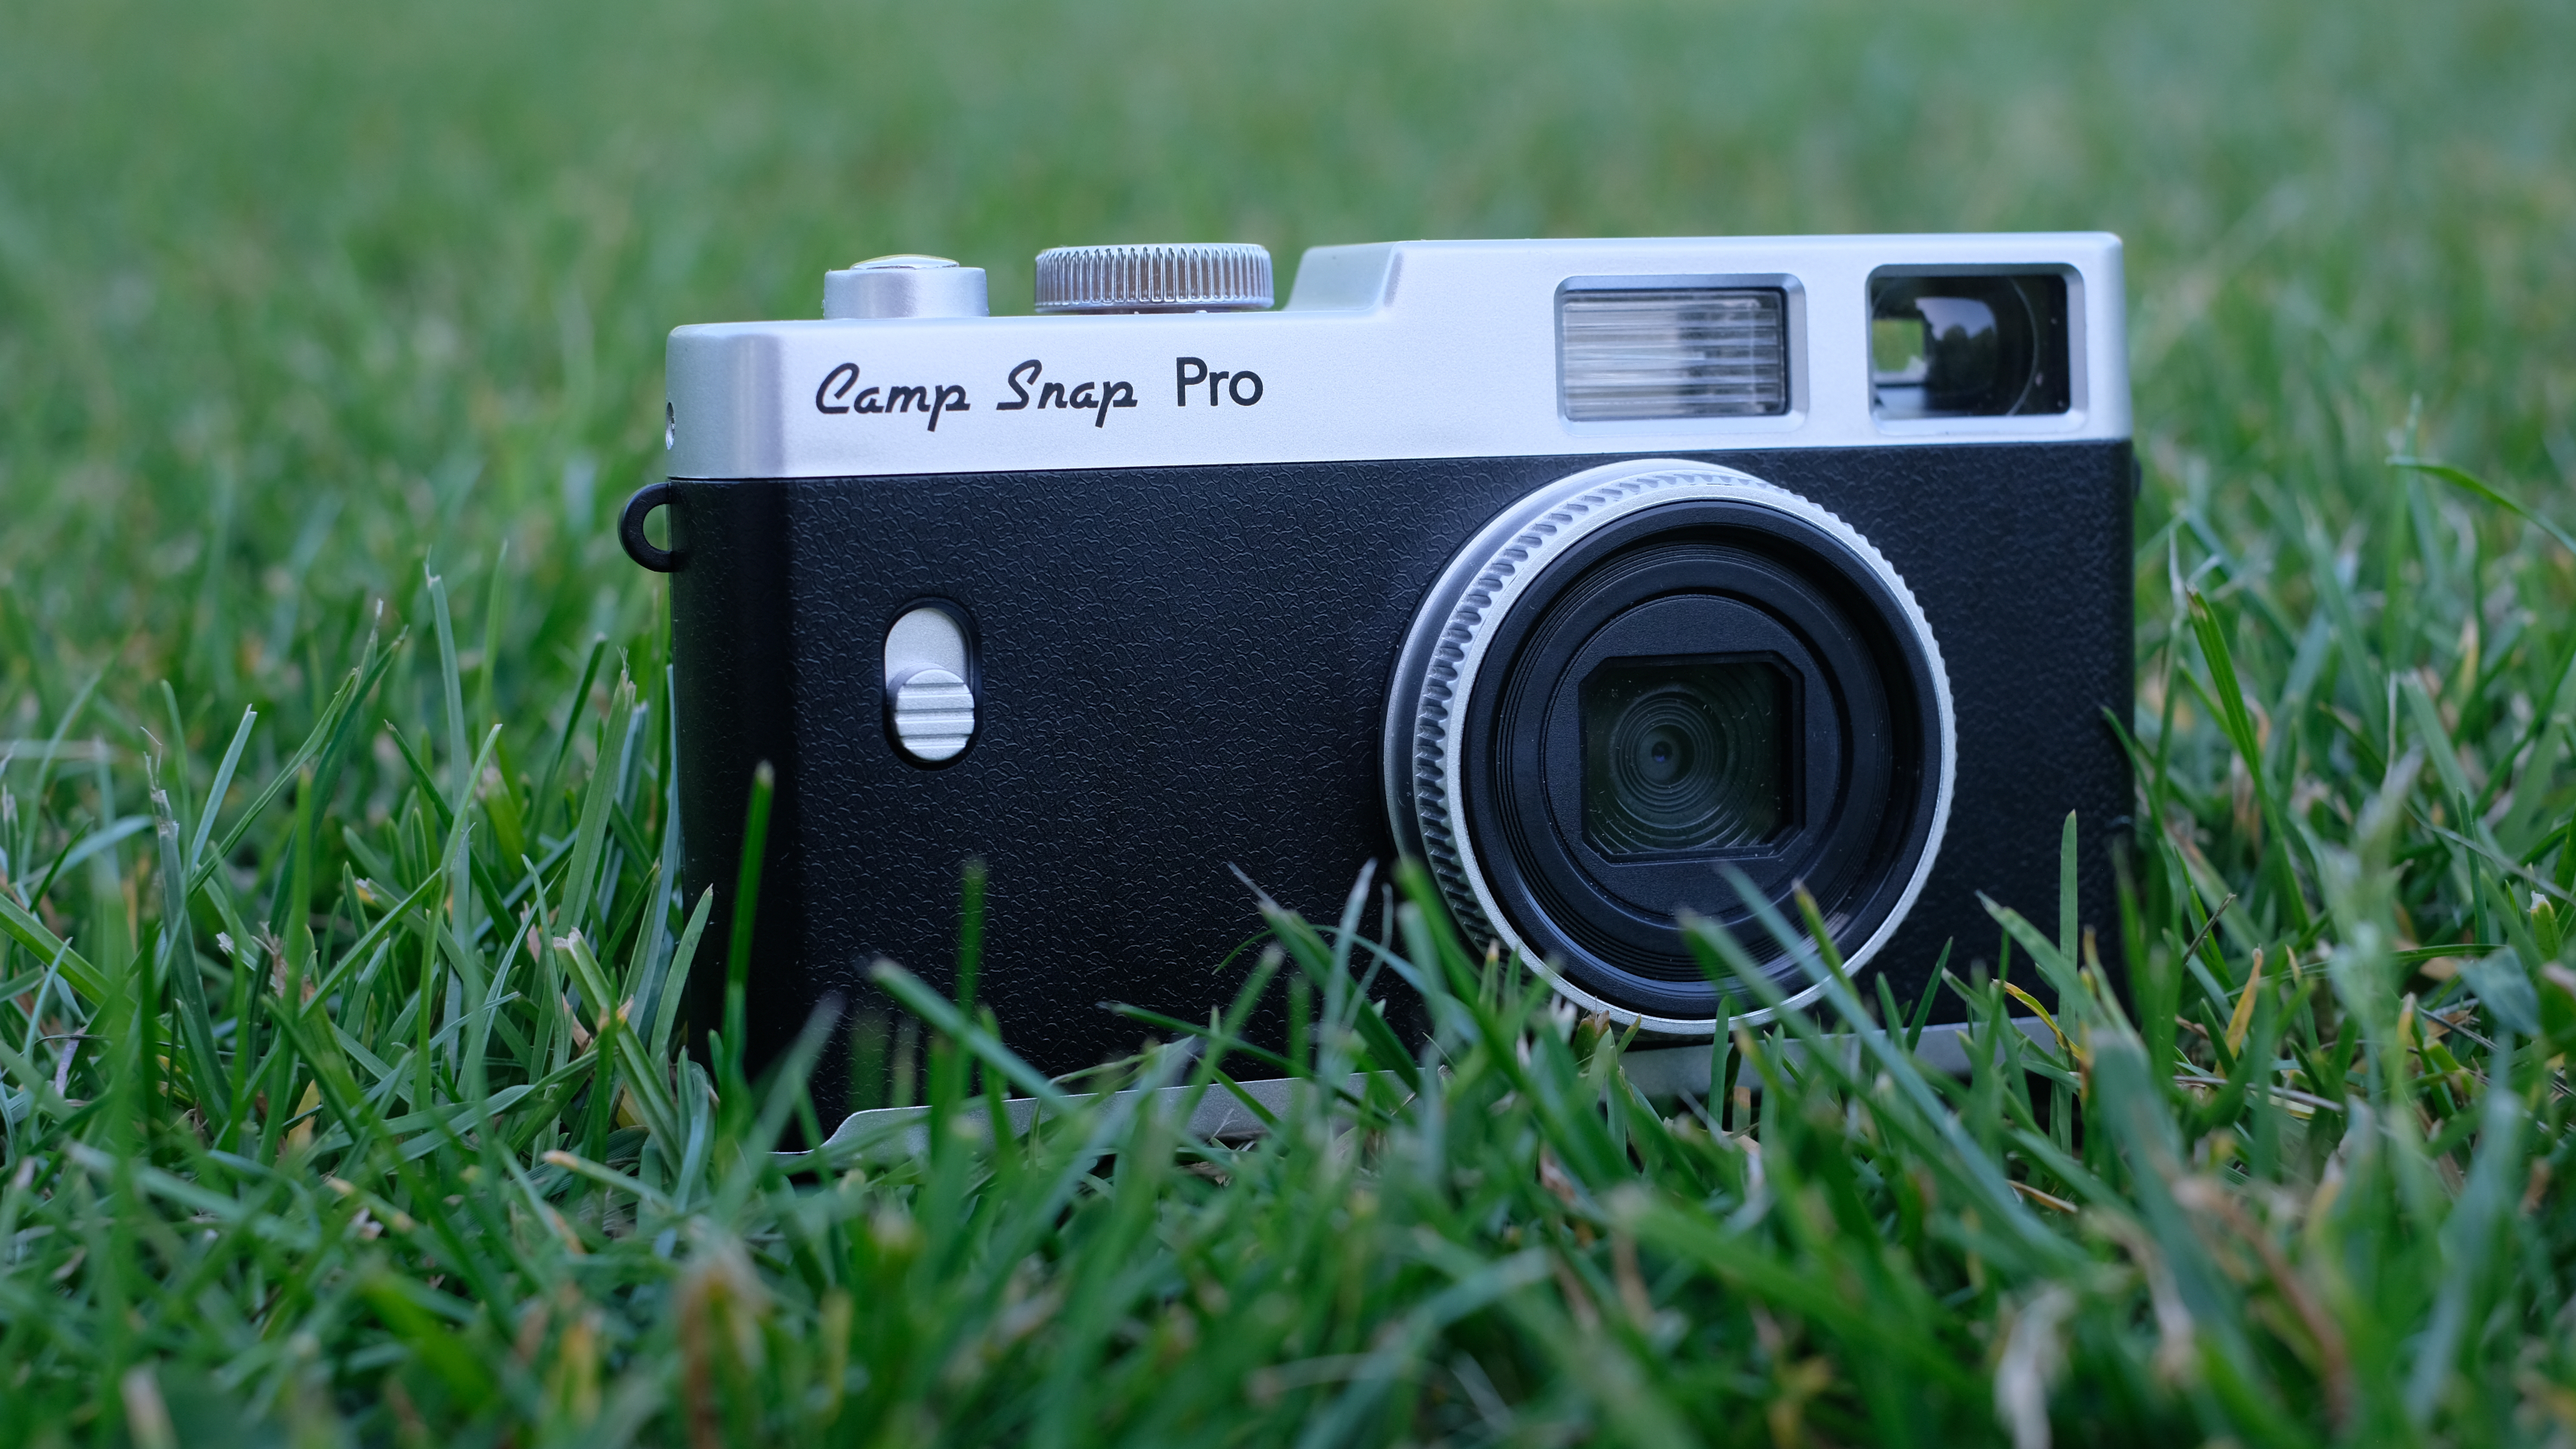
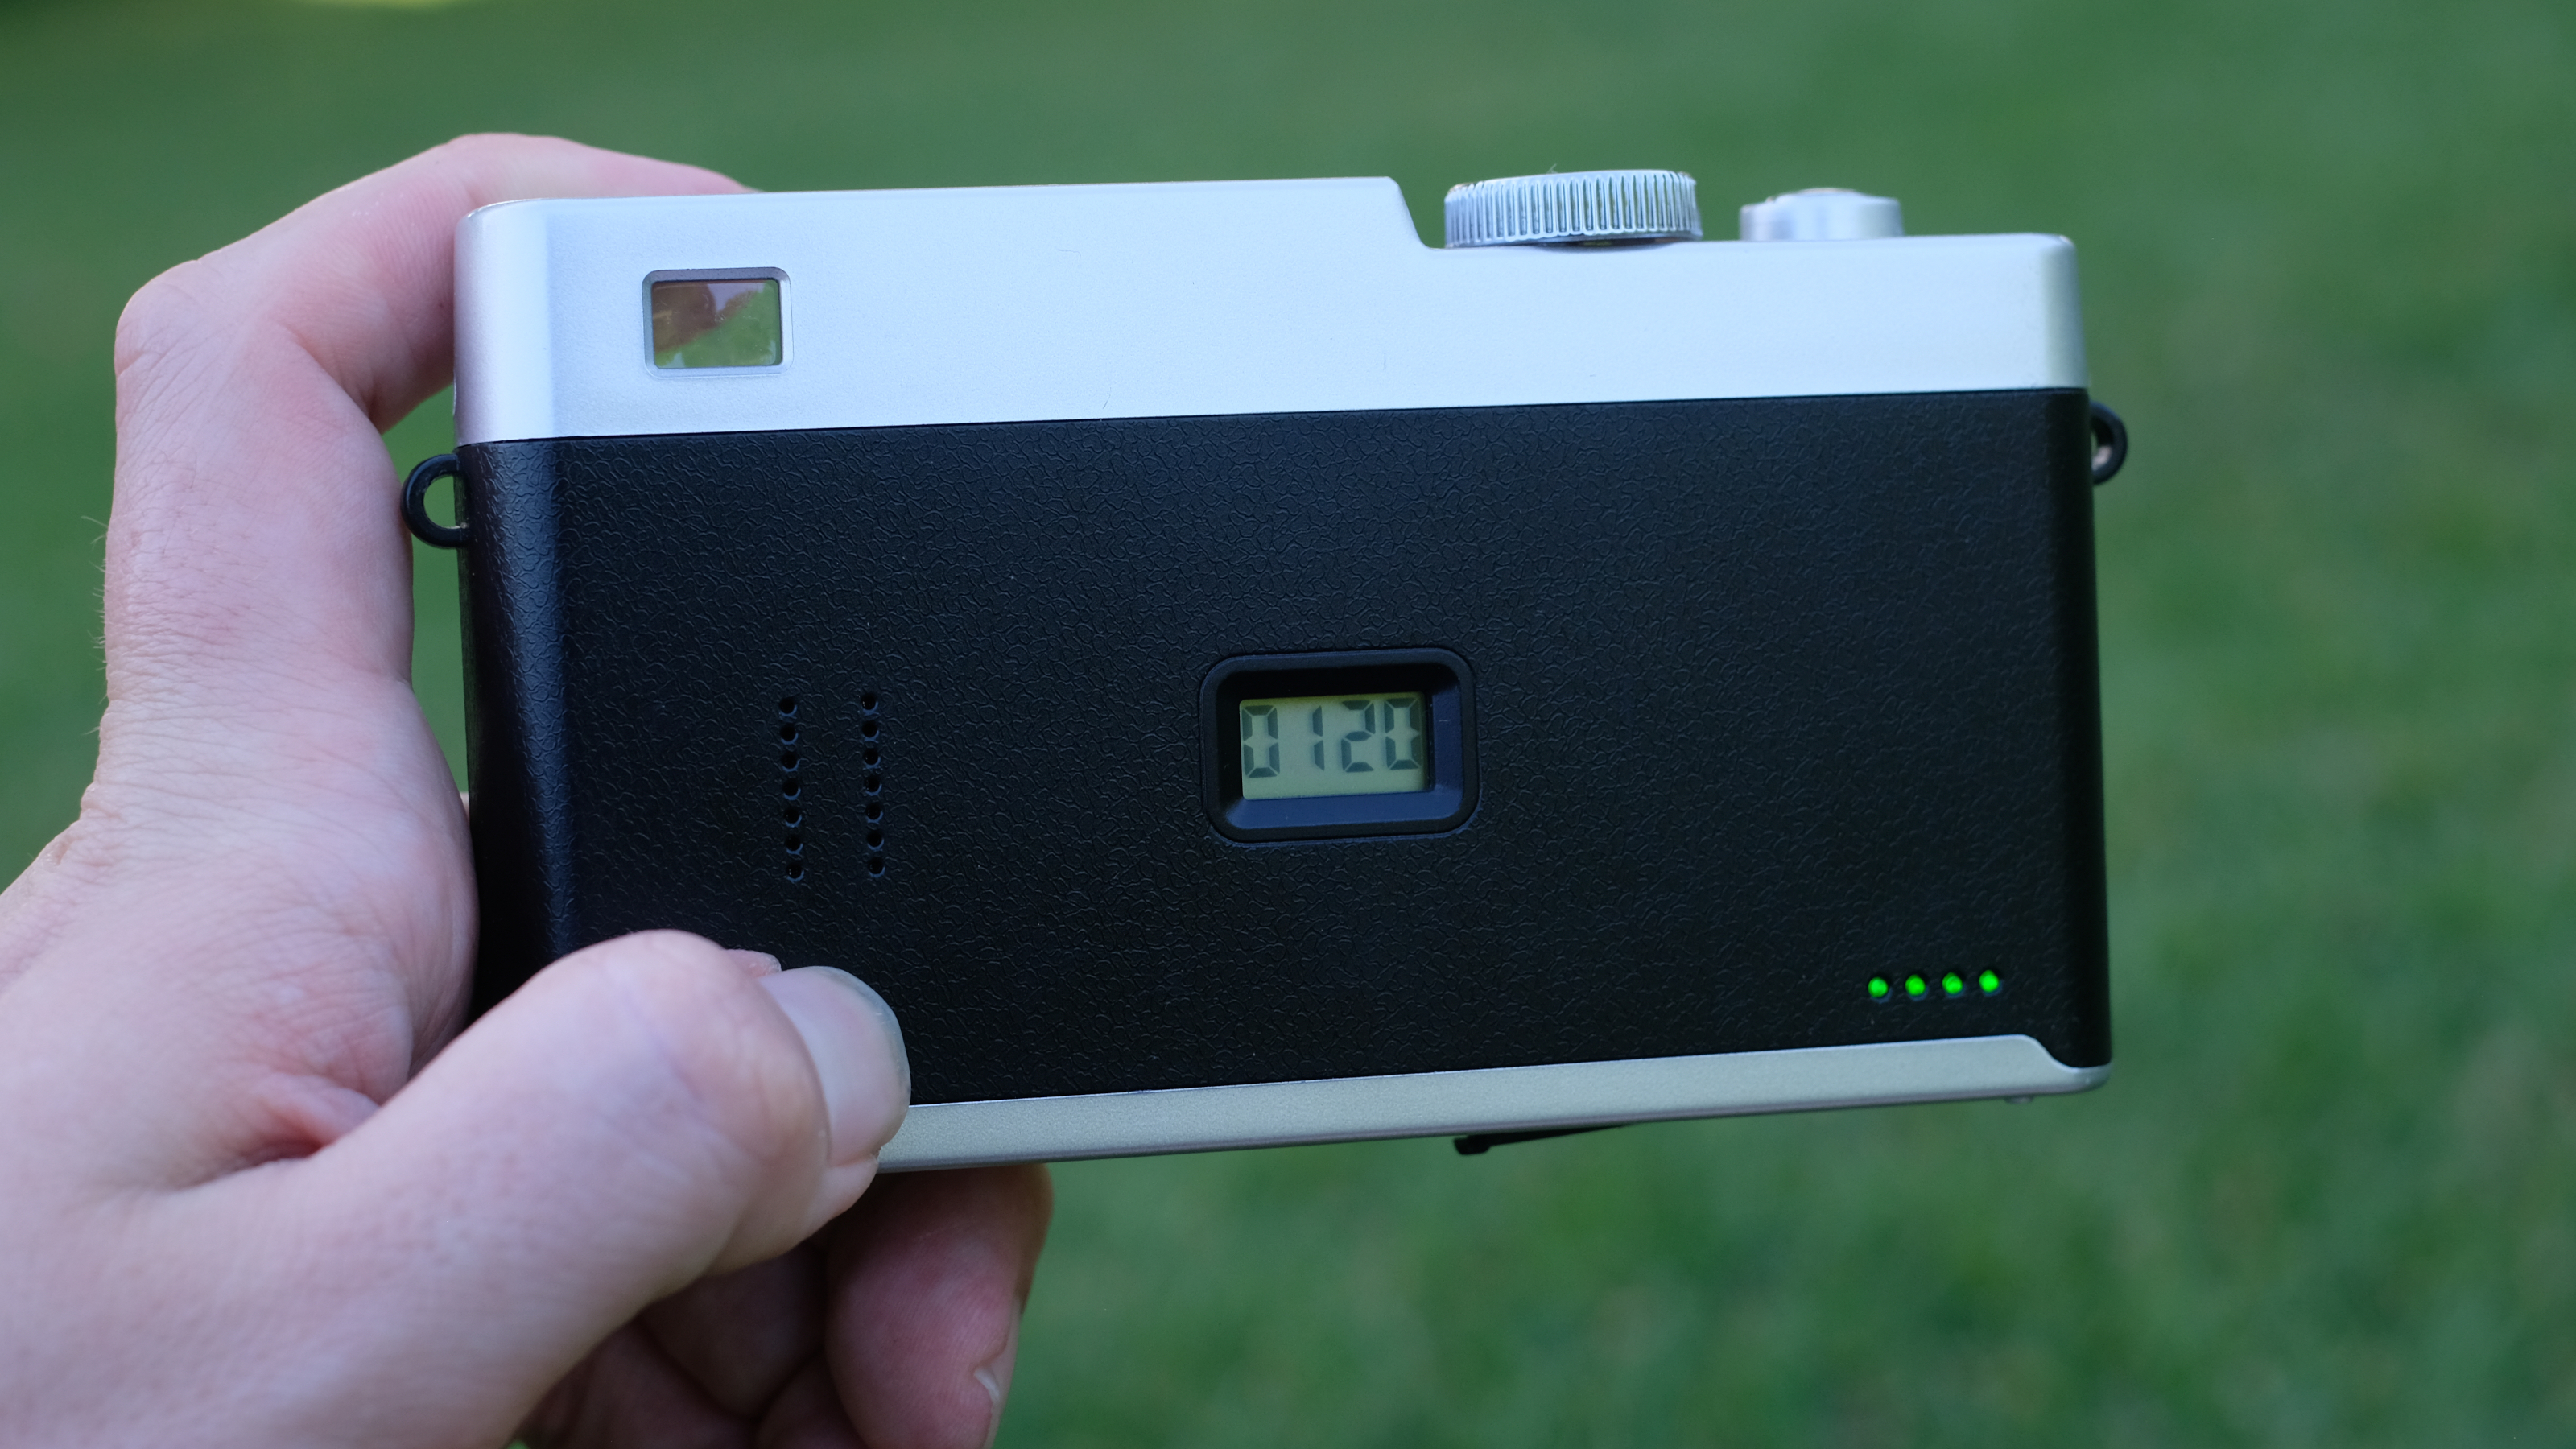
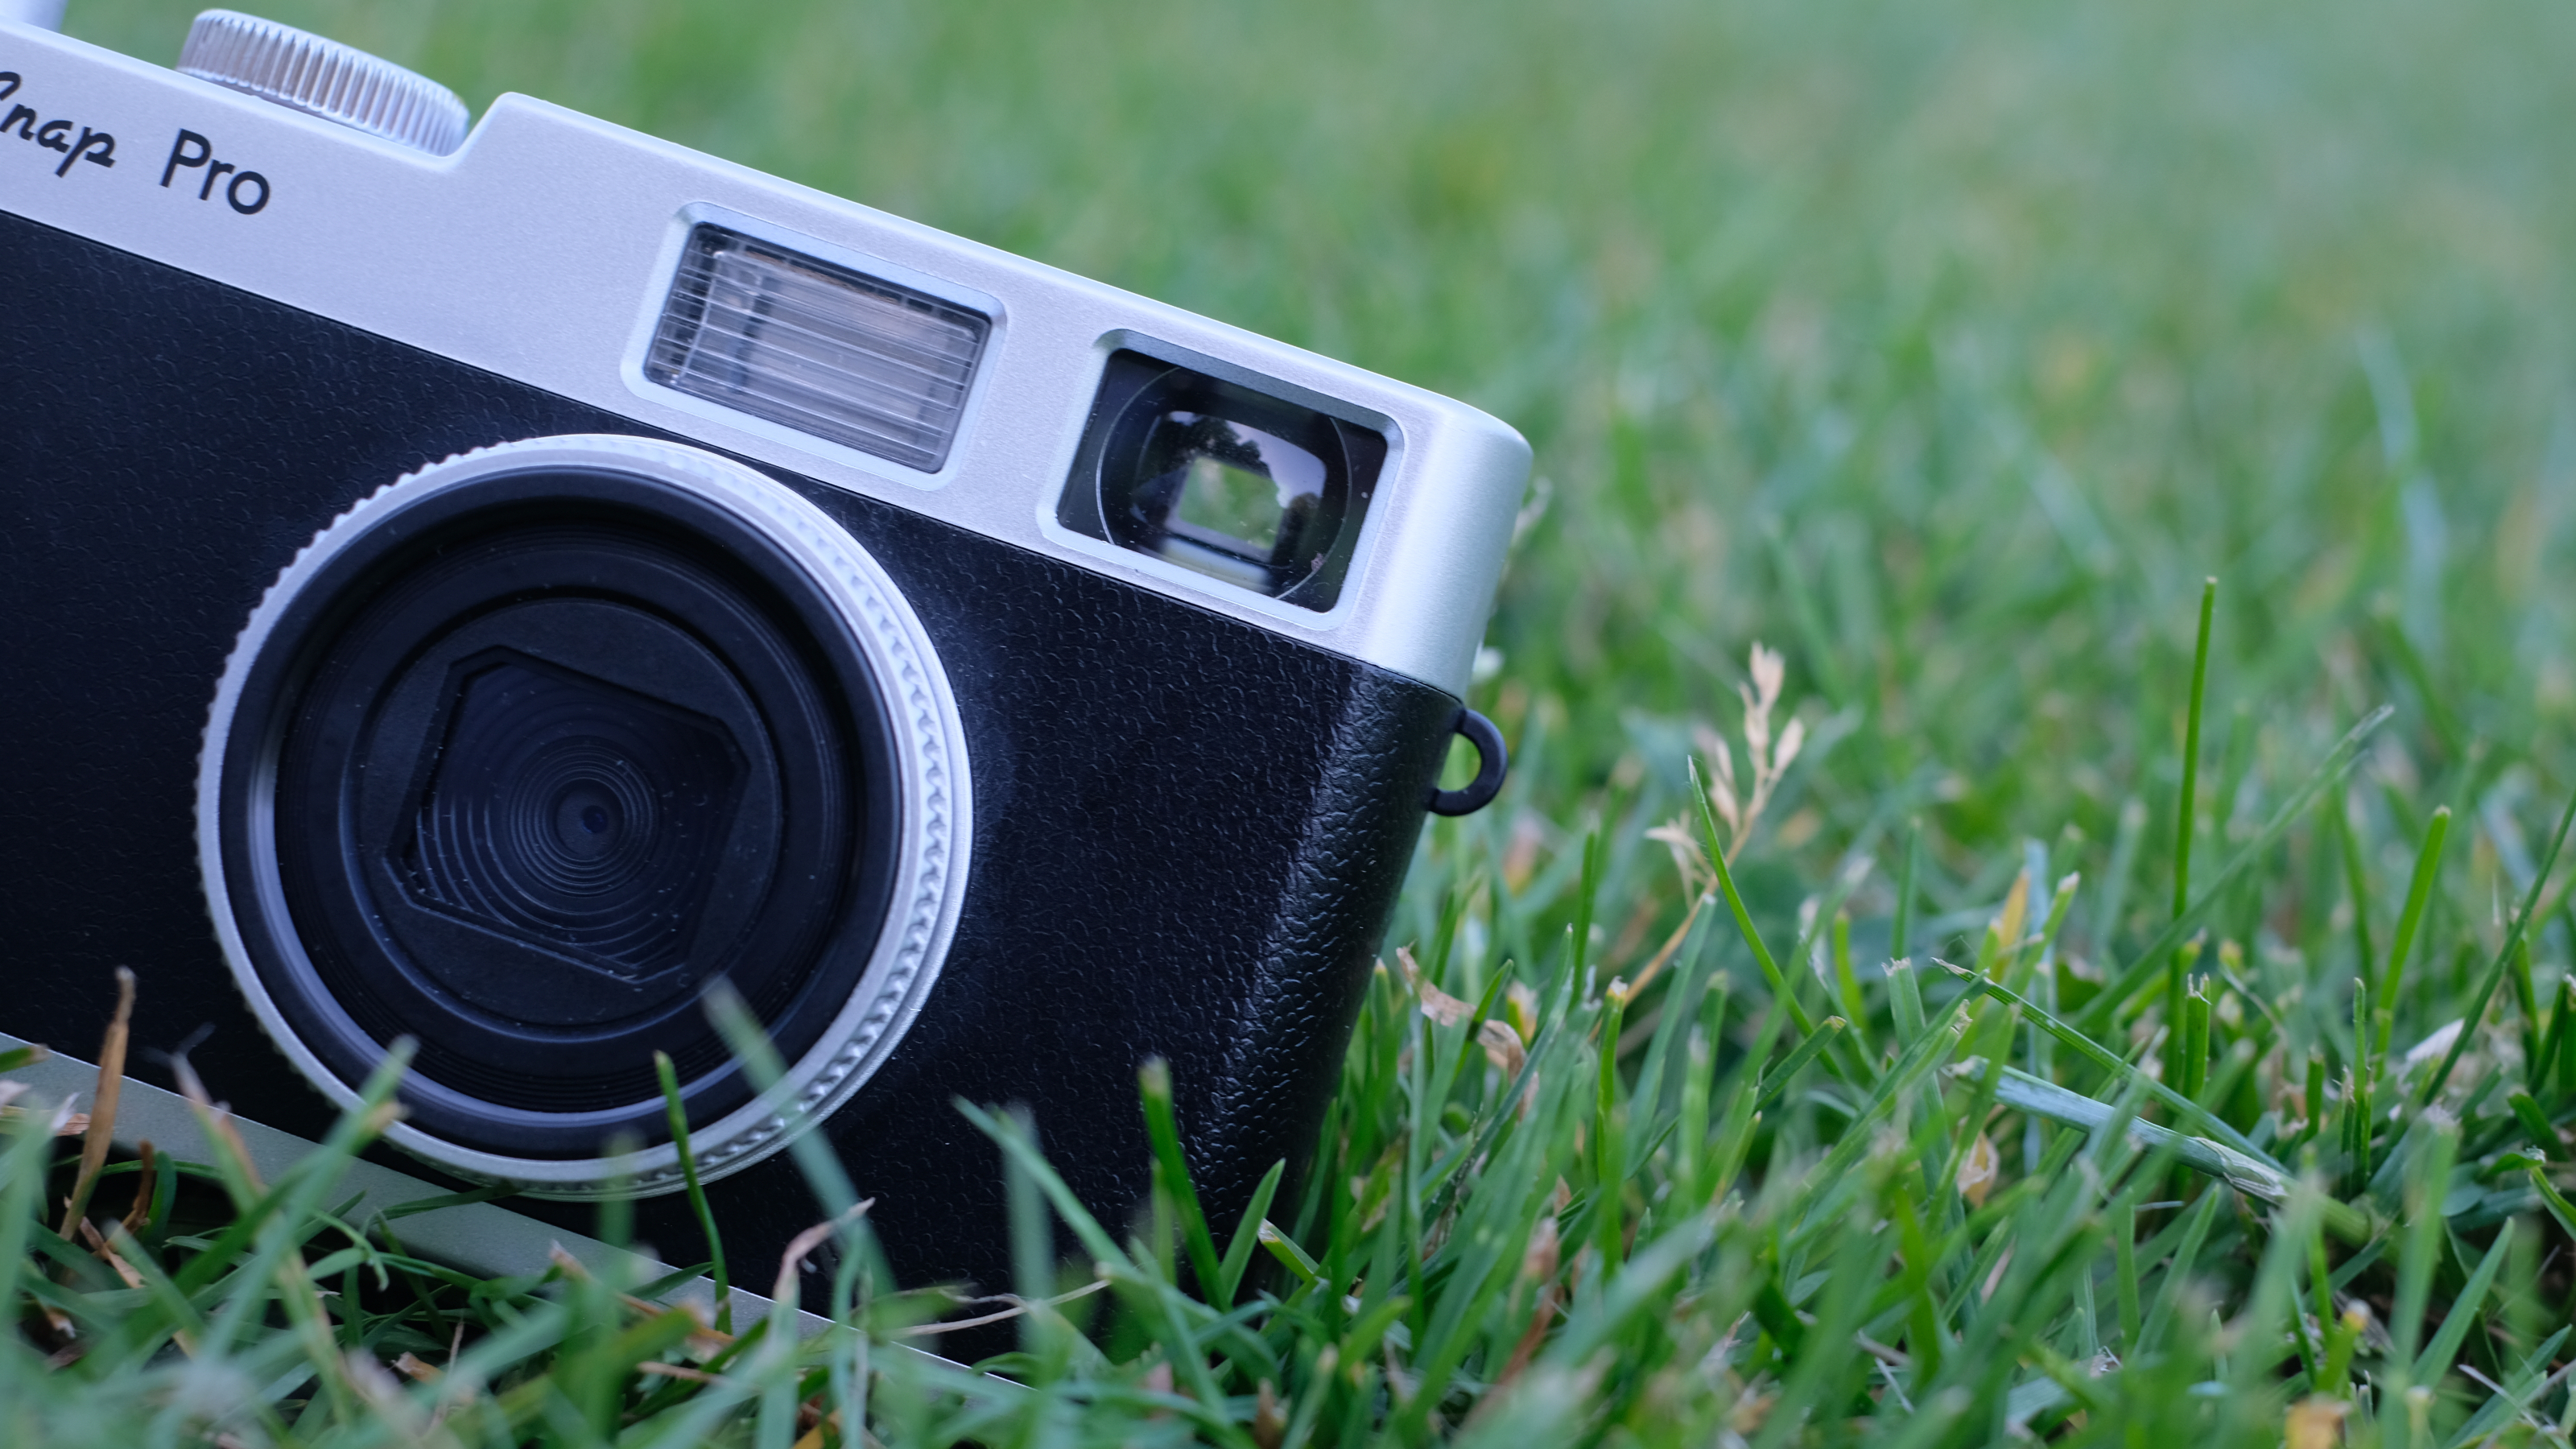
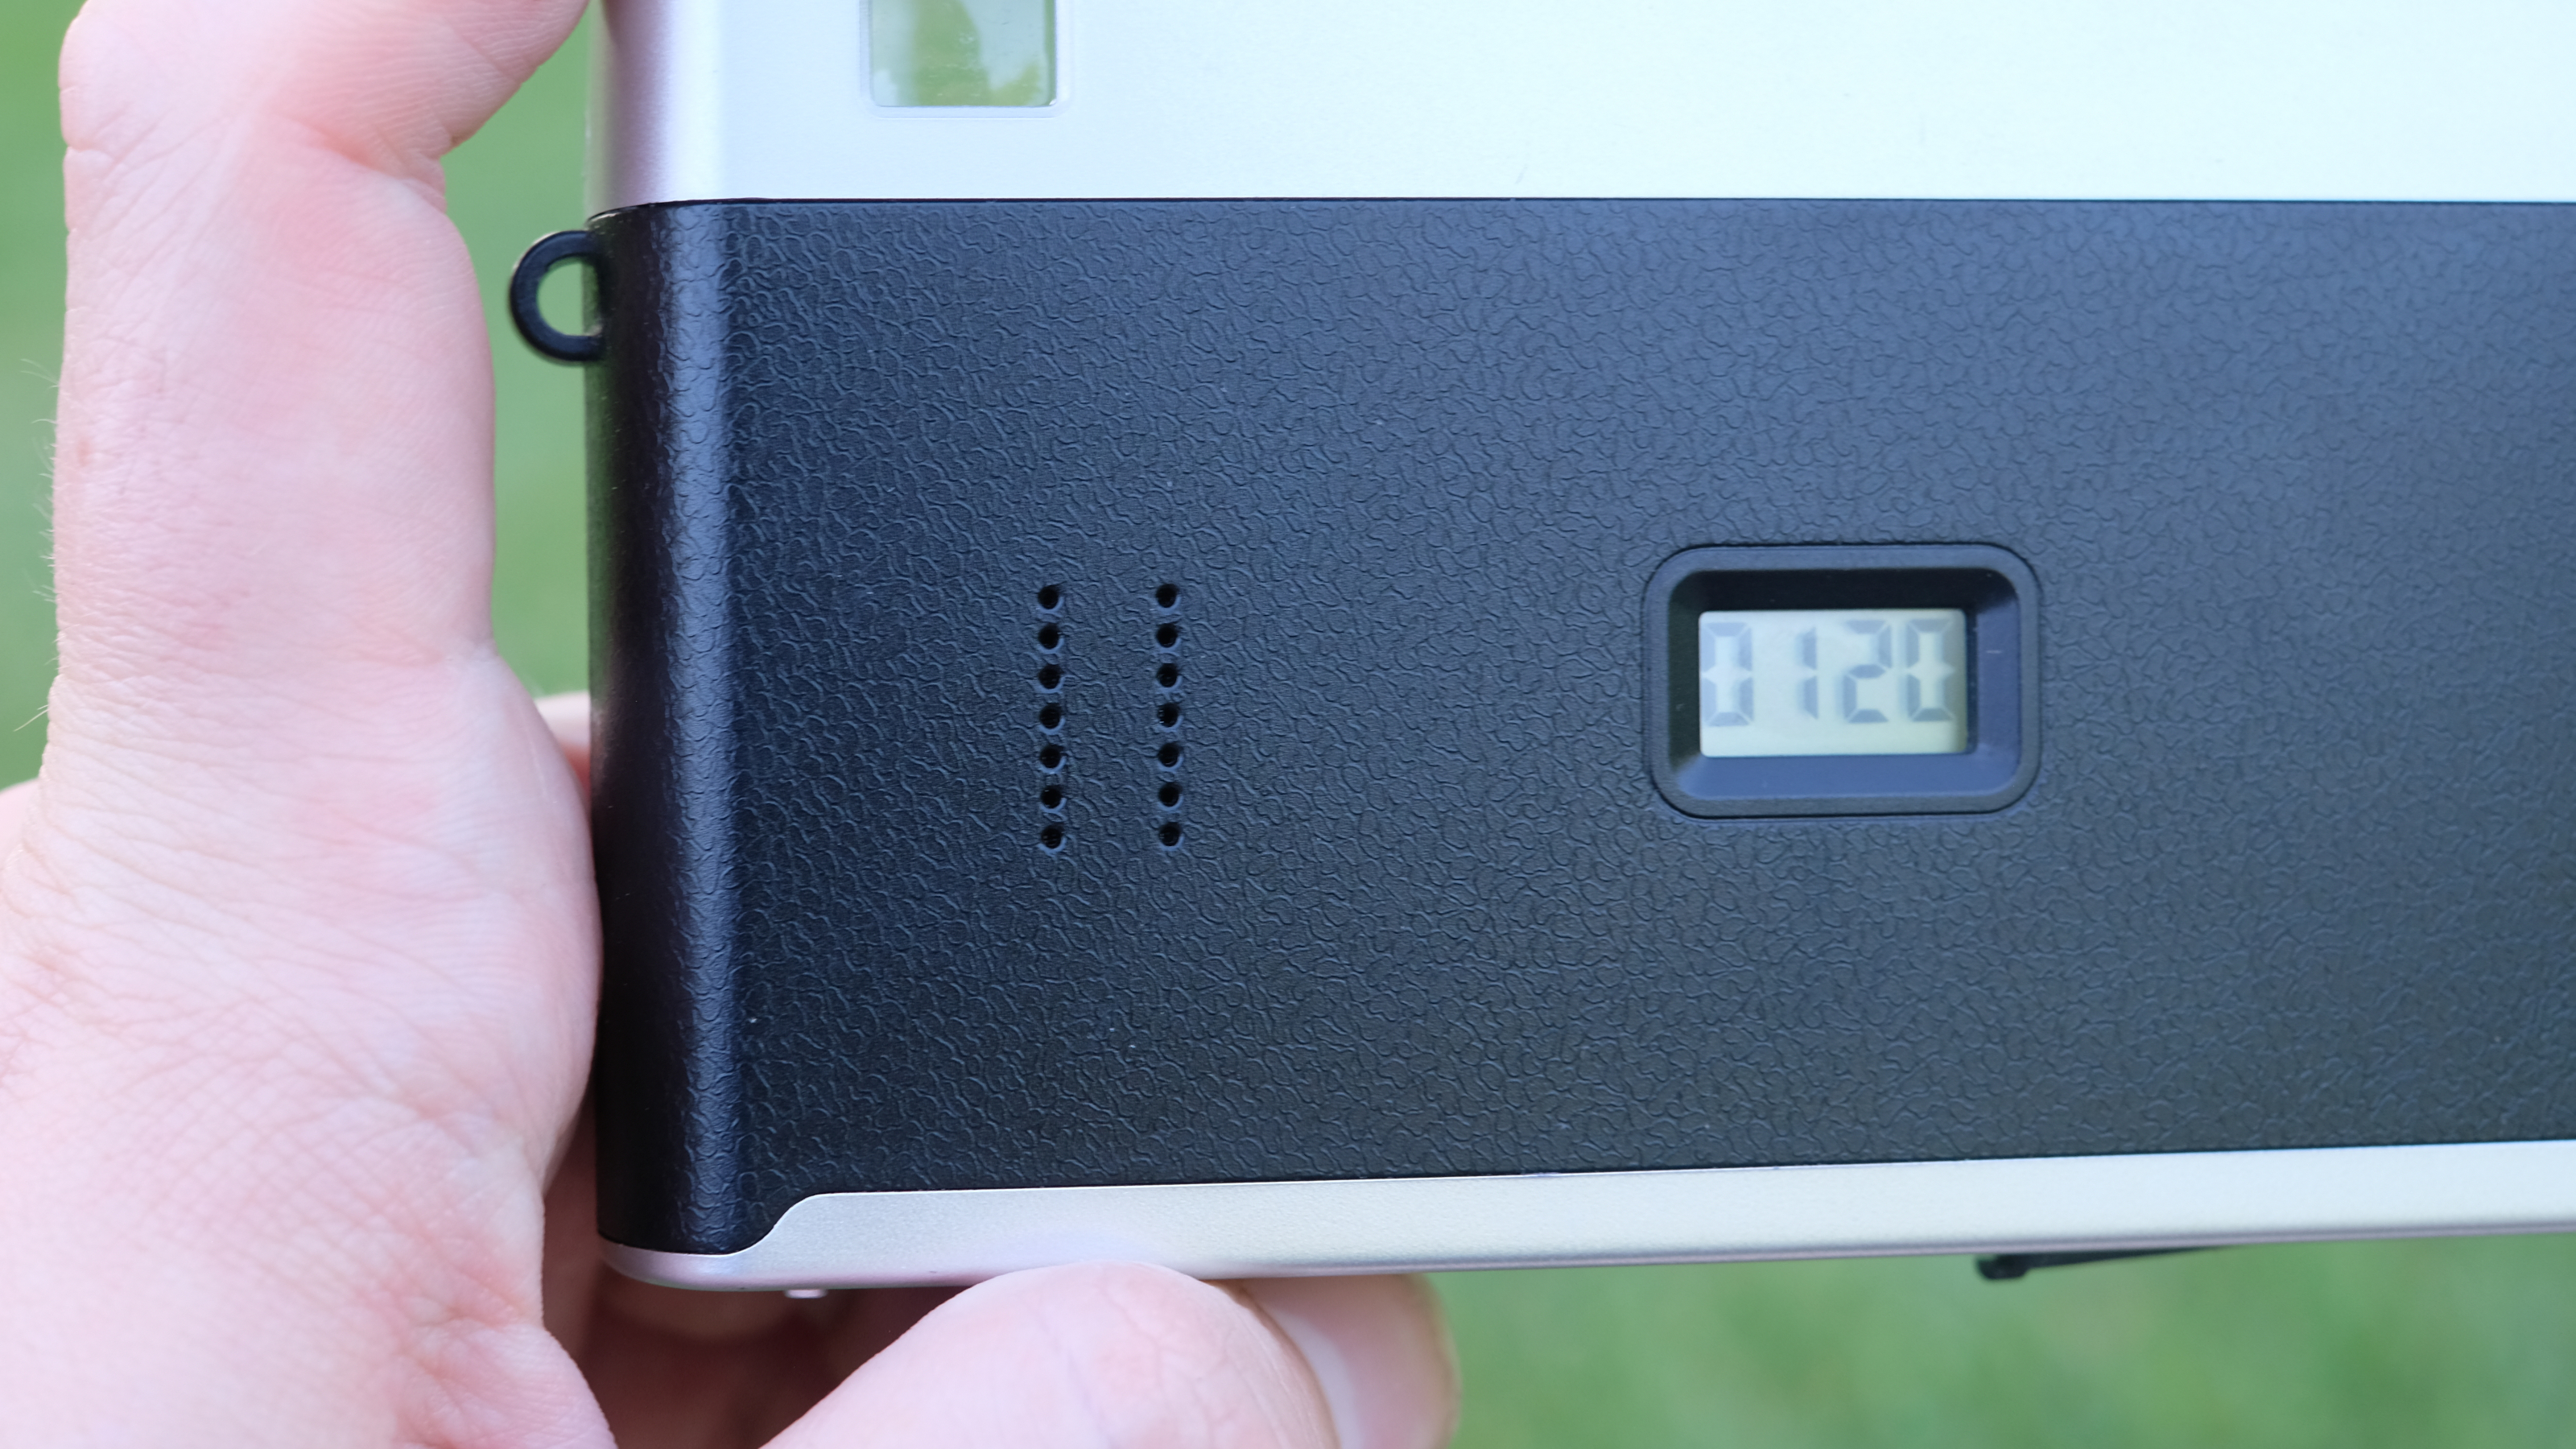
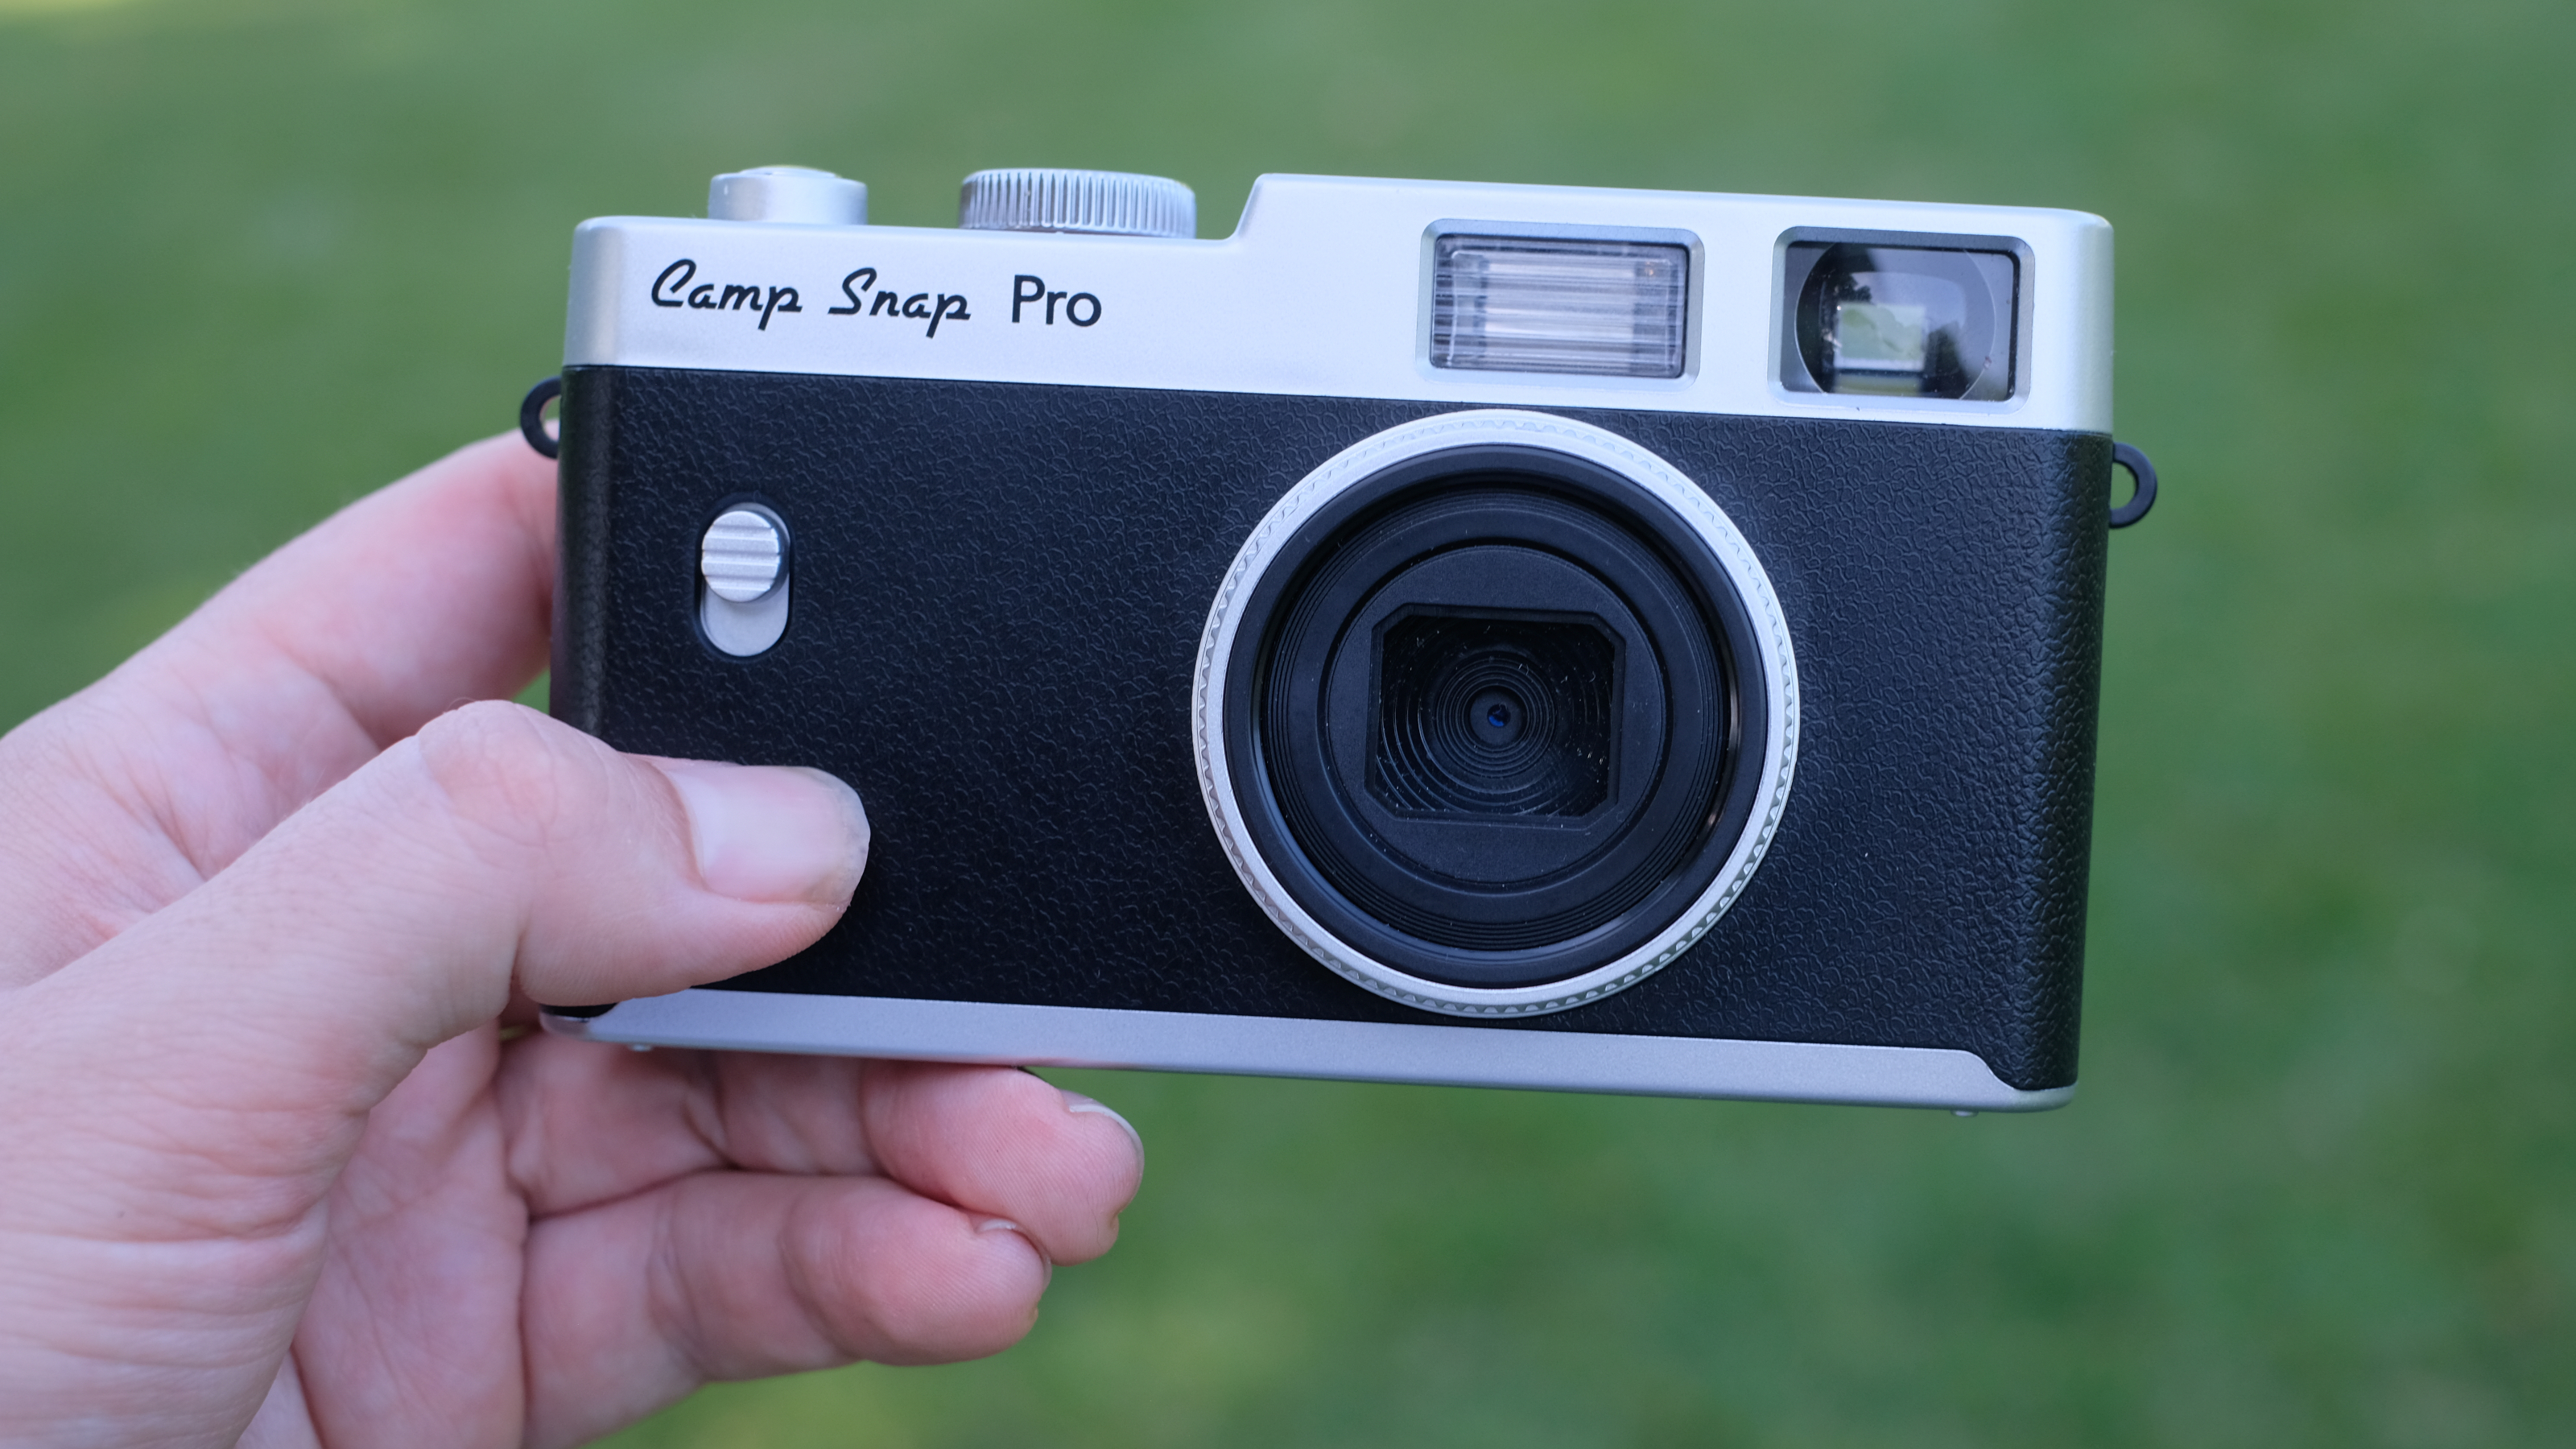
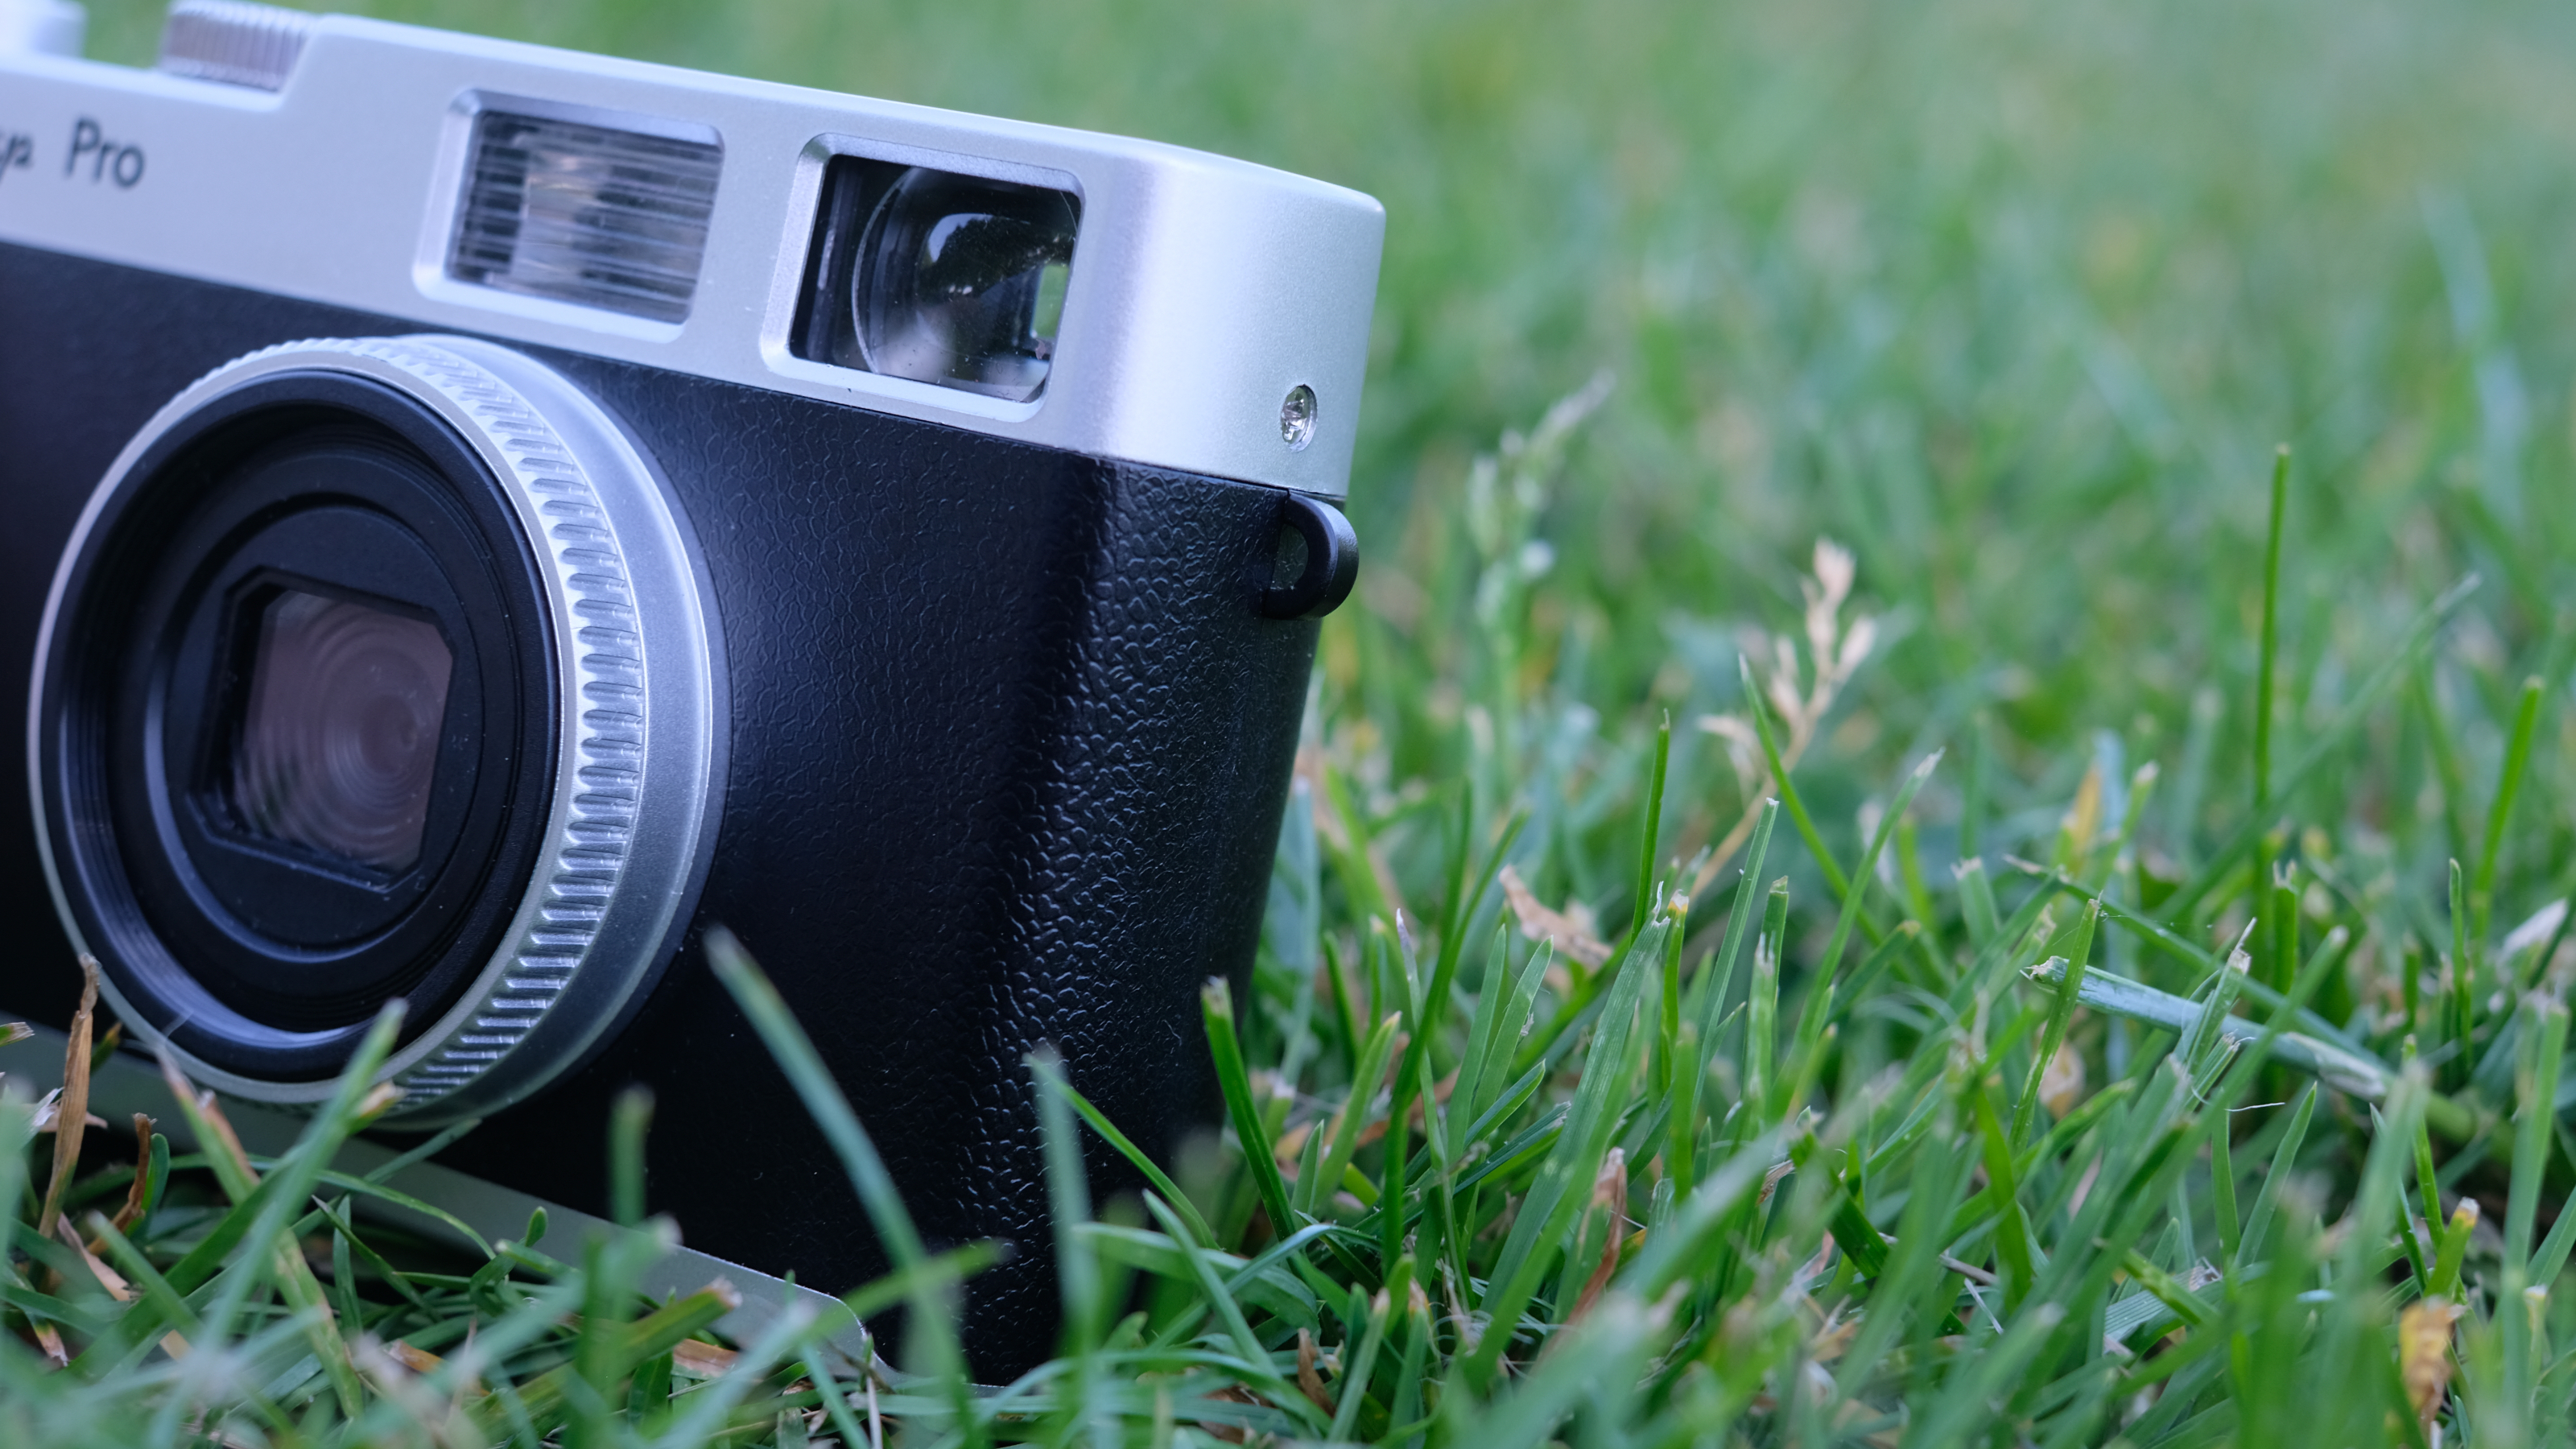
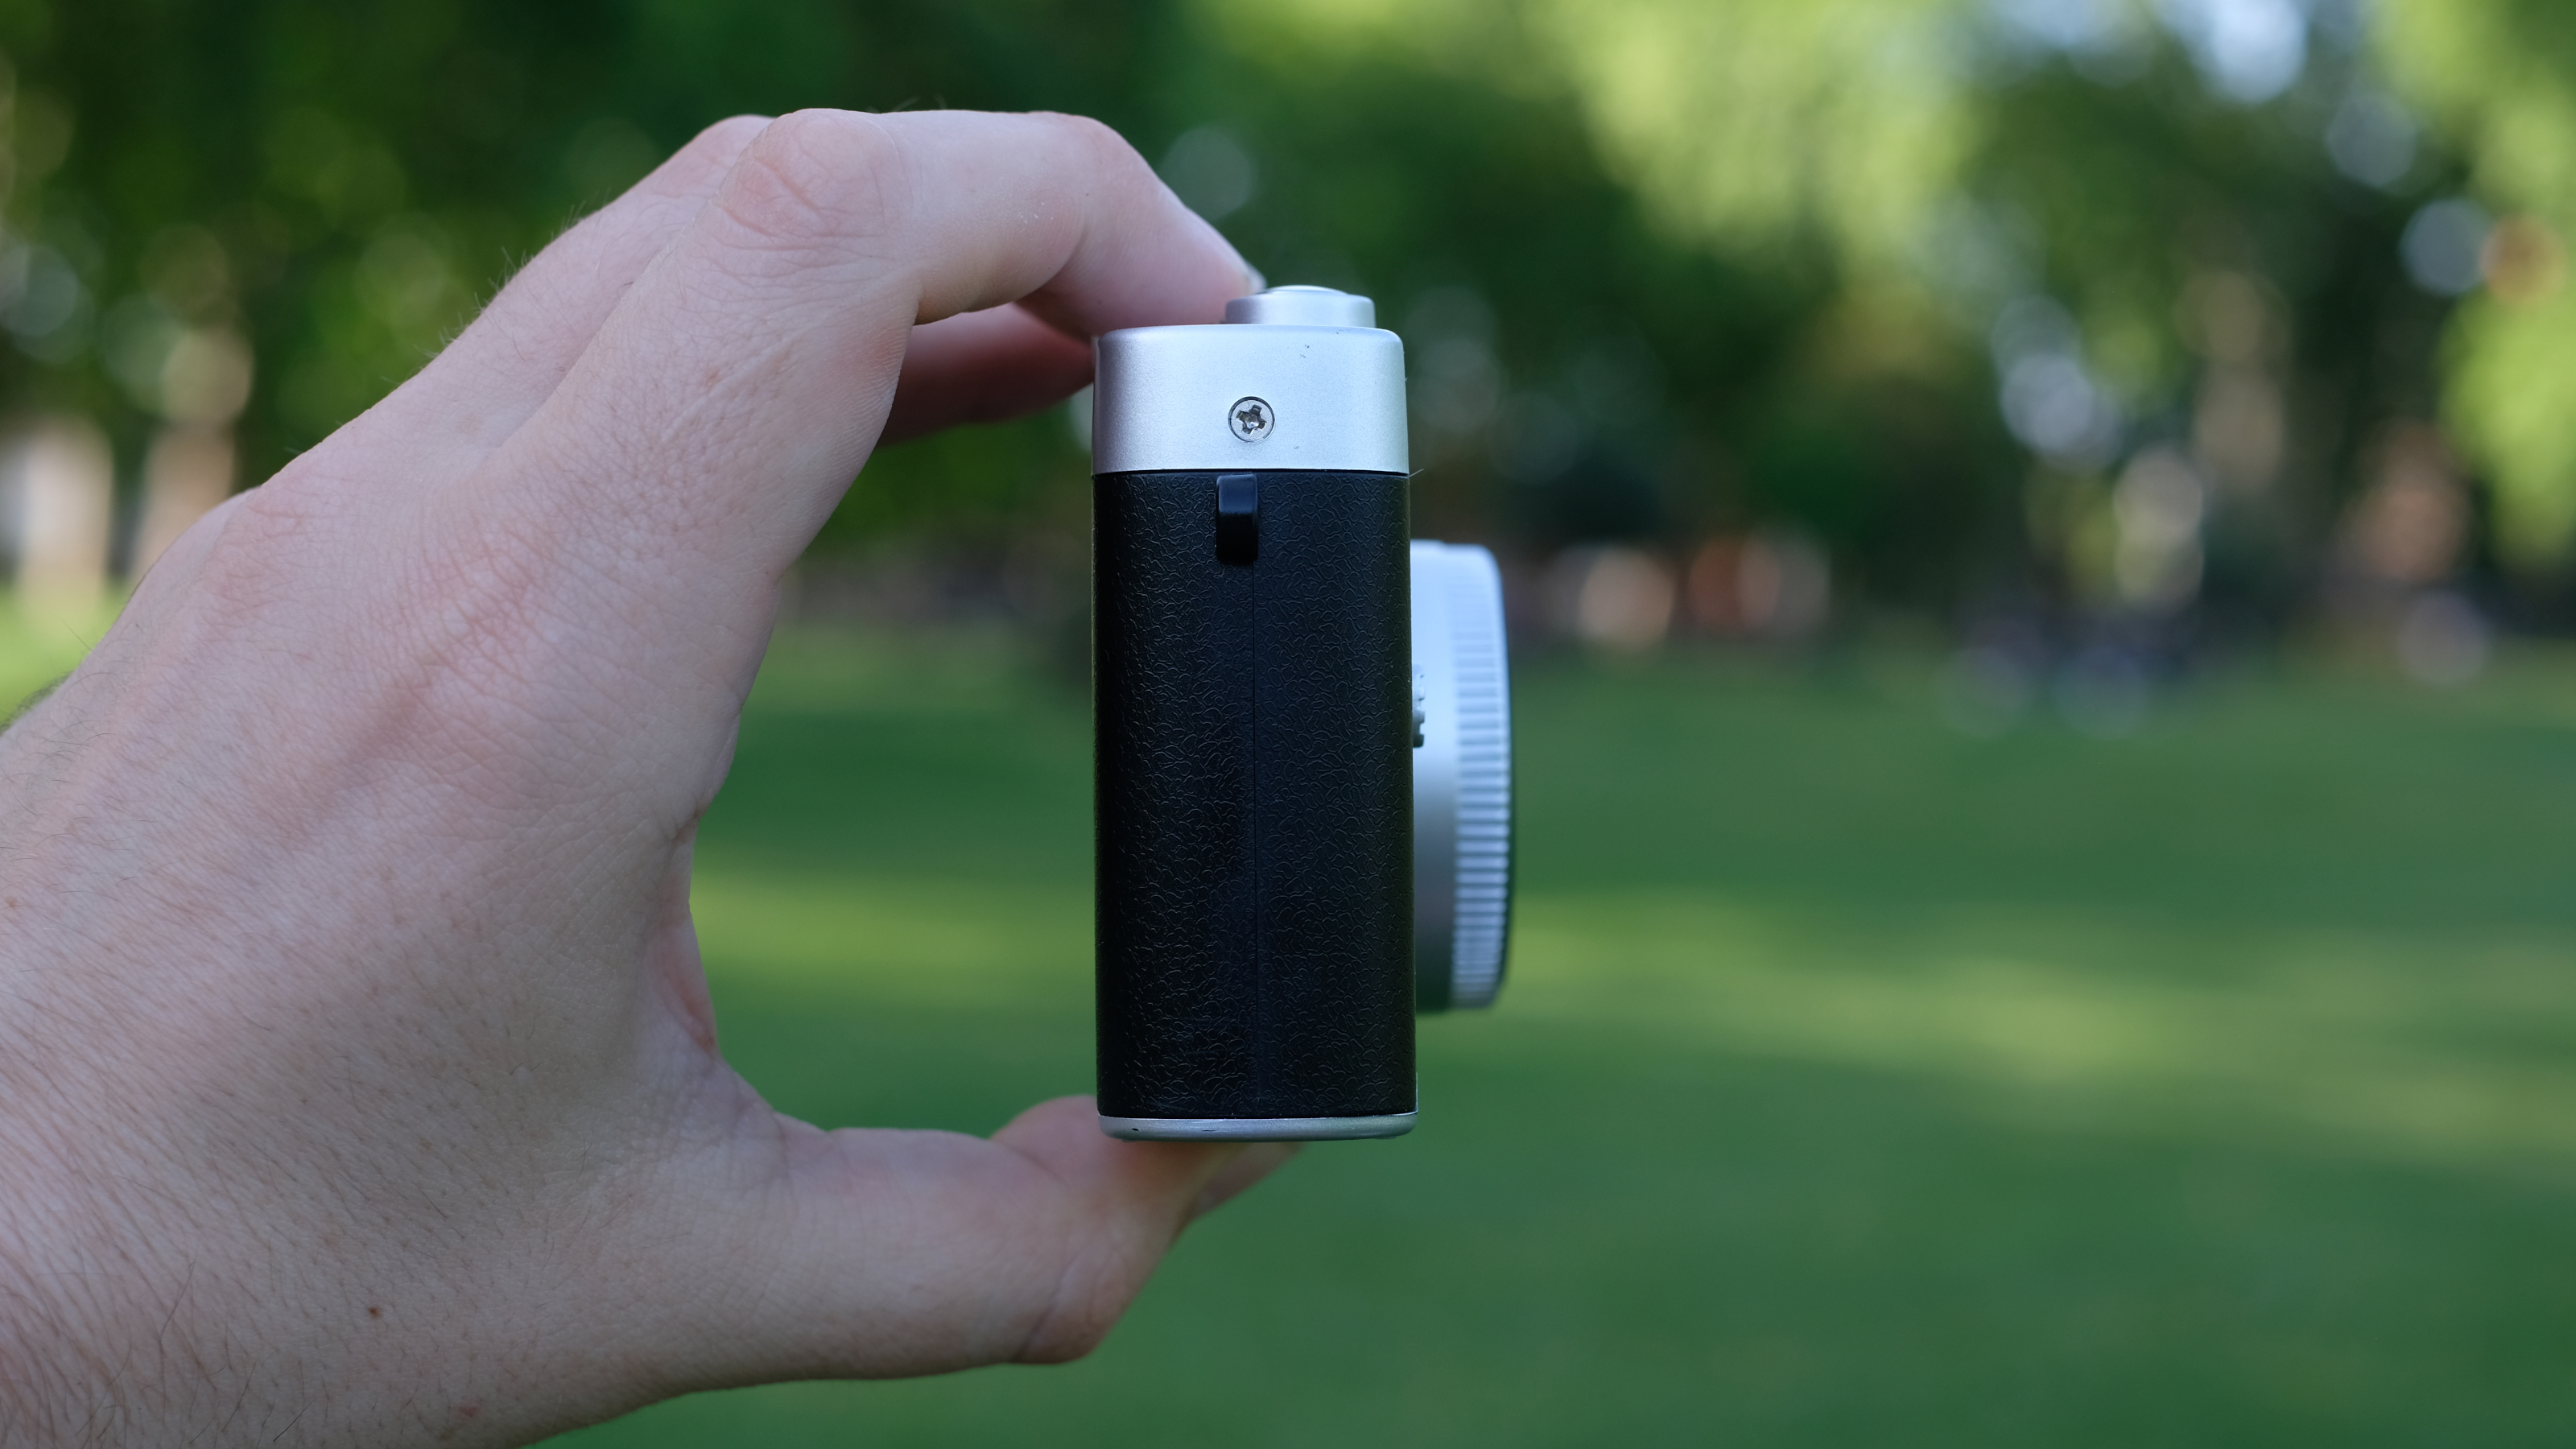
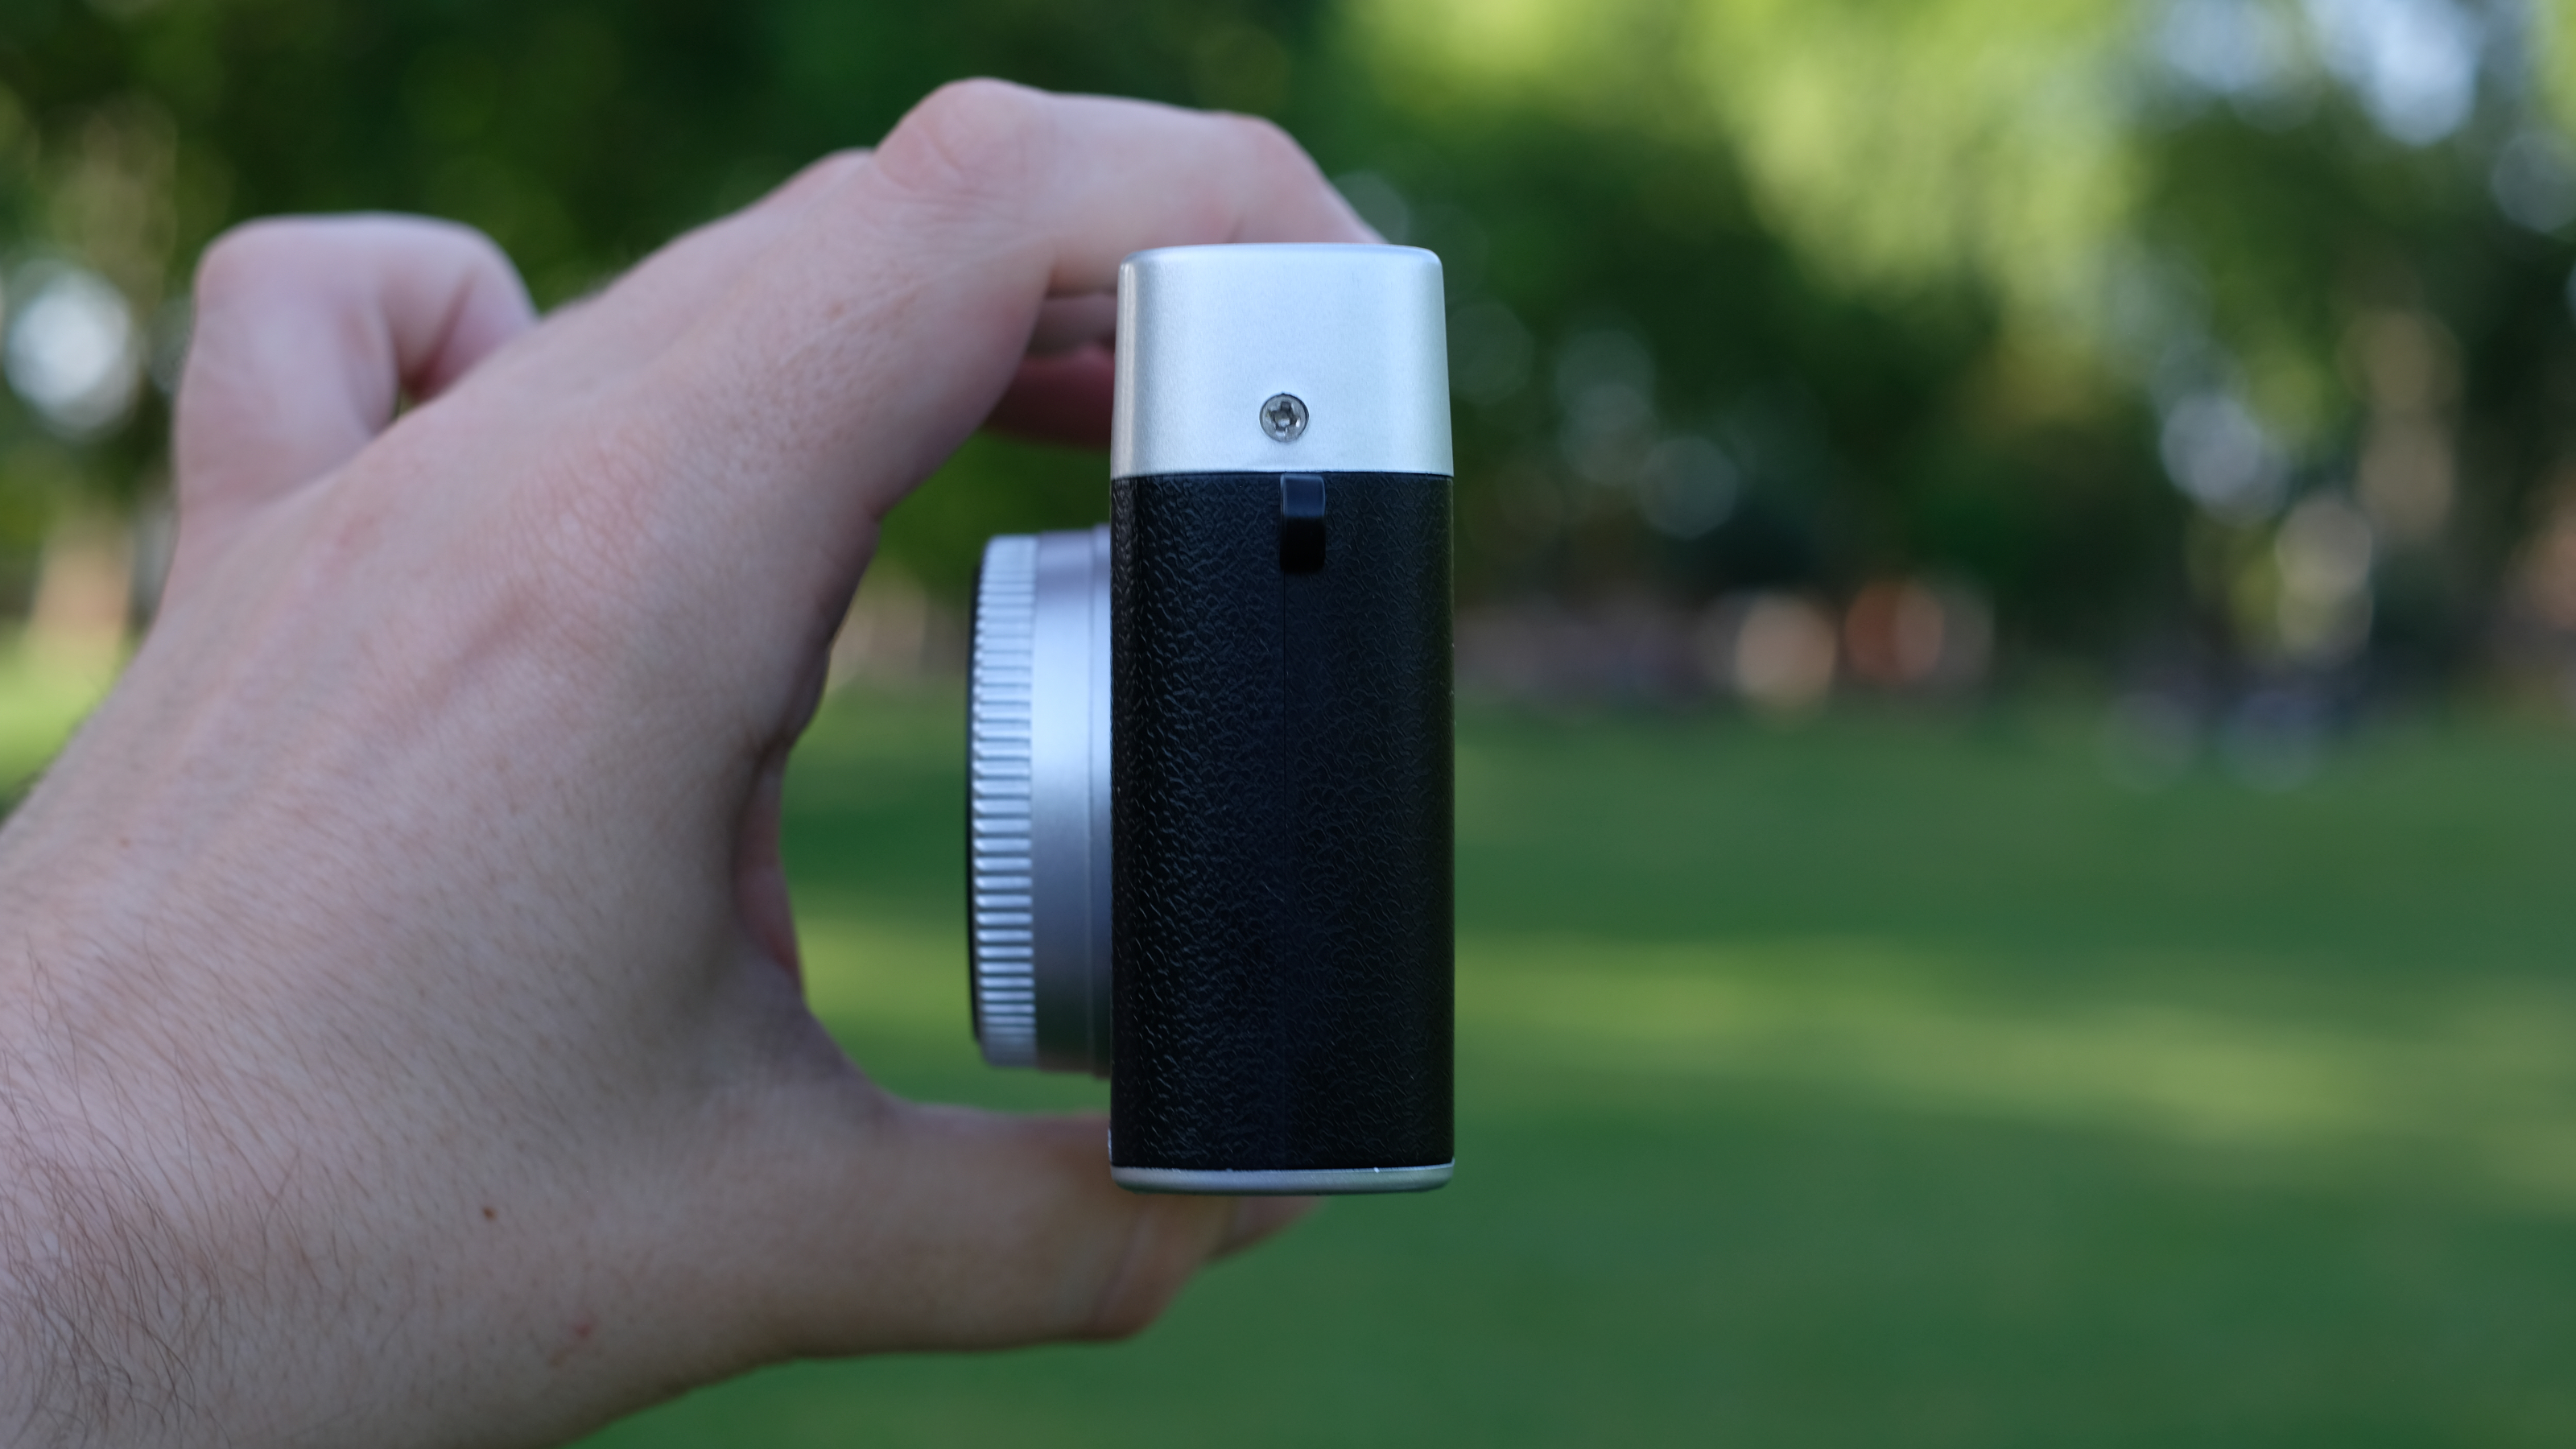
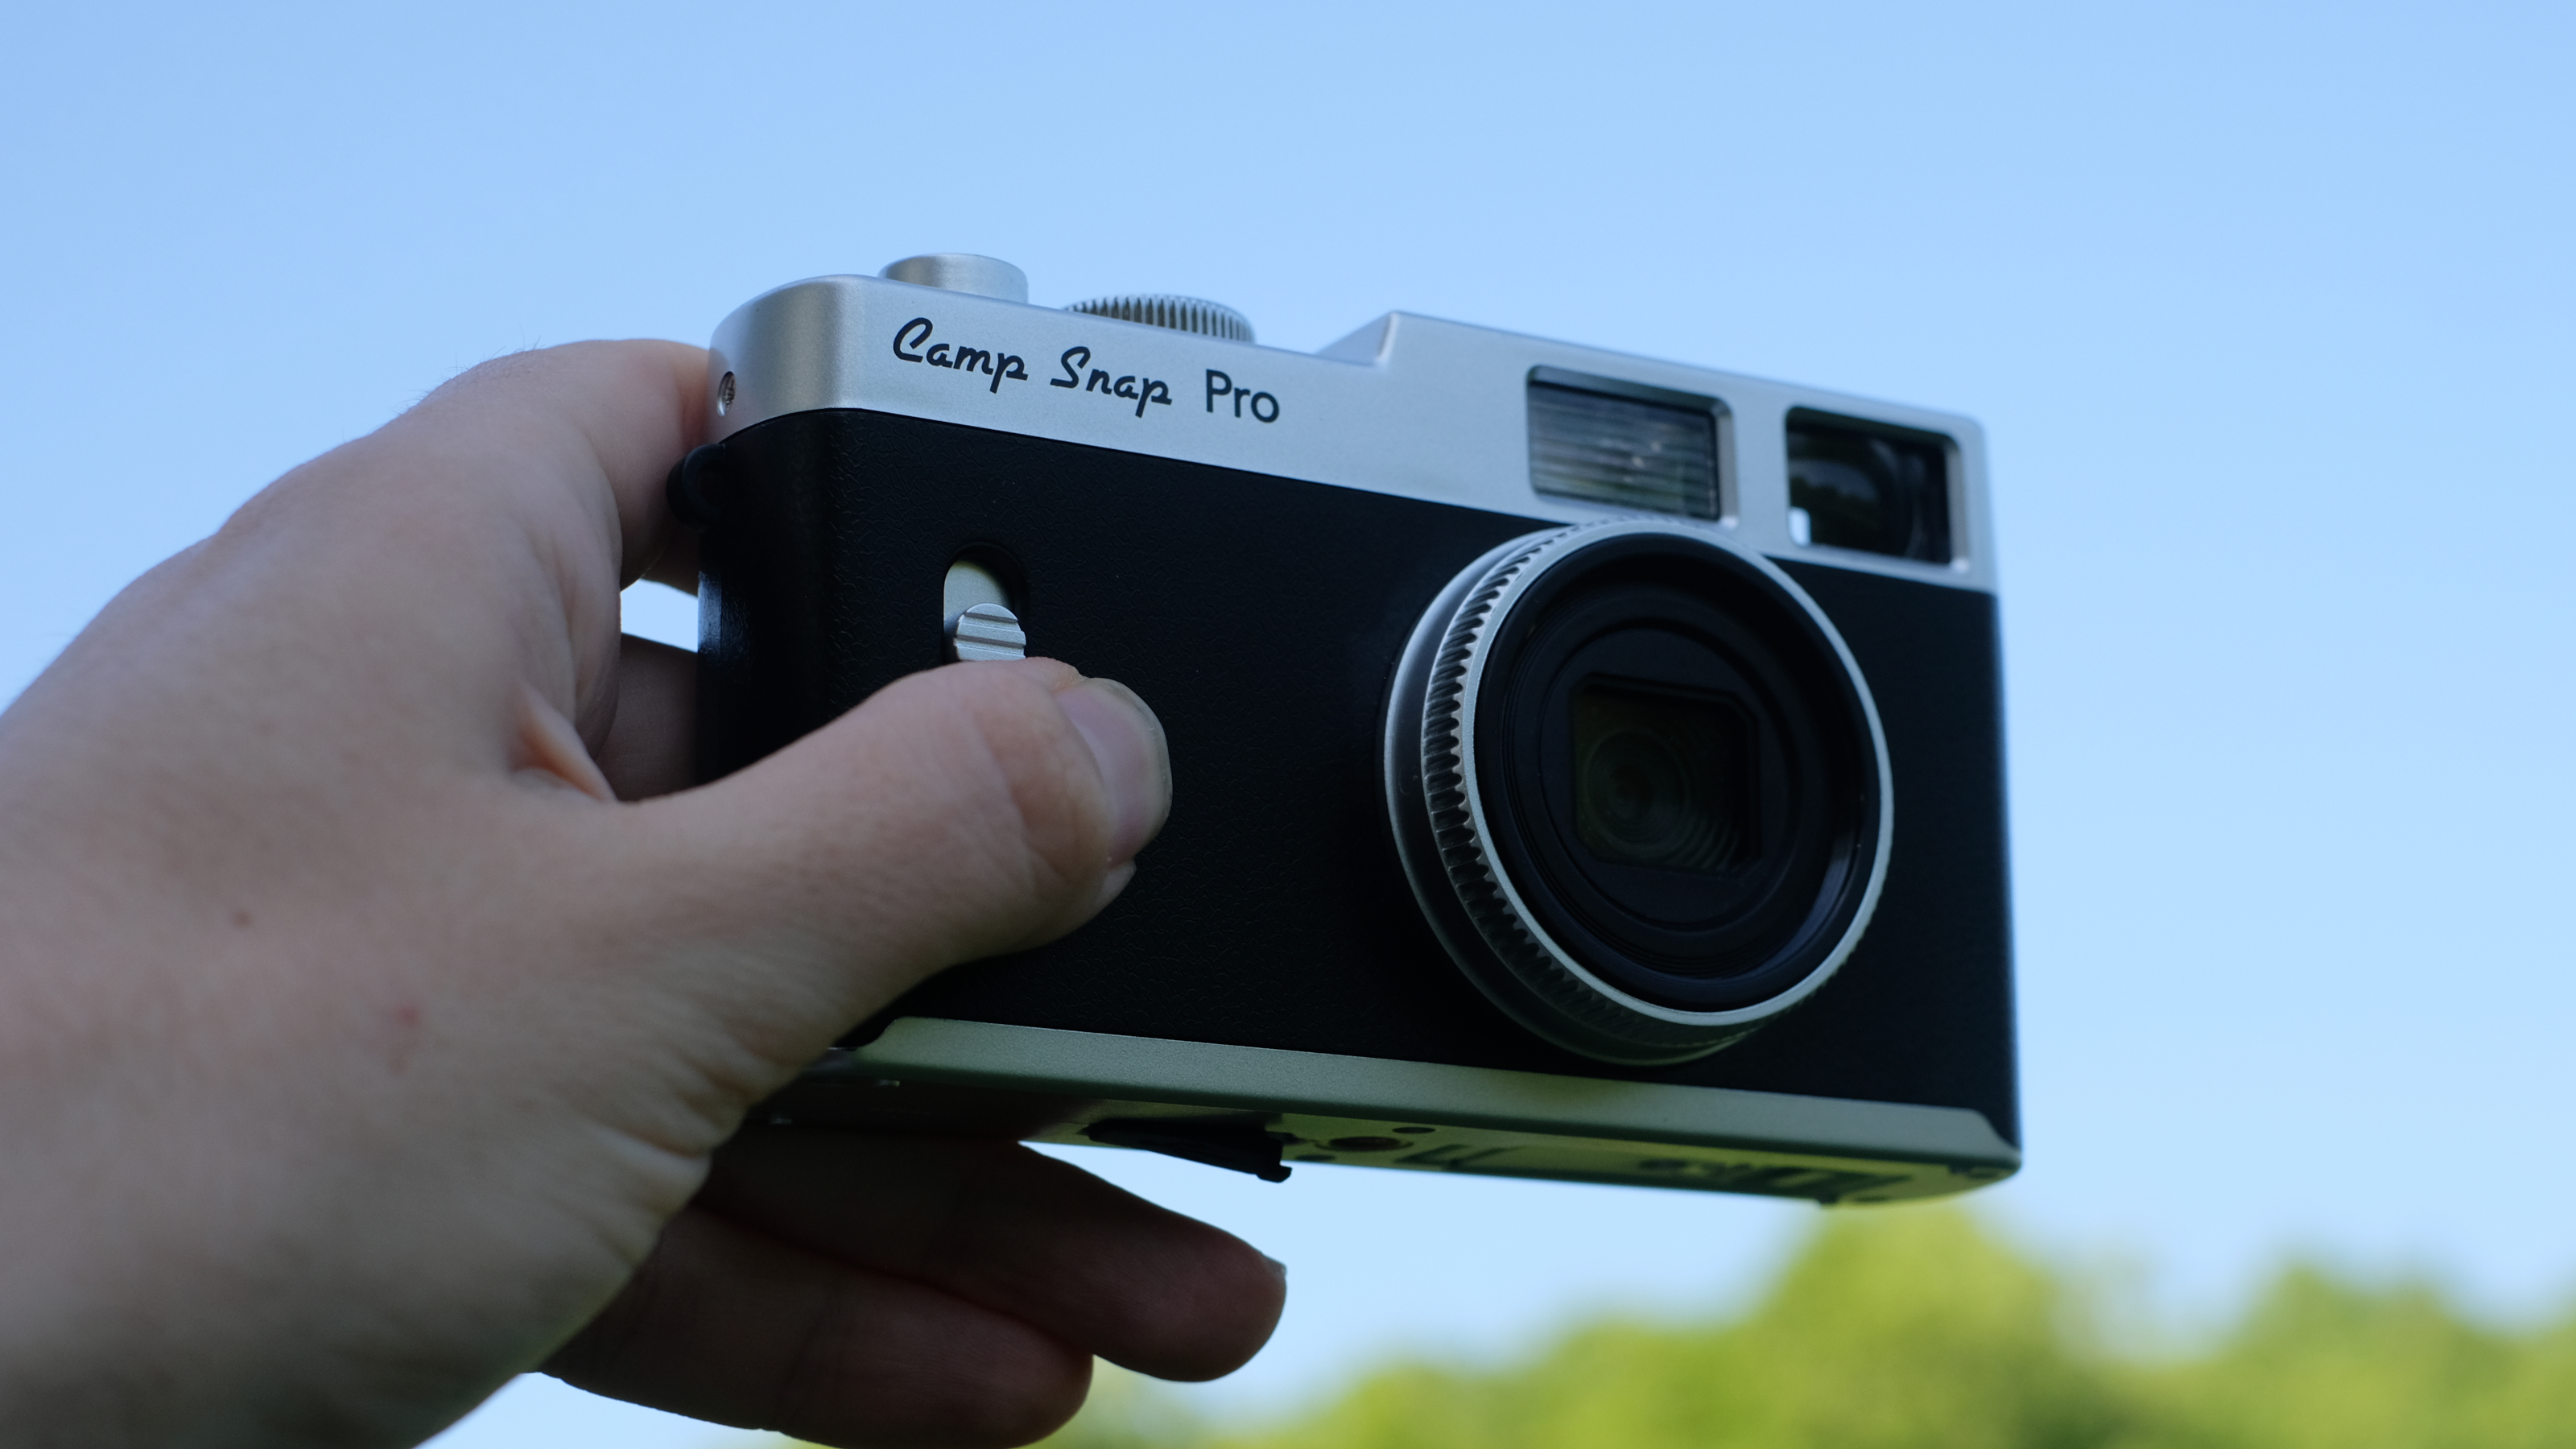
In the top-left corner is the optical viewfinder. It's a tiny thing — a far cry from the big, lovely viewfinder on the RewindPix — and the fact that it's both above and to the left of the lens means what you see through it bears only a passing resemblance to what your captured image is going to look like.
On the front, beside the viewfinder, there's a flash. One of the common complaints about the original Camp Snap was the rather weak-beer effort of its piddly LED flash, and the manufacturer has compensated in spades by throwing in a powerful Xenon flash. I'll talk more about this in the next section, but for now it's worth noting that a switch on the front allows you to toggle it between 'Off', 'Auto' and 'Forced'.
Also, surprisingly, the lens on the front has a 37mm filter thread, meaning you can attach protective UV filters, NDs, polarisers or special-effects filters if you have them in the corresponding size. I'm going to be honest — I think the crossover between 'Camp Snap buyers' and 'lens-based filter enjoyers' is vanishingly small, and I find it hard to imagine many people using this feature. But I'm not complaining.
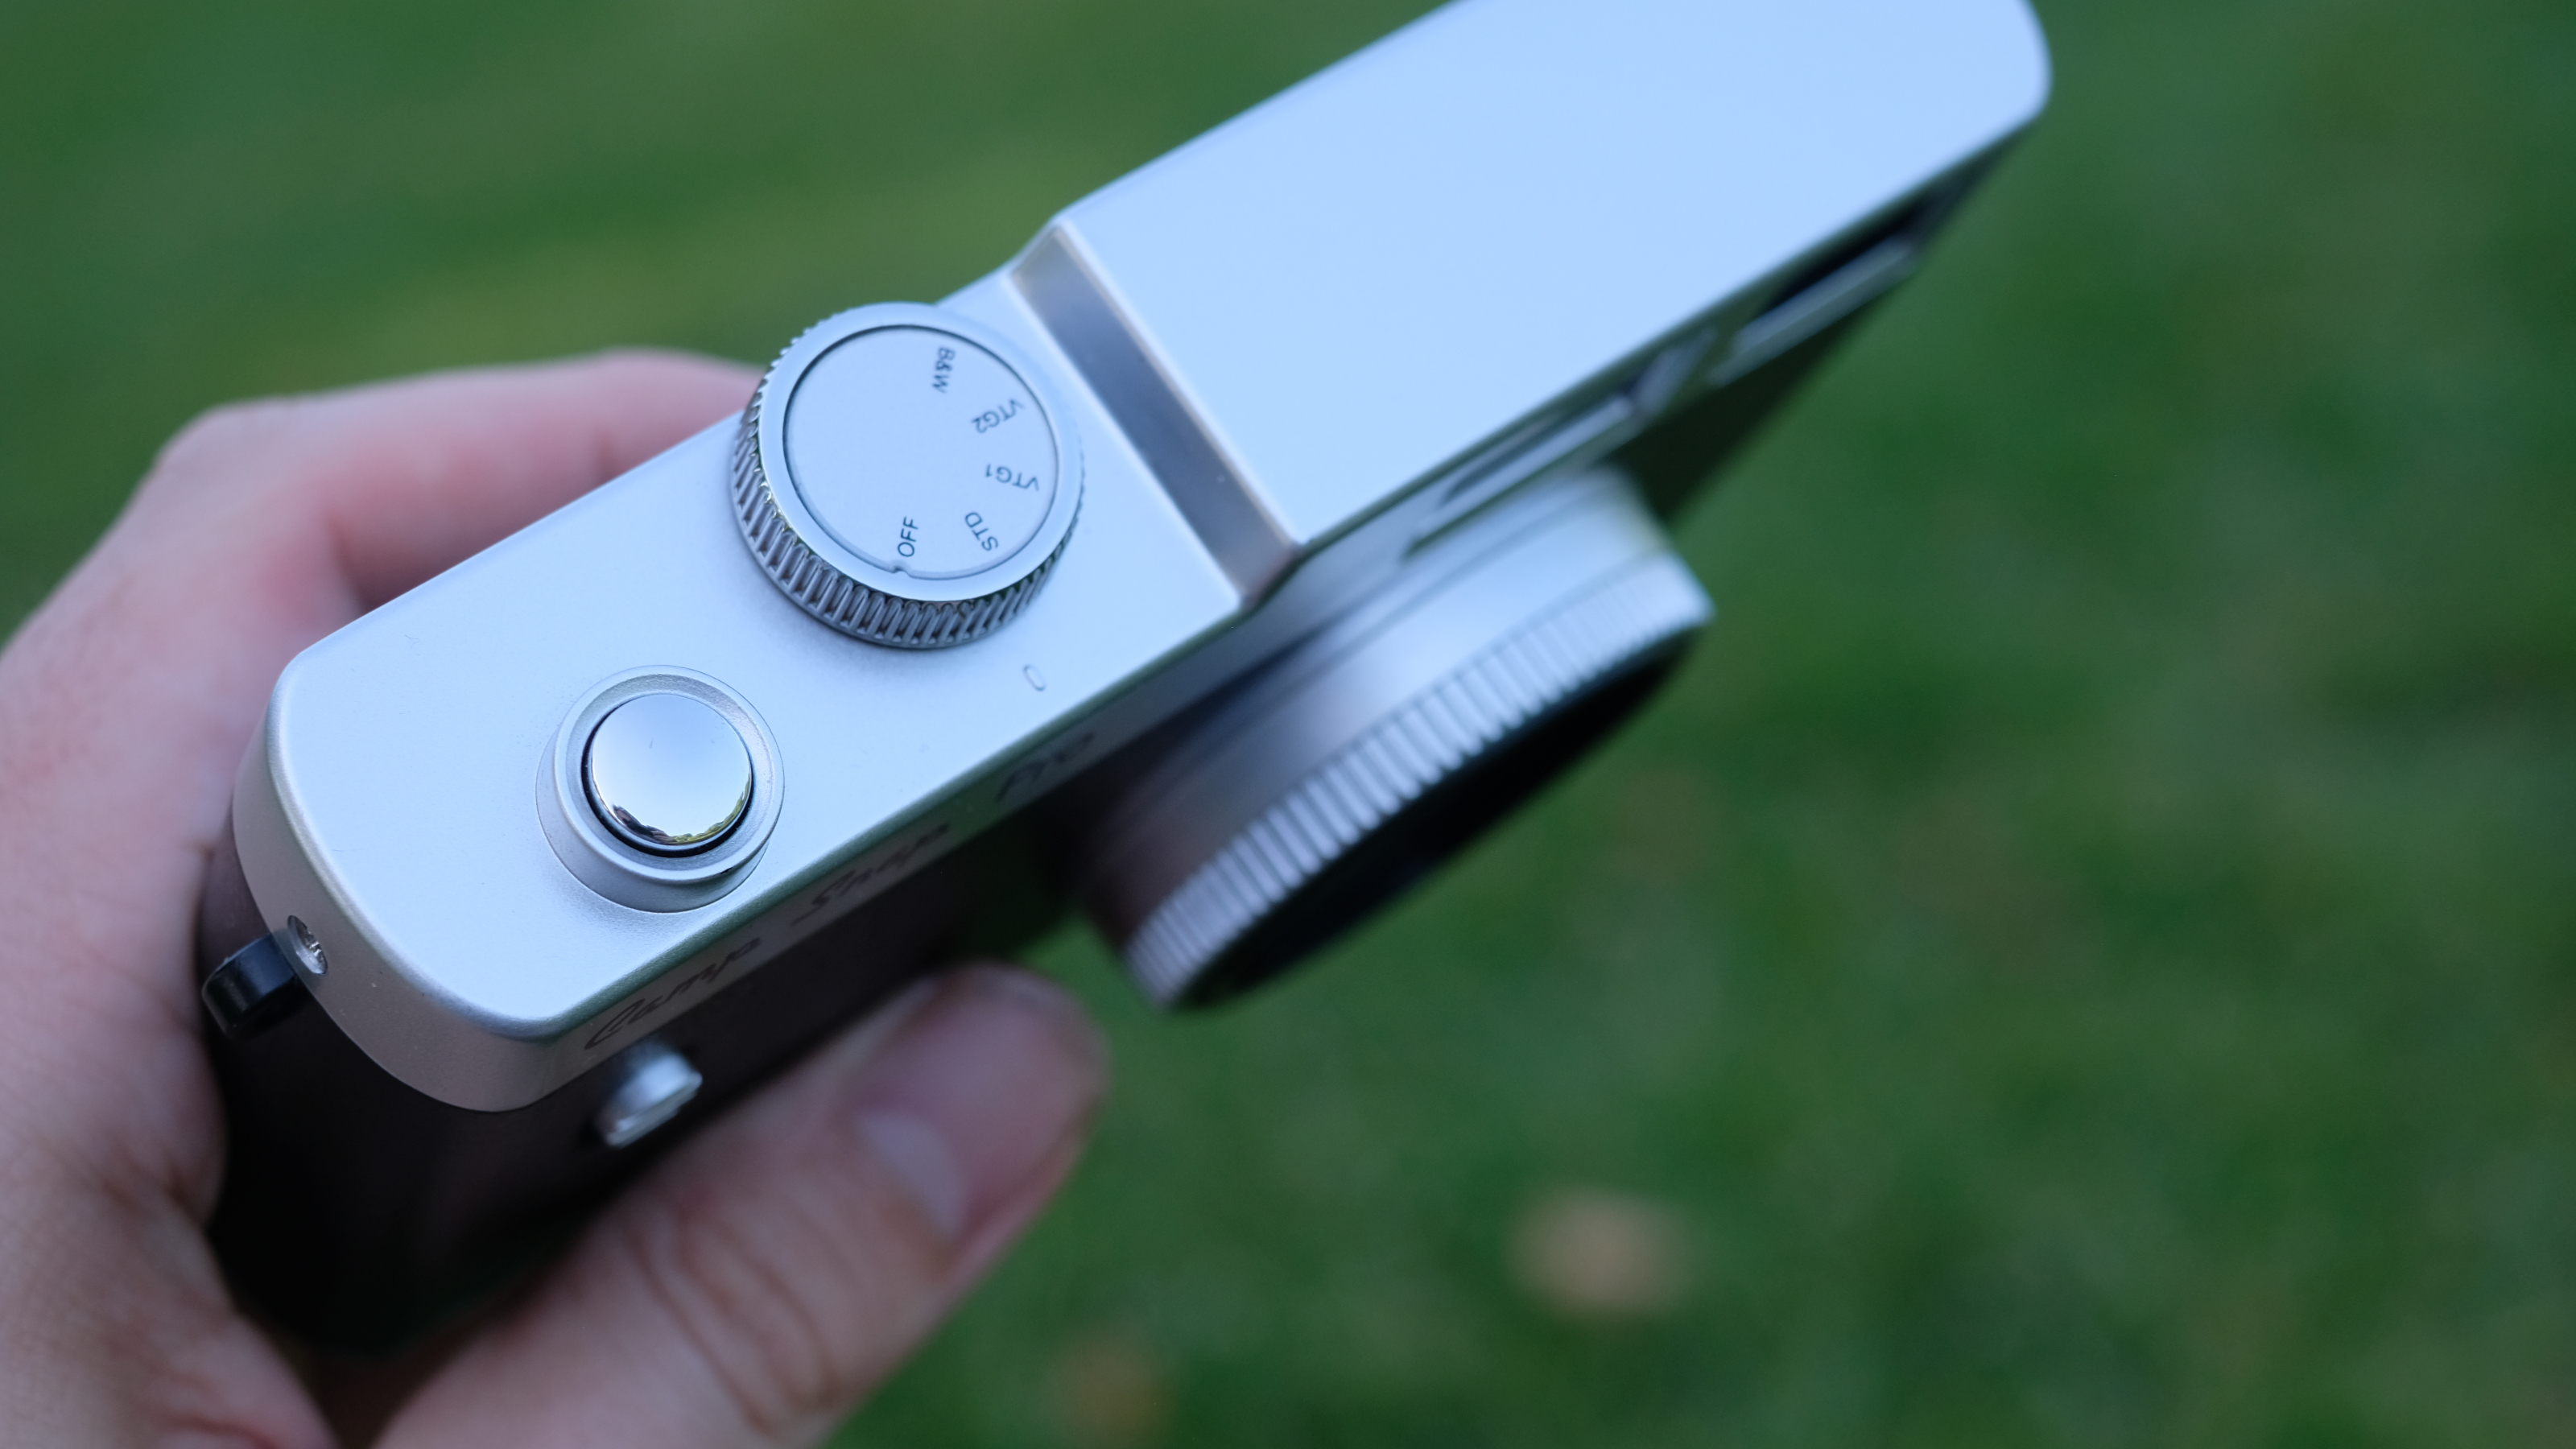
There are lugs for a strap, but no strap is included in the package — no pouch or case either, though Camp Snap did at least find room to pack in a USB-C cable for charging. The port is located on the bottom of the camera, along with a screw thread for mounting on a tripod, and a screwed-on panel that houses the built-in 4GB micro SD card, which you can unscrew to access directly if needed.
Camp Snap CS-Pro: performance
- Images are bright and punchy, but fine detail is lacking, and it can't handle high lighting contrast
- While fixed-focus lens makes operation easy, it can be creatively limiting, and there's no close-up ability
- Xenon flash is ludicrously overpowered — you can thankfully stick with the sensible 'Auto' setting
I'll say it straight out — I find my images from the CS-Pro to be very likeable. Are they high-quality? Absolutely not. They do not stand up to close scrutiny on a pixel level, and I would not make prints from them. But in good light, the CS-Pro produces images with bright, punchy colors — vivid blue skies, pleasant greens, and rich, golden sun.
The wide lens allows you to reliably fit plenty into the frame. Running a few shots helps you get used to finding the sweet spot of distance from your subject — being too close gets you a blurry mess. As a rule, if you're trying to capture an image of a specific object, animal or person, you want at least a meter's distance. Close-ups are a no-no, and you're not going to get creative effects like shallow depth of field.
The extra megapixels on the sensor has definitely improved matters compared to the original Camp Snap, with landscape-style images in particular looking much better thanks to greater detail for delineating distant subjects. However, the small size of the sensor means that dynamic range is still an Achilles' heel. Contrasty light situations are pretty much a no-go – you're all but guaranteed to get blown-out white highlights, or murky impenetrable shadows, or if you're really up against it, both. There's just a physical limit to the kinds of shooting situations the CS-Pro can handle.
However, one thing that can help matters here is the filter dial. Giving your images a retro glow with VTG-1 or VTG-2 can be a handy way to make a blown-out highlight look like an artistic choice, rather than a technological limitation. Indeed, I am generally a fan of the filter dial, even if I do think offering just three options other than the Standard look is rather tight-fisted.


VTG-1 is lovely and warm — great for sunny evenings. I can see it getting a lot of use in pub gardens and the like. VTG-2 is bright and saturated, giving your images just a bit more zing; like Kodak Ultramax, I'd take it to a day at the beach. And the B&W filter delivers a nice level of tonal contrast for moody monochrome, ideal for days when the weather is overcast and uninspiring. Dull light makes Camp Snap images very dull indeed, and the B&W filter is an excellent way to get around this.
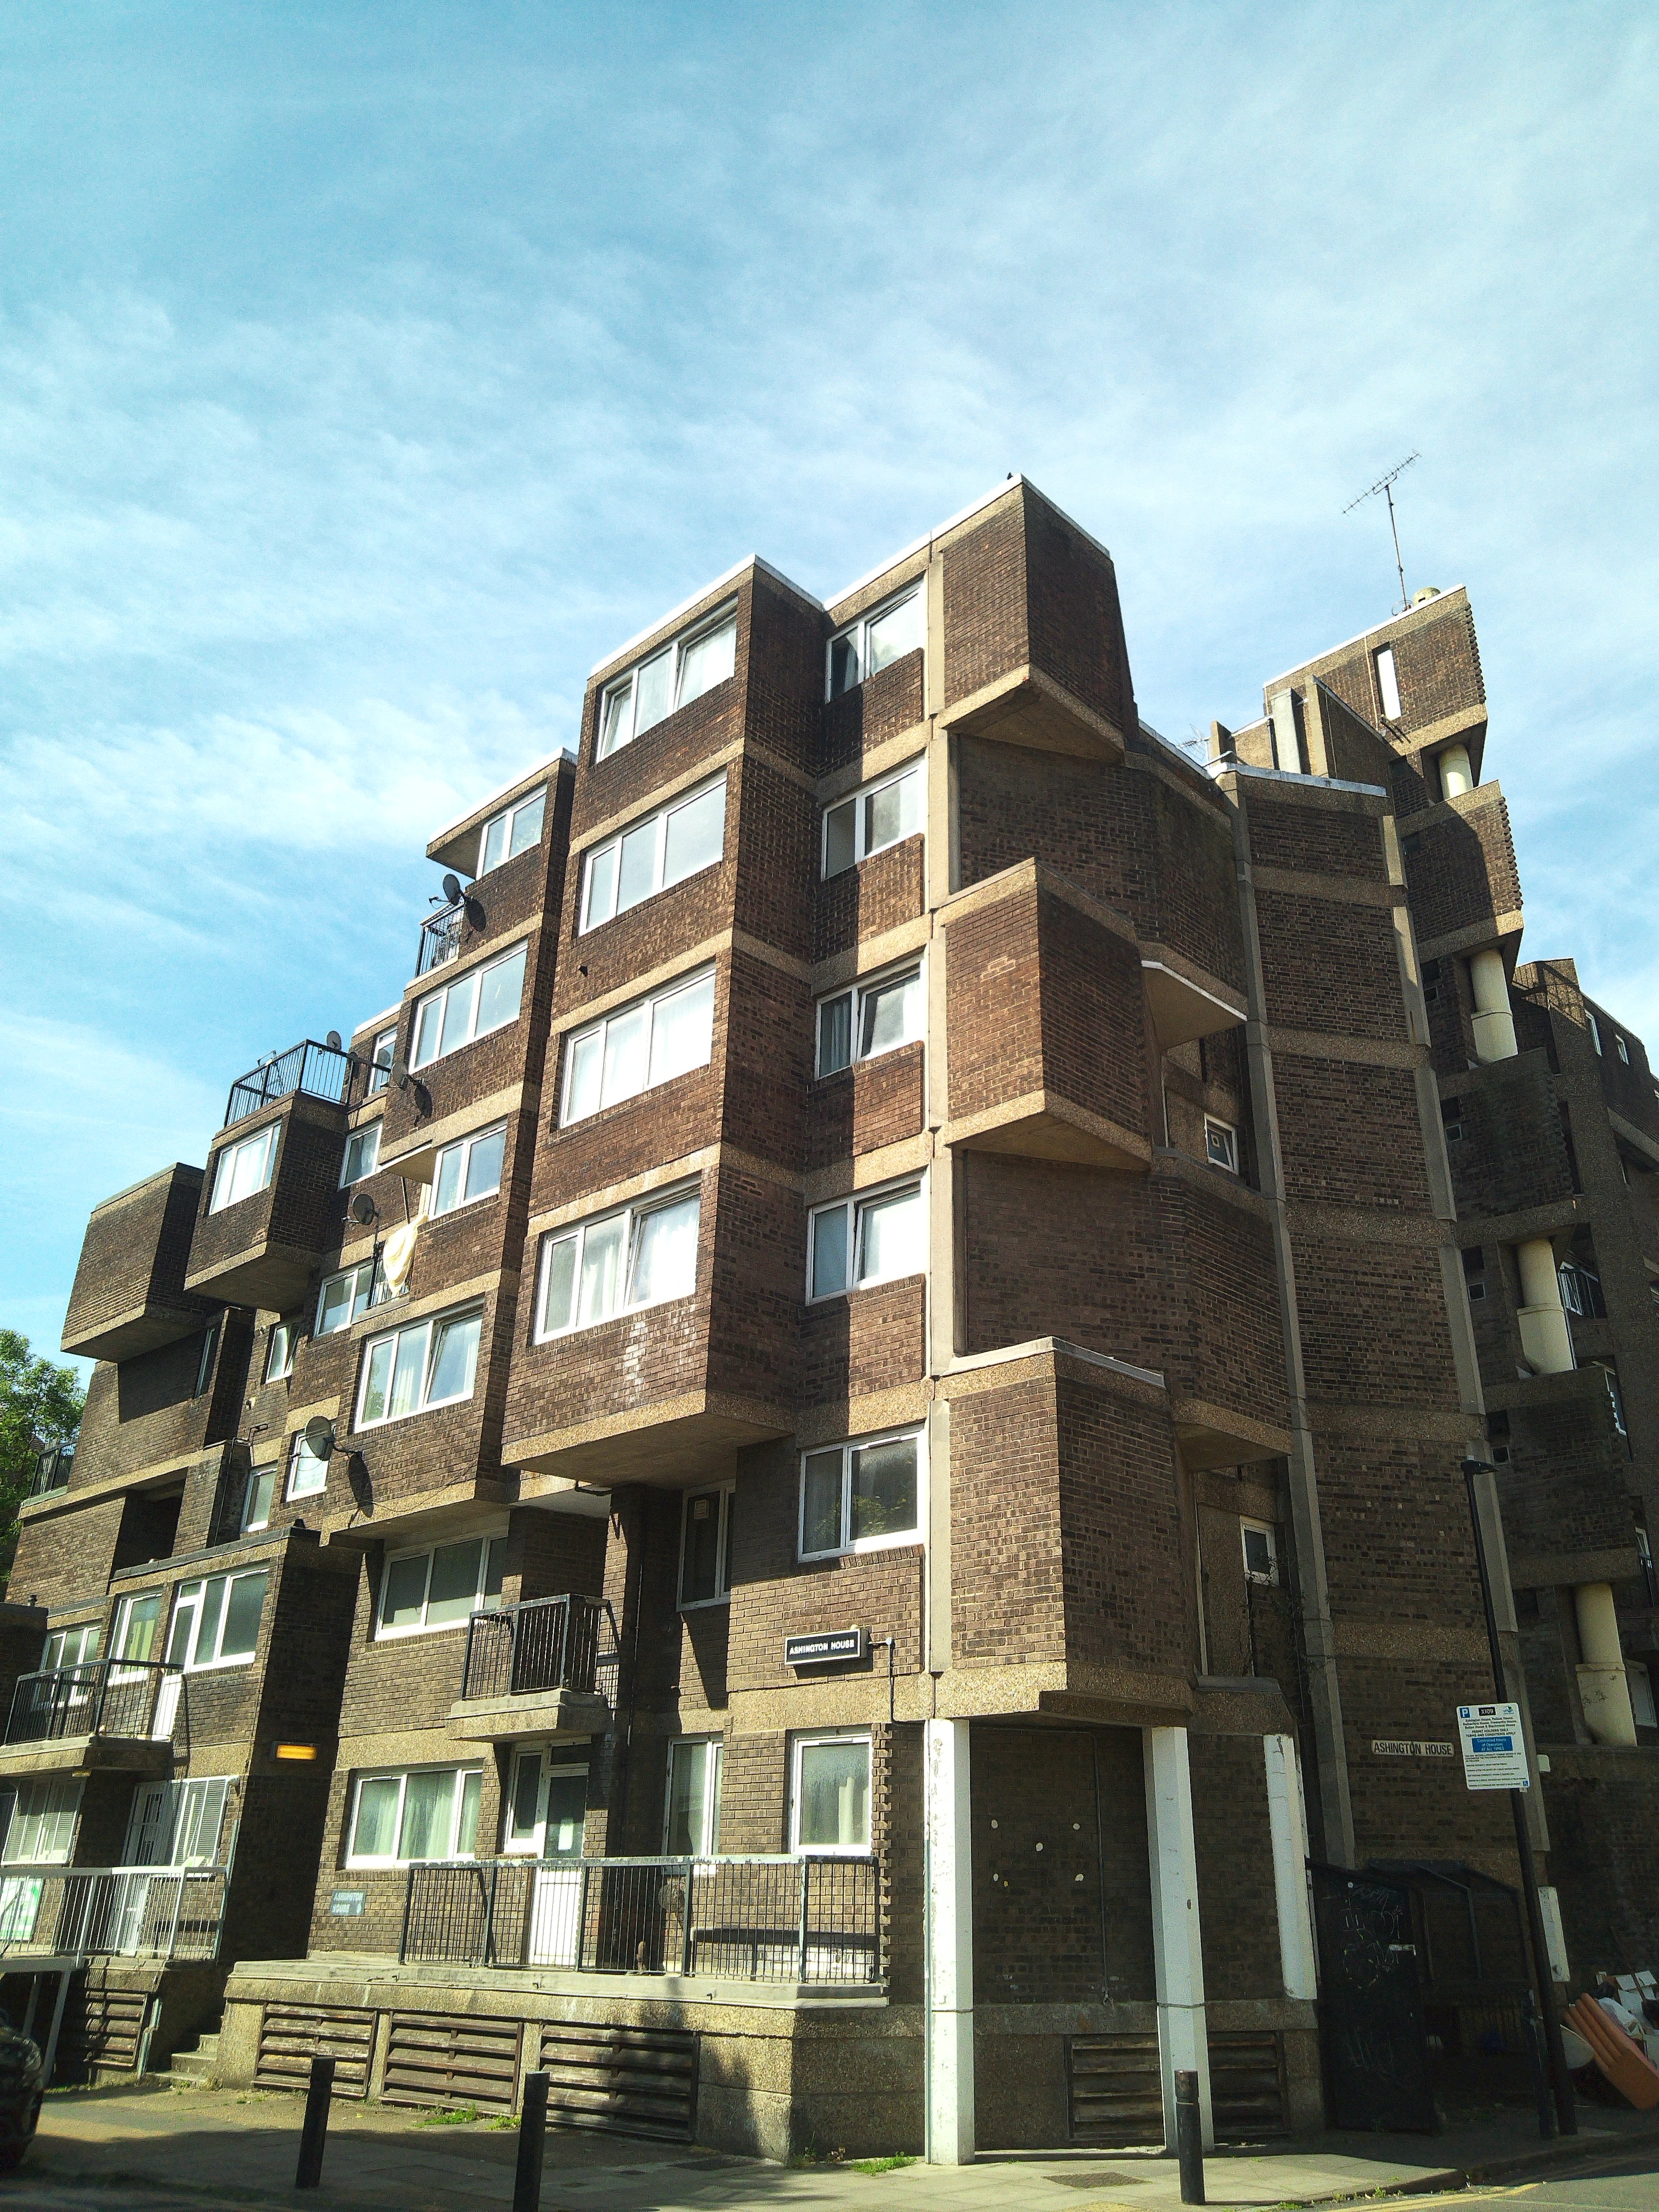


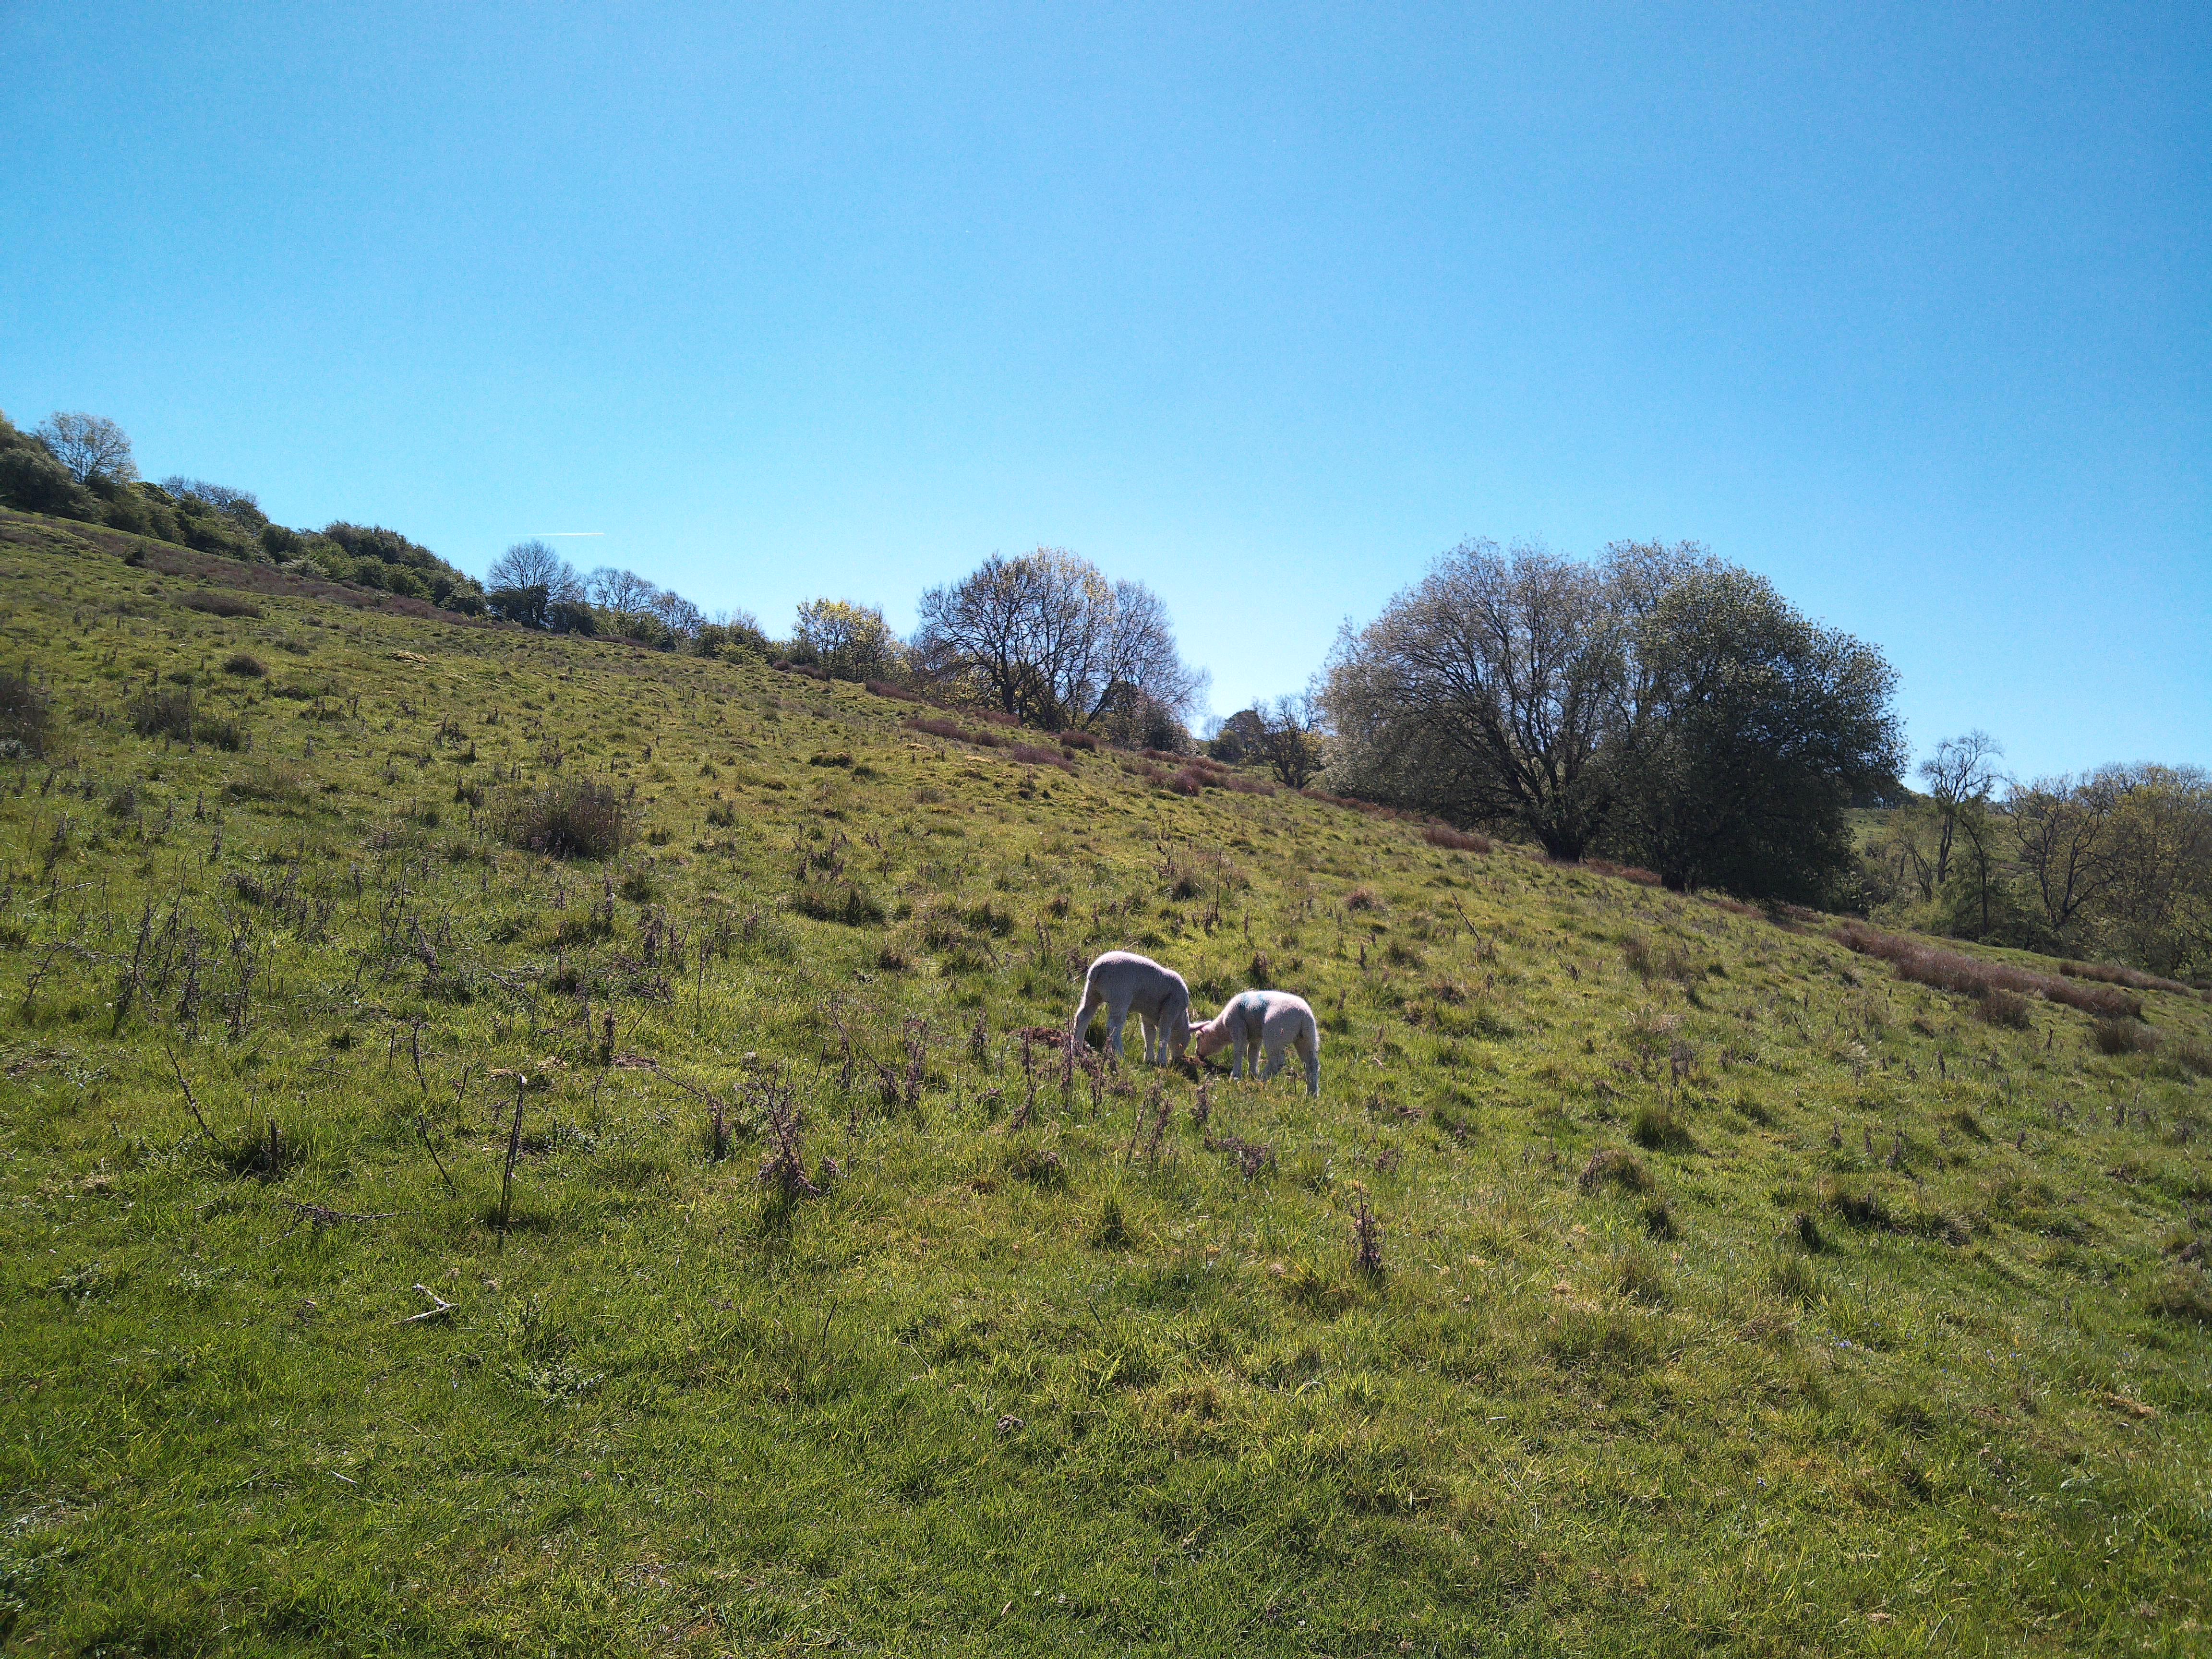


As mentioned, a few more filters would have been nice by default — though there is a library of community-made filters to explore, as well as the option to create your own, so that does have the potential to extend the camera's lease on life. Camp Snap also sells its own downloadable add-on packs of filters, which goes some way to explain why there are so few to begin with.
I was excited by the idea of the Xenon flash, but having tested it out, I feel that a hammer is being used to crack a nut here. It is an incredibly powerful unit, much more powerful than the CS-Pro needs, frankly, and every time I have set it to the full-power 'Forced' mode, I have ended up with a blown-out, overexposed mess of an image. Thankfully, the 'Auto' mode does much better, providing balanced exposures that illuminate the subject well.


It also merits mentioning that the shooting experience of the CS-Pro is nice and brisk. One of the common complaints about the original Camp Snap was that it had some truly deleterious shutter lag. This has been corrected for the CS-Pro thanks to an upgraded processor. While there's no burst mode per se, I was able to fire off successive shots at a rate of about 1 per second — the only feature that fell behind, amusingly, was the artificial free-midi-download shutter-release noise. And I can live with that.
Should I buy the Camp Snap CS-Pro?

Buy it if...
You want a break from your screens.
Having no LCD for monitoring or playing back your shots keeps you living in the moment — an analog-like experience without the difficulty and expense.
You want an affordable, lightweight compact camera
Incredibly light and commendably cheap, the CS-Pro is a camera you can take everywhere without a worry.
The first Camp Snap was just too low-quality for you.
Operability improvements and a resolution upgrade make this a markedly better shooting experience.
Don't buy it if...
You want creative versatility
You can't change your settings, you can't focus the lens — despite the 'Pro' moniker, this is a point-and-shoot.
You want a tough camera that can handle a knock
It's not weatherproof at all, and I wouldn't rate that all-plastic body to stand up to much punishment.
How I tested the Camp Snap CS-Pro
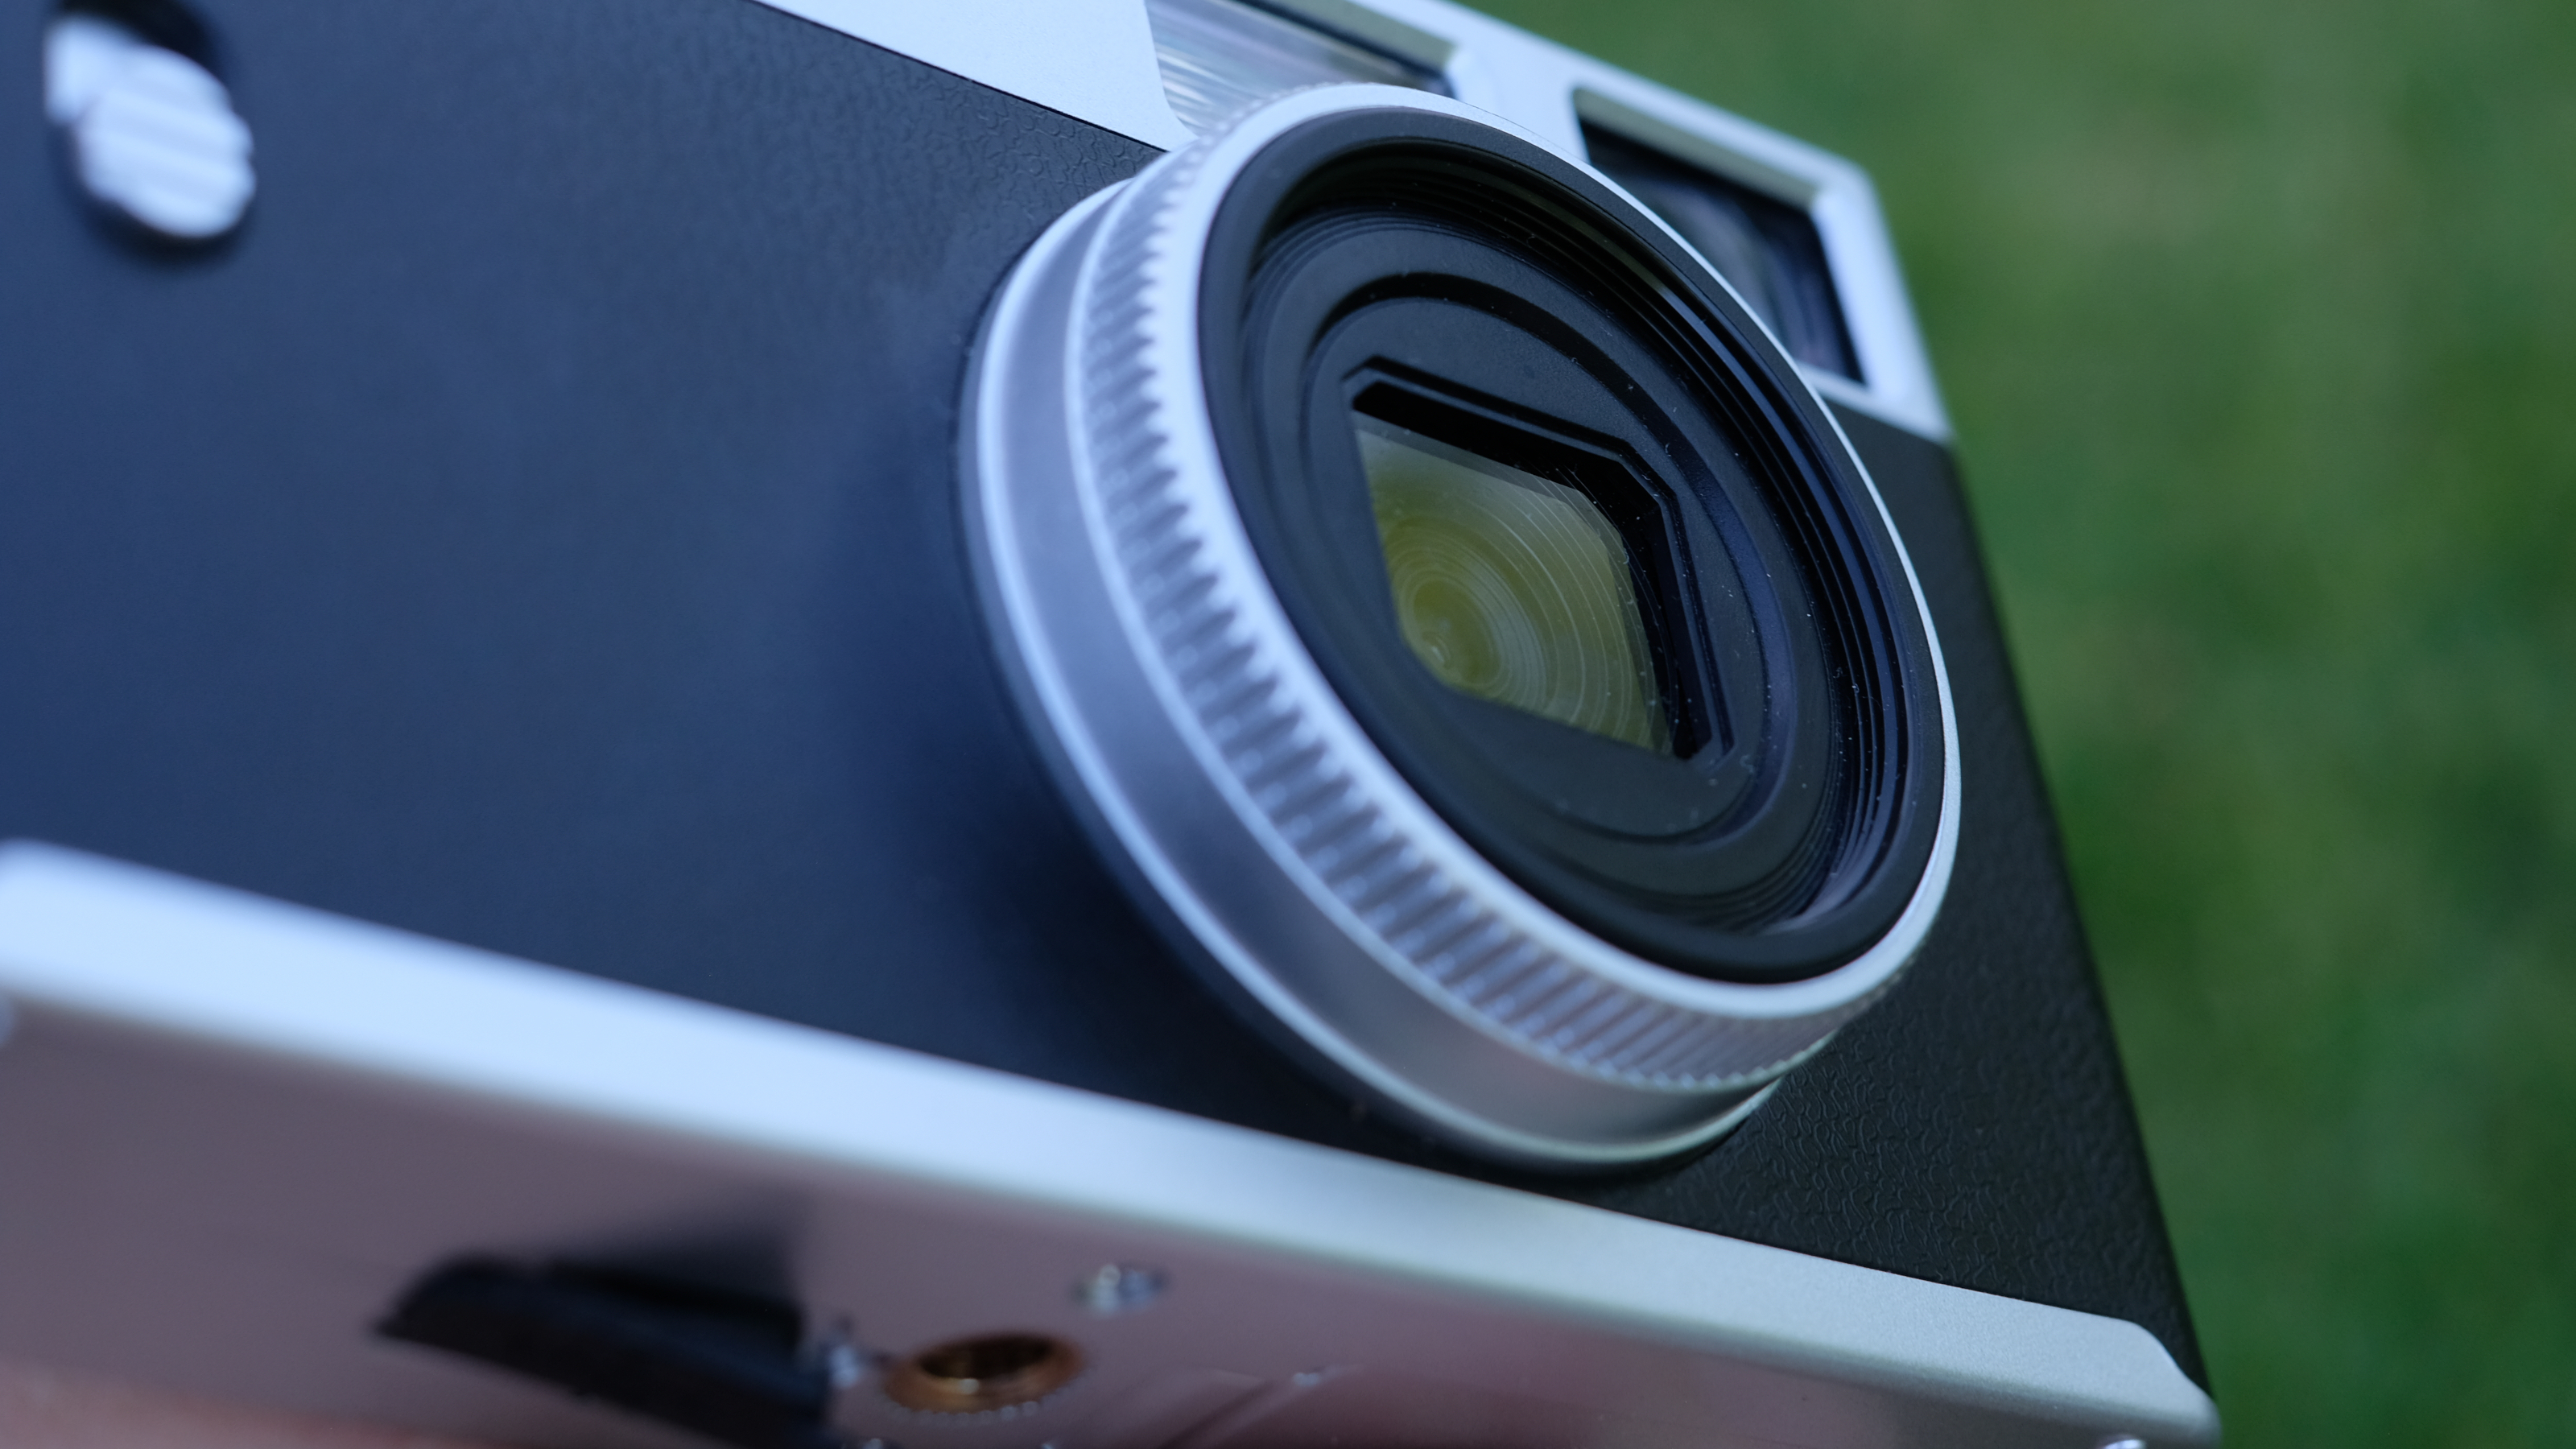
- I received a loan unit of the Camp Snap CS-Pro for testing
- I have taken it out on a number of photo excursions in London and on a short rural mini-break
- I’ve shot in variable light conditions throughout April and May, with a mixture of bright and overcast weather
So far, I've used the Camp Snap CS-Pro to capture more than 100 images, over a period of several weeks, during which time I took it on several days out in London as well as on a countryside mini-break in Gloucestershire, UK. The weather was quite variable during my time with the camera, though predominantly bright and sunny. I used the CS-Pro indoors and outdoors, and aimed to capture a broad range of subjects and situations.
First reviewed May 2026