
If you are interested please click on this link and make an Offer
Thank you!
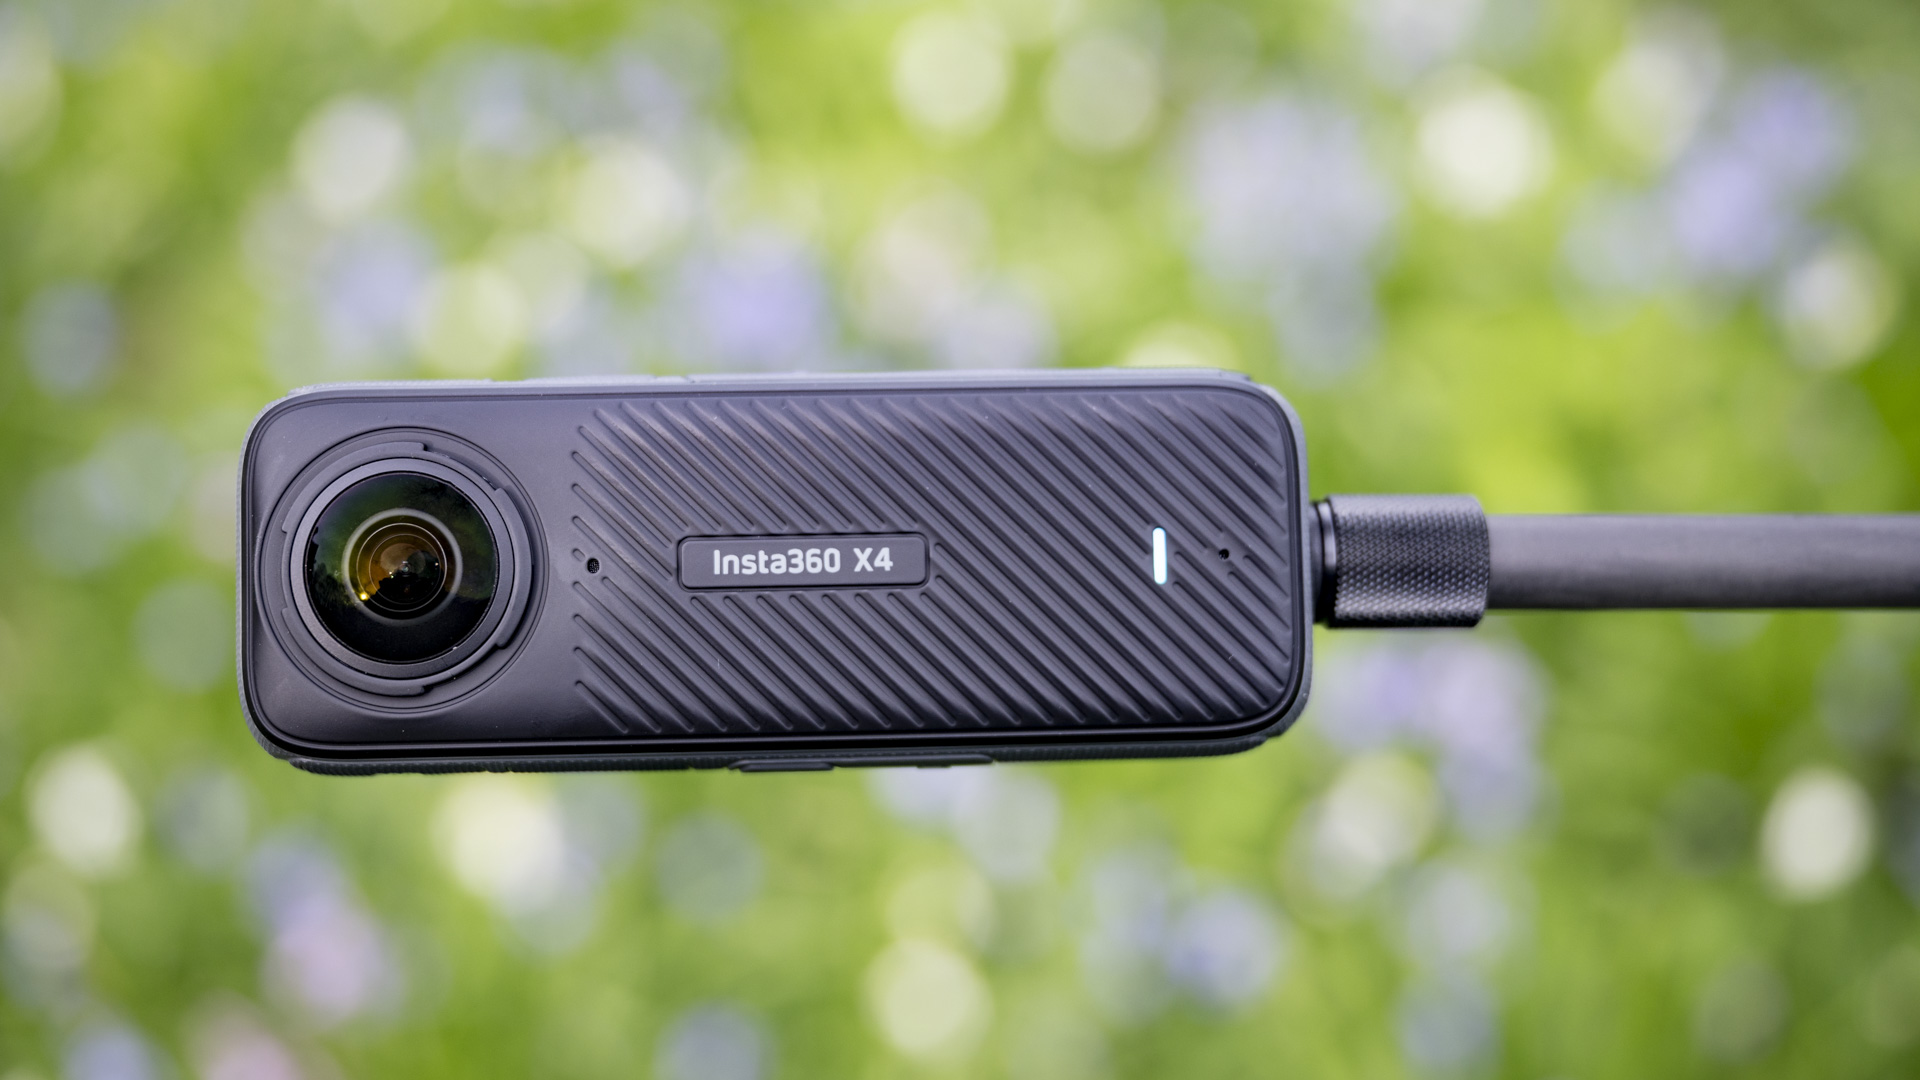
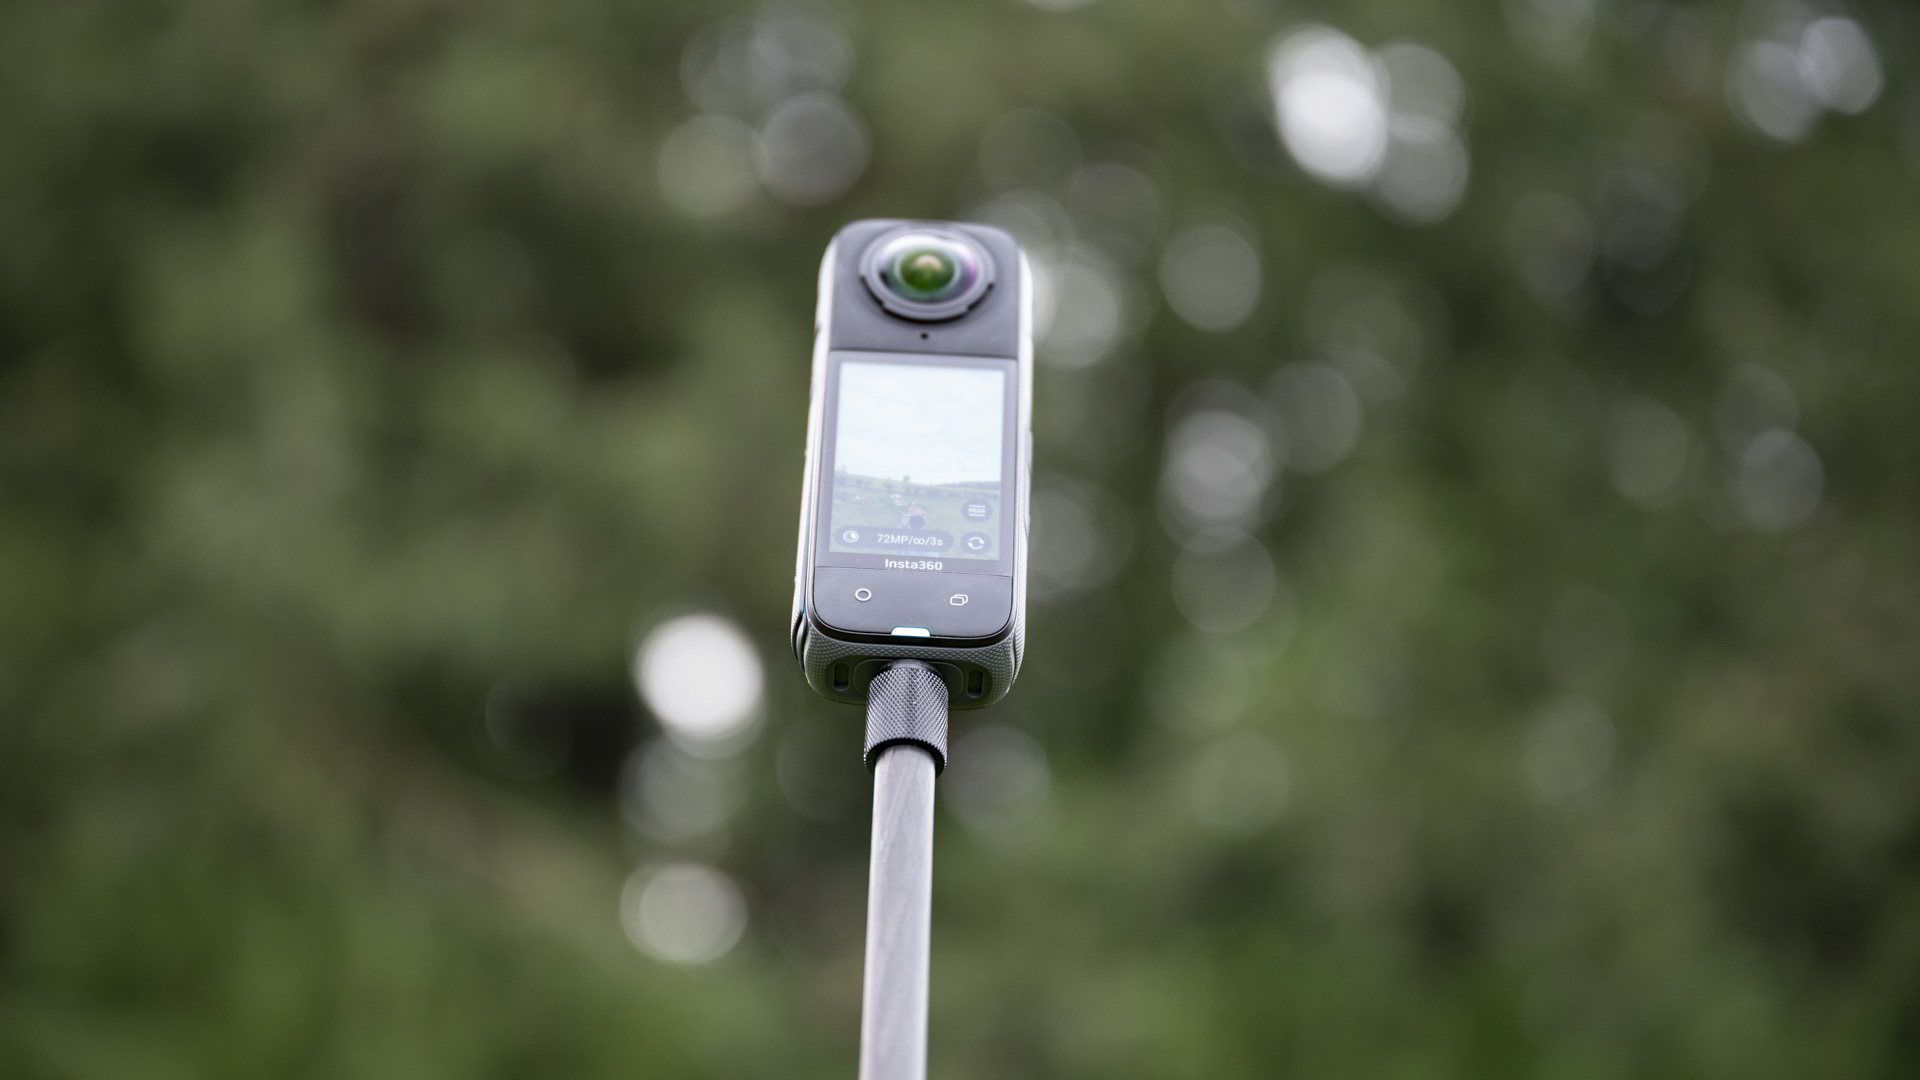
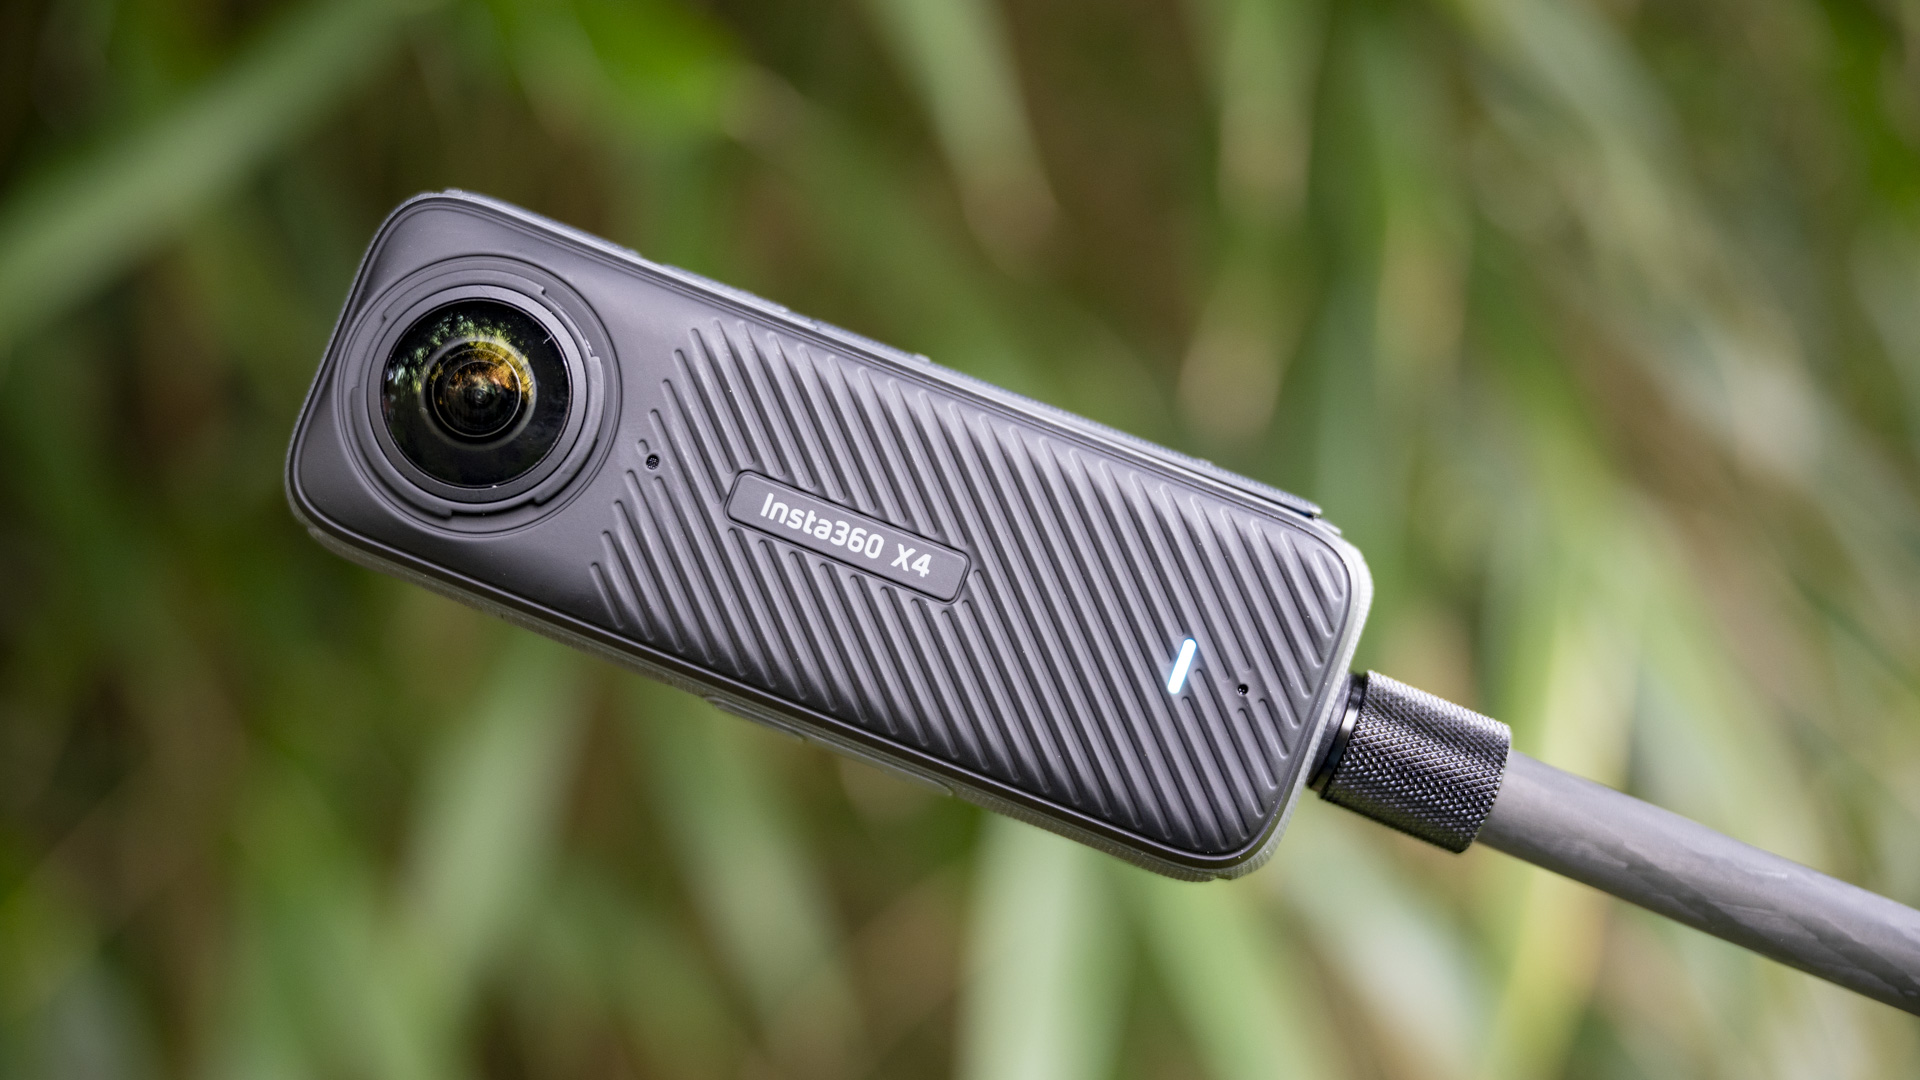
The best handheld 360-degree camera just got better with the latest iteration, the Insta360 X4. It builds on the X3, most notably bumping up the video resolution from 5.7K to 8K – and when we're talking about such a wide field of view from twin ultra-wide lenses, resolution matters.
Sensor: Dual 72MP 1/2-inch sensors
Video: 8K 360-degree, 5.7K up to 60fps, 4K up to 100fps, single lens up to 4K 60fps
LCD: 2.5-inch touchscreen
Video modes: Active HDR, Timelapse, Timeshift, Bullet Time
Connectivity: Wi-Fi, Bluetooth 5.0, USB-C
Memory card: MicroSD UHS-I
Size: 46 x 123.6 x 37.6mm
Weight: 203g
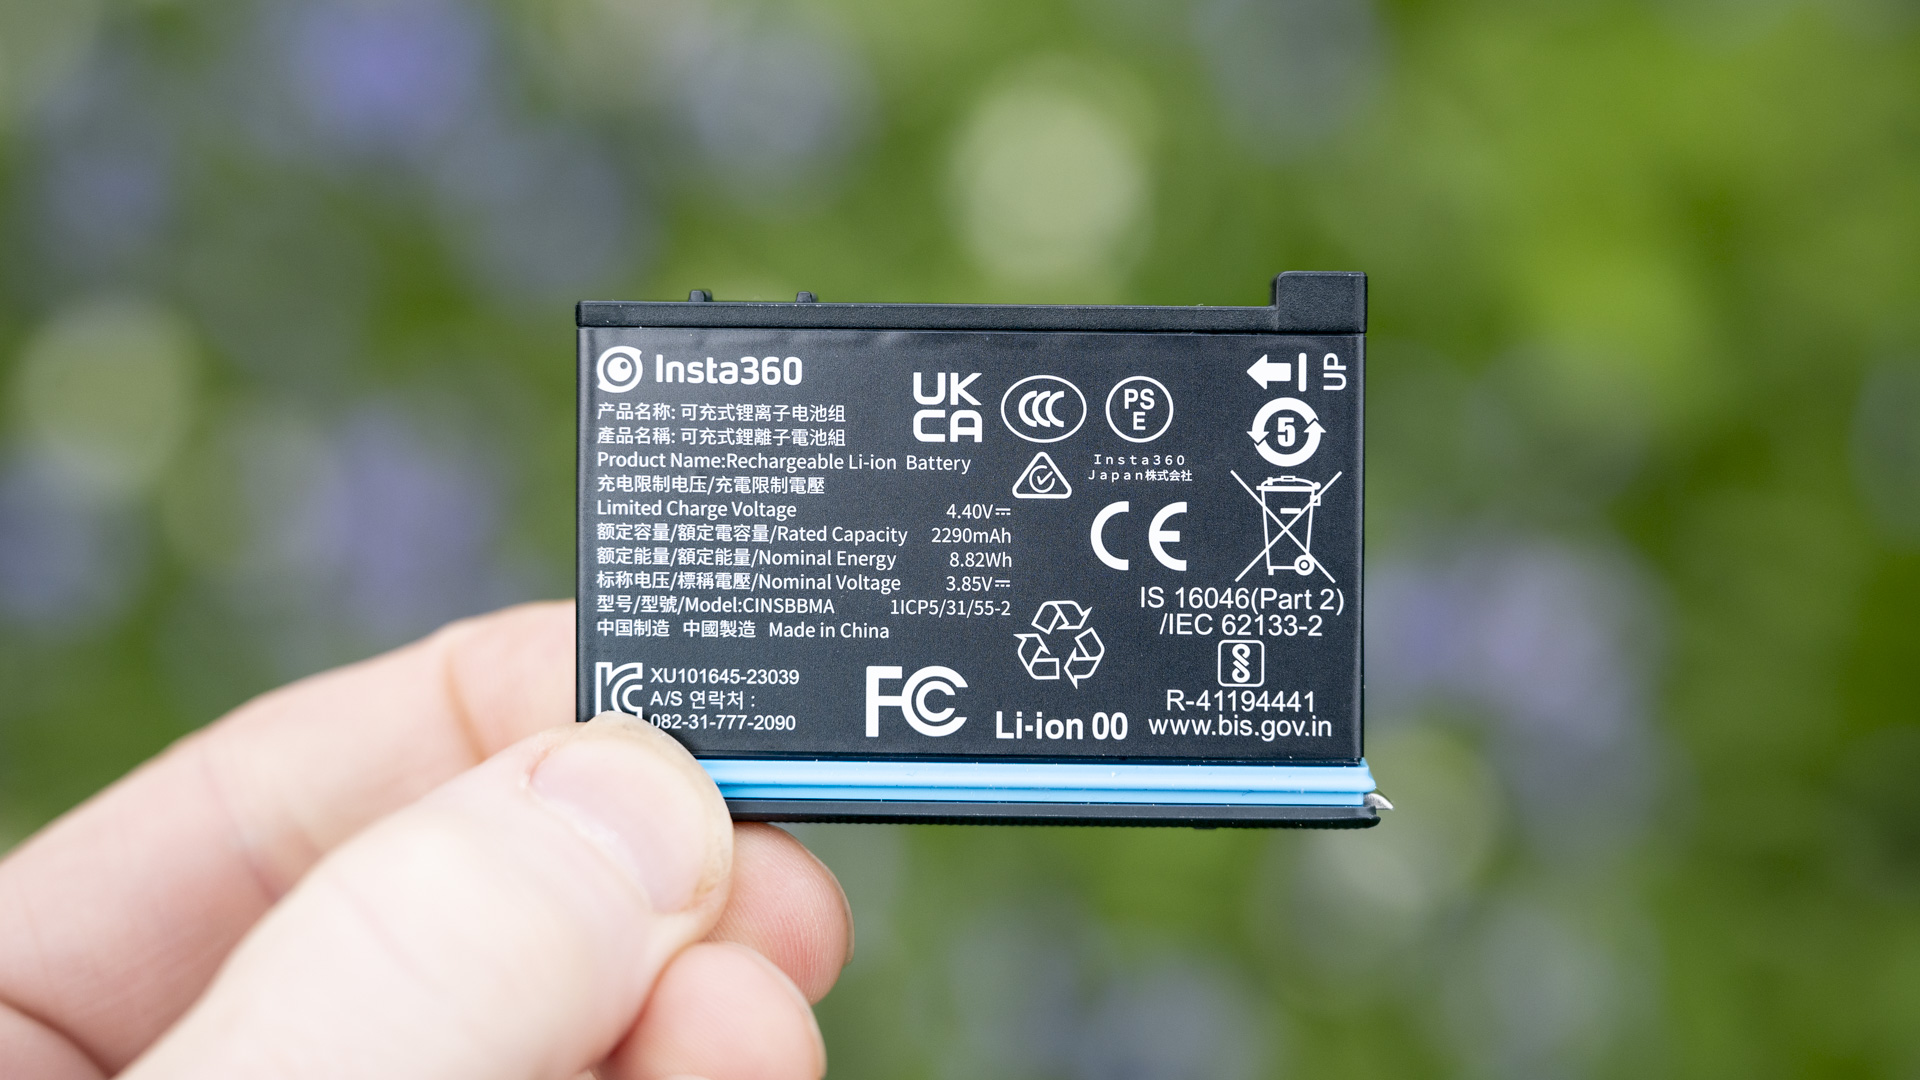
Battery: 2,290mAh
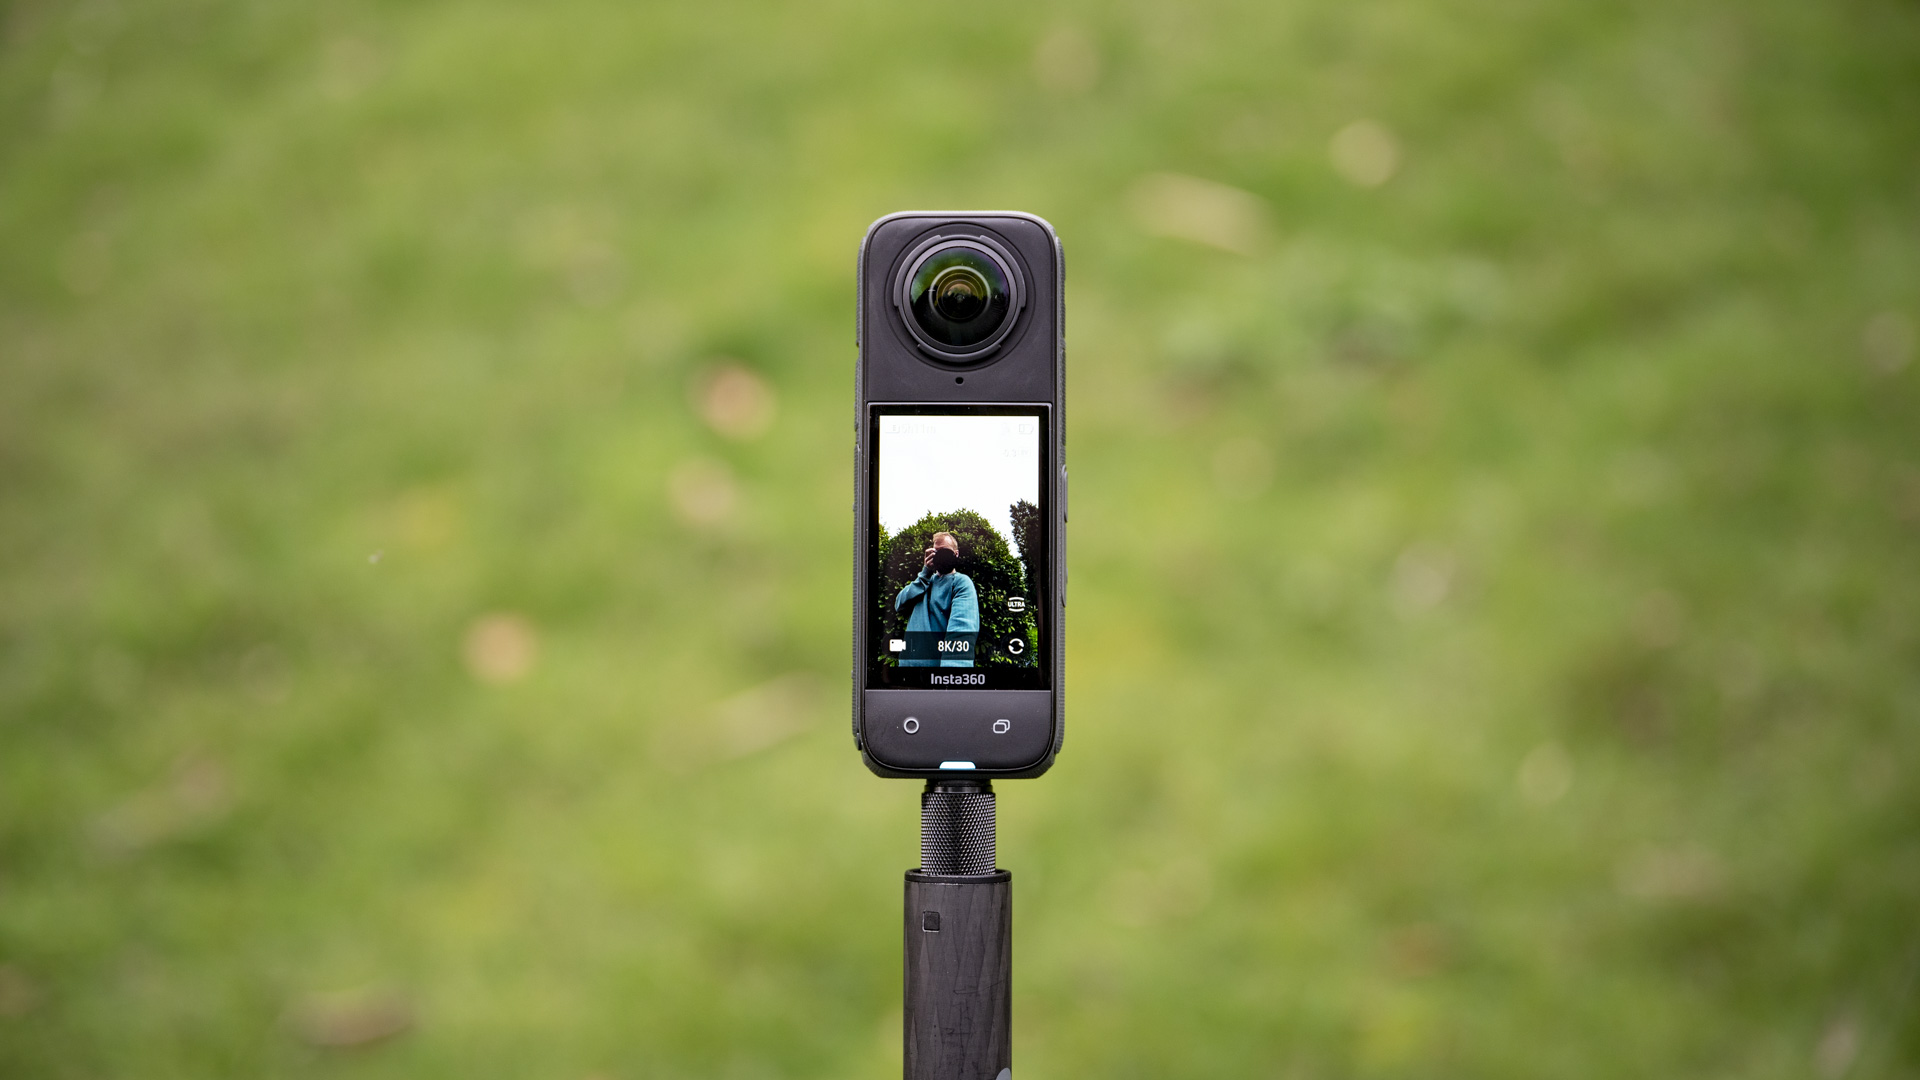
8K video up to 30fps trickles down improved capabilities at lower resolutions, too, with 5.7K video up to 60fps and 4K video up to 100fps. The single-lens mode also gets a bump in frame rate, with 4K up to 60fps.
Video can be shot in a standard mode with choice of standard, vivid and flat color profiles, plus there's a HDR video option for increasing perceivable detail in bright highlights and dark shadows – something the X4's small 1/2-inch and high-resolution sensor otherwise struggles with.
With its improved capabilities, the X4 feels like a more versatile pocket camera. Like the X3 it offers neat video modes you don't get on the best camera phones, like a 360-degree field of view that enables a shoot-first reframe later way of shooting, and creative effects such as Bullet Time and hyperlapse, but it now also feels like a highly capable action camera, vlogging tool, and – particularly for motorcyclists – dash cam.
Video modes are supported by superb image stabilization that smooths out the shakes in your action footage, plus 360-degree horizon lock, which levels your edited footage when the camera rolls with the action.
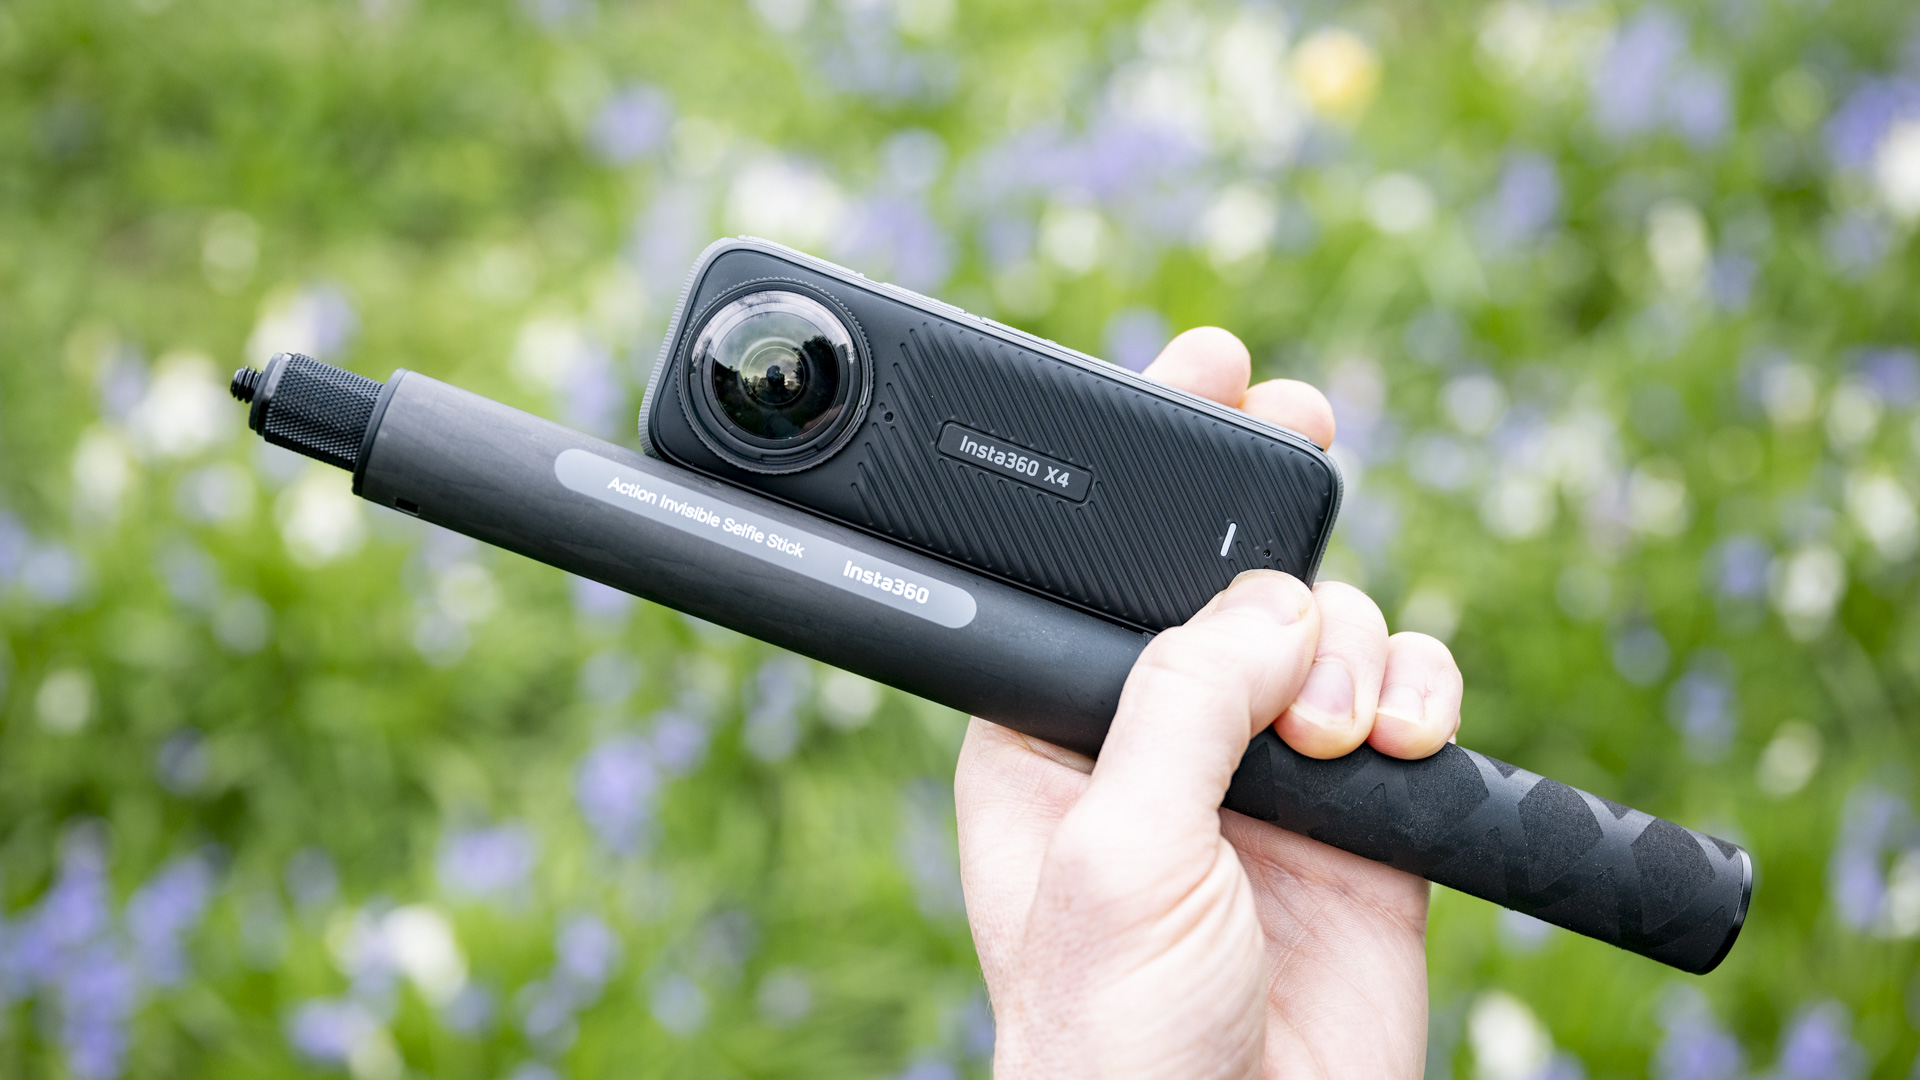
Insta360's clever ‘invisible’ selfie stick allows you to film everything around you from a third-person view, whether it's mounted to bike handlebars or in the hand, while the extra-long selfie stick can give you a drone-like perspective. This is also a fully waterproof camera up to 33ft / 10m, so most experiences are covered.
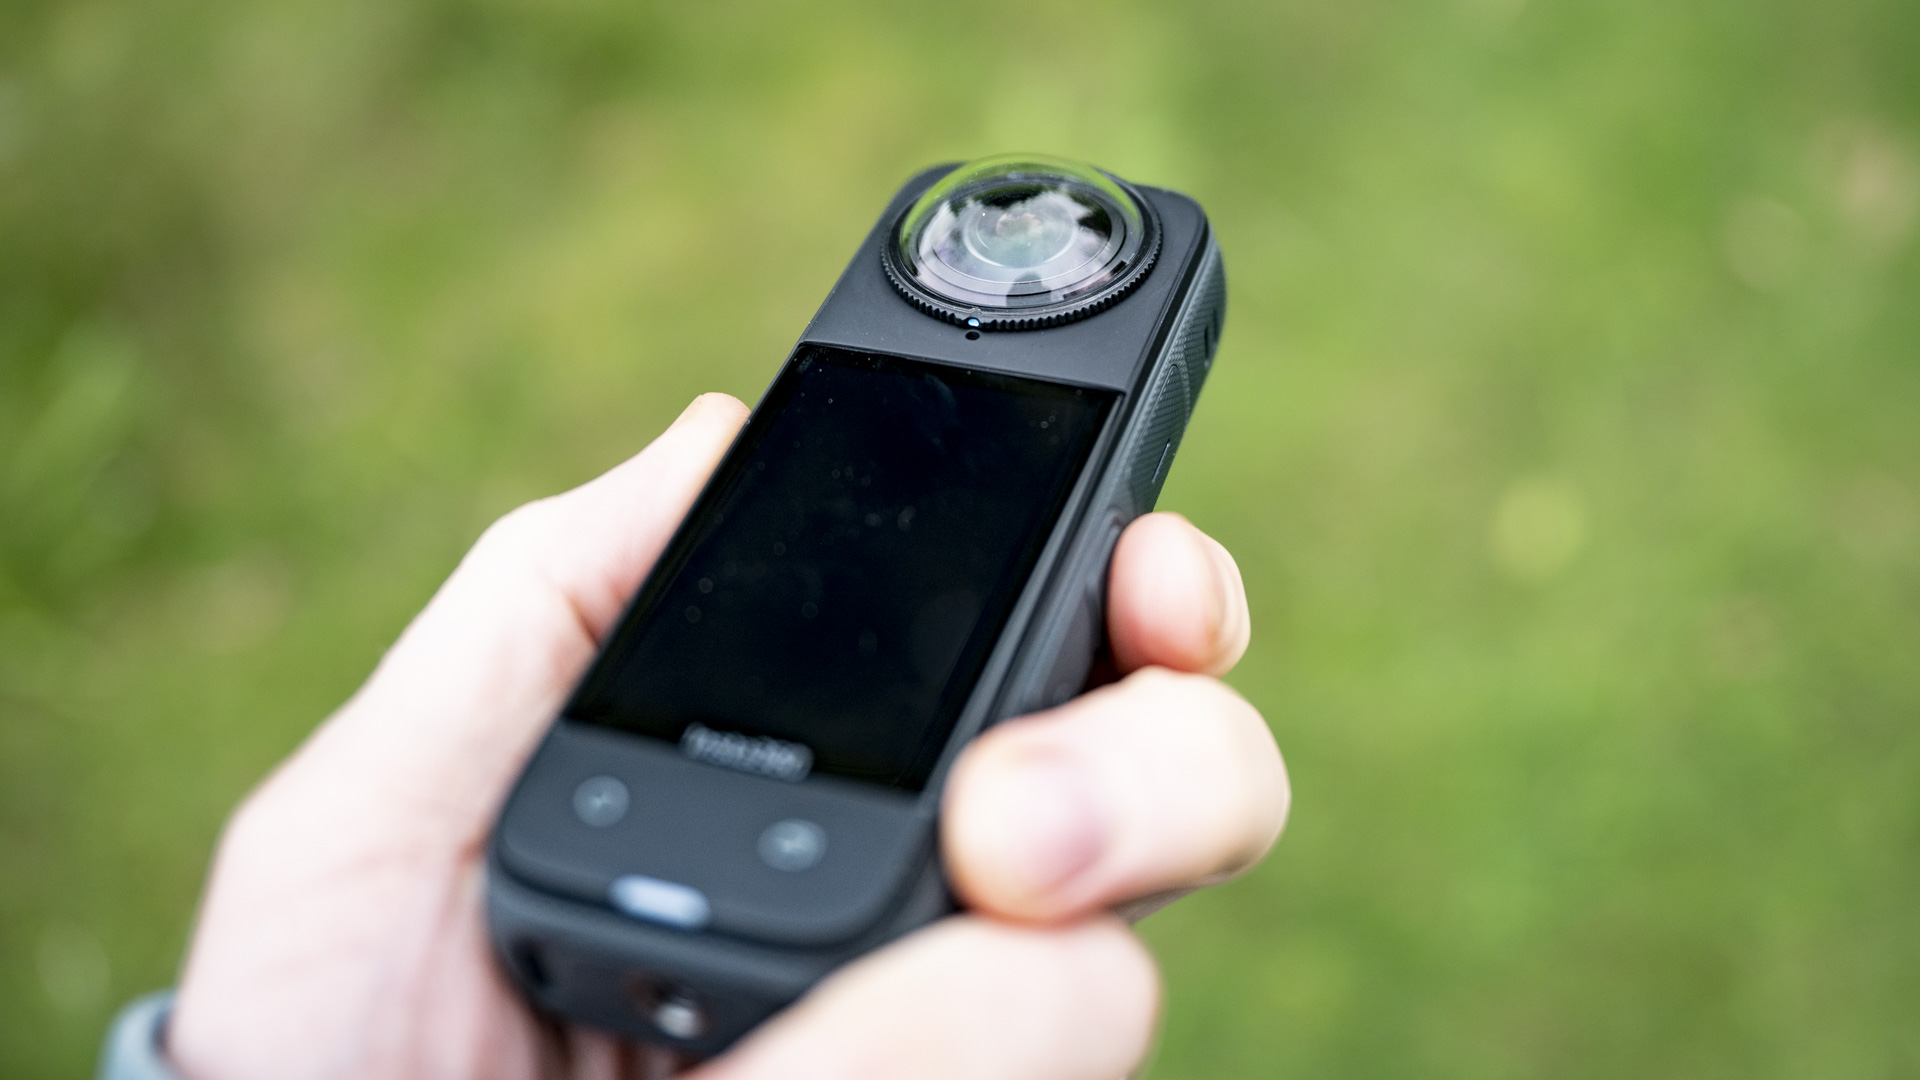
We get a lovely new 2.5-inch touchscreen with tough Corning Gorilla Glass and simple interface, while a beefier battery has been squeezed into a body that’s roughly the same size as before, albeit around 10% heavier, and gives a huge bump in battery life.
The most capable rivals, such as the GoPro Max, Kandao Qoocam 8K, and Ricoh Theta X, are either dated or pricier – or both – and until they’re replaced, the X4 is 2024's unrivaled 360-degree camera, and could be the one extra pocket camera in addition to your smartphone that you choose for getaways, gatherings, and events. It handles superbly, and captures the kind of video footage you simply can't yet shoot with a phone.
The Insta360 X4 is available worldwide now following its April 16 announcement, and costs $499.99 / £499.99 / AU$879.99 – that's roughly a 10% markup from 2022's X3. Given inflation and the new camera’s improved capabilities, that price increase seems fair, although the X3 has fallen in price since its release, and will likely drop in price further following the X4’s launch, and is a compelling cost-effective alternative.
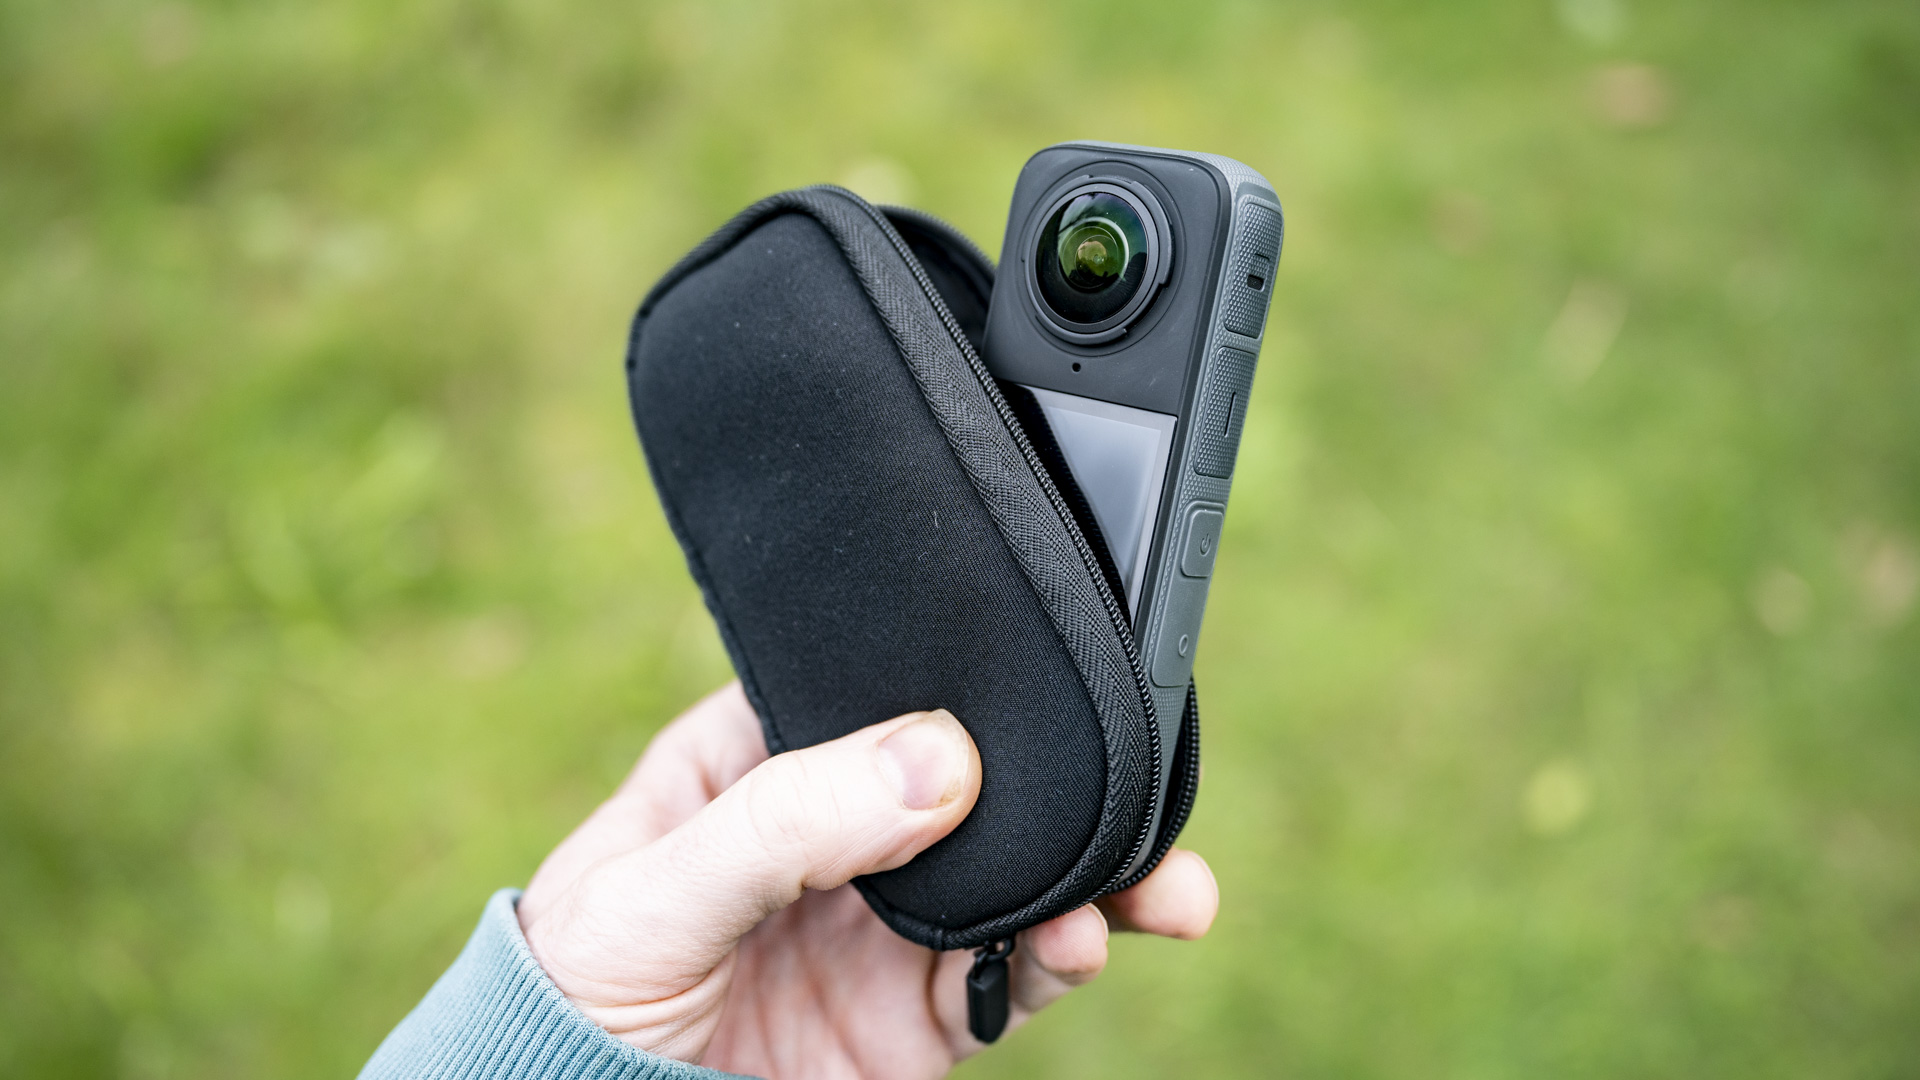
There are a host of optional accessories in the Insta360 ecosystem, including various selfie sticks (one of which is designed to enable you to capture ‘bullet time’ effects), mounts, and an underwater housing. In the box you get the X4's new detachable lens protectors (replacement protectors are available separately), while you'll need a microSD memory card to store photos and videos. The X4 is also available in various bundles that come with different accessories – visit the Insta360 store to see all the accessories on offer.
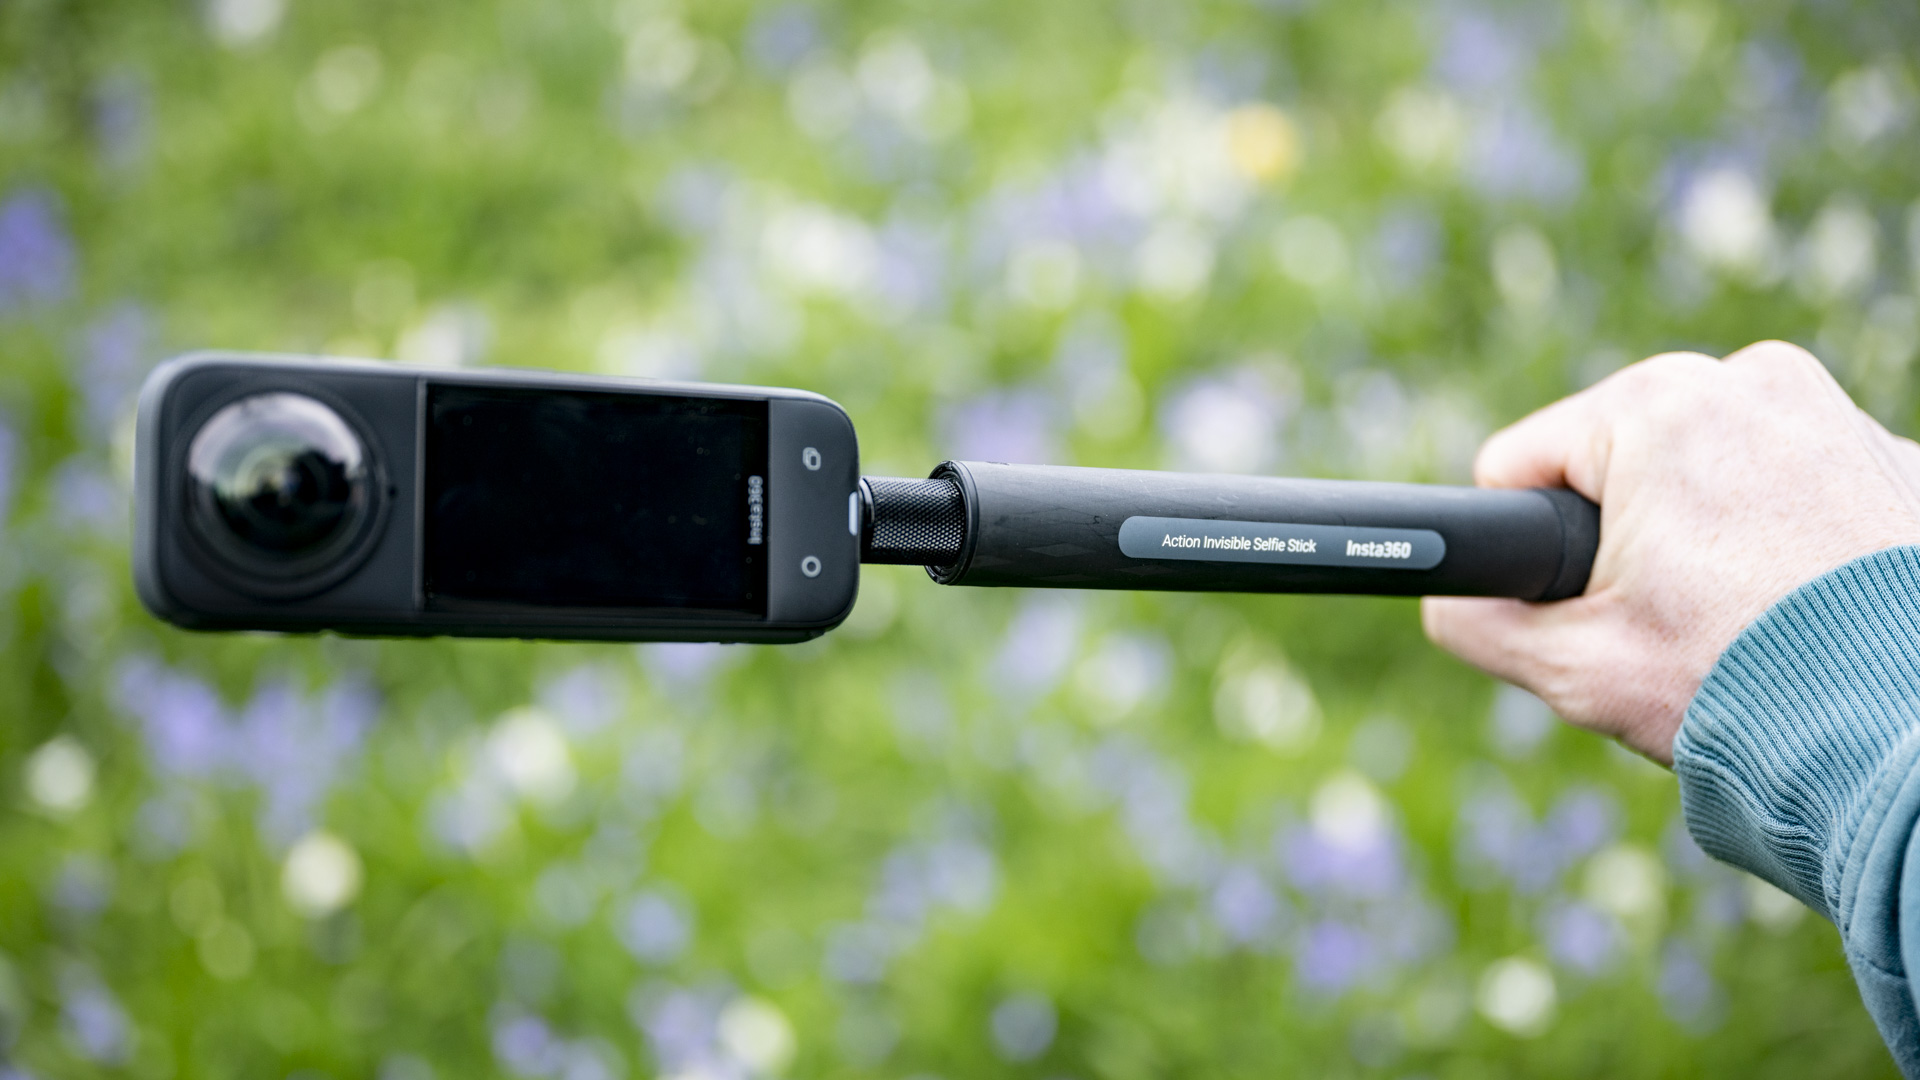
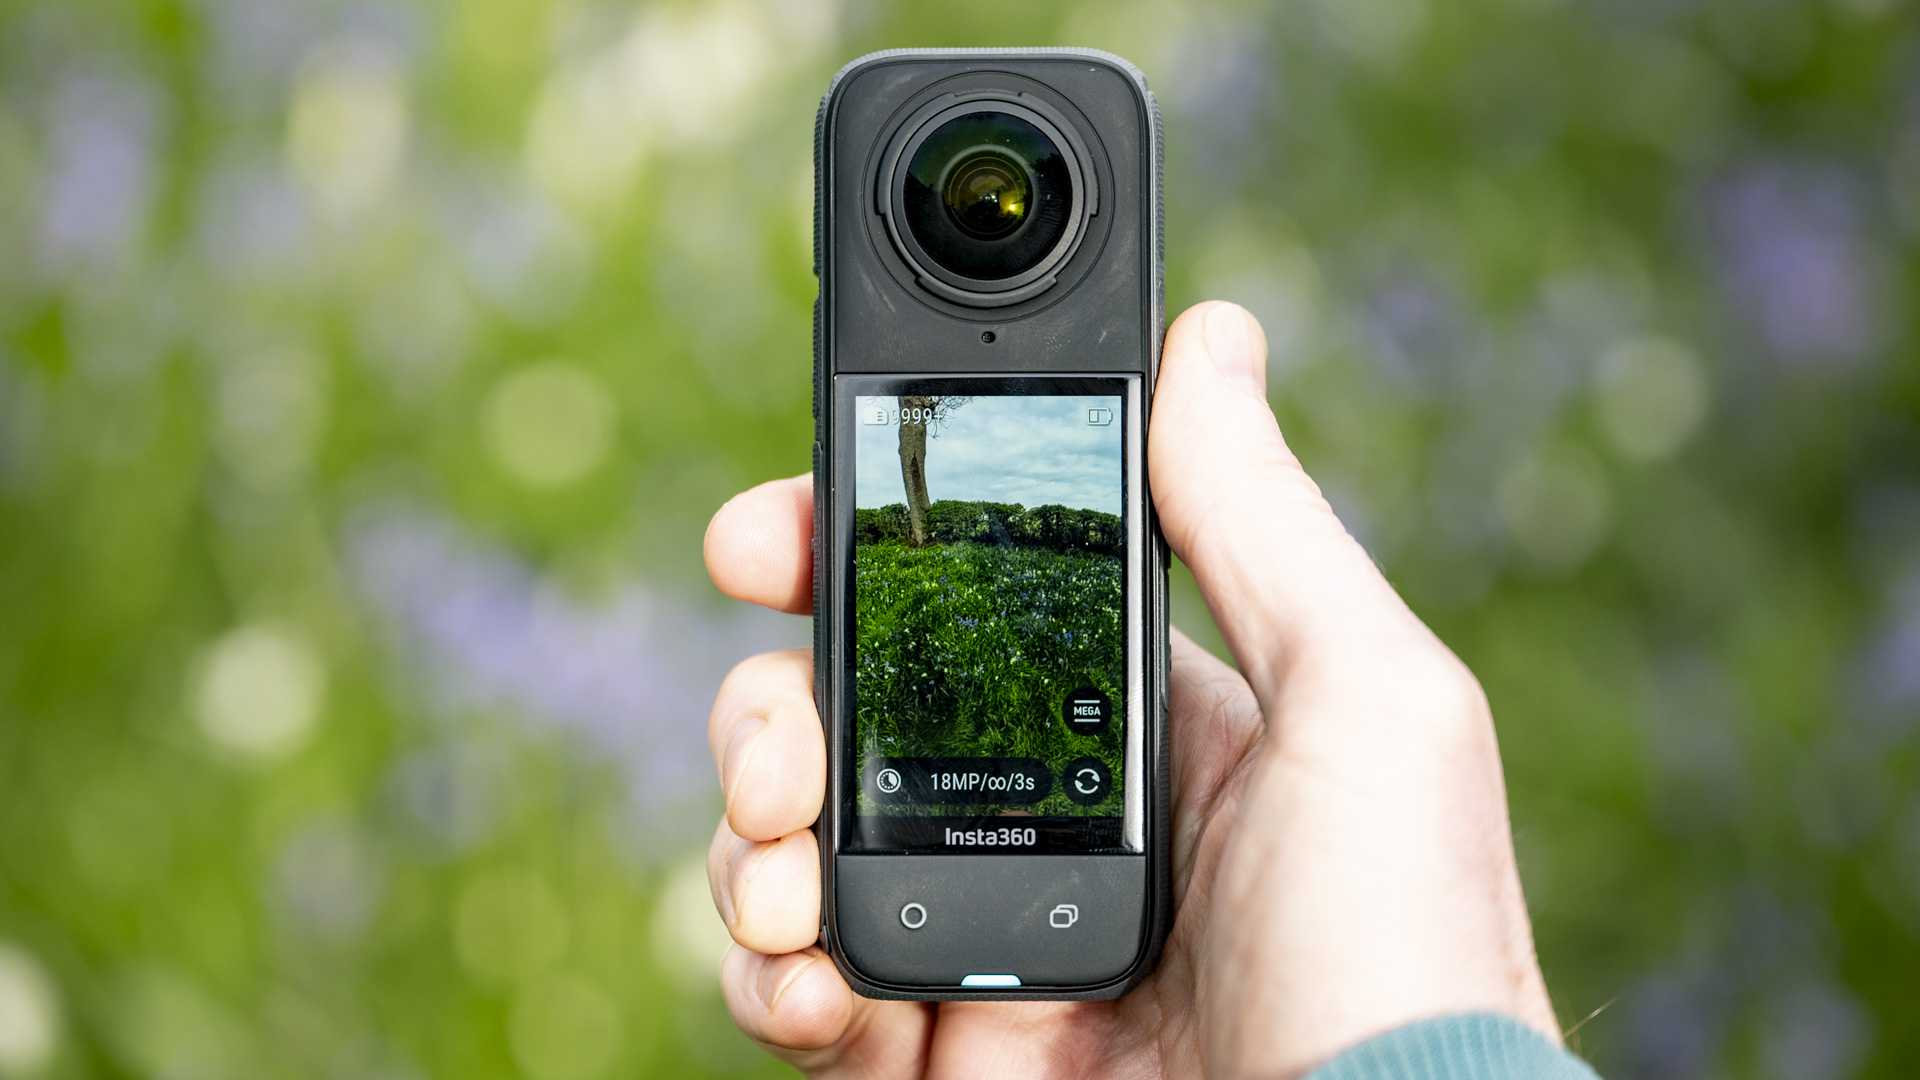
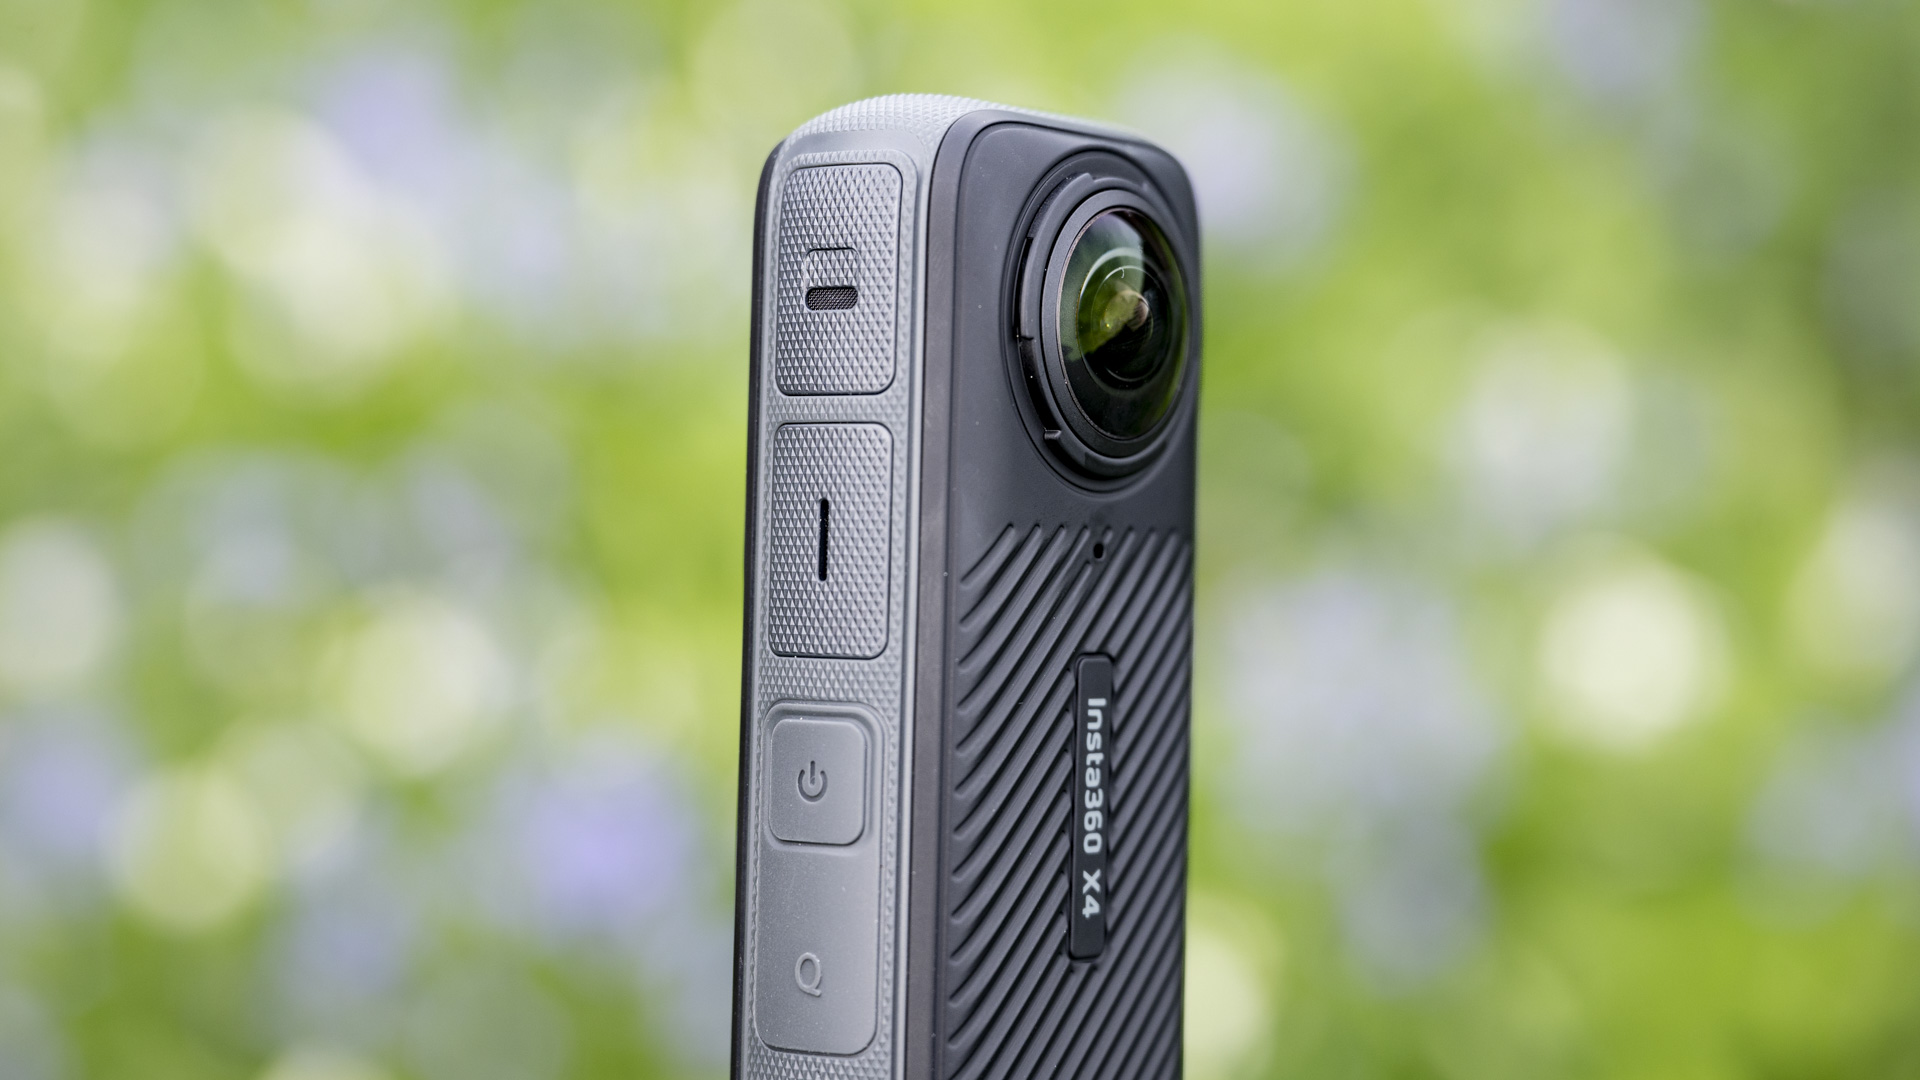
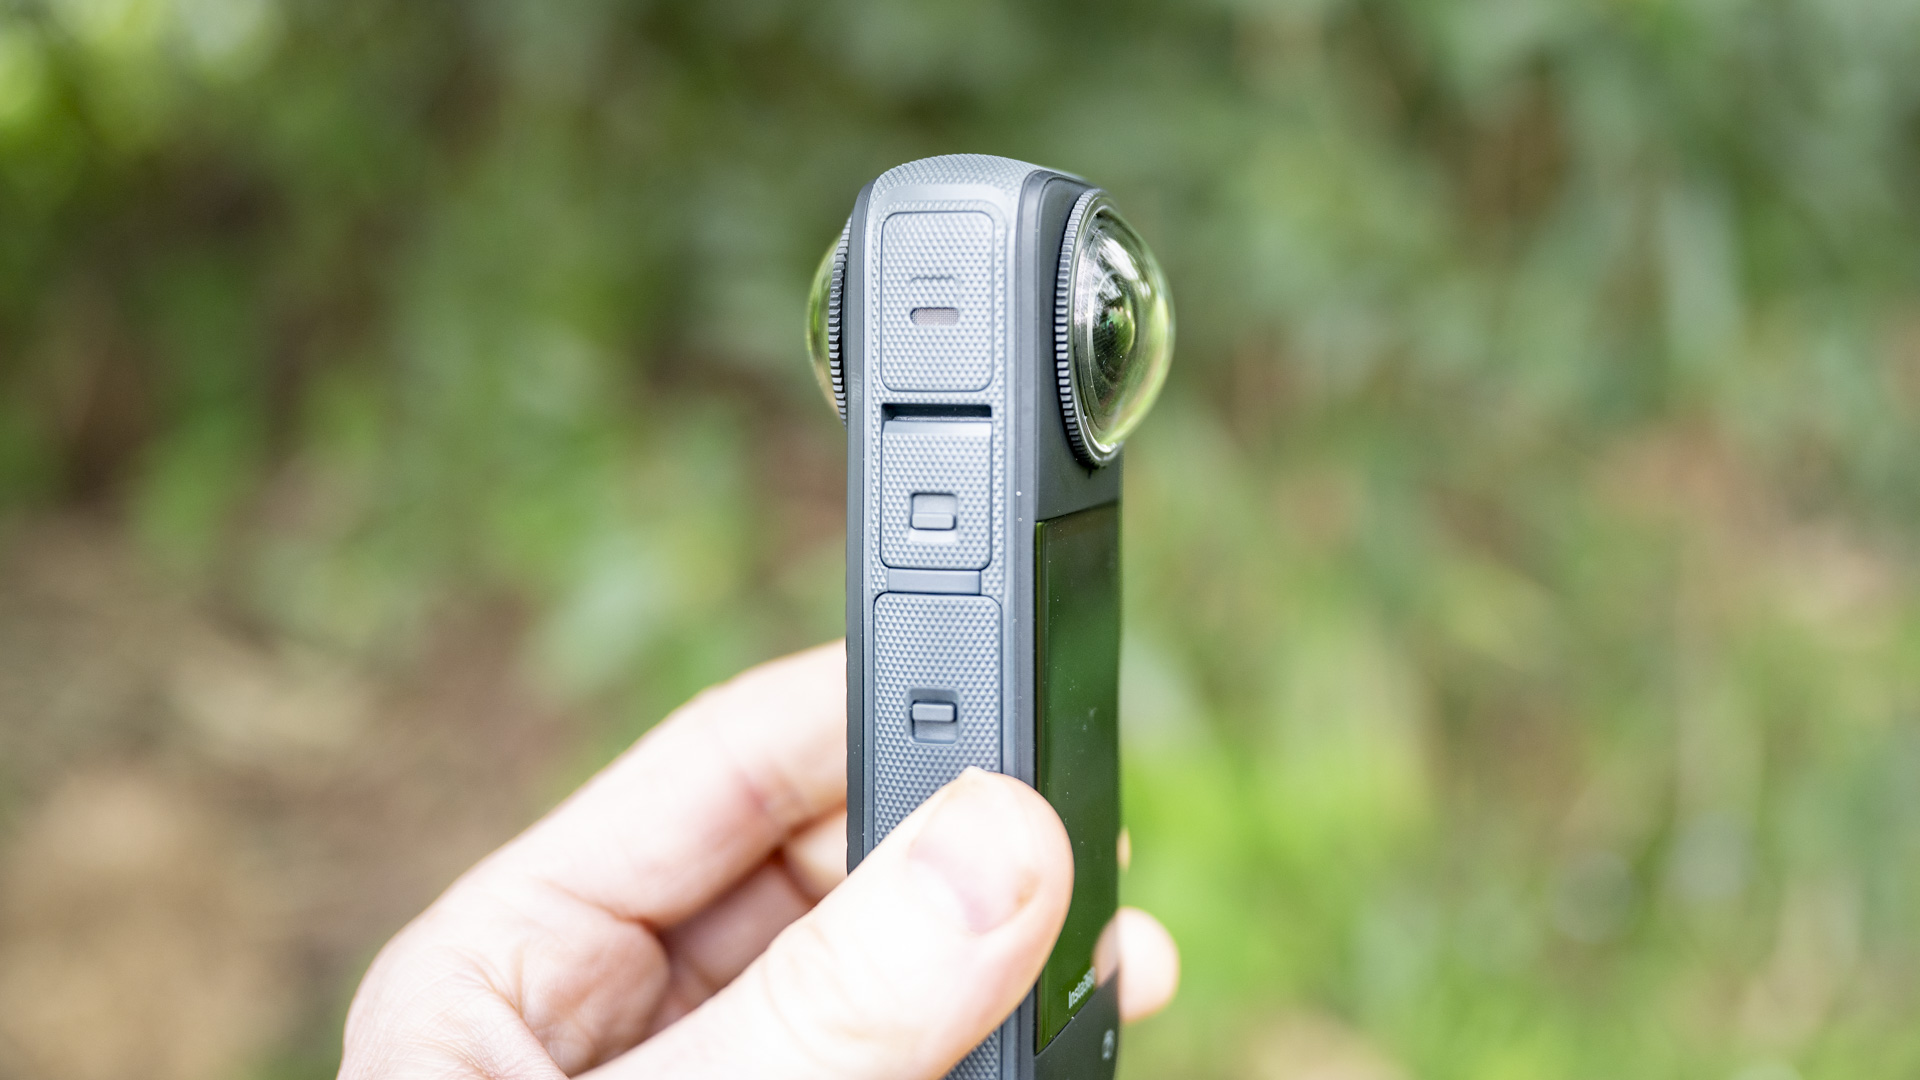
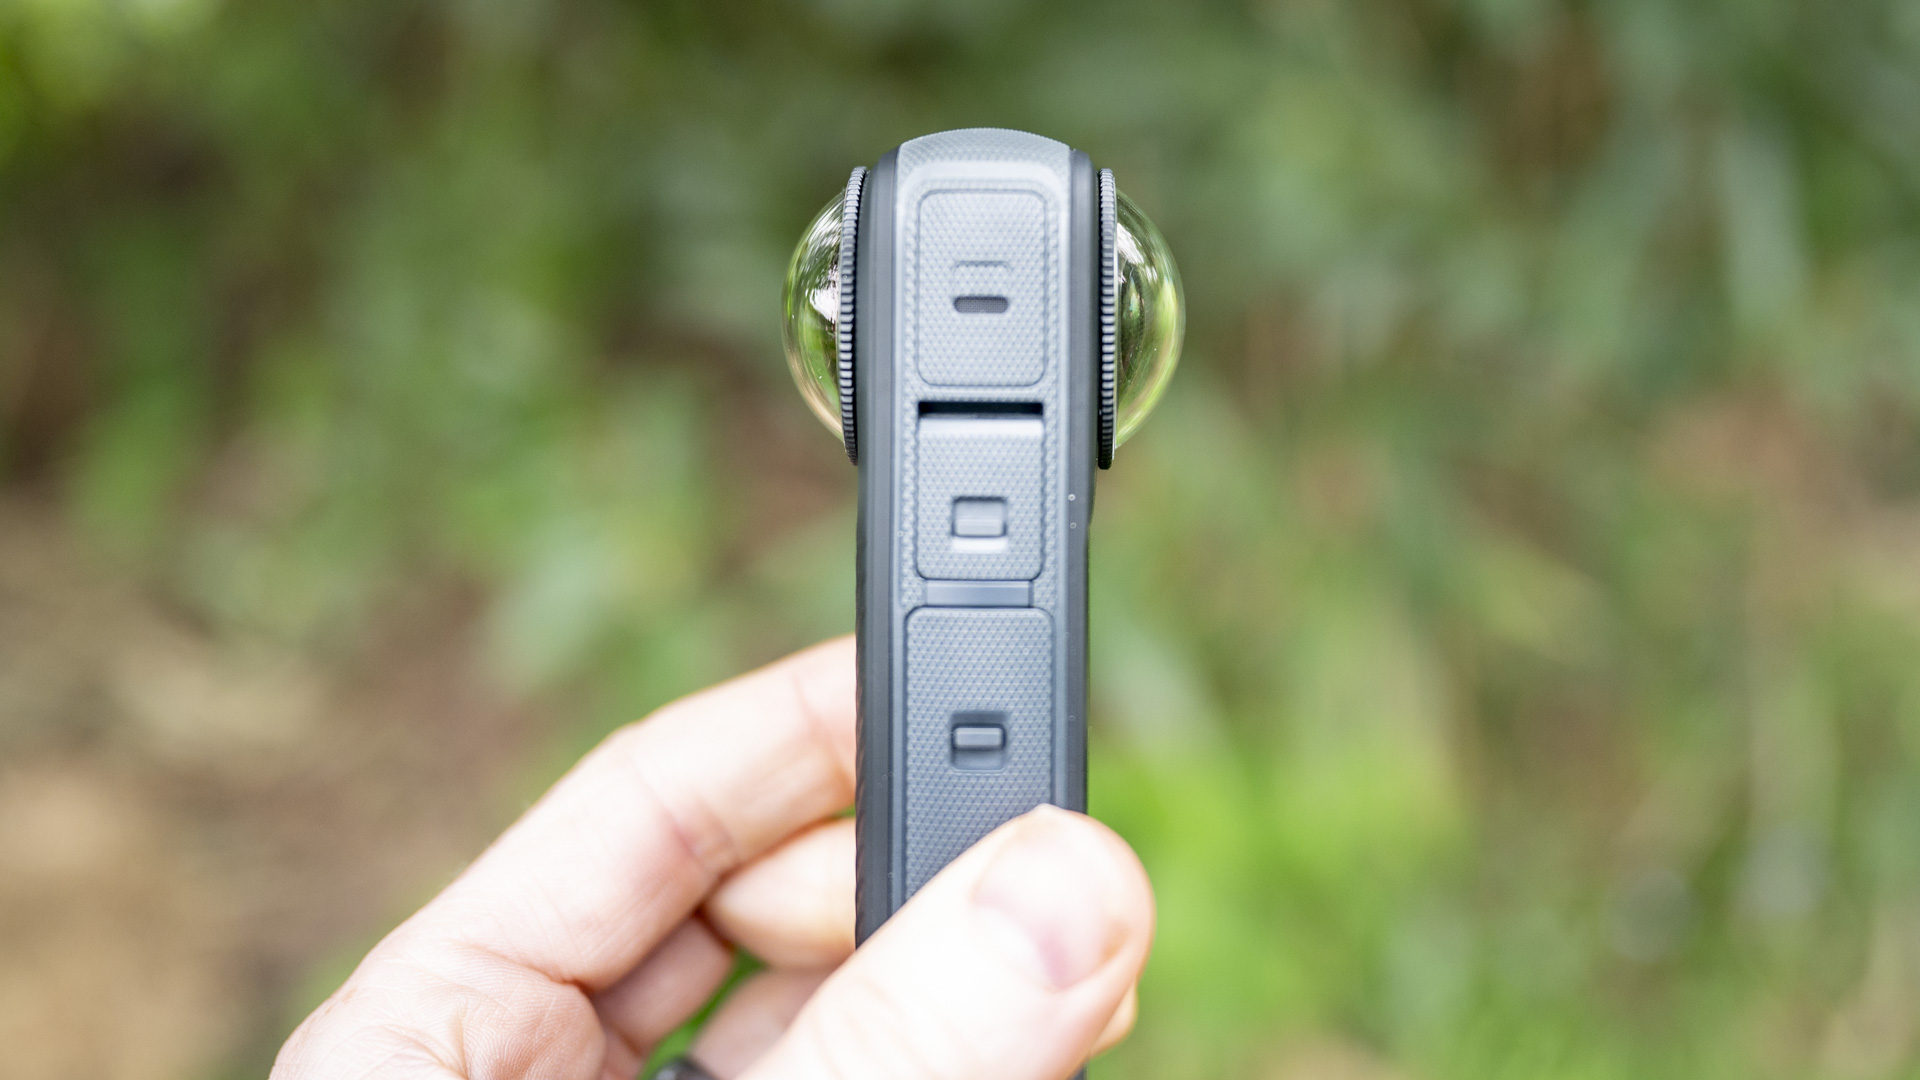
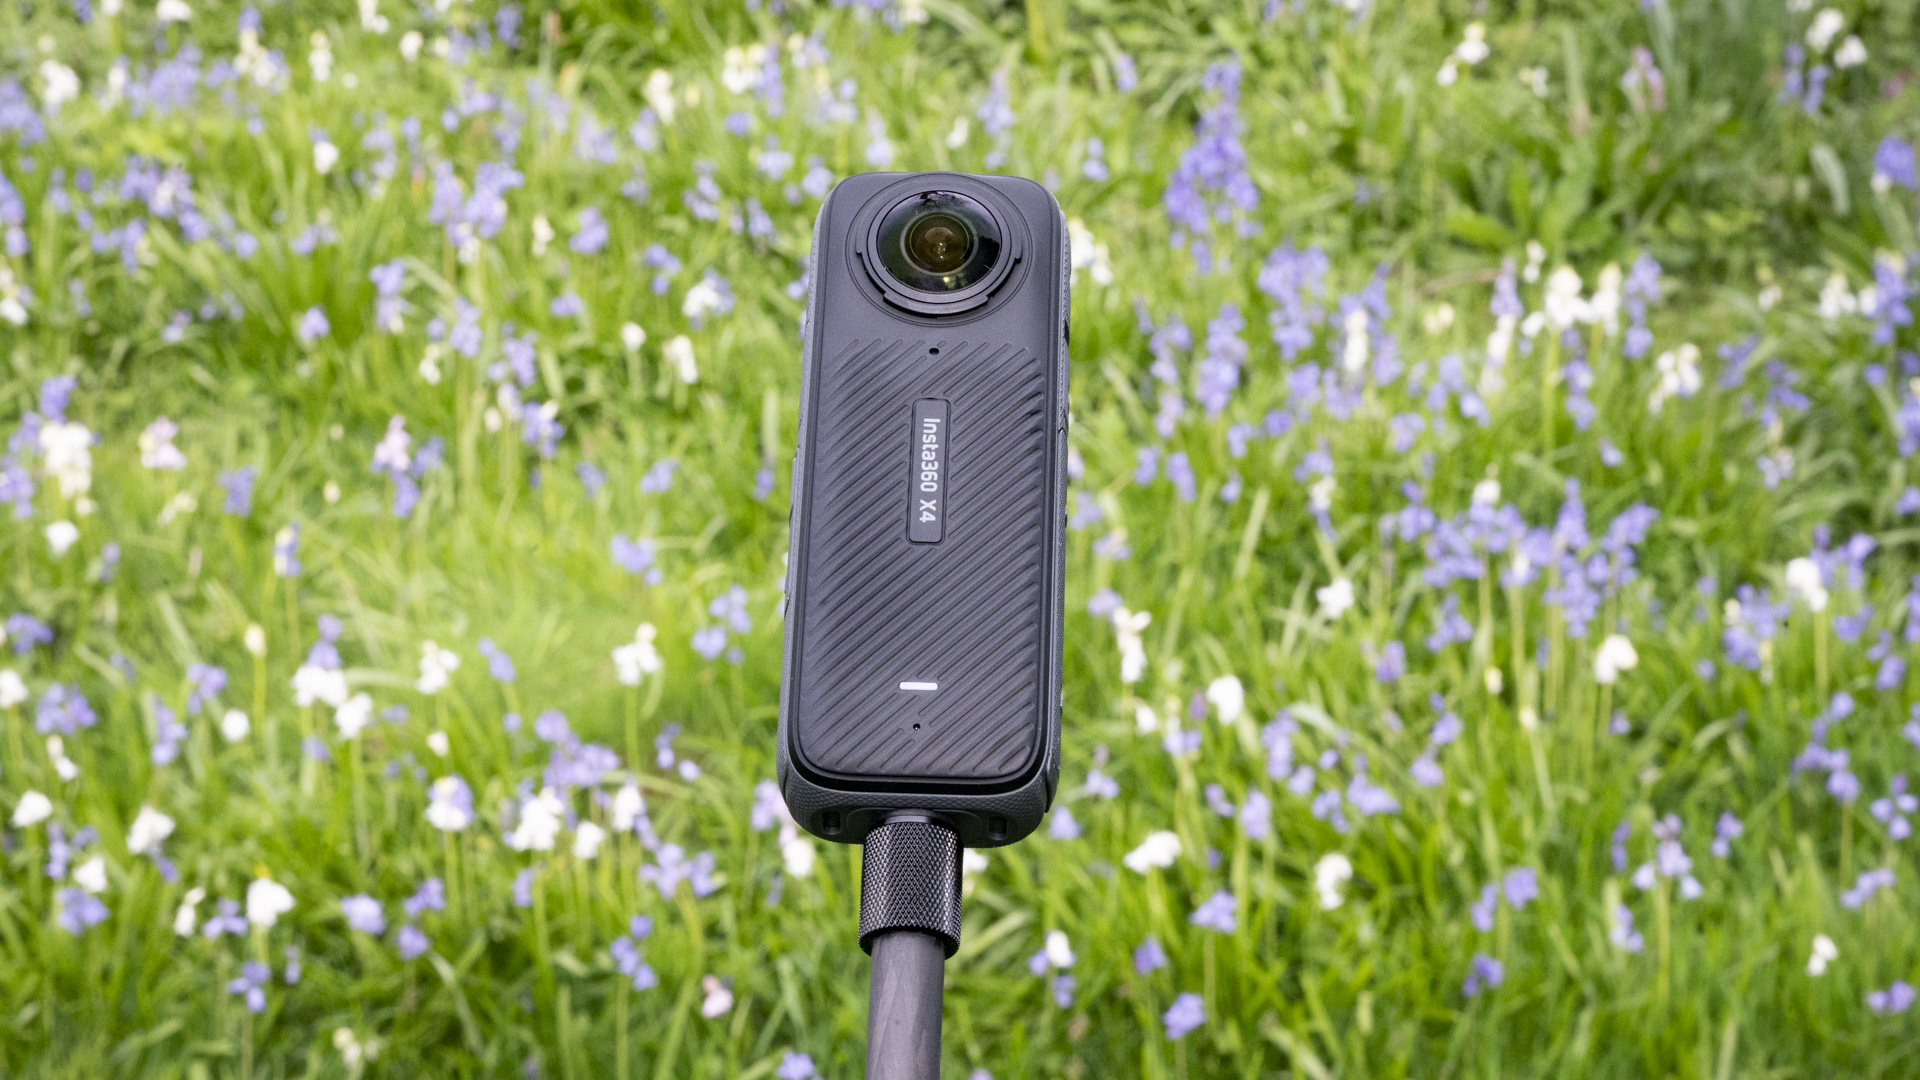
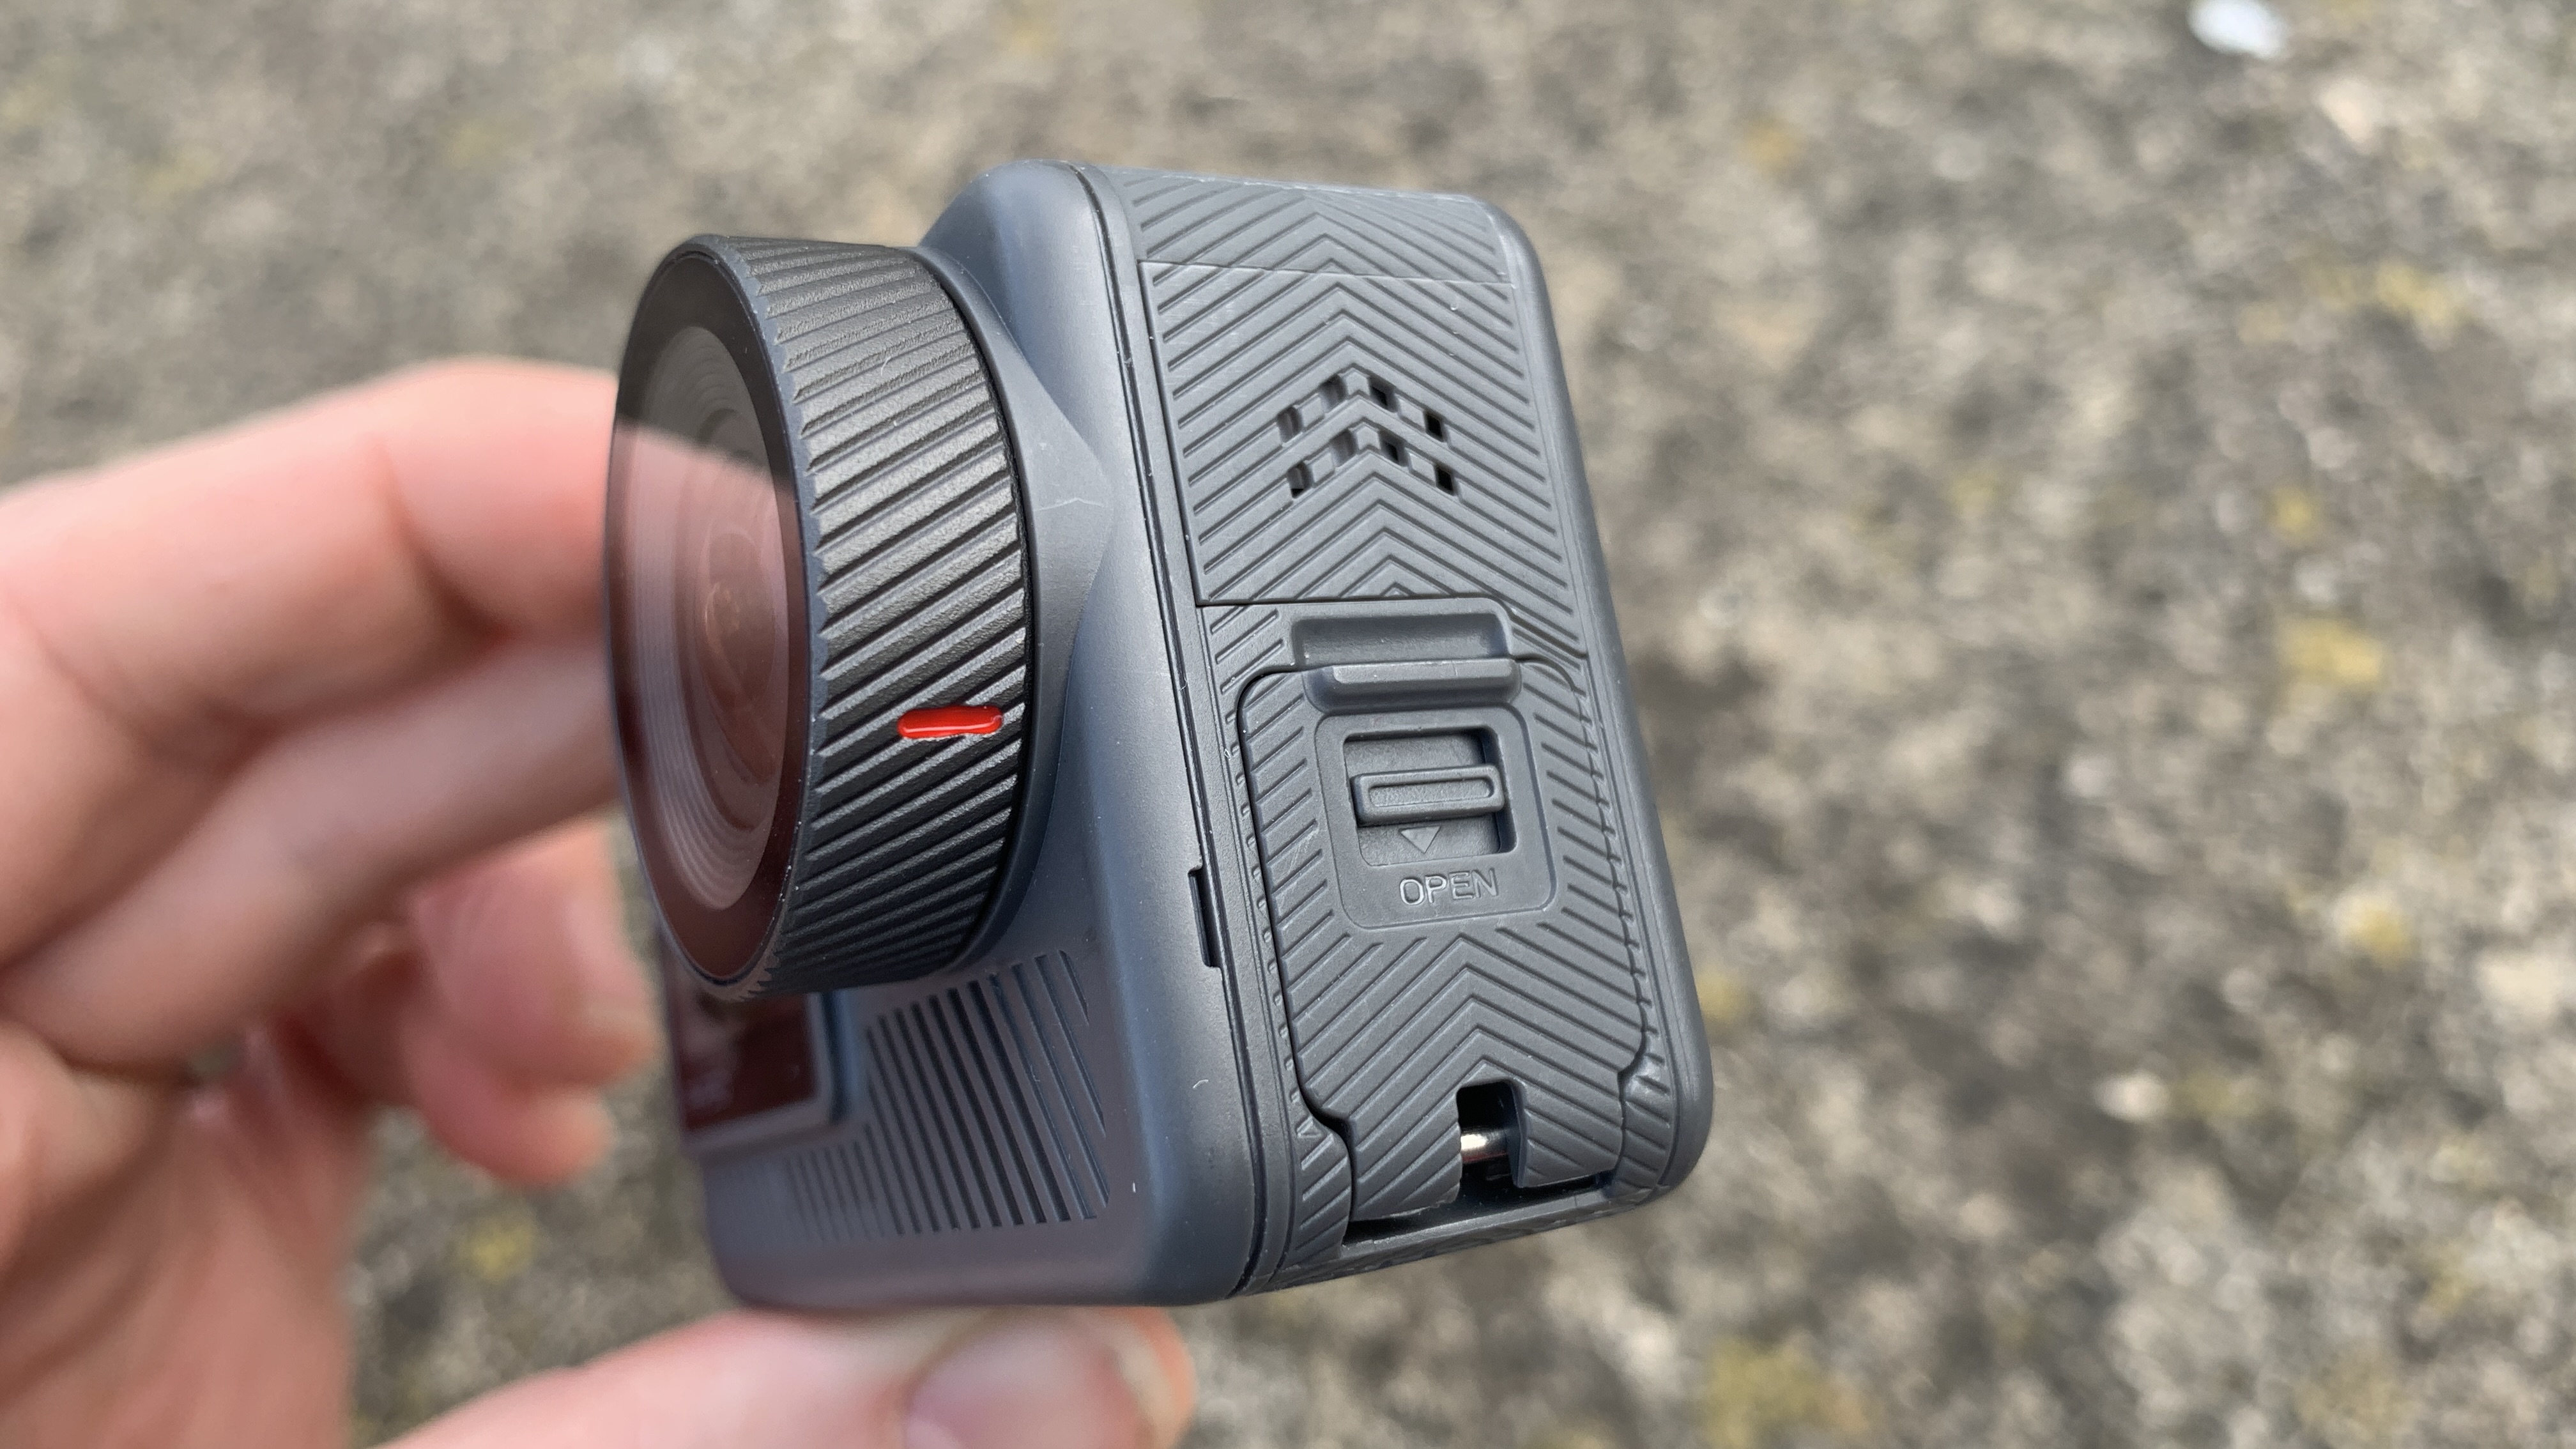
The stick-like design of the Insta360 X4 is very similar to the X3, and that's a good thing, because the X3 is one of the most user-friendly 360-degree cameras available. Its grippy exterior is easy to hold, or you can attach one of Insta360's invisible selfie sticks using the threaded mount point on the bottom.
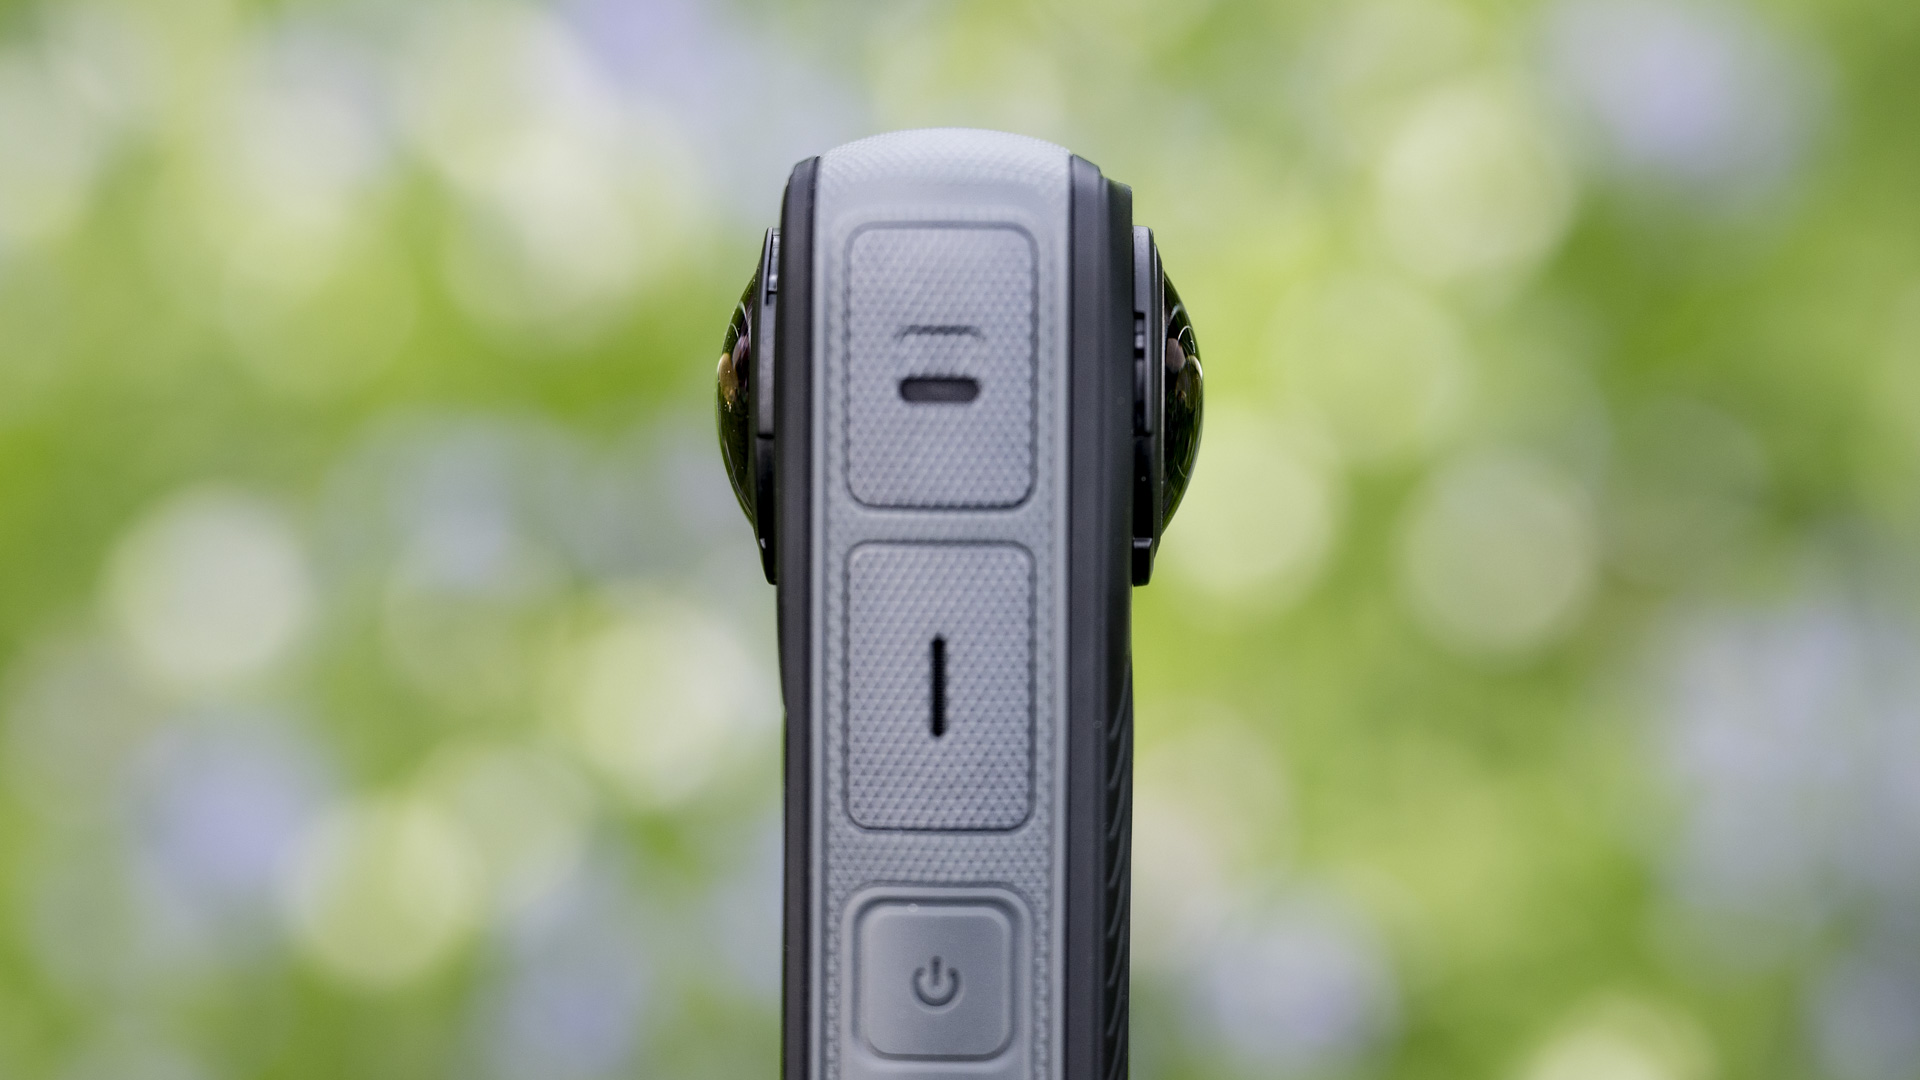
Twin bulbous ultra-wide lenses cover the entire 360-degree field of view – these are the part of the X4 that really needs protecting, and to that end the camera comes with ultra-light clear lens protectors that can be screwed on and off, whereas the X3 uses non-reusable sticky lens guards.
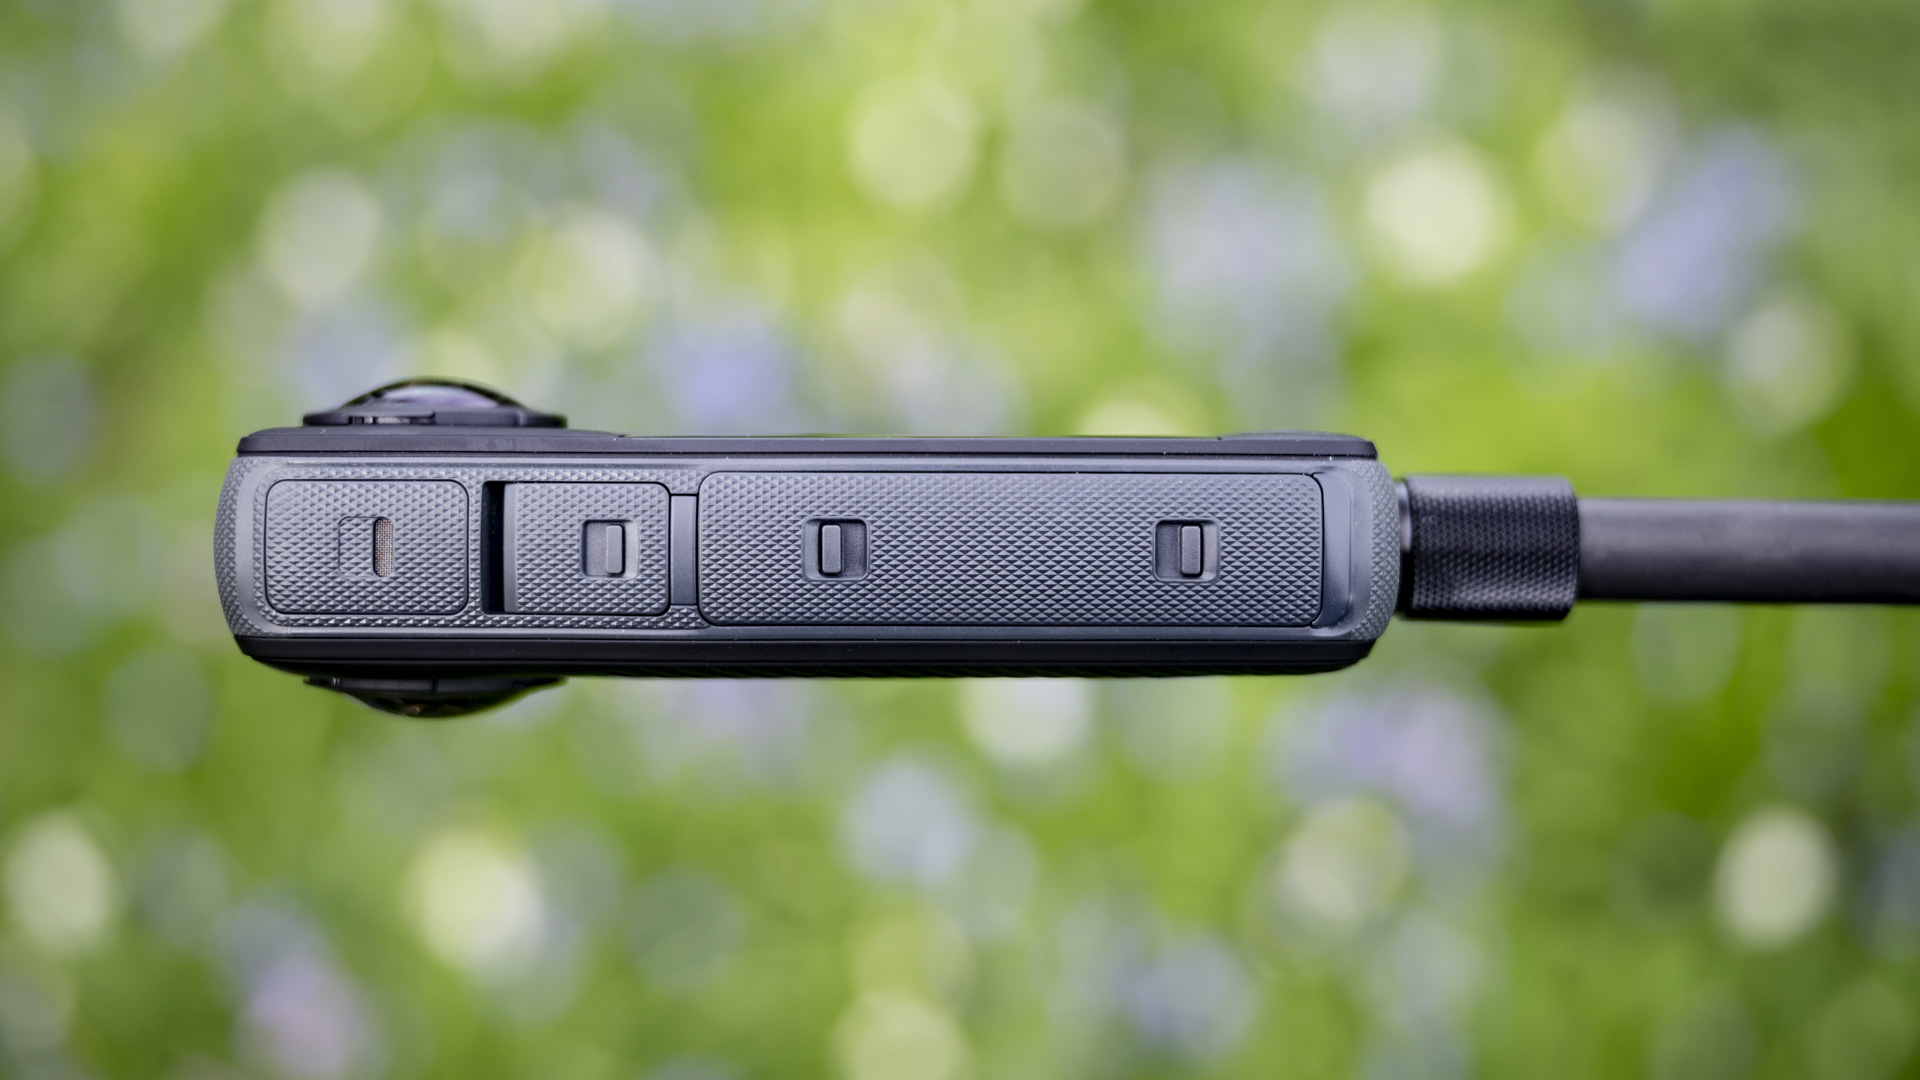
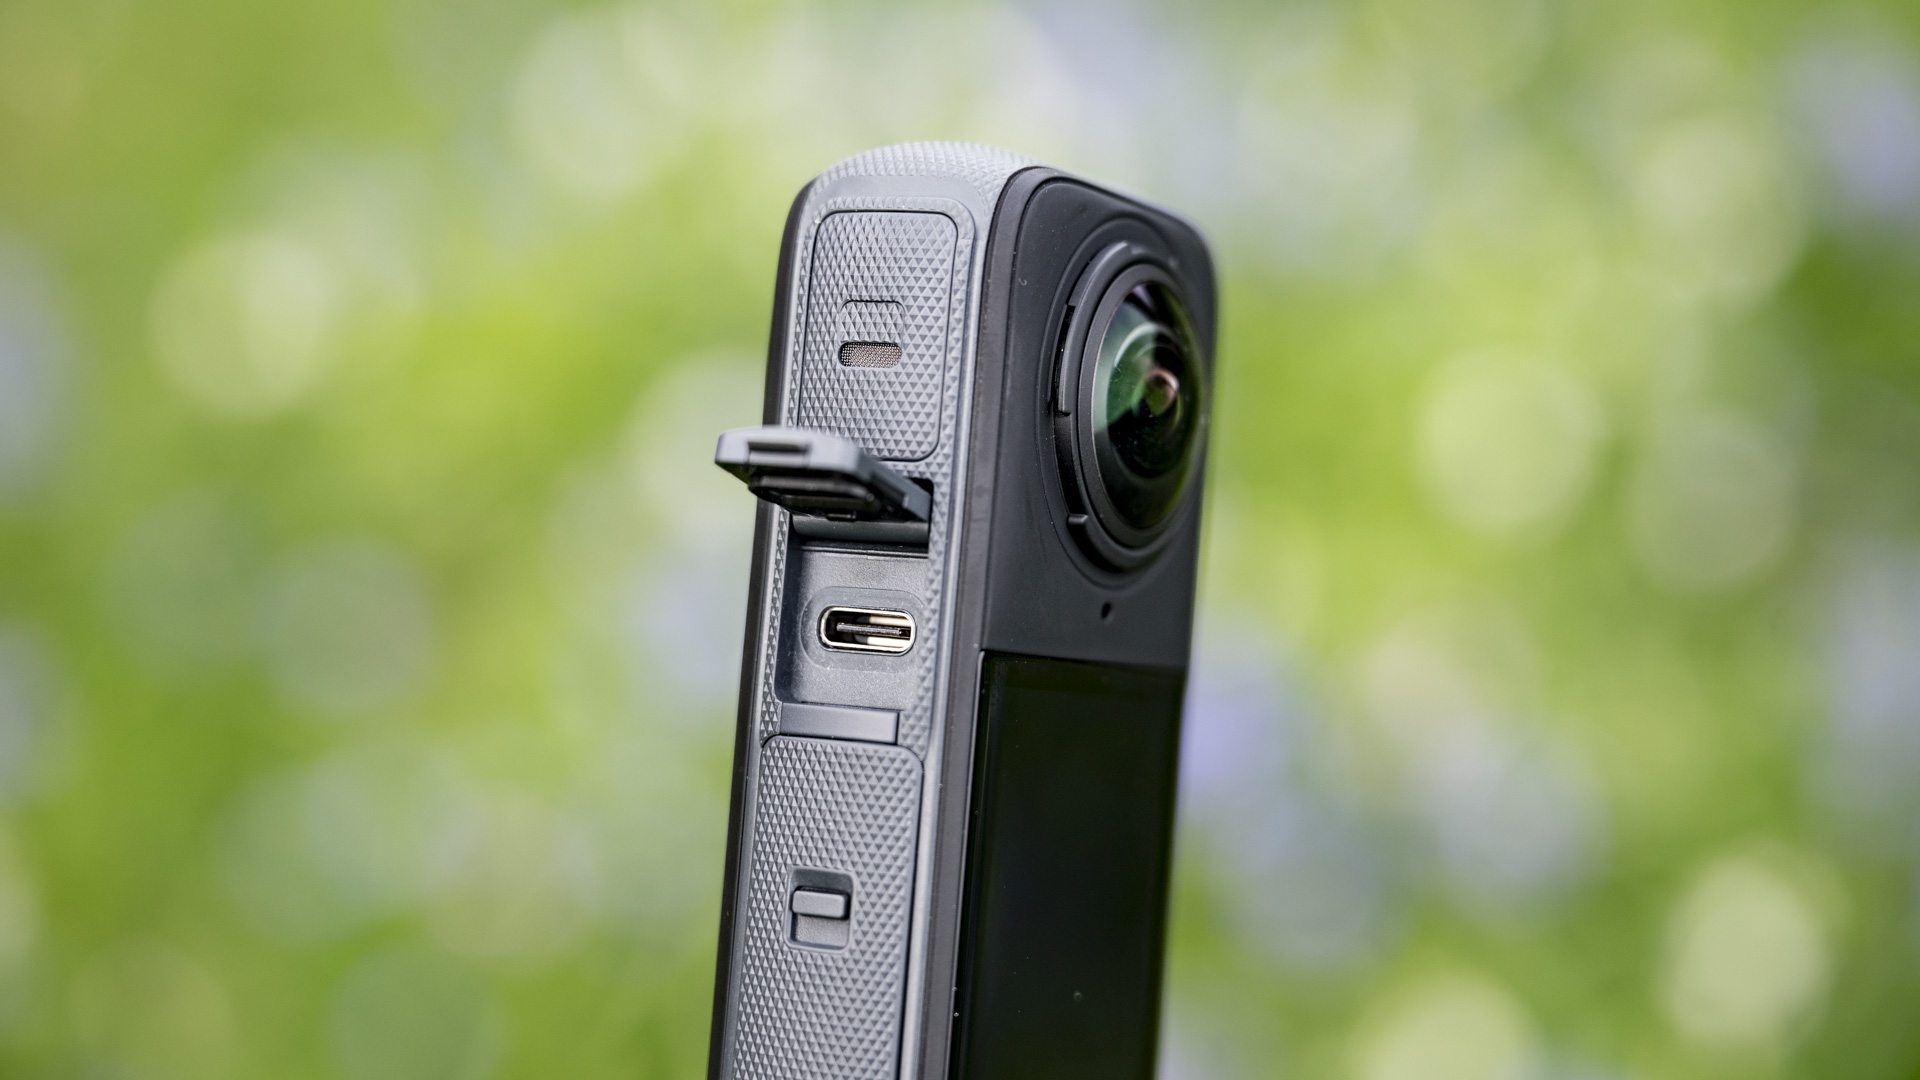
Build quality is superb: the camera is fully waterproof up to 33ft / 10m, with all ports rubber sealed (though I haven’t had the opportunity to test the waterproofing out properly, yet). You’ll know if the seals aren't fully locked, thereby compromising waterproofing, as the orange coloring inside the catch will be visible – a neat bit of design.
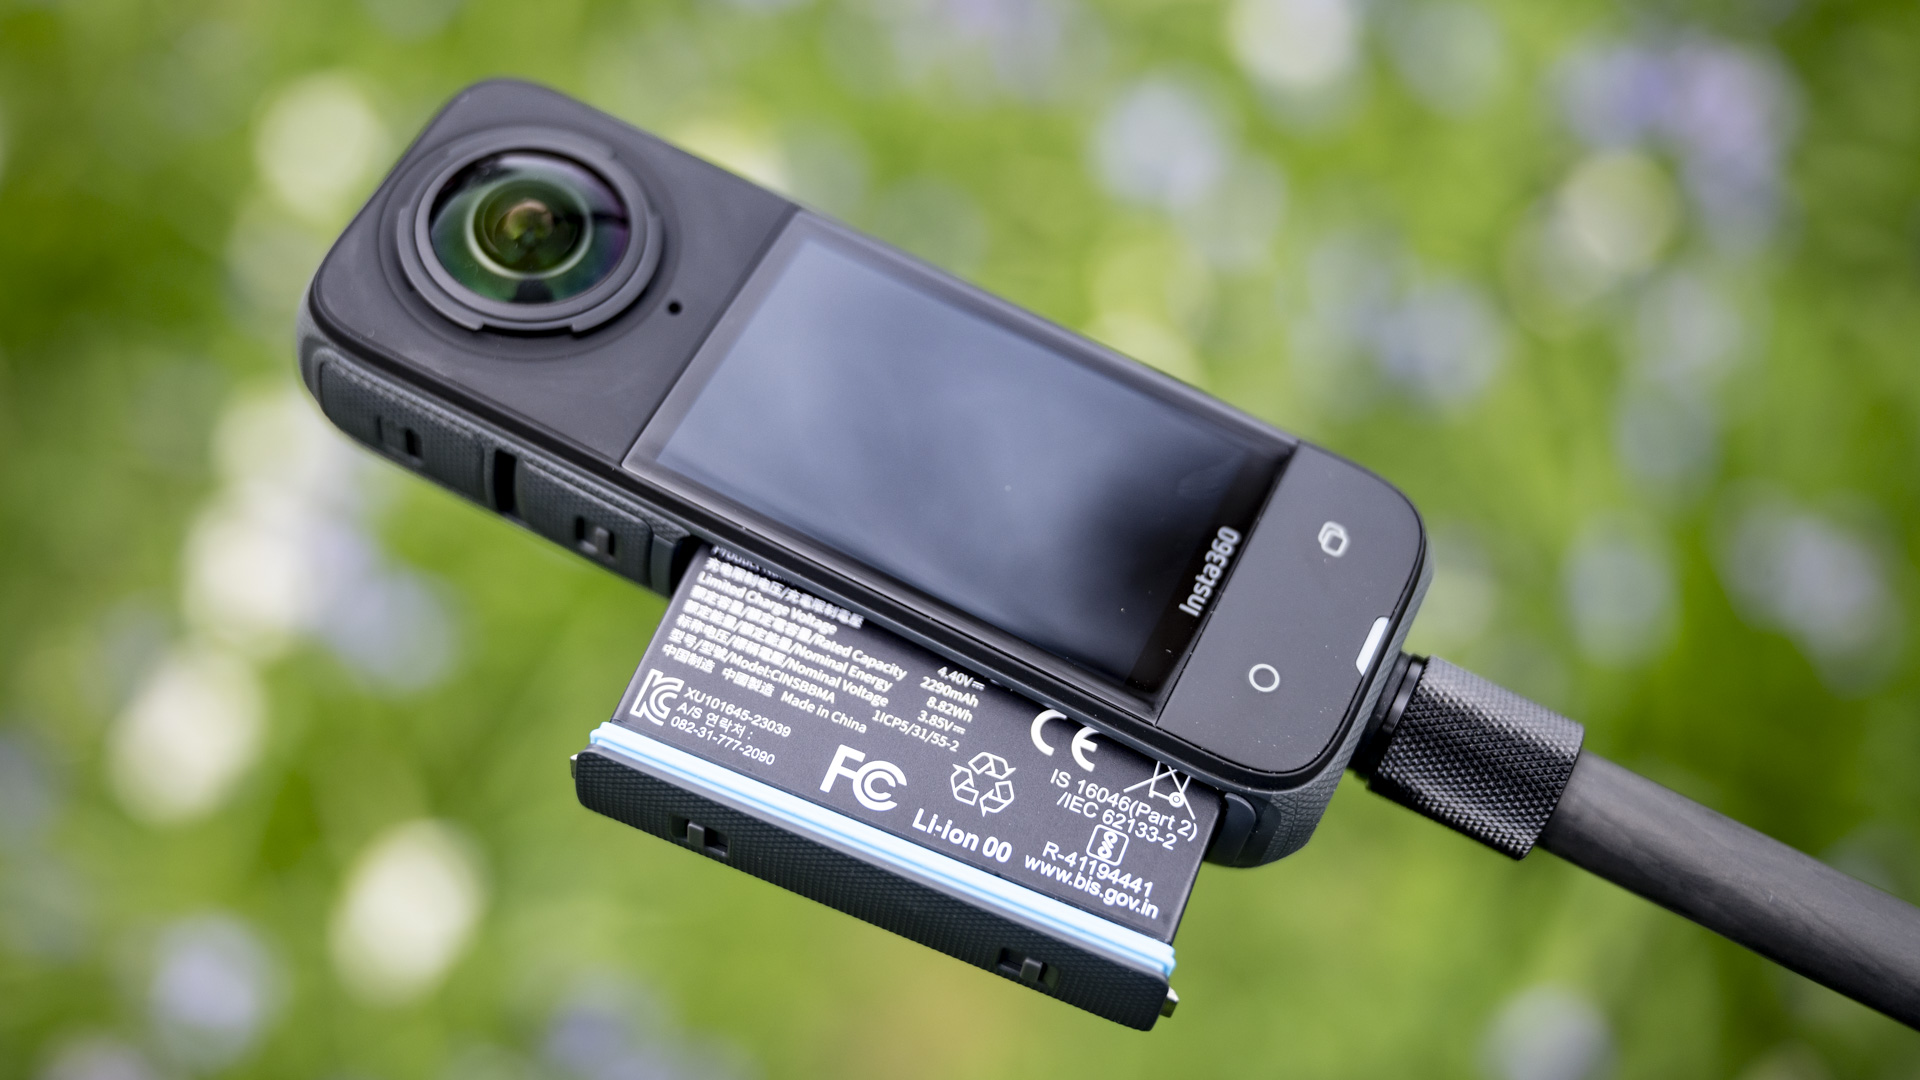
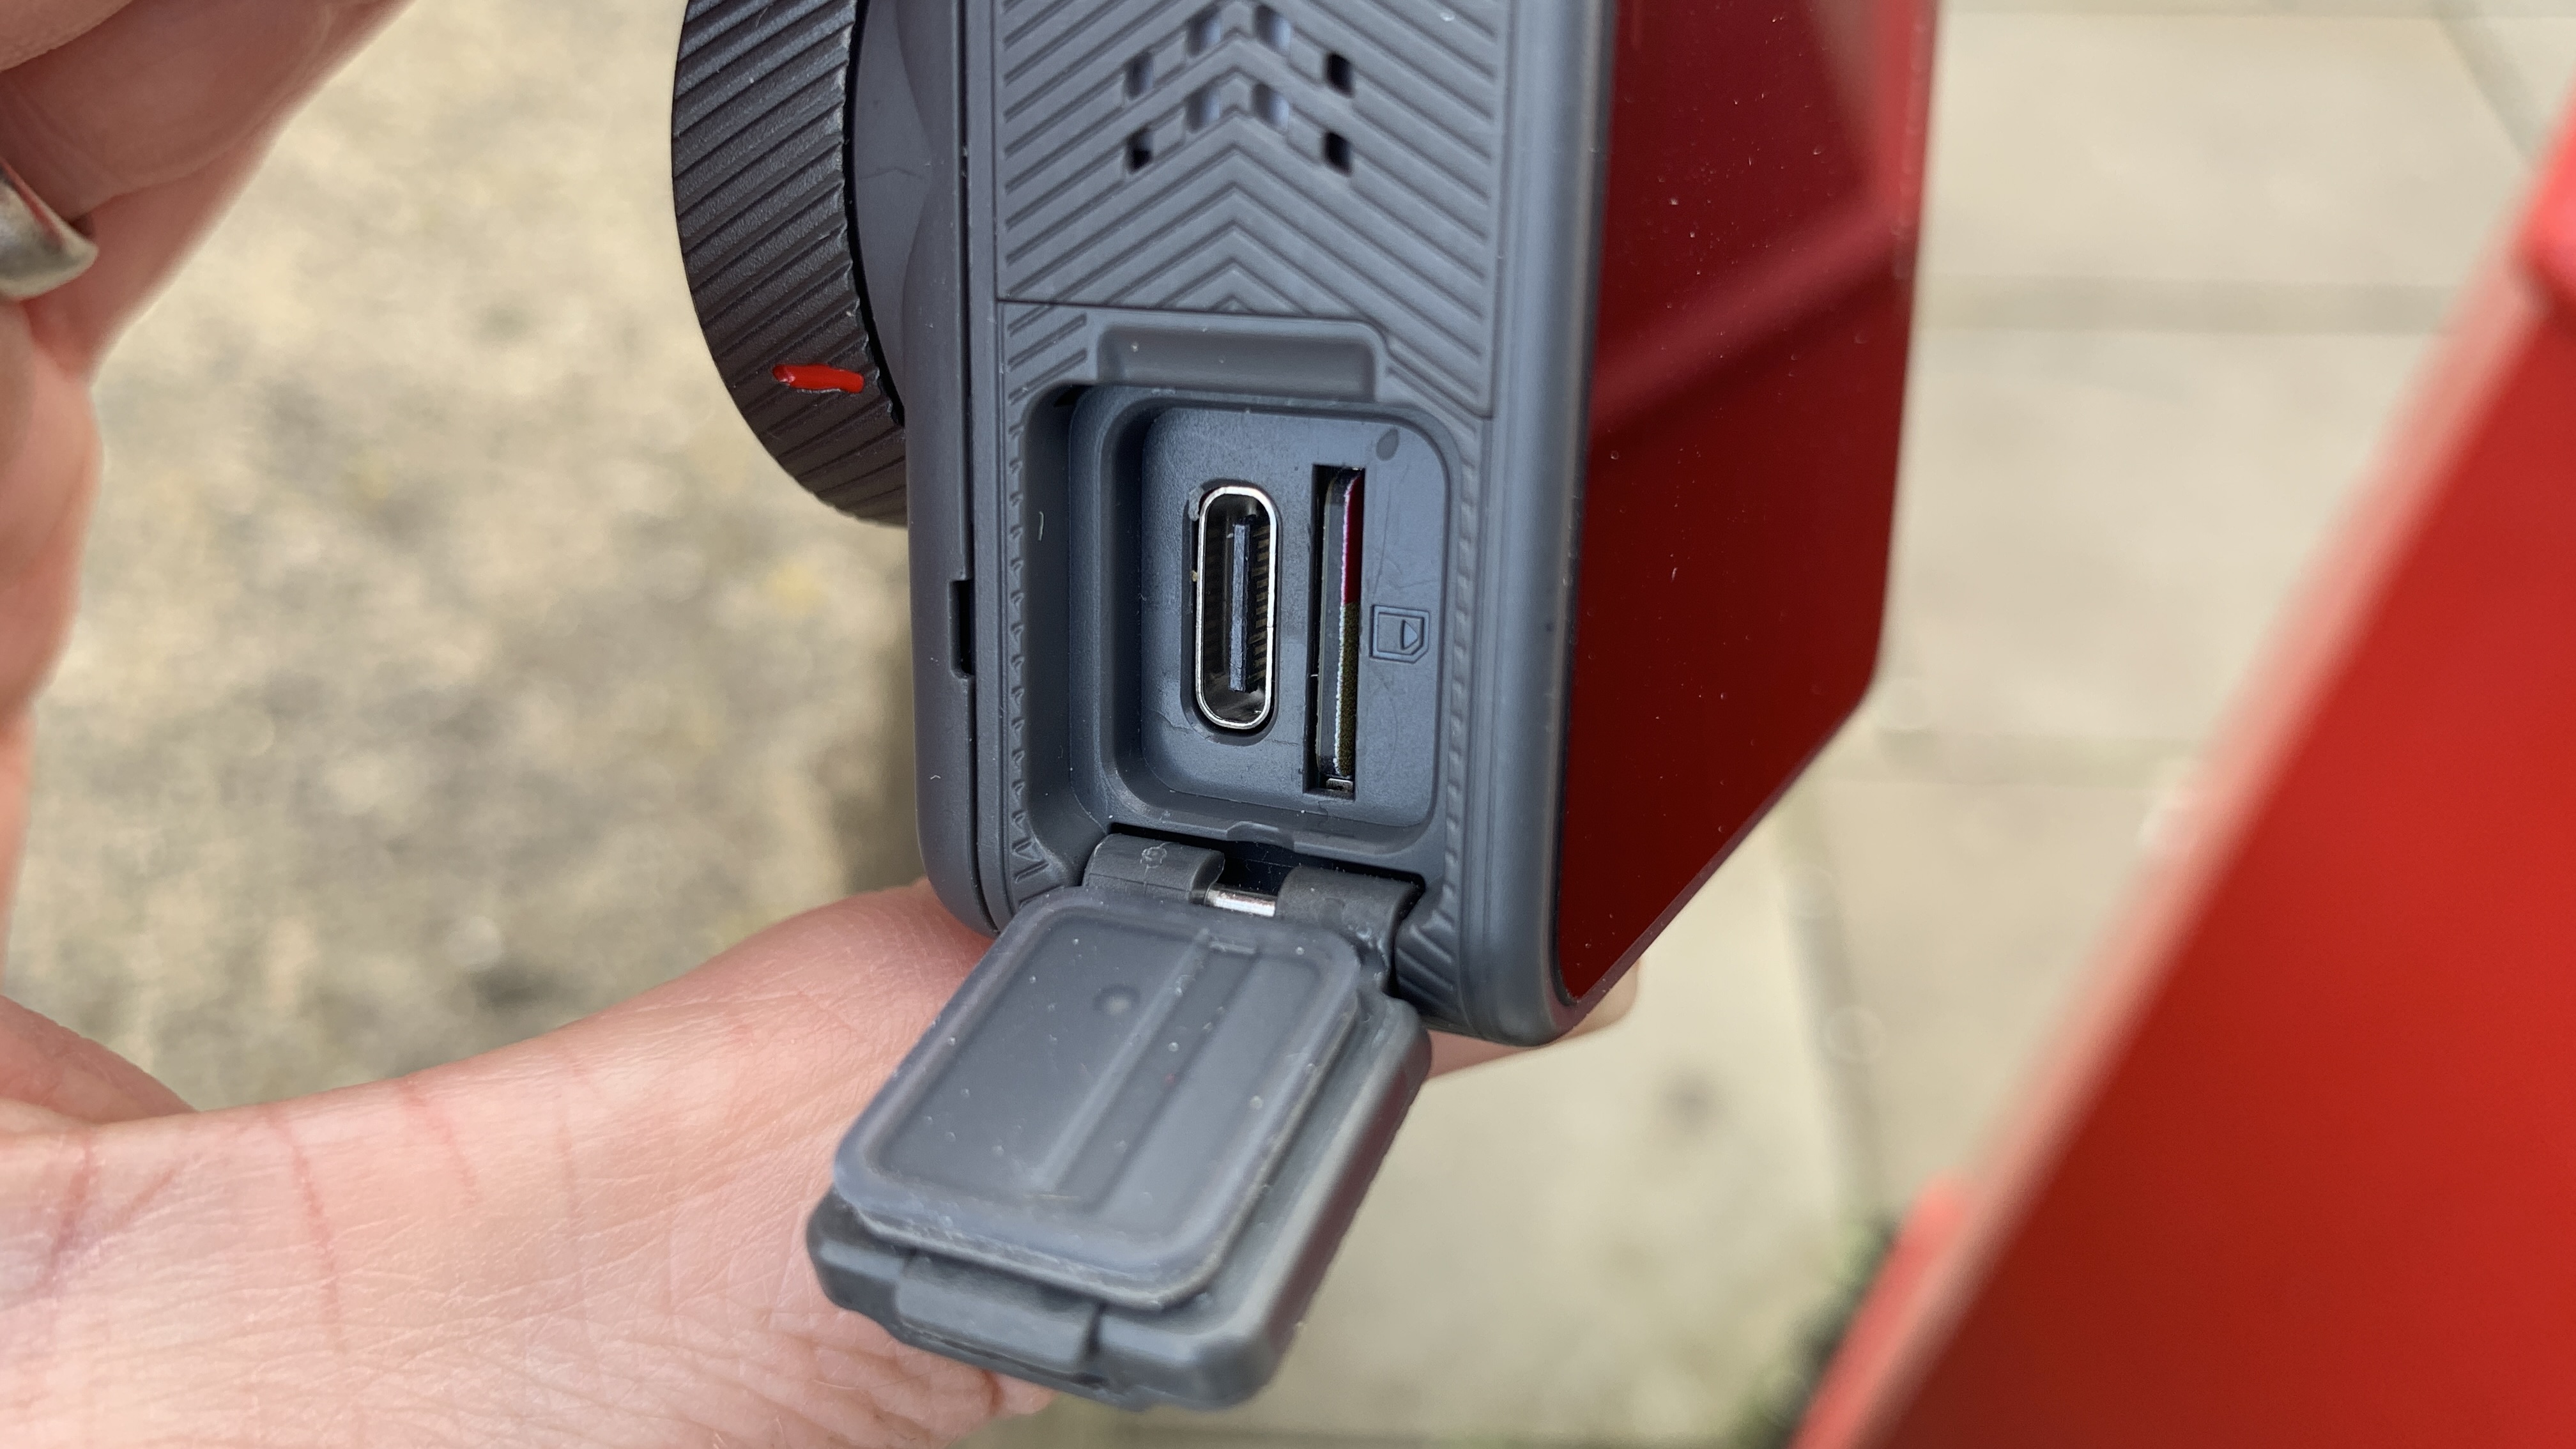
You get a USB-C port for connecting and charging the camera, plus a hefty 2,290mAh battery that can record for up to 135 minutes – that's a huge increase from the 81 minutes provided by the X3's 1,800mAh battery.
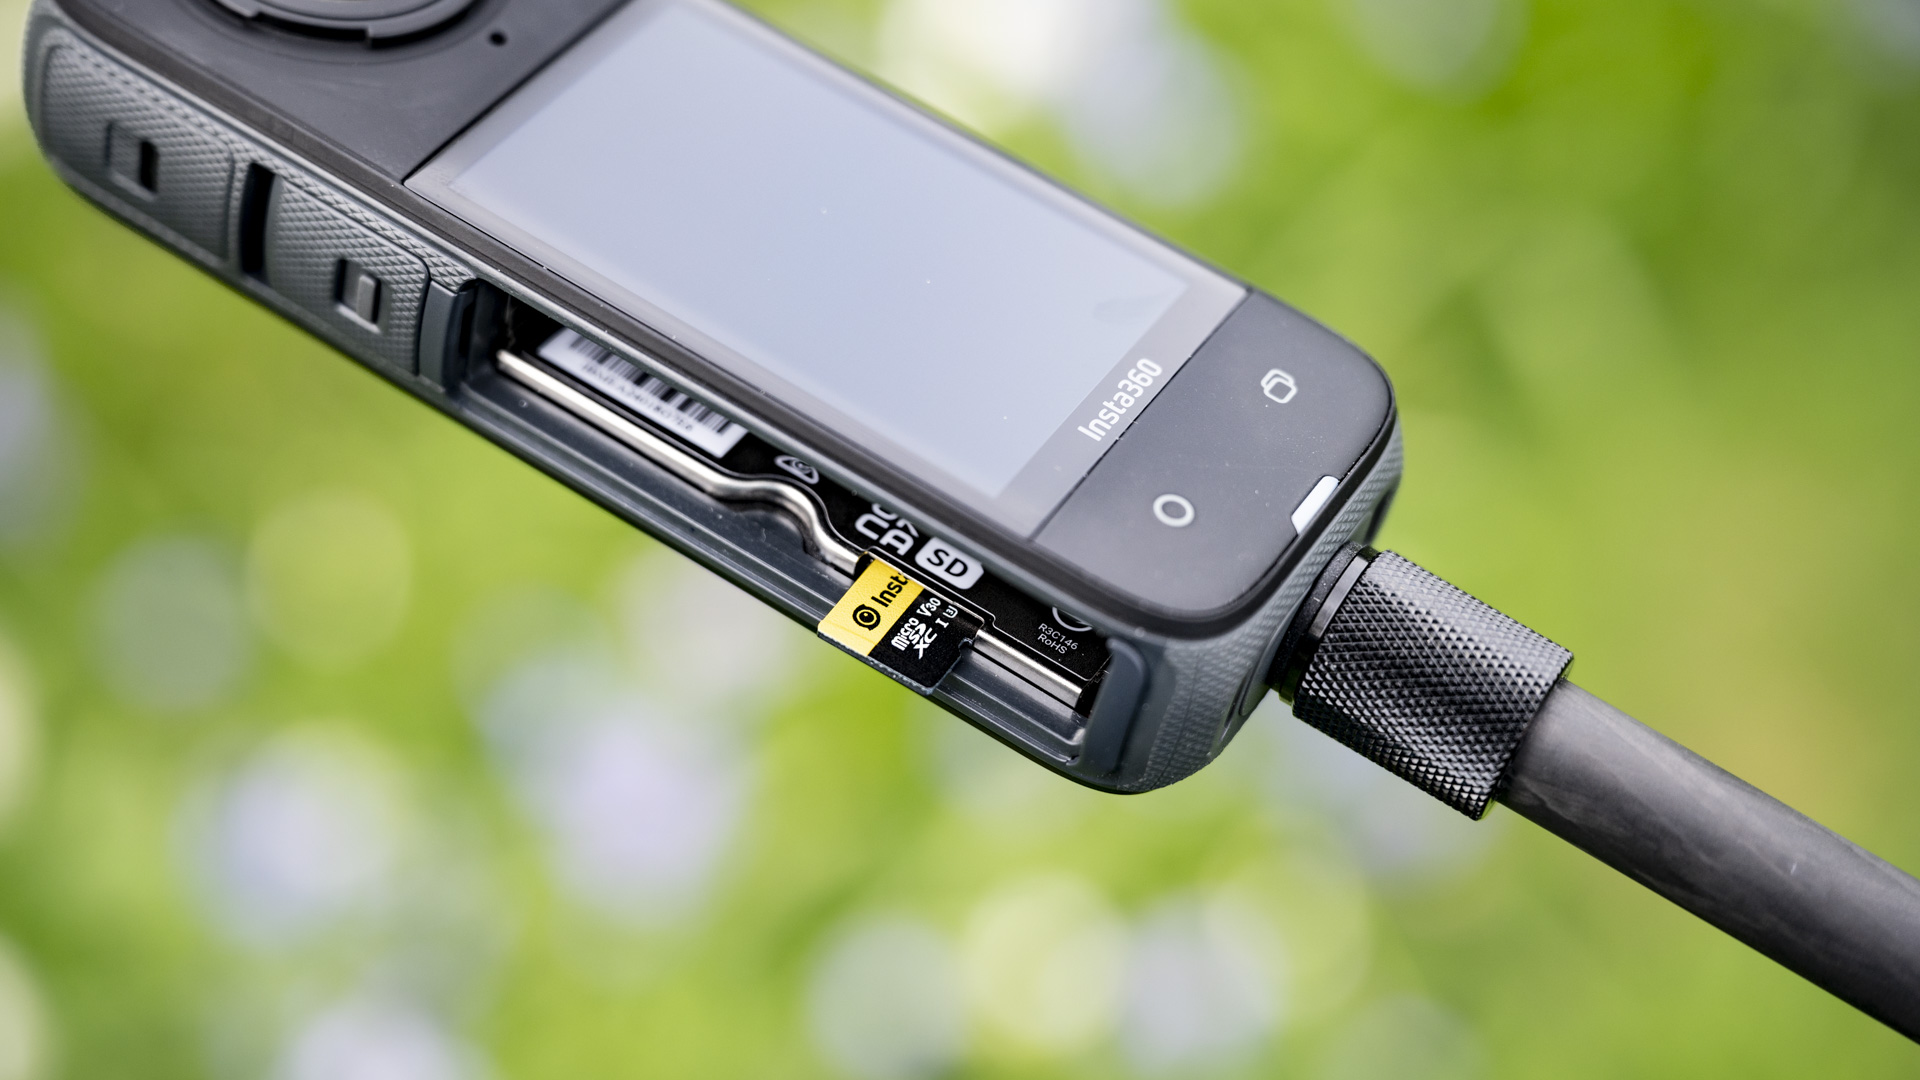
The X4 records onto microSD memory cards, and naturally, because of the waterproof design, the card slot is inside the camera's battery compartment rather than directly accessible outside, as is the case on the less-robust and action-averse DJI Osmo Pocket 3.

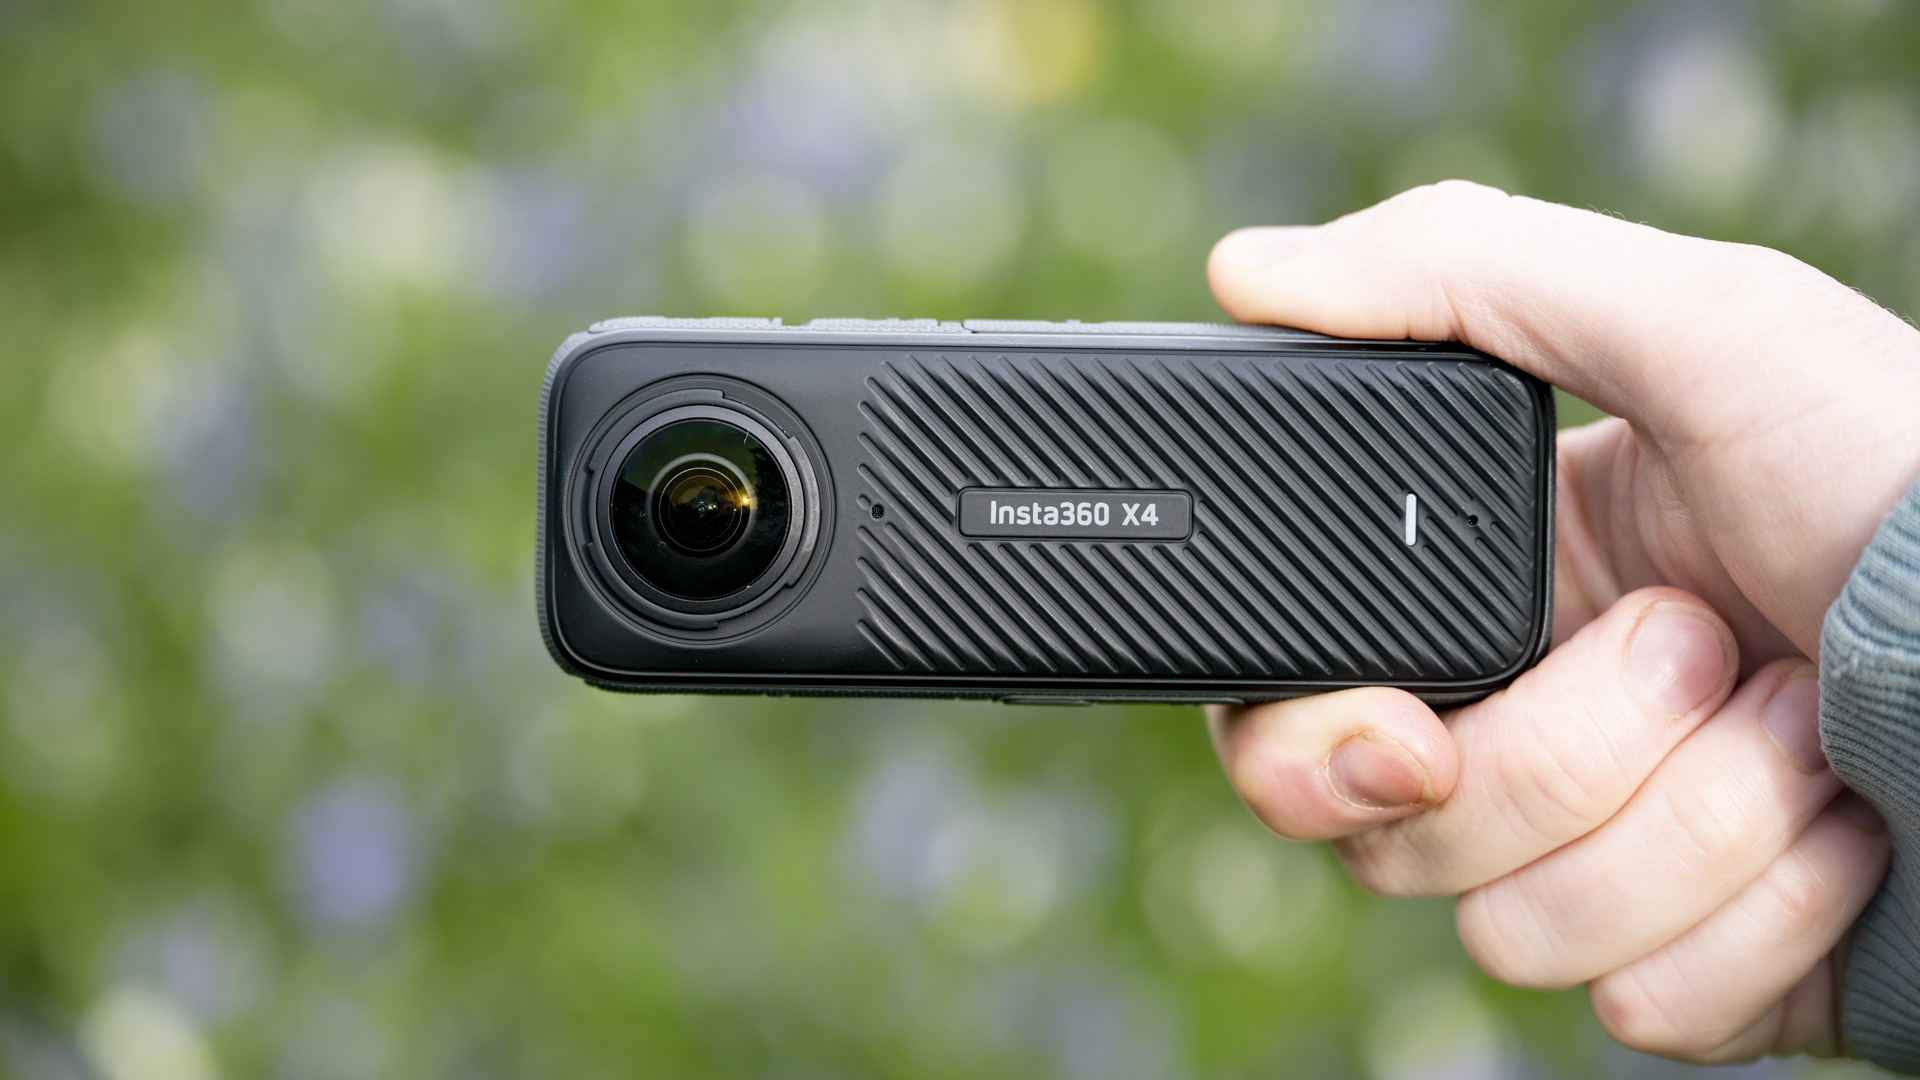
There's a slight increase in size from the X3, though it’s barely noticeable, plus a 10% increase in weight – the X4 weighs in at 7.16oz / 203g, and feels reassuringly solid for its diminutive size.
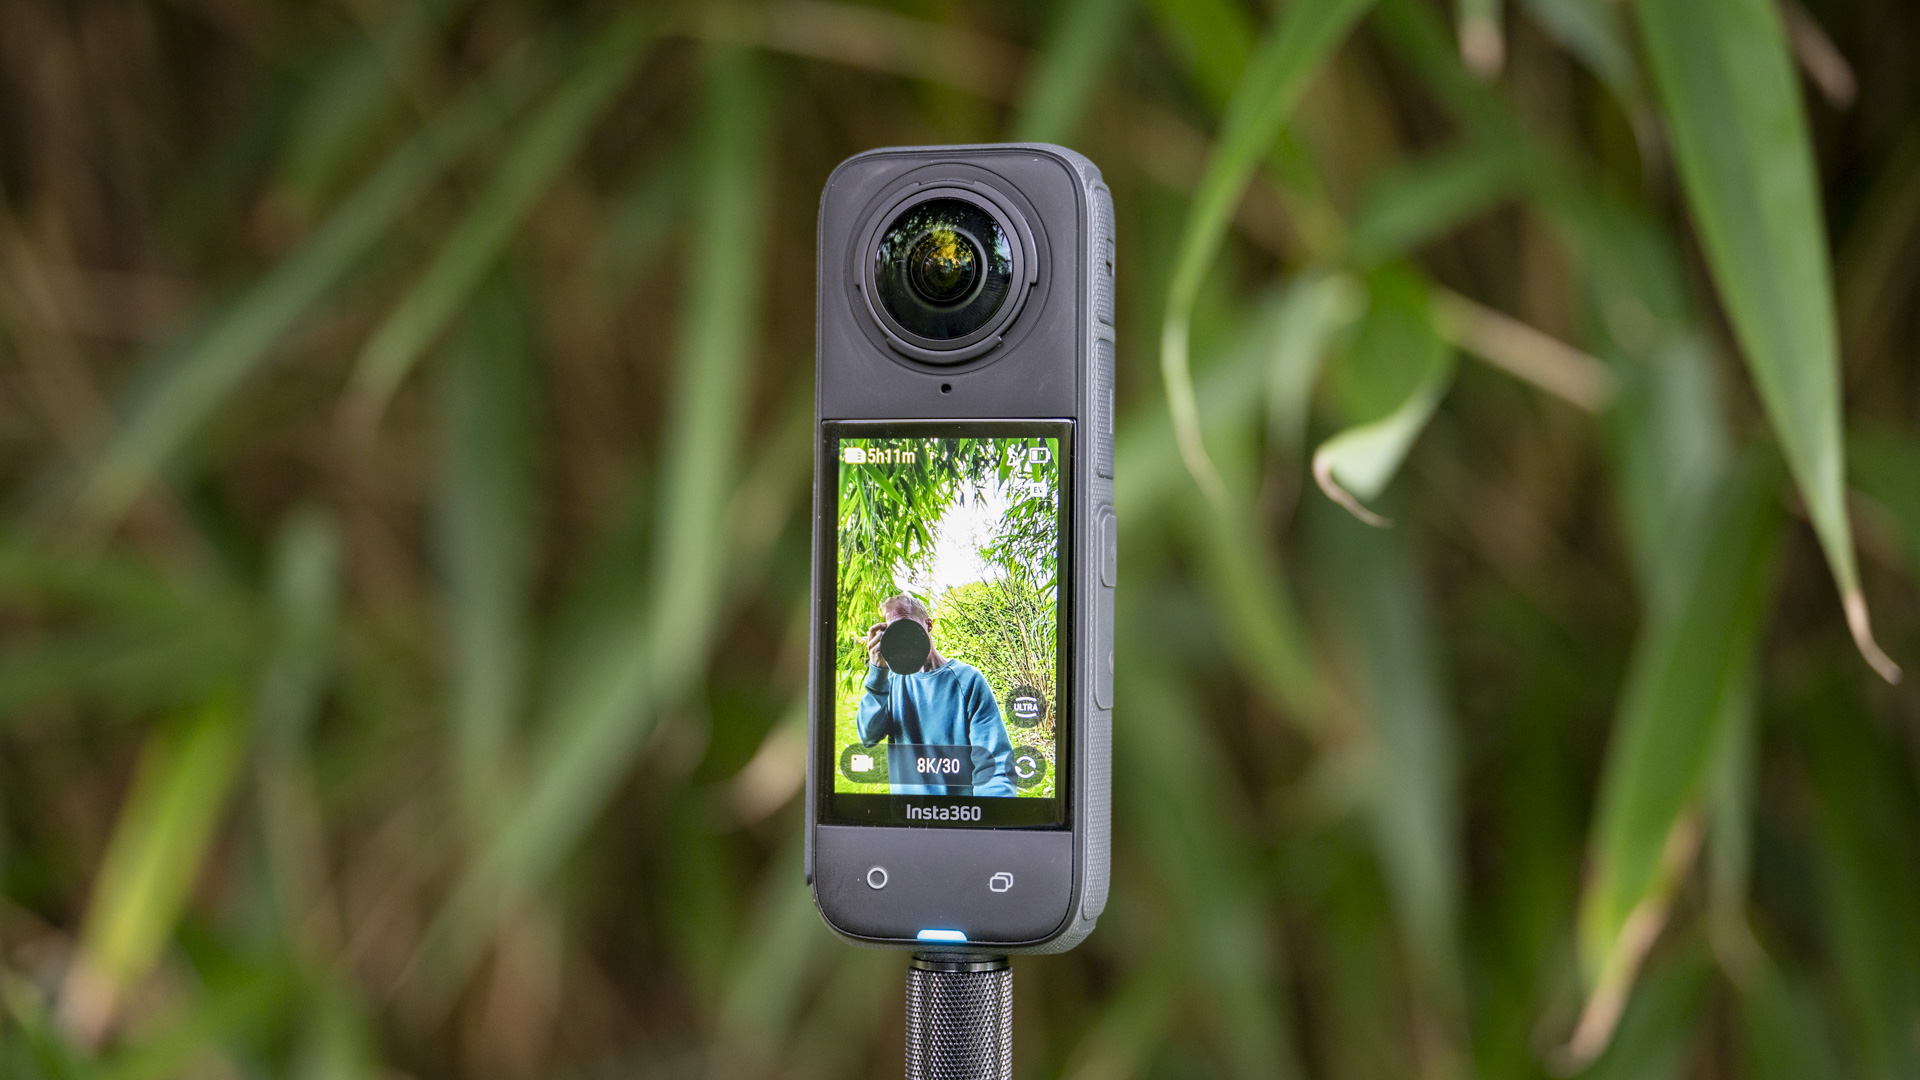
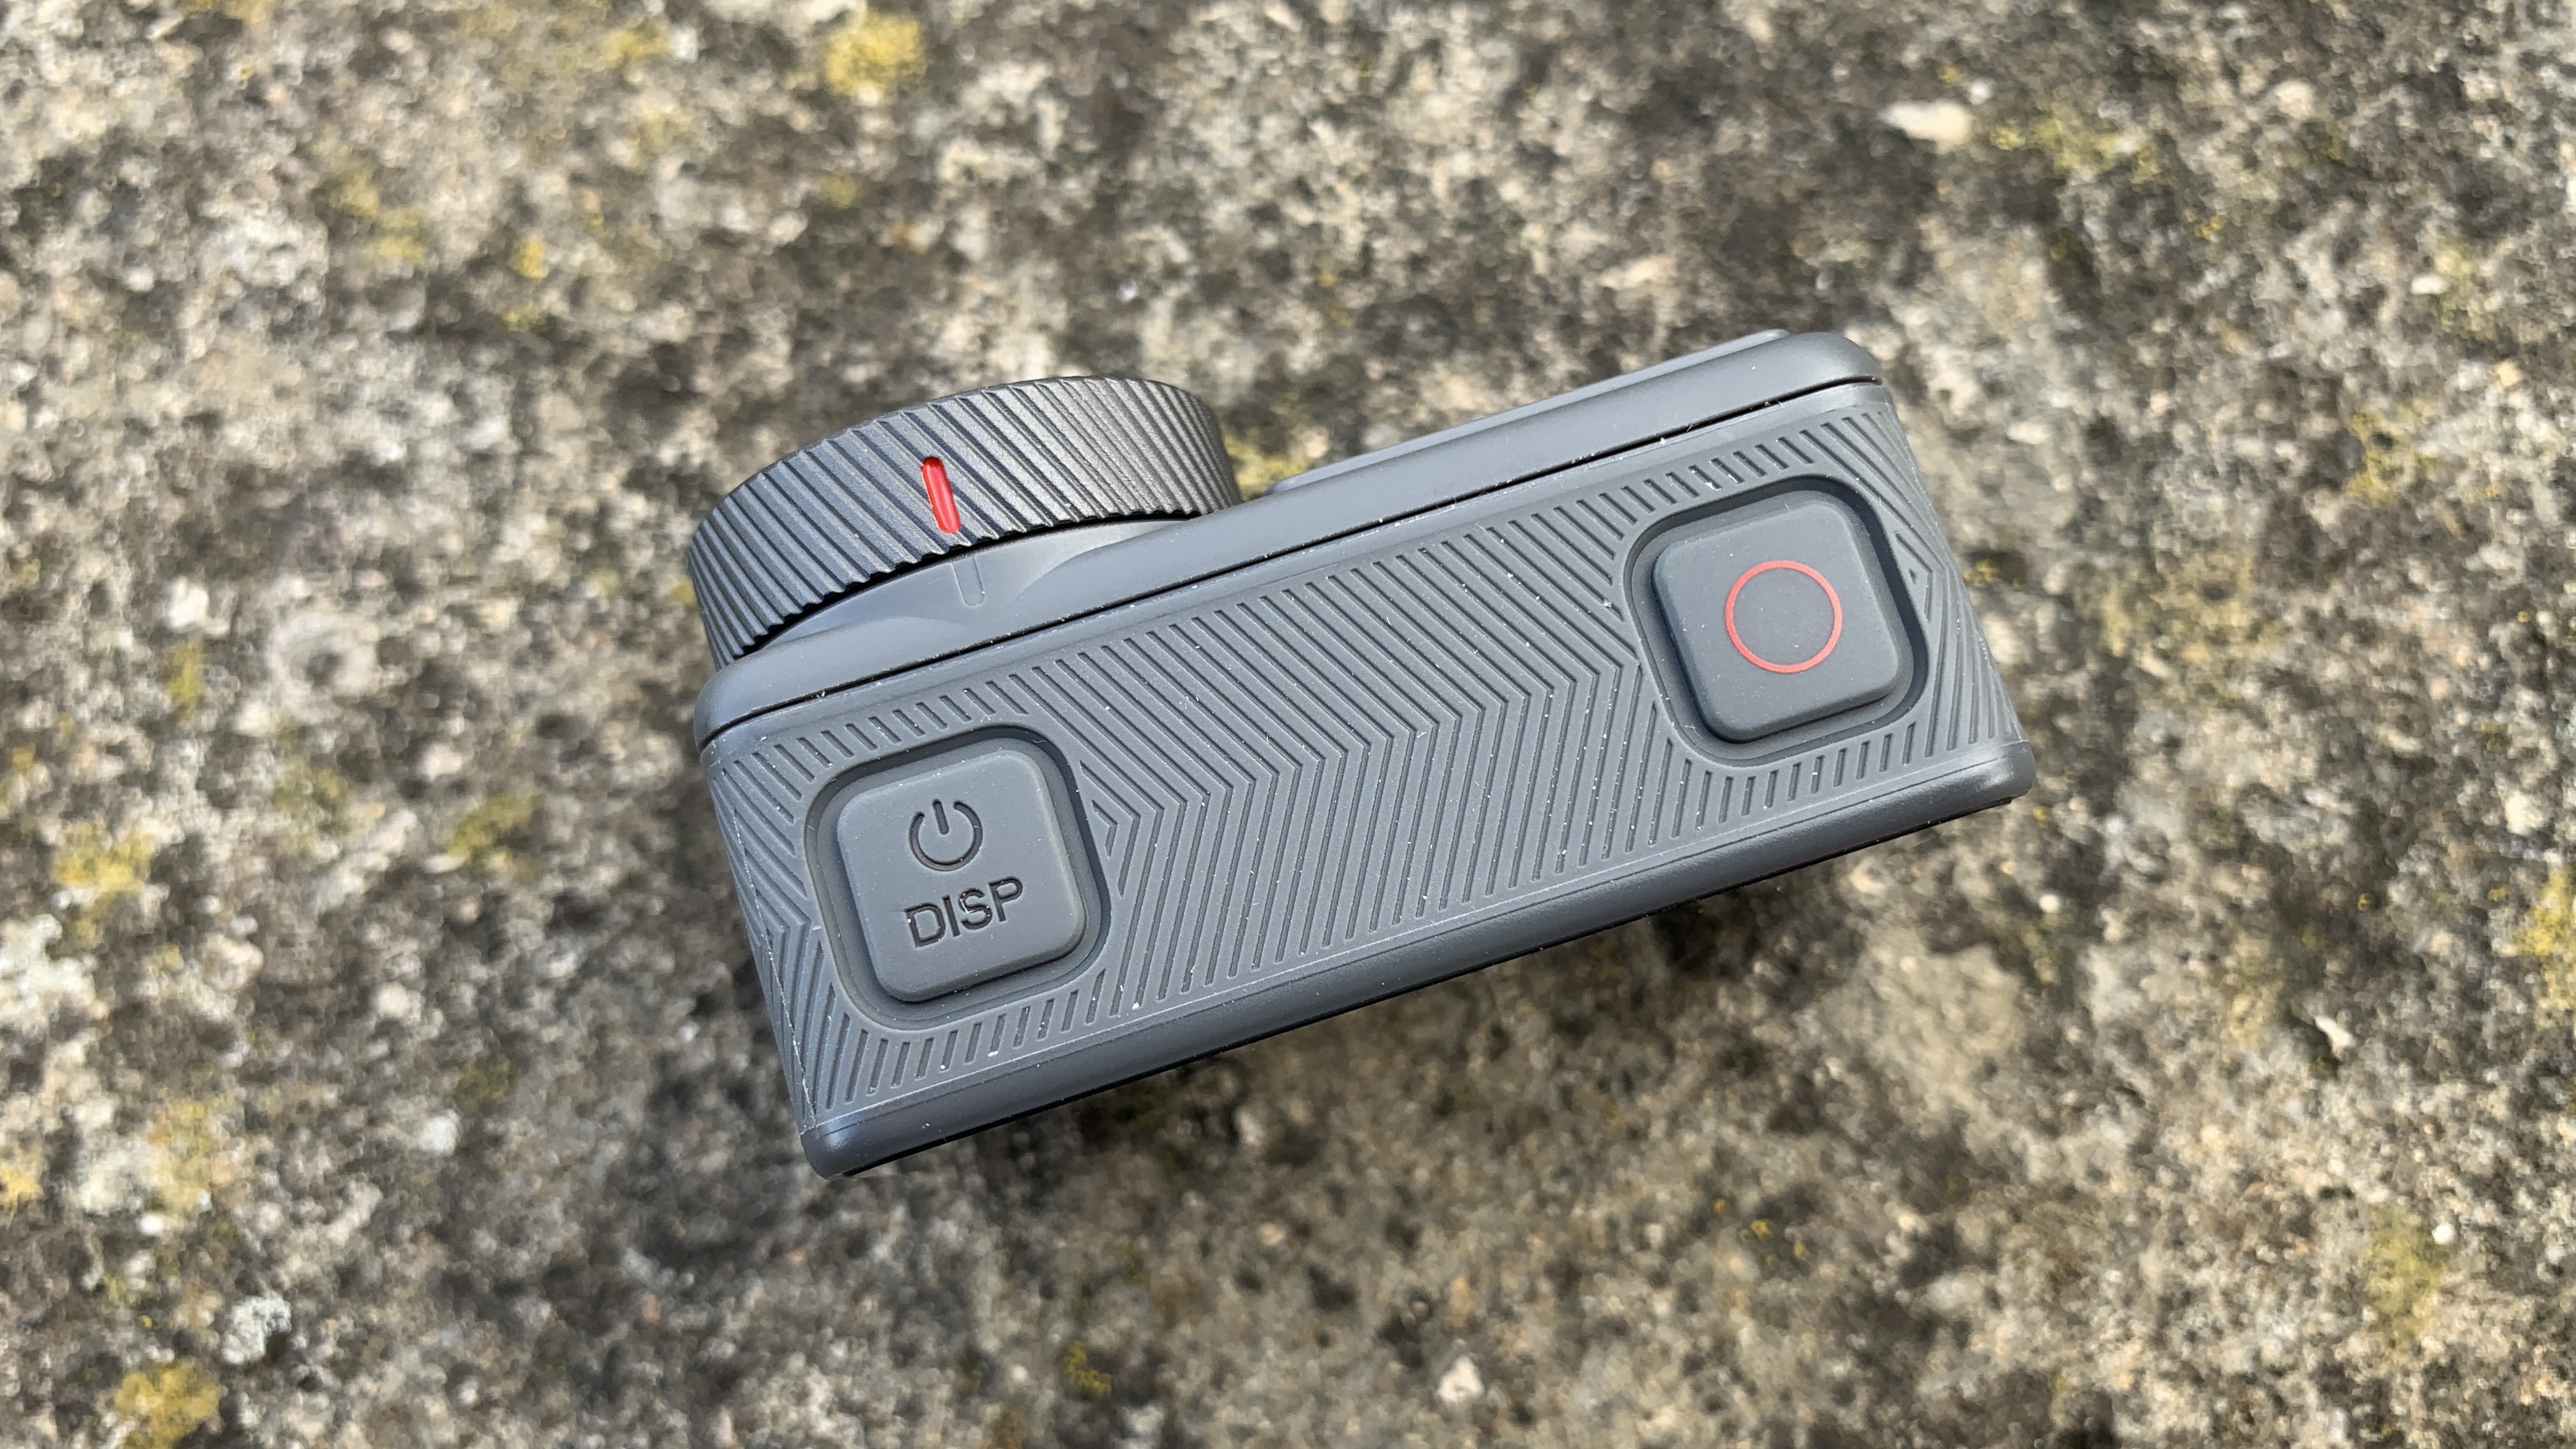
There are four direct physical controls around the camera: robust power and quick menu buttons on the side, plus shooting mode and record buttons under the generous 2.29-inch touchscreen. Most of the action happens through the responsive touchscreen.
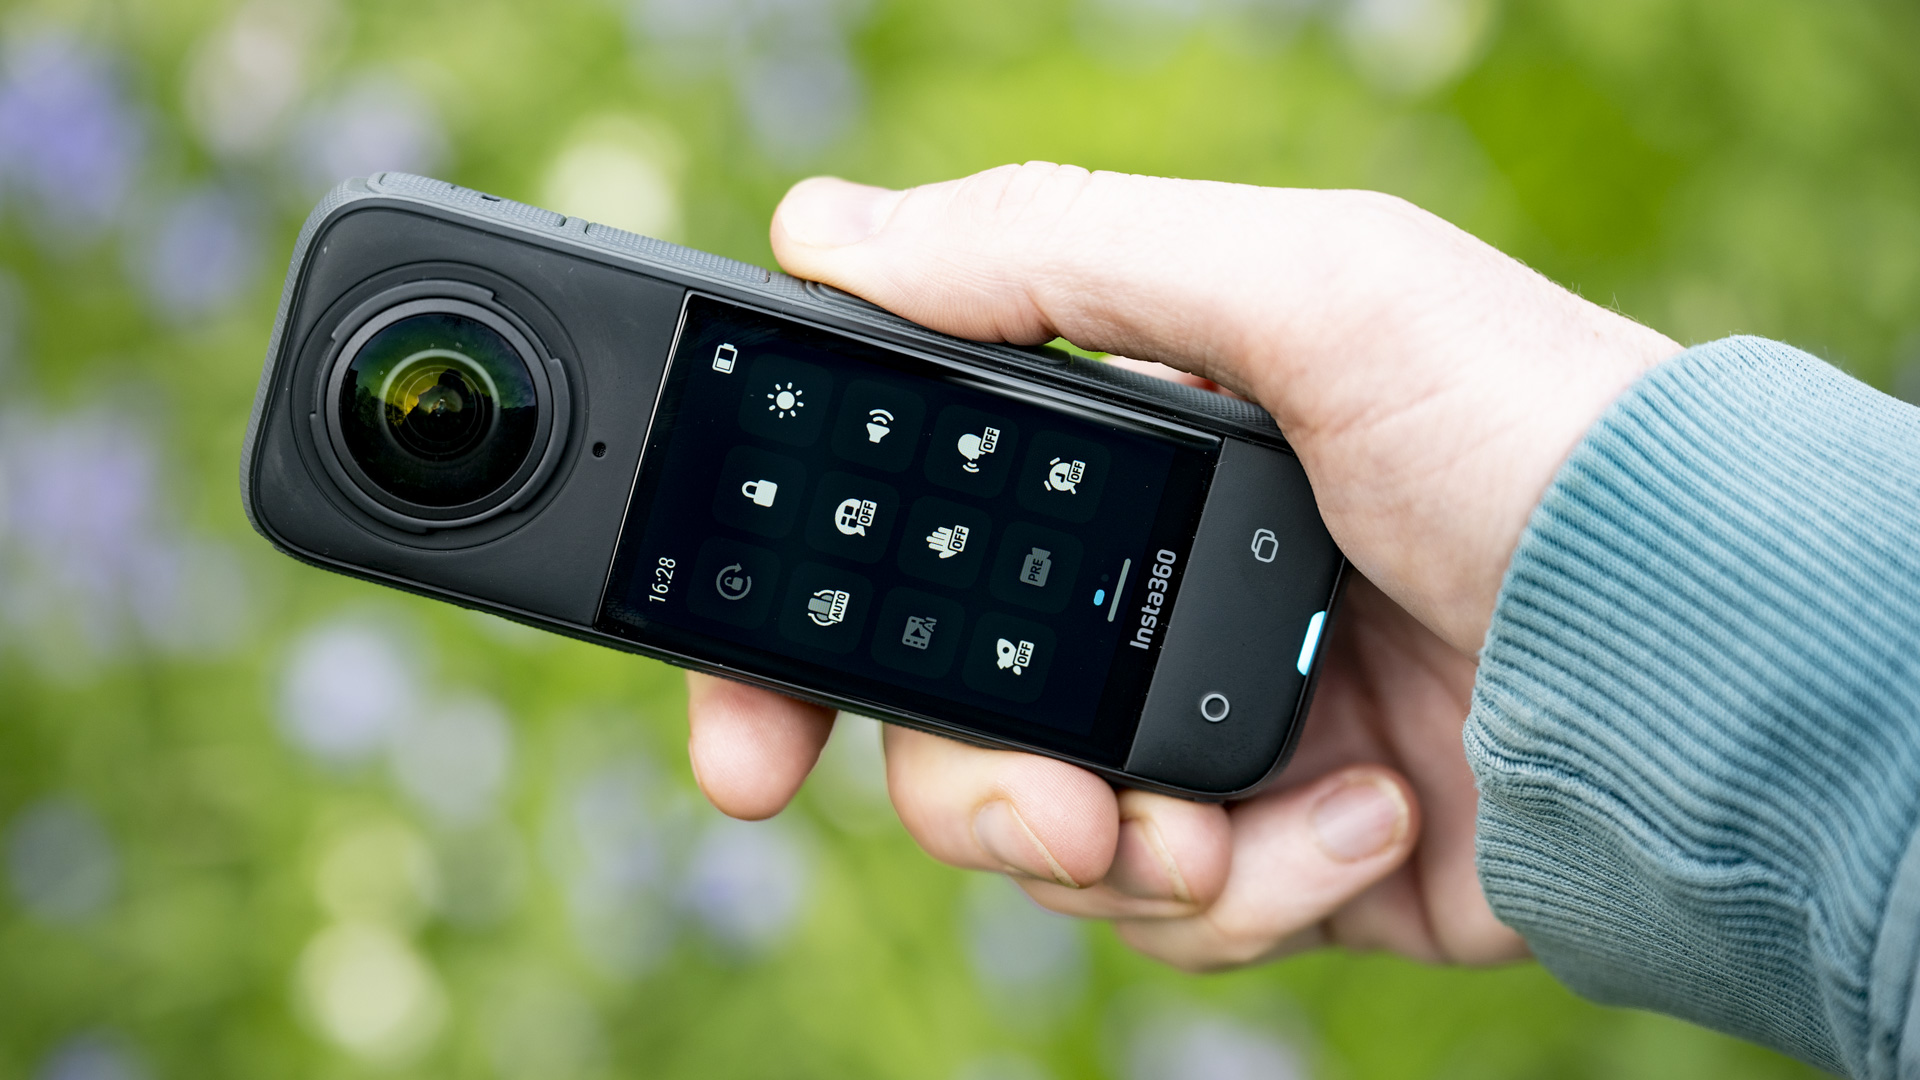
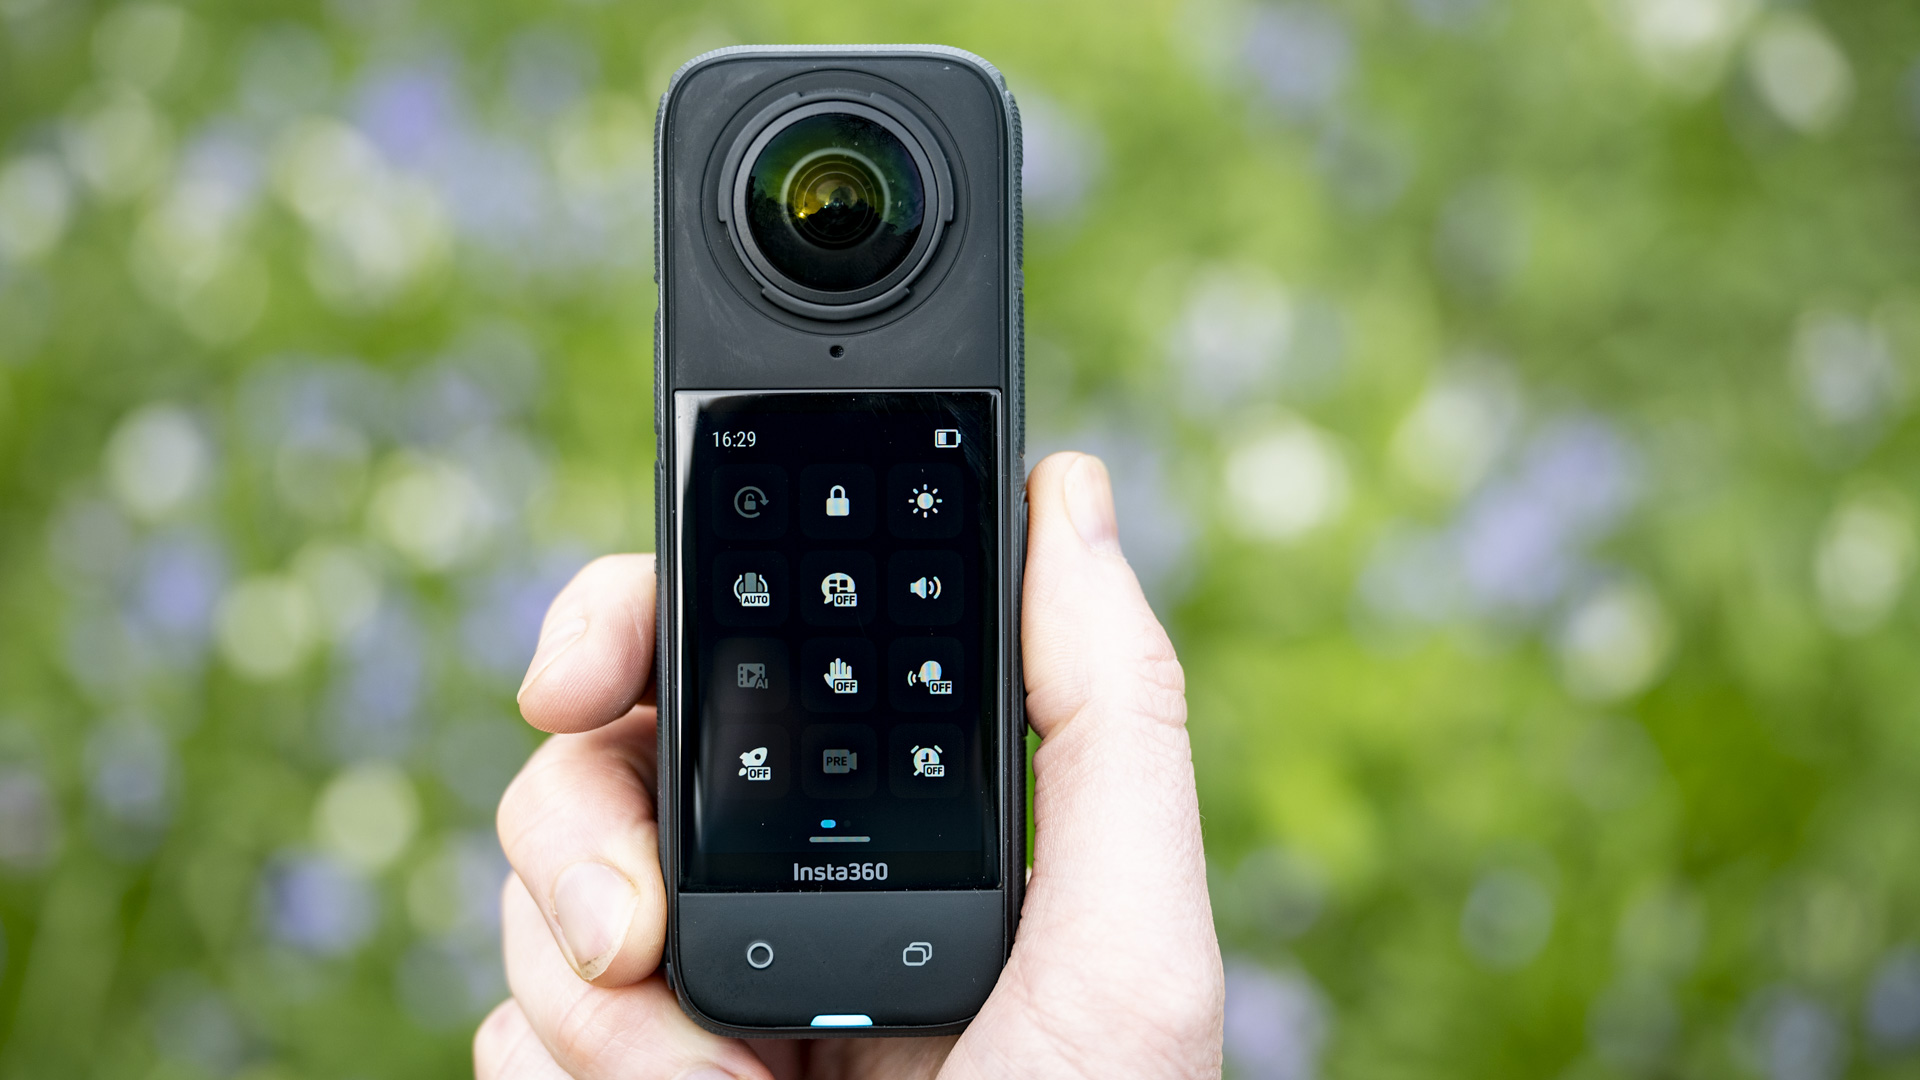
By default the customizable options displayed on screen for quick access include the shooting mode and resolution settings, the lens, plus the lens perspective. At a push you can switch between viewing 360-degree footage from the front or rear lens (in the single-lens mode, this option selects the lens you're recording with).
The user interface is simple and quick to navigate, though a little keen to go idle – I've needed to reopen the menu many times to confirm video mode selections.
Physical controls are hard to access when the camera is out of reach on a selfie stick, and that's where voice and gesture controls come in. You can command the X4 to start and stop video recording – which proved super-handy when I had it mounted three meters above my head on the extra-large selfie stick, while a peace sign gesture will trigger the timer for taking photos. The mixture of audible and visual commands covers you in most scenarios, including underwater.

There's more to dig into by swiping the touchscreen. Flicking from right to left reveals exposure settings including color profile, while swiping left to right opens up your photo and video gallery for playback, and during playback you can swipe the screen to move around the 360-degree perspective.
Swiping down from the top of the screen opens up the main menu, through which you can activate and deactivate a number of controls such as gesture and voice commands, and connect to compatible Bluetooth-equipped devices such as headphones and remotes. You can also adjust the screen brightness here.
Explanatory on-screen text appears for most of the operational controls and shooting modes, which is super-handy when you’re getting started, especially for getting the most out of the shooting modes.
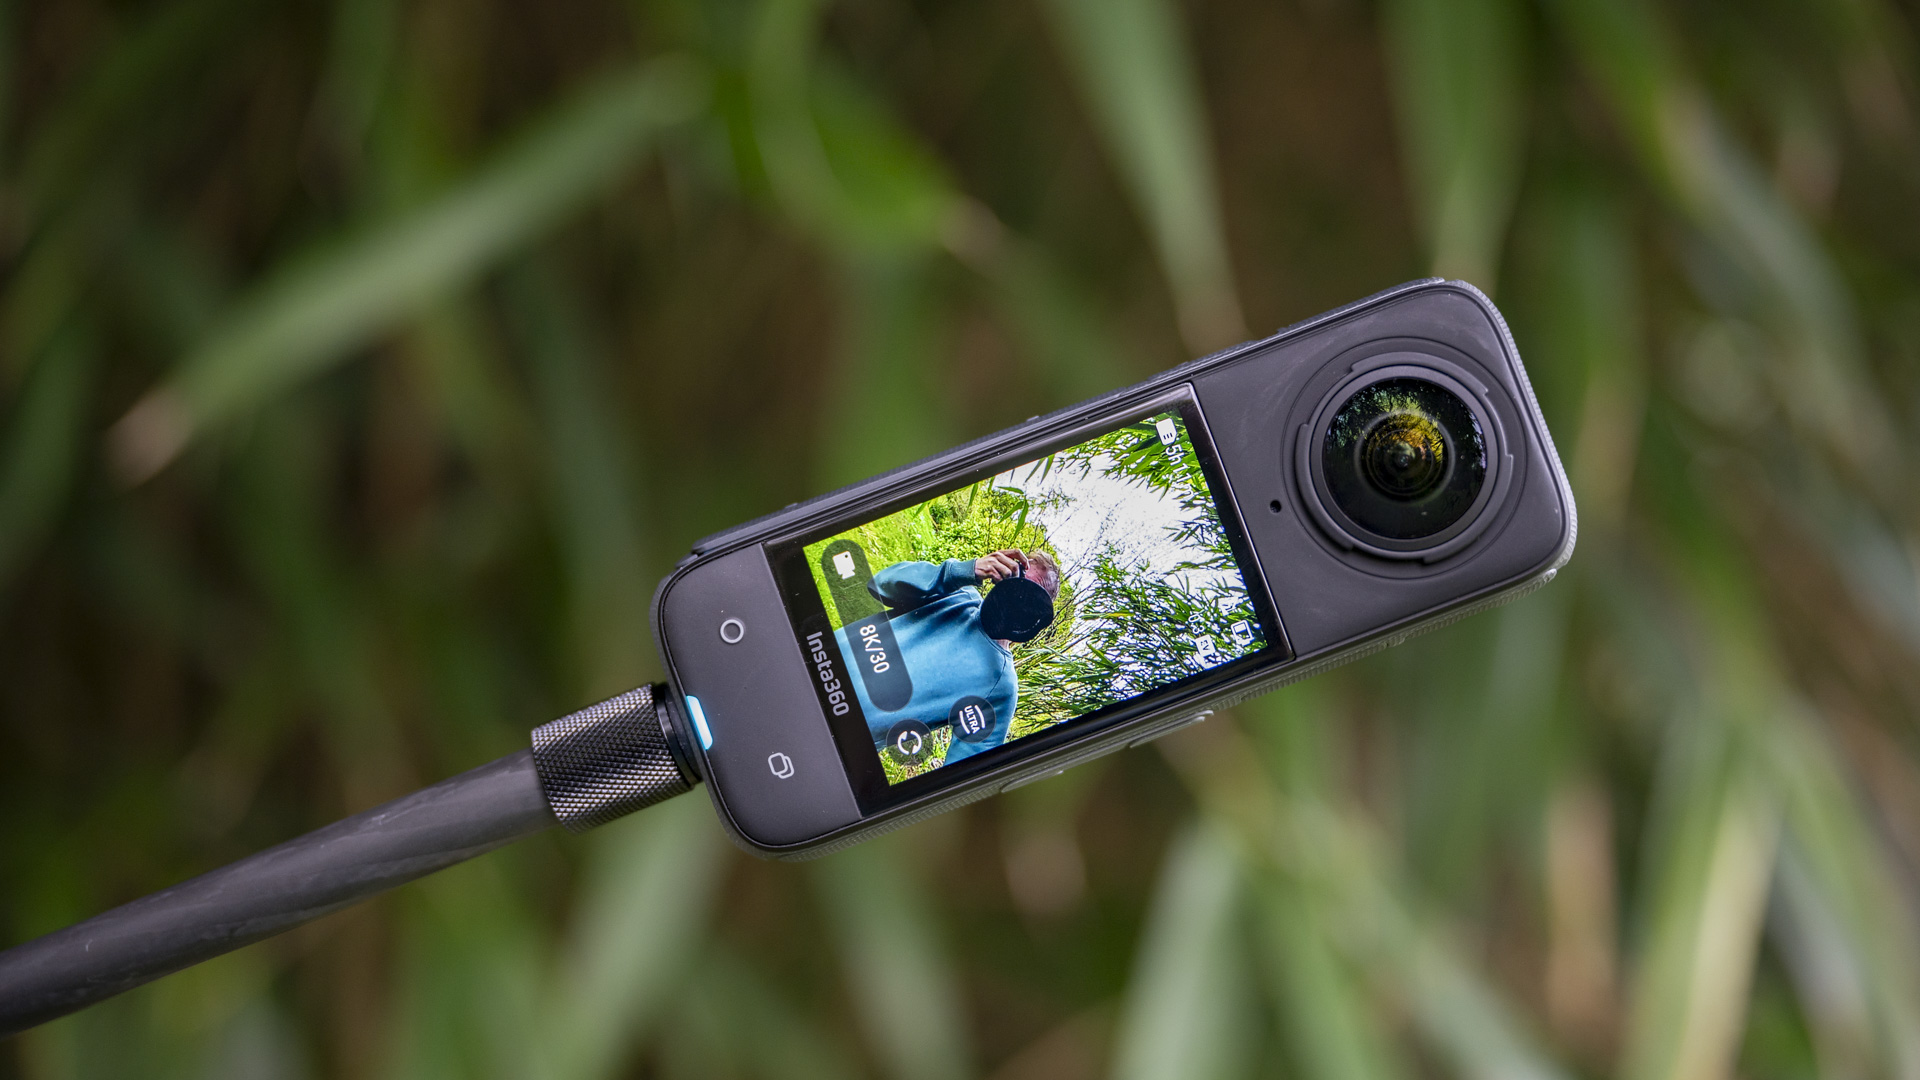
The X4 is designed to be used in vertical orientation, and as such your handling and viewing experience is largely in the 9:16 ratio. You can record in horizontal format using the single-lens mode, and there’s also a multi-aspect FreeMe mode where you can choose the aspect ratio, but overall the user experience is geared to content creators and mobile users familiar with the vertical format.
During recording, the X4 can get warm quickly, especially in the power-hungry high-resolution video modes. If you're using the X4 for shooting action, your movement will go some way to cooling the camera down, but if you're recording while largely stationary or in particularly warm environments, things can get moderately warm.
Overall, the X4 handles superbly for users of all experience levels and abilities.
As already noted, the X4 has significantly better battery life than the X3, a camera that was already one of the best of its kind. The new 2290mAh battery betters the X3's 1800mAh unit, providing up to 135 minutes of recording time – that's 67% longer than the X3's 81 minutes.
To conserve power, the camera automatically switches off the display after recording for a certain time, which is necessary especially when you're recording videos over a long period, such as timelapses. Ultimately, I've been able to use the X4 heavily over the course of a day and still have juice left, and you can also charge the camera on the go via USB-C.
Aside from a sluggish startup time – you have to wait 2-3 seconds after pressing the ‘on’ button before you’re able to record – the X4 is a responsive camera in every way. Voice and gesture commands are fairly reliable, with the tally lamp confirming you're in business.
Insta360's FlowState image stabilization is superb. The ultra-wide perspective of the lenses provides plenty of latitude for applying stabilization, and also for the 360-degree Horizon Lock, which can level your footage when the camera is moving at all angles.
There are also plenty of shooting modes to have fun with – and having fun is one of the huge draws of the X4. I shot plenty of Bullet Time effect videos with the help of accessories supplied by Insta360 for this review – you attach the selfie stick to a mini tripod that doubles up as a handle, and then swing the selfie stick with attached X4 over your head.
Bullet Time shoots at 120fps, which marries up with the fast speed at which you swing the camera above your head to produce a 360 rotation with you at the center of the action.
Hyperlapse is designed for speed ramps when you're on the move – a fun effect for showing off new places – while timelapse is designed more for when the camera is stationary, such as capturing the transition from golden hour to nighttime.
Single-lens modes include the MeMode, with subject tracking that automatically keeps you (selfies) or your subject at the center of the action. FreeFrame is super-handy, too, providing an adjustable aspect ratio, so you can decide if you'd rather have a horizontal or vertical aspect for social later on.
There are too many modes to fully unpack here – suffice to say the Insta360 X4 combines a plethora of fun shooting modes with a simple user experience.
The Insta360 X4's headline feature is its 8K video recording, a bump from the 5.7K resolution of the X3. Given the particularly wide field of view of the twin lenses, the extra resolution gives you much greater flexibility when editing your 360-degree videos to focus in on key action areas, and detail looks nice and crisp from what I've seen so far.
There's also a greater range of frame rates, and you can record slow-motion video up to 100fps in 4K (the X3 recorded 100fps in 3K), and the single-lens mode can now shoot in 60fps where the X3 was limited to 30fps. This increased flexibility enables you to mix up the feel of your shots, and also makes you feel like the X4 is a competent standard action camera, especially with modes like FreeFrame, which enables you to mix up aspect ratios.
The X4 isn't just a video camera, and can record 360-degree photos up to 72MP and 18MP HDR photos. Switch to the single-lens mode and photo resolution is 36MP, and there's an easy to set gesture-controlled timer for any photo mode, giving you time to get ready for your close-up.
The high-resolution 1/2-inch sensor is pushed to the limit indoors, and indeed in bright sunlight, especially when you consider that the X4 records everything around you, from bright sky to deep shadows.
As such, it's worth thinking through which video modes you'll use for scenes. HDR video captures more detail in bright highlights and deep shadows, with the downside being footage that looks visibly processed rather than natural. A decent alternative for those who don't mind editing is shooting in the Flat color profile, and then grading the footage afterwards.
We're currently processing the wide variety of sample photos and videos that we've shot with the Insta360 X4, and we'll update this hands-on review with those, once we've spent sufficient time editing and analyzing the quality of the content we've captured. Only then will we add a final score rating for the X4 – but our first impressions are hugely promising.
If our Insta360 X4 review has inspired you to think about other options, here are two more cameras to consider…
We had our hands on the Insta360 X4 for several weeks before its official launch. Sadly we've not used it for the kind of adrenaline-filled extreme sports that you see in the launch videos, although it's still had extensive real-world testing.
We've run it in 8K capture for long periods to test its power and stamina, used it for vlogging on the move, and for moderate sports such as road biking. We've tried out the various video resolutions, color profiles and HDR video capture to see how the small 8K sensor copes in bright and low light.
The various video modes have been played with too, including bullet time and hyperlapse, plus we've taken still photos in the various options.
First reviewed April 2024
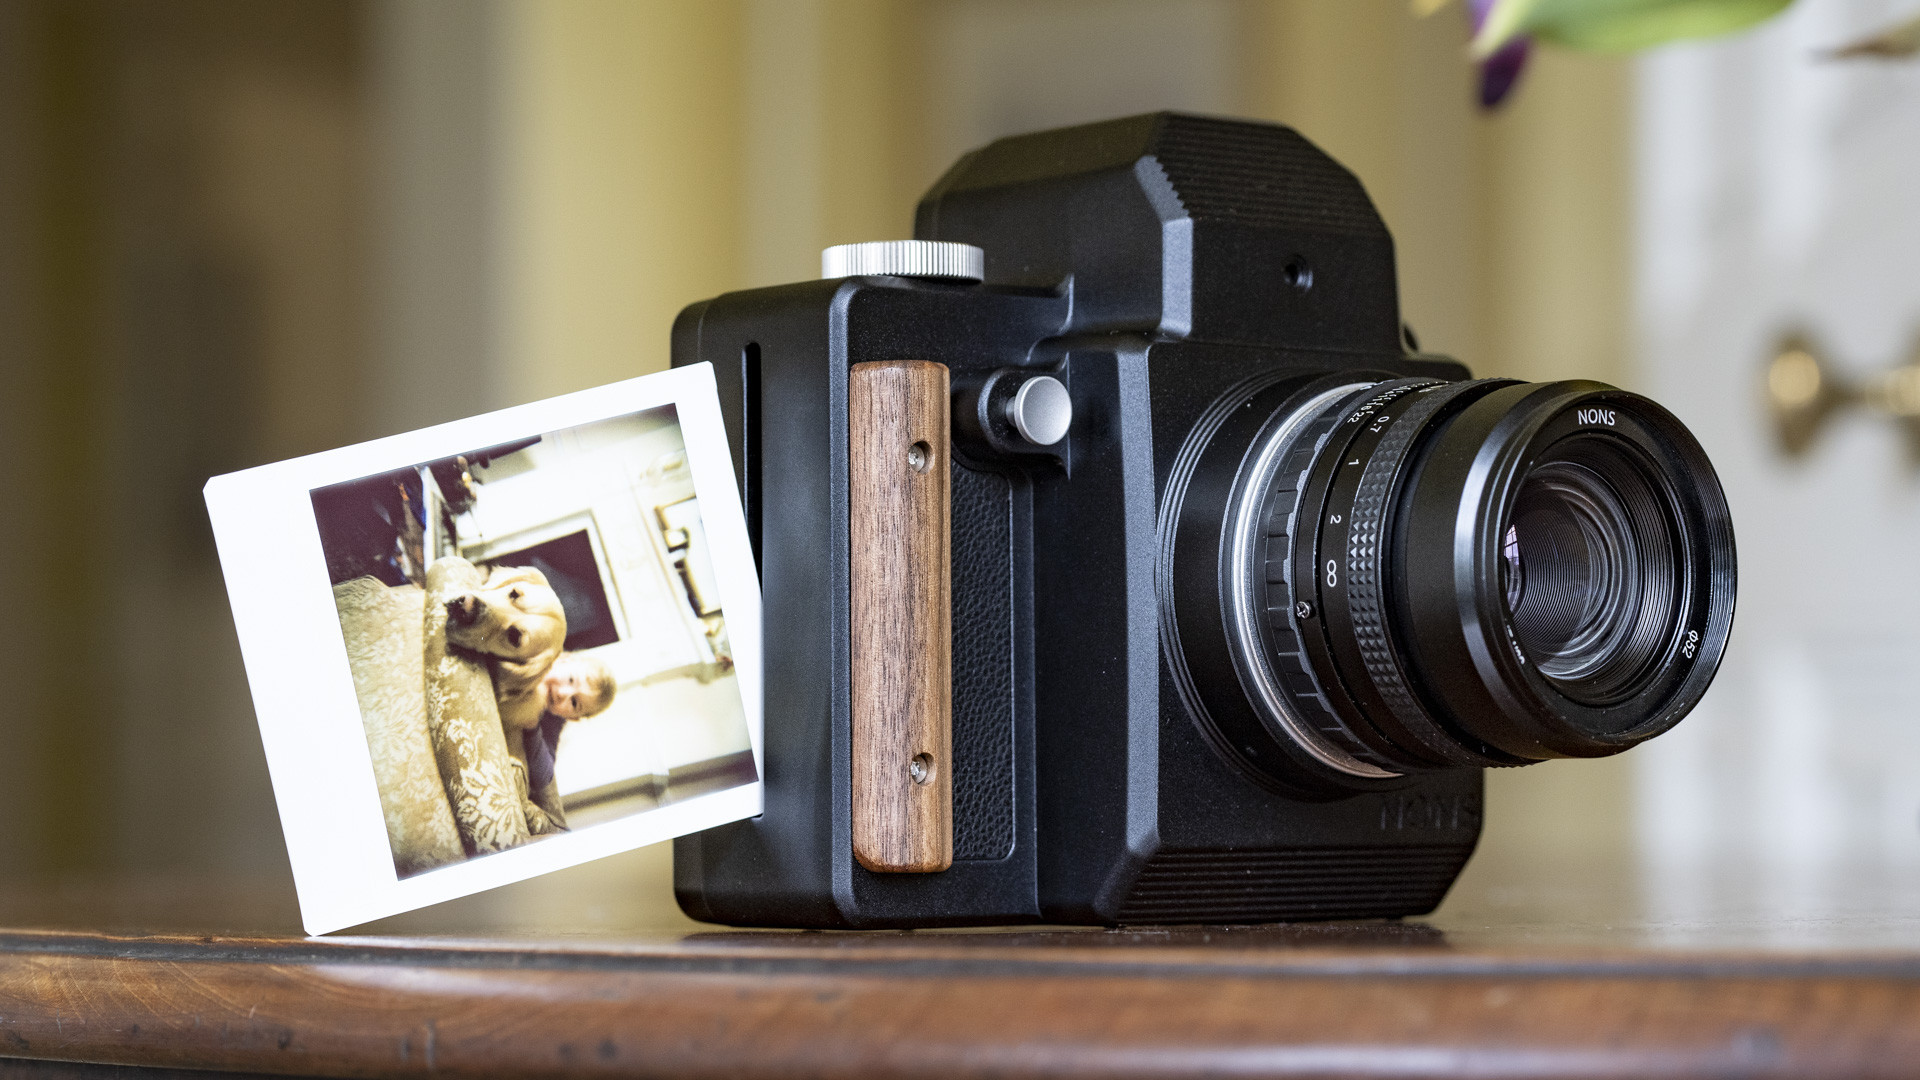
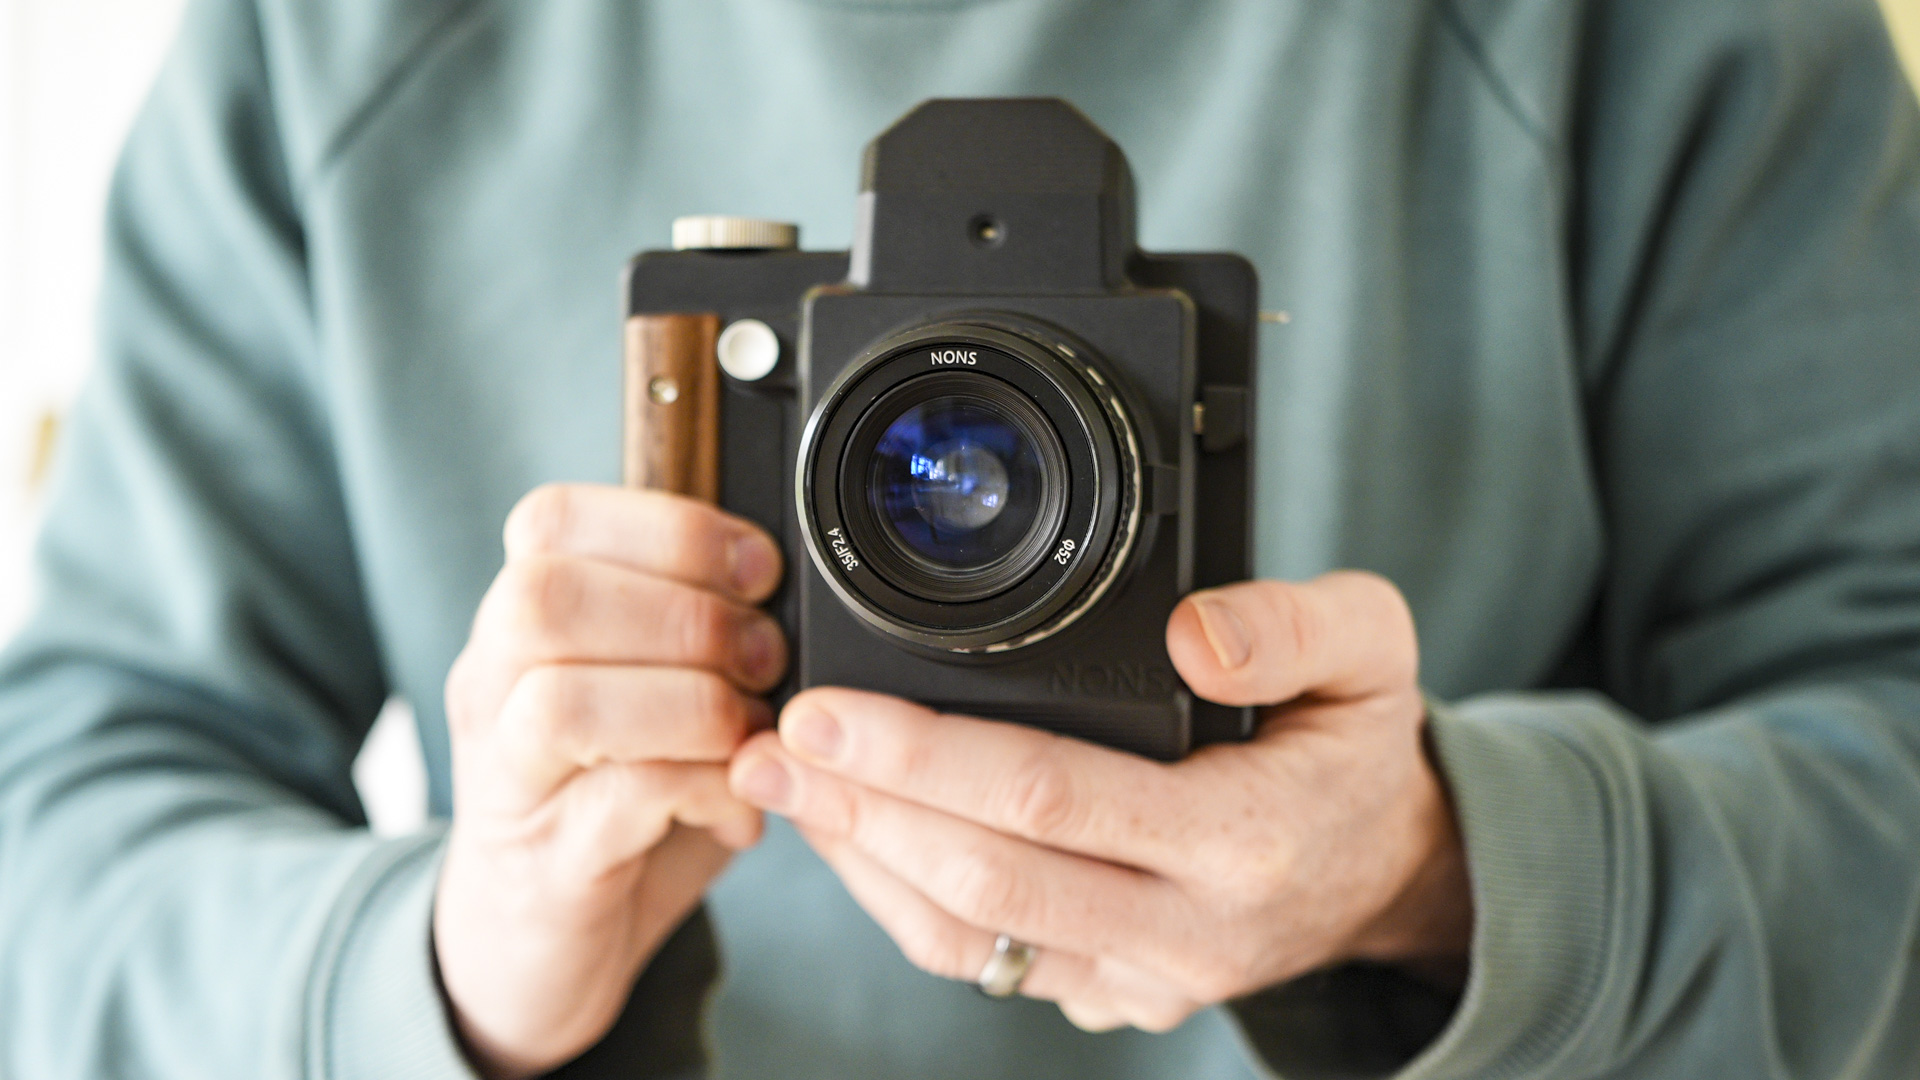
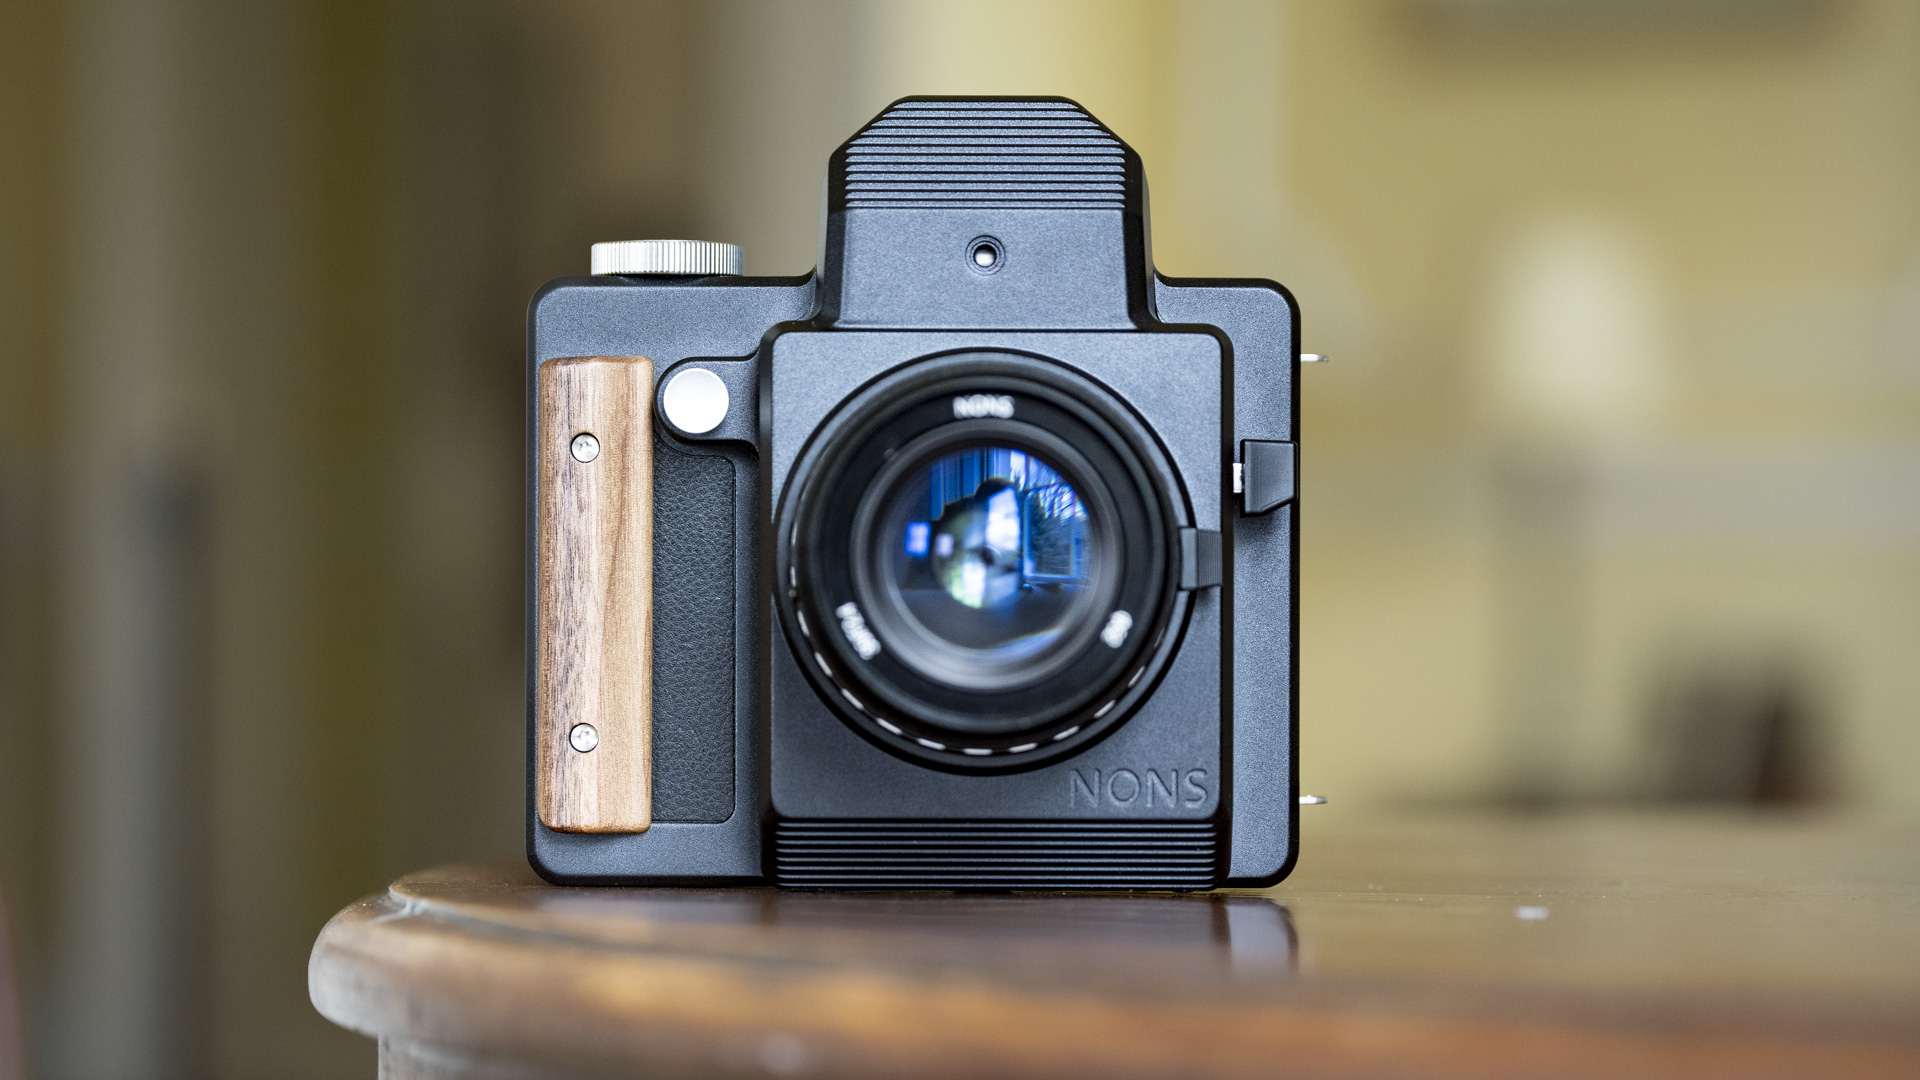
As TechRadar’s Cameras Editor I see all kinds of weird and wonderful devices for capturing stills and video, but just when I thought I’d seen it all, the Nons SL660 popped up in my YouTube feed and piqued my curiosity. It’s an instant camera, but not as we know it, being an angular hunk of metal – an SLR with passive Canon EF lens mount, that captures to readily available Fujifilm Instax Square film.
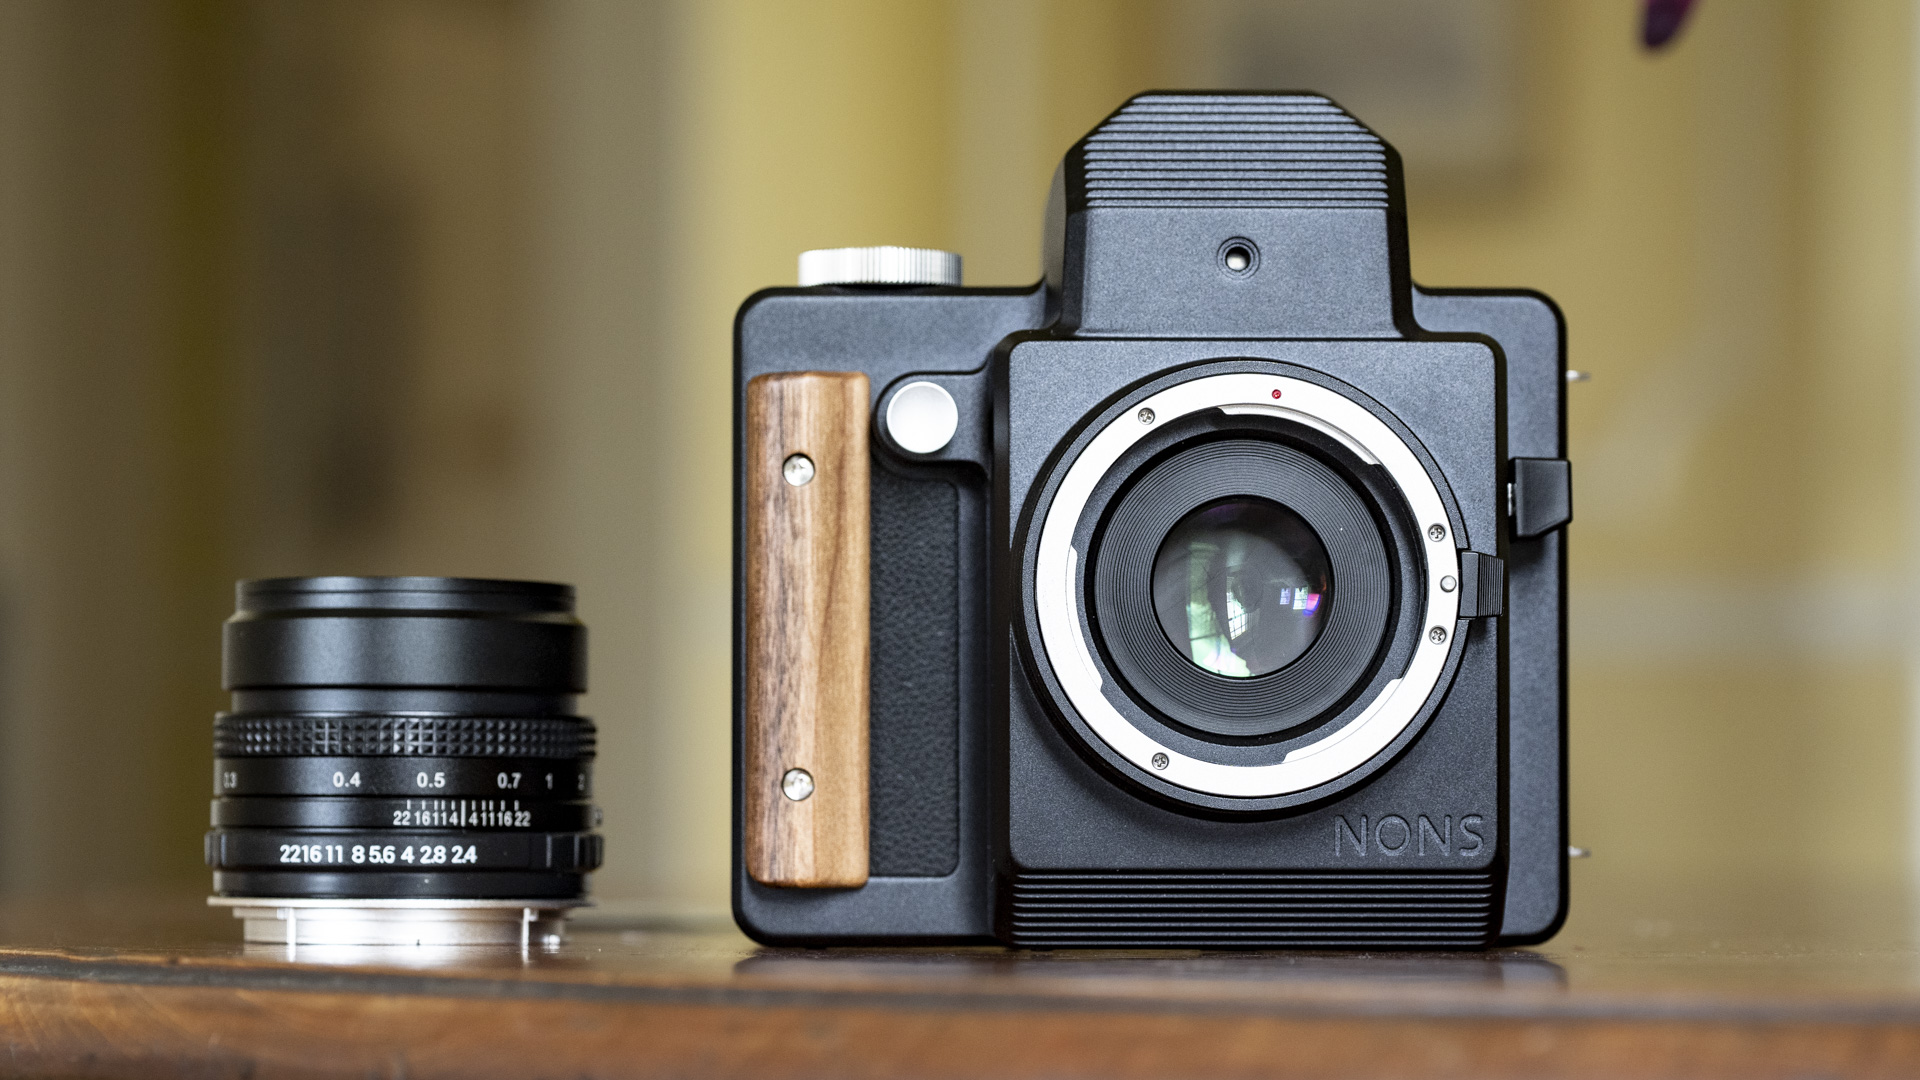
Nons makes two lenses that are directly compatible with the SL660’s Canon EF lens mount – a 35mm f/2.8 and a 50mm f/1.8 – plus a range lens adaptors for other popular SLR lens mounts, including Nikon F and Pentax K. When I requested a loan sample from Nons for this feature, I asked for the Canon EF to Nikon F adaptor because I own a few excellent Nikon lenses, including the full-frame Nikon 20mm f/2.8D AF.
There’s also a Nons SL645, camera, and the key difference between that model and the SL660 is that it records onto Instax Mini film instead. Personally, I much prefer the size of Instax Square prints (and the larger-still Polaroid film even more), so the SL660 was the obvious choice for review.
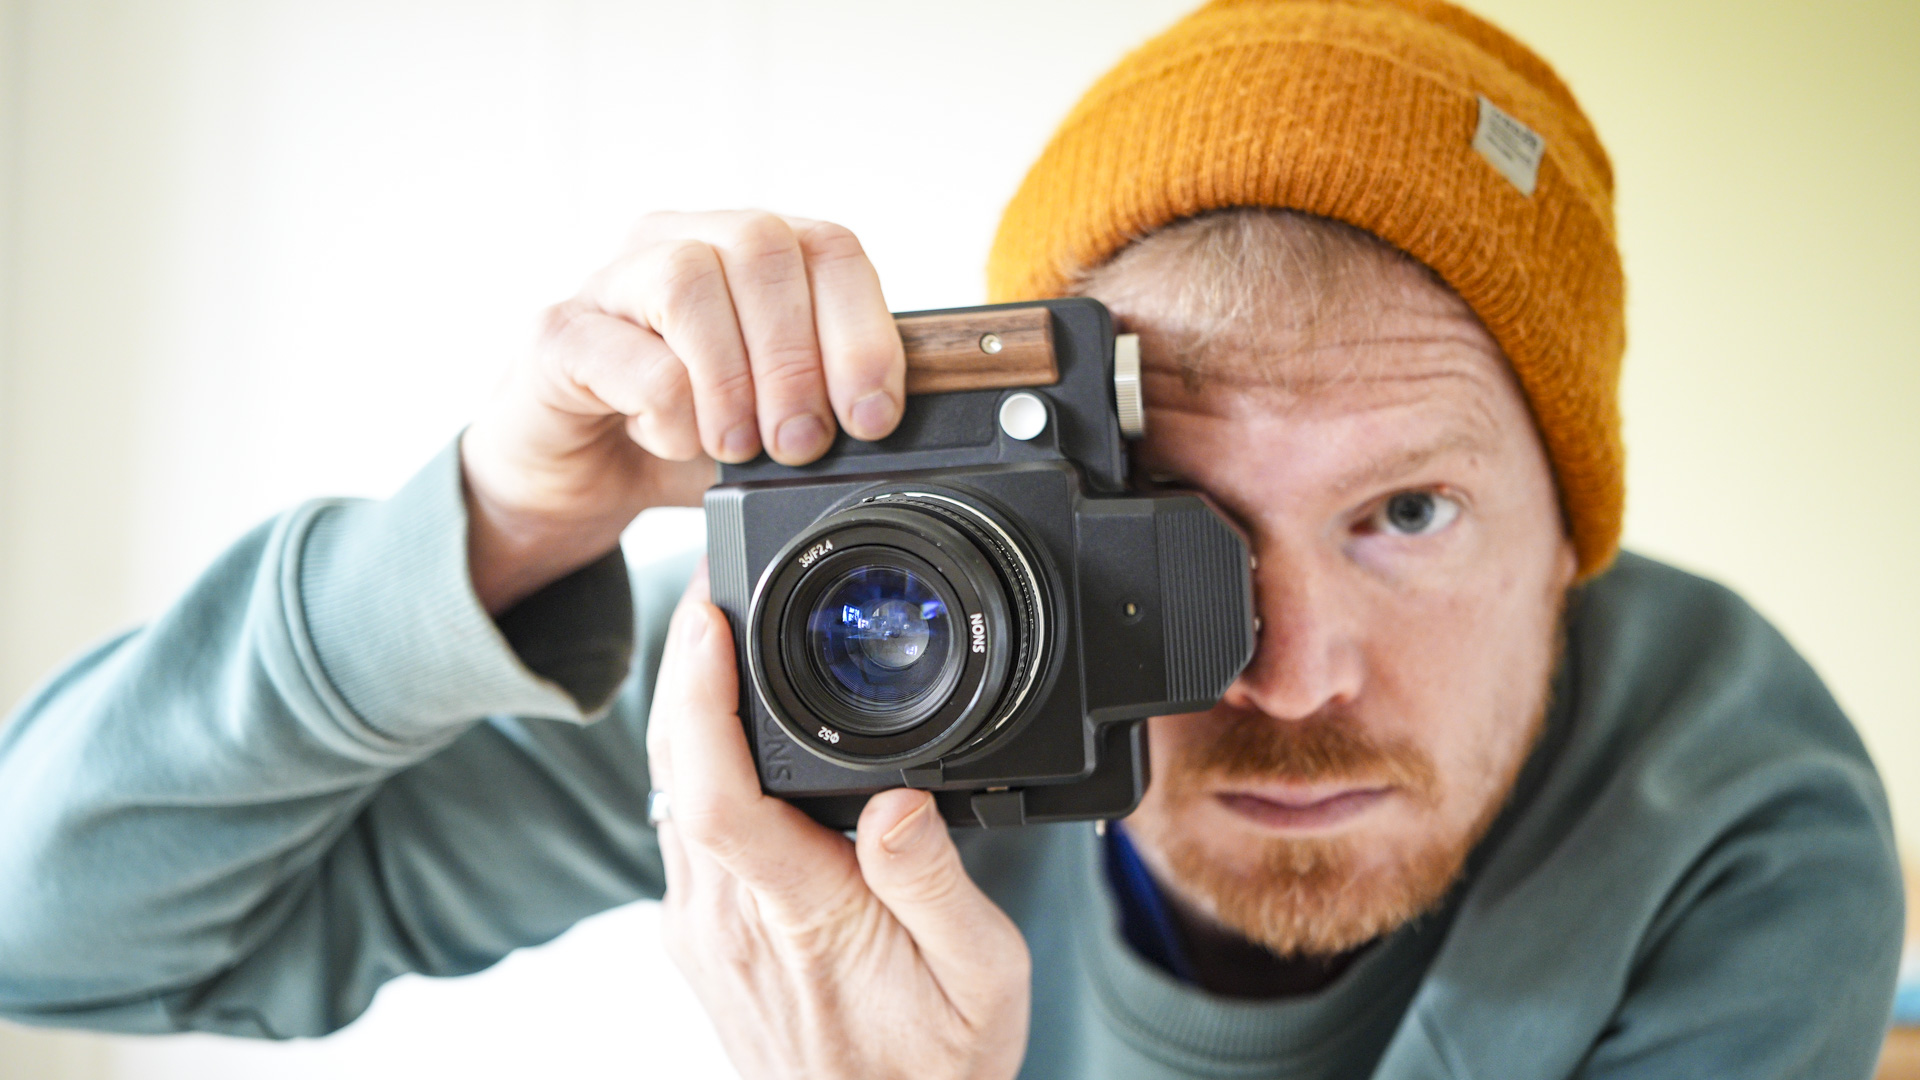
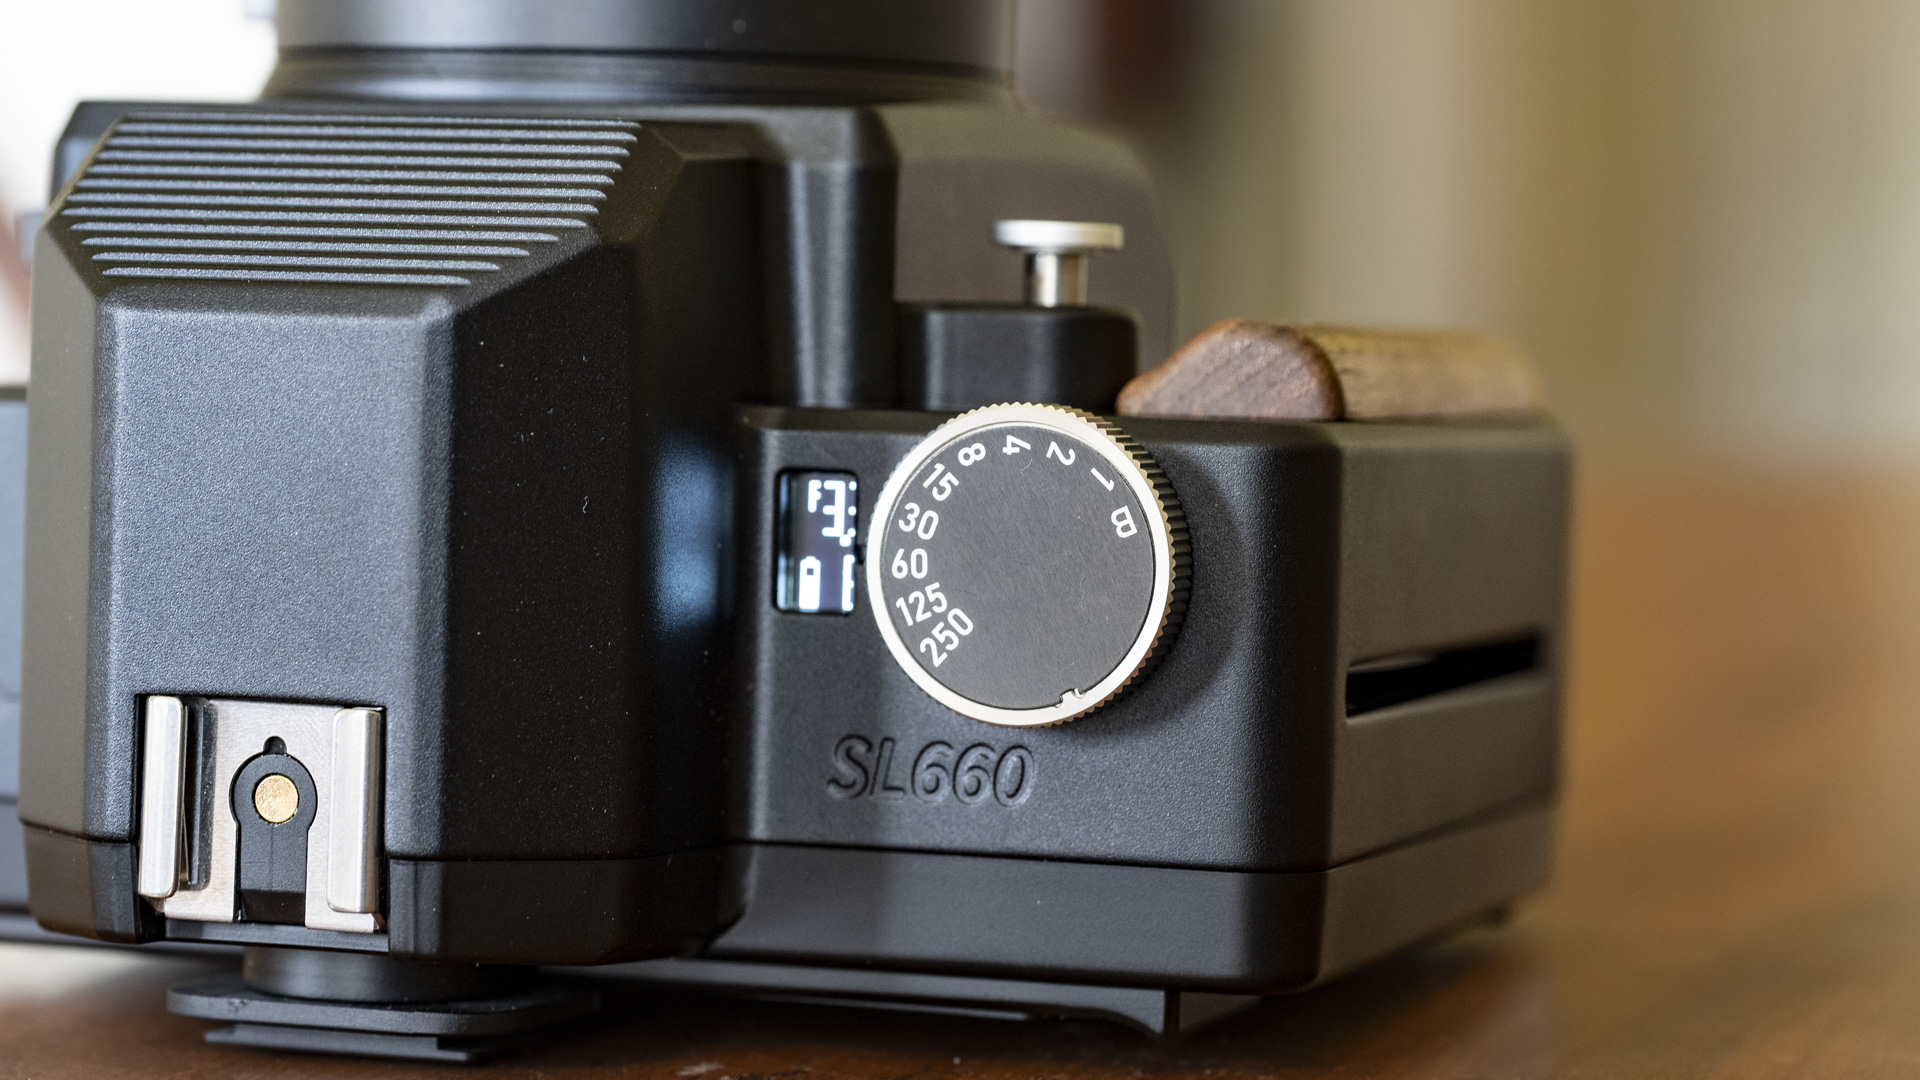
Unlike most simple point-and-shoot instant cameras that only offer auto exposure, the Nons SL660 is SLR by design, and entirely manual in operation. You’ll need to select the shutter speed and lens aperture, with an exposure meter above the lens telling you what aperture to use with the selected shutter speed. Your frame is viewed through a pentaprism viewfinder, focus is manual, and you even have to manually eject the print when you’ve taken the shot – a feature that enables multi-exposure shooting.
This is truly a photographer’s instant camera, and to that end you can swap lenses to mix up the type of shots you can make. It’s also one of, if not the most, expensive instant cameras available. It’s pricier because it’s made of tough metal and in smaller batches versus the standard plastic used in most other mass-produced instant cameras like the Fujifilm Instax SQ40; the Nons SL660 is an altogether different camera to those, and the high-end build quality goes some way towards justifying the significant outlay.
The SL660 is a bulky and heavy instant camera, and the image quality it's capable of producing is ultimately limited by the Instax Square film it uses – you will, for example, need an ND filter in bright light. Despite its constraints, I'm charmed by it, and I suspect that of all the best instant cameras you can buy, the Nons SL660 is the one that photographer me will come back to again and again.
The Nons SL660 camera alone costs $599 / £603 from the Nons website or from Amazon, and with its passive Canon EF lens mount it's best suited to manual-control Canon EF lenses. If you use modern Canon EF lenses you might sacrifice aperture control (if your lens doesn't have an aperture ring) and even manual focus control ('STM' lenses). You can also purchase the SL660 as a bundle with the 35mm f/2.8 lens for $709 / £717, with the 50mm f/1.8 lens for $649 / £660, or with any one of a number of lens adaptors for $609 / £615. This high-end pricing pits the SL660 firmly against the Polaroid I-2 – the two cameras are in a different league to point-and-shoot instant cameras. Pricing for the Nons SL645 starts at $539 / £541. We'll update this review if and when pricing and availability for Australia are confirmed.
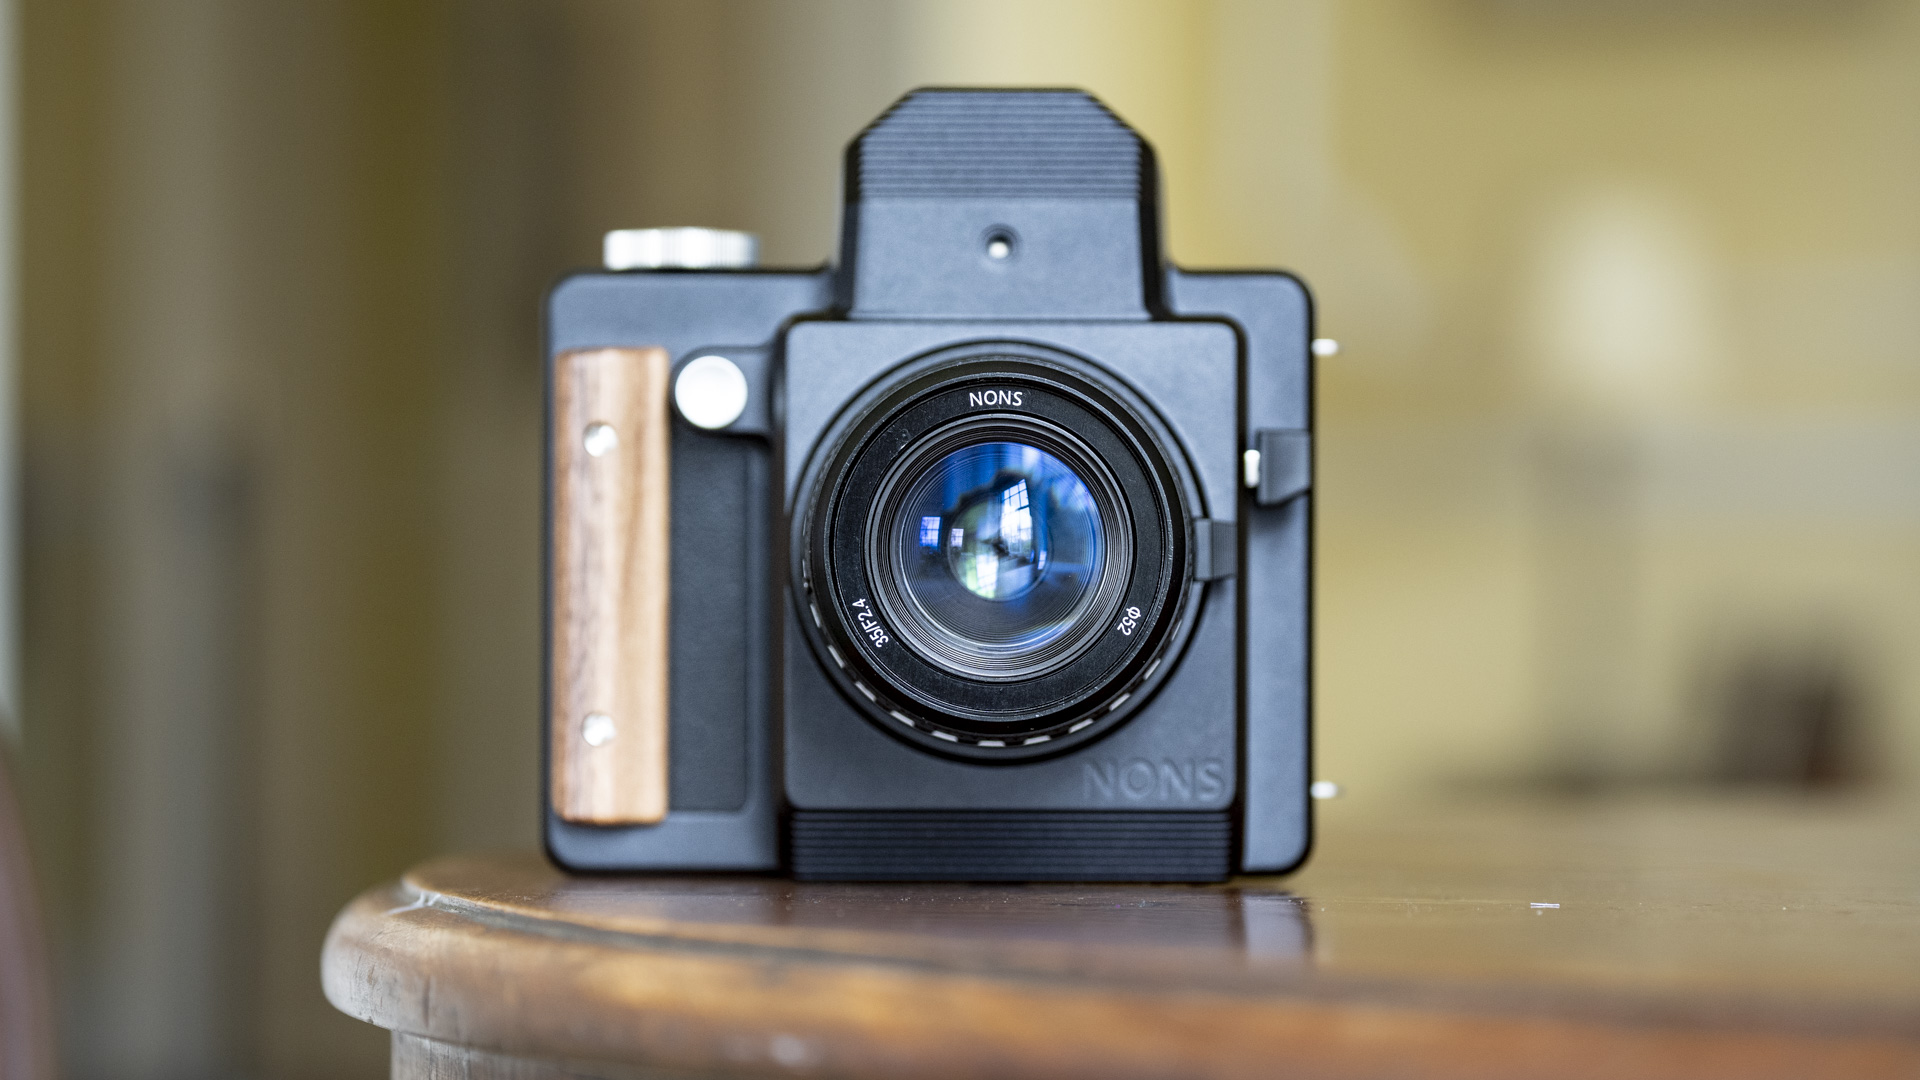
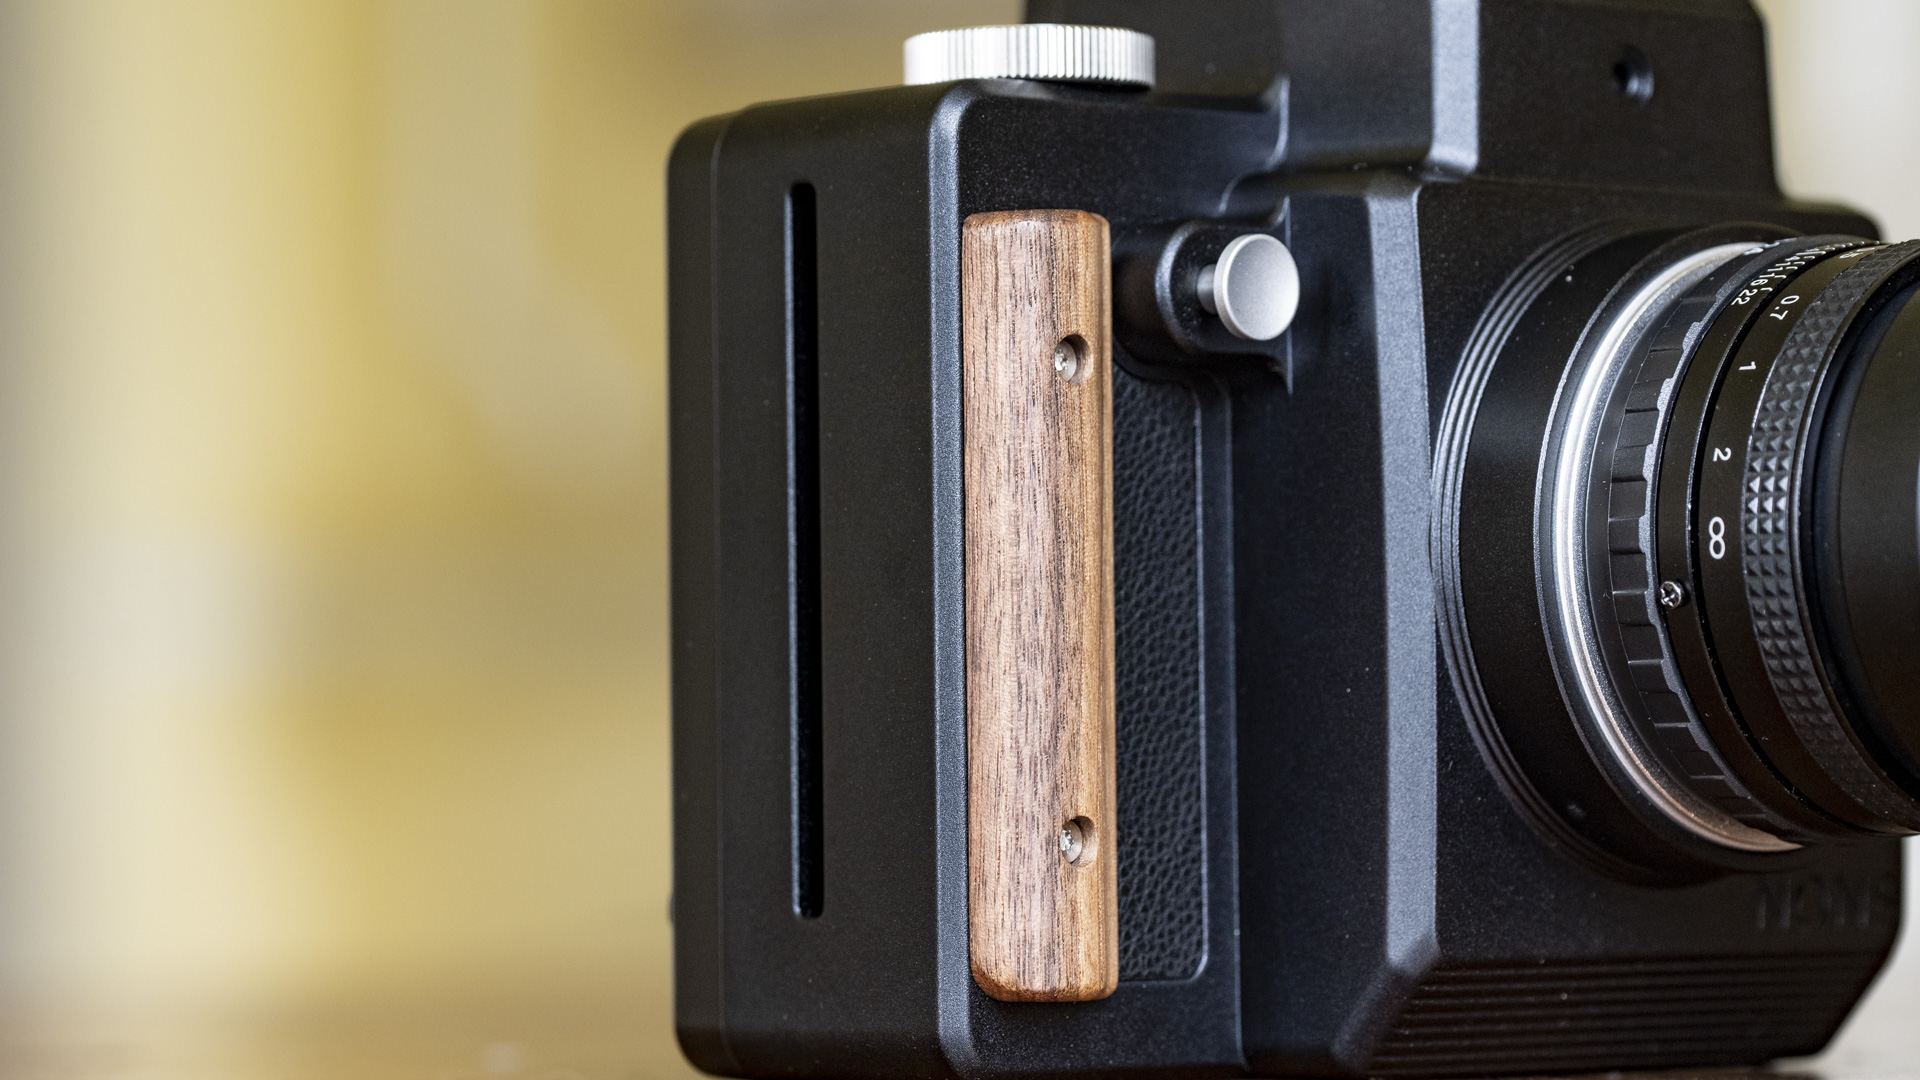
Images of the Nons SL660 online didn’t prepare me for what I set my eyes on when unboxing the gear – this looks like no other instant camera. It’s a love it or hate it brutalist block of aluminum with defined features: a genuine wooden grip, a crank to engage the viewfinder, a pronounced shutter button, and striking shutter speed dial.
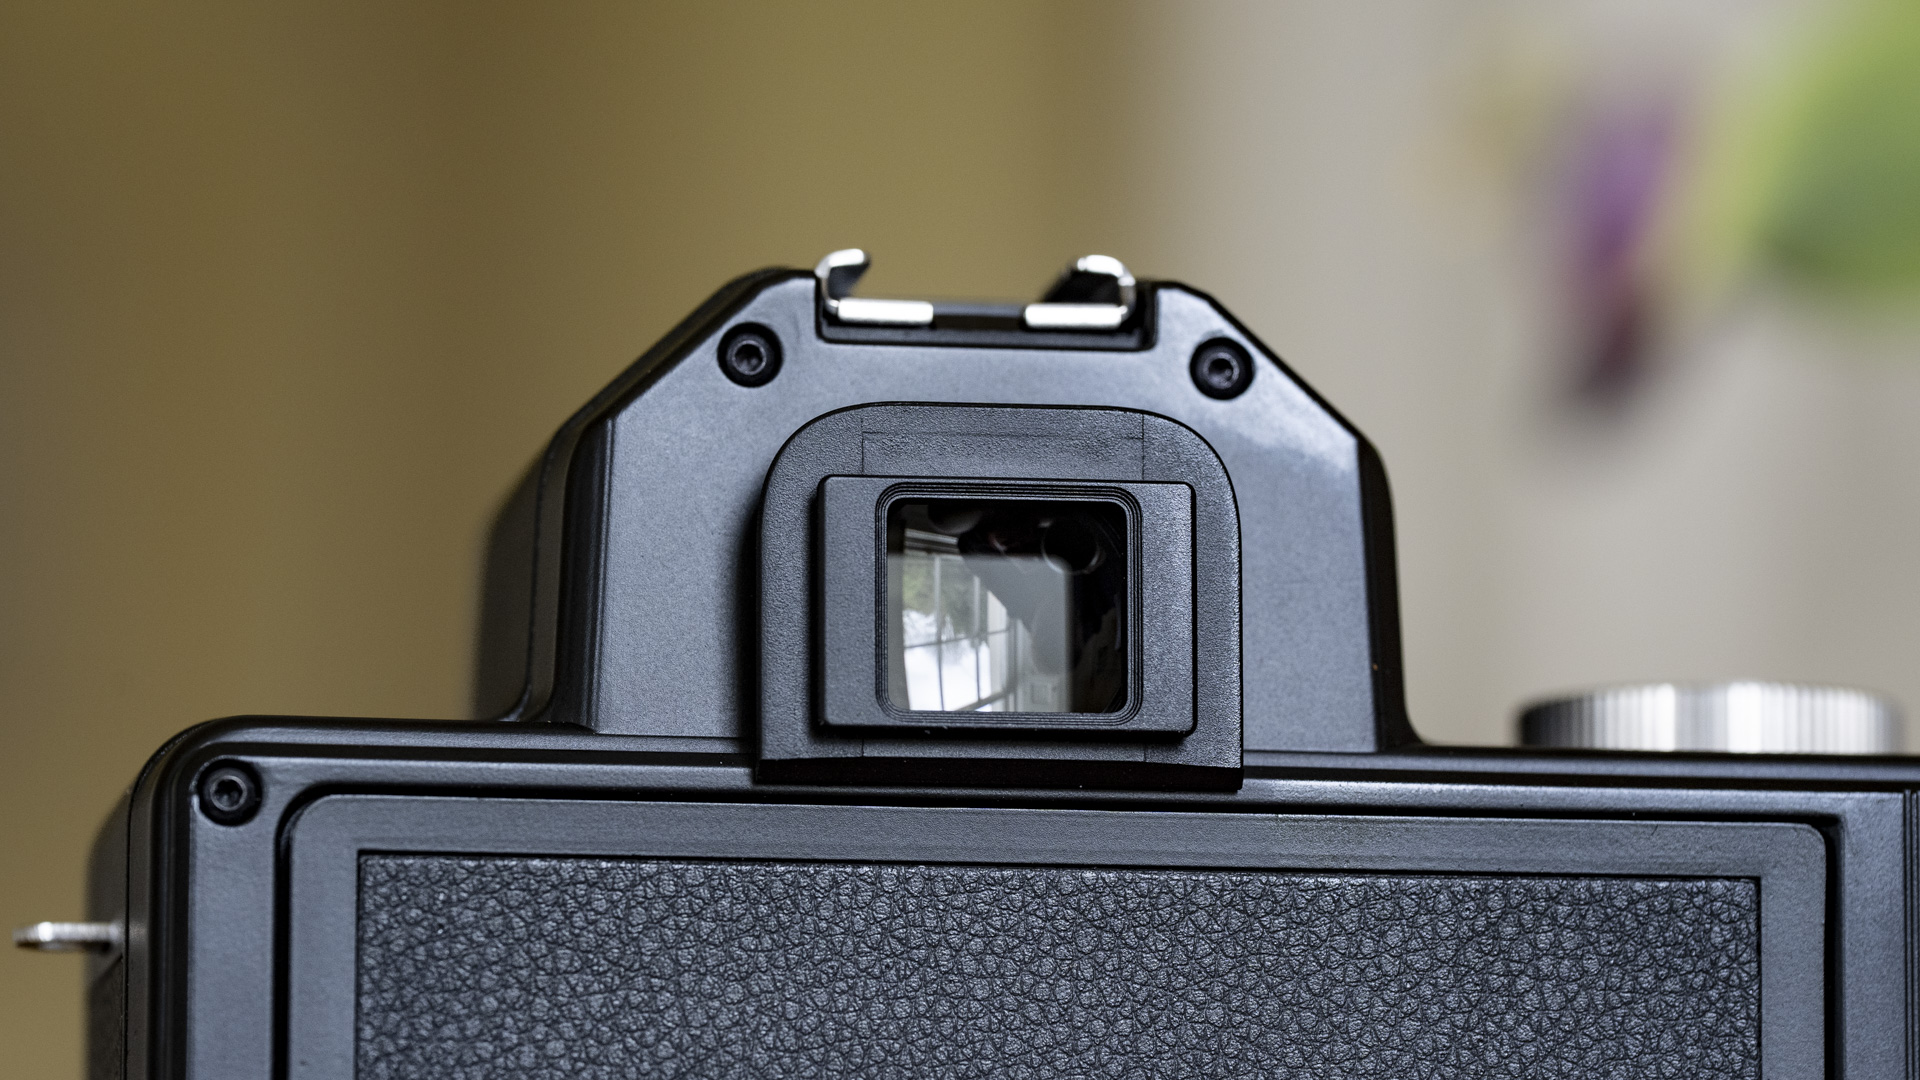
There’s an optical viewfinder with through-the-lens display, so the perspective is correct to the attached lens. The display is dim, but I like its grainy filmic quality. There’s a portion of your instant print that you don’t see through the viewfinder display – when shooting with the thick border at the bottom of your Instax Square print, the unseen section is to the left. It takes a couple of shots to get used to this, and thereafter you can factor this in to make the best possible composition.
To shoot the ‘correct’ way, with the thicker border positioned at the bottom of your print, you need to flip the camera 90 degrees with the grip at the top – vertical if you will – otherwise the thick border will be on the left-hand side of your print, which looks weird unless that’s your intention.
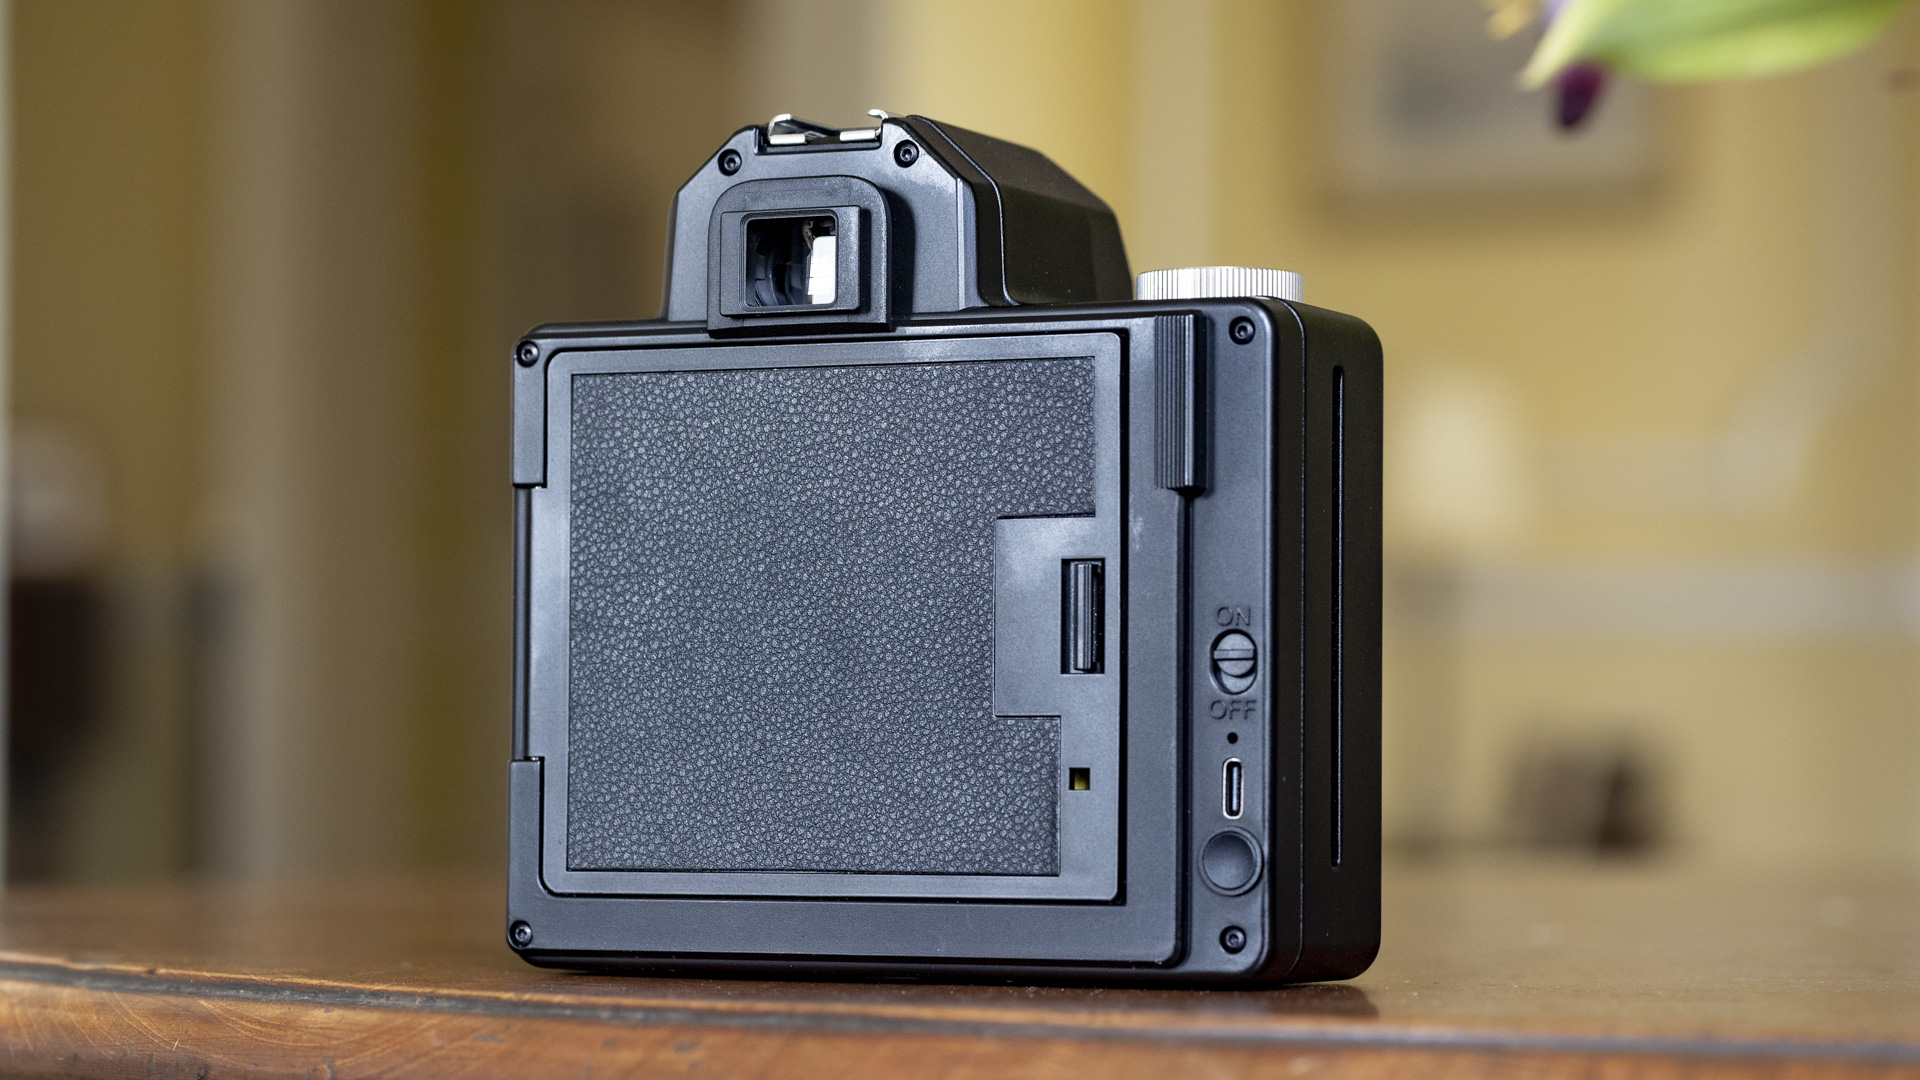
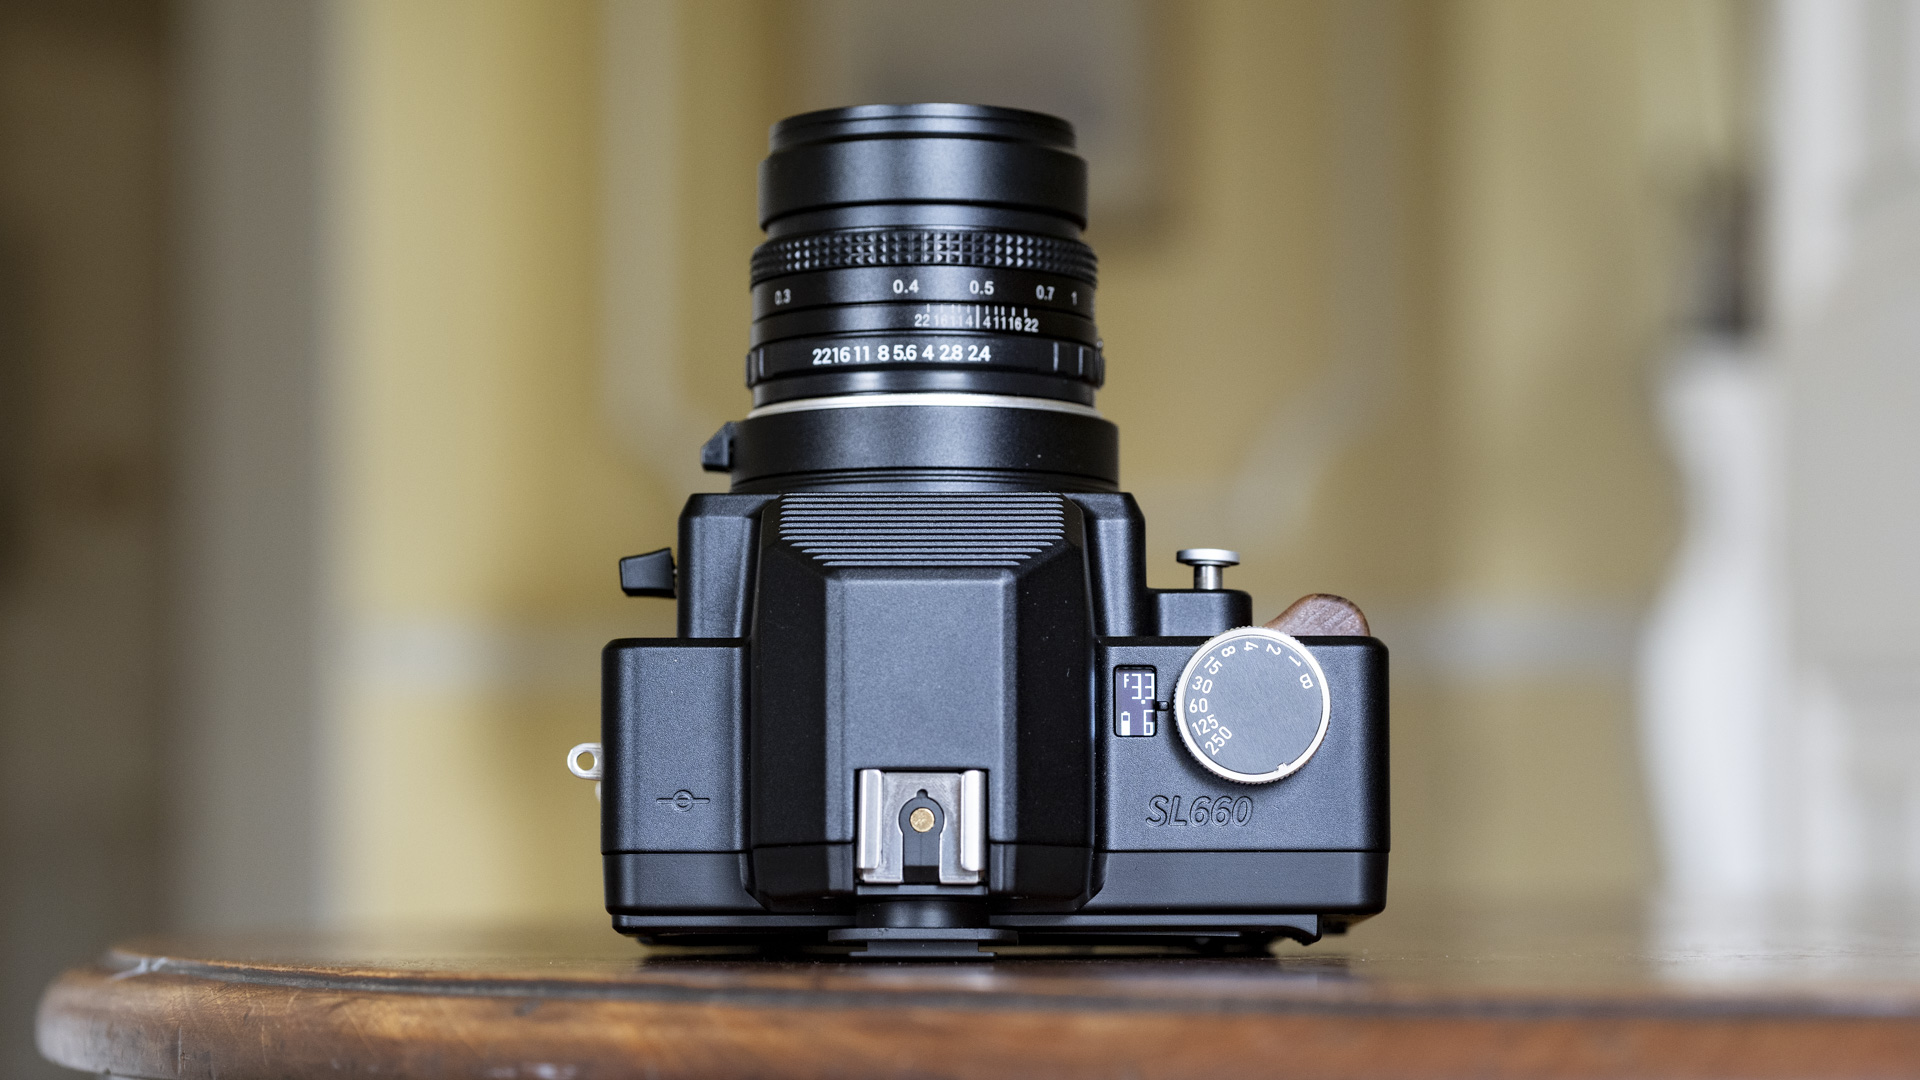
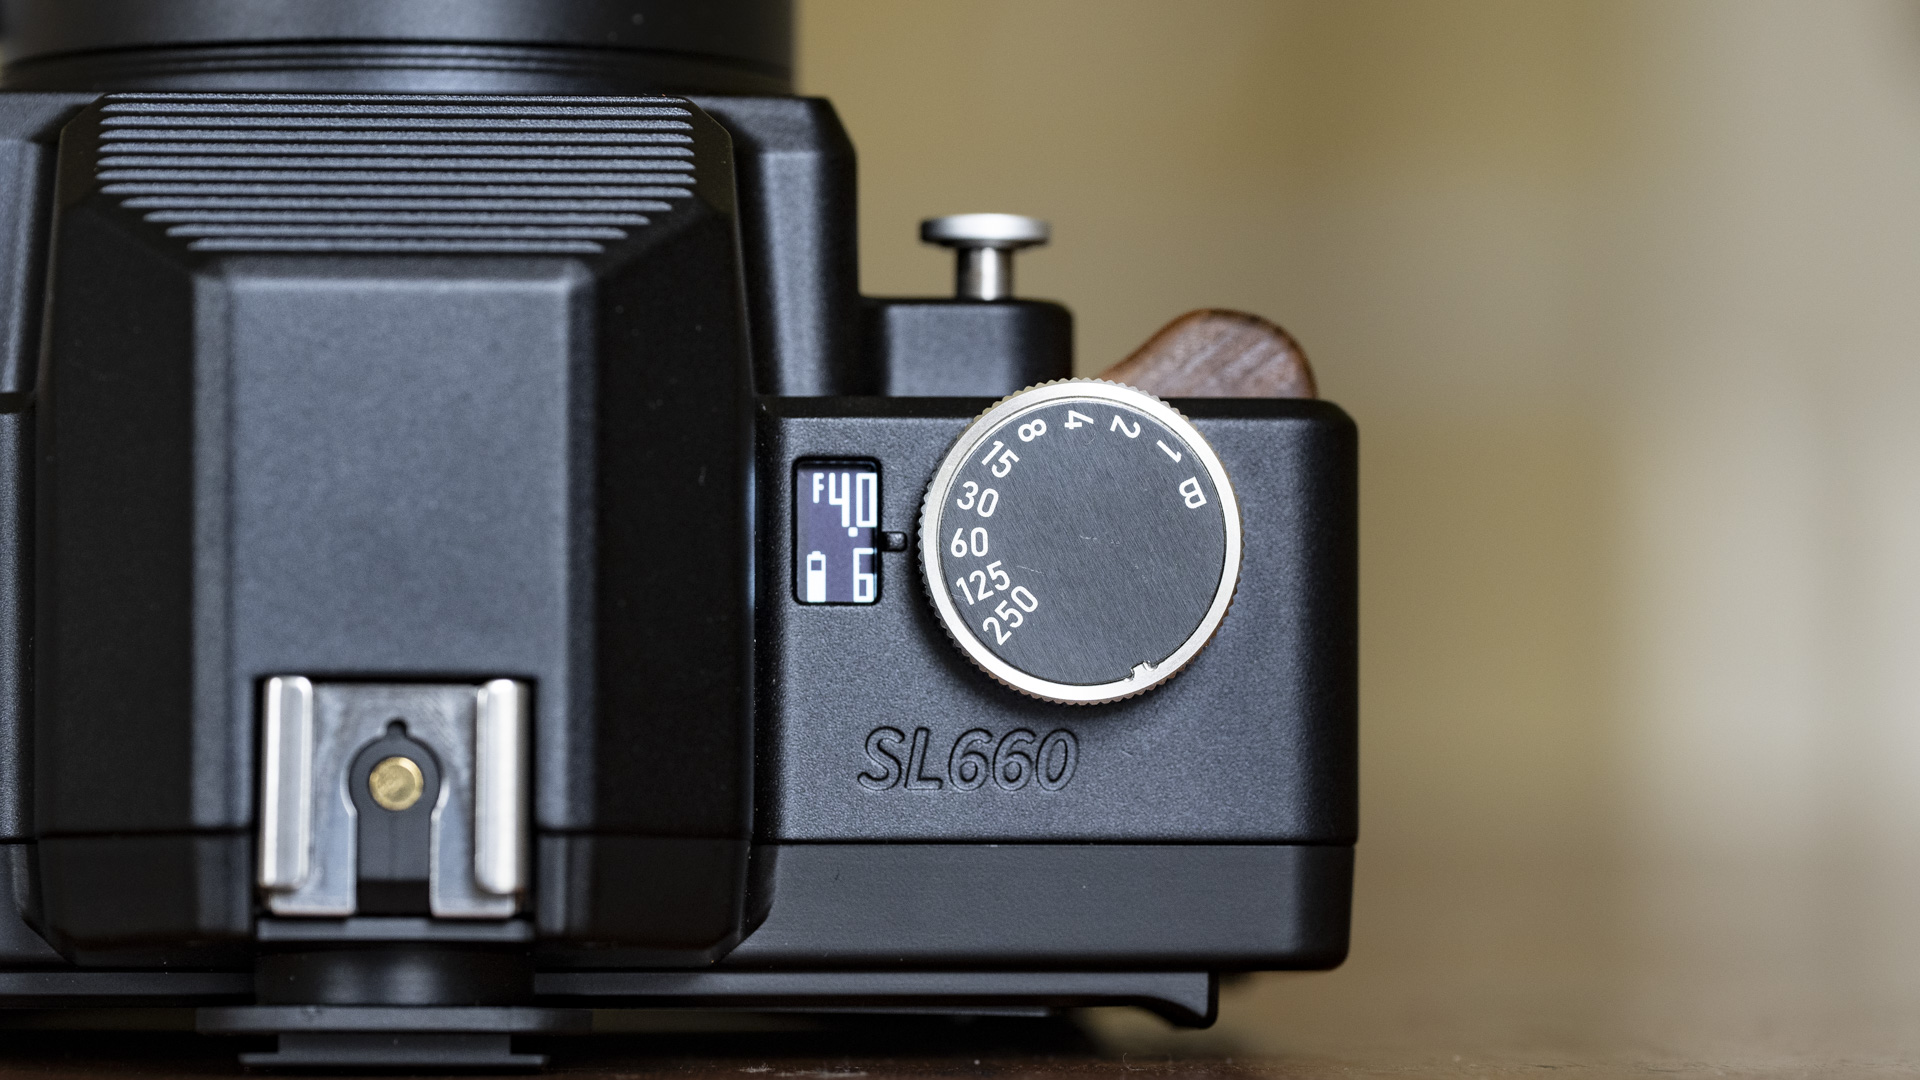
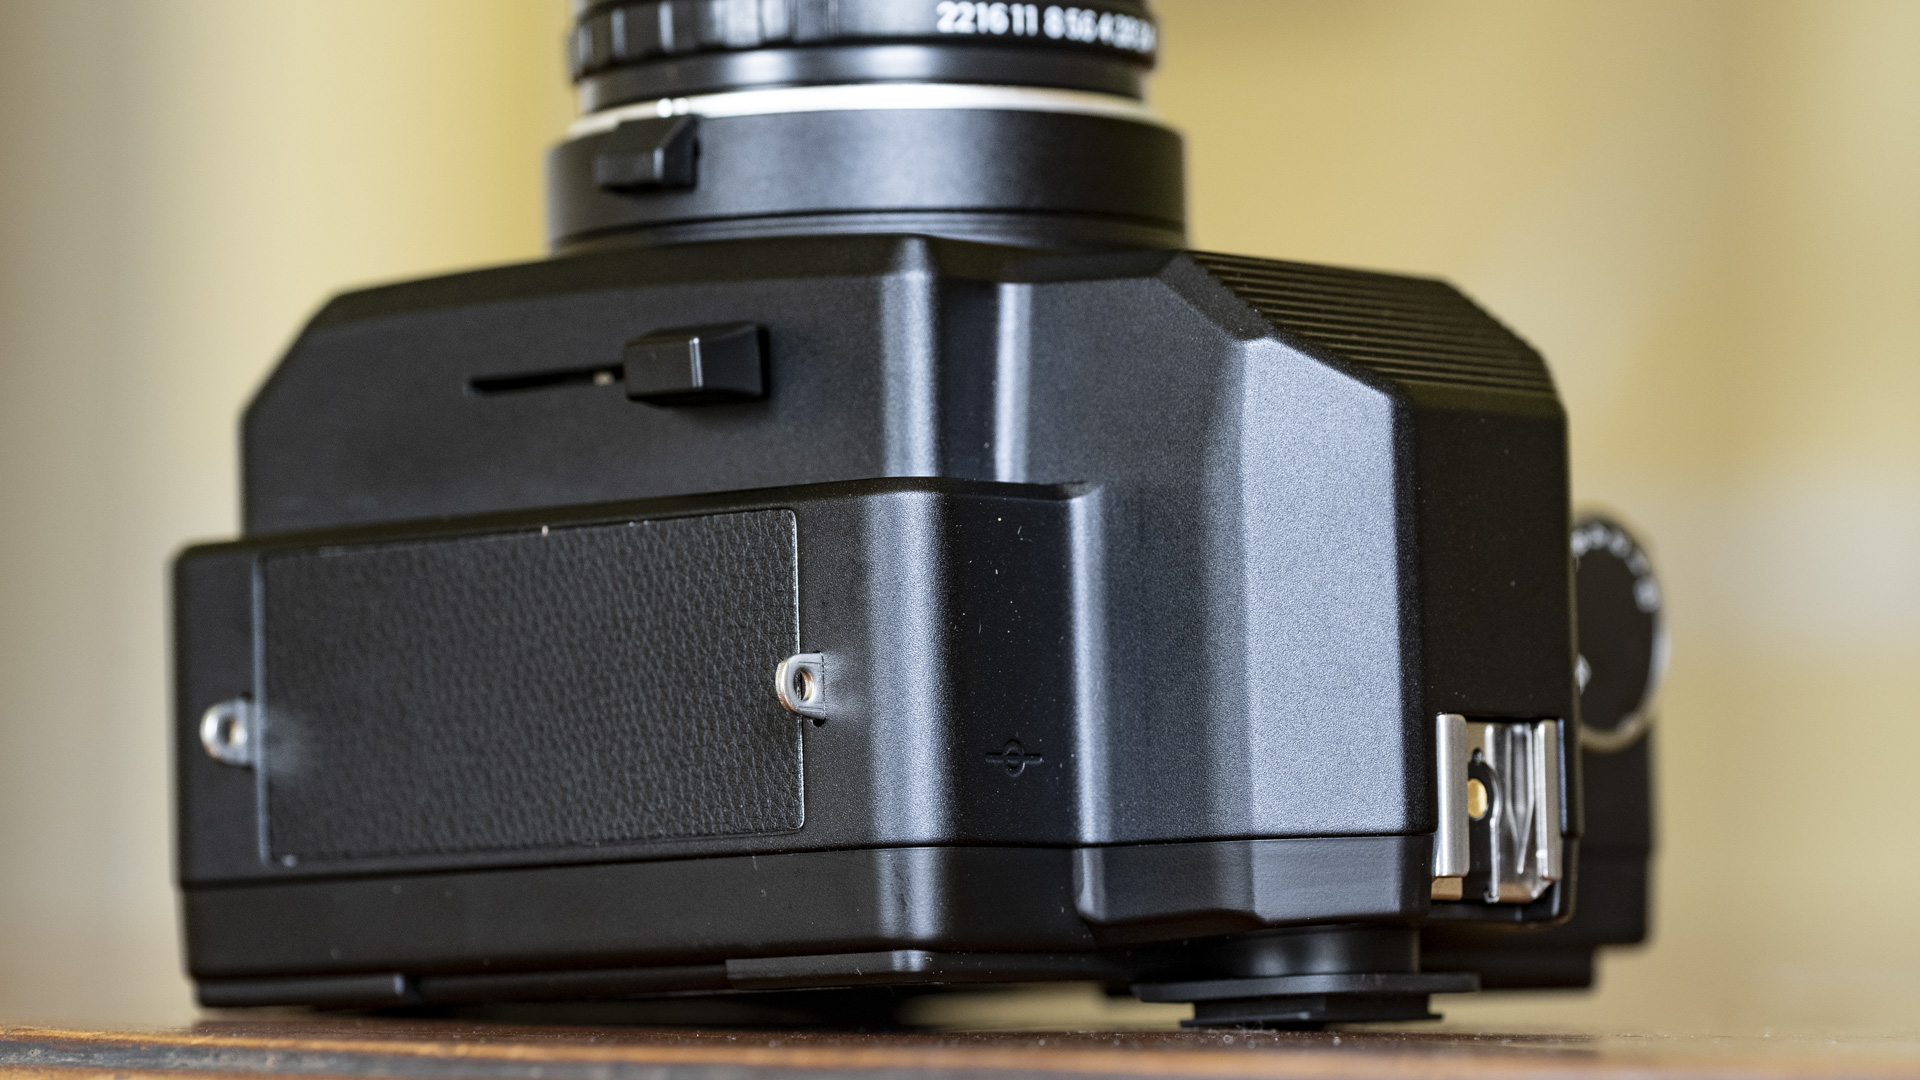
The Nons SL660 is powered by an internal battery topped up via USB-C (using the supplied USB-C to USB-A cable, not just any USB-C cable) and is rated for around 100 shots on a full charge. A tiny top LCD displays battery life along with the number of prints remaining in the inserted film pack (the shot counter failed in my review sample after a couple of packs of film), plus the aperture setting needed on your lens to get the correct exposure for the selected shutter speed, based on the camera's exposure metering.
If you're shooting in bright light you'll need an ND filter for your lens, or else your shots will be overexposed – a 3EV to 7EV variable ND is perfect. The Nons 35mm f/2.8 lens I had has a 52mm thread. Because the exposure meter is separate to the lens (ie., not TTL), you'll need to calculate the exposure settings based on the strength of the filter, or place it in front of the meter to get the reading first, and then attach it to the lens. The 'reflective' exposure meter calculates an evaluative reading for the whole frame.
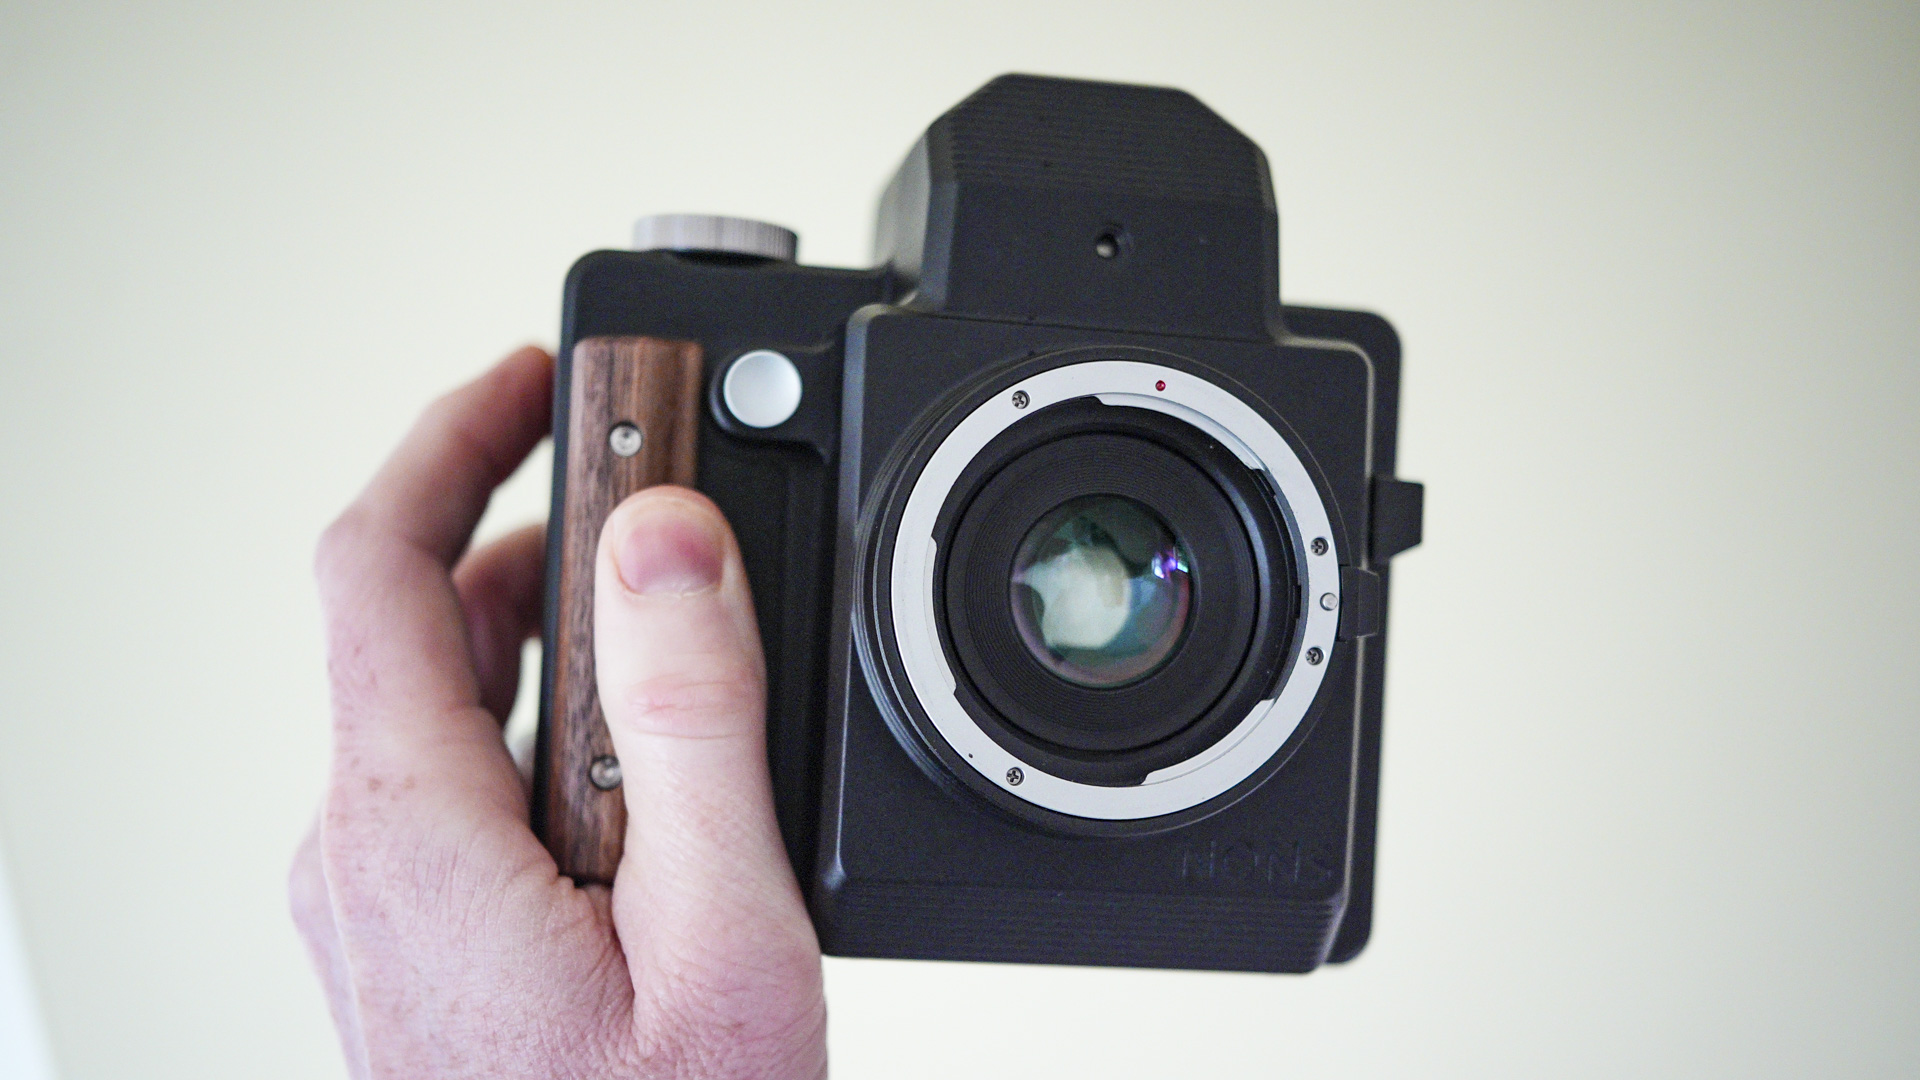
By today’s standards the Nons SL660 is awkward to hold, and by heck is it chunky, primarily because it needs that extra depth for the Canon EF-mount flange focal distance. This is no pocket camera. It’s also a paradox – a custom-made one-of-a-kind feel, yet it captures onto the most popular and accessible instant film. I had several packs of regular Instax Square film for this review, and there are a few readily available alternatives, like a monochrome film, too.
Stylistically I like the pronounced shutter button. However, it’s all too easy to press it unintentionally, which results in a wasted print. I almost lost that screw-on button, too, as it unthreaded itself more than once. The reason that the button is detachable in the first place is to allow you to swap it out for a cable release for hands-free operation, which is neat, but a tighter thread is needed for a secure fix.
Long before I'd received the Nons SL660 or taken any shots with it, I had formed a certain expectation regarding the quality of instant prints it could make. After all, it comes with a proper Nons lens, plus, in my case, I can use it with some excellent Nikon lenses. Rival instant cameras like the Instax SQ40 are restricted to a built-in, low-cost lens.
Surely, then, the instant photos made with the Nons SL660 would be superior to anything else before it? Well, yes and no. Despite the superior optics, we’re still shooting onto the same film type – an ISO800 stock with limited dynamic range. Also, the print area of Instax Square film only measures 62mm x 62mm, and so it’s hardly big enough to really show off lens quality.
Rather than outright image quality, the real appeal of the SL660 over cheaper and simpler rivals, besides its unique design, is that you can swap out lenses and therefore mix up the focal length and perspective of your shots. Unfortunately, my telephoto macro lens for Nikon F-mount lacks an aperture ring, and I was unable to get a good shot with it. Get the right manual lens, however, and great fun can be had.
Almost all the instant photos I took with the SL660 for this review were taken with the Nons 35mm f/2.8 lens. For full exposure control when adapting an alternative lens, like I did through the Nikon F-mount adaptor, you need a lens with aperture control. That counts out most modern DSLR lenses from Canon, Nikon and Pentax. When using a Nikon lens without an aperture ring, the aperture is automatically set to its smallest setting, while some Canon lenses are set to their widest aperture setting. (I also had a great struggle removing the adaptor ring from my Nikon lens after use.) Besides Nons' own lenses, an old Canon EF lens with aperture ring makes the most practical sense.
To get prints with the correct brightness, I needed to experiment a little to understand the behaviour of the SL660’s auto-exposure metering. If you follow the suggested aperture settings to a tee, then prints tend to come out a little dark for my liking, but when I increased the exposure by around 1EV, by opening the aperture up or halving the shutter speed, the results were better.
Apply this knowledge about the camera's exposure metering and most your shots will come out fine. However, alternatives like the Fujifilm Instax Square SQ40 shoot in auto-exposure only, with a built-in auto flash, and with those cameras you'll get fewer wasted prints.
You also need to understand the limitations of Fujifilm Instax film. It has an ISO 800 sensitivity rating, which is bang on with the fastest possible 1/250 sec shutter speed and f/4 aperture (approx) when shooting in cloudy weather, but when the sun comes out you need to stop the aperture right down, to nearer f/22 or even beyond the limit of the lens.
I prefer the look when shooting with a wider aperture, not least to make subjects stand out better, but also in this case for a brighter and clearer view through the viewfinder (it gets dimmer as you reduce the aperture size), and so a ND filter is a must-have accessory – otherwise the SL660 is practically unusable in bright light.
There’s also a hard limit on the dynamic range of the film – if you shoot scenes with high contrast, like a backlit portrait or a white overcast sky, you’ll need to choose between a brightness for highlights or shadows; you can’t have both. An ideal scenario is even lighting: soft sunlight on your subject and background, or at least a darker background so the subjects pops.
There's a standard hotshoe to attach an optional flash. Nons doesn't sell its own flash, nor did I use the SL660 with a flash for this review – that's a whole other creative technique I look forward to exploring with this camera. I’ve complained about certain Fujifilm Instax cameras with built-in flash in the past because some models auto-fire the flash for every photo you take, whether you need it or not. However, that’s a better option than the SL660, which has no built-in flash at all – at least you can cover an Instax camera's flash with your finger when it’s not needed.
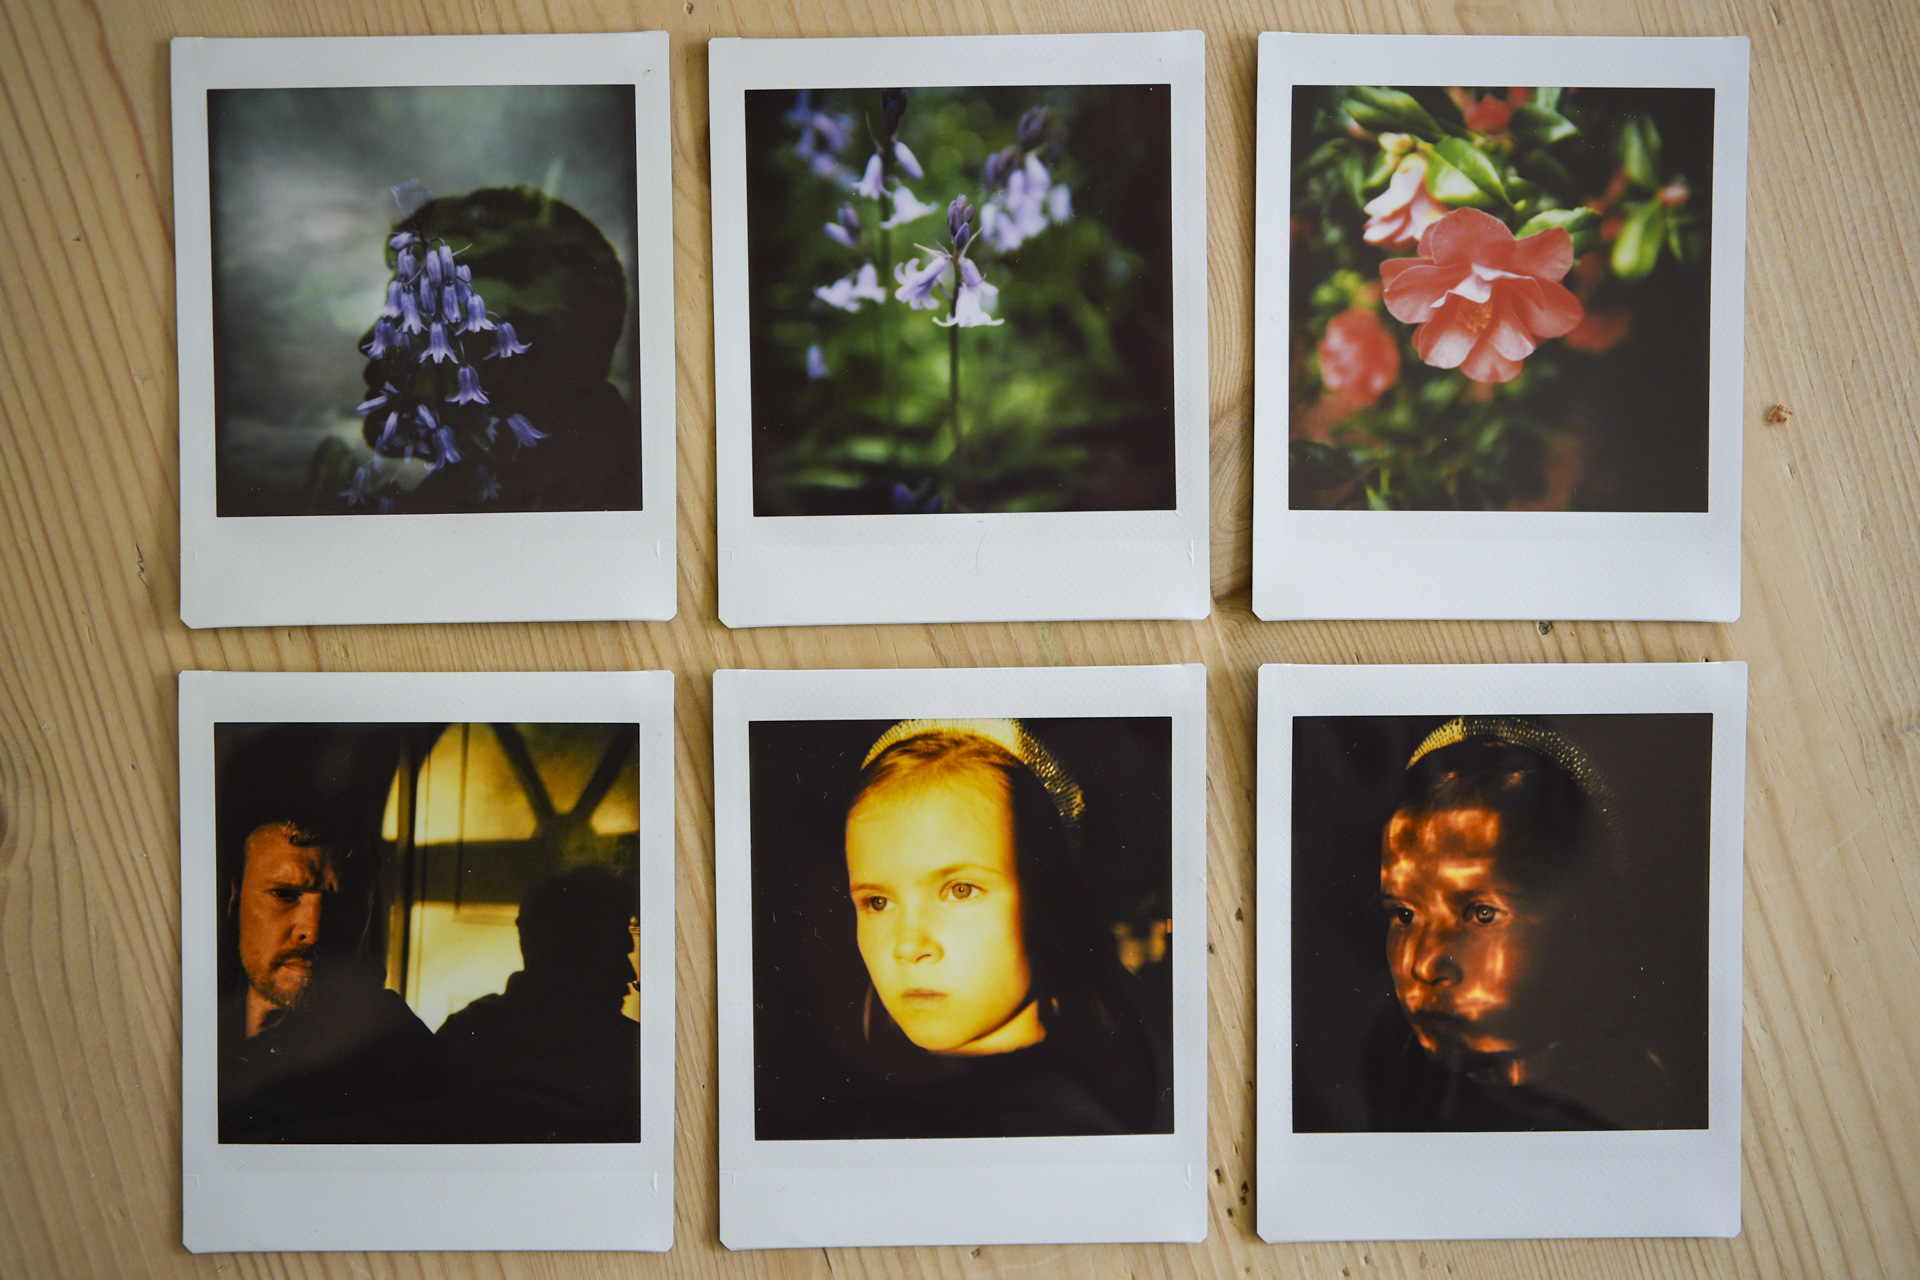
Once your shot is ready, you hard-press the eject button and out pops the print. This manual-eject control also enables a multi-exposure function. You’ll need to recalculate the correct exposure for each shot depending what’s in each frame, and the results can be excellent if you know what you’re doing, or at least be prepared to waste a print or two experimenting. For example, I shot a self-portrait silhouette against a bright sky in one exposure, and then another one of closeup details of flowers that visibly populates the silhouette – a classic double-exposure effect.
Overall, if you’re using the Nons SL660 with the 35mm f/2.8 lens without ND filter or flash, it’s fairly limited as to what scenes it's suitable for. But if you're equipped with accessories and willing to experiment, great results can be achieved.
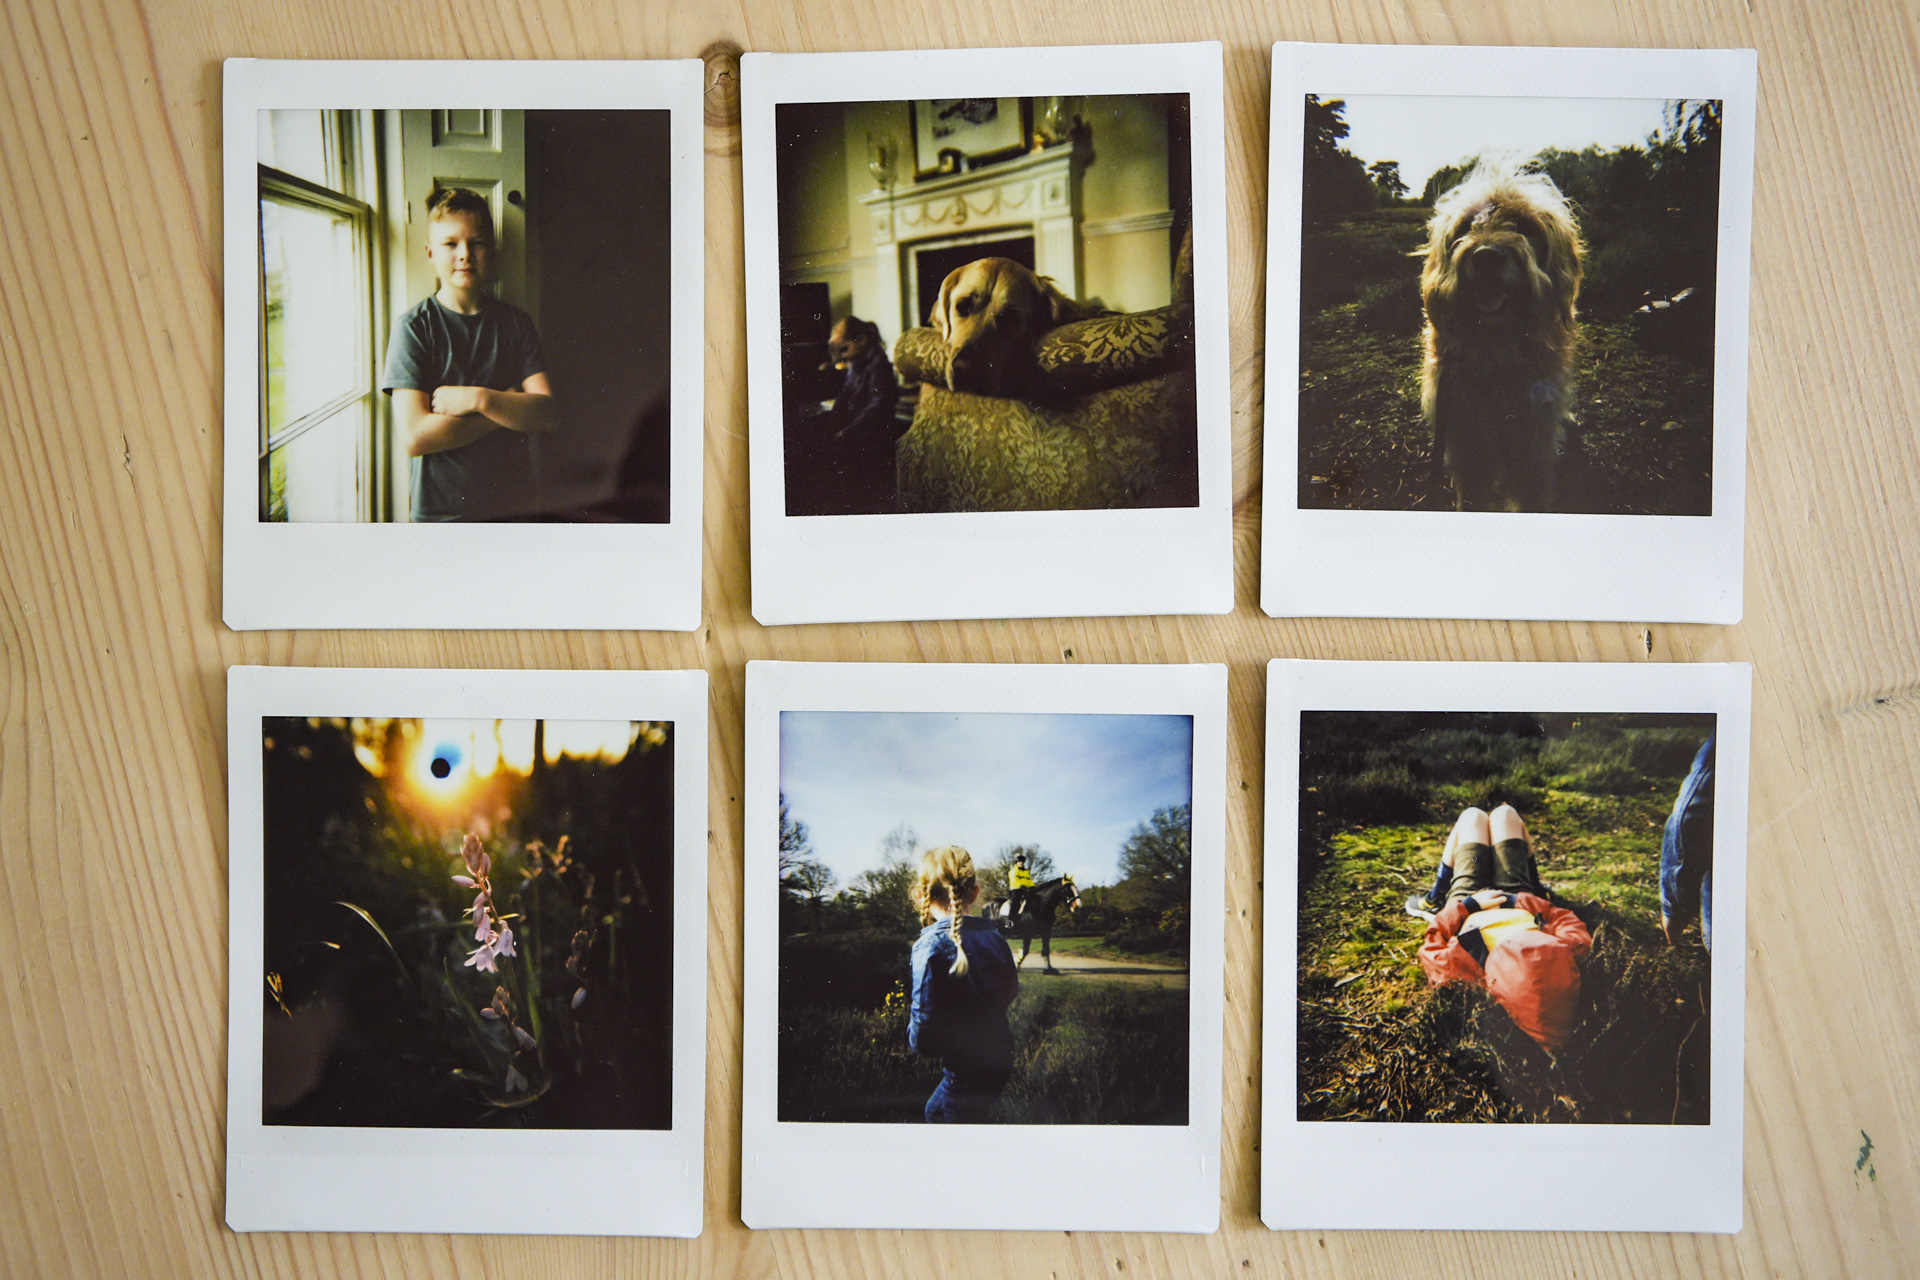
I had the Nons SL660 SLR instant camera for a couple of months, and I went through a fair few packs of regular Instax Square film. For the majority of the review I used the Nons 35mm f/2.8 lens, although I did adapt a couple of my Nikon F-mount lenses with mixed success.
Testing the camera in a variety of lighting conditions that ranged from sunny weather to indoors, I experimented with various shutter speeds and lens apertures, and took both single-shot and multi-exposure photos. I've not used the Nons SL660 with a hotshoe mounted flash, nor used the bulb mode or attached a cable release.
First reviewed April 2024
FPV (first person view) drone flight has taken the world by storm. Something that started more than 15 years ago as very much an underground hobby requiring ingenious and determined pilots to source parts, and build and repair their own drones, has now well and truly established itself as a mainstream pursuit that’s available to more people than ever before – and that’s thanks in no small part to market leader DJI.
What DJI offers is a straight-out-of-the-box solution for those who want to fly drones using immersive FPV goggles (and therefore see what the drone ‘sees’) without the difficulty and steep learning curve of flying traditional self-built FPV drones.
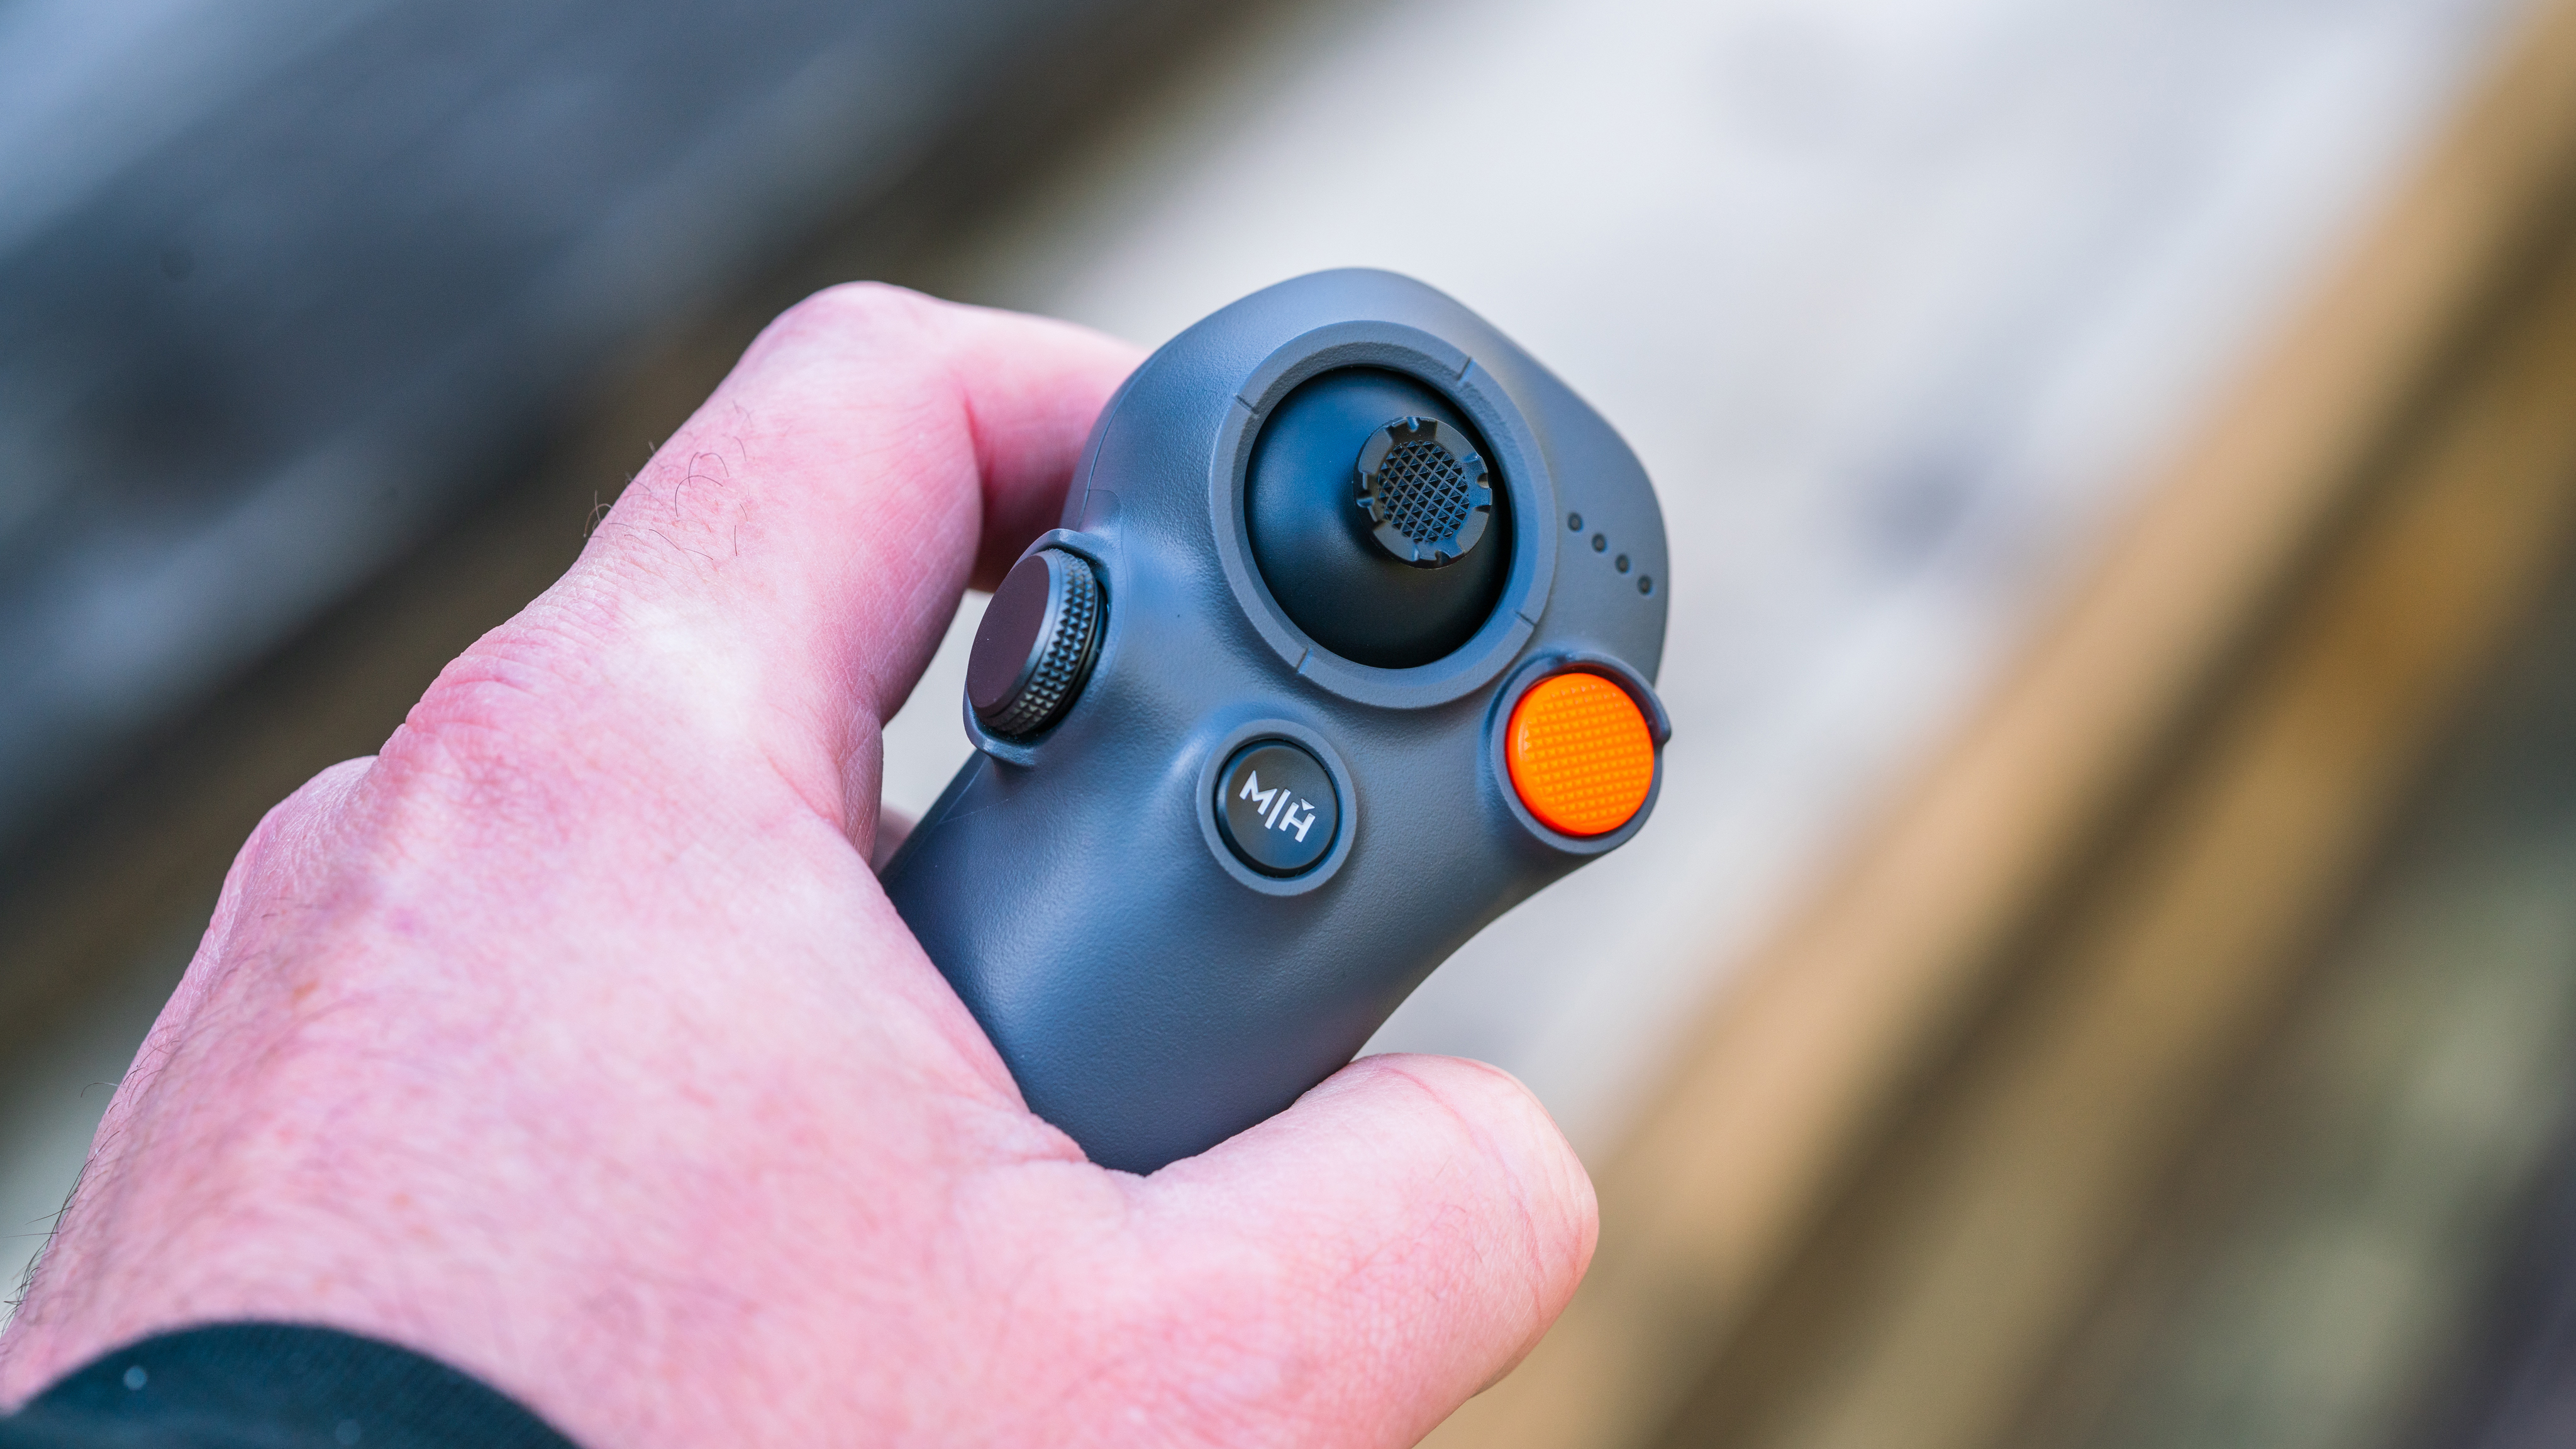
Once you buy the Avata 2 you can then decide how easy or difficult you would like it to be. At the novice end of the scale, you can fly easily and stress-free in Normal mode, using the intuitive DJI Motion Controller 3 and all the built-in assistance DJI provides including automatic takeoff, obstacle avoidance sensors, and automatic return to home. This means anyone, regardless of prior experience, can enjoy the thrill of immersive flight while capturing photos or video – although really, FPV is more about the flight experience and videography.
If you feel more confident you can switch to Sport mode, which allows for more speed and control. Finally, you can opt to disable all flight-assistance features, and fly in full manual using the DJI Remote Controller 3 – but beware, this is not for the faint-hearted and, and unless you put in sufficient practice hours first in a simulator you’re without doubt going to crash and damage your new Avata 2, which is not built to withstand multiple heavy collisions.
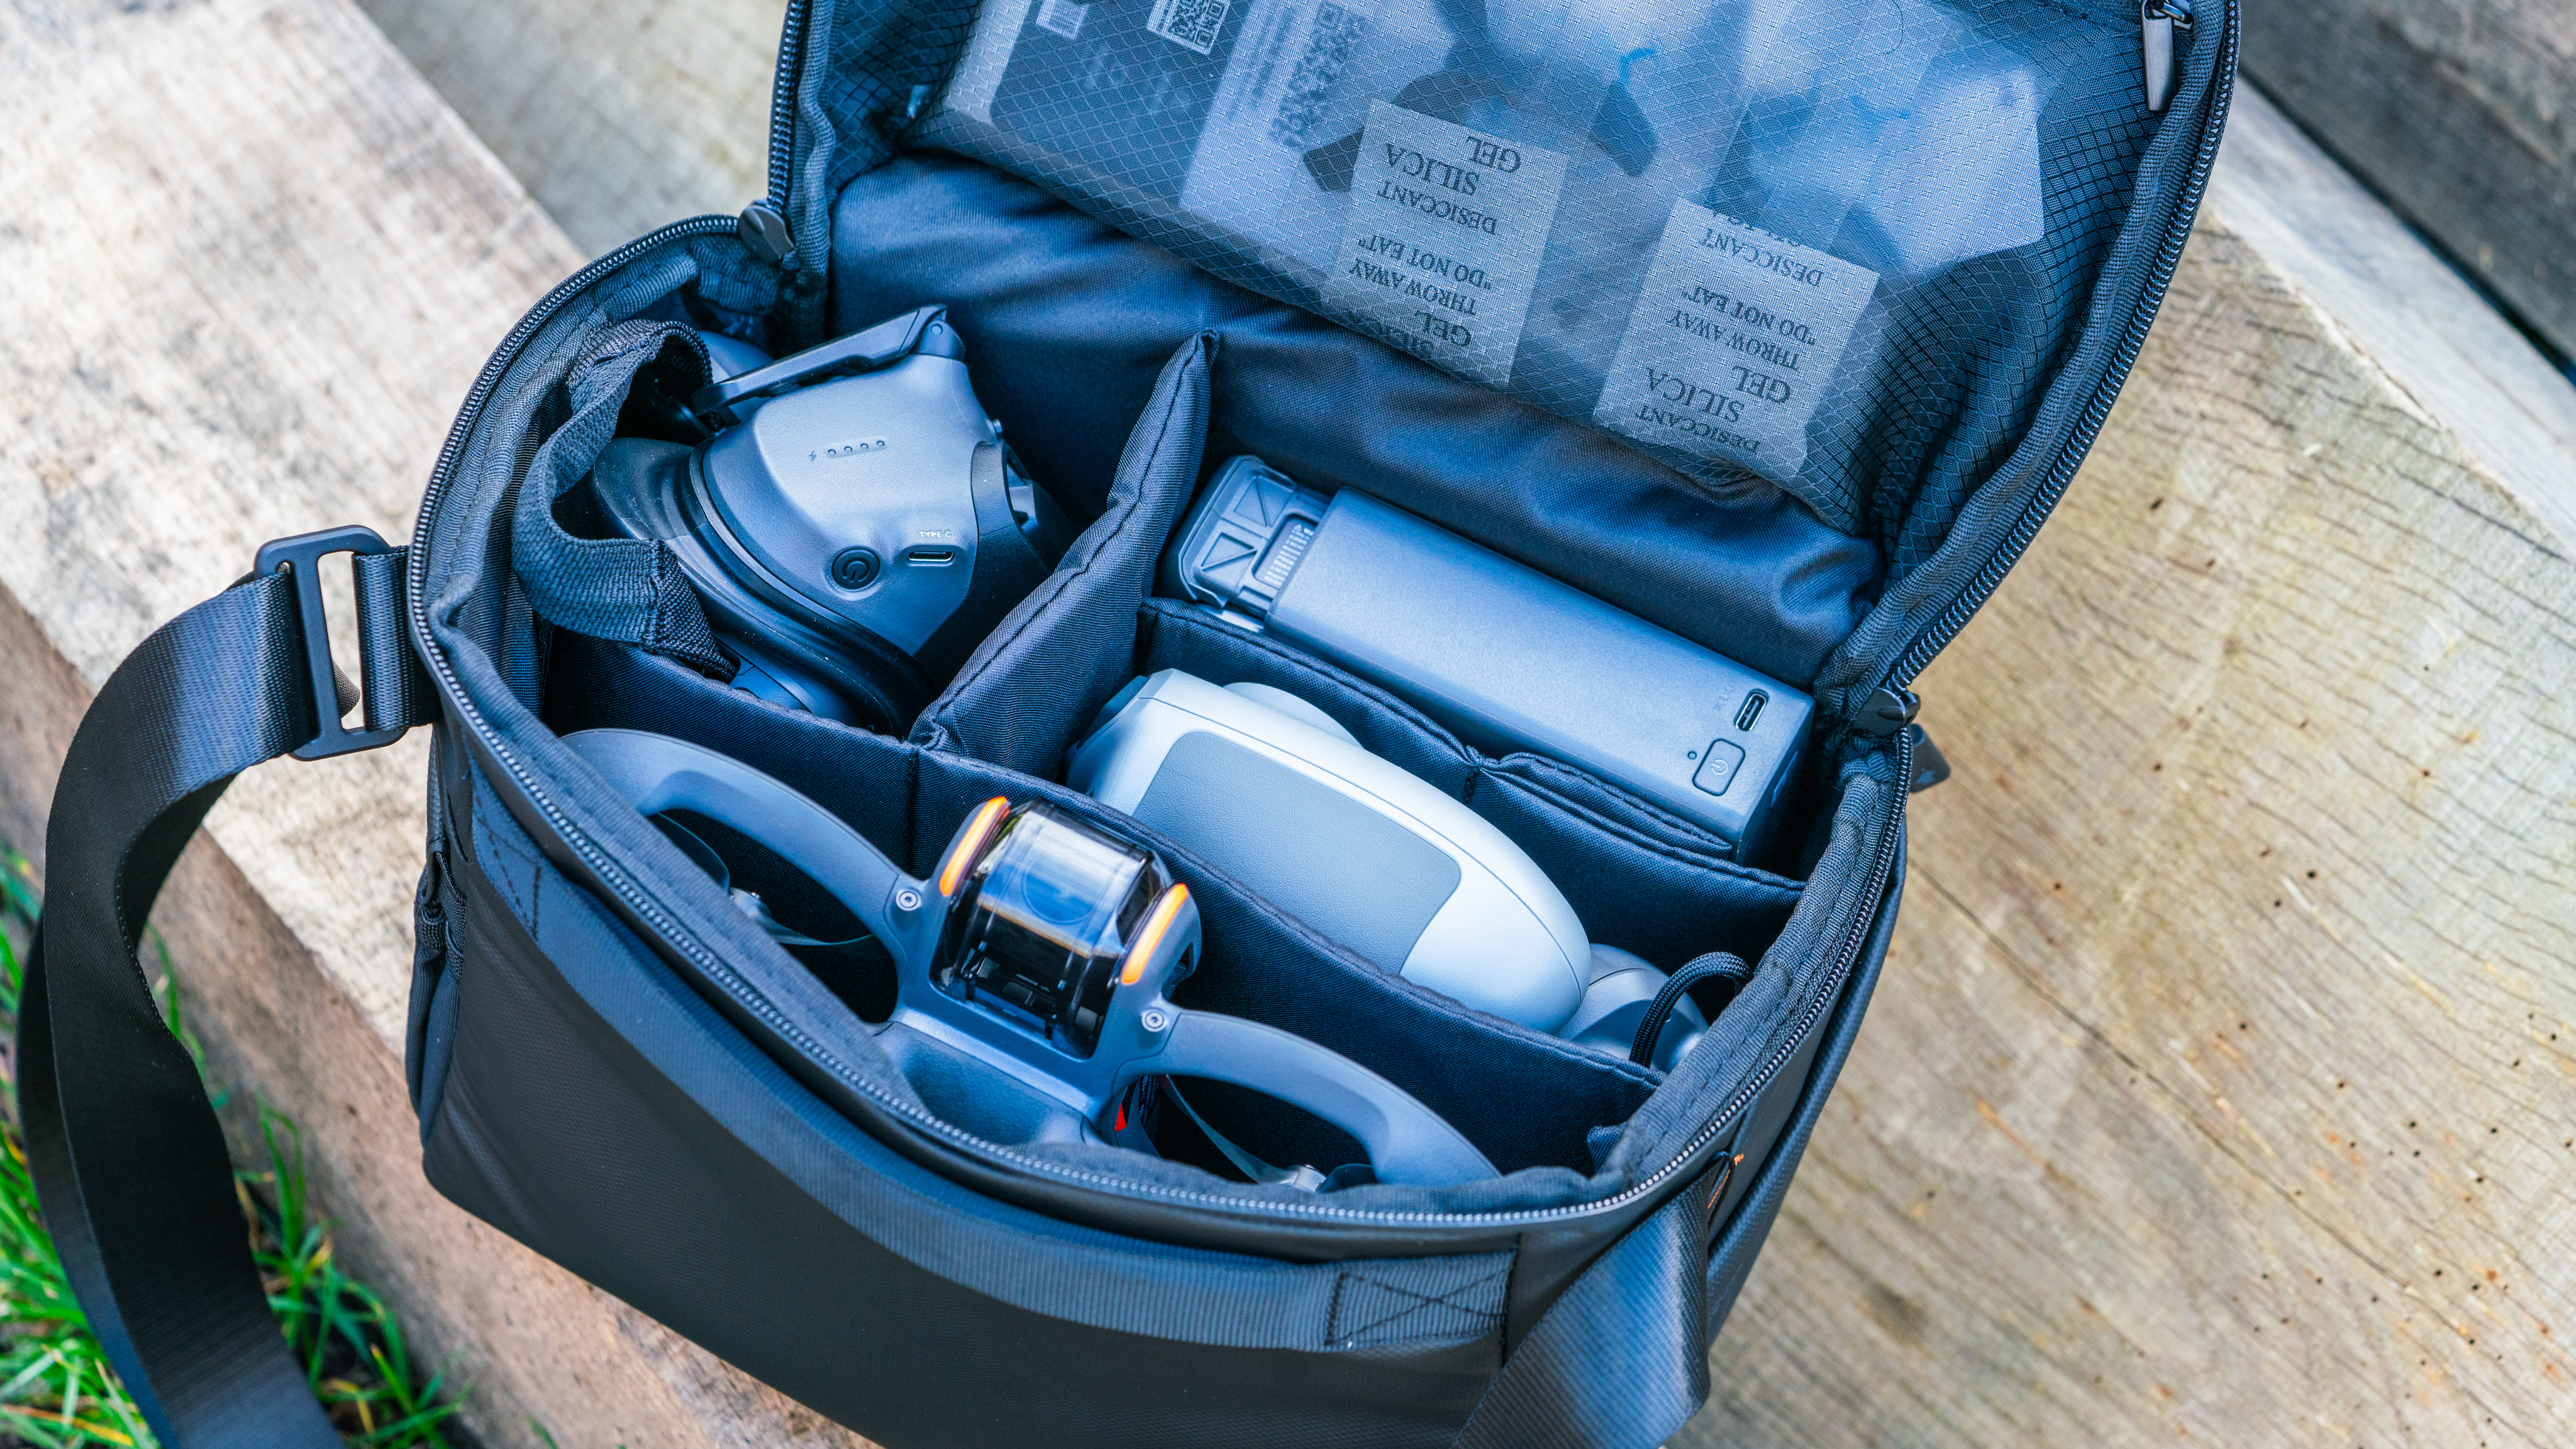
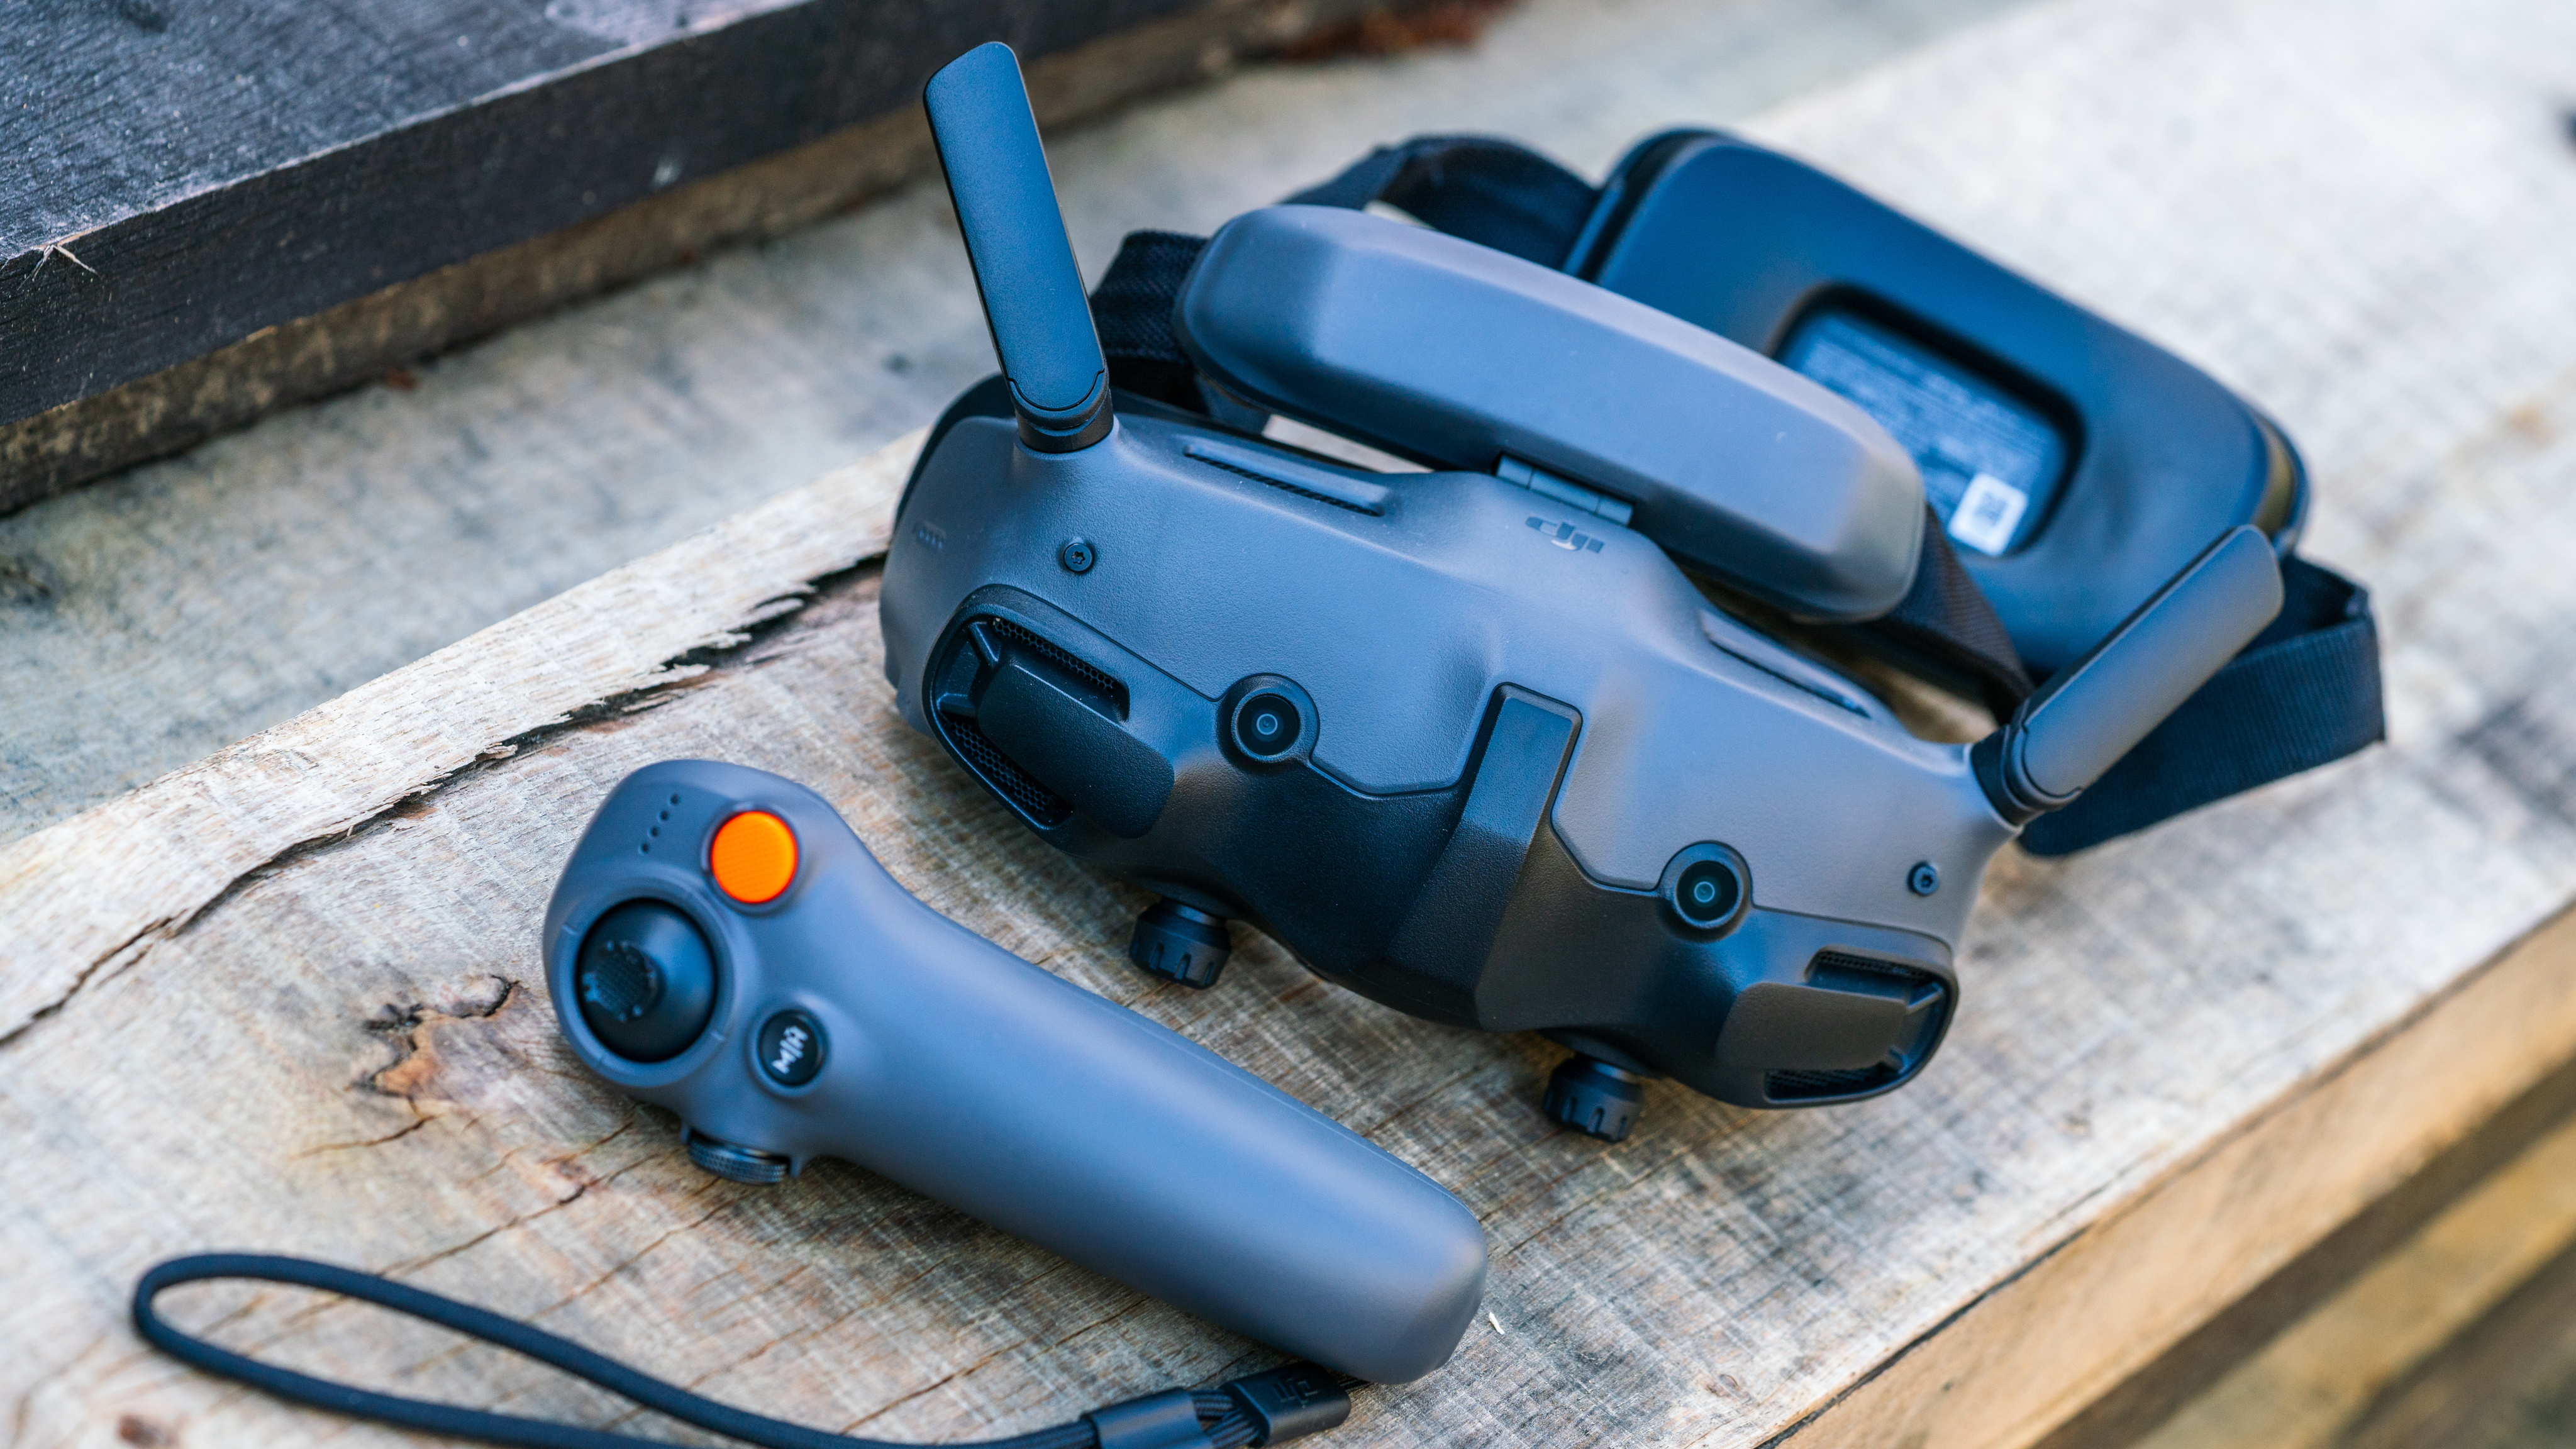
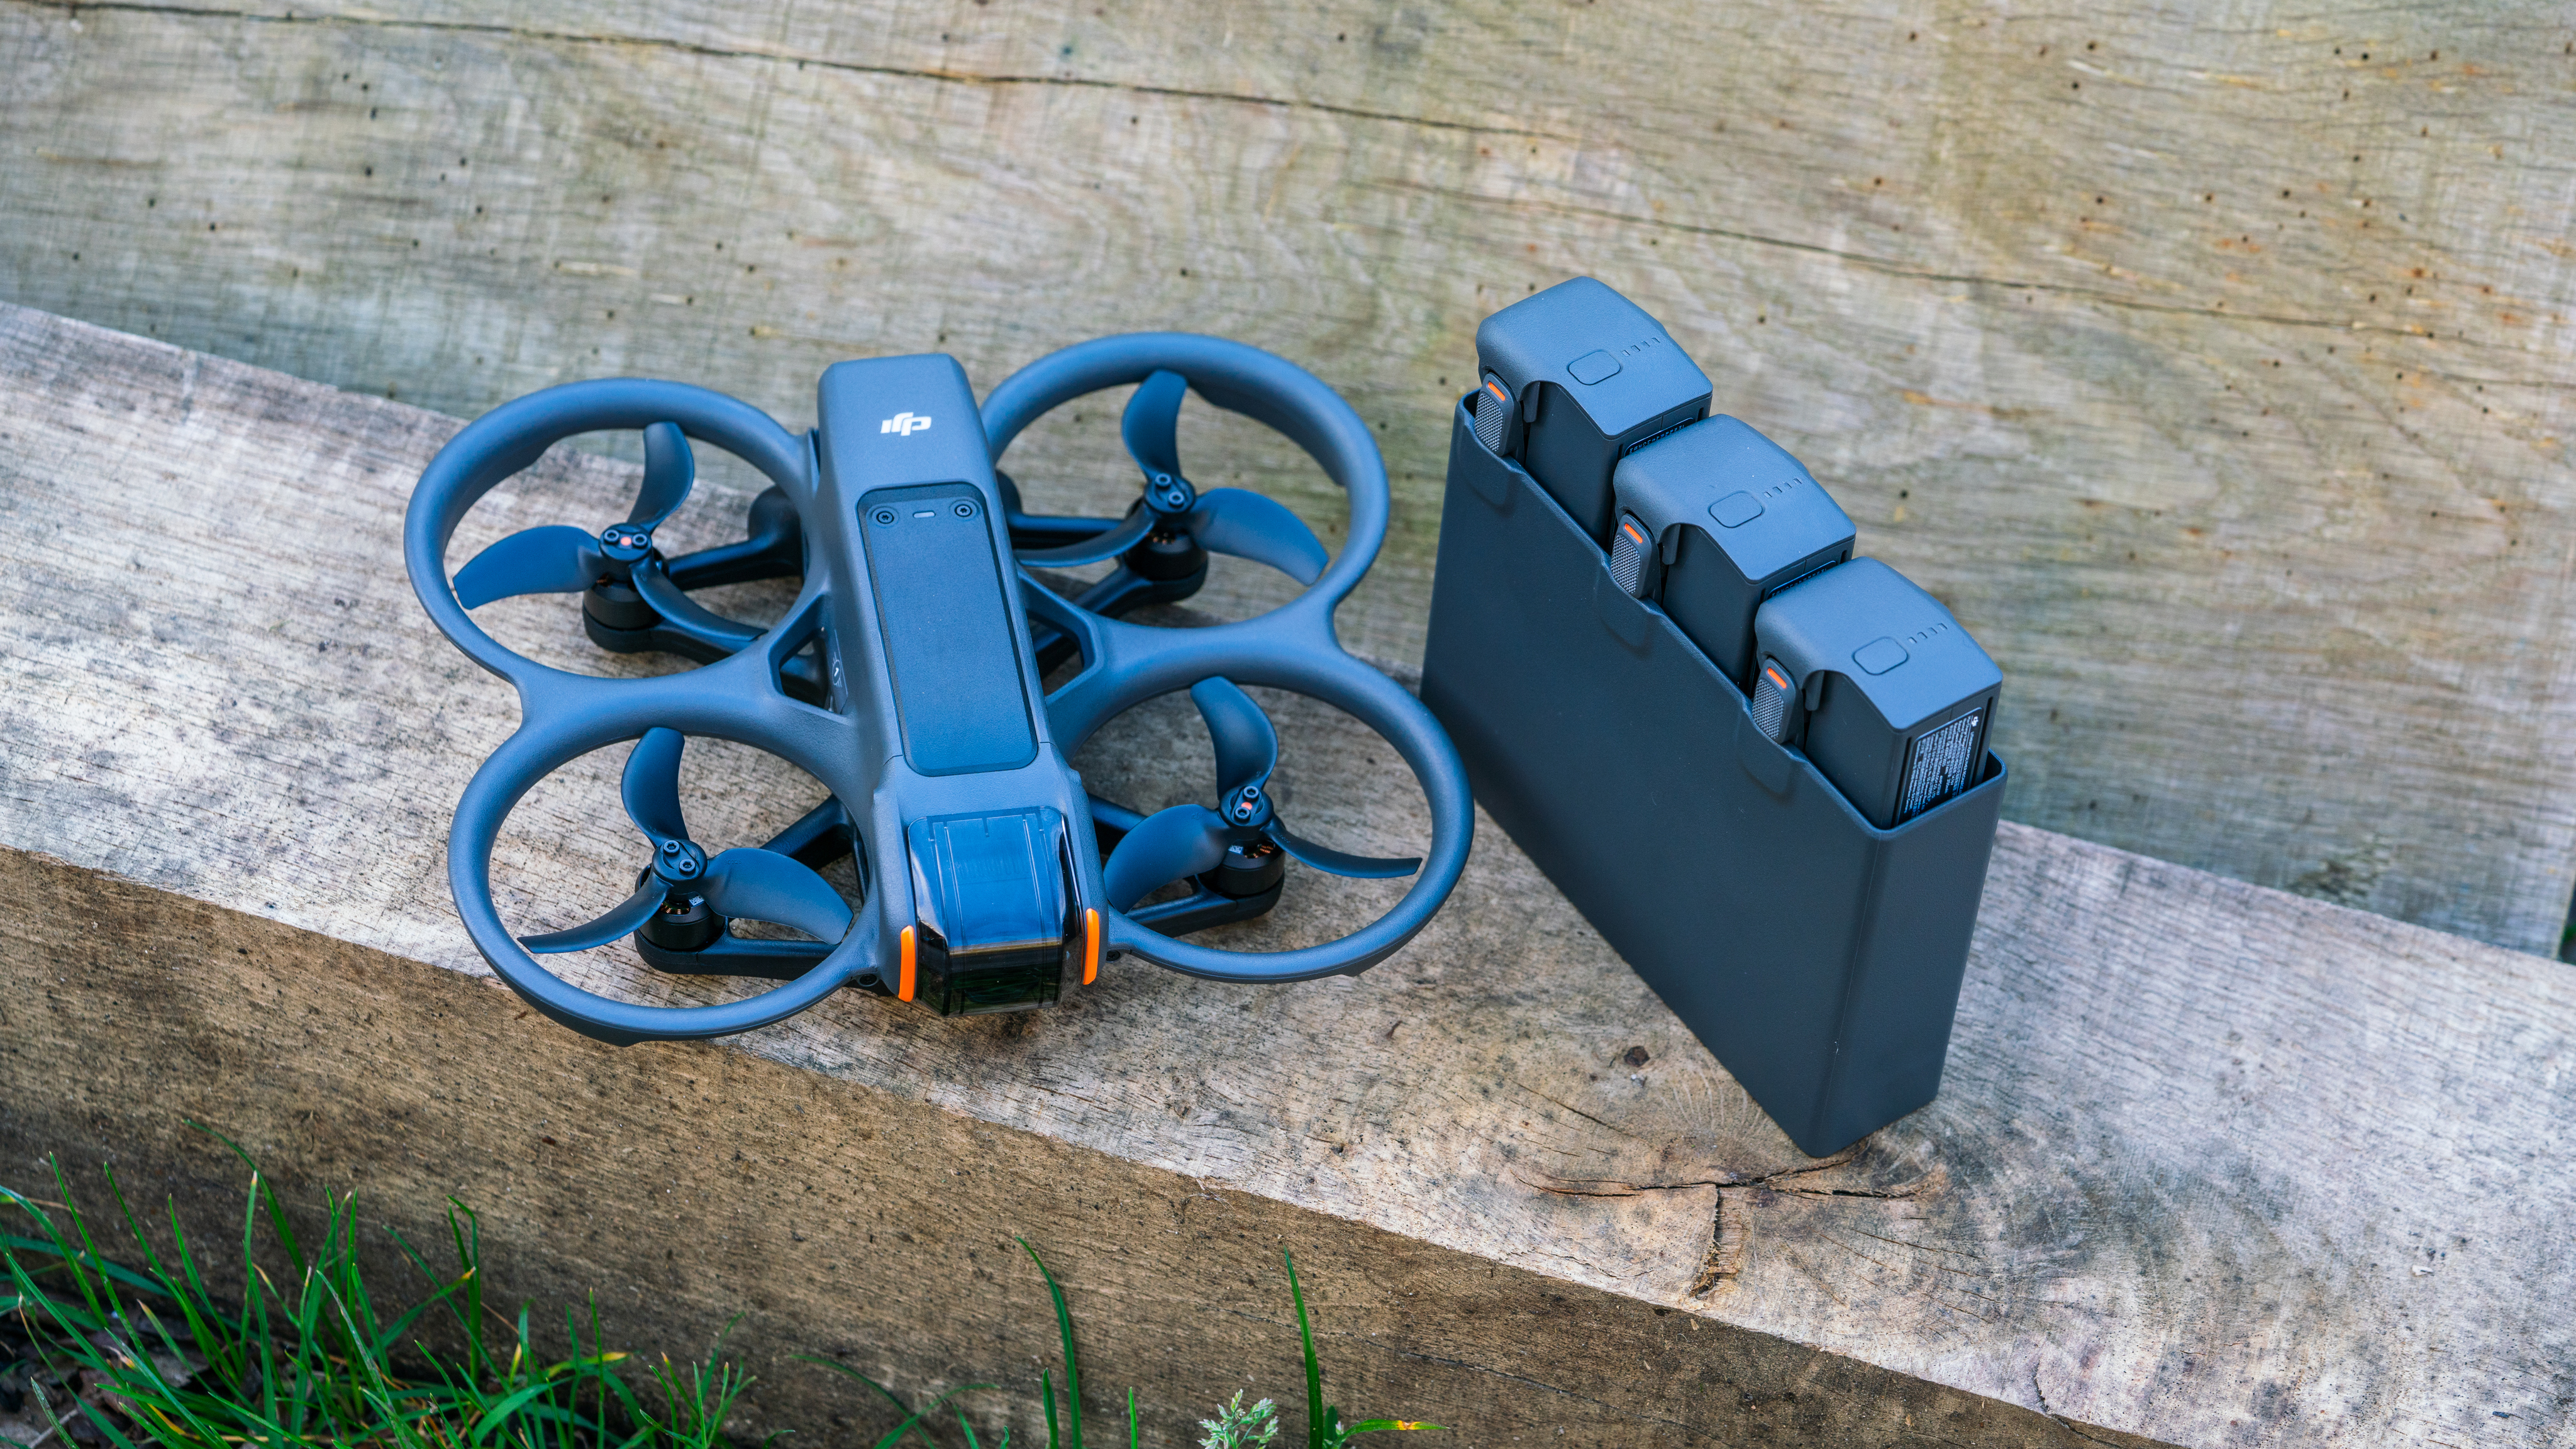
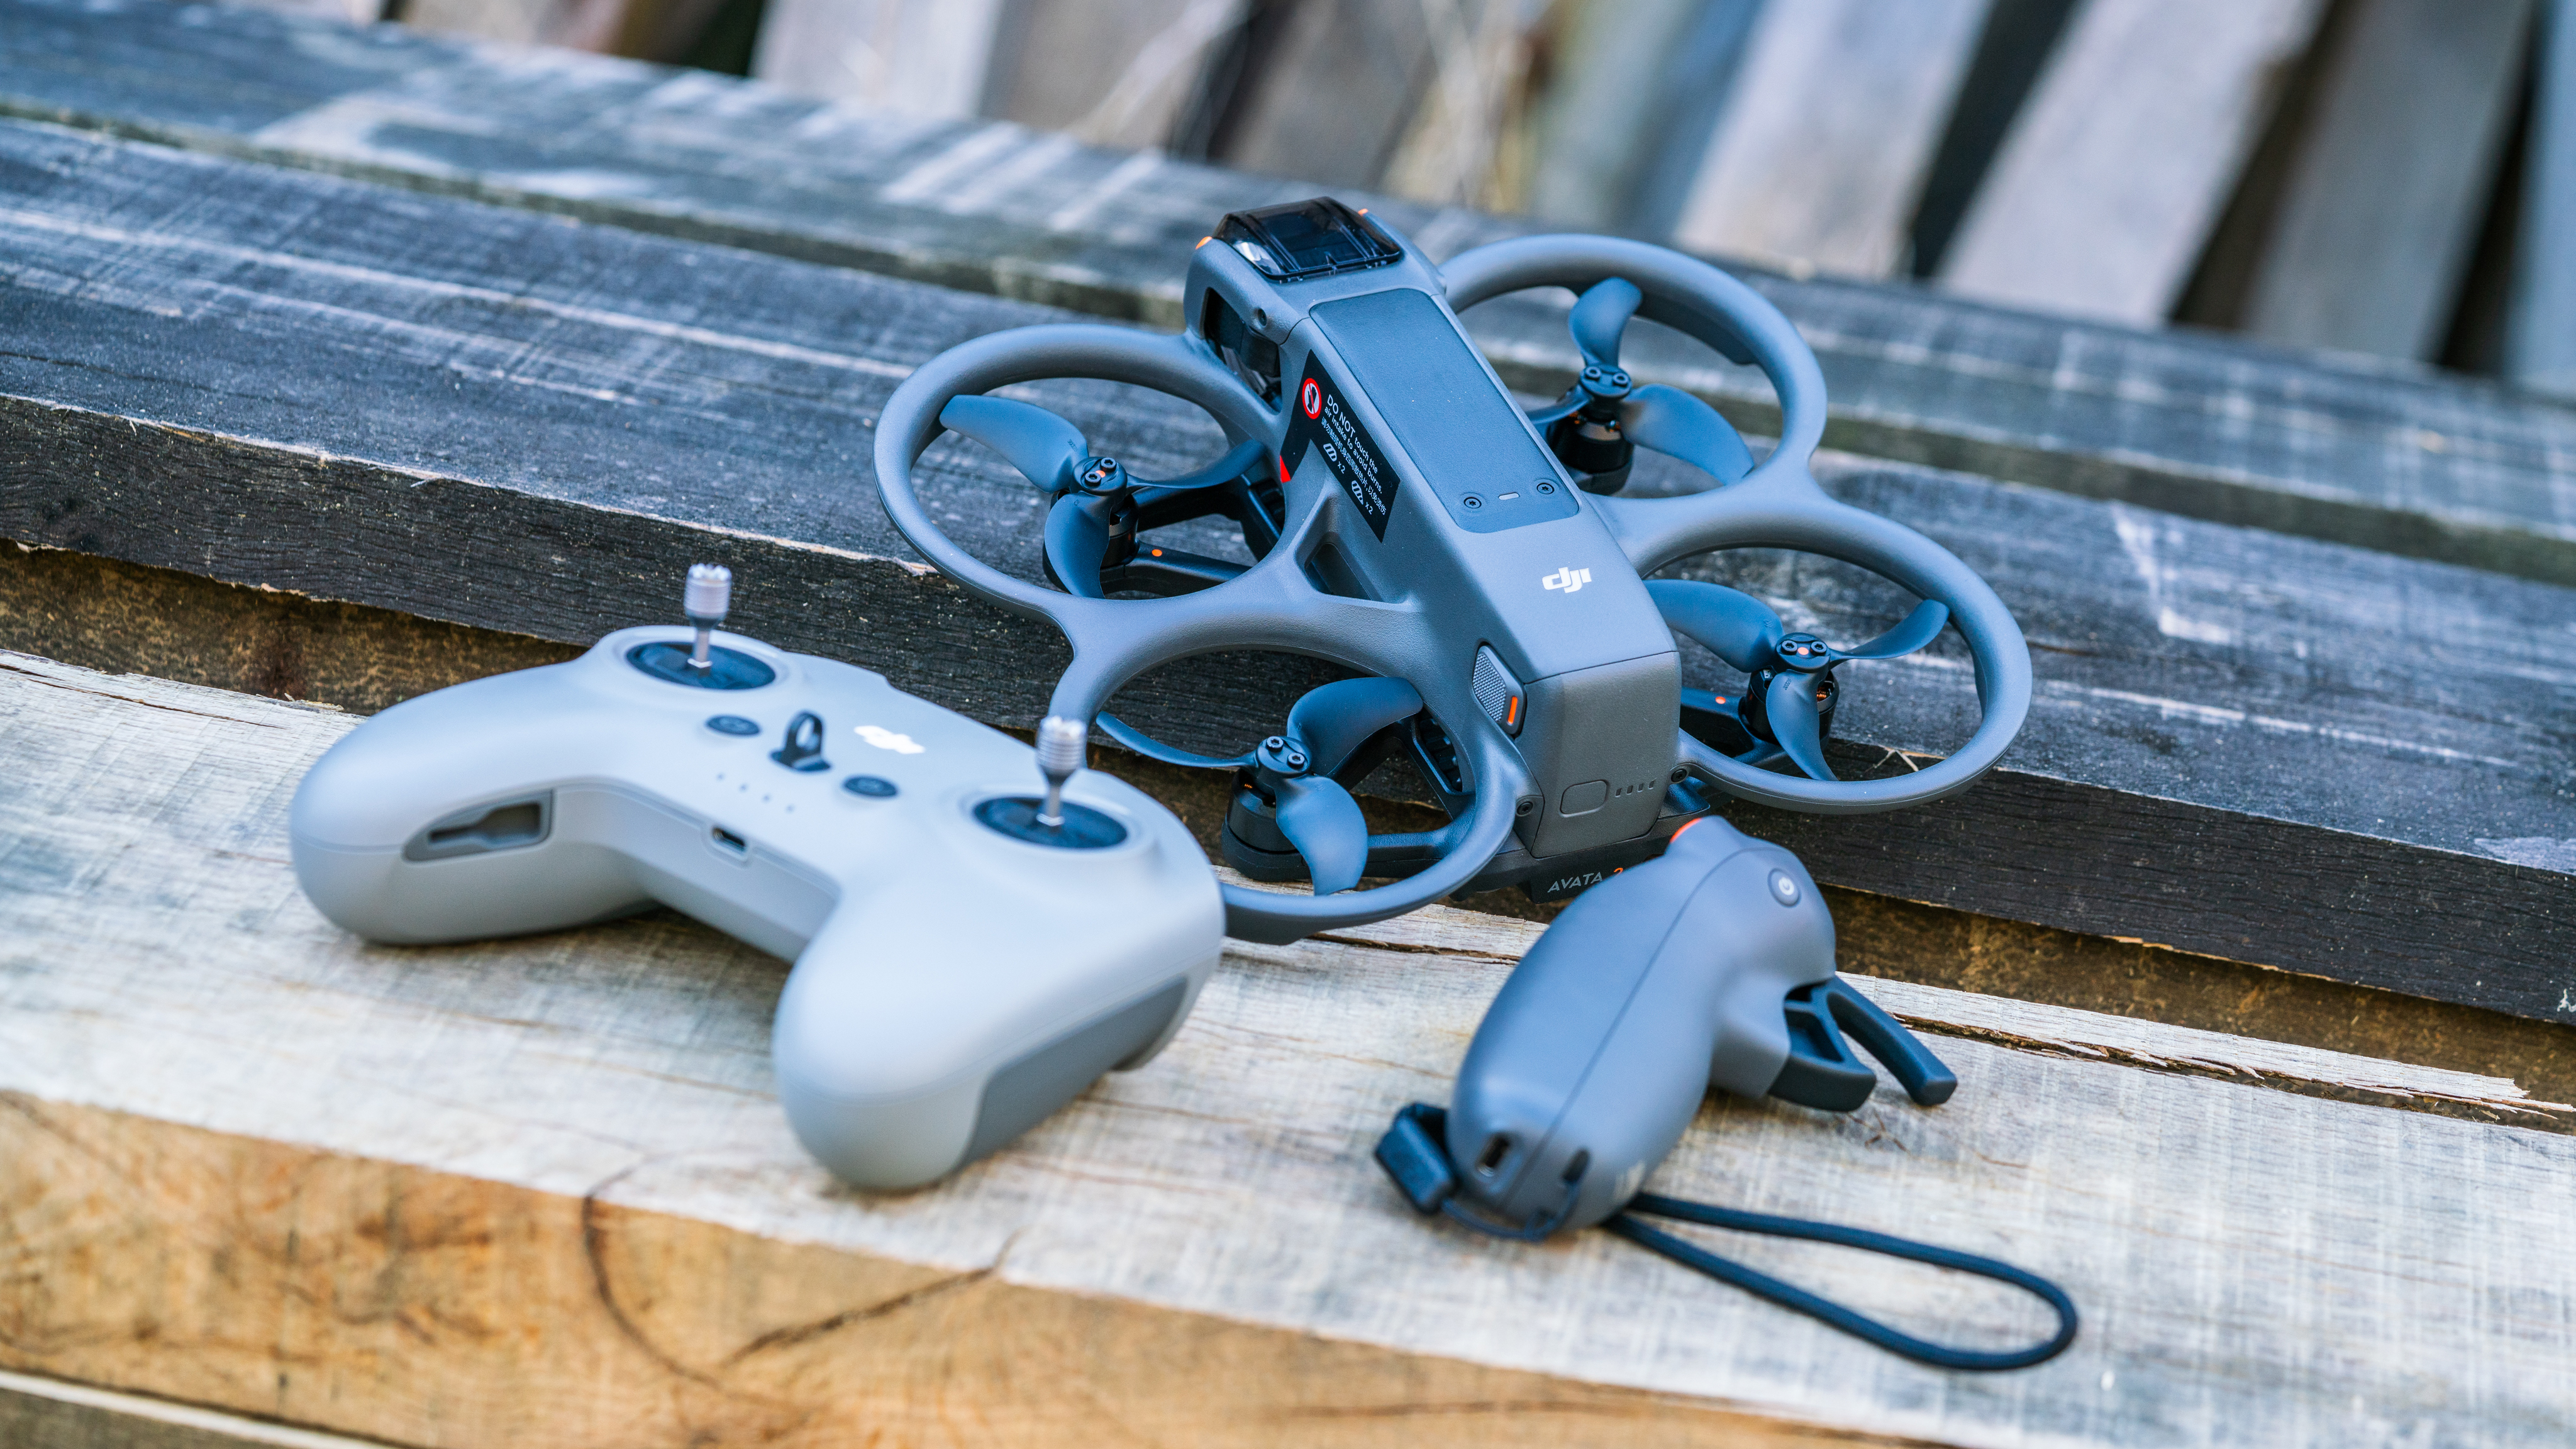
The DJI Avata 2 is DJI’s third FPV-focused drone. It was announced on April 11 2024, with immediate availability from the DJI website. It’s the successor to the Avata, which was released back in August 2022, and the DJI FPV launched in March 2021. It’s available as the Fly More Combo with one battery for $999 / £879 / $1,499, or with three batteries for $1,199 / £1,049 / AU$1,839. The Fly More Combo includes the drone, the new DJI Goggles 3, and the new DJI Motion Controller 3, with everything fitting neatly into the well designed included black bag.
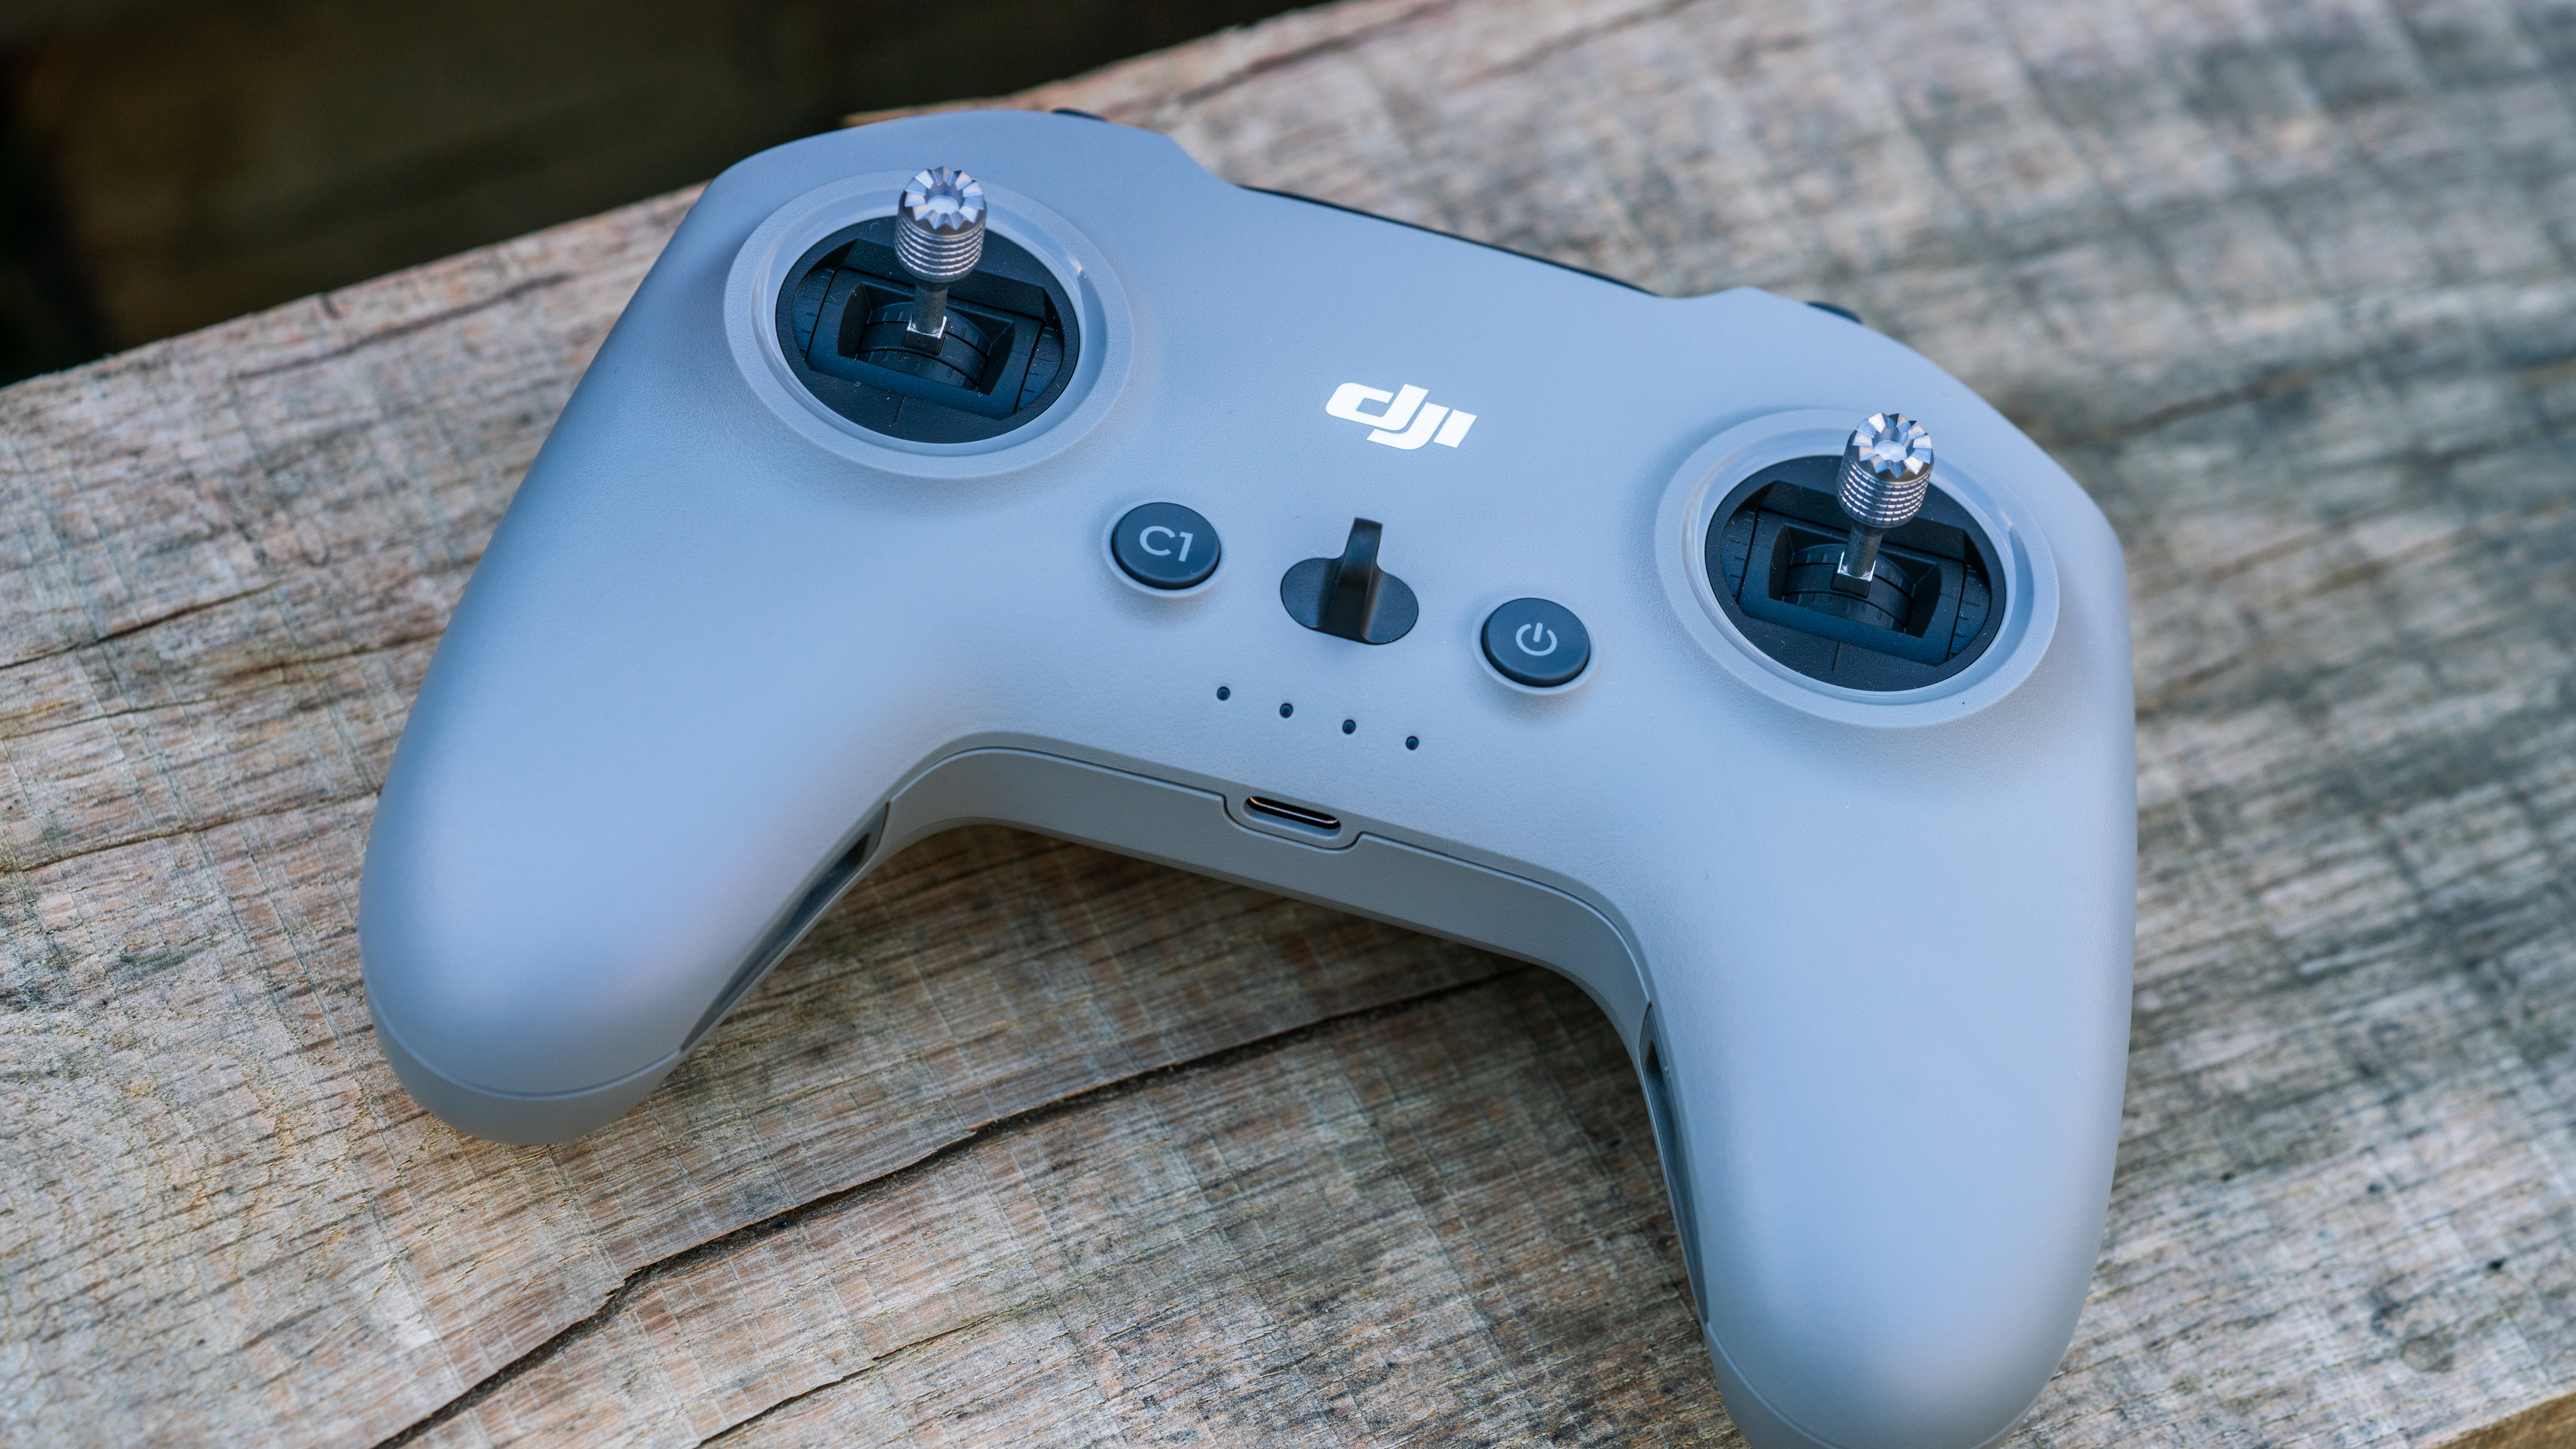
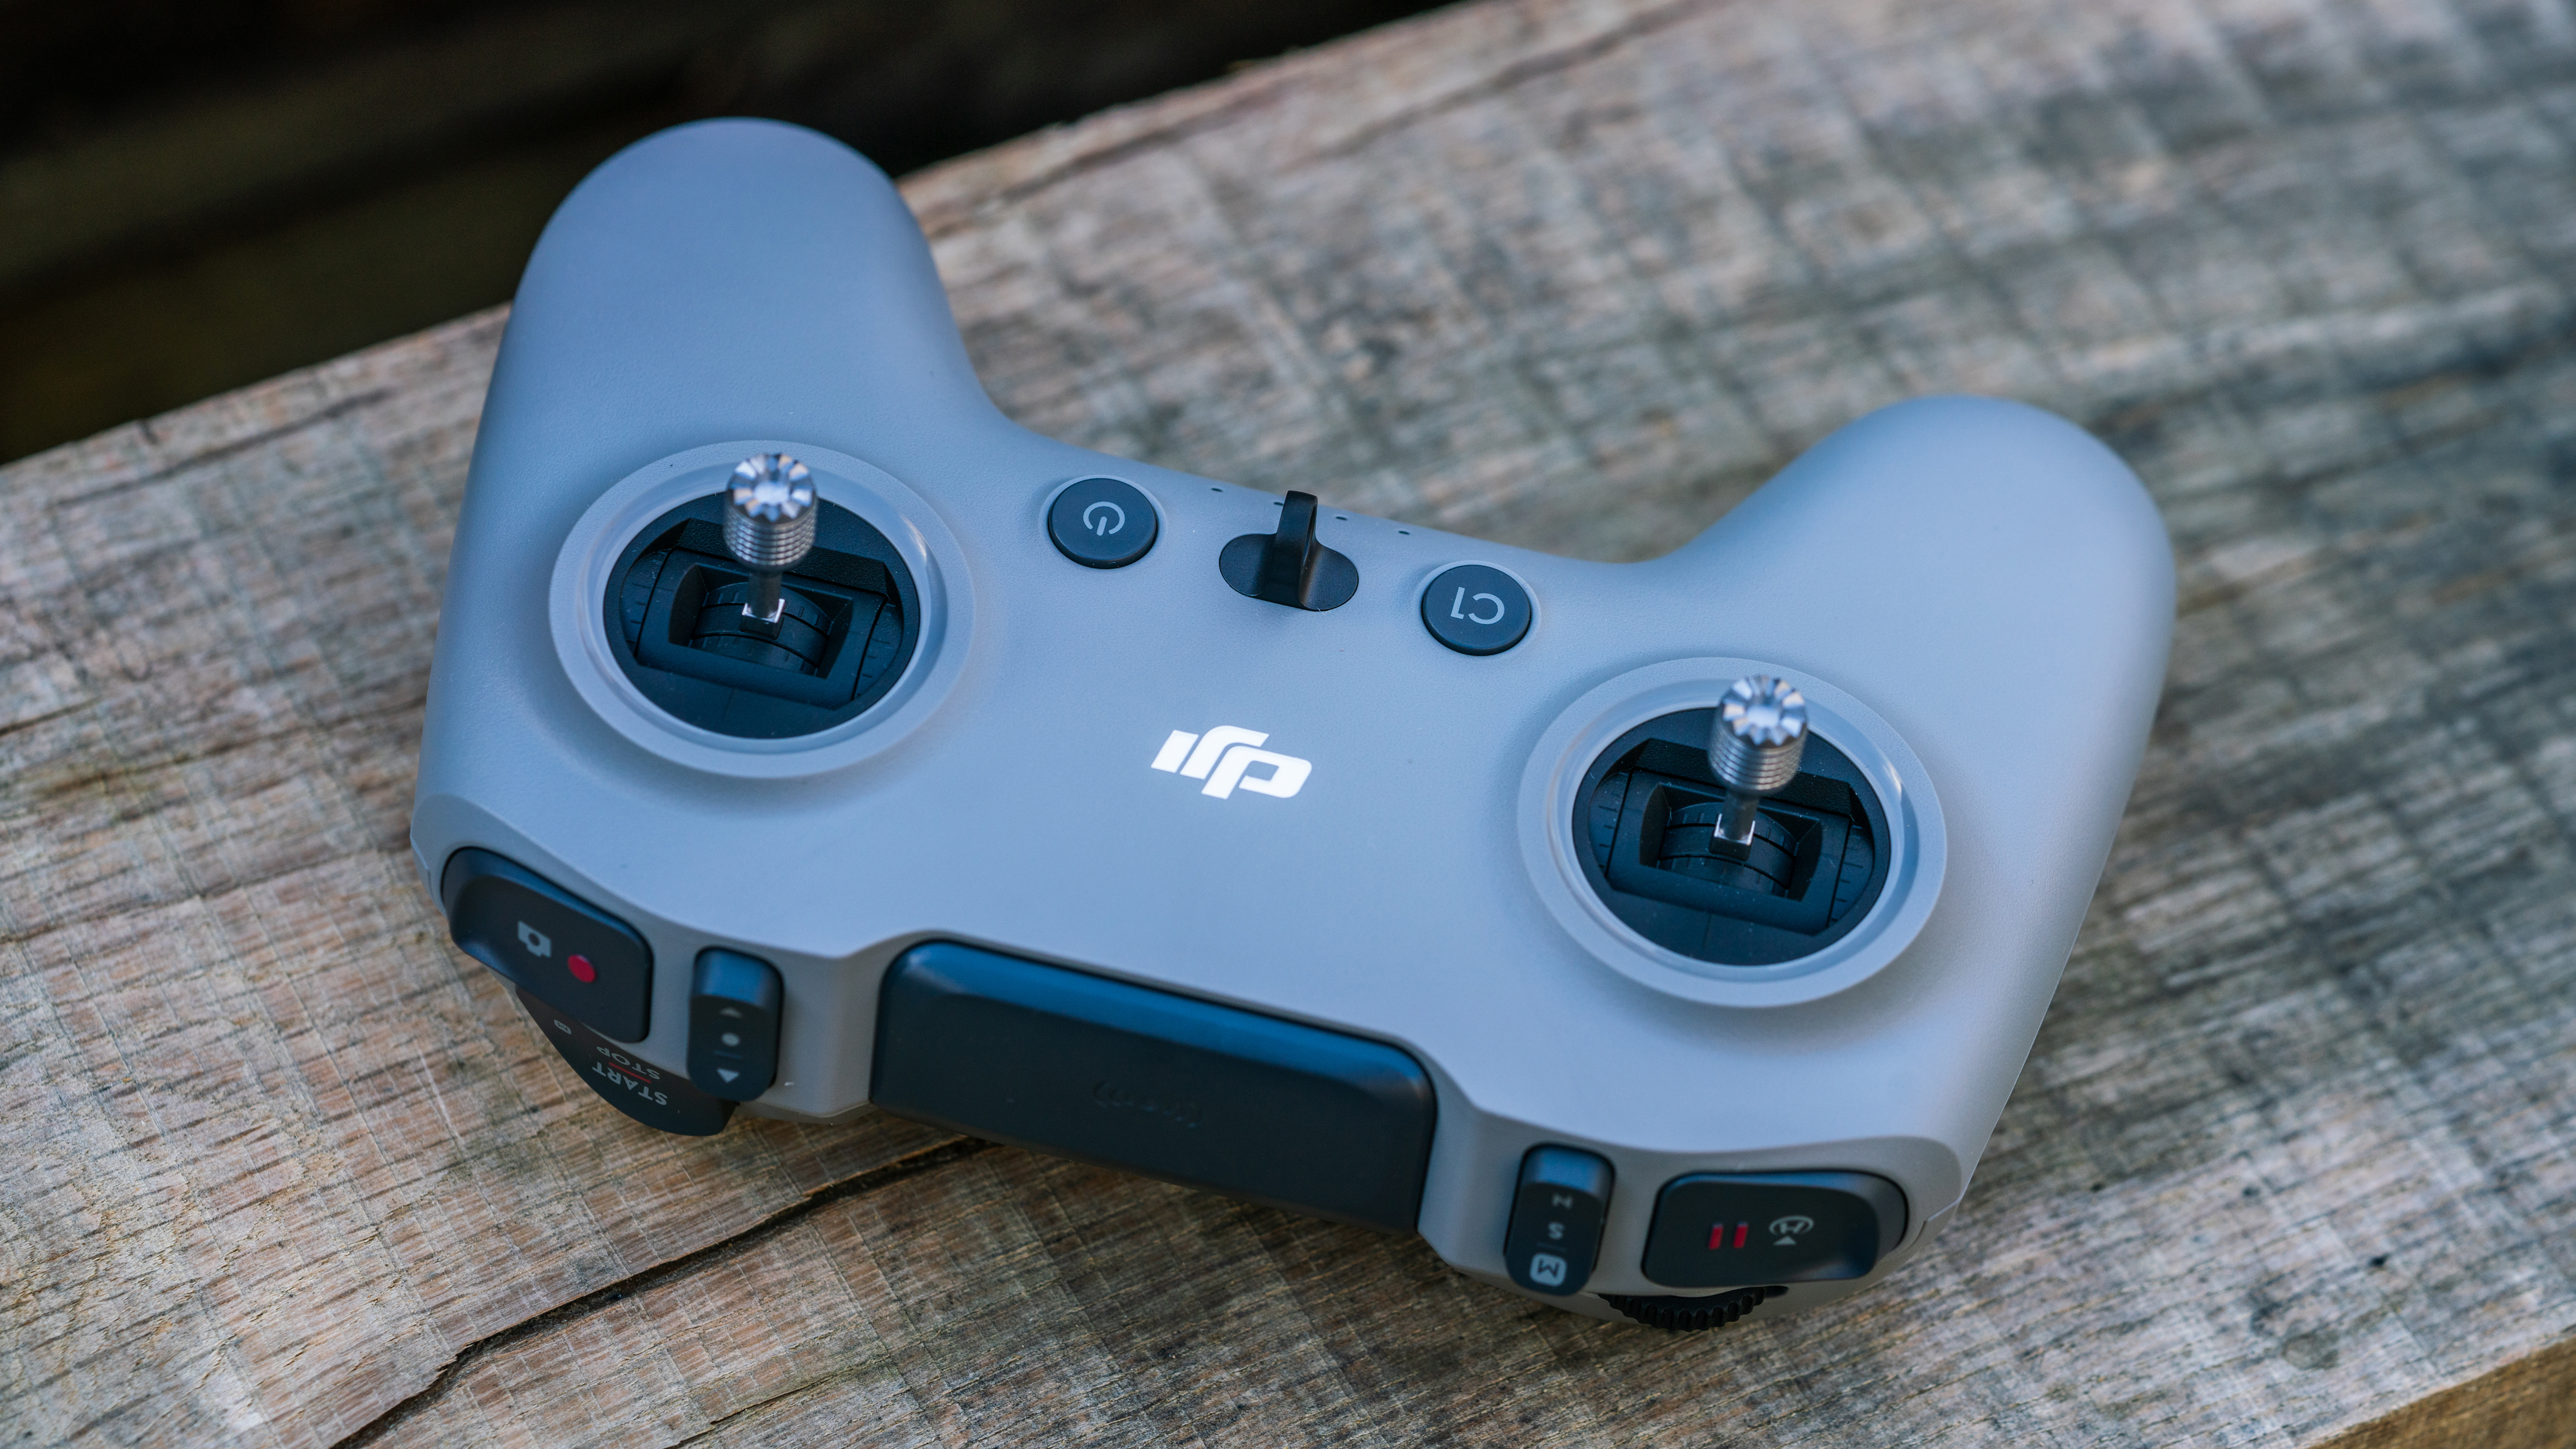
If you prefer to fly using a gaming-stye controller, the DJI Remote Controller 3 is available for $199 / £139 / AU$229. It appears to be the same design as the DJI Remote Controller 2, except that the previously foldable antenna is now encased within the controller.
The DJI Avata 2 Fly More Combo is reasonably priced considering what’s included in the package – notably the Goggles 3, which, paired with the O4 camera and transmission, result in excellent image quality with a far better dynamic range than the Avata, the DJI FPV, or the O3 Air Unit that’s commonly used on self-built quadcopters. Shadows contain more detail, and are better balanced with the highlights. Fly More combos come with one or three additional batteries, a carry bag, a charging hub and other useful accessories, and offer value if you see yourself requiring extra batteries anyway.

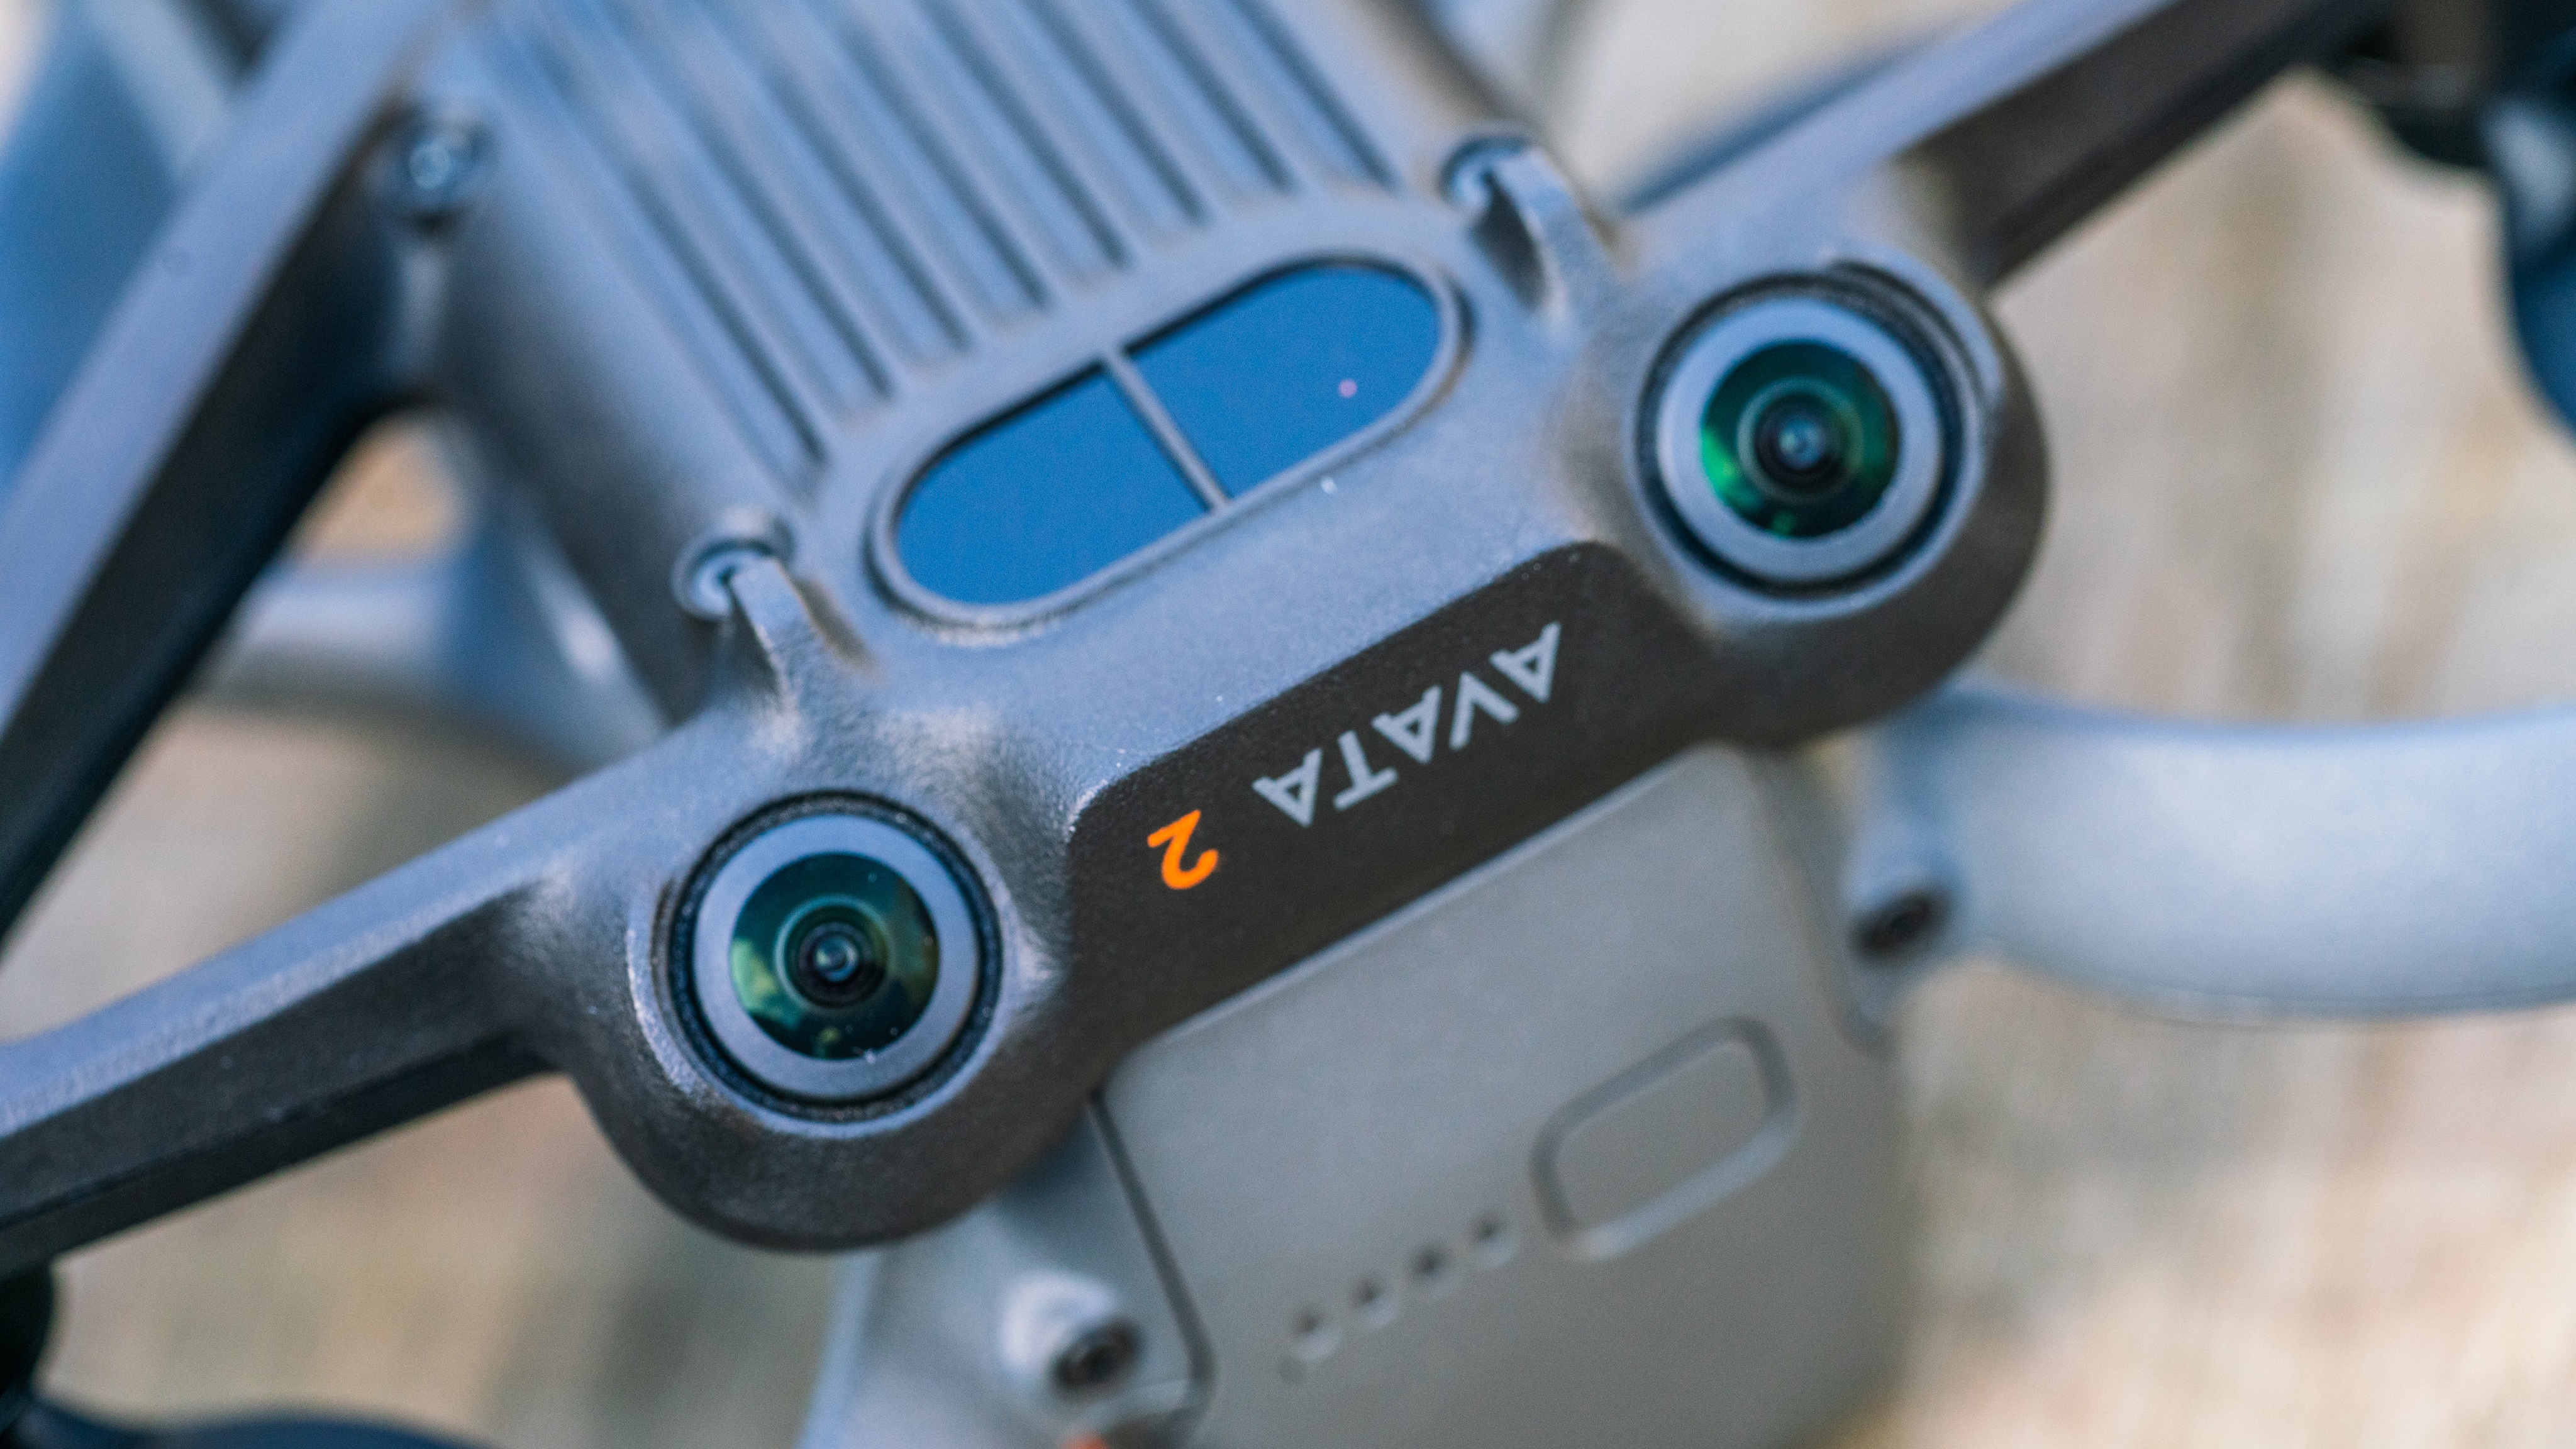
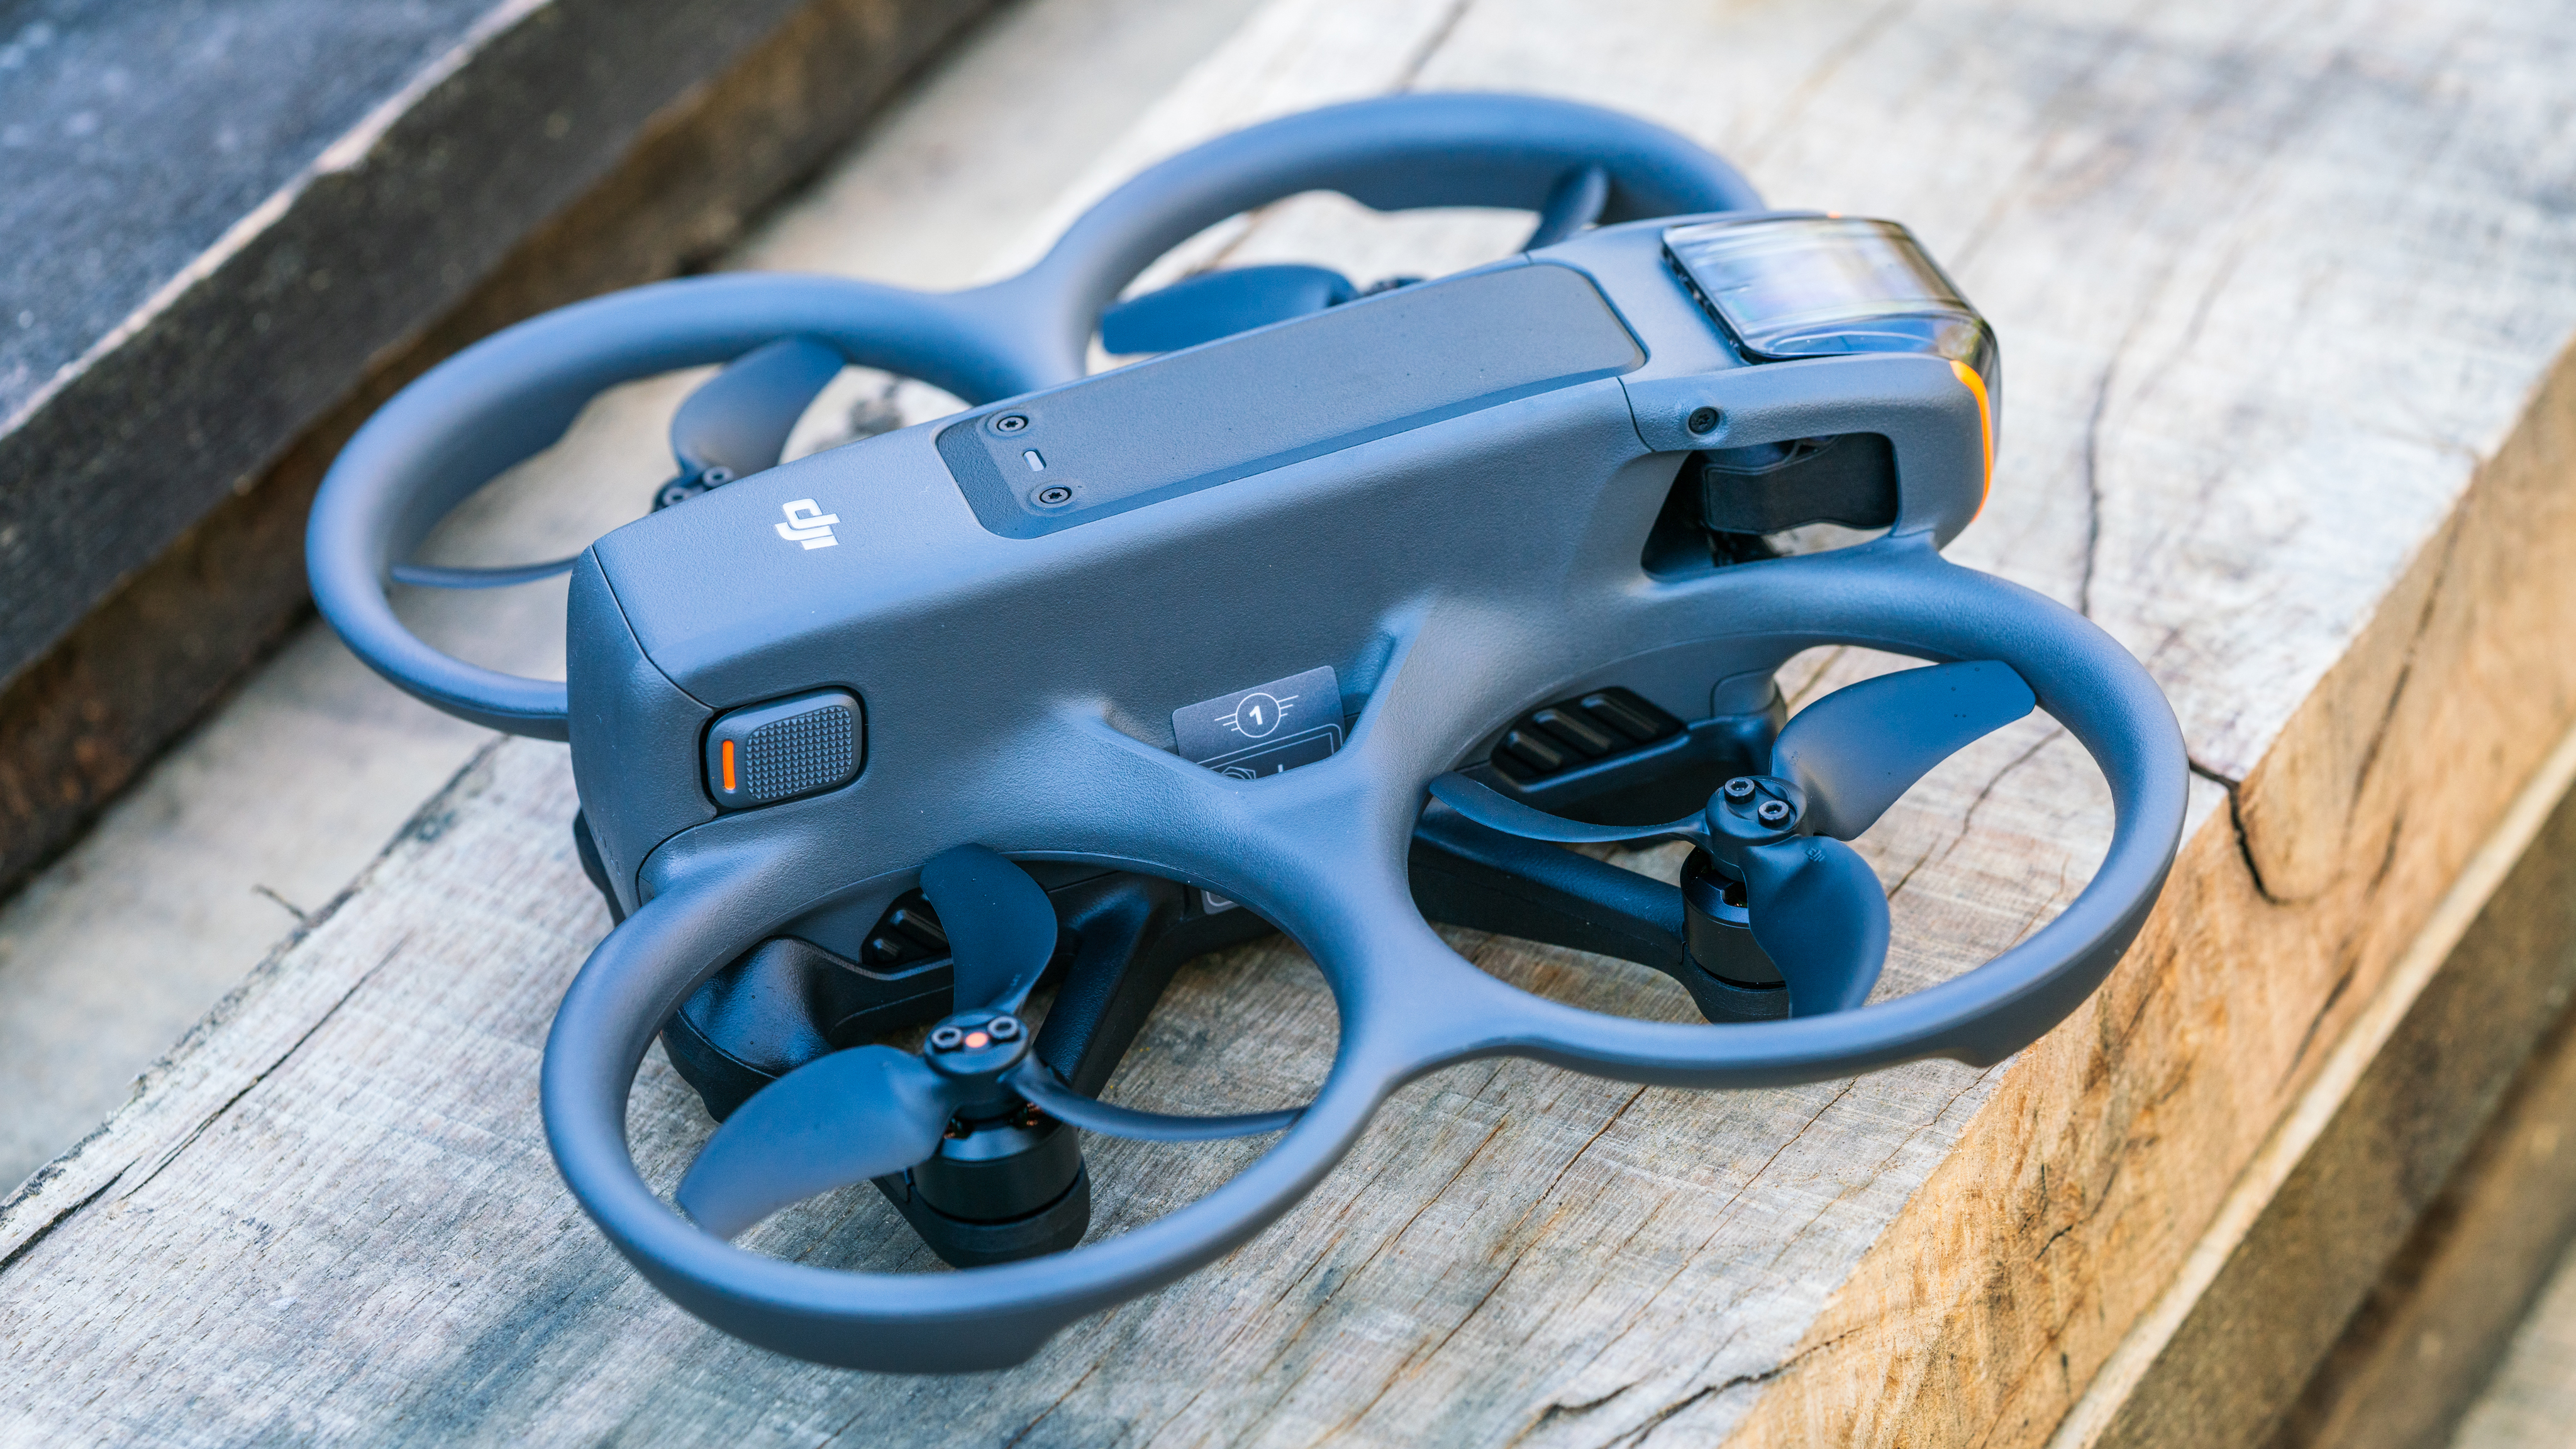
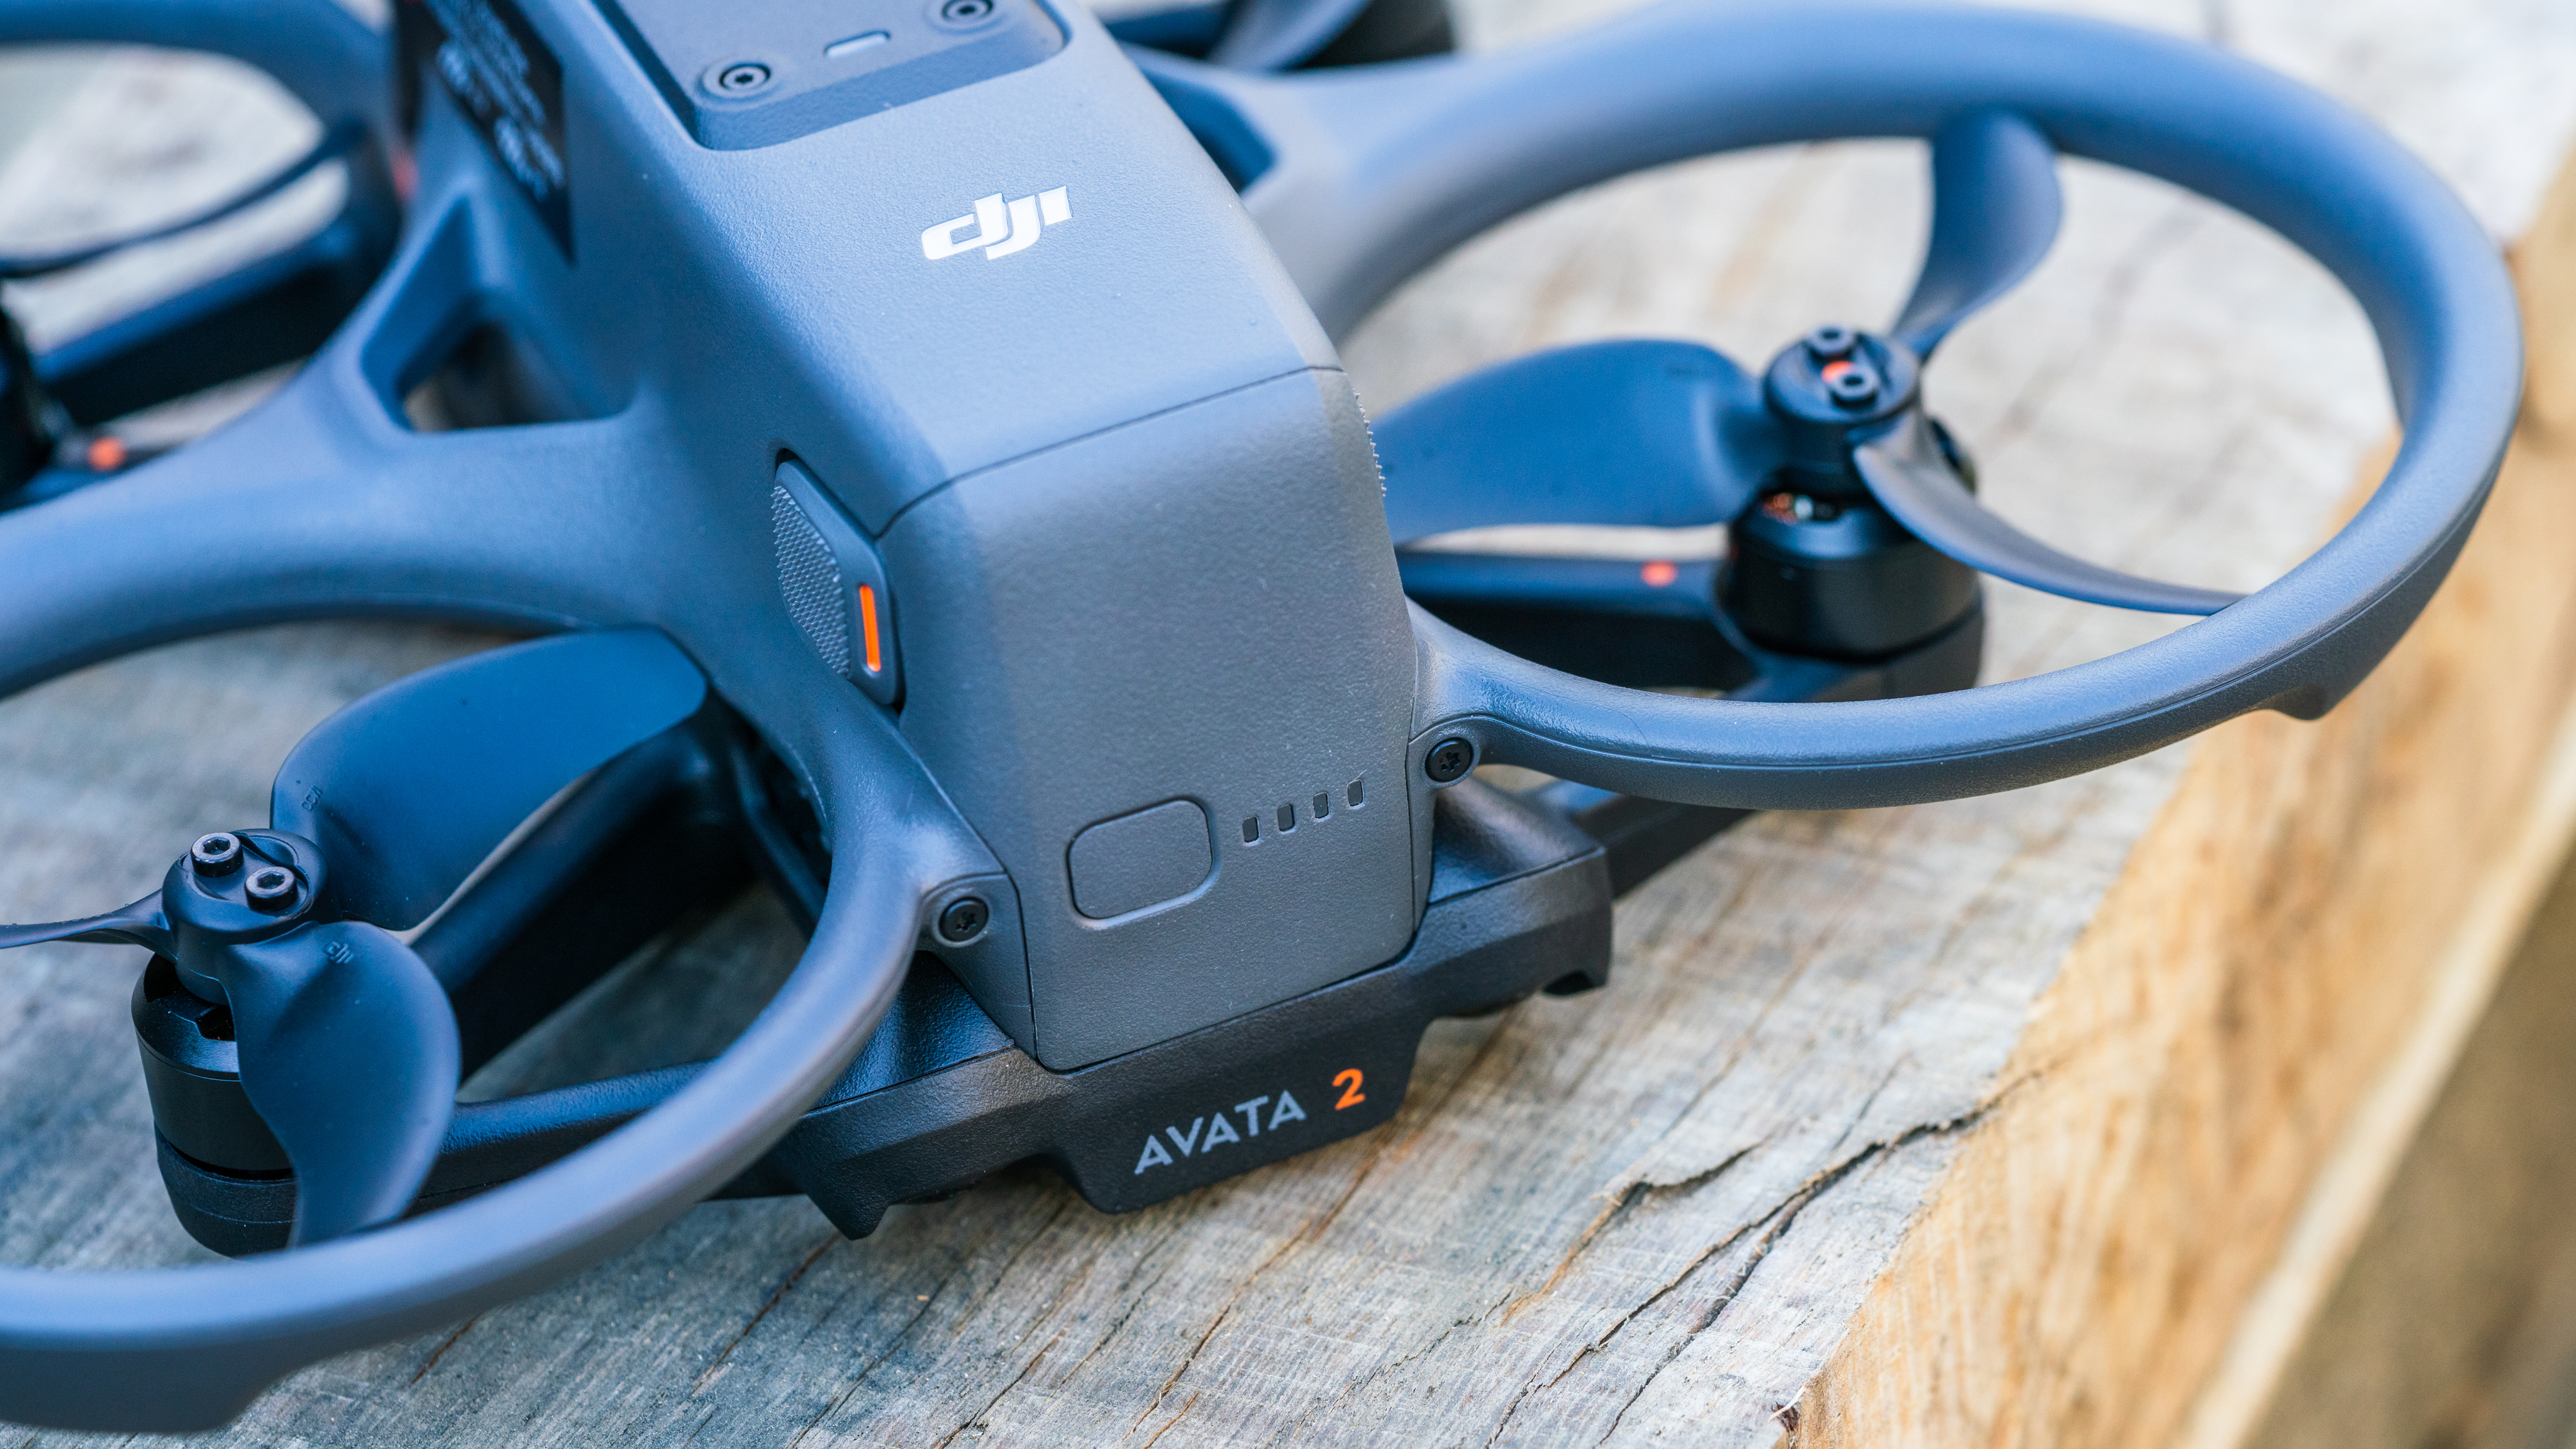
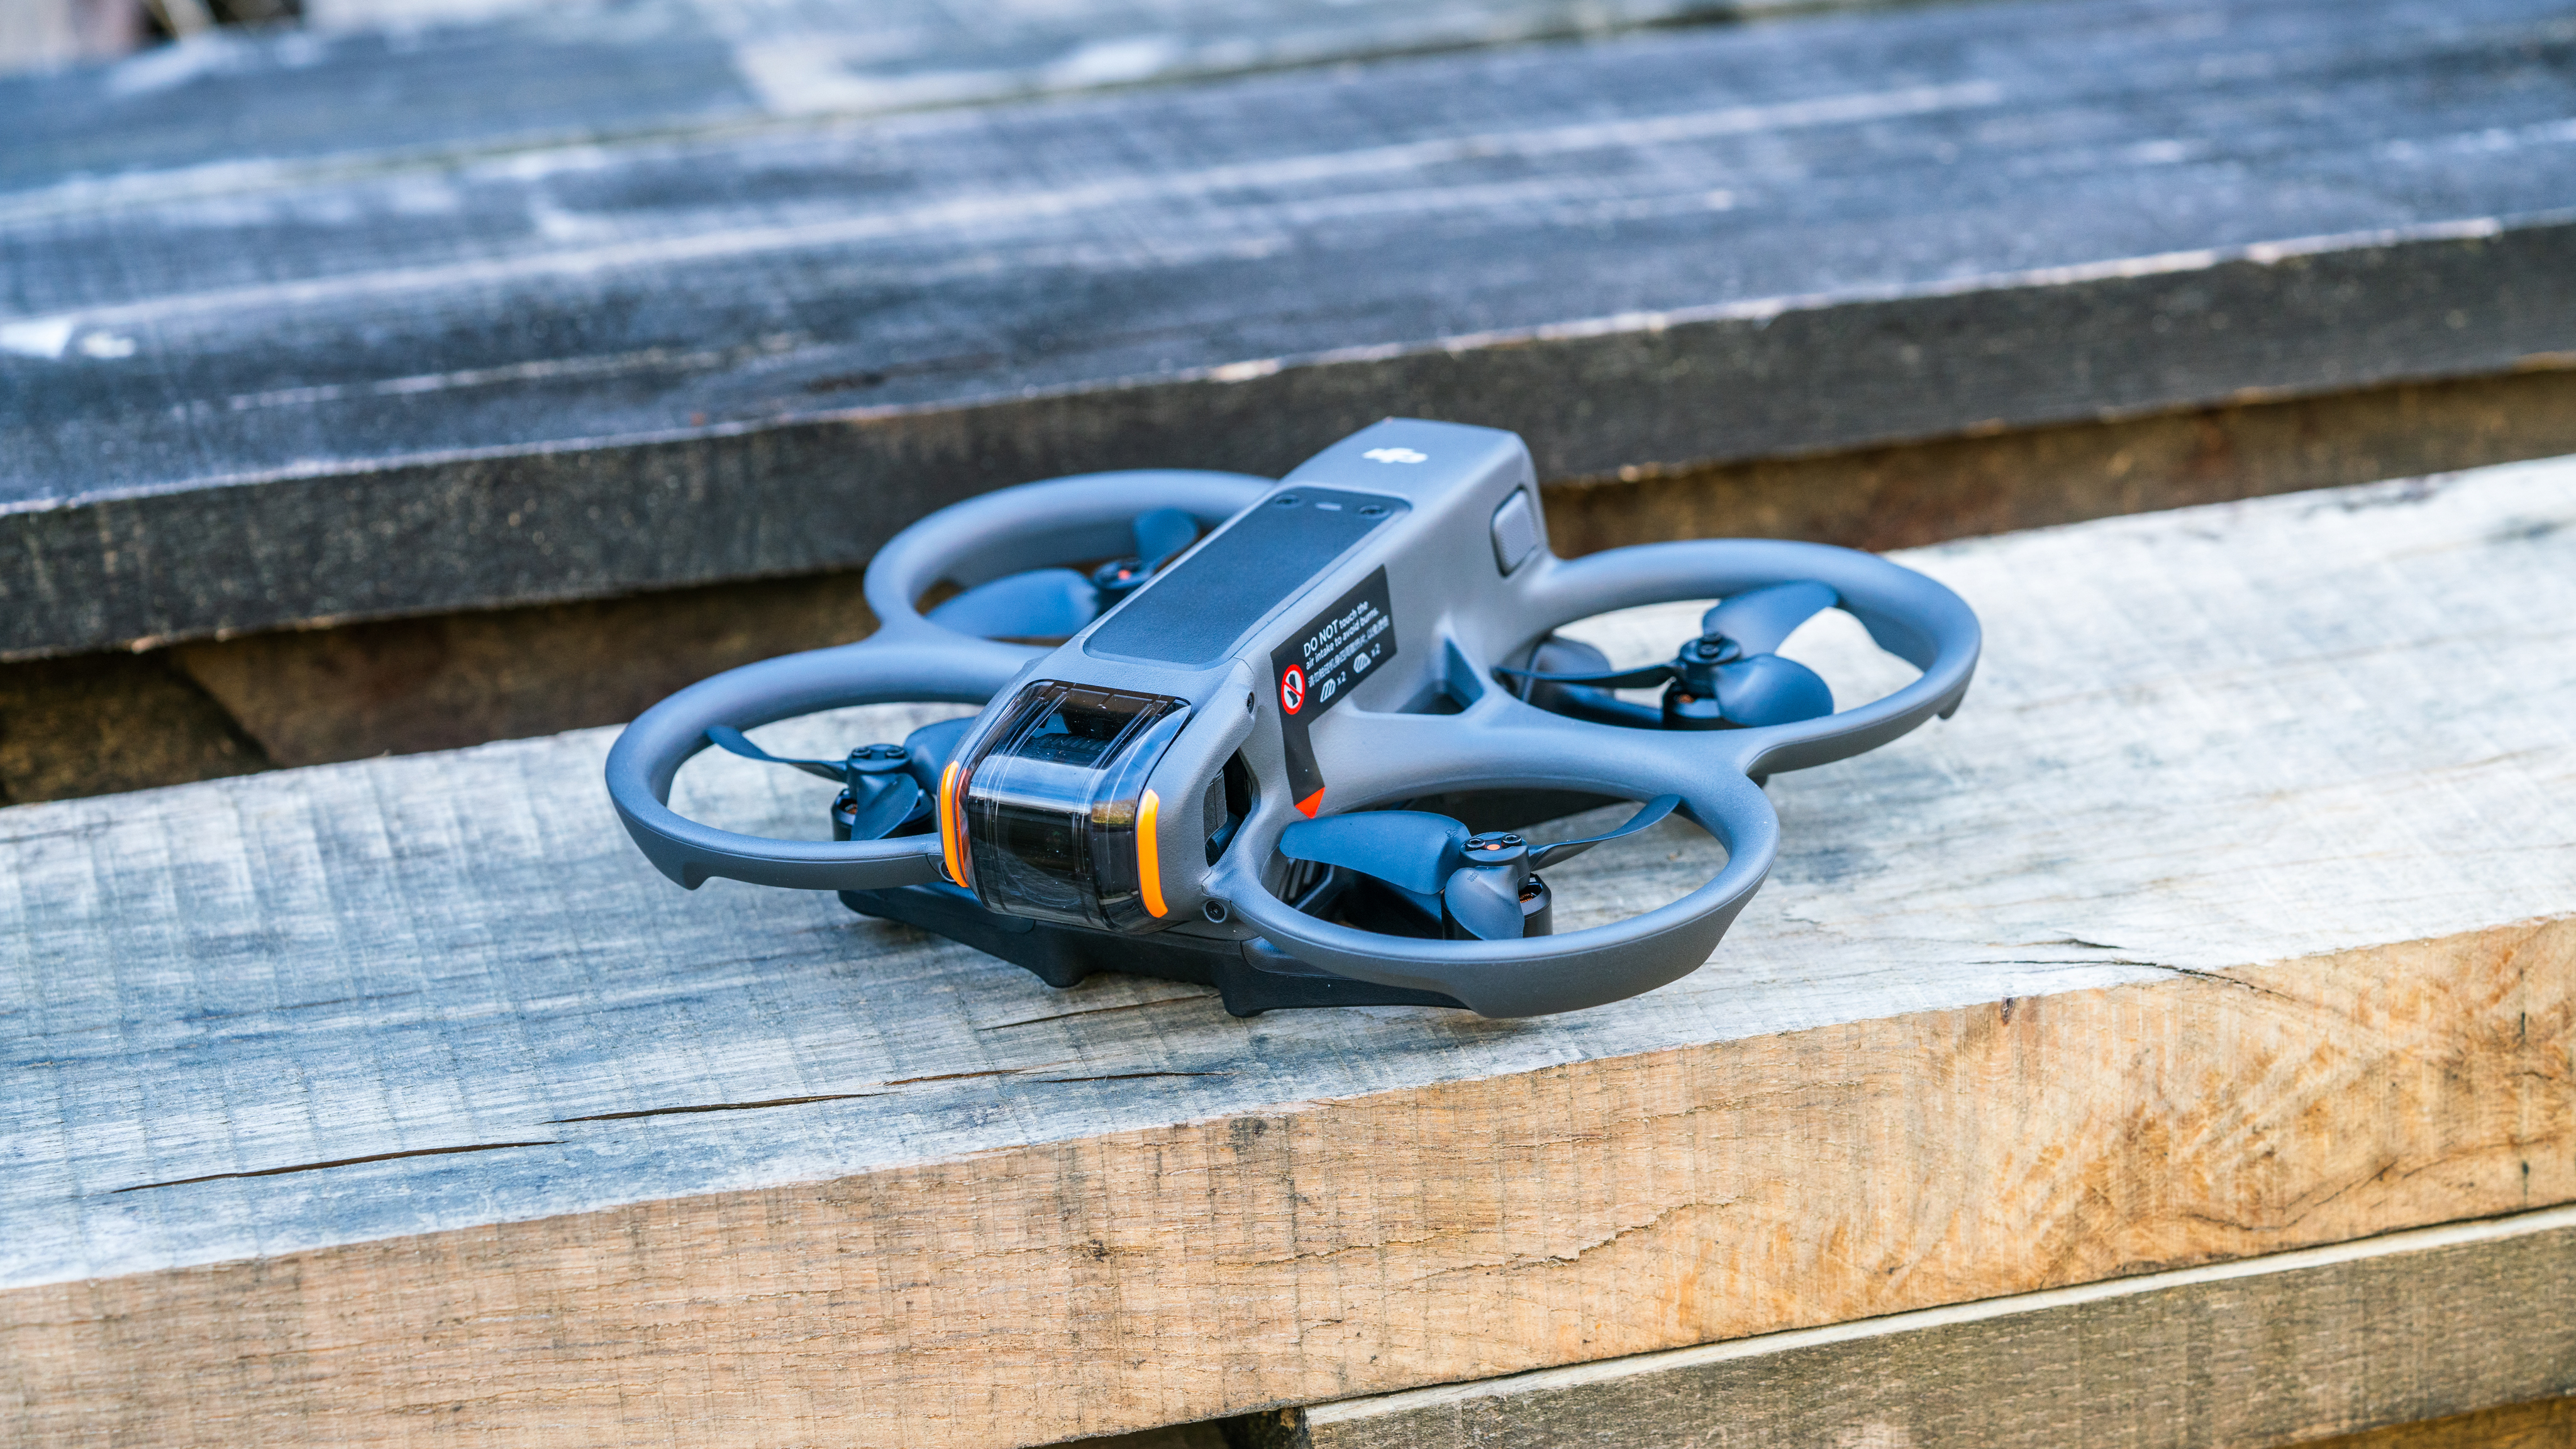
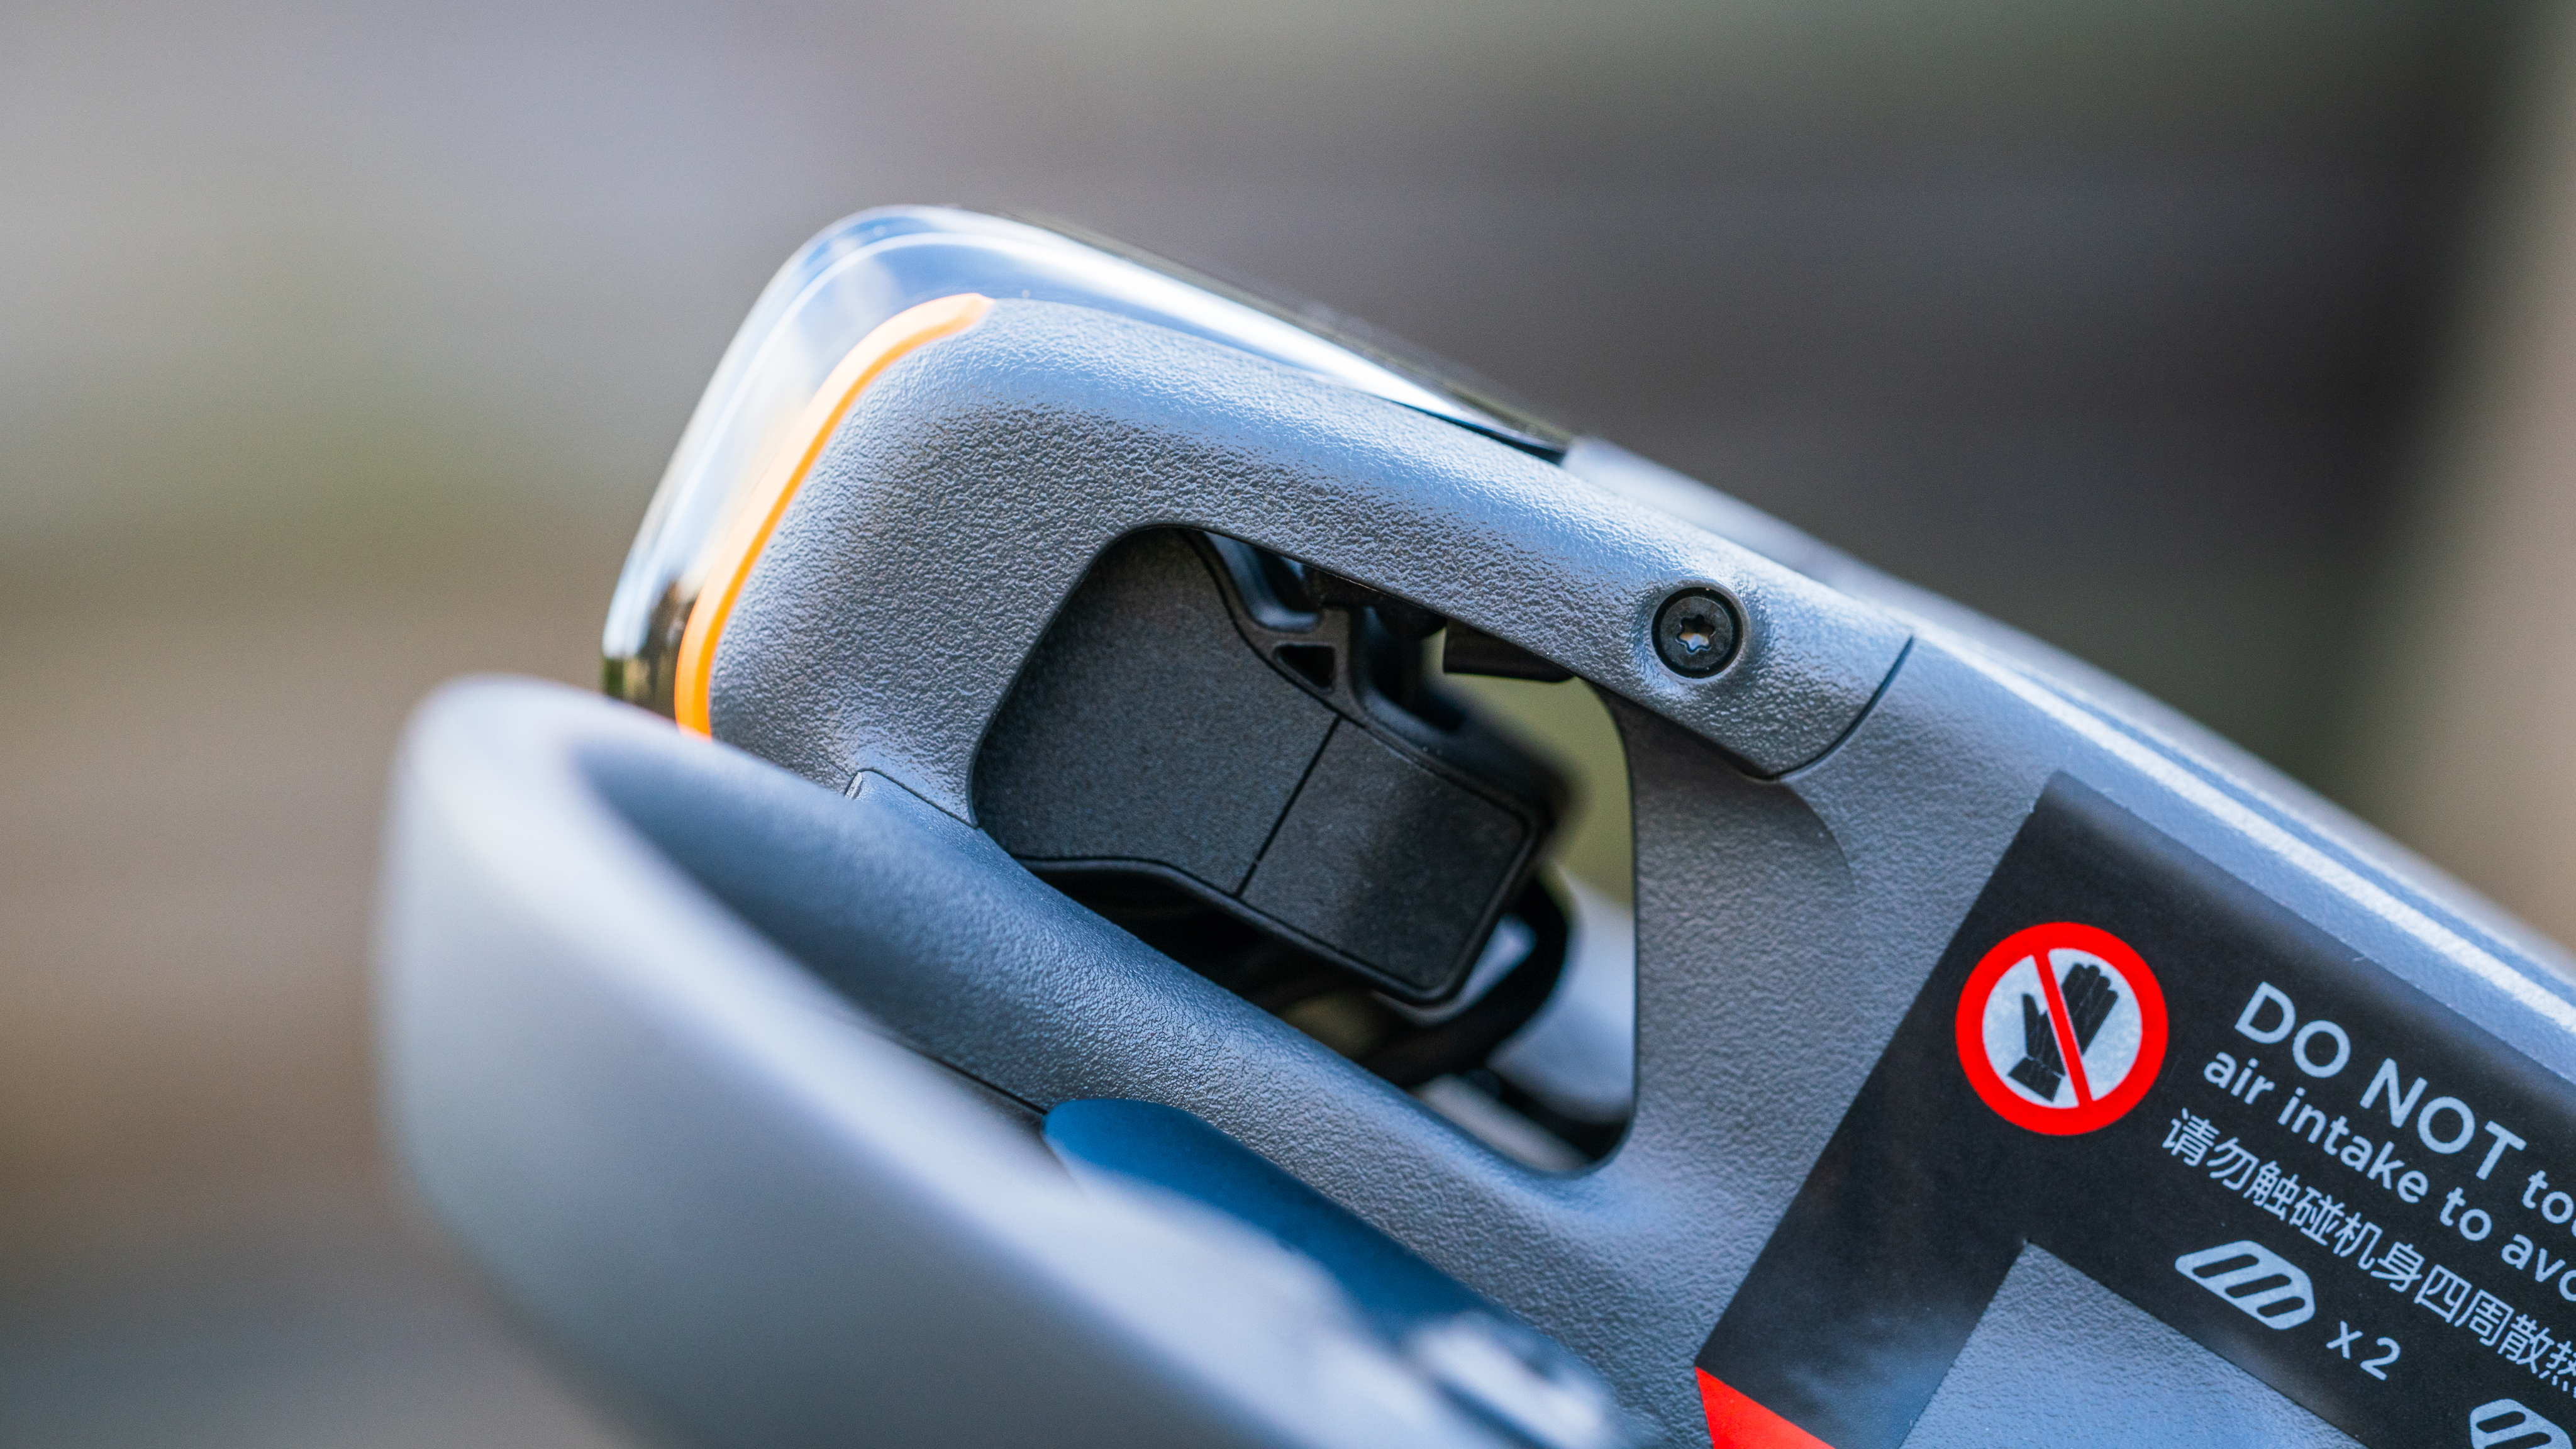
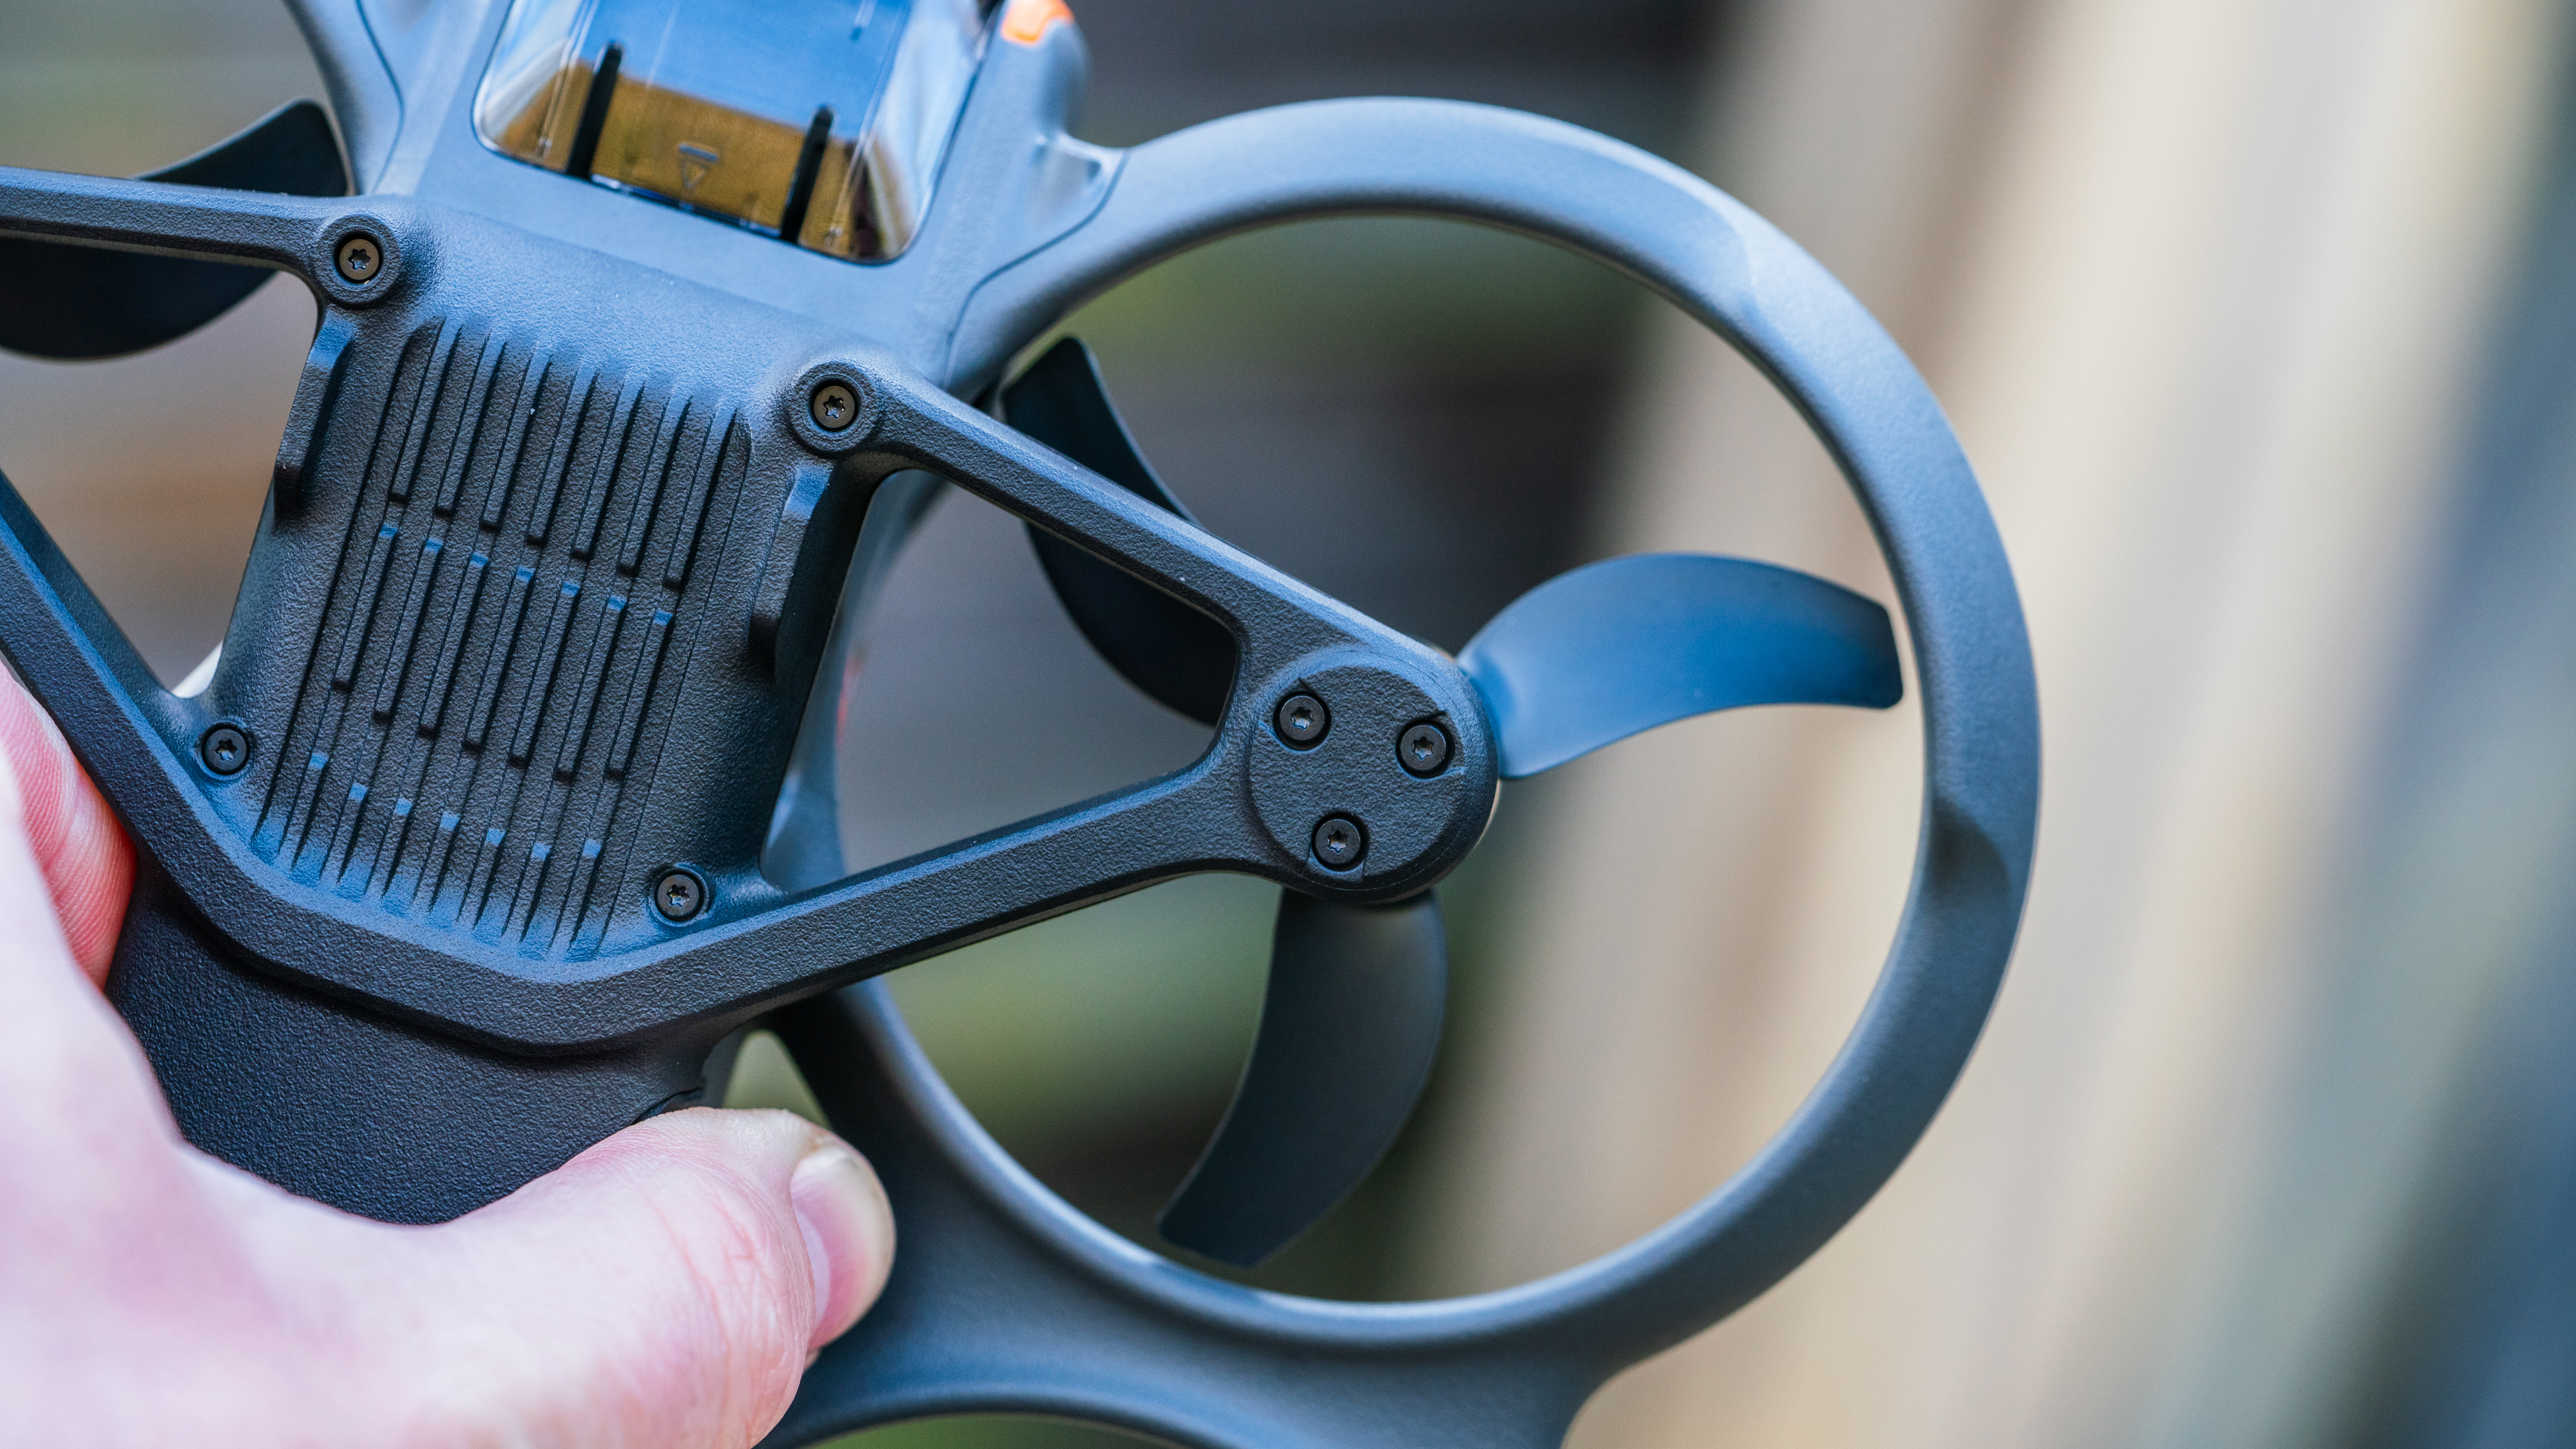
The DJI Avata 2 is a complete redesign from its predecessor, with a longer wheelbase, dimensions of 7.26 x 8.35 x 2.52 inches / 184.5 x 212 x 64mm, and a flatter frame for improved aerodynamics. DJI claims the Avata 2 offers better durability and power that its predecessor, while weighing 1.06oz / 30g less. Without a battery it’s surprisingly lightweight, and how well it can withstand repeated crashes remains to be seen, although such mishaps can be largely avoided by opting for to use the built-in obstacle detection and avoidance. It’s perhaps worth saying that this was never designed as a freestyle FPV drone – it remains a cinewhoop with ducts.
In the UK the Avata 2 can be flown by the operator using HD goggles as long as they have a spotter with them who can keep visual line of sight of the drone at all times. Our article about where and how you can fly FPV drones explains more, or you can refer to the CAA website for more information on UK drone laws, the FAA website in the US and the CASA website in Australia.
The Avata 2 is powered by a 2150mAh battery that allows for up to 26 minutes of flight when slowly cruising on a windless day; should you fly manual and perform loops and rolls on a more windy day, your flight time will be reduced considerably, although endurance is still good. This is particularly useful for those using this drone commercially, as it allows them to concentrate on the task at hand without having to constantly worry about battery exhaustion and fear of missing that key moment.
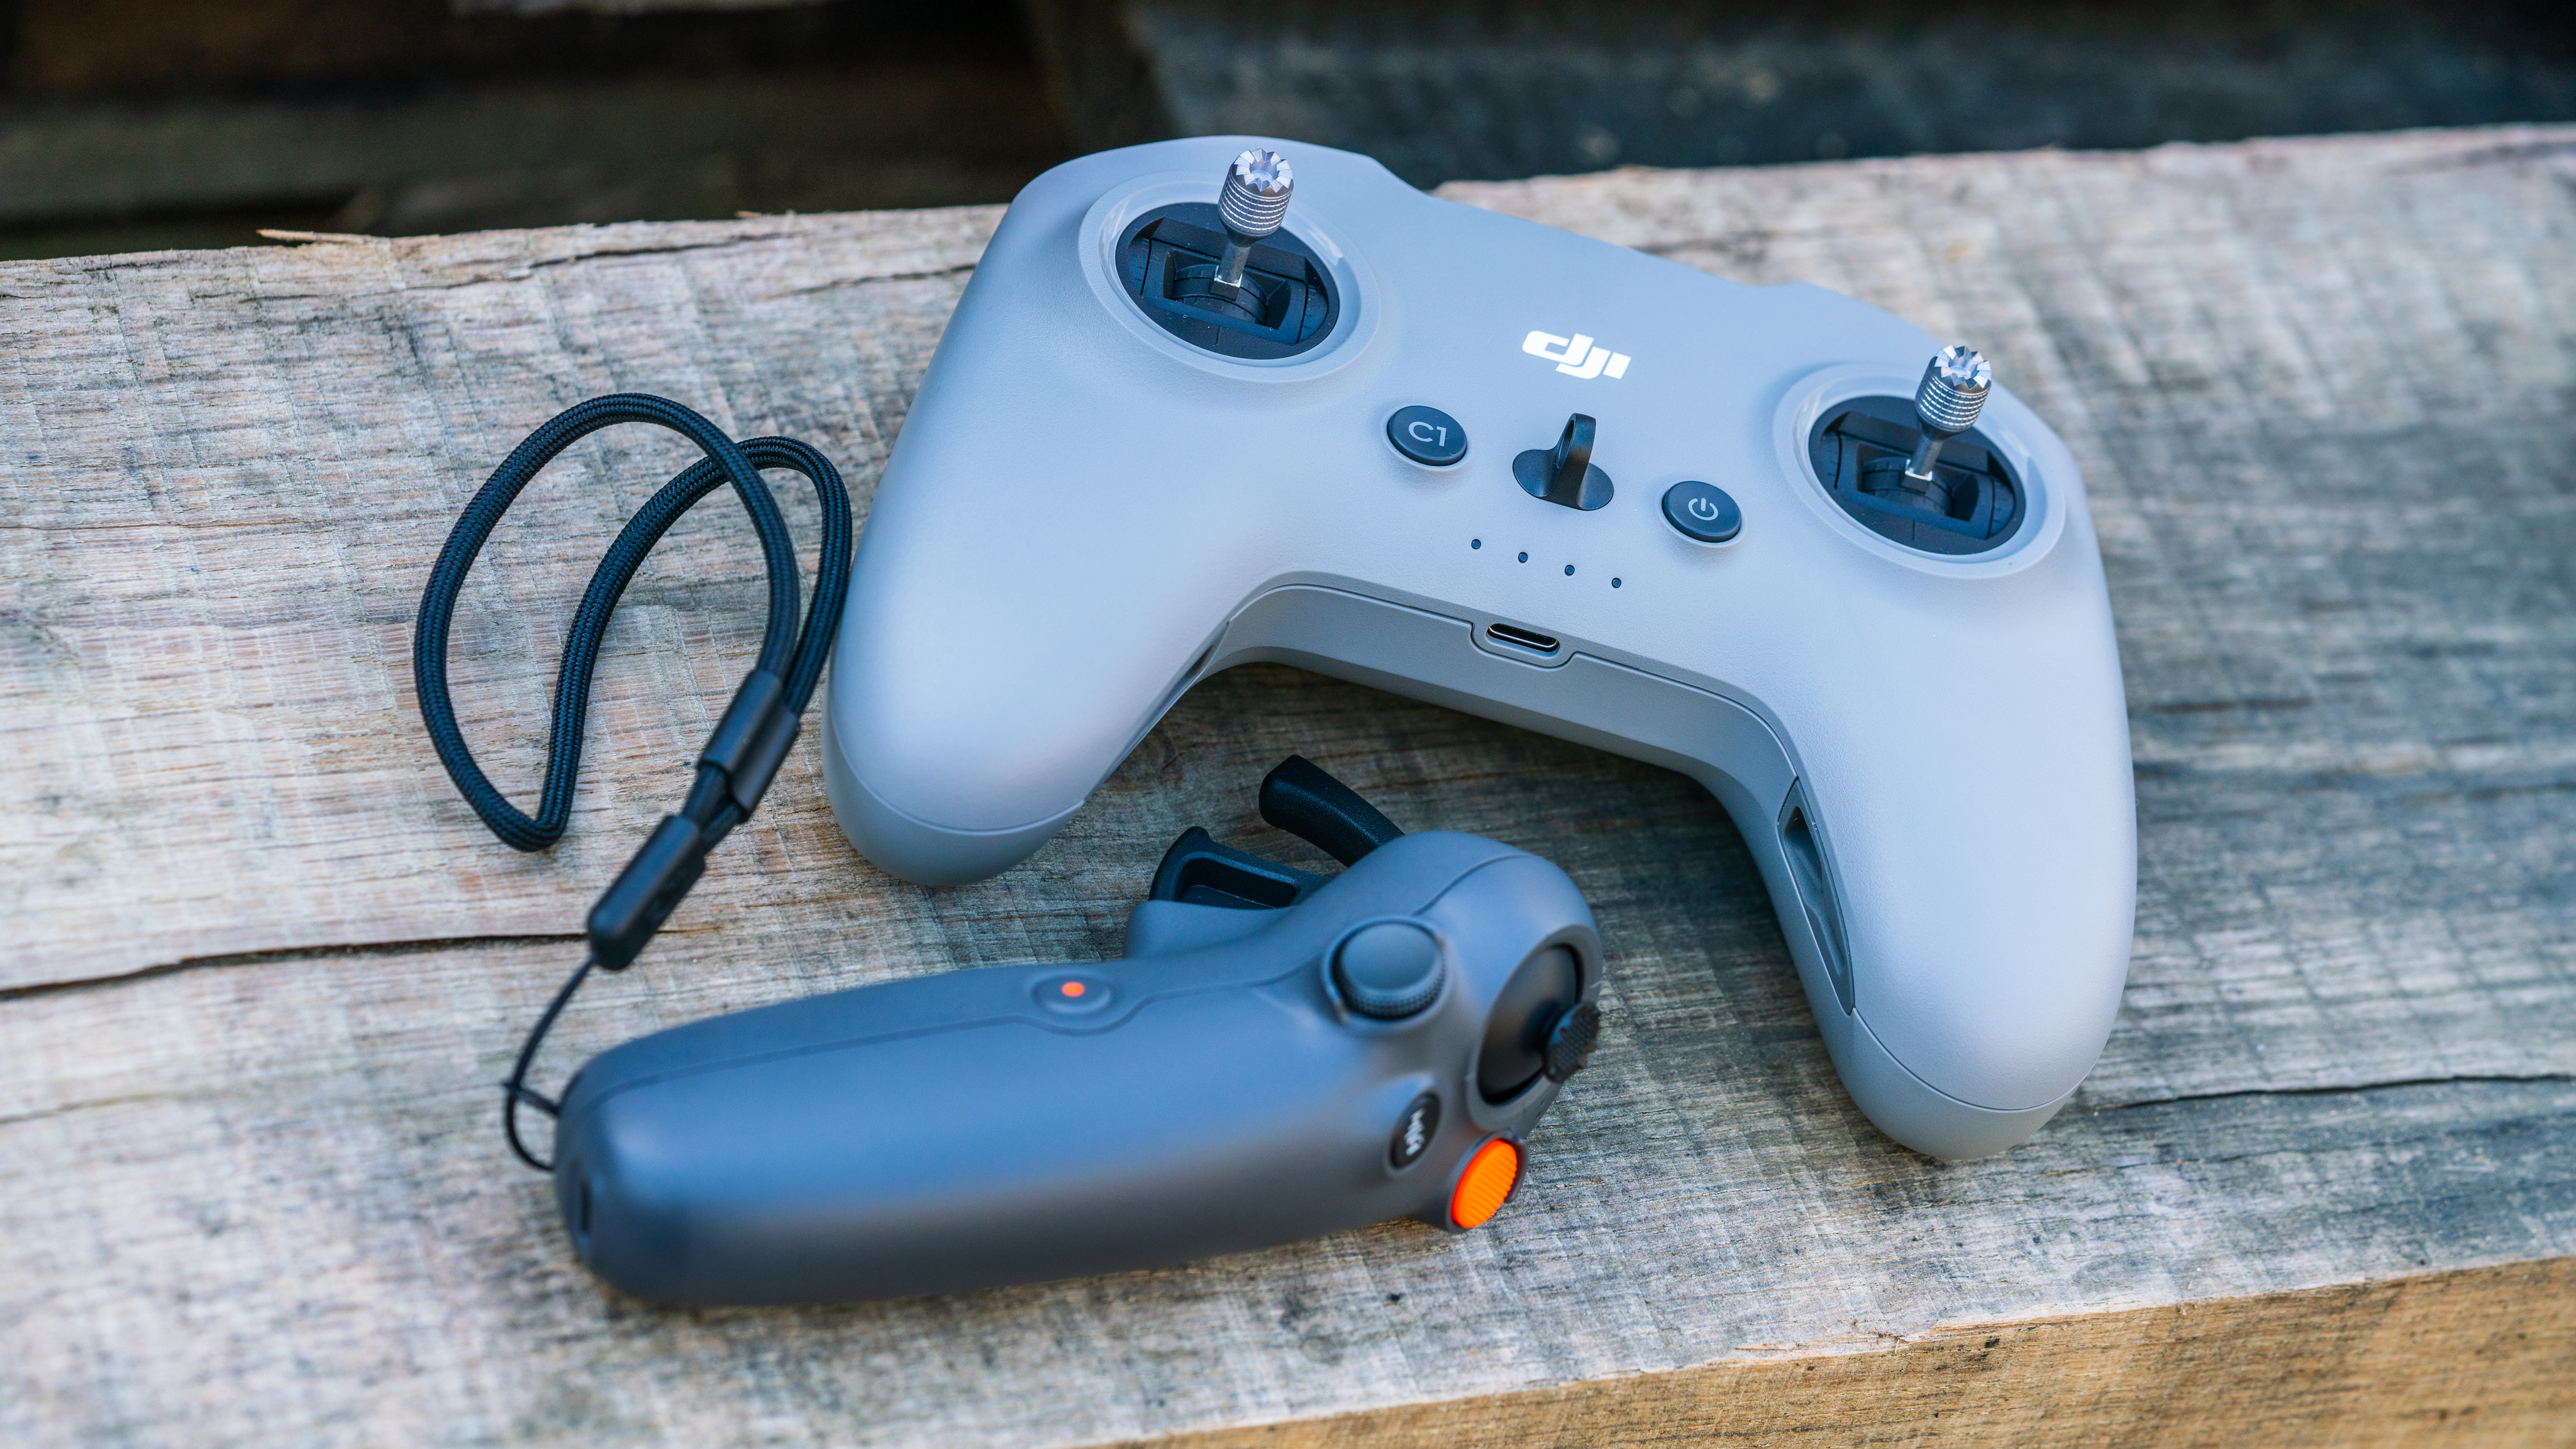
Two controllers are available: the new DJI Motion Controller 3 is included with the Fly More Combo, while if you prefer a gaming-style controller the DJI Remote Controller 3 is available separately.

The DJI Motion Controller 3 is an intuitive way to control your drone, and allows users with no experience to immediately fly in a reasonably precise and controlled way. For more experienced pilots, though, this can feel like a less attractive option than a gaming-style controller, which offers full control in manual mode to let you execute aerobatics. Which you choose will depend on your level of skill and experience, and how adventurous you feel, as well as the applications you plan to use your FPV drone for. For example the DJI Motion Controller 3 could prove very useful for flying in confined environments, such as for indoors real-estate tours.
DJI has added ‘Easy Acro’ to this controller, a simple solution for anyone who’s less comfortable with aerobatics that enables them to perform flips and rolls at the push of a button. It’s a feature that should particularly appeal to novice pilots.
Unfortunately, the design will frustrate left-handed users – it’s built for right-handed users, and it’s impossible for a left-handed person to press the record buttons while flying.
The DJI Remote Controller 3 replaces its predecessor, but unfortunately its ergonomics are not the best for anyone flying in manual mode – if you’re a pilot who ‘pinches’ the gimbals on the remote to control your drone, the handling is quite awkward and distracts you from the task of flying.
Like its predecessor, DJI Avata 2 brings FPV flight to the masses, allowing everyone to enjoy this normally very challenging and technical hobby. You can now start flying straight out of the box after a quick setup process, and be immersed in your flight thanks to DJI Goggles 3.
So what else makes this new iteration worth buying?
First of all, the full redesign compared to the first Avata means this drone is quieter – while not quiet, it will still attract a lot less attention than the ‘screaming’ Avata did. It also features a longer wheelbase (frame size) and a more aerodynamic / flatter design, which results in better flight performance.
One of the main reasons to buy the Avata 2 over its predecessor is the huge jump in video quality. Until now, whether you flew the Avata or the DJI FPV, the video lacked dynamic range, with very dark shadow areas lacking detail. The O4 ultra-low latency video transmission system proves to be a huge leap not only for the footage captured, but for the footage displayed in the new DJI Goggles 3. It’s very crisp, and not only does it look good, it helps greatly when it comes to avoiding hard-to-spot obstacles such as thin branches and power cables.
The DJI Avata 2 features three flight modes which can be selected through the DJI Motion Controller 3 or the DJI Remote Controller 3: Normal, Sport, and fully Manual (which is only available when using the DJI Remote Controller 3).
Normal mode selected on the DJI Motion Controller 3 offers the most safety, and most relaxed flying experience. You can fly with extreme precision, and even reverse, which is not common in the FPV world. It’s perfect for beginners – in fact, someone who’s never flown a drone before should be able to start flying in this mode immediately with minimal help. This is the mode you’ll likely want to use for flying indoors or in very tight spaces.
Sport mode is for those who want to feel more of the thrill of FPV flight, with higher ascent, descent and forward speeds, and no obstacle avoidance.
Then there’s full manual mode, which is only available with the DJI Remote Controller 3 (sold separately), and is only intended for trained FPV pilots, as it removes all flight assistance and stabilization. You’re fully in control, and are free to fly, dive and perform aerobatics like a bird. If you’re not flown in this way before you’ll need to spend some time using an FPV flight simulator, otherwise you will most certainly crash at the first attempt.
The video in this article was filmed in full manual mode, in a single flight without cuts, so that you can get an idea of the Avata 2’s potential when unleashed. Acceleration, deceleration, flying high but also at very low level, flying through tight gaps, performing loops and flips… you can do it all. This is not a freestyle drone, but it’s fun to see how far it can be pushed.
What I’ve learned from flying FPV drones is that it’s about compromises, and establishing what you want from a drone, and choosing the one that’s right for you. It’s similar to choosing a car in some respects – one person might prefer a model that’s safe, solid and dependable, while another may feel the need for speed.
The first DJI FPV was released in 2021, and it was the drone that got me into FPV flight. I’m thankful that DJI introduced it, giving total newbies the opportunity to try FPV and see if it was for them. However, after learning to fly in full manual I quickly decided that I needed a more robust carbon fiber frame and ‘traditional’ DIY FPV, because I like to perform some level of freestyle aerobatics which inevitably lead to crashes – and some very hard crashes. I must have crashed 200 times in the past year with minimal damage to my quadcopter, and I also think such drones fly better.
Having been flying self-built quadcopters, I have to say that I don’t have as much fun when returning to FPV DJI products – they don’t fly as well, and they won’t survive multiple crashes. In fact, when I flew the Avata 2 in full manual mode it felt like I was constantly fighting the drone – it was not tuned as well as I’d like, and compared to my daily carbon fiber FPV quadcopter I found the flight more stressful.
But as I’ve said, FPV is all about compromises. Does my FPV quadcopter have GPS? No it doesn’t. Does it have obstacle avoidance? No it doesn’t. Does it offer generous flight time? Nope. Does it return to home at the press of a button? It doesn’t.
The FPV world is diverse, and this allows people of all aspirations and skill levels to find what’s right for them. I’m constantly tinkering and repairing, soldering components onto my FPV quadcopter; it can be a real headache, but it’s also part of the fun. However, that’s not something everyone wants or has time to do, and that’s the problem DJI solves.
So while the Avata 2 may not be for the most advanced FPV pilots, it’s fabulous for those who want the safety of the GPS and return-to-home functions, object avoidance sensors, and the safety of the ‘panic button’ which immediately slows the drone to a hover if things get too hairy or overwhelming. It has long flight times, allowing you to explore more and immerse yourself deeper, thanks also to the stunning O4 video transmission paired with the Goggles 3.
Did I also mention that it’s cheap? The price is incredible considering that you get everything you need to fly, and the drone, goggles, and remote are the latest technological advances in the drone world.
I tested the video quality, and I can say that it’s as good as it gets, and the best you can currently get within the FPV world without having to rely on GoPros or external cameras.
Unfortunately I wasn’t provided a set of ND filters for my review testing, so keep that in mind when viewing my footage, as ND filters are key to obtaining smooth footage with the right amount of motion blur, especially on bright sunny days. I still think the quality of footage is fantastic, though, especially the dynamic range and the balance between dark shadow areas and brightly lit skies.
The ability for the camera to be tilted during flight is another advantage of choosing DJI’s drones for FPV flight. The Avata 2 can be tilted from -95 to 90 degrees, allowing the user to look up or down, and anywhere in between.
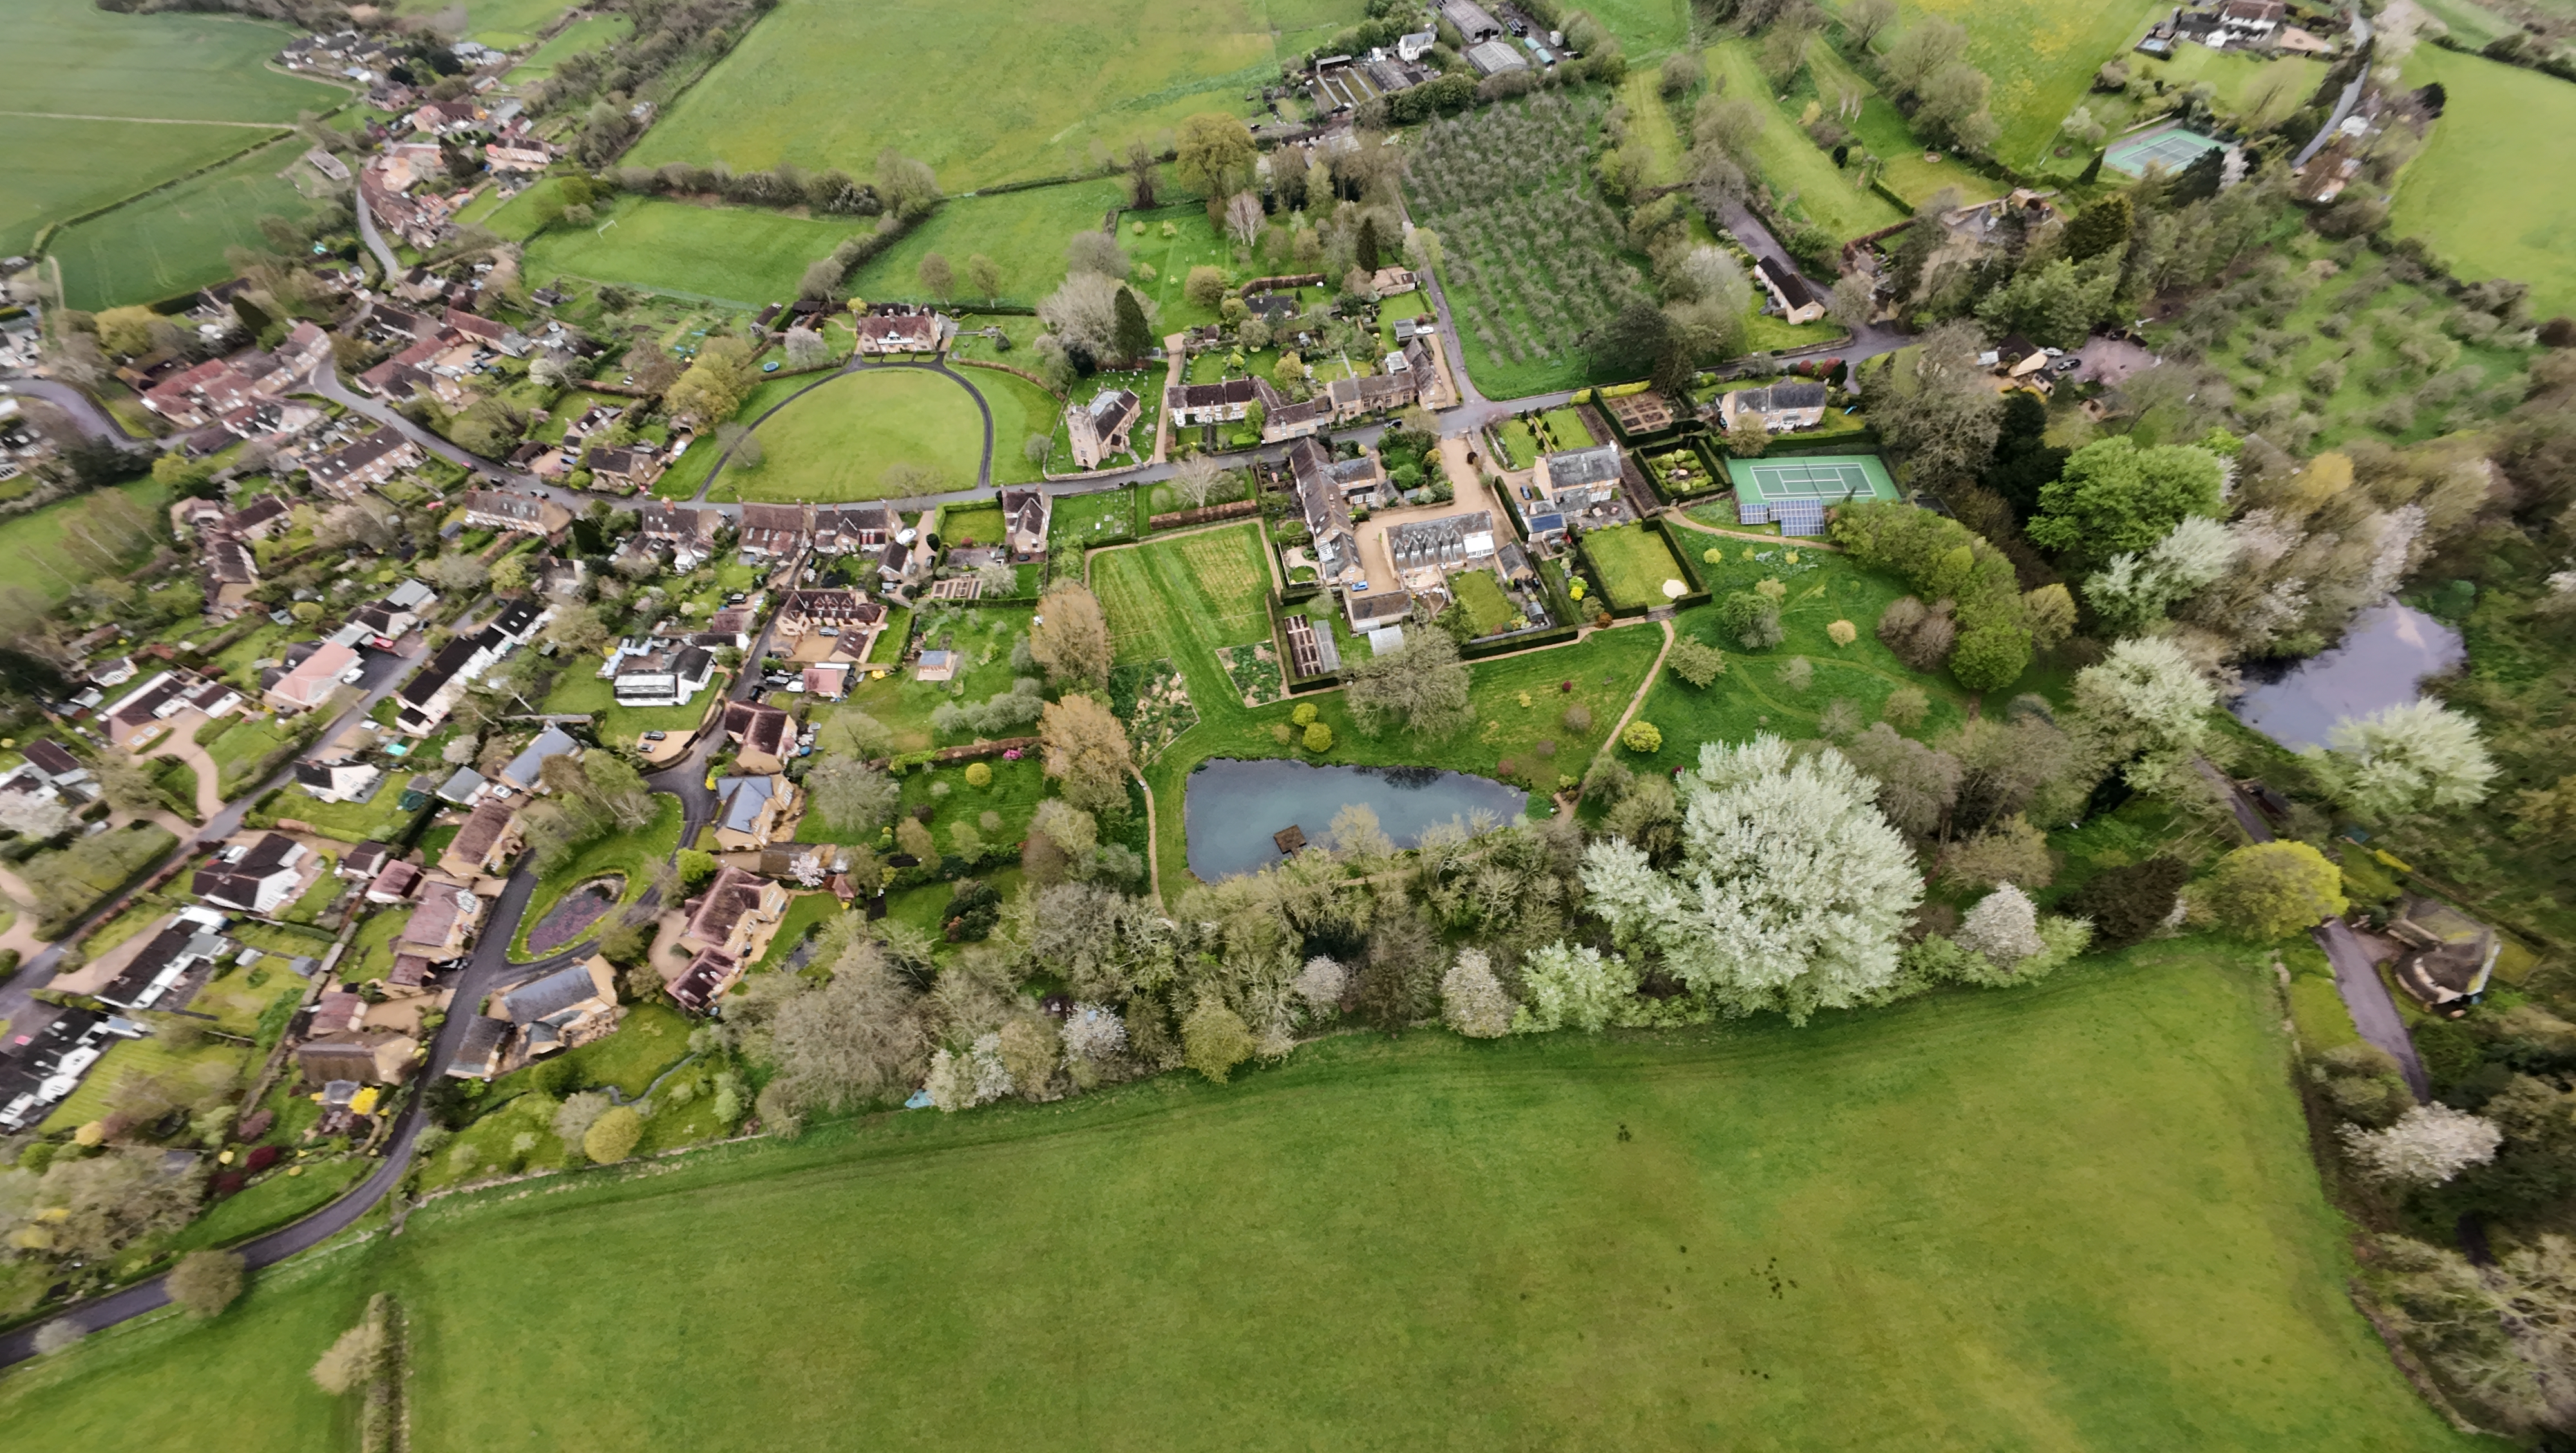
The Avata 2’s 1/1.3-inch image sensor offers 12MP of effective pixels at a fixed aperture of f/2.8, and with a field of view of up to 155 degrees it supports standard, wide-angle and super-wide-angle modes. While you can take perfectly good photos with the Avata 2, it remains a drone focused on video, and those who only intend to shoot photos may want to consider one of DJI’s camera drones instead.
The DJI Avata 2 shoots up to 4K at 60fps, all the way down to 1080p at 120fps, at up to 130Mbps. You can shoot footage in standard mode if you want to use it immediately, or D-Log M if you want to capture more detail and have the ability to color-grade your footage in editing software for more control over the final look of your footage.
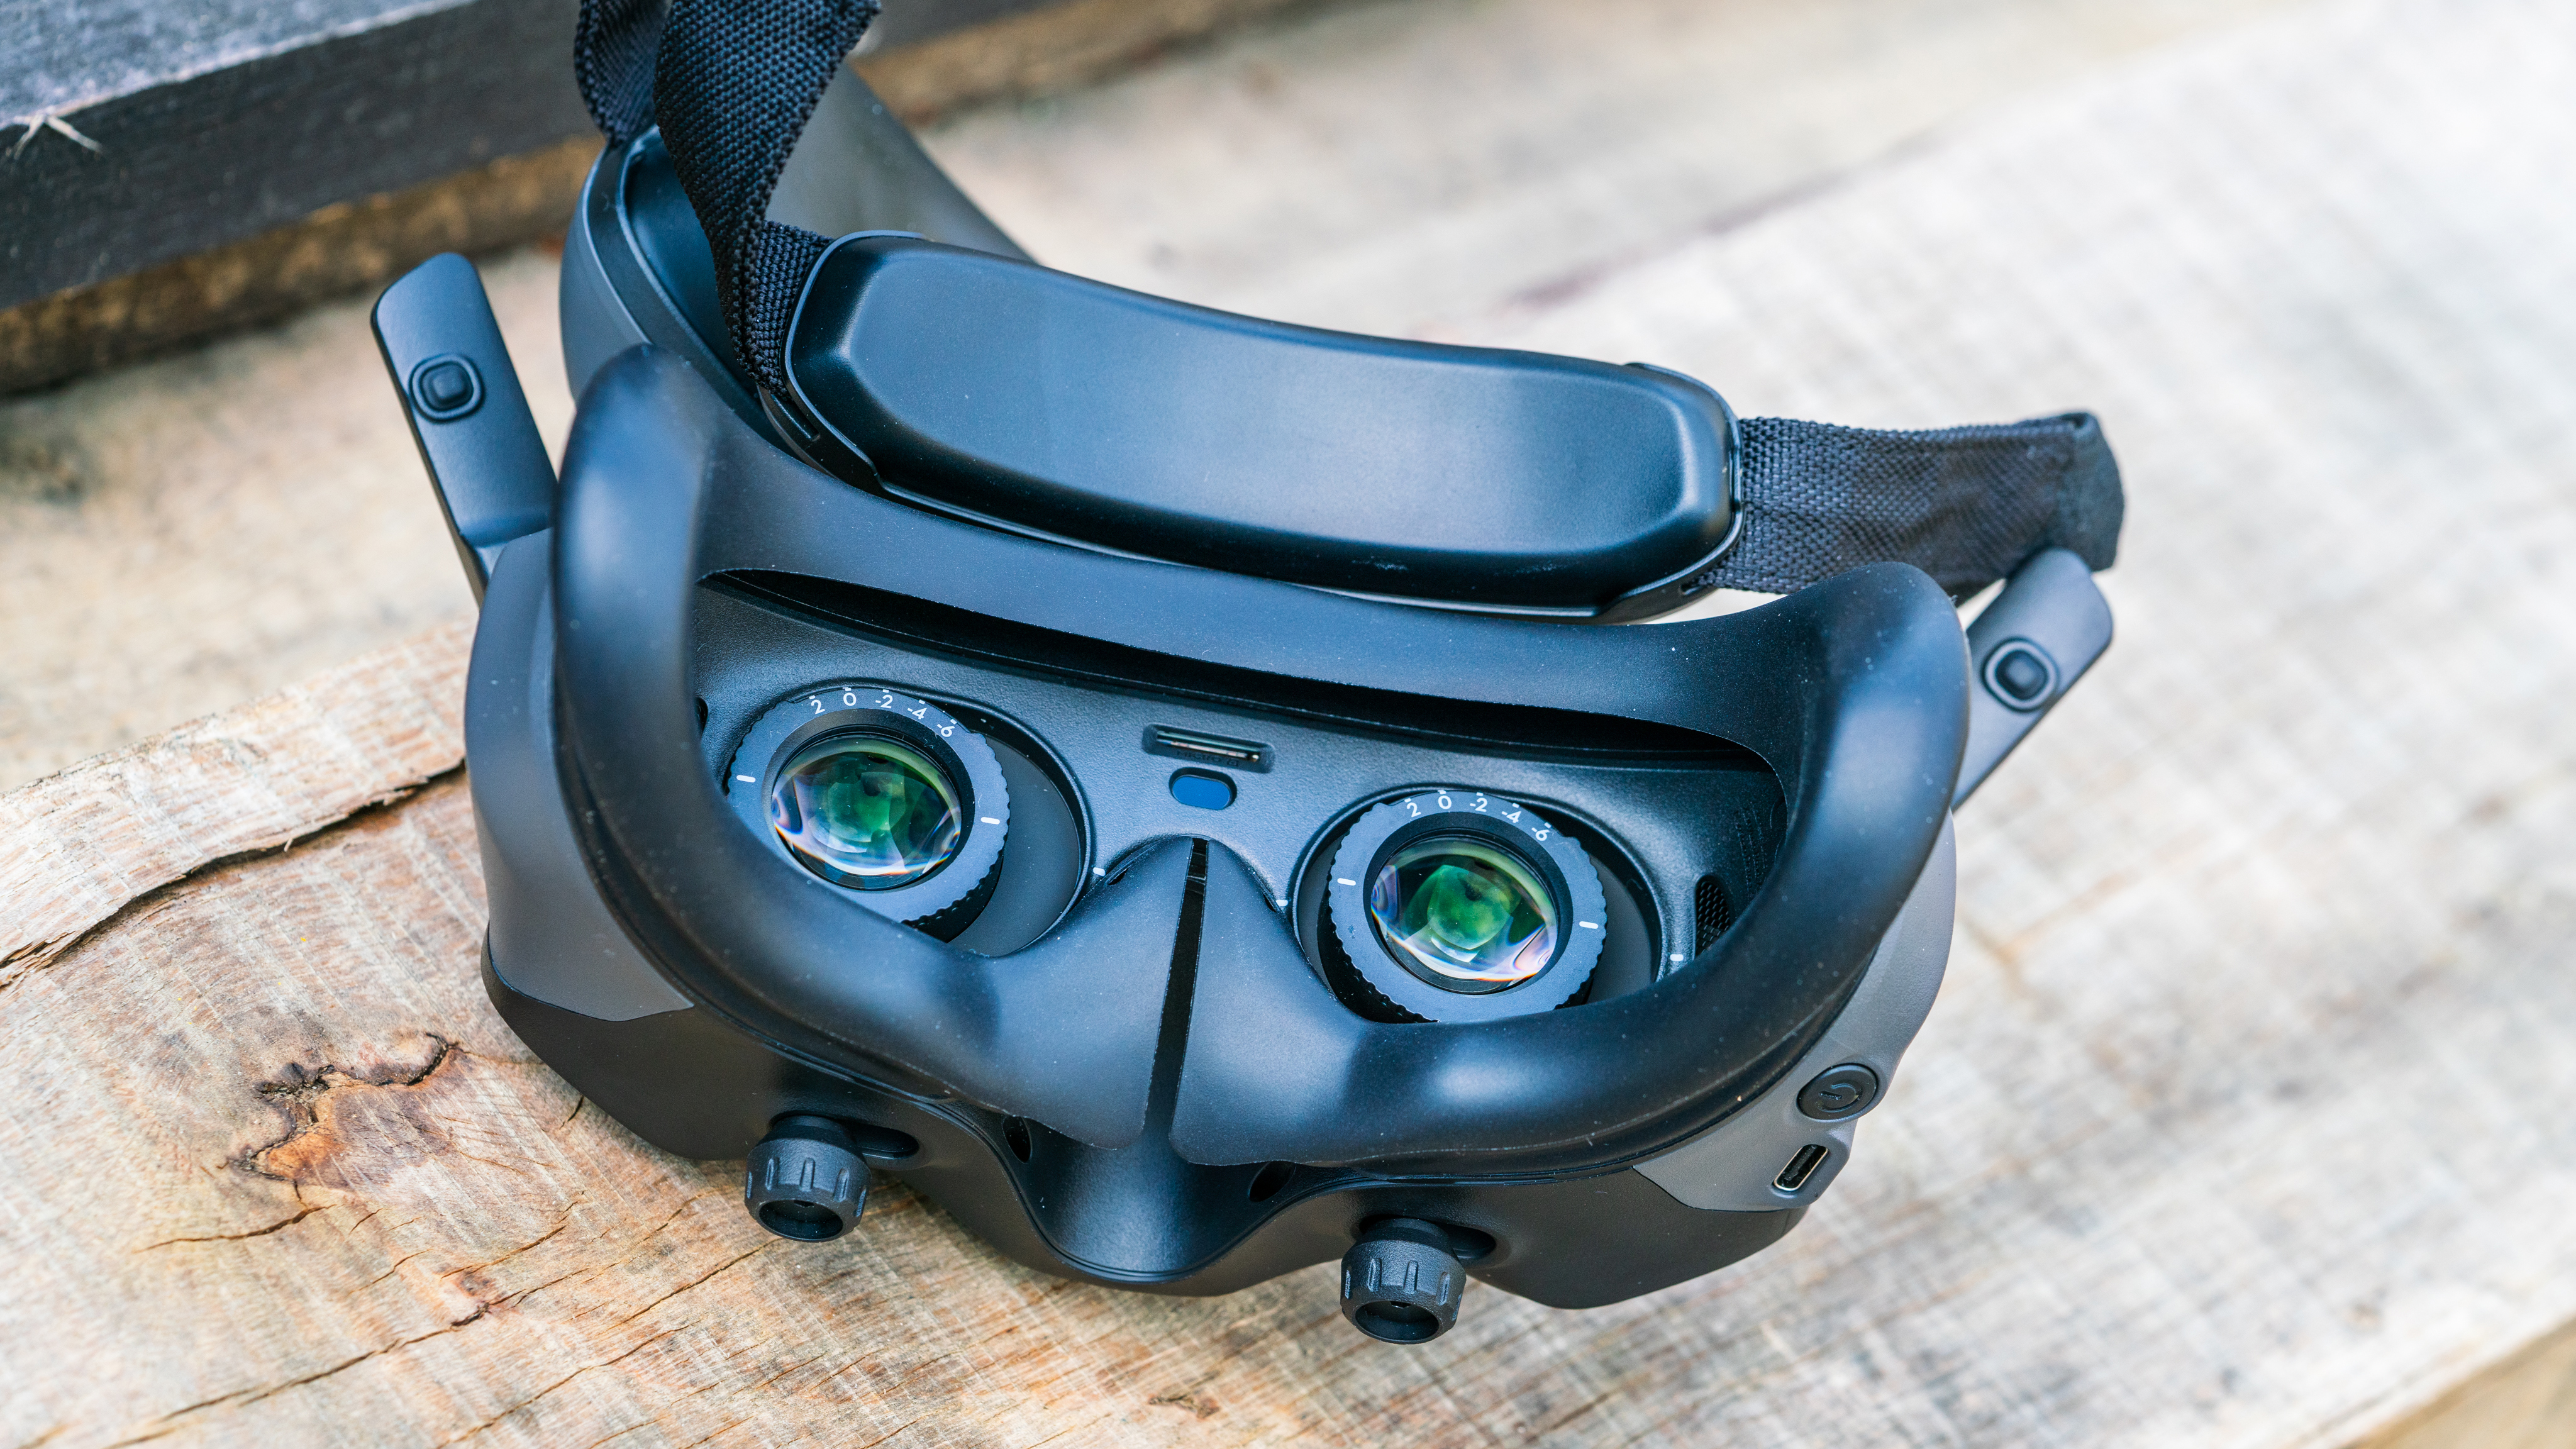
The Goggles 3 provided in the Fly More Kit are mostly excellent – they fit very well, with minimal light leaks, and they’re comfortable, light and compact. Equipped with dual 1080p Micro-OLED displays boasting a refresh rate of up to 100Hz and certified for low blue light by TÜV Rheinland, they offer vivid colors and detail.
Yet I feel DJI has missed a trick here. It has incorporated two tiny lenses at the front of the goggles, enabling users to switch from what the drone camera sees to what those two lenses see in front of you with a simple double tap, without the need to remove the goggles. I doubt this would legally remove the need for a spotter as you still can't both fly your Avata 2 and look at your drone from afar as a spotter would. Unfortunately the angle of view is not the same as human vision, and it makes it awkward to do anything without removing the goggles anyway.
DJI has incorporated a new forehead support linked to the goggles via a small hinge. Initially I thought: “This is genius, I can now flip the goggles up using the hinge without the need to remove the goggles altogether”. Sadly, though, this hinge only allows for small fit adjustments, and not a full lift of the Goggles, which would have been such a useful feature.

I tested the DJI Avata 2 over the course of a couple of weeks, starting by flying in Normal mode with the DJI Motion Controller 3, then moving onto the Sport mode, and finally – and my personal preference – flying in fully manual mode using the DJI Remote Controller 3. While this is not a freestyle drone, it is considered a cinewhoop, and I wanted to test its ability to perform light freestyle maneuvers, from very low to the ground to high up, and from flying fast to slowing right down, and testing the ability to fly through various gaps, all in an environment I’m familiar with and in which I’ve flown many other FPV drones.
Testing was done on private property with multiple spotters, away from people and buildings, and in compliance with local aviation laws and restrictions to ensure that all flights were safe and legal.
I’ve been flying camera drones since 2014, and since 2022 I’ve been flying FPV quadcopters, which has been incredibly fun and very challenging. I fly a multitude of different drones, from sub-100g tinywhoops to carbon fiber freestyle drones, but also camera drones for the variety of creative opportunities they offer. I fly four leading brands of drones, and have no affiliation to any of them, so I’m able to produce impartial reviews to help others make informed buying decisions.
First reviewed April 2024
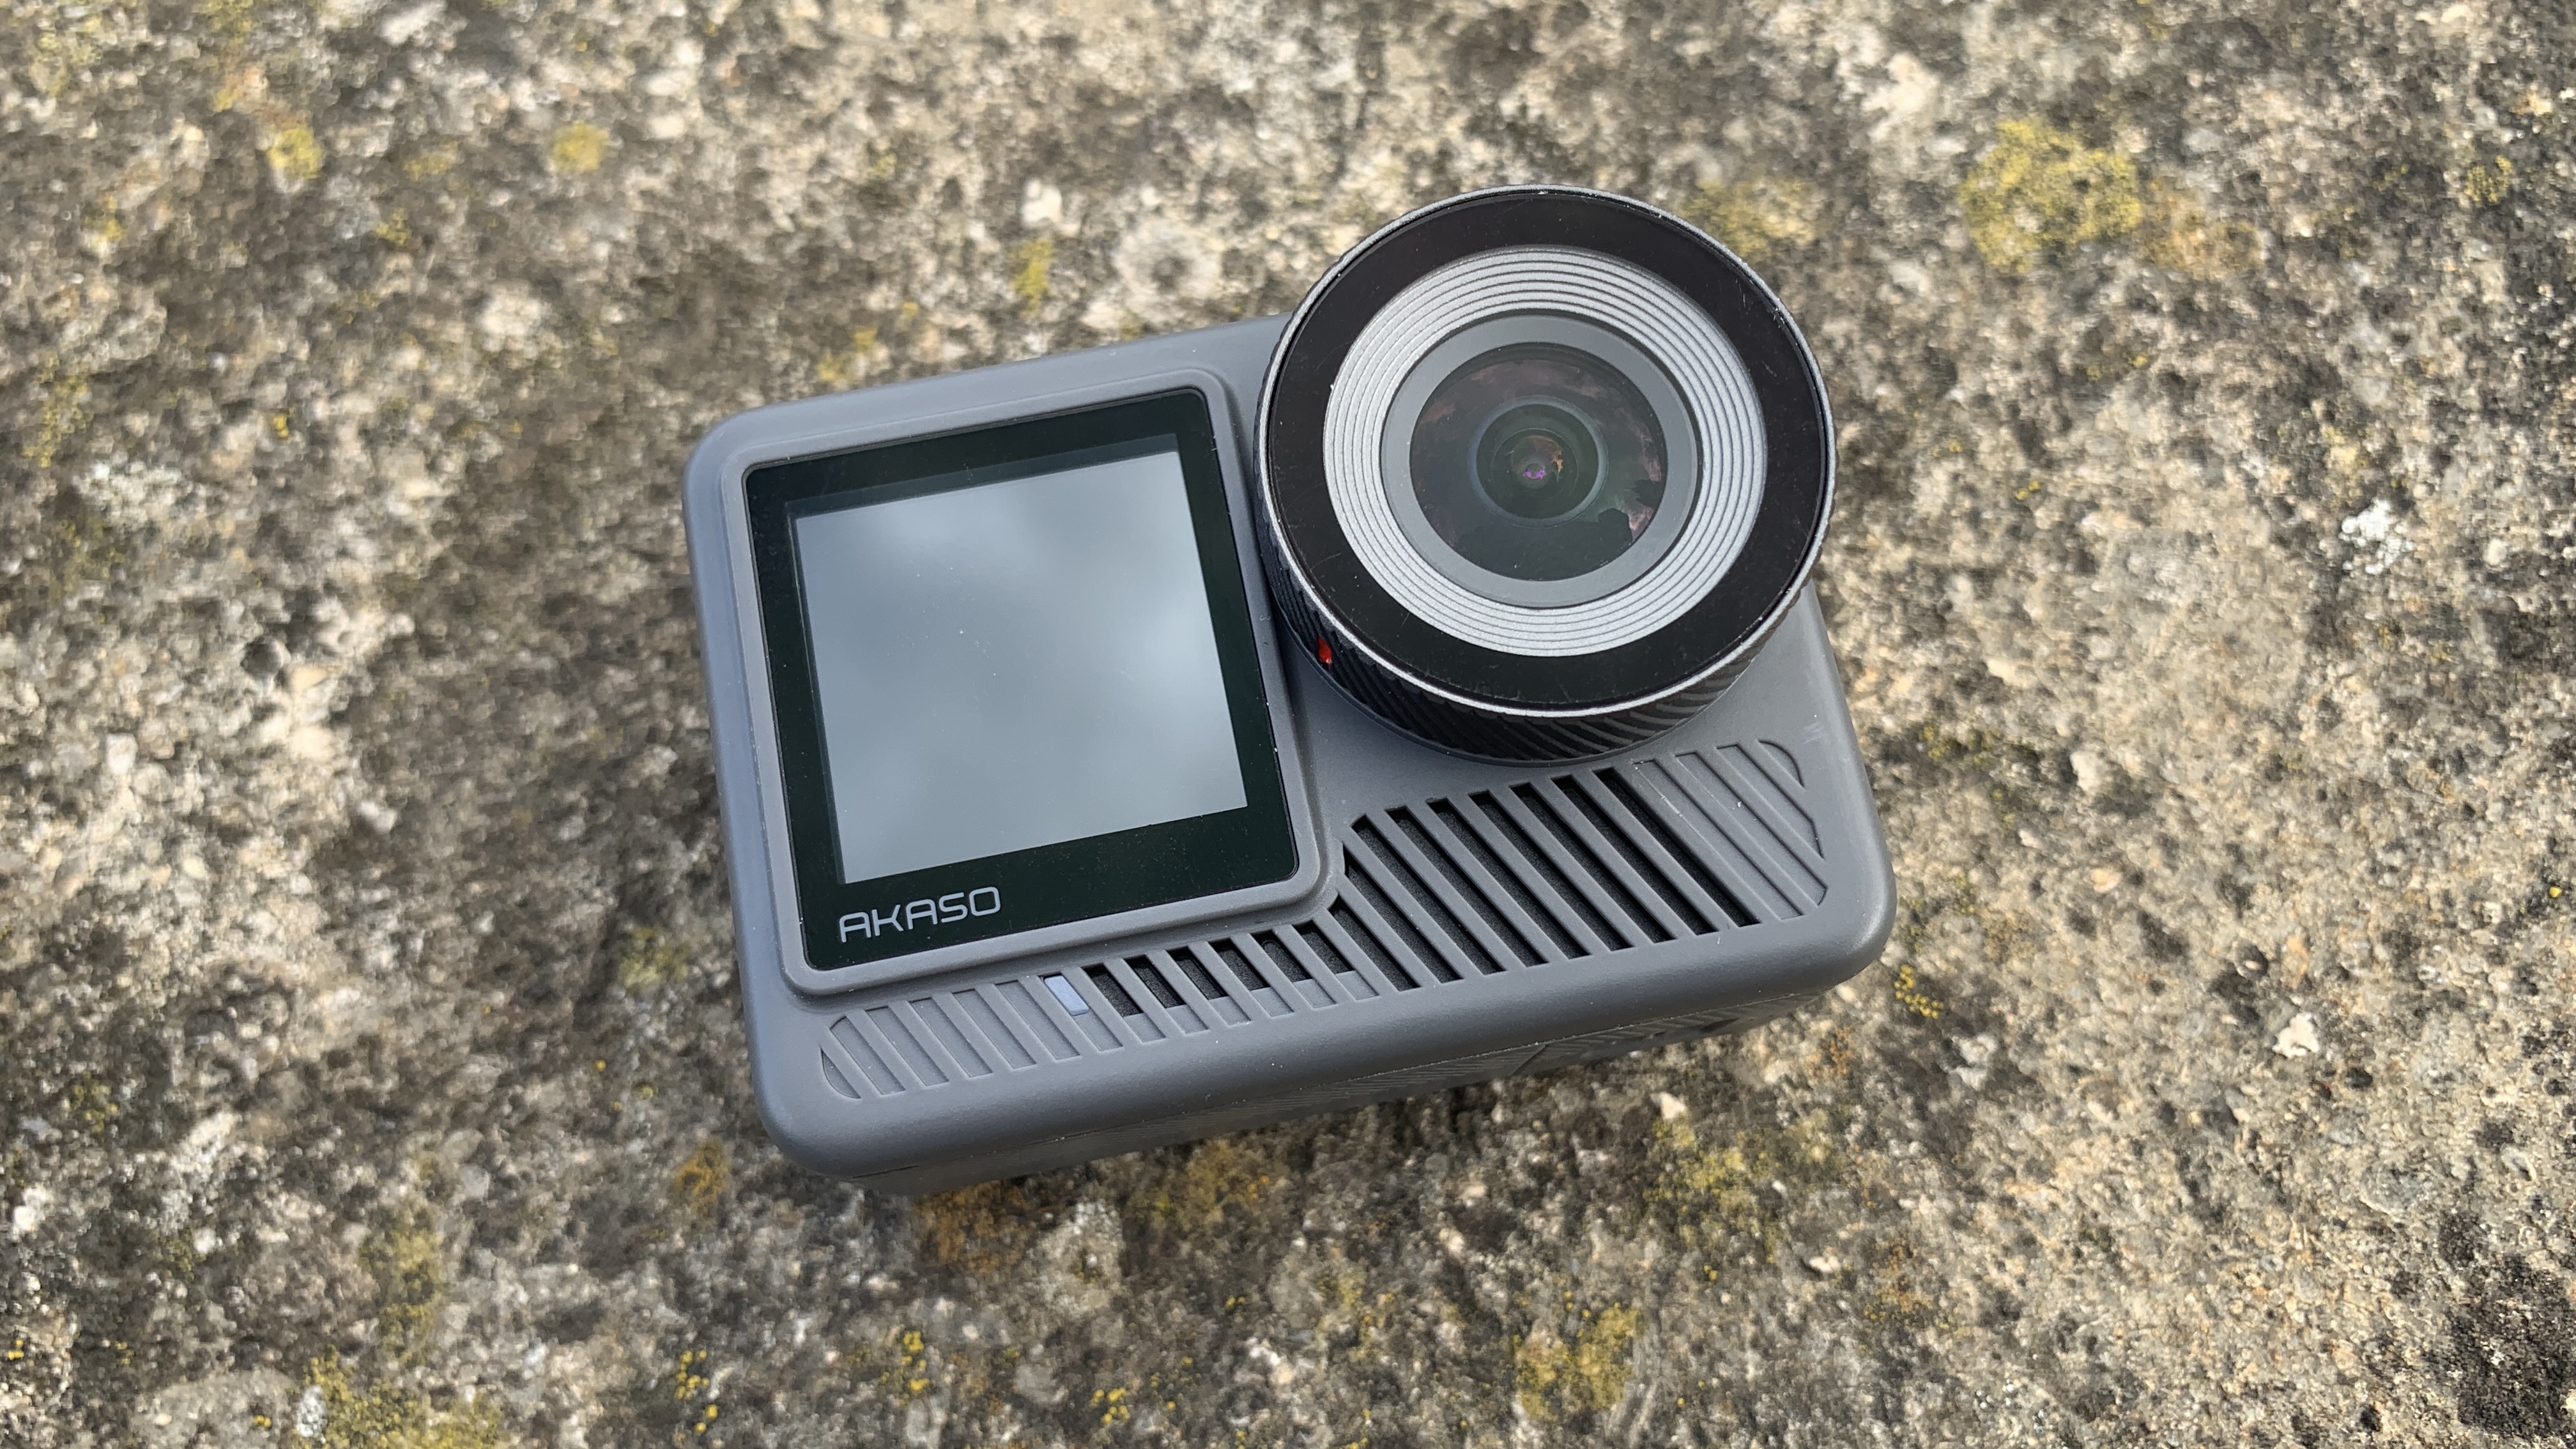
The Akaso Brave 8 Lite is a stripped-back version of the Brave 8. No surprises there. For a saving of $90 / £50, you'll have to trade in the 1/2-inch sensor for a 1/2.3-inch alternative, and accept a drop in resolution from 48MP to 20MP.
As a result, this camera's video and image quality are inferior to not only the Brave 8's but that of other flagships such as the GoPro Hero 12 Black and the Insta360 Ace Pro. This is particularly noticeable in low-light conditions, a scenario that introduces so much noise that the footage oftentimes becomes unusable.
Before you rule out the Brave 8 Lite, though, you'll actually get a range of features that are not available on the more expensive Brave 8, including HDR video, a longer runtime, and Hindsight. The last of these enables additional recording time prior to pressing the record button, just in case you were too late to start shooting.
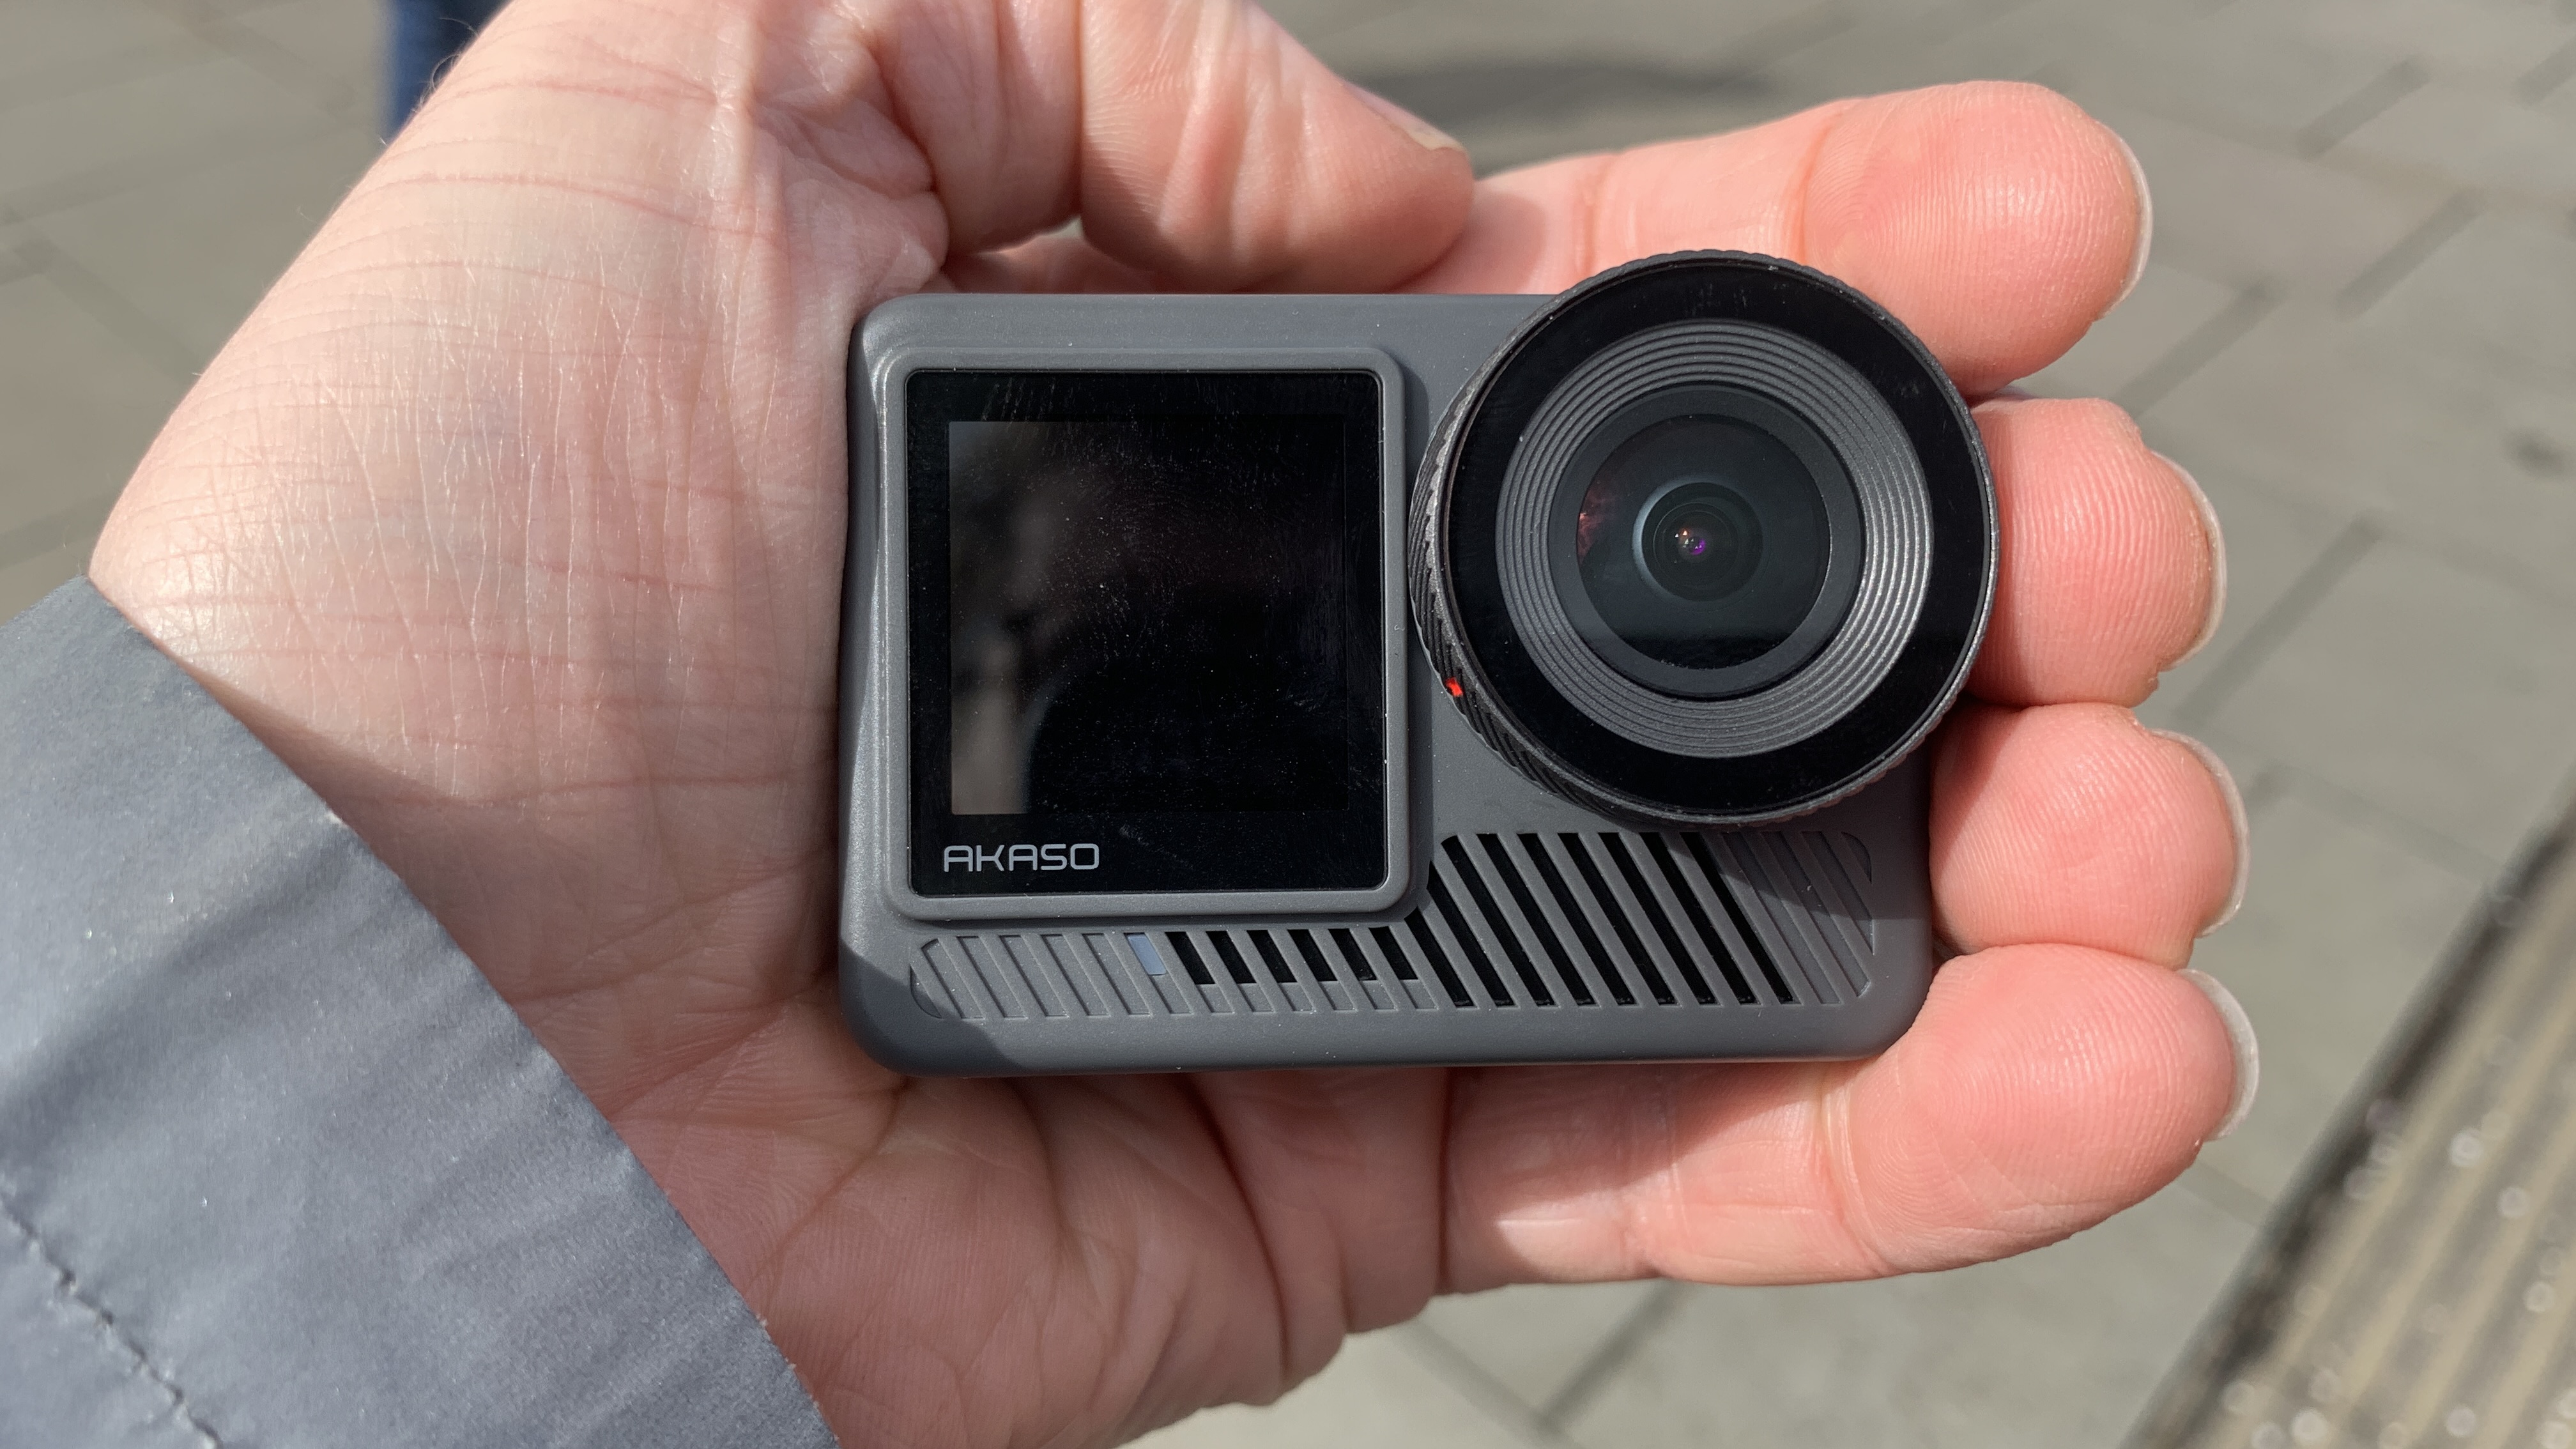
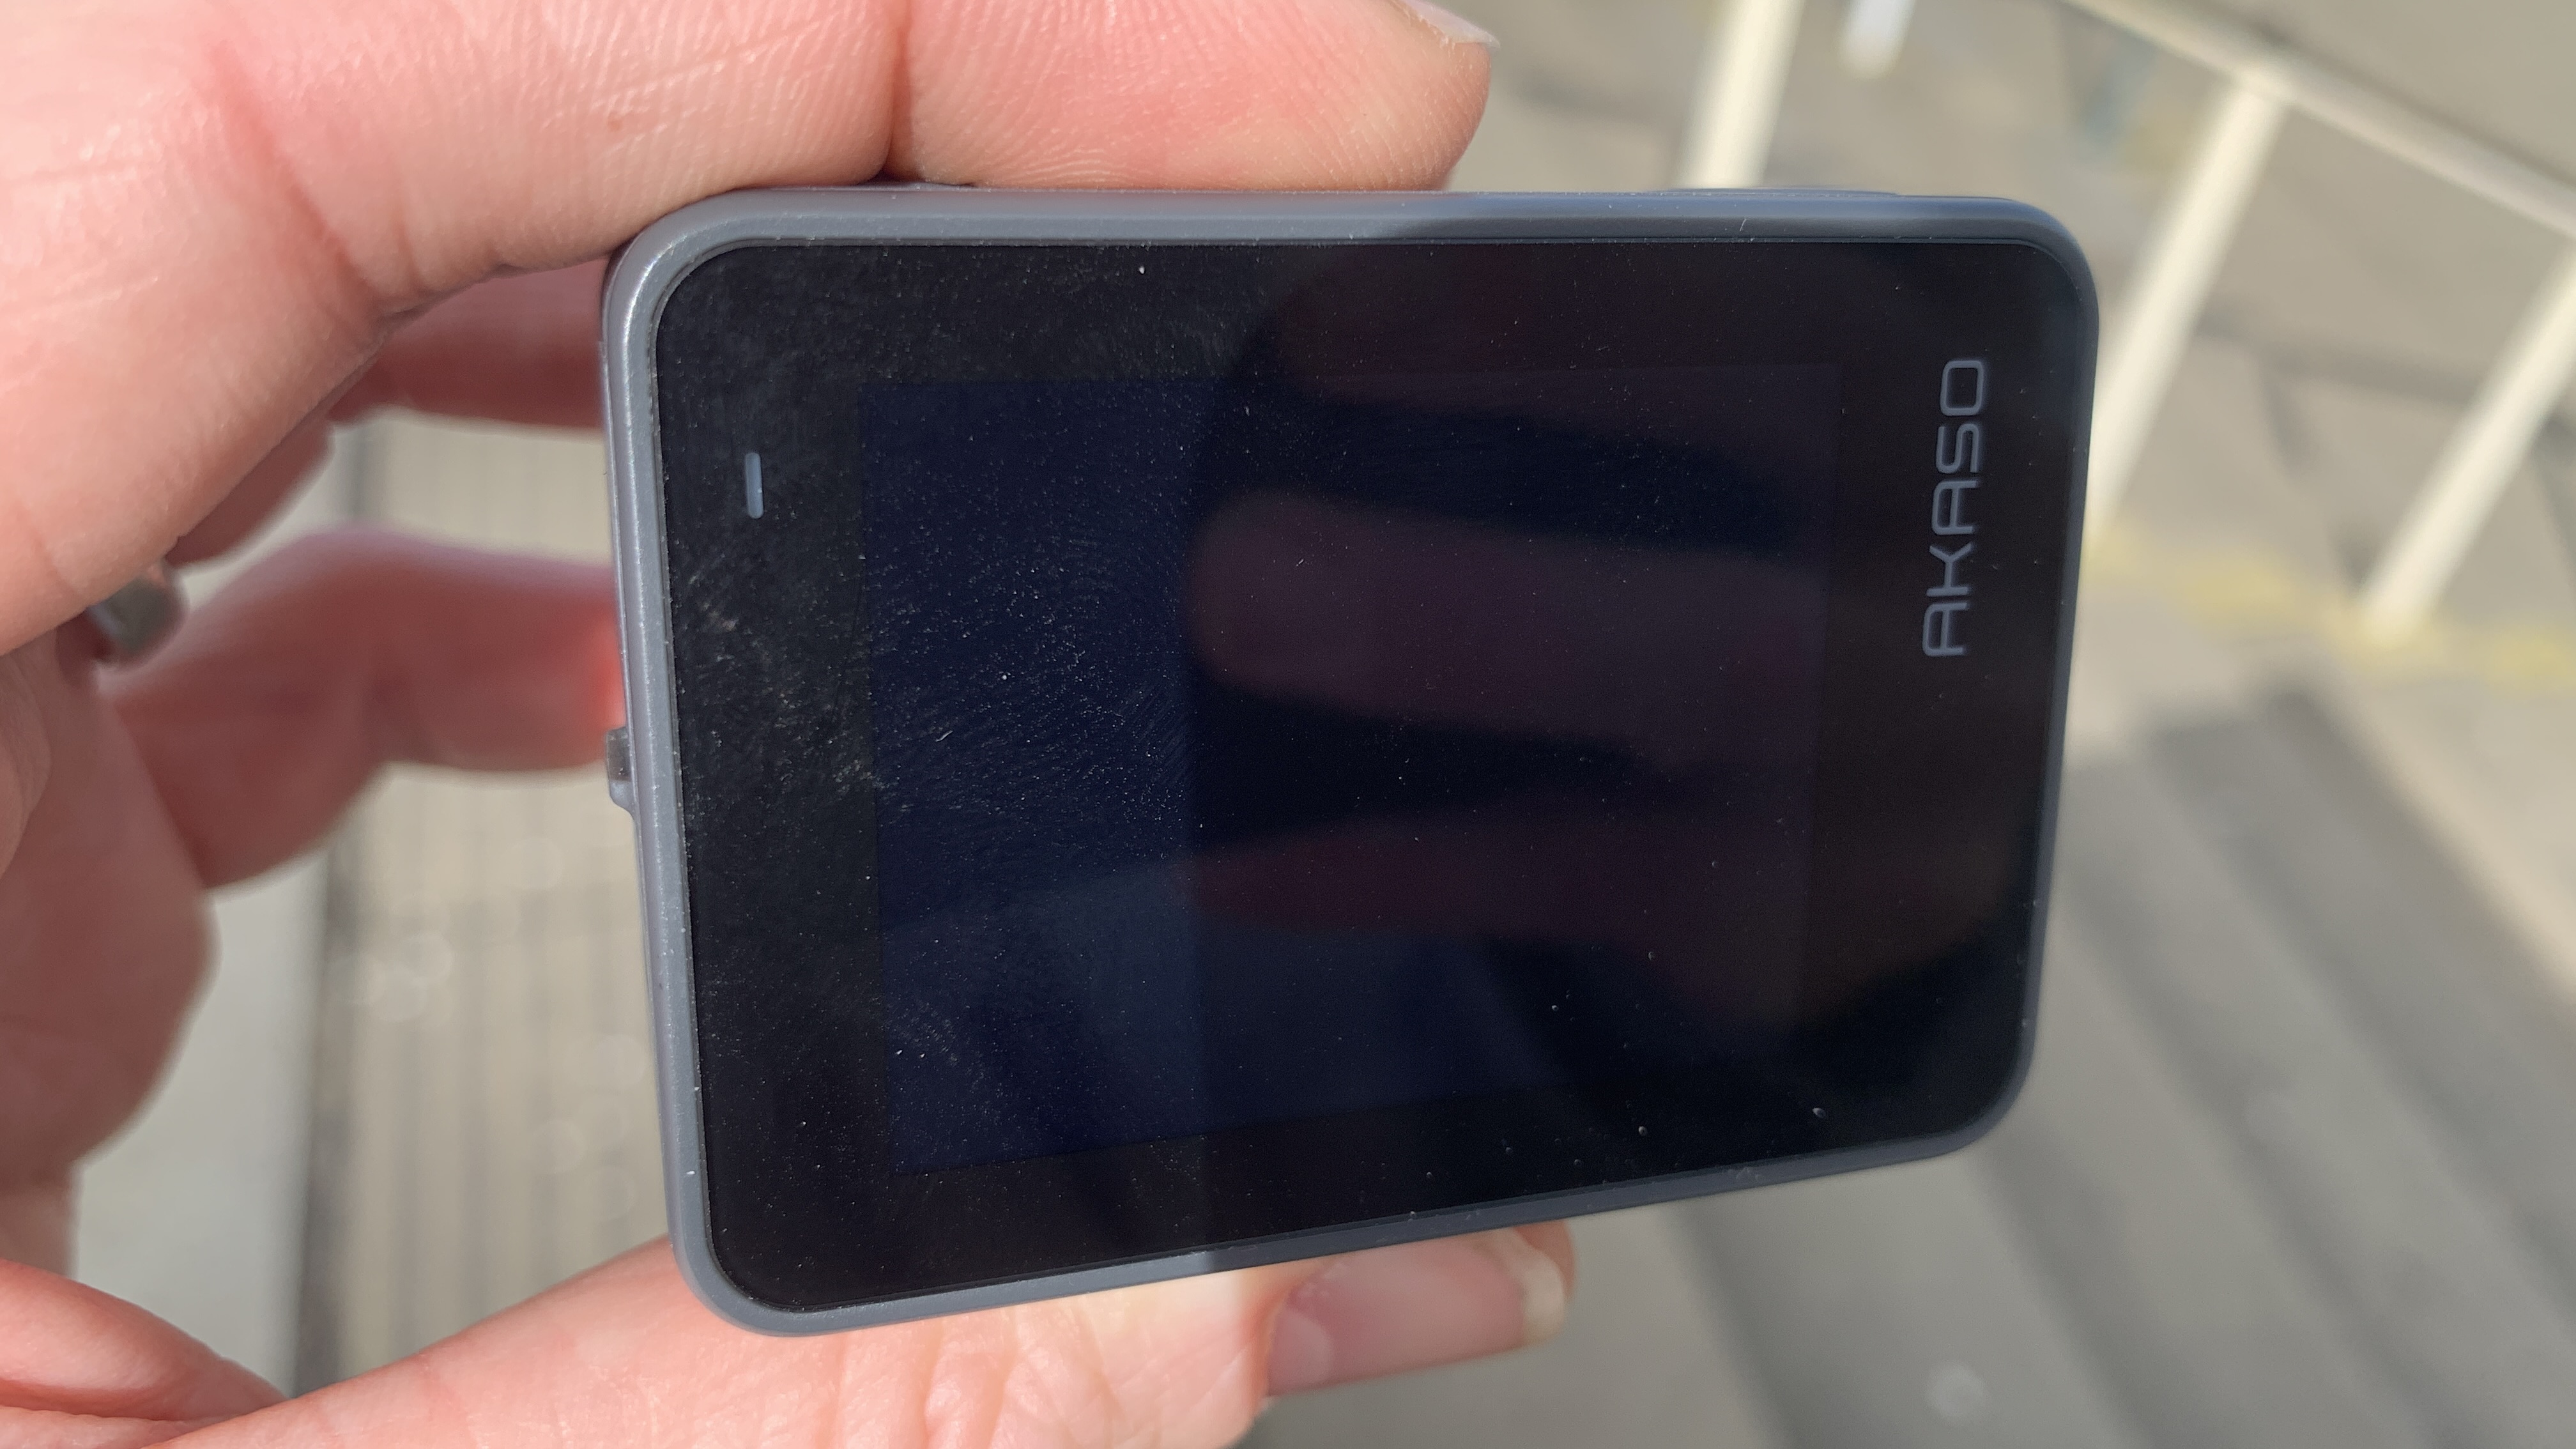
I love the rubber casing on the body, something that not only makes the camera easy to grip but is also pleasant to handle. This finish is let down, though, by the cheap plastic port hatches, which feel like they're going to break every time you open them. You'll also have to be especially dexterous to figure out a way to open the microSD card hatch with only one hand.
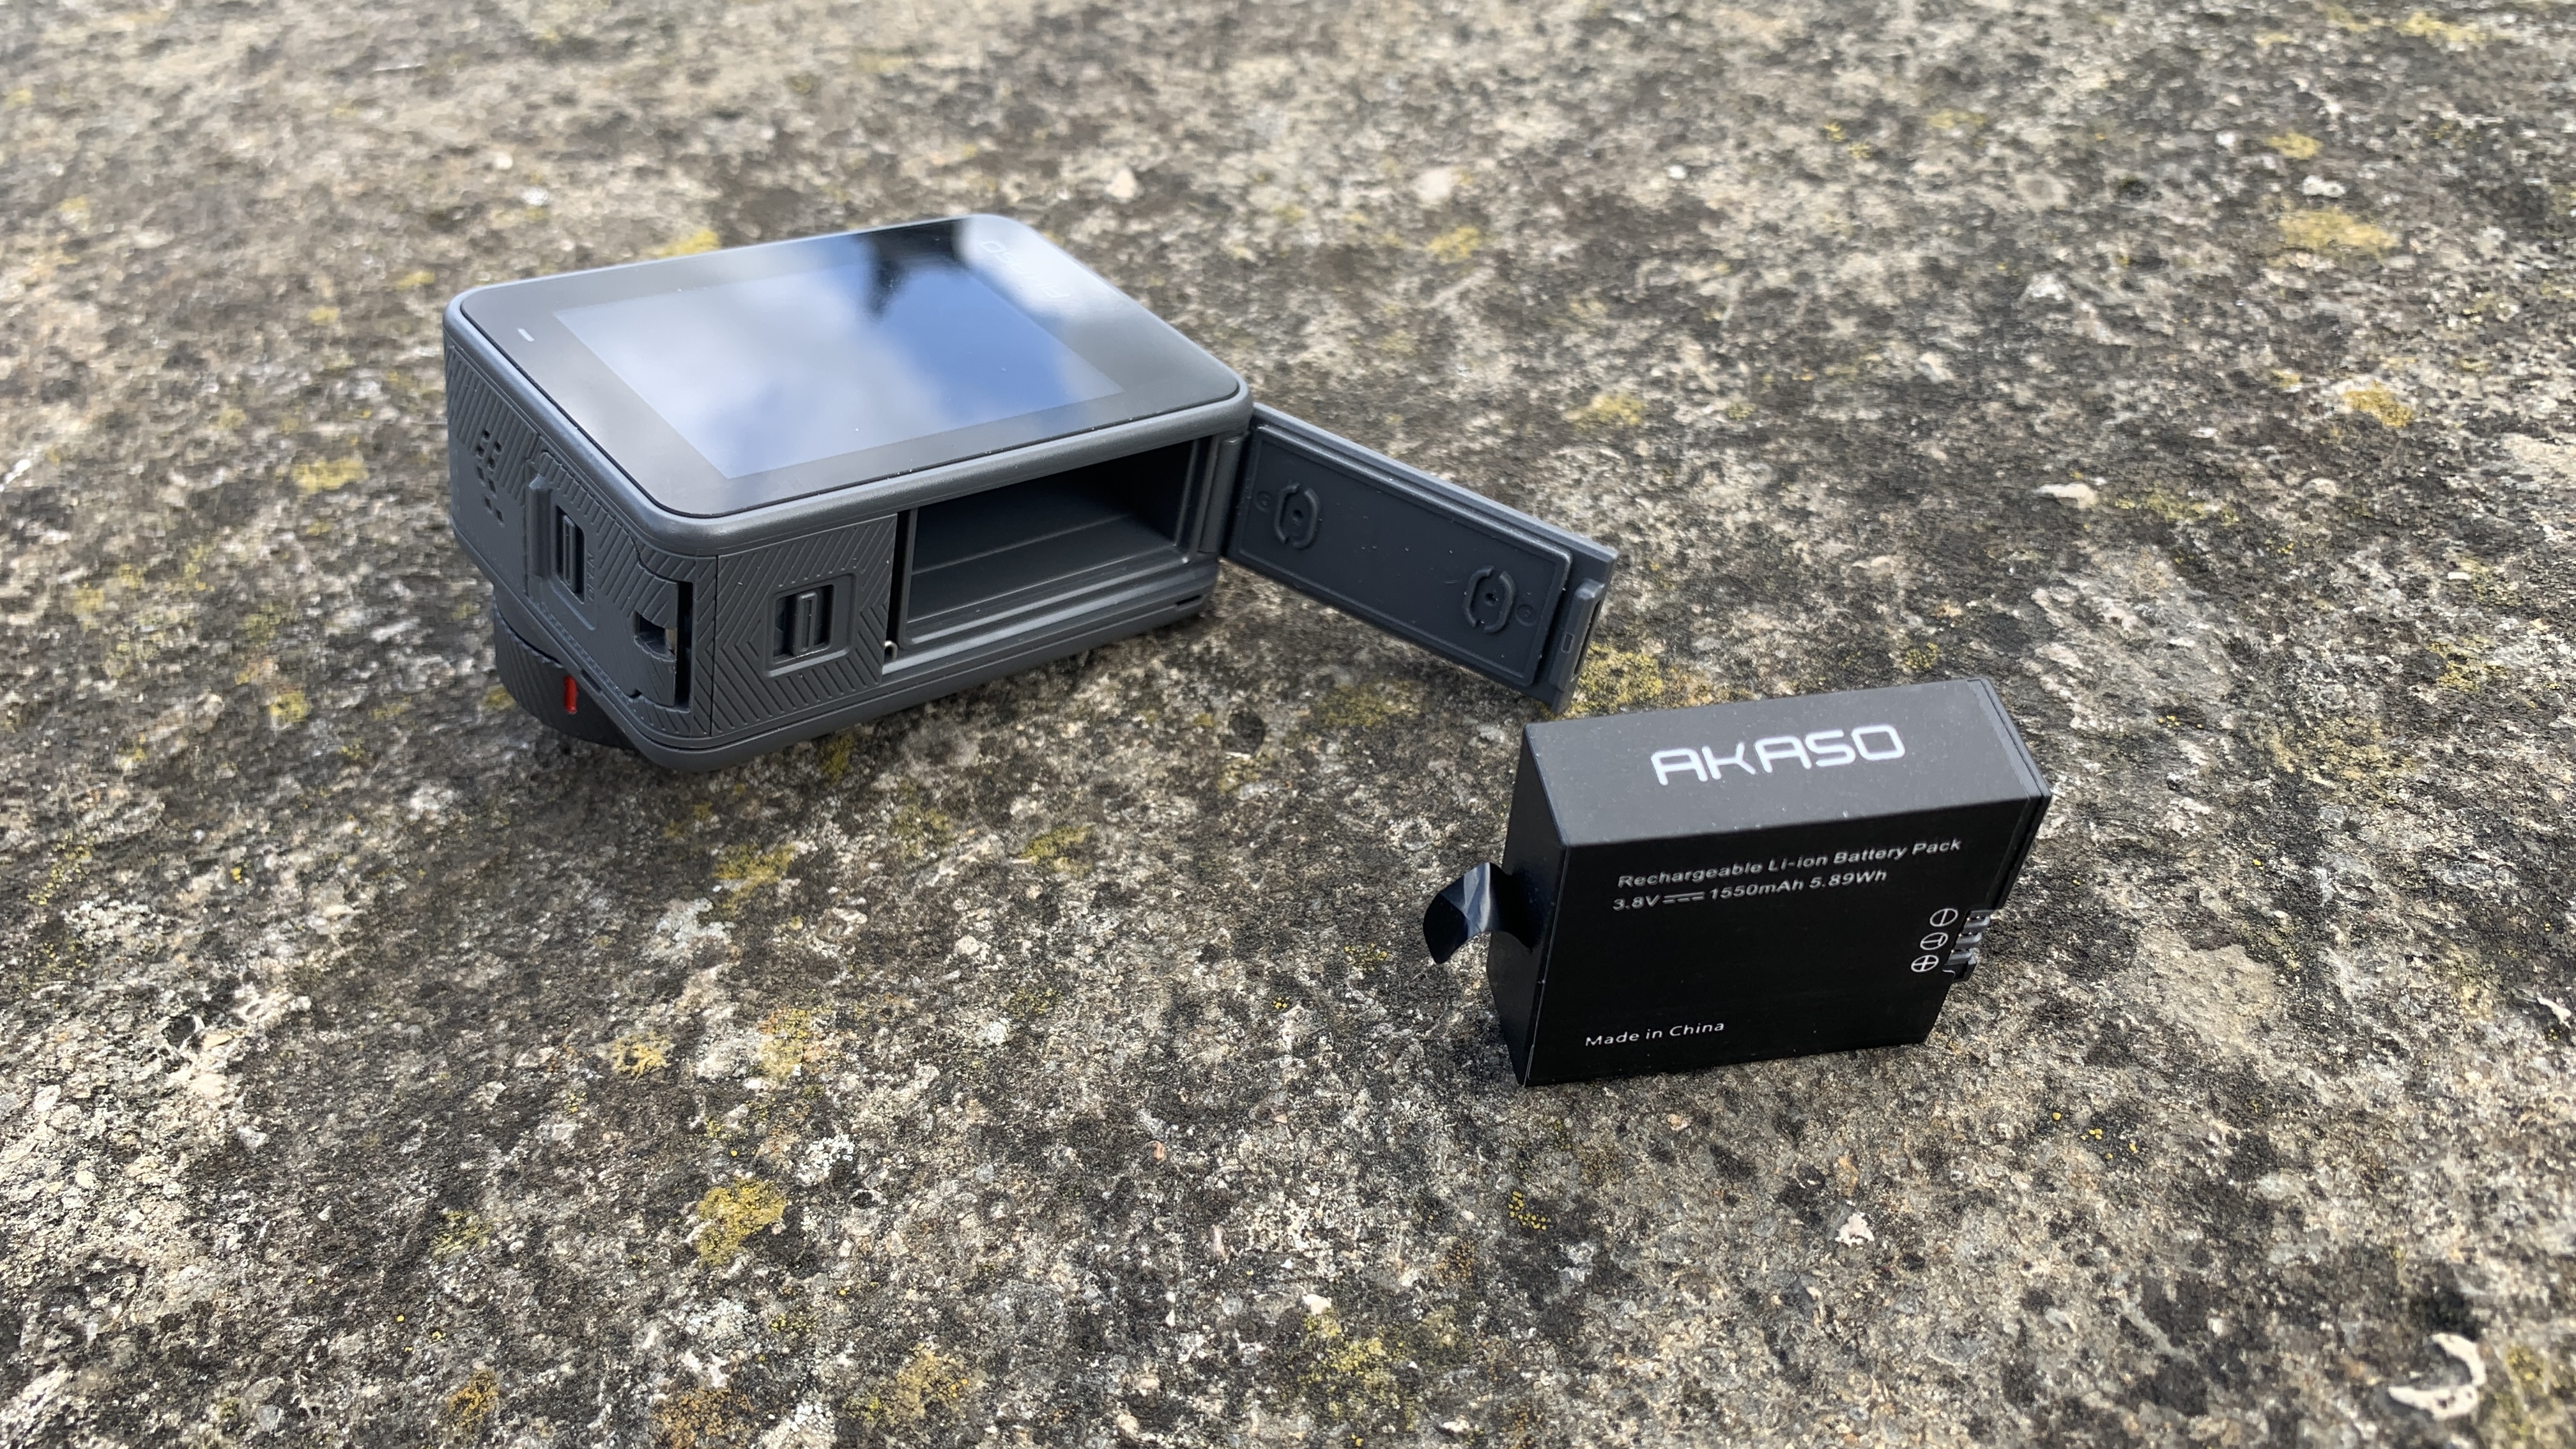
The Brave 8 Lite is one of the smallest action cameras available, and will fit neatly into any bag or pocket. The abundance of additional cases means you can mount the camera on any surface, including a tripod, bike, or helmet. The metal case is particularly handy when you know you're going to struggle to keep the camera free from knocks, although you can't replace the battery when using this case.
There's no shortage of creative shooting modes, such as timelapse, hyperlapse, slow motion, and HDR video. Not all of these are available at 4K, though, and the resolution must be dropped to get extreme editing capabilities with regards to slowing down and speeding up the footage.
All in all, the Brave 8 Lite is a very capable action camera that performs as well as most flagships did two or three years ago, and at a more affordable price than the Brave 8 it's a great entry level choice.
The Akaso Brave 8 Lite is available for $199.99 US / £189.99 UK / $319.99 AUS. This makes it $90 US / £50 UK / $80 AUS cheaper than the fully fledged Brave 8.
The Lite version has a smaller resolution, a slightly smaller sensor, and inferior slow-motion capabilities. On the flip side, over and above the full version you'll get longer runtime, and HDR video functionality. If you're happy with 20MP photo resolution and inferior low-light performance, the Brave 8 Lite is well worth the savings.
The Akaso Brave 8 Lite looks much like most other action cams, and the fact that it's almost identical to the Brave 8 is to be expected.
The body measures 2.5 x 1.75 x 1.4 inches / 64 x 45 x 35mm. This makes it smaller than the likes of GoPro Hero 12 and Insta 360 Ace Pro, both of which are around 6mm larger in both width and height. The small body results in a very light overall weight of 4oz / 114g (including battery).
This lightweight body is wrapped in grippy gray rubber, which ensure that it stays securely in the hand, and also affords a reasonable degree of protection from knocks and scrapes.
Unfortunately, the hatches are of plastic construction, and they're very flimsy. Even in the short amount of time that I was testing the camera I noticed that I was visibly damaging these parts, even with careful handling. The microSD card hatch is also incredibly difficult to open, and despite trying numerous times I couldn't find a way to open this hatch with one hand.
The front of the unit is taken up by the lens and front-facing screen. The lens is prominent and aesthetically pleasing, with a removable guard that provides access to the lens itself for cleaning purposes. The 1.22-inch front screen is perfect for vlogging, but it isn't large enough to provide much feedback on images beyond basic composition. It also lacks touchscreen functionality.
The rear 2-inch touch screen is adequate enough for cycling through settings and getting a rough idea of what the sensor is picking up. There's room for a larger screen, though, which would really help, especially for reviewing footage and photos. For comparison, the GoPro Hero 12 has a 2.27-inch screen, which provides a much more pleasing experience.
Every action camera needs to be waterproof, and the Brave 8 Lite is rated to a depth of 33ft / 10m. That's fairly typical, with the main outlier here being the Osmo Action 4, which is rated down to 60ft.
The camera's interface is very easy to use, with the responsive touchscreen making it a joy to move through the menus. You're not able to zoom into photos in review mode, however, which is a shame given the small screen size.

The Akaso Brave 8 Lite performs as you'd expect for a sub-$200 action camera with a 1/2.3-inch sensor, and despite the inclusion of the aforementioned additional features over and above the Brave 8, in terms of video and image quality, the Brave 8 Lite doesn't match up to more expensive models.
Its 4K video footage looks pretty good when captured in ideal lighting conditions. Colors are vividly and accurately reproduced, although images are unnecessarily high in contrast. The lens and sensor begin to struggle when filming scenes that have extreme light and darkness, and the camera fails to capture the full dynamic range of such challenging scenarios.
This is not a camera that's made for filming in low-light conditions. An abundance of noise is introduced to dark areas, and while much of this can be removed in post without affecting image quality, the added step is a little annoying.
The wide-angle lens keeps distortions to a minimum, although as soon as you begin using the digital zoom you'll notice a reduction in the image quality, especially in terms of noise levels. The maximum zoom setting, named 'narrow angle' in the camera introduces so much noise that, in my opinion, the footage becomes unusable.
The Brave 8 Lite offers a range of other shooting modes, including timelapse, hyperlapse, slow motion, and HDR video. The slow motion functionality is only available at 2.7K resolution and below, and the fact that it's not available at 4K is disappointing. At 2.7K it's possible to slow footage down by 4x, while reducing the resolution to 1080p makes it 8x slower.
Like several other action cameras, the Akaso Brave 8 Lite features a hyperlapse mode that enables you to create high-speed timelapse sequences. Footage can be sped up by up to 30 times, which allows for a flexible level of creativity.
Photo resolutions of 20MP and 12MP give users the ability to manage their storage space, but the larger size option falls some way short of the 27MP of the GoPro Hero 12 Black.
Stabilization of footage is where the Brave 8 Lite really struggles, as can be seen in the clip below. The clip was shot a bumpy road, and the camera seems unable to provide anywhere near enough stabilization to make the footage usable. This is less of a problem with slow-motion or hyperlapse footage, but if you want a more reliable setup then you'll need to opt for something like the DJI Osmo Action 4.
Almost every action camera struggles to maintain a meaningful runtime, especially at 4K, and the Brave 8 Lite is no different, with the advertised runtime of 150 minutes only being available at 1080p. The battery is the same as the one in the Brave 8, so if you have both cameras, you'll be able to swap batteries between them.
The Akaso app is far easier to use than the on-board interface. The menus are more streamlined, and the higher resolution video display makes it possible to get a clearer idea of what you're filming. I prefer not to rely on an app when capturing footage, but for this camera, it became something of a necessity.
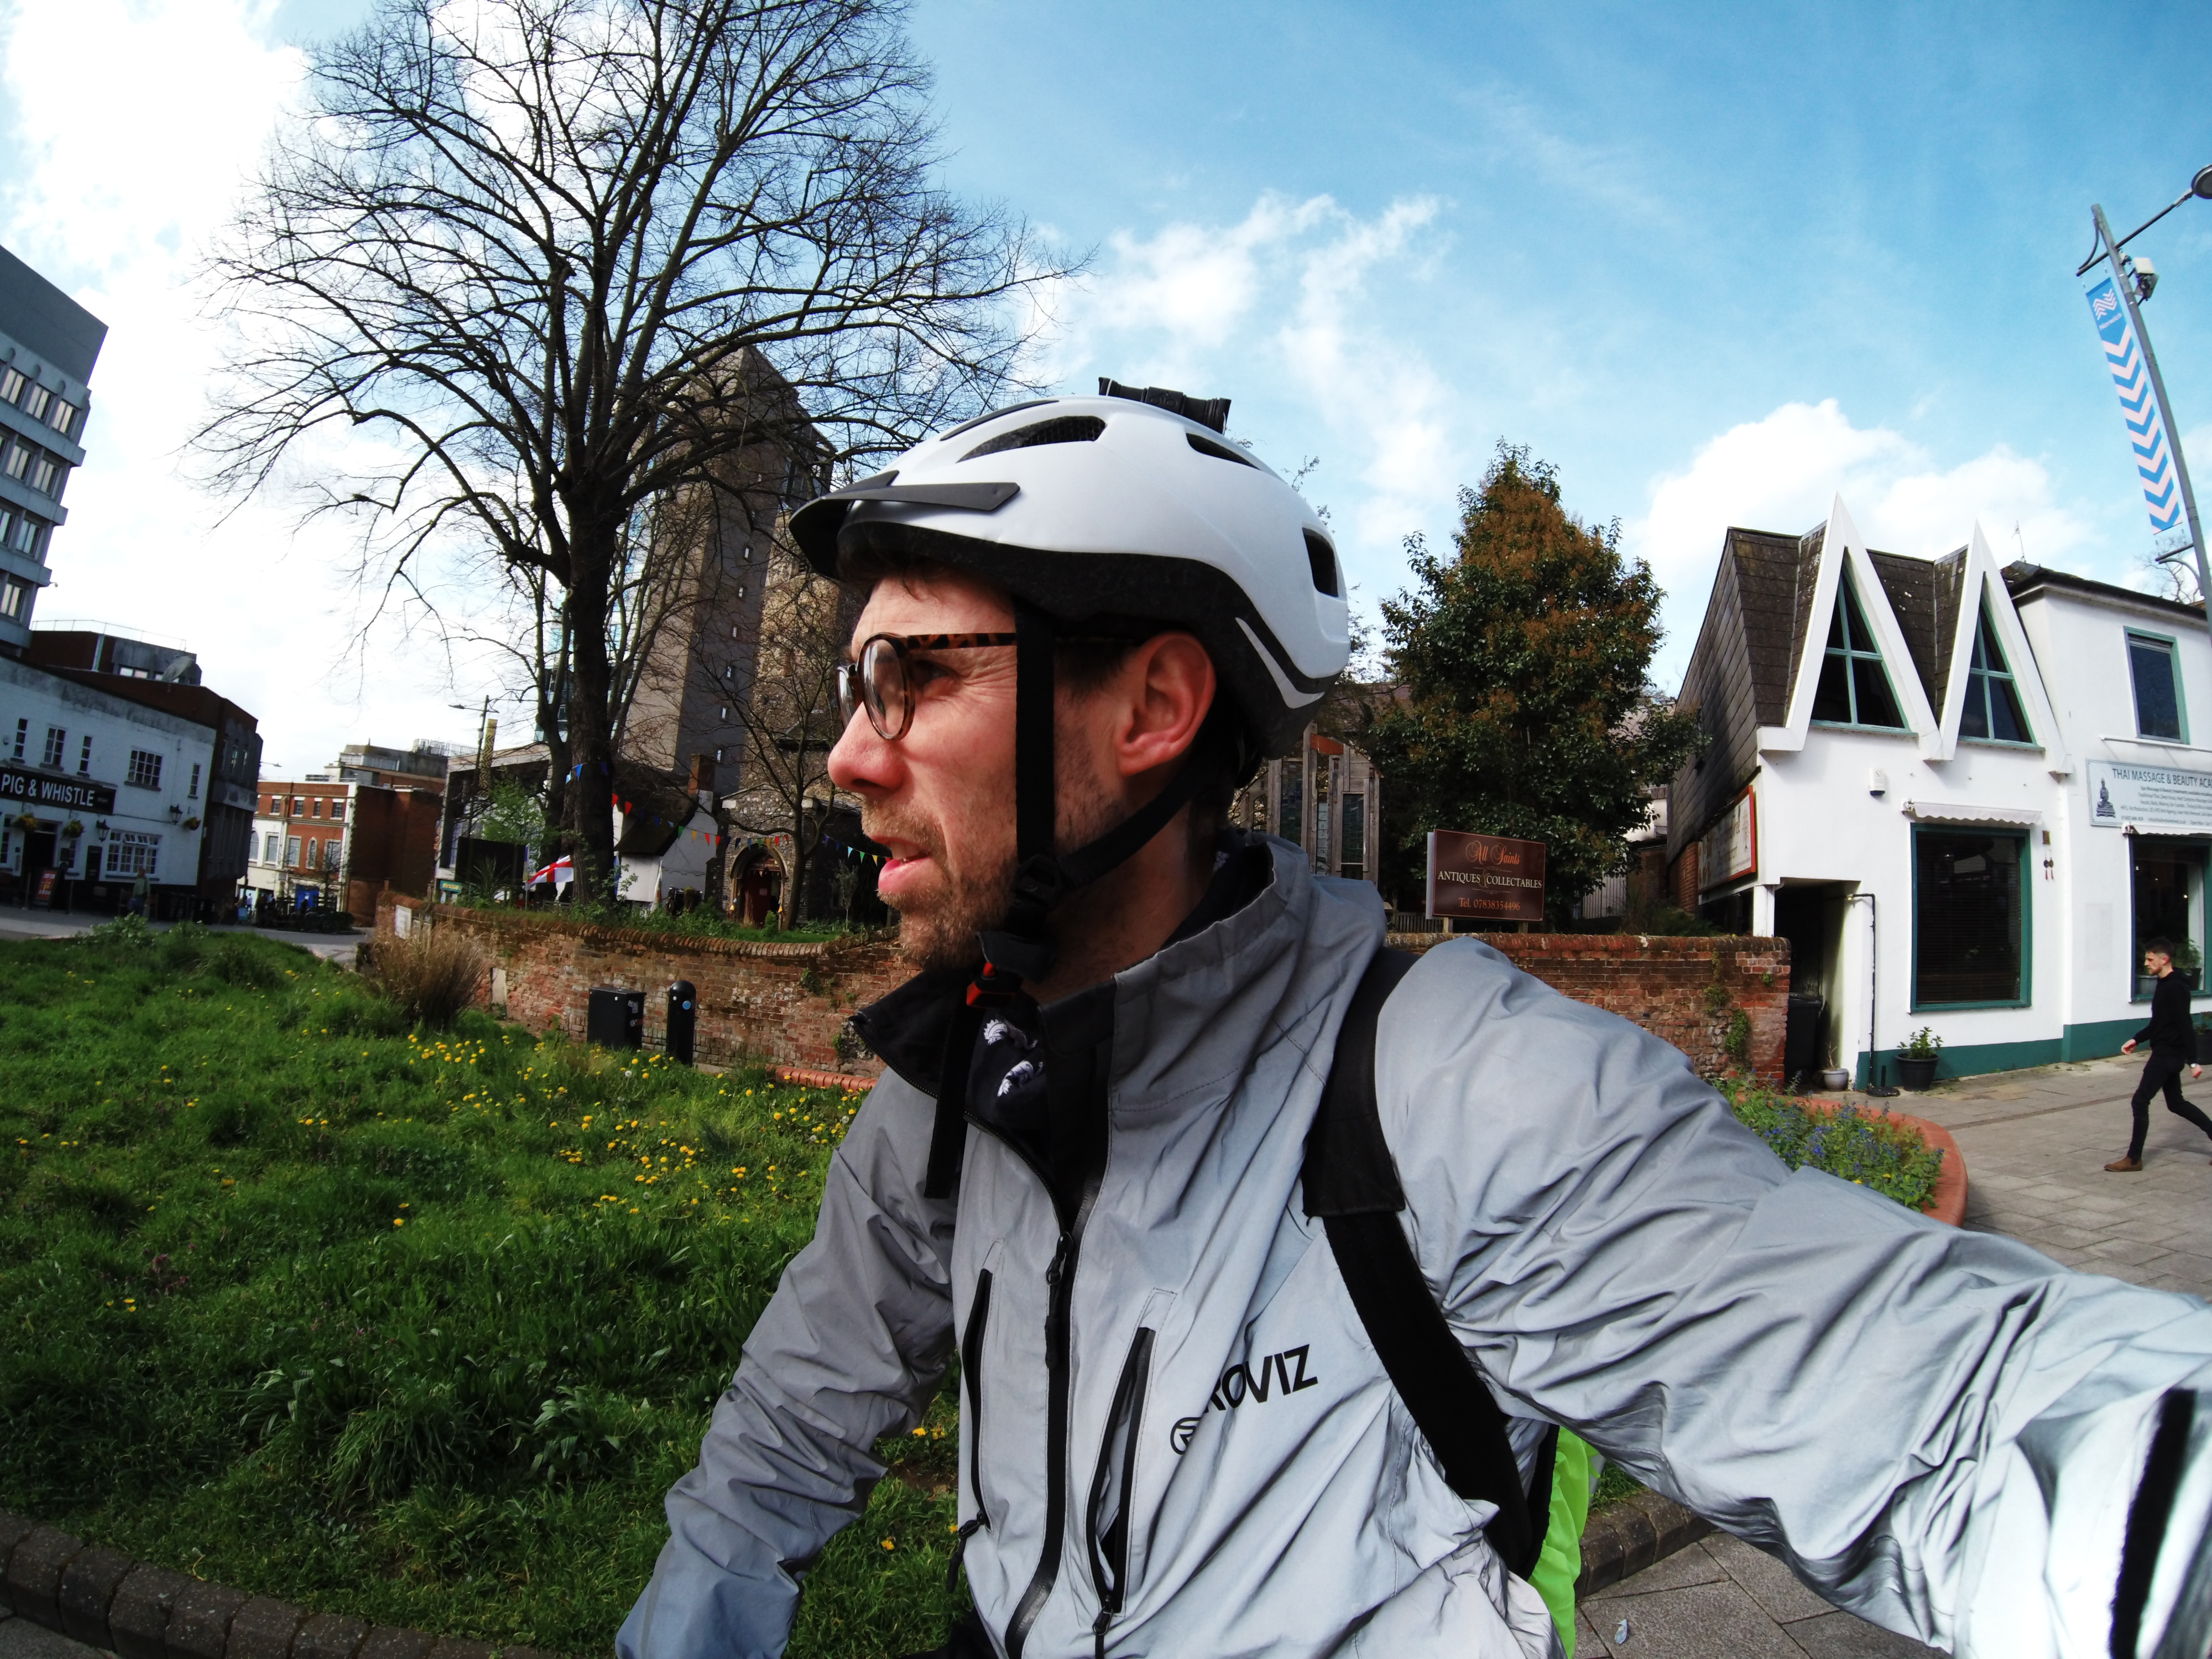
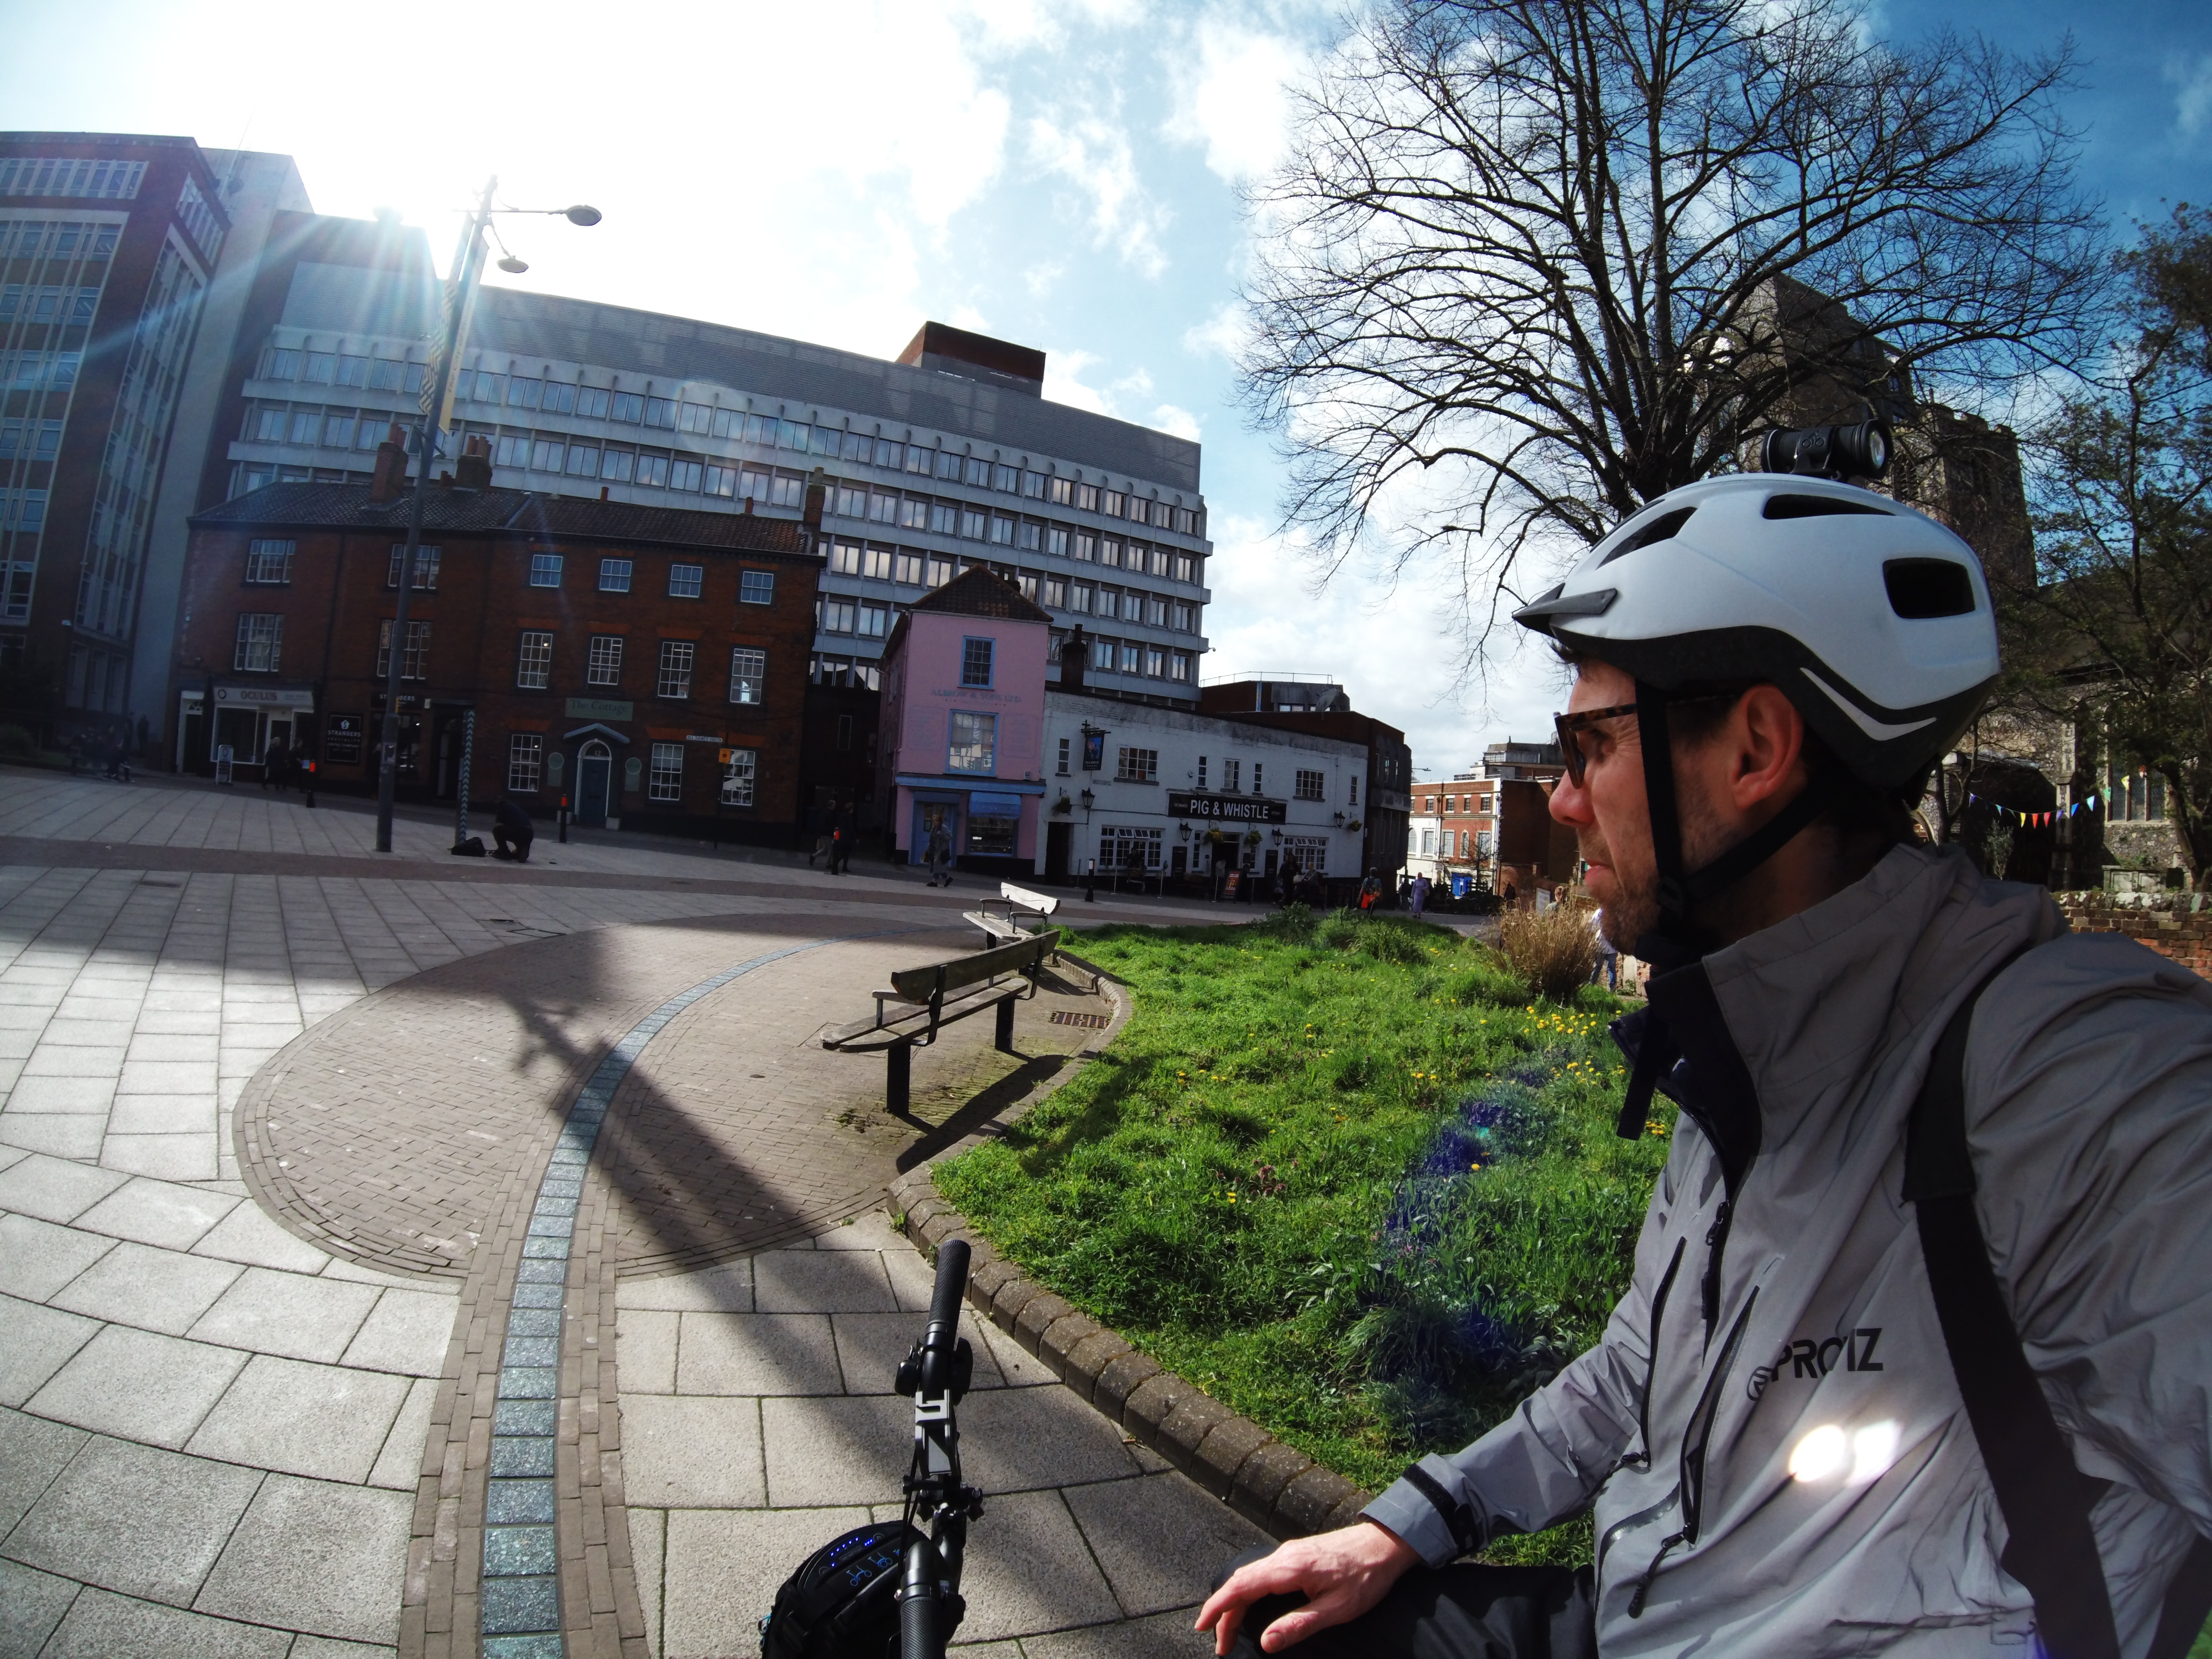
I tested the Akaso Brave 8 Lite during a range of activities, including walking, running, and biking, capturing both stills and video in a variety of locations.
The Brave 8 Lite comes with a wide range of different shooting features, and I made sure to test every single one of them. This took a fair amount of time, but it was interesting to see where this camera excels and where it struggles.
One of the things that sets action cameras apart is their ability to handle low light, so I was also keen to put it through its paces when faced with both ideal and less-that-ideal lighting conditions.
First reviewed April 2024
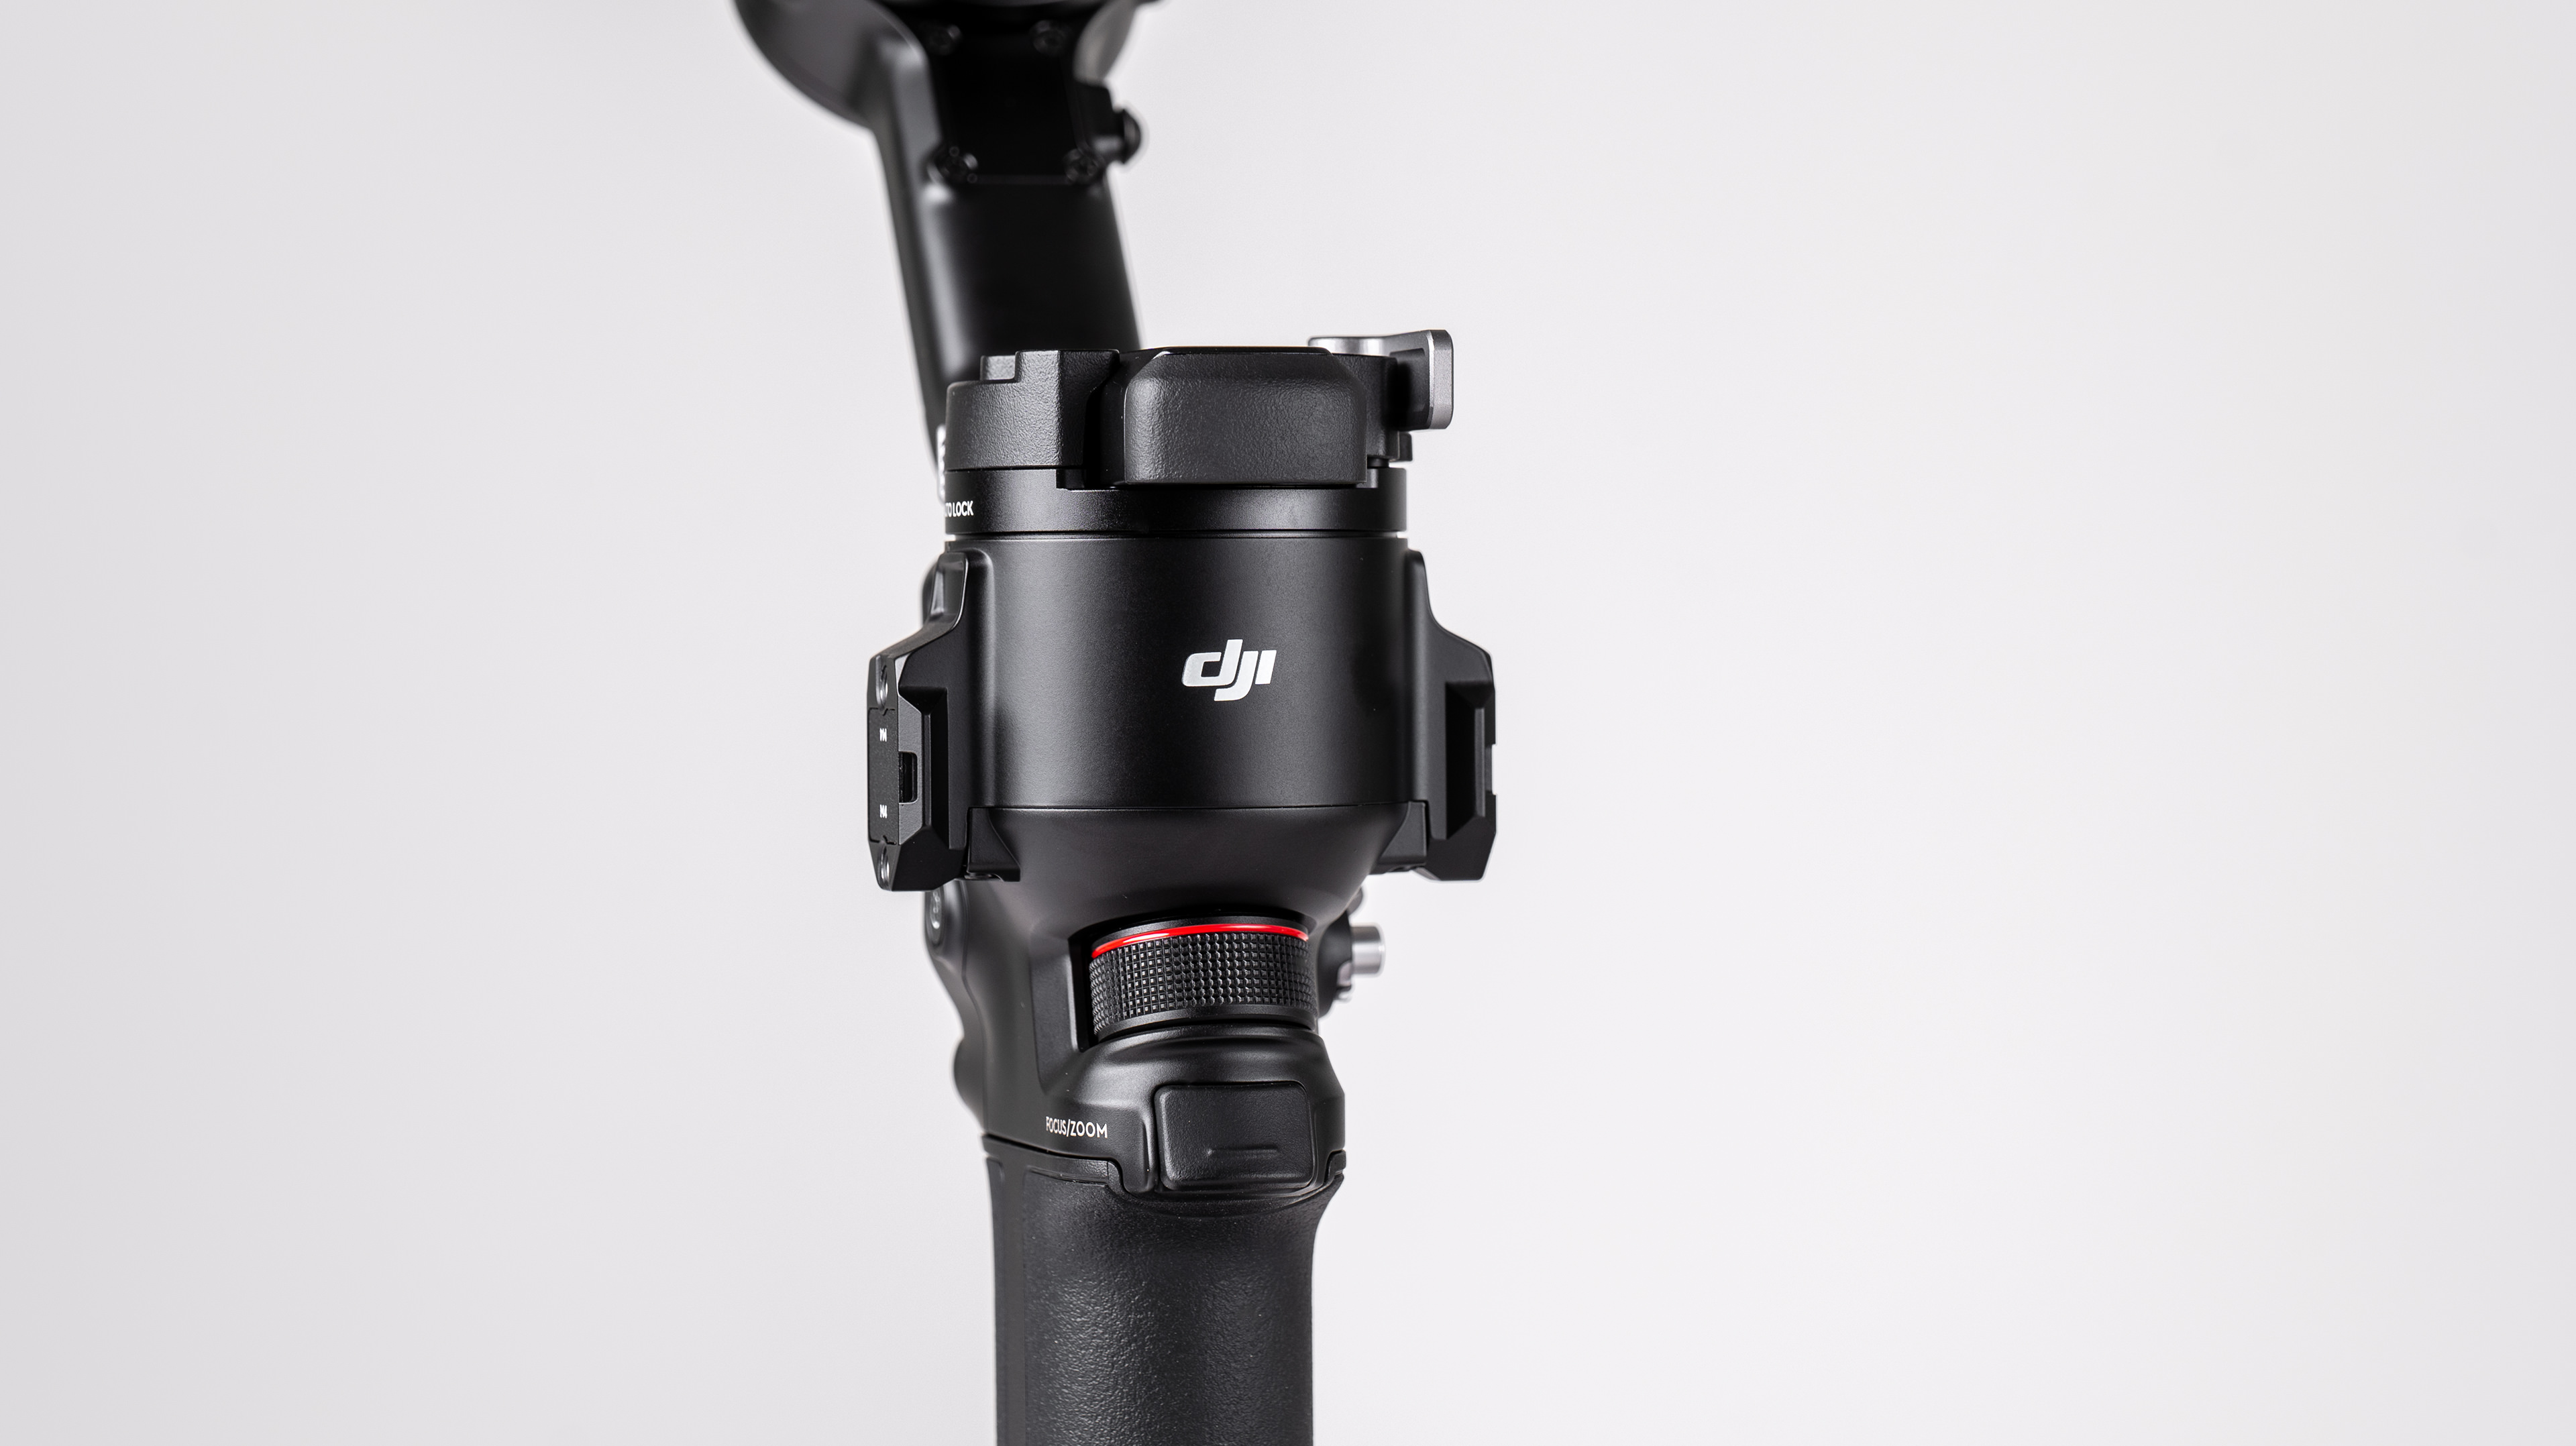
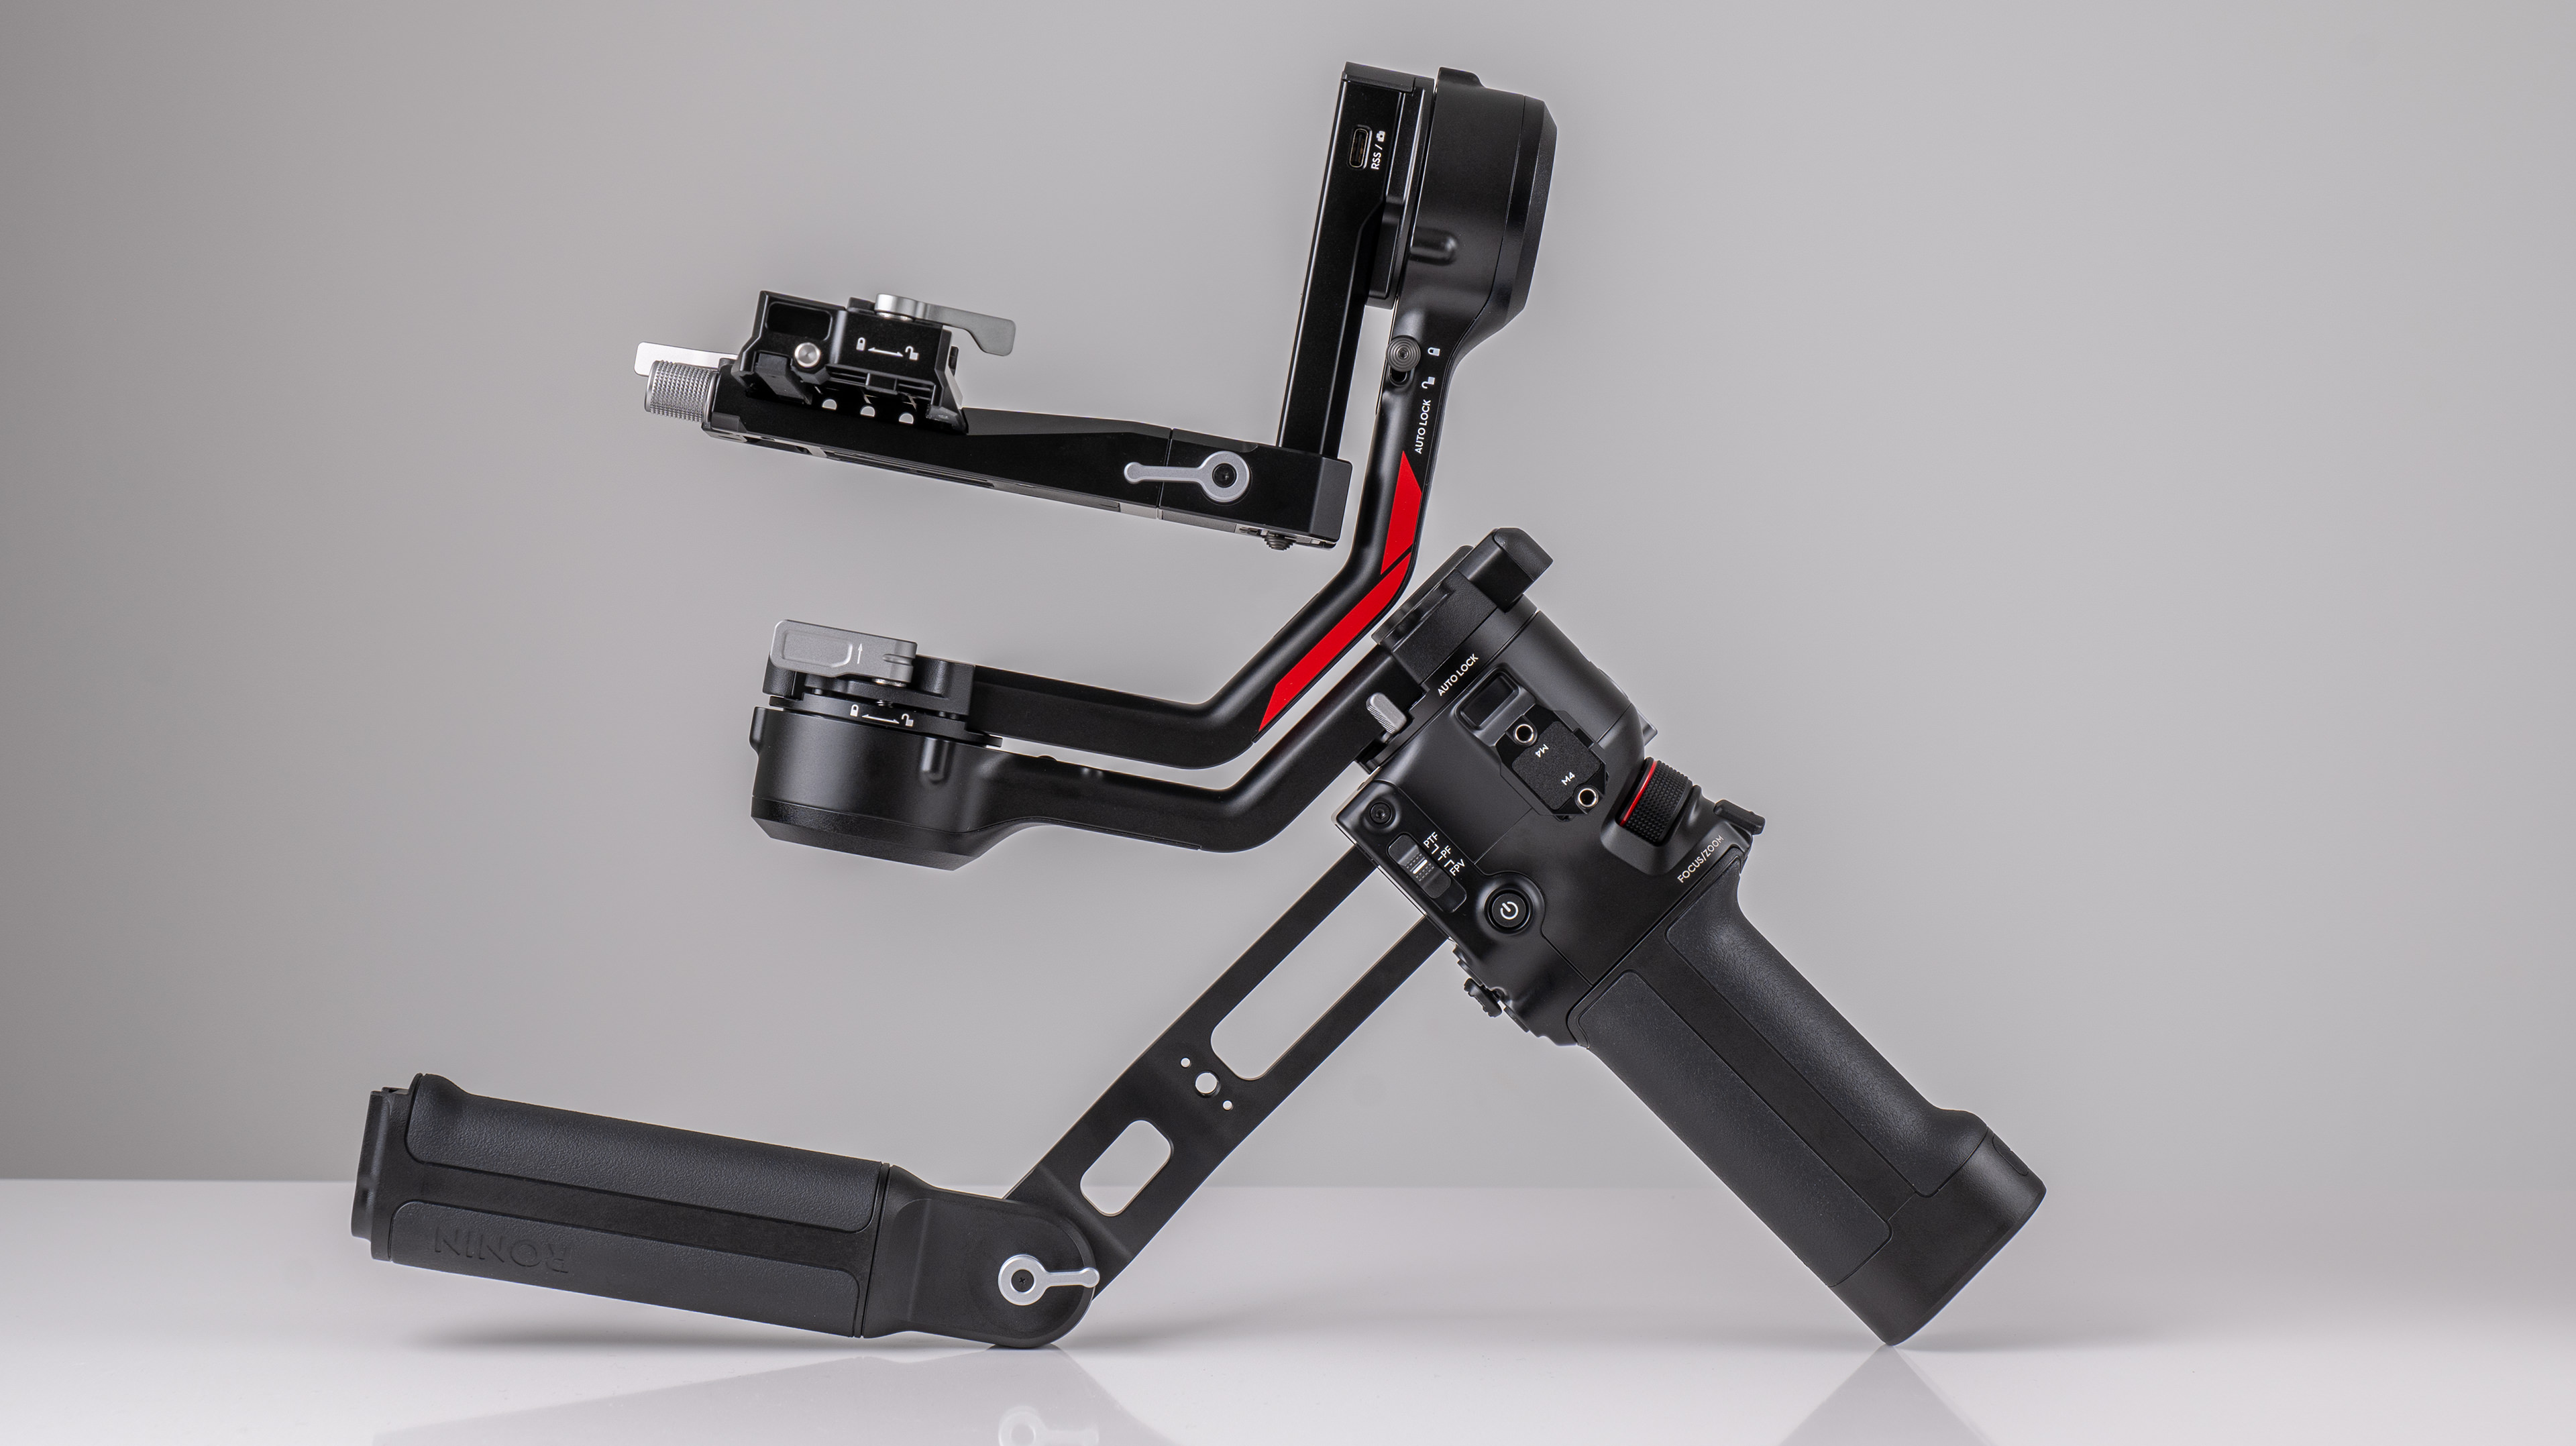
The RS 4 is the latest in line of handheld gimbals to demonstrate why DJI is the biggest name in this market. Gimbals can be a nuisance to use, taking too long to set up and being given to outbursts of freakish behavior in polite company, which is why many videographers try to avoid using them whenever possible.
DJI, however, has recognised and acknowledged this common perception, and has continuously worked to iron out the many niggles that plague gimbal users, and the RS 4 is its next step is the process of making the operator-gimbal encounter stress-free. DJI had gone quite a long way on that journey with the Ronin RS 3, but this new model brings a host of changes that make life quite a bit better.
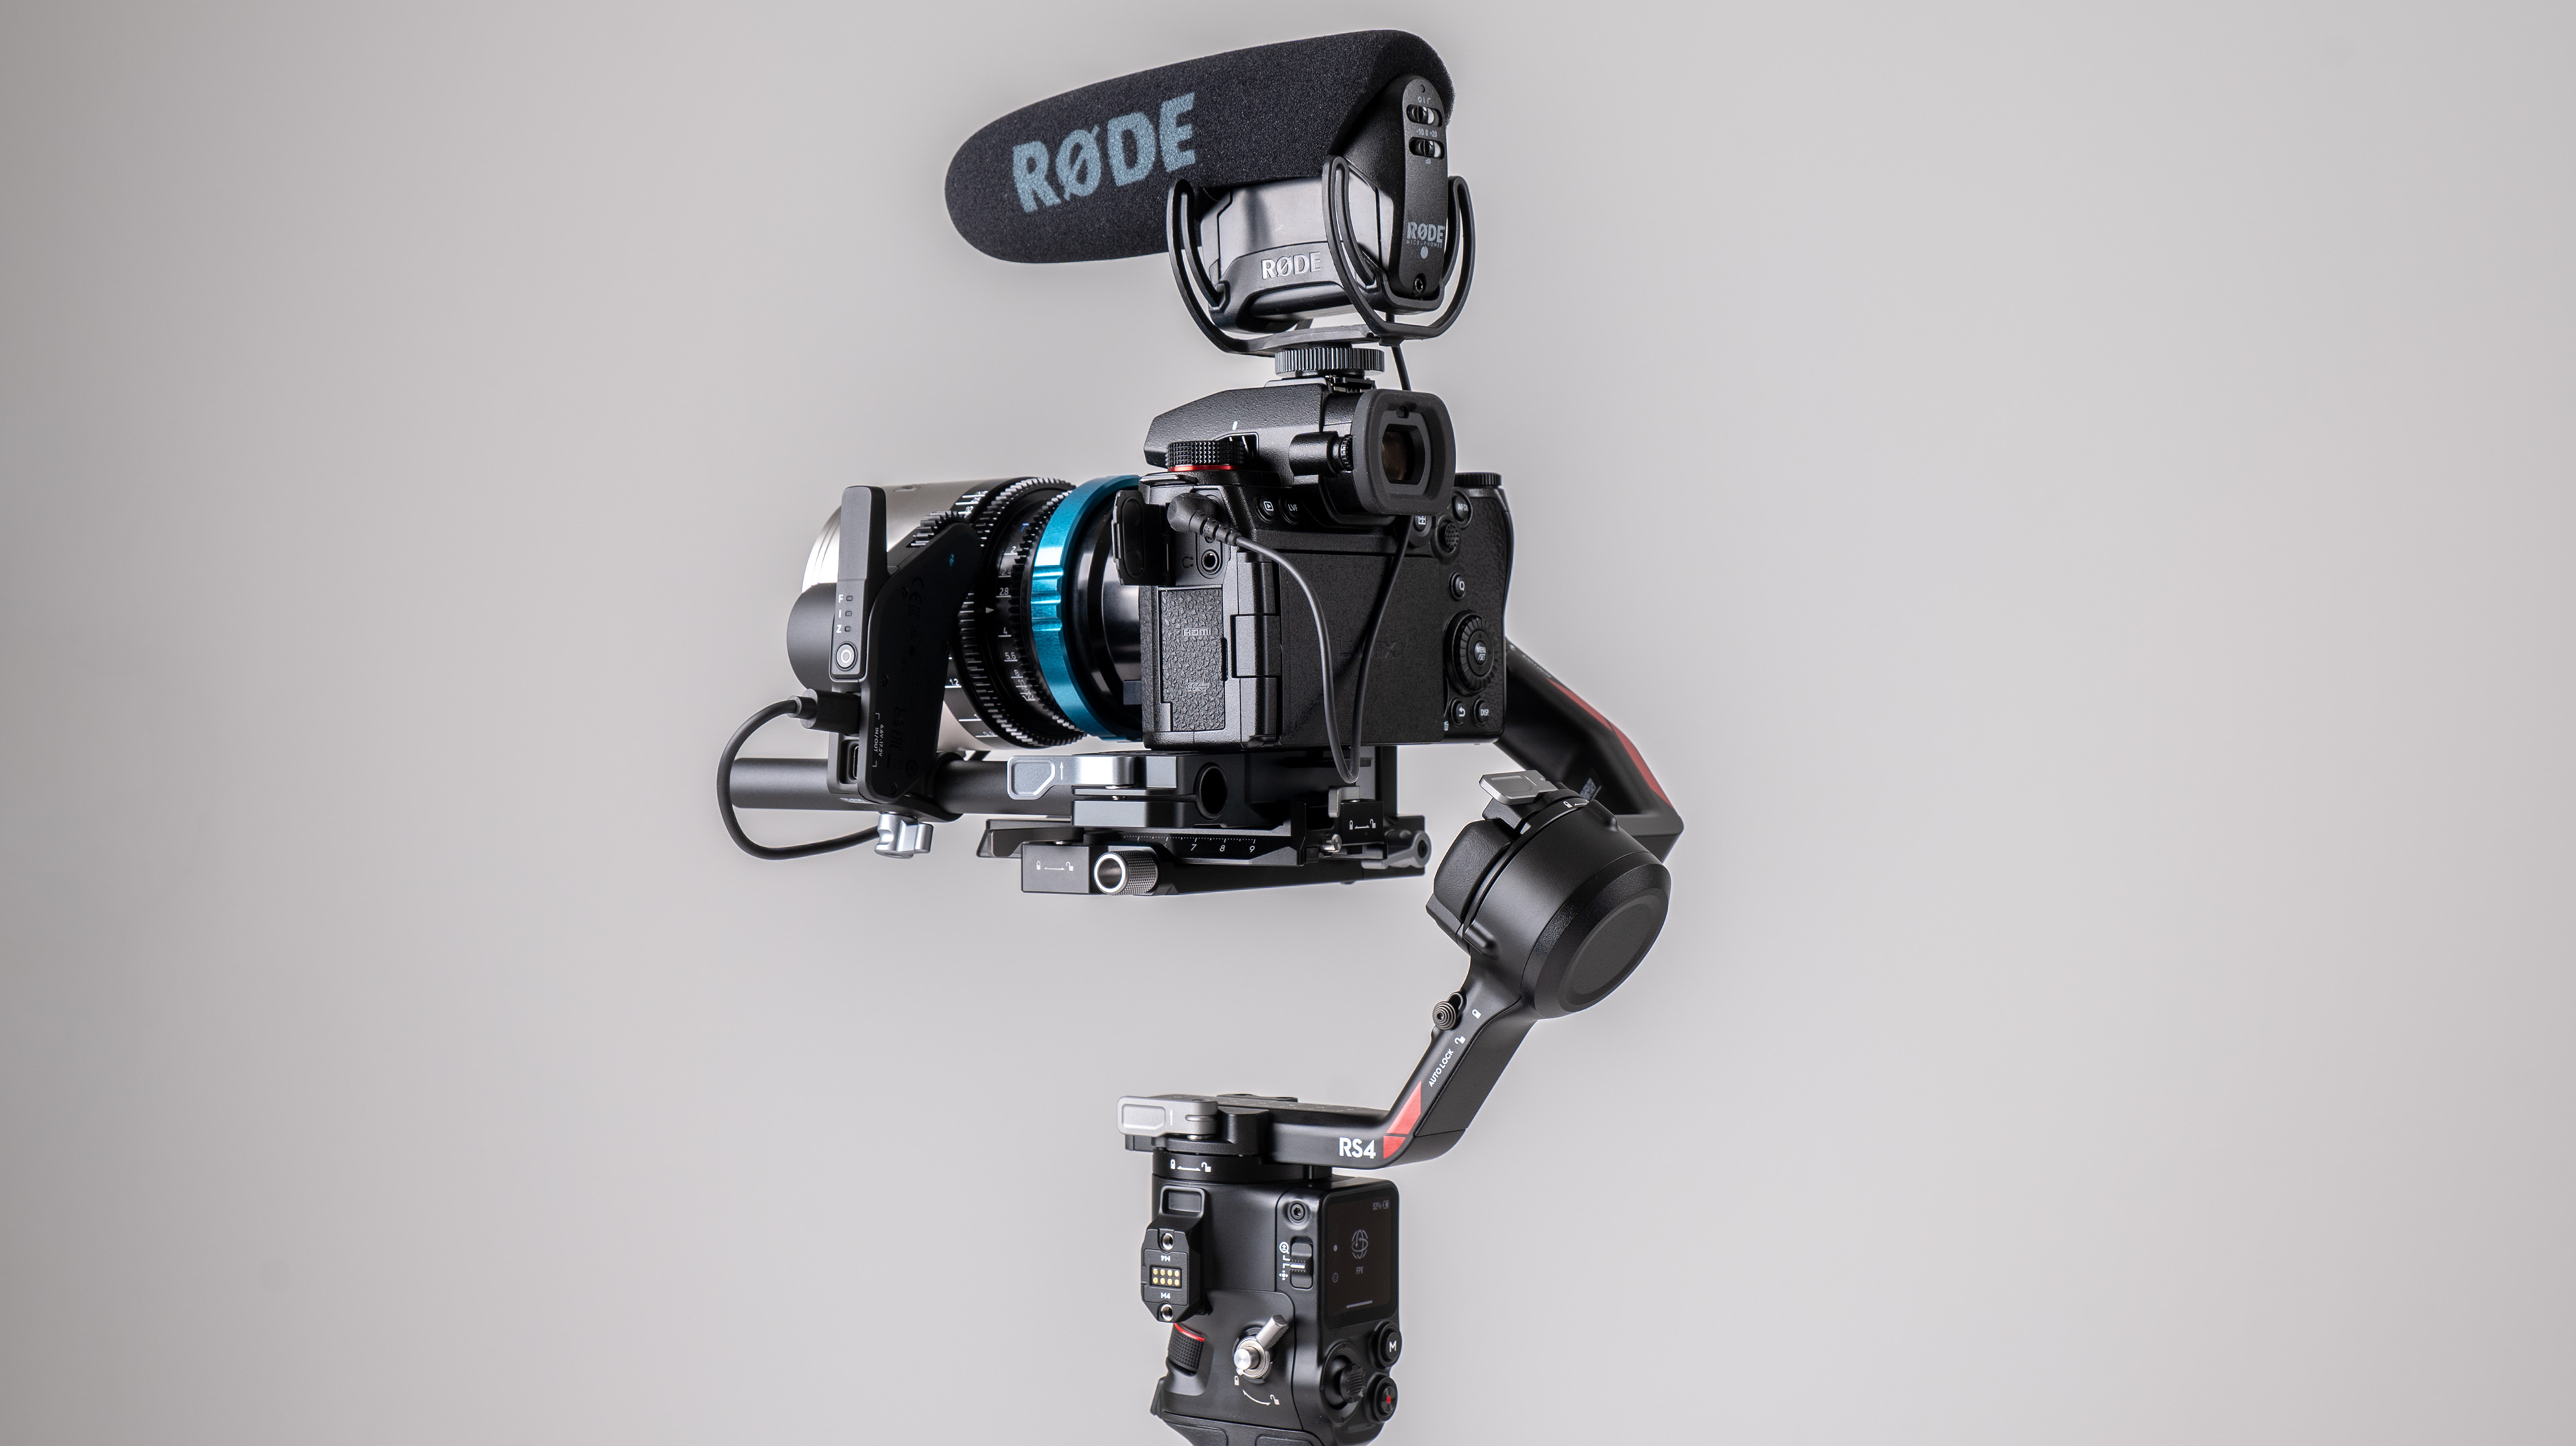
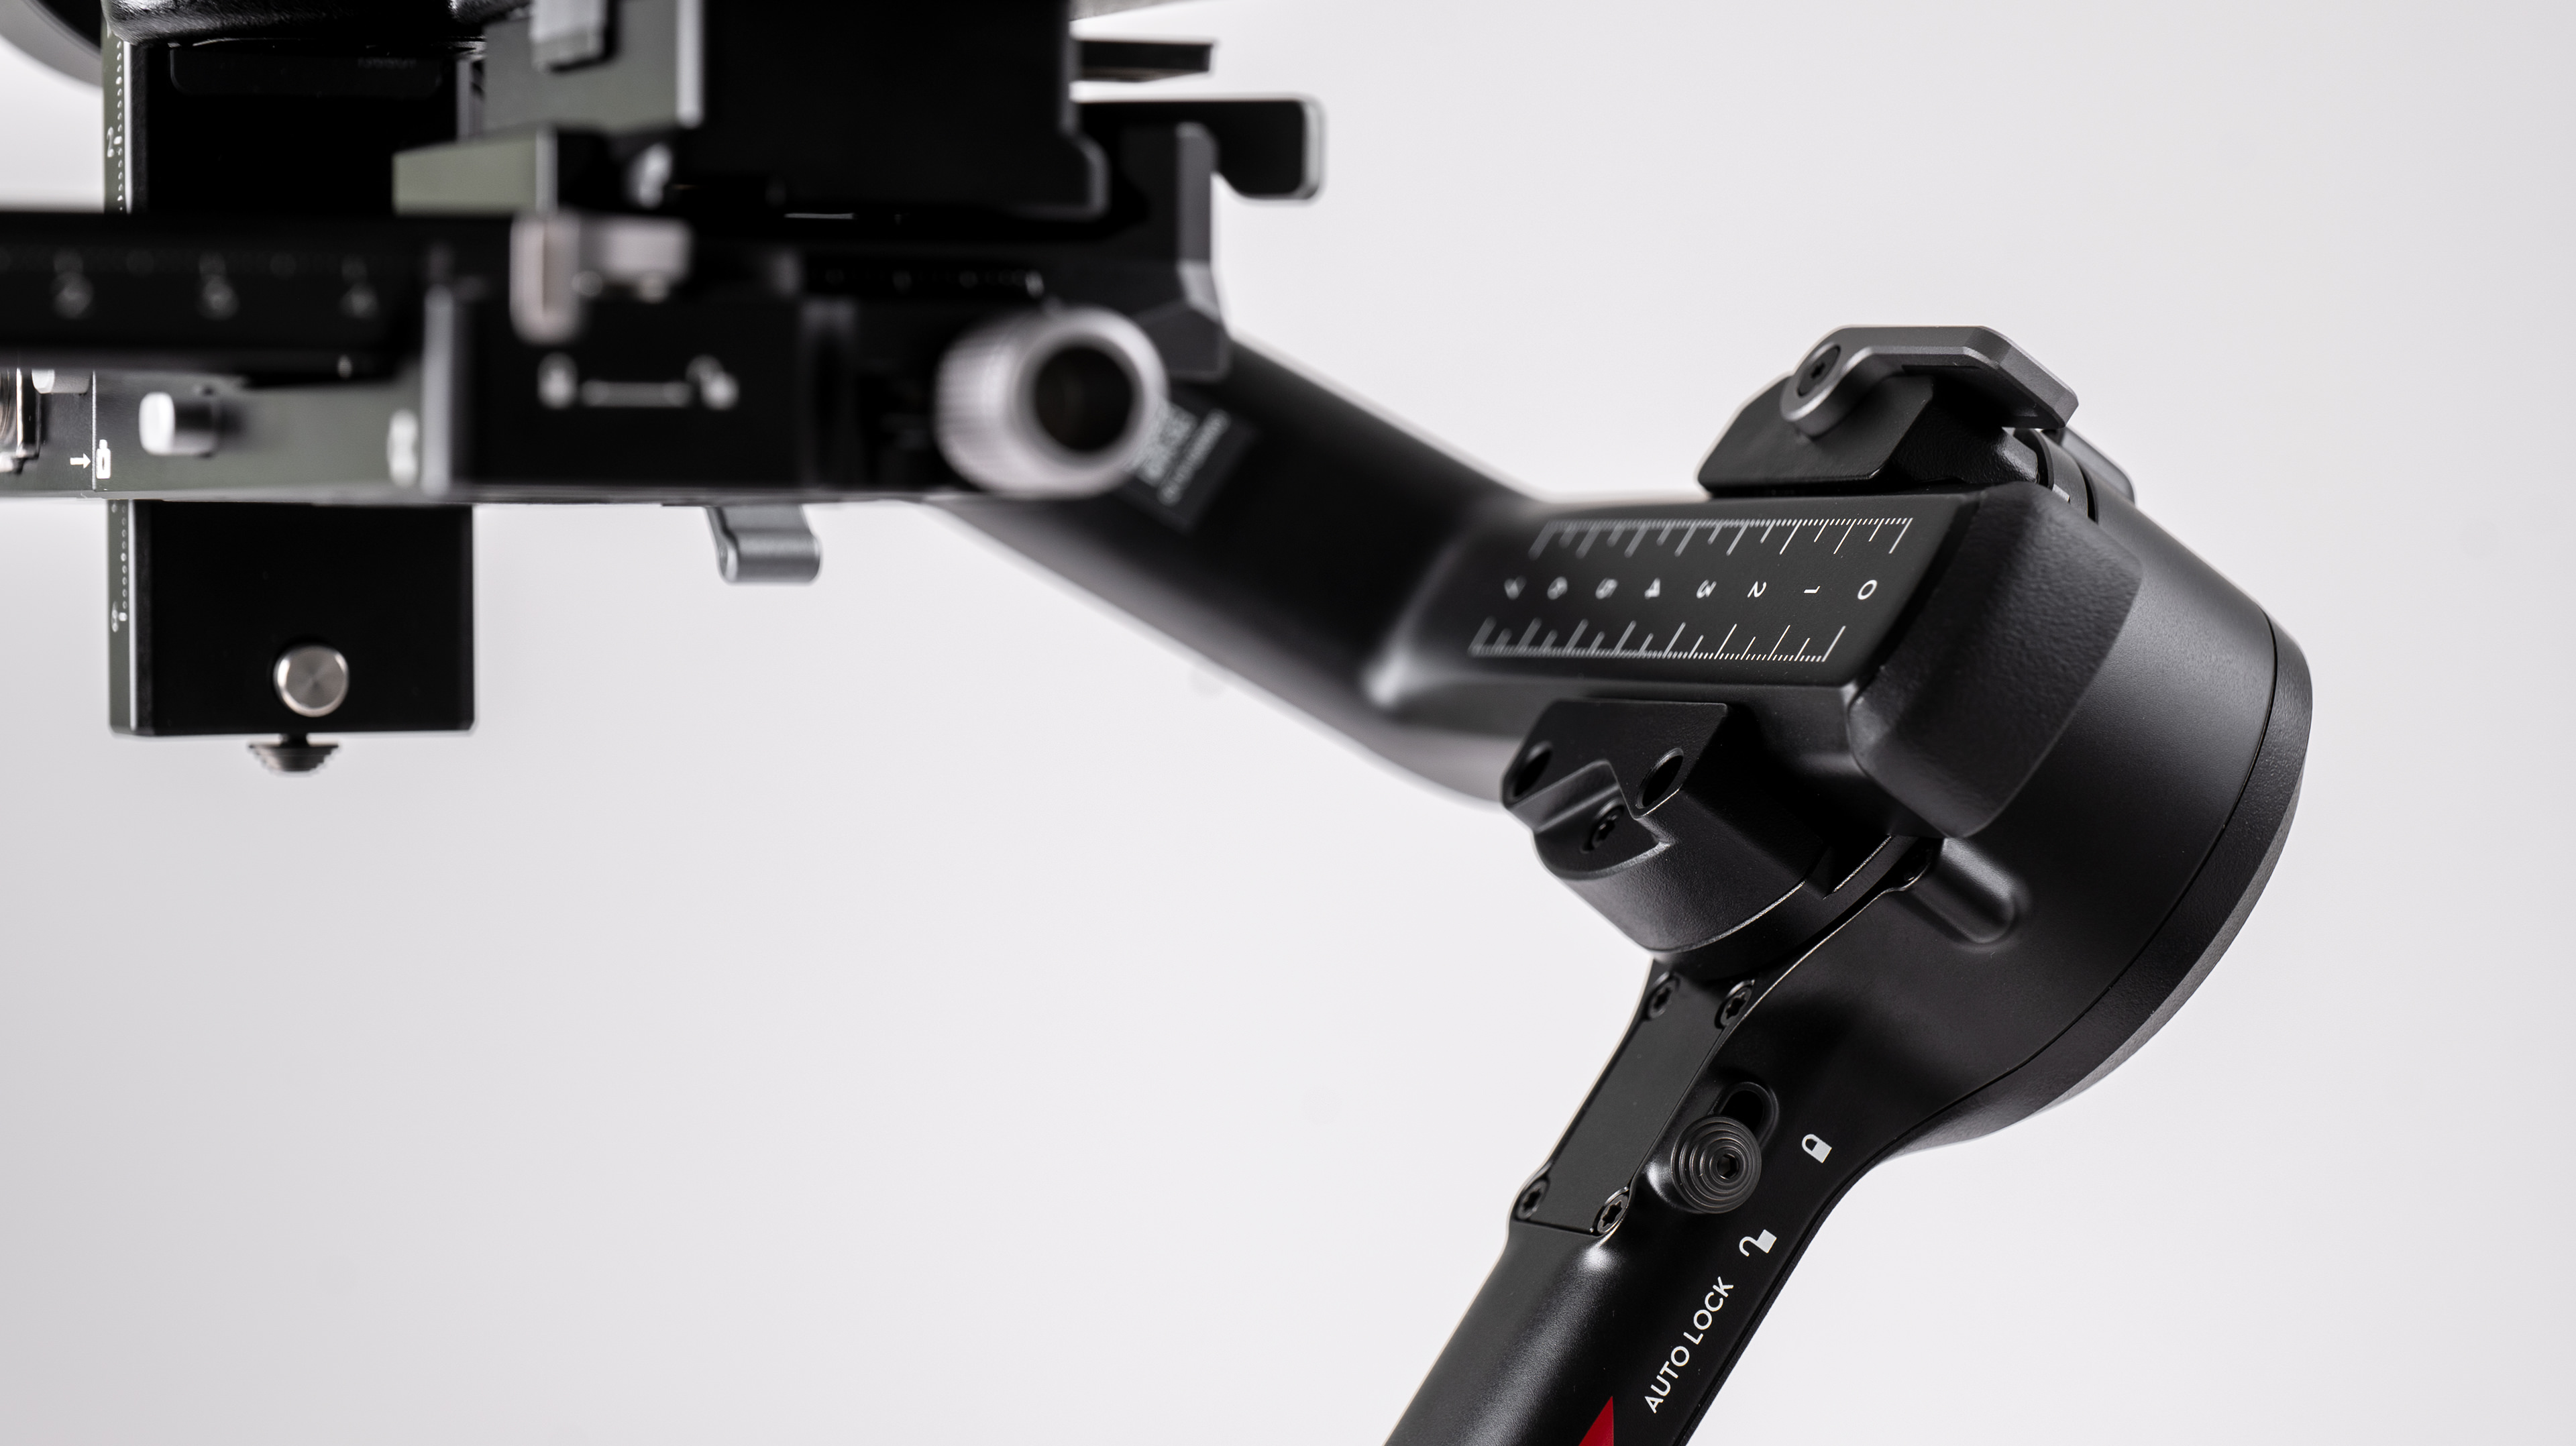
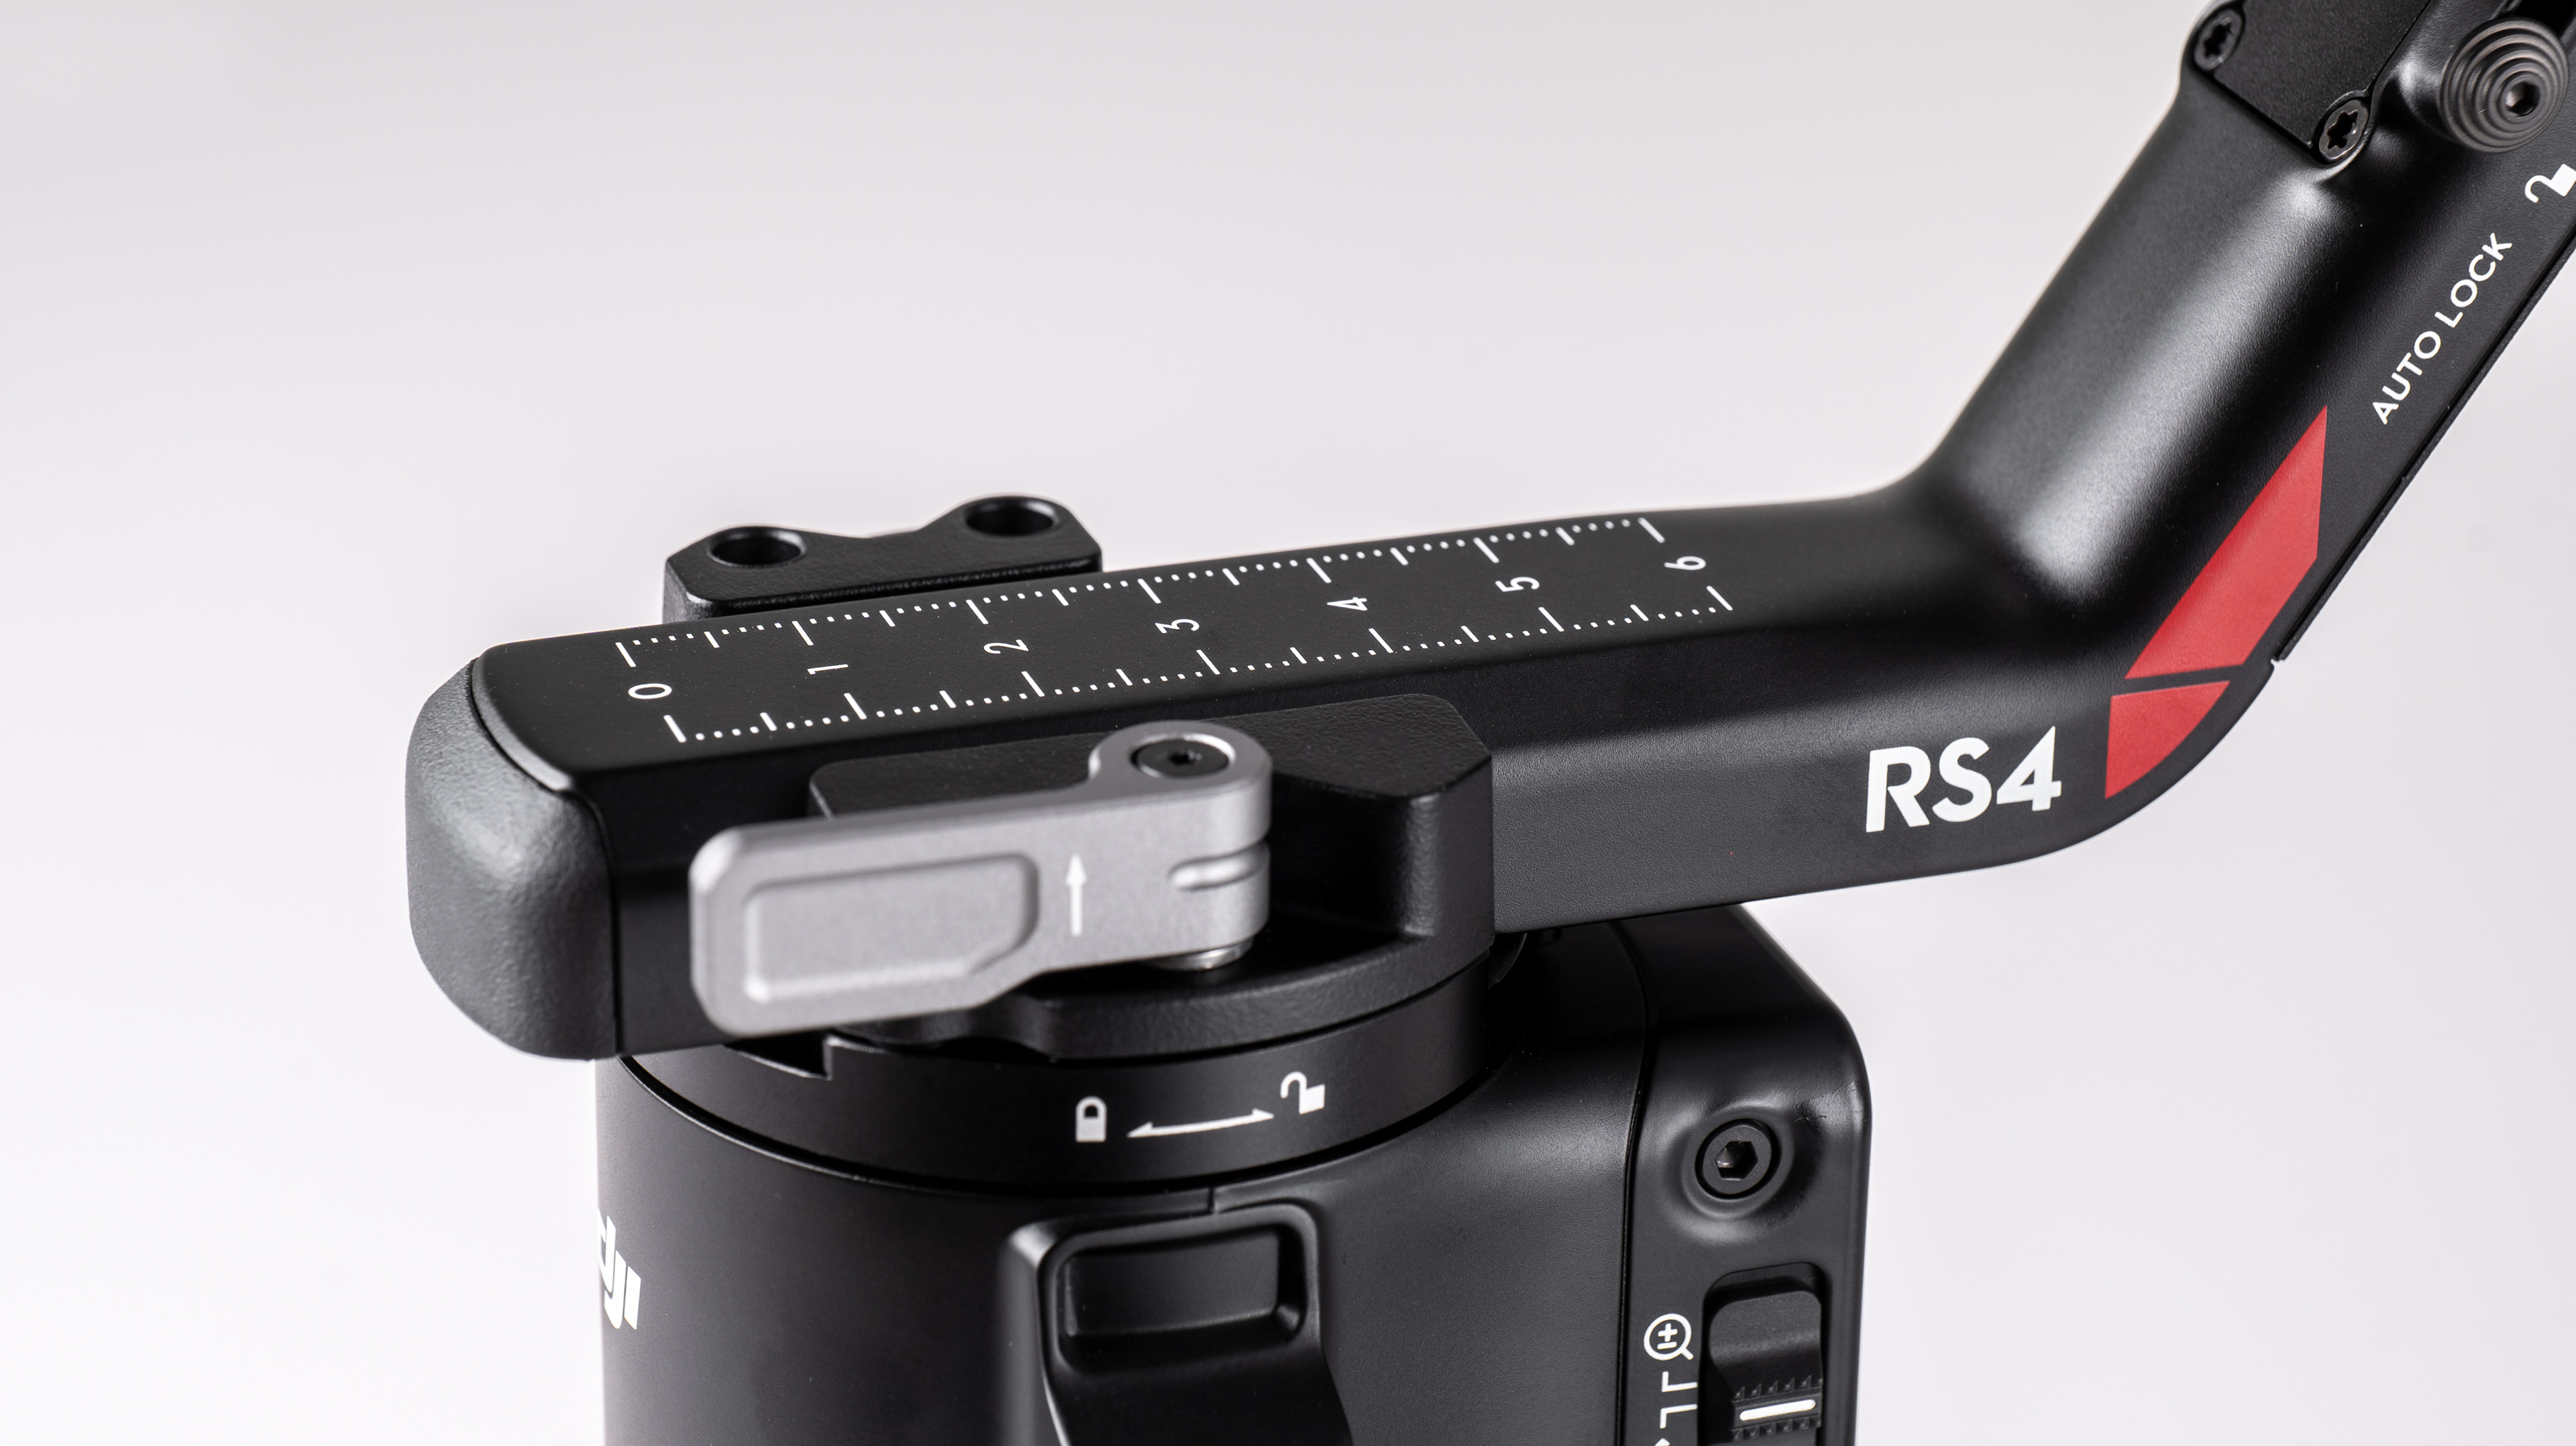
One thing that all videographers will appreciate immediately is the Teflon coating on the arms of the gimbal. Along with the micro-adjustment knob on the camera mounting that was introduced in the RS 3, this makes balancing and rebalancing the gimbal much easier. The Teflon surfaces enable users to make tiny shifts of the axis mounting points with less effort, instead of having to put lots of pressure on the arms to overcome inertia, only to find the shift has gone too far. With the large locking clasps on the arms, what might seem a minor change actually makes a big difference, and I had the gimbal balanced with my camera very quickly. I also was quite happy to add extras to the camera after balancing, as I knew it wouldn’t be a huge drama to rebalance the system.
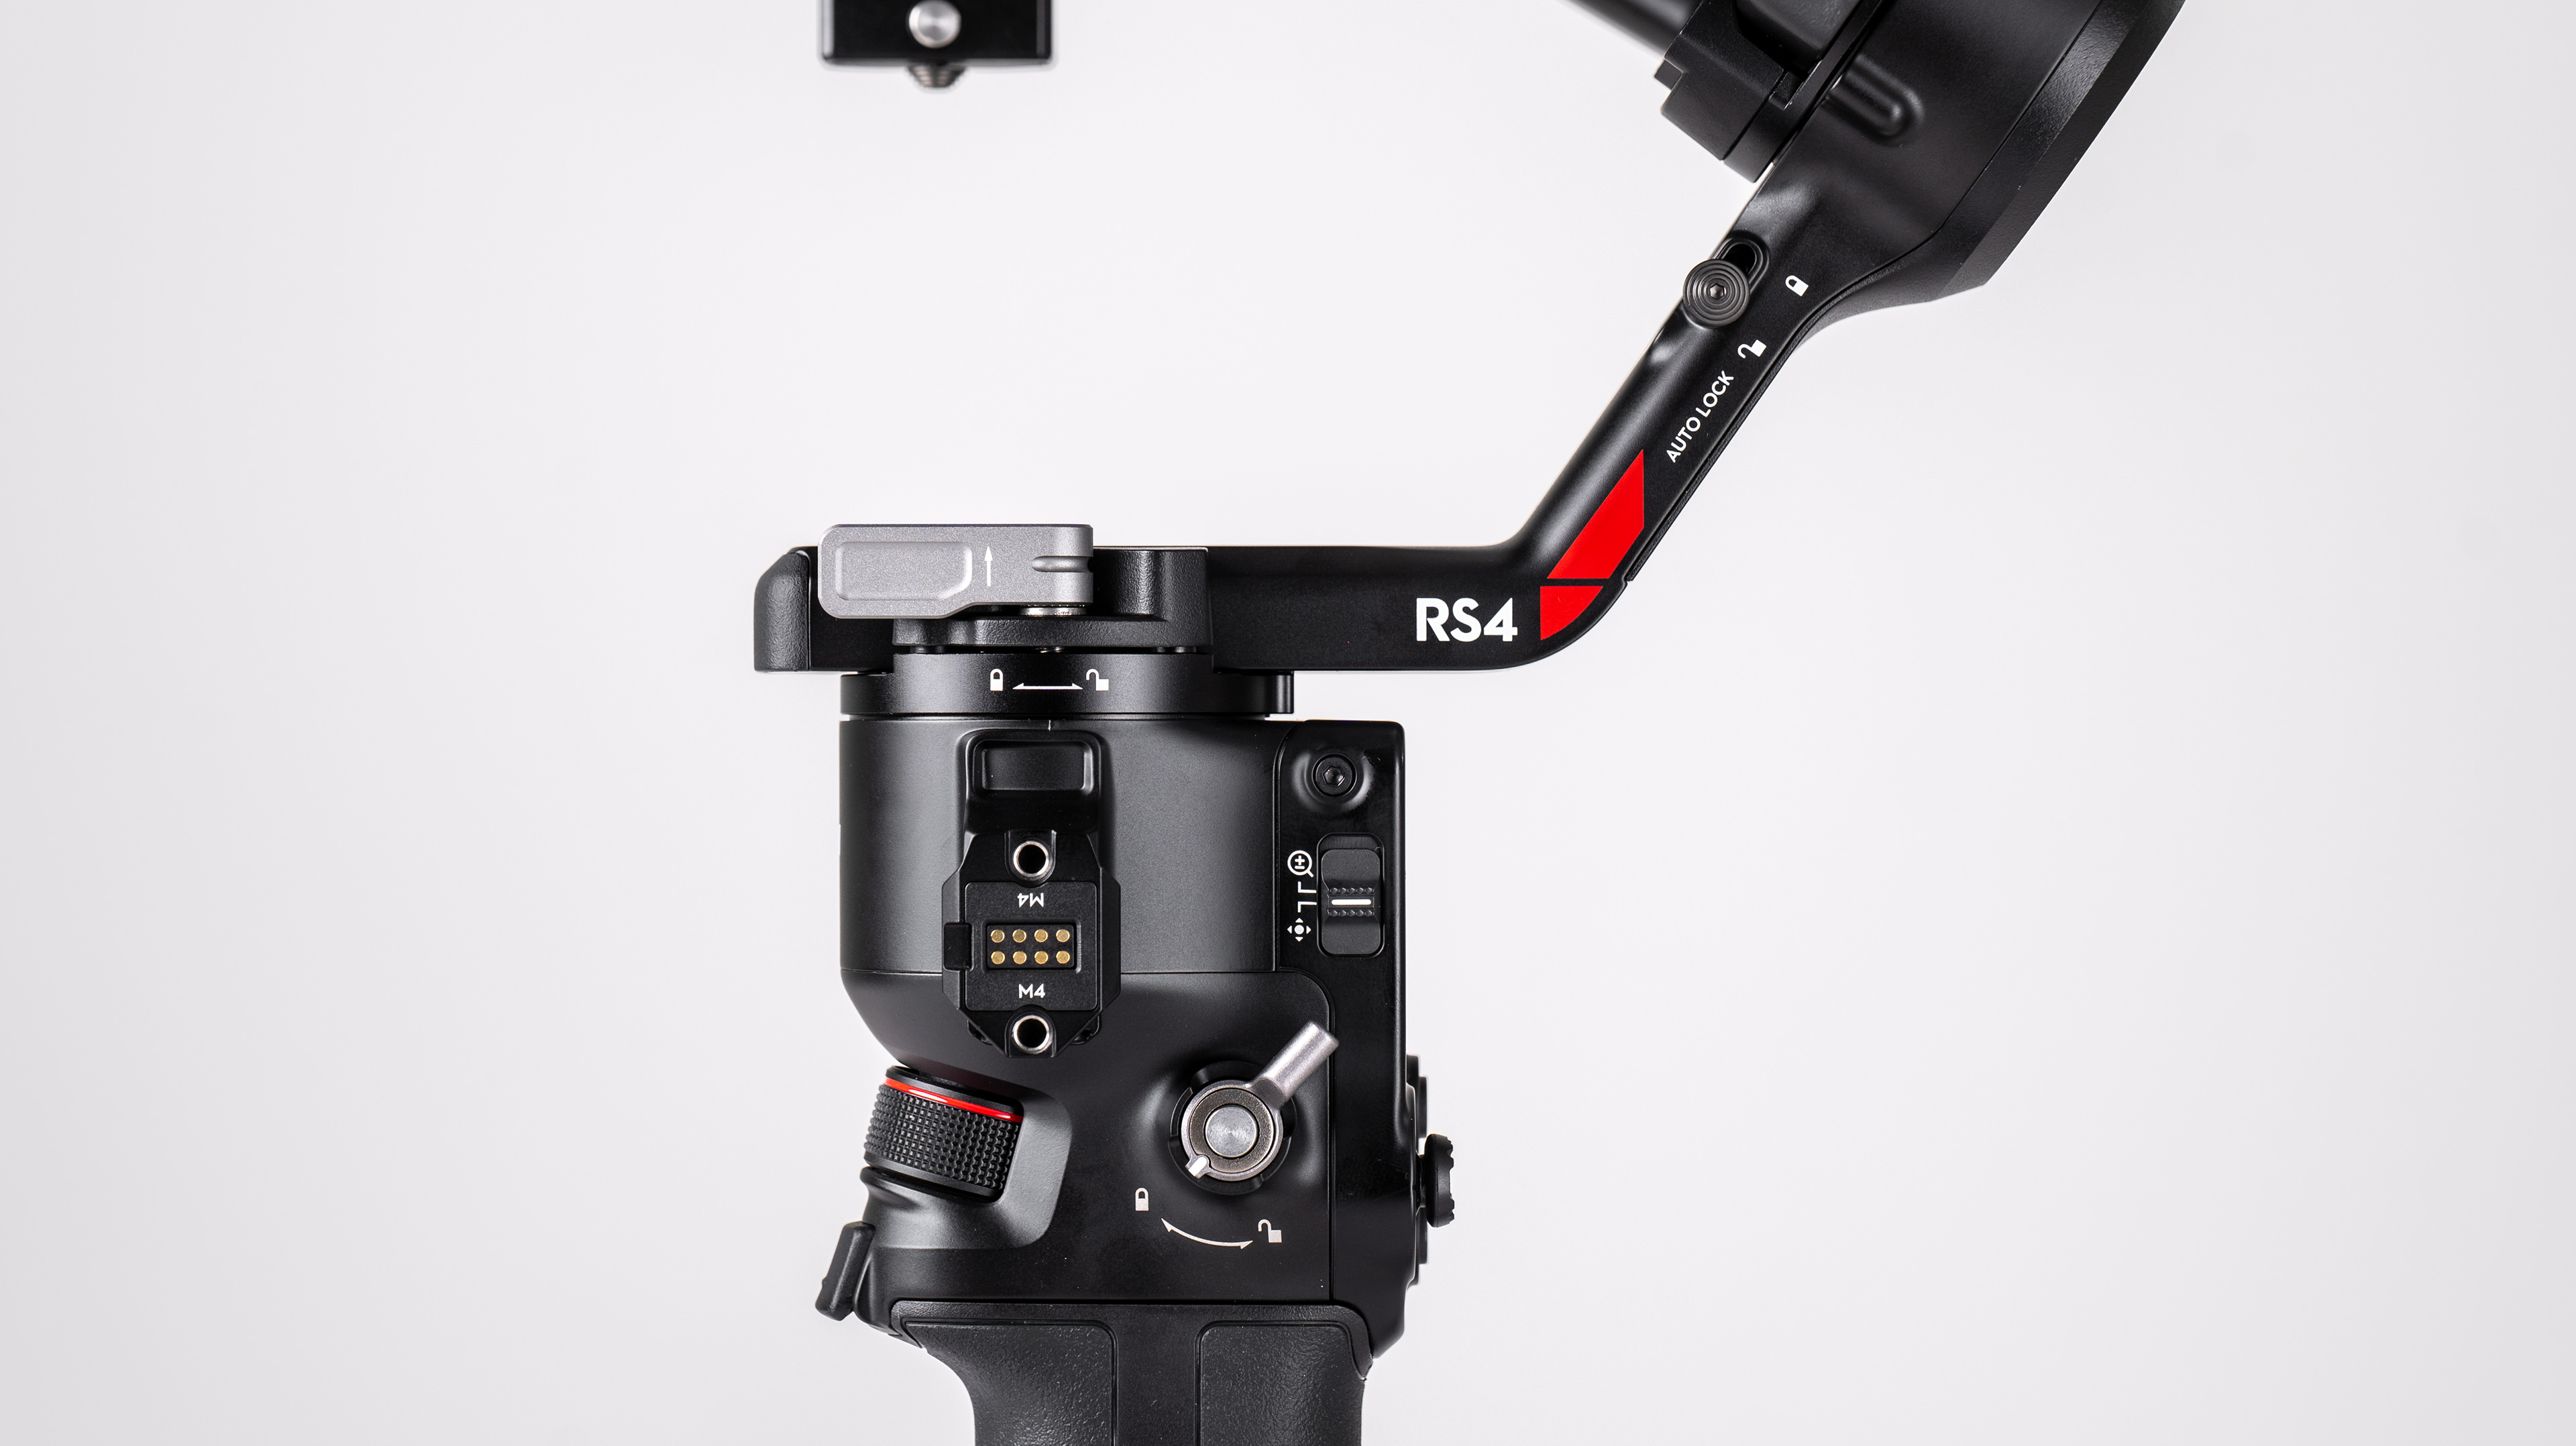
On the subject of balancing, the RS 4 has a longer tilt-axis arm than its predecessor, which makes it possible to add more accessories to the camera without running out of arm to balance it all. The arm is 8.5mm longer than the arm on the RS 3, which is enough to allow the user to add microphones on top of the camera and/or a pile of filters on the front of the lens. In total the Ronin RS 4 can carry up to 6.6lbs / 3kg, which is the same as the capacity of the RS 3, but the new arm means that weight doesn’t necessarily have to be placed right around the center of gravity of the camera.
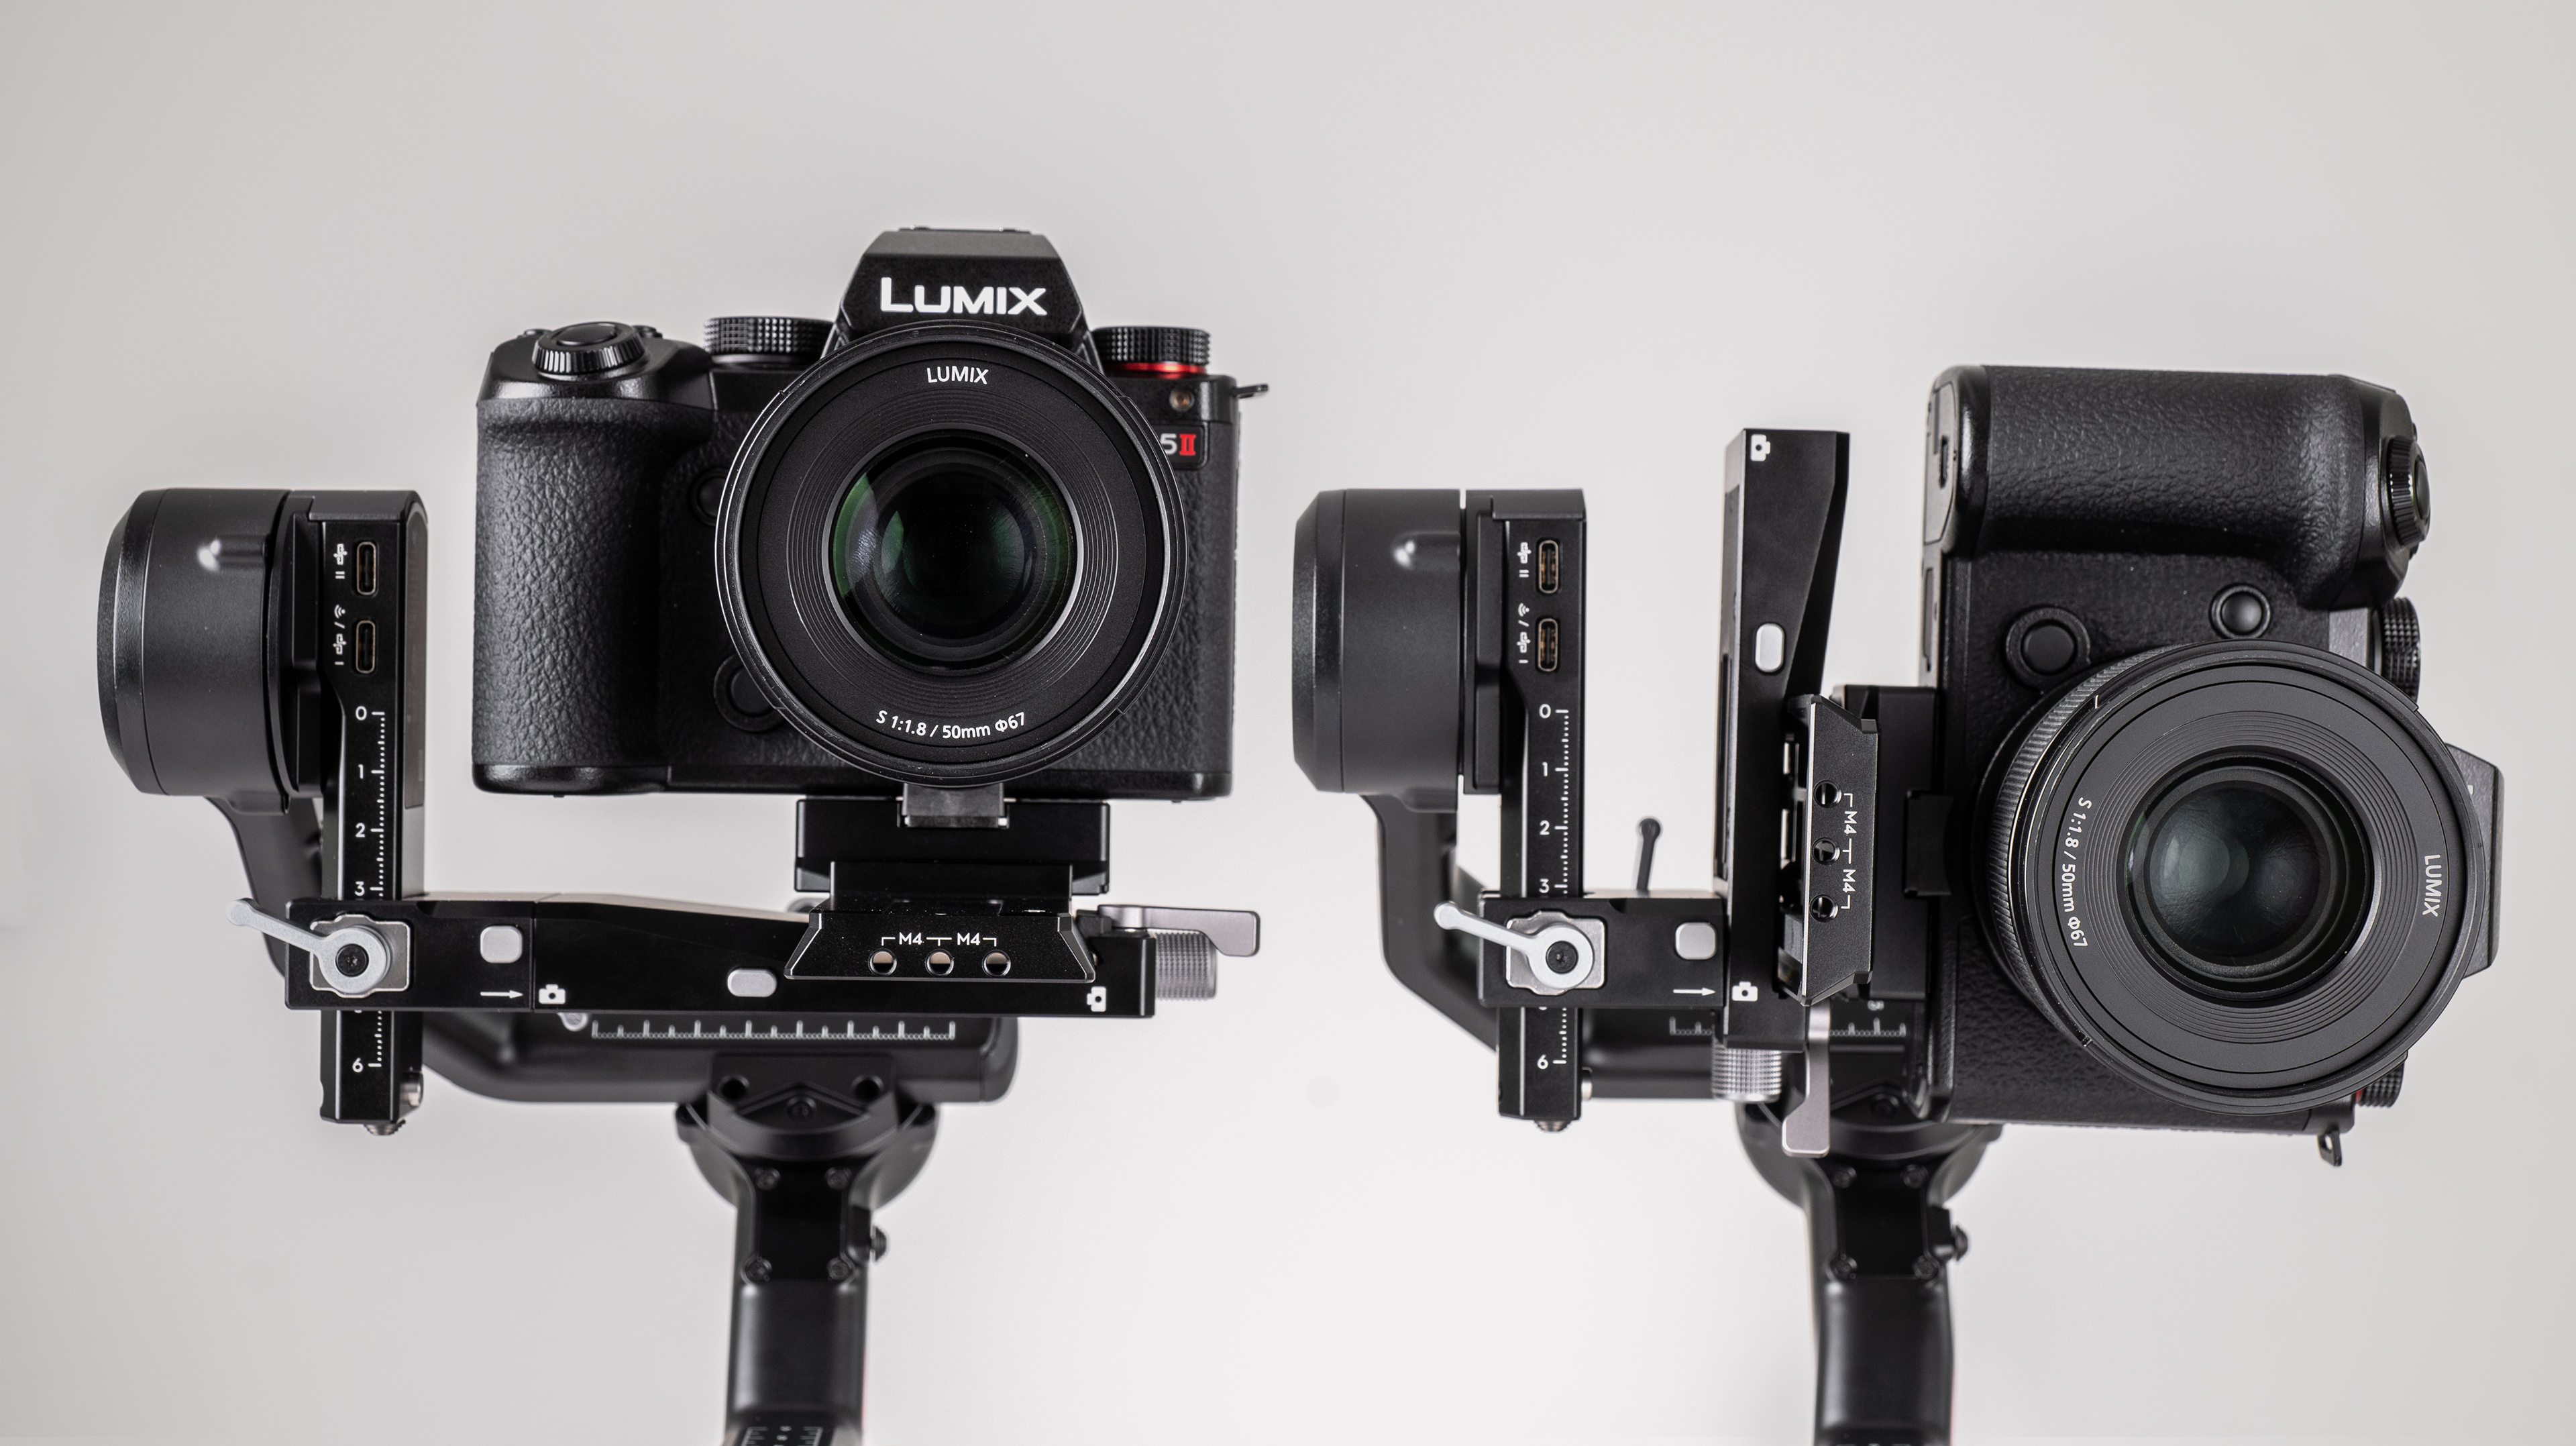
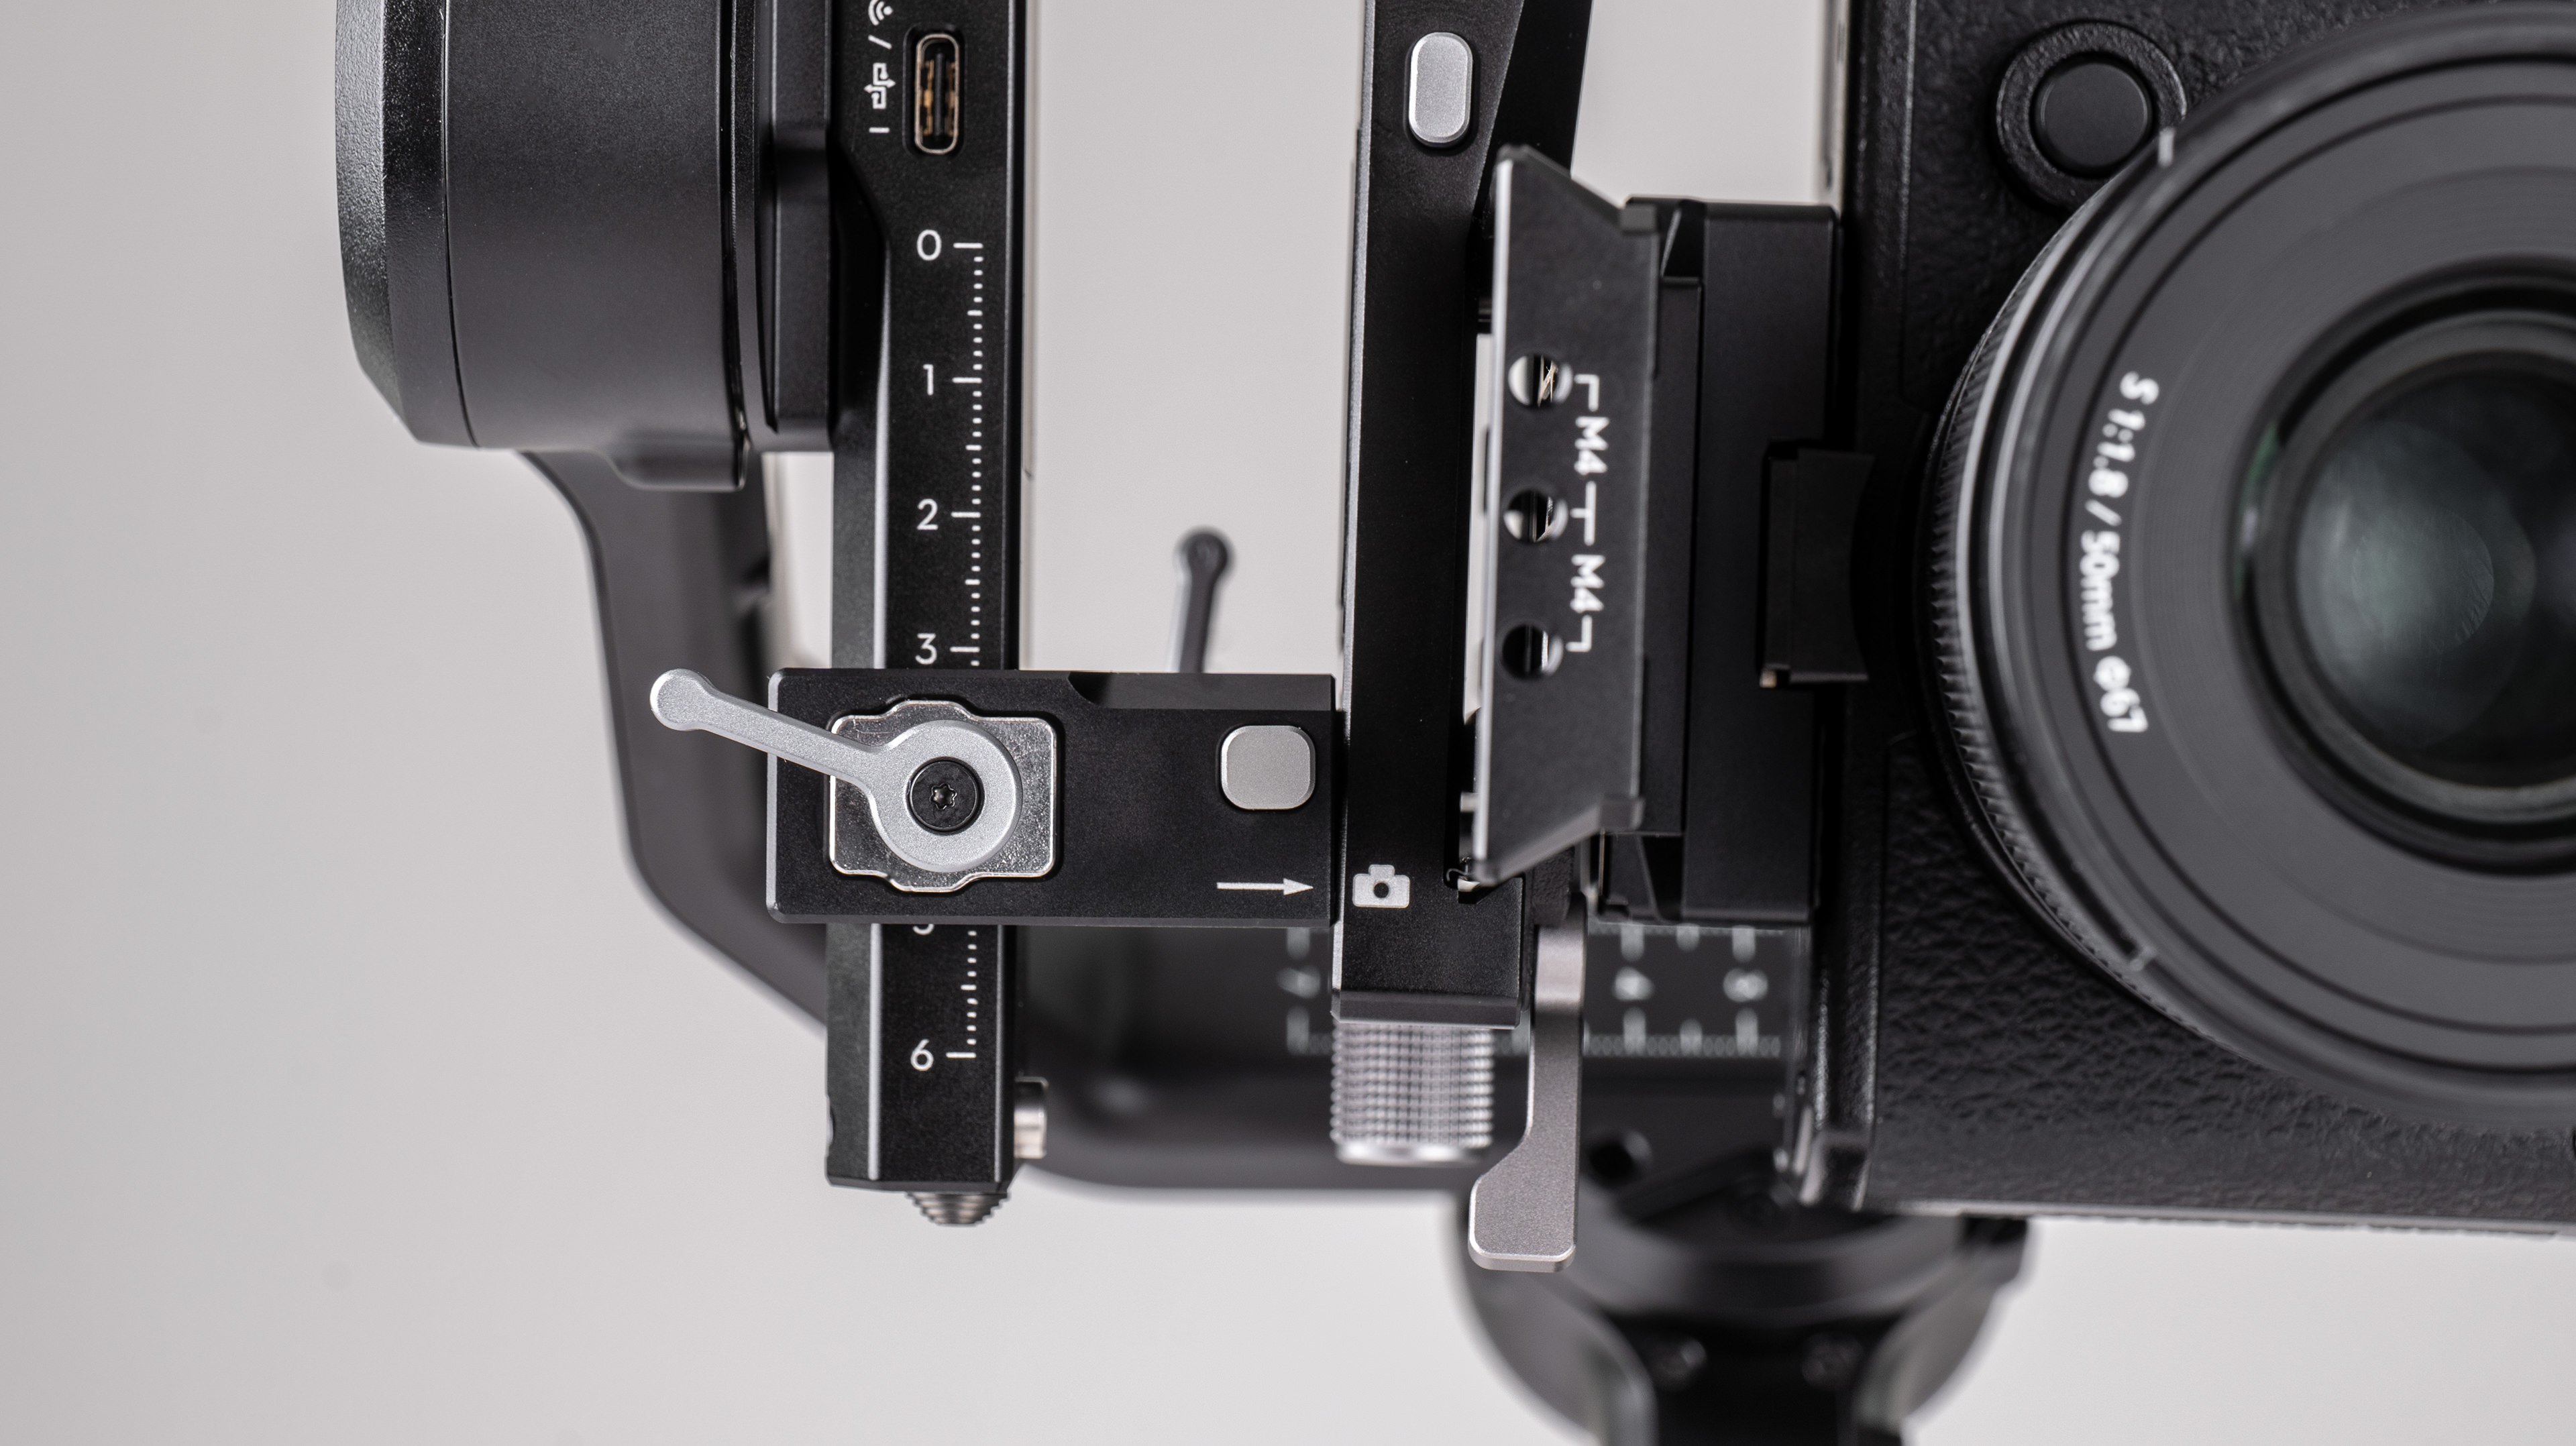
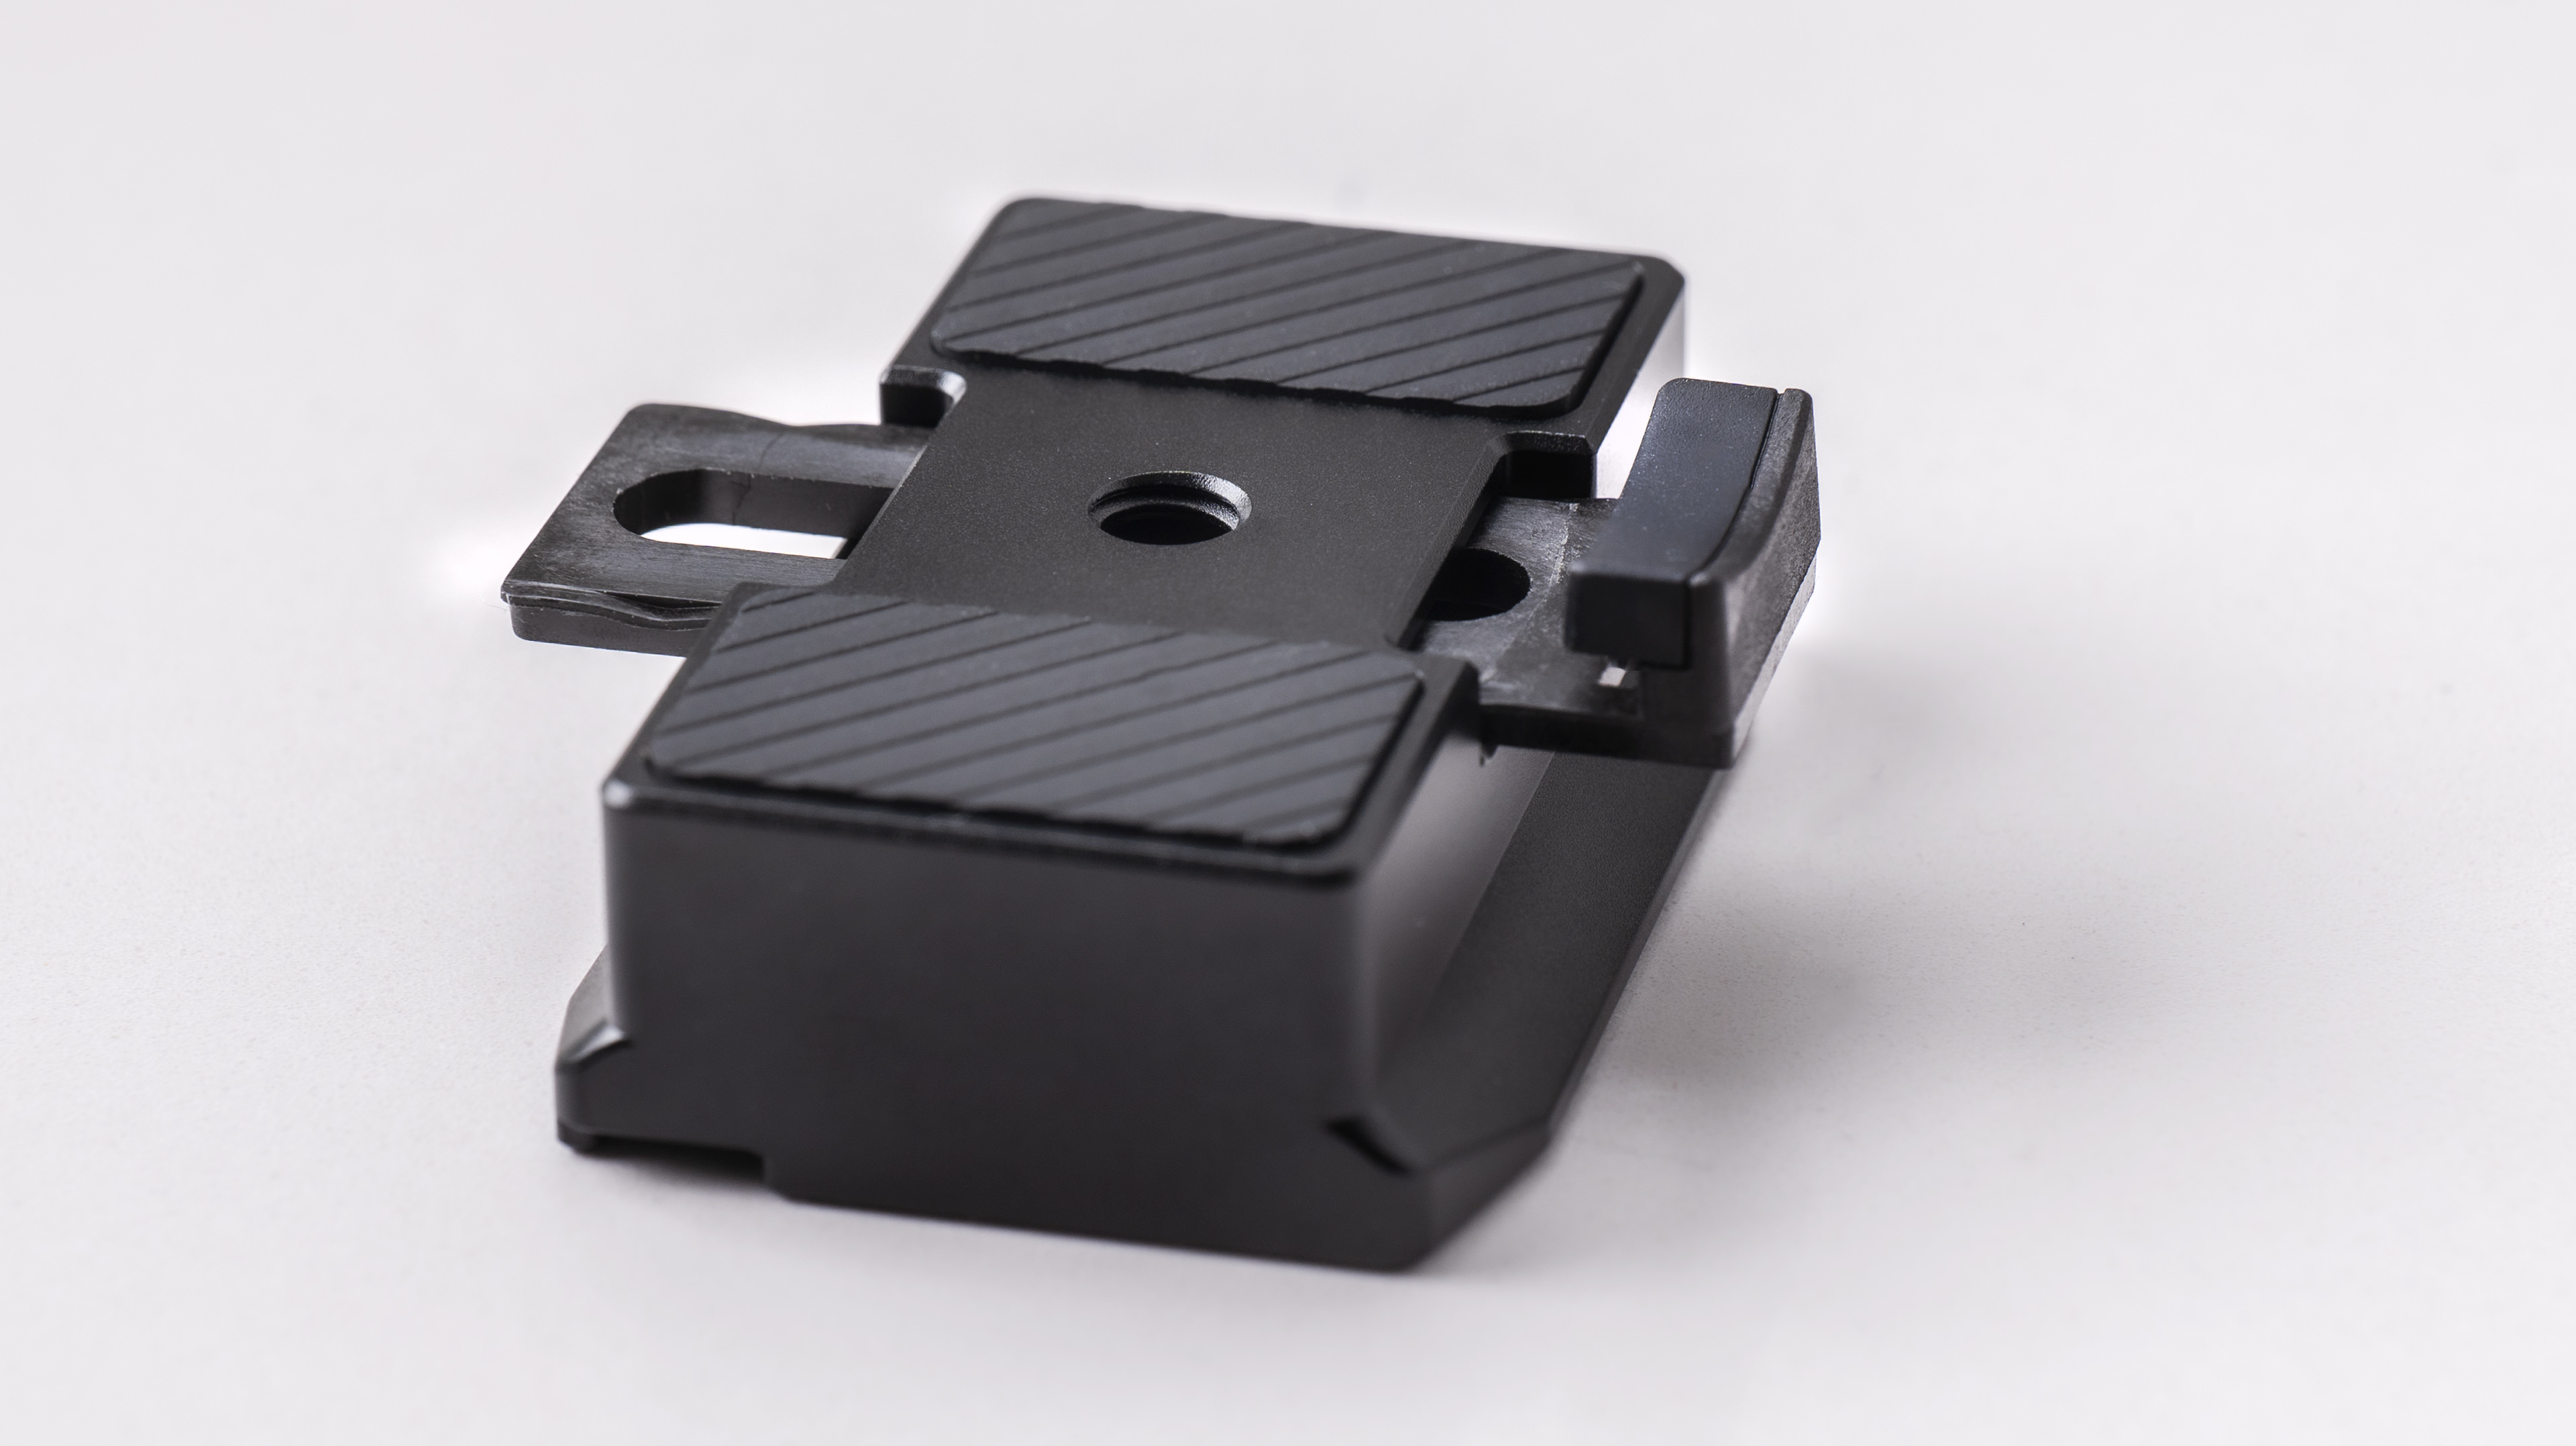
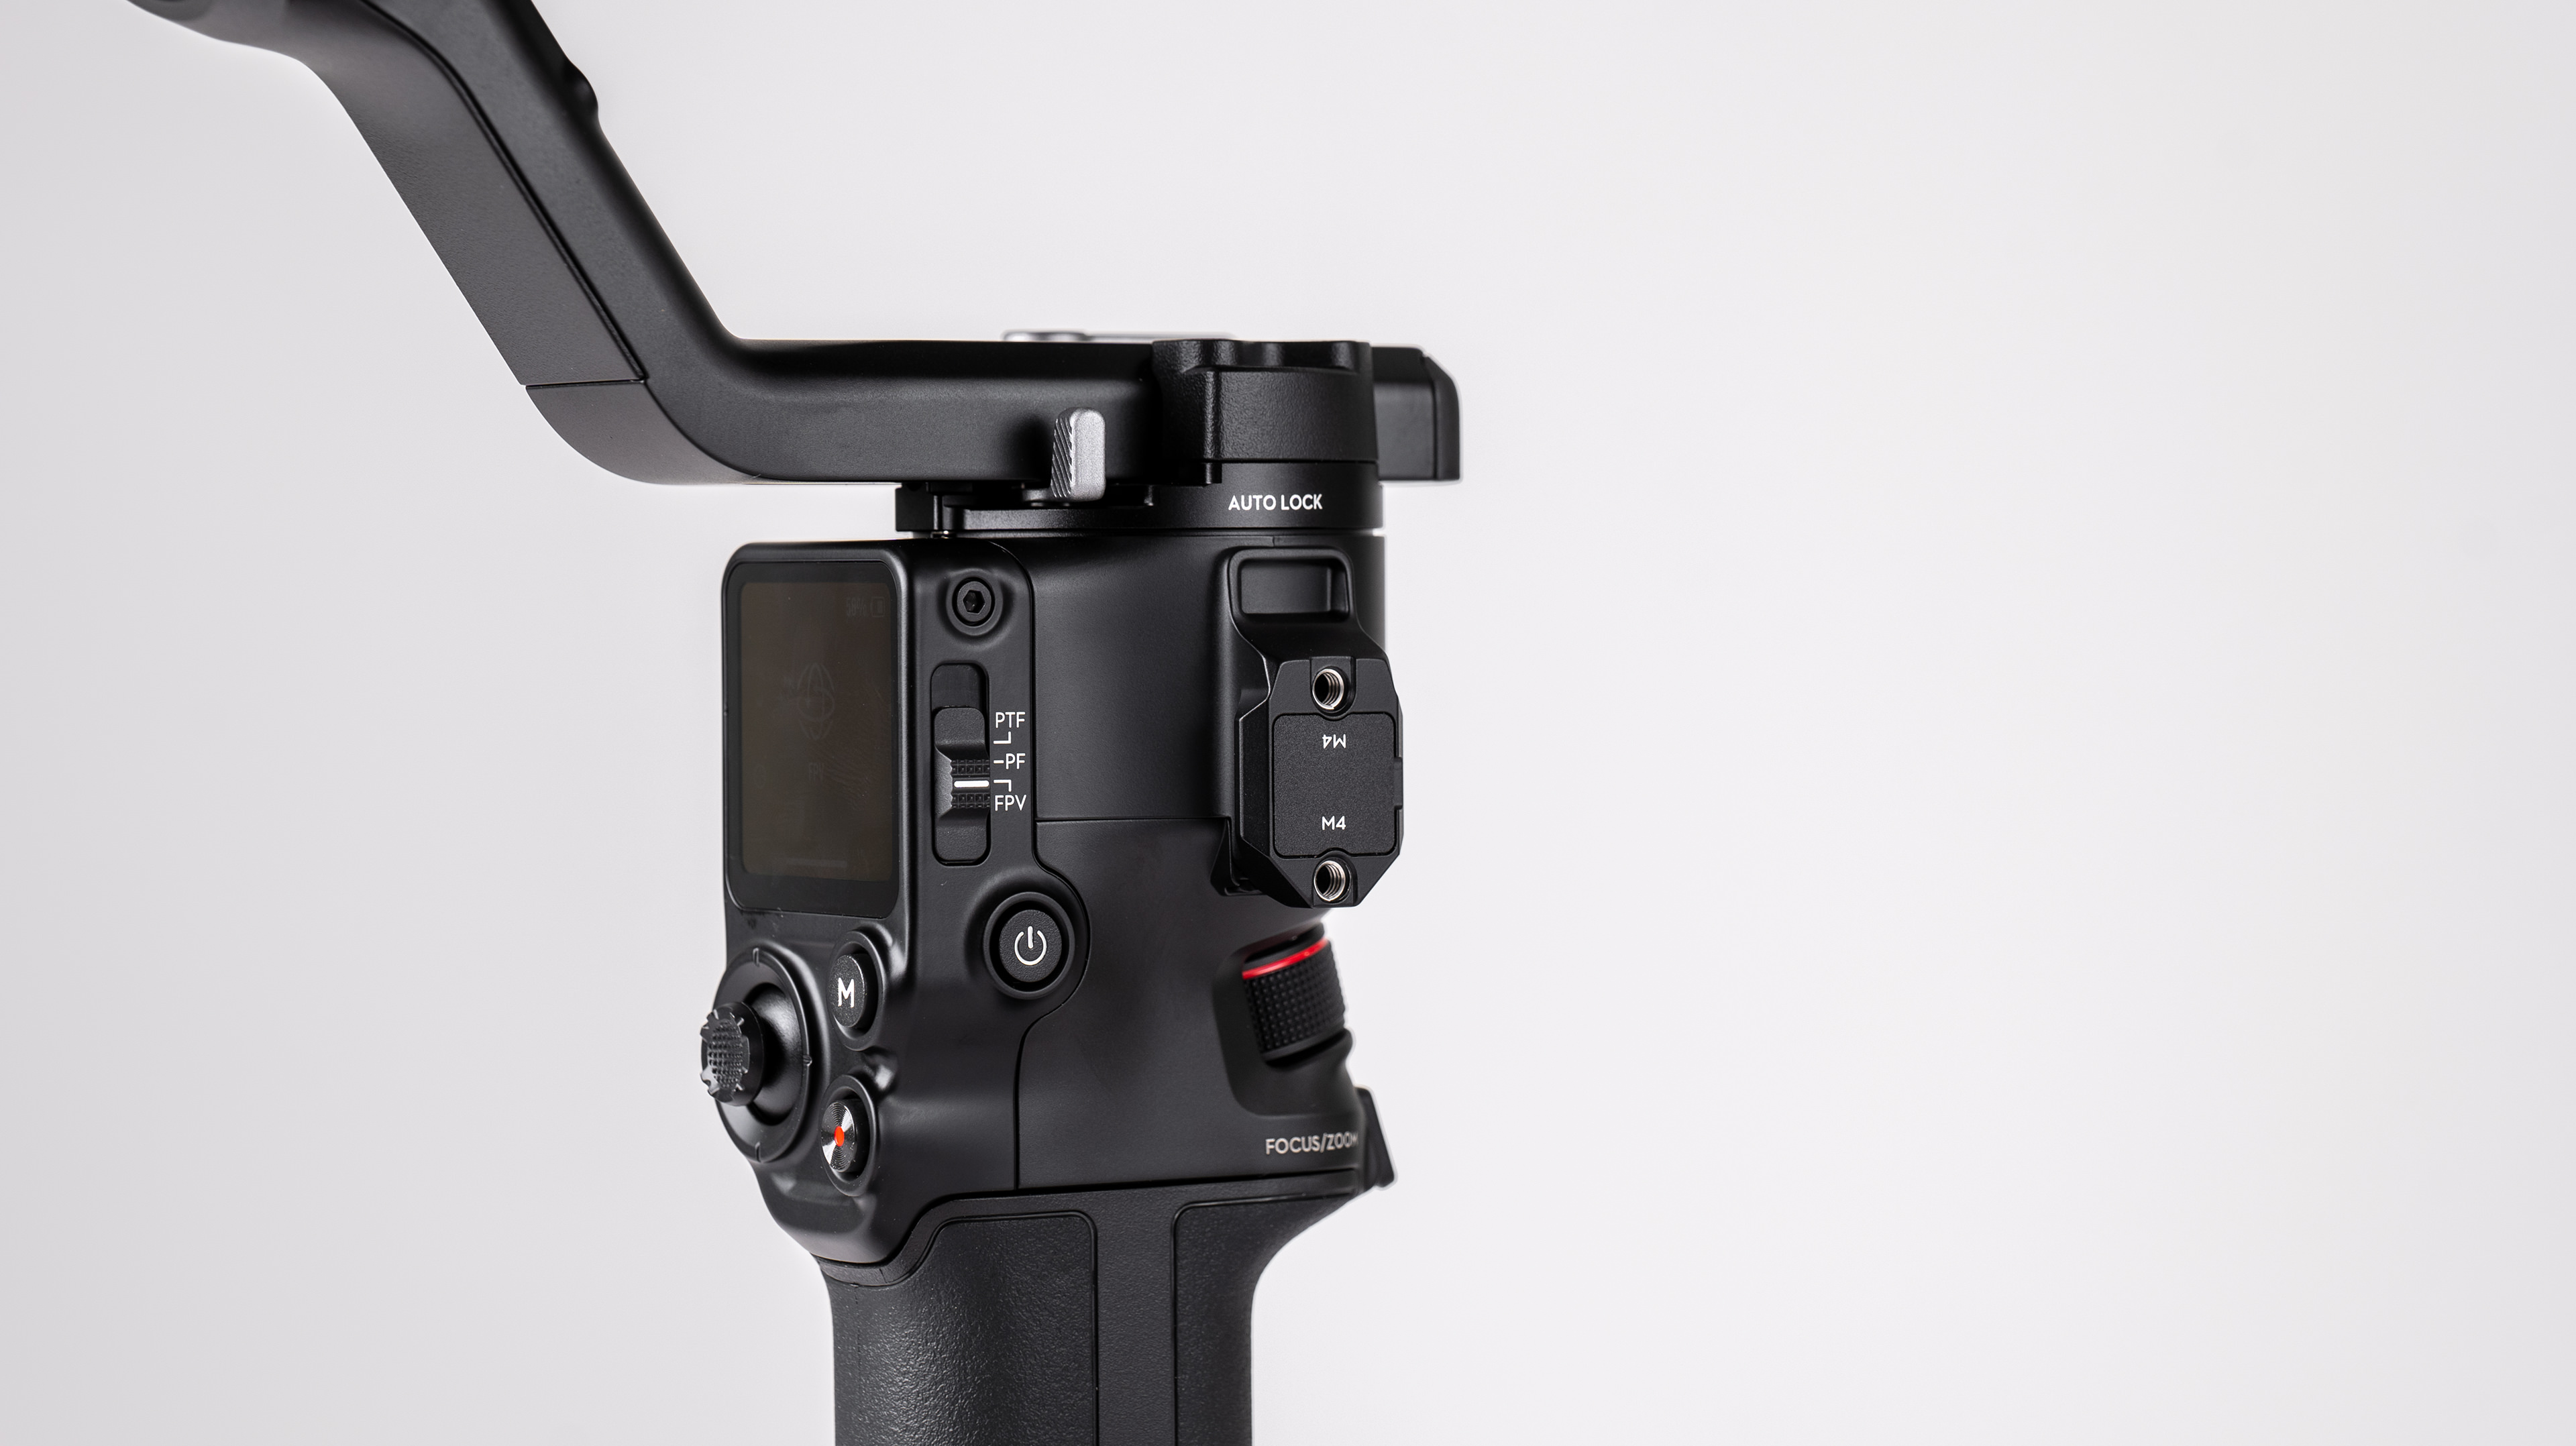
The other big difference in this model compared to the previous one is the way you can shoot vertical video. With the RS 3, you needed to set Portrait mode in the PTF settings, but with the RS 4 you just unclip the camera mounting plate and stick it on the other way. The camera mount has two connection points – a regular one on the end and one underneath – and a quick-release button. You simply unlock the plate, release it, and reattach it using the connection point underneath so that the camera is held in the vertical position. It’s very quick to do, the camera doesn’t need rebalancing, and you have the full range of follow modes available, as well as the movements you can create via the joystick. It feels like a much more satisfactory solution.
Another important upgrade is the introduction of a 4th-generation stabilization algorithm that not only improves stabilization in horizontal orientation when things are bumpy, such as when you’re running, but which is also better optimized for vertical shooting.
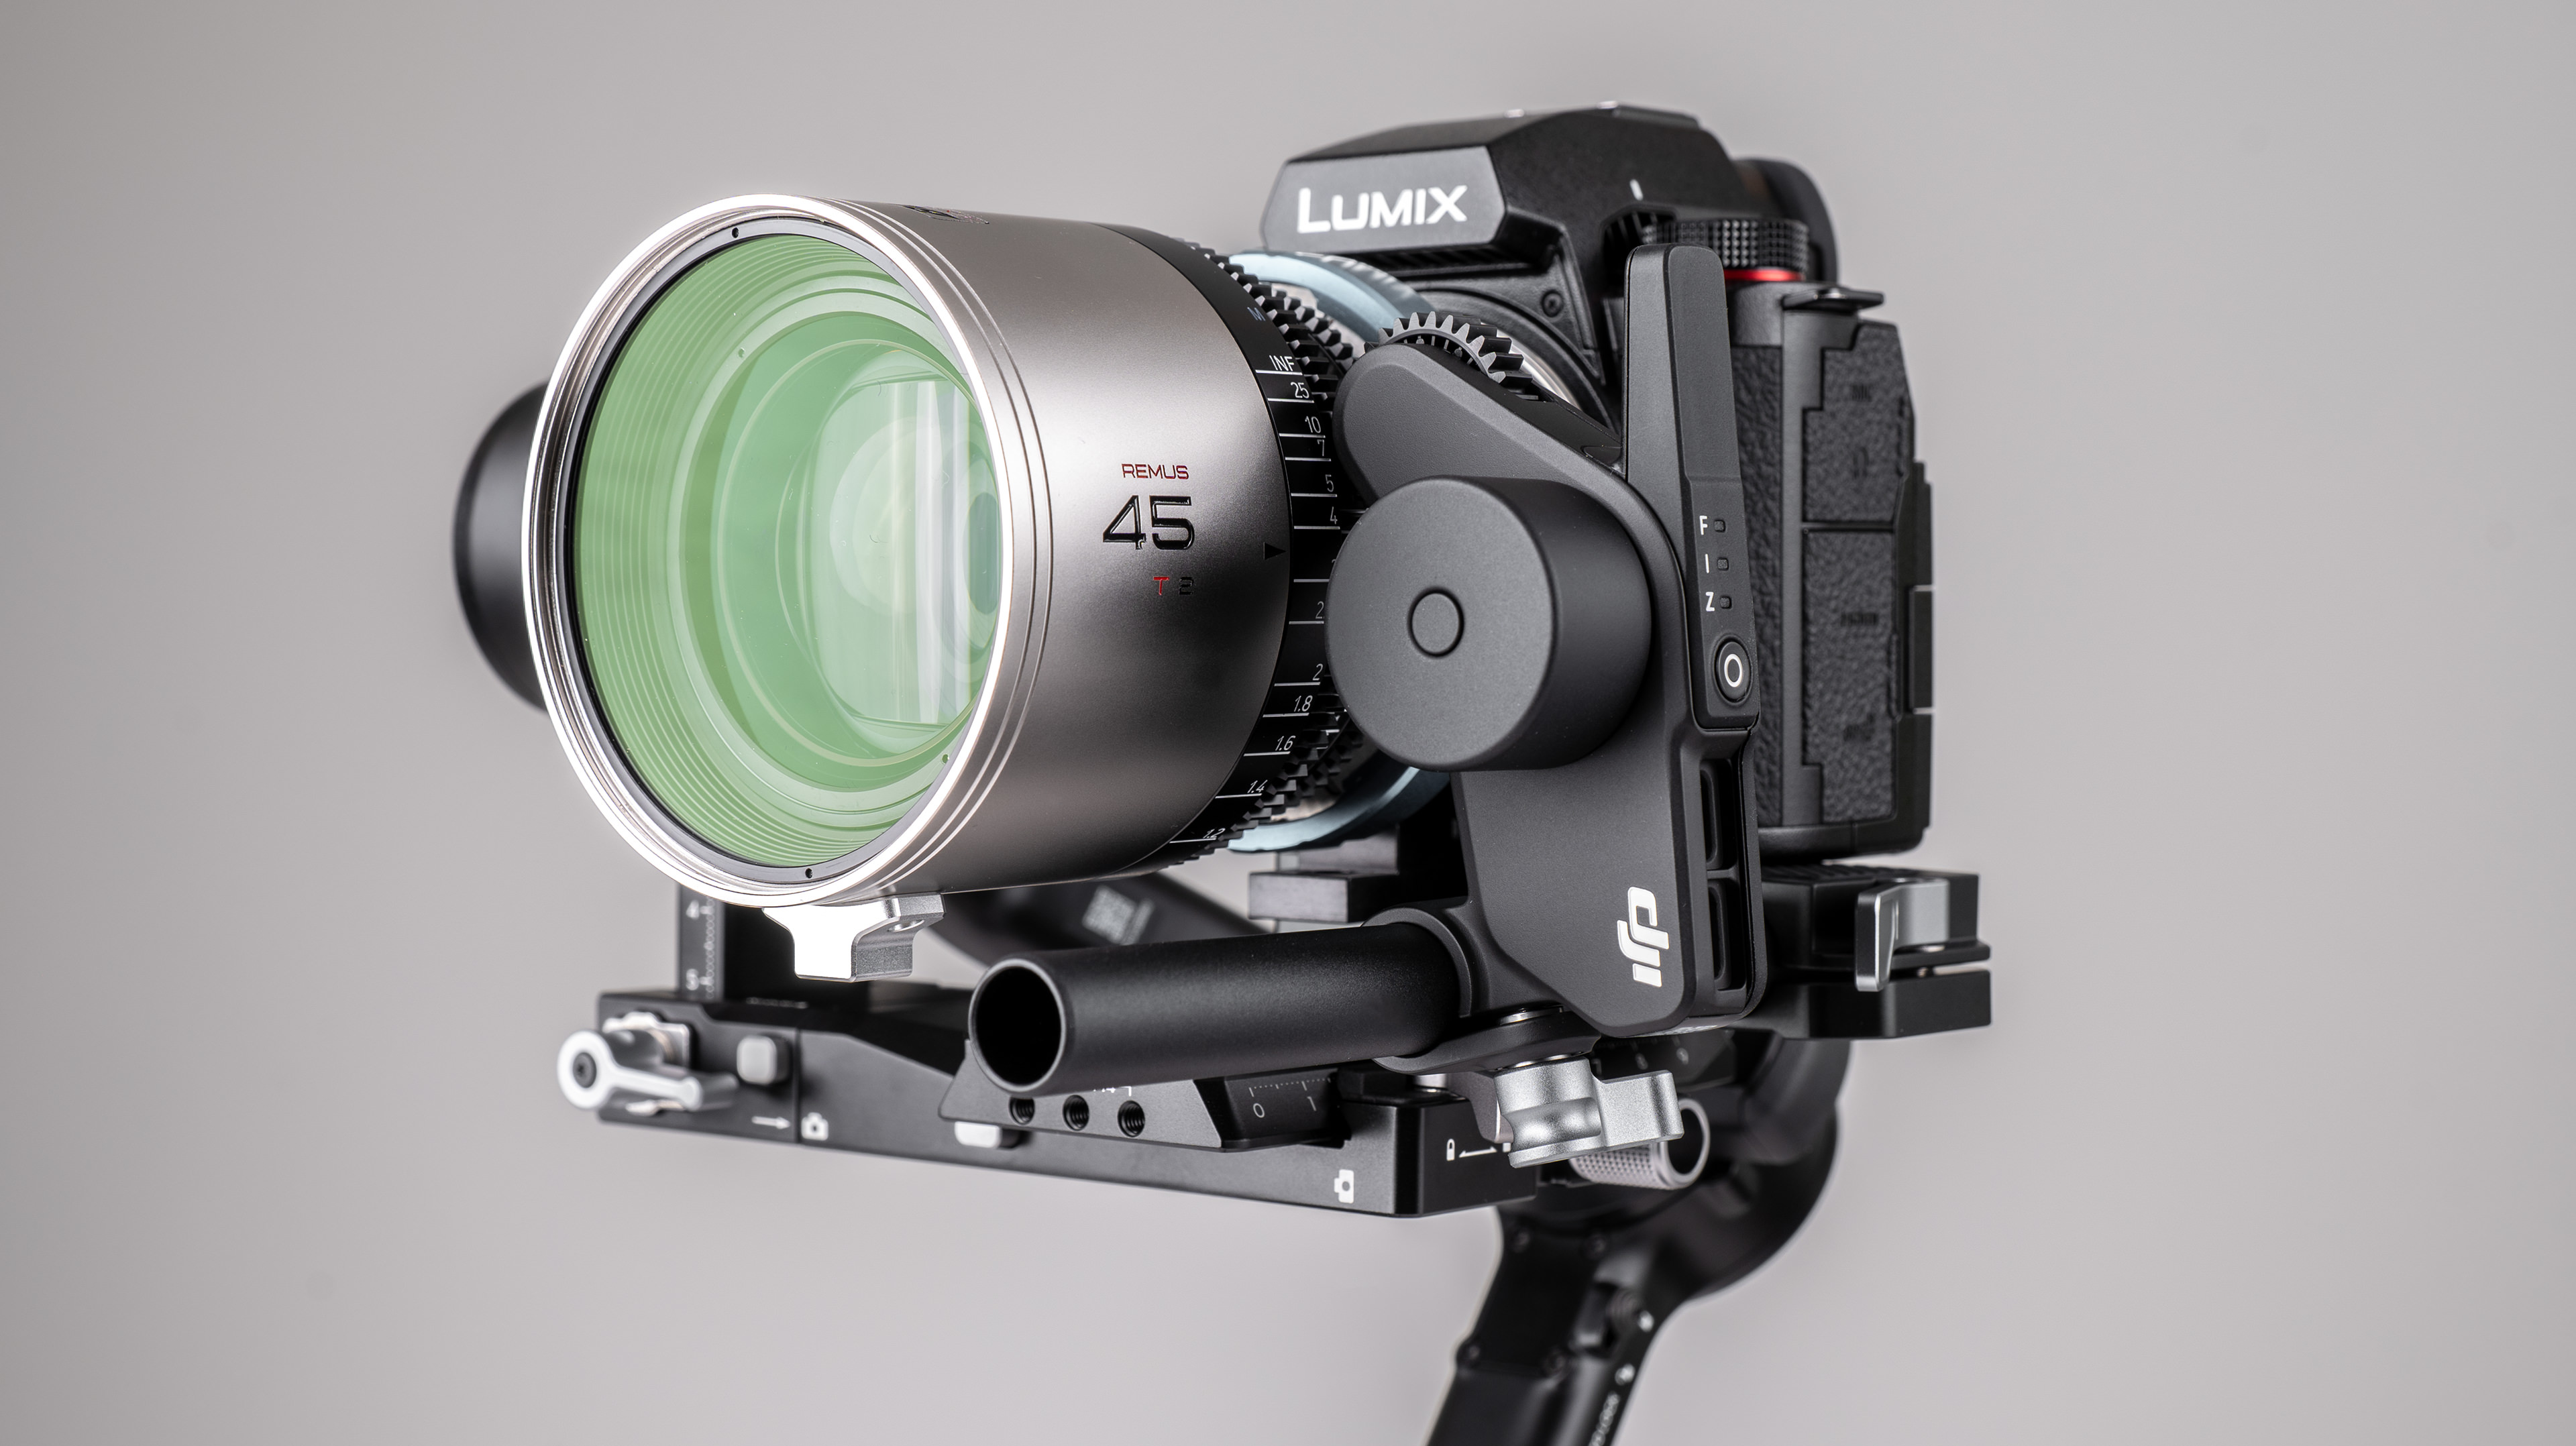
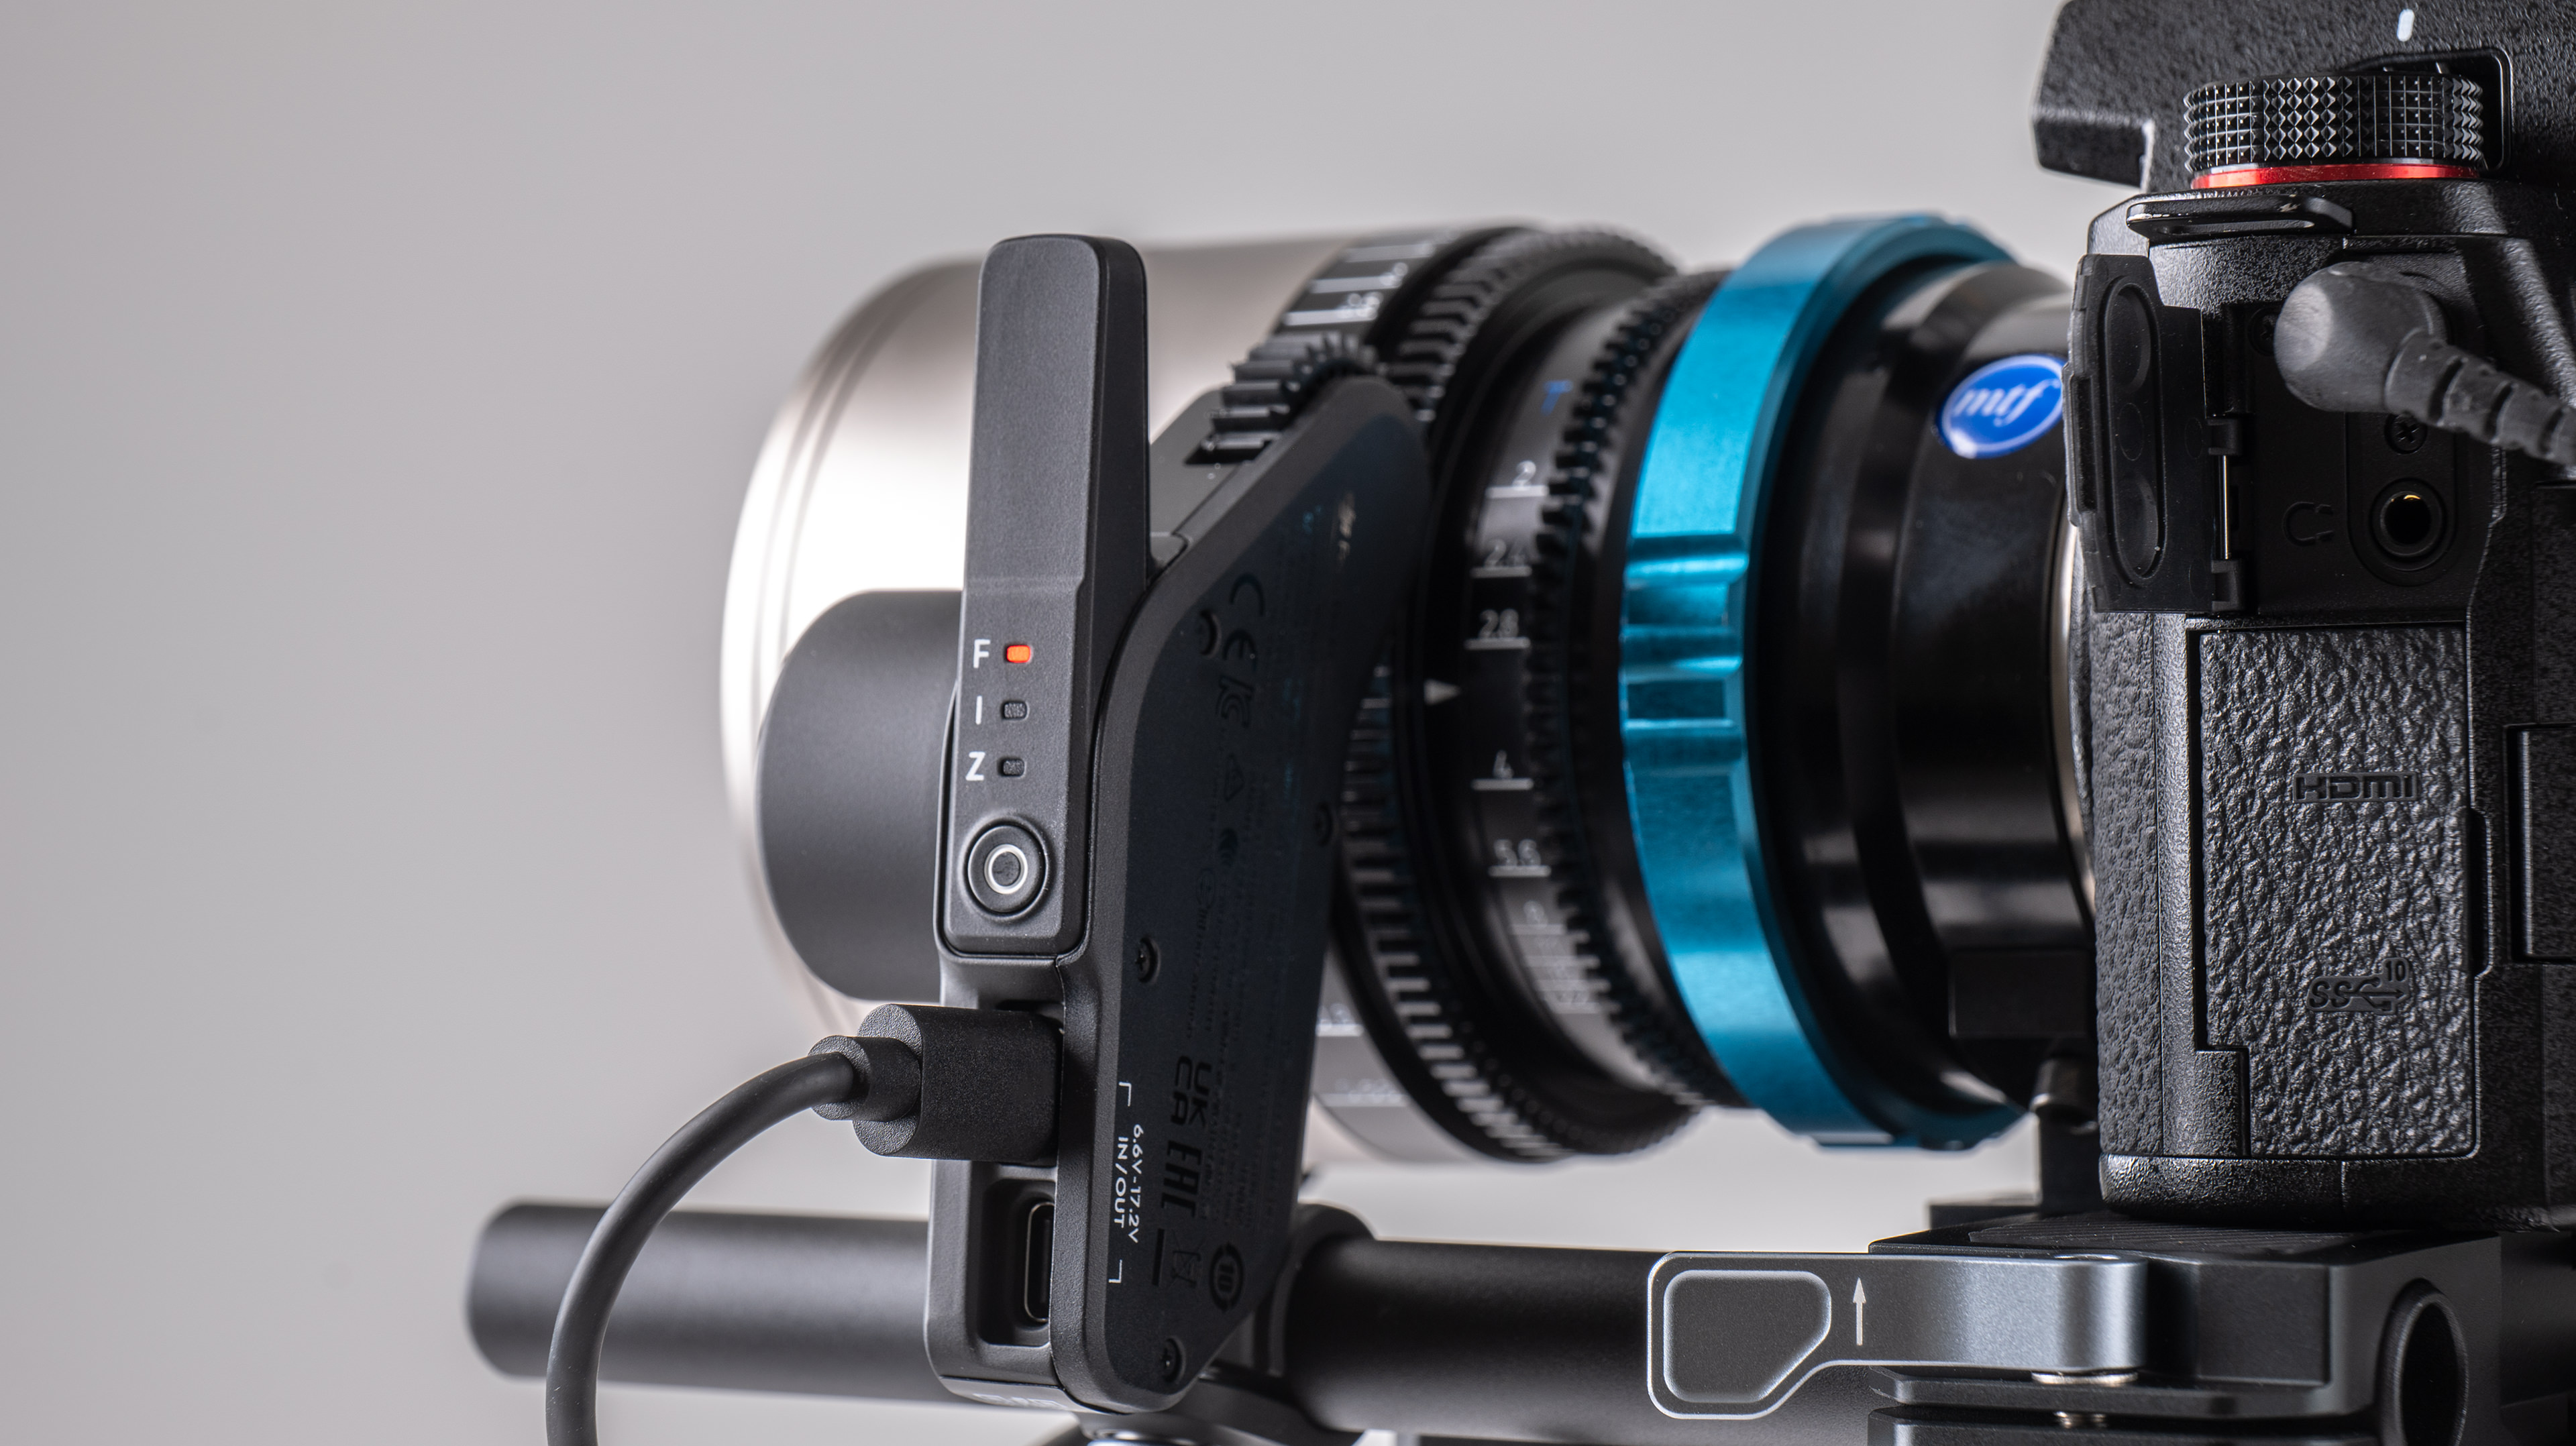
If you go for the RS 4 combo kit you’ll get the lens control motor in the box. The Focus Pro Motor can be used to turn zoom rings as well as focus rings on your lens, and can be controlled either via the joystick for zooming or the front dial for focusing. This new version of the motor is 30% faster than the previous model, but still offers users the chance to adjust its speed, torque and direction via the menu.
As before, the gimbal’s control buttons and dials can be used to control certain elements of compatible cameras, so you can stop/start recording, take a photo, and adjust some exposure settings. Depending on the model of camera, these things can be achieved wirelessly via Bluetooth or via a USB connection to the body of the gimbal.
The DJI Ronin RS 4 is not entirely without its complexities, but so long as you dedicate the time and effort to familiarize yourself with its workings it will reward you will good faithful service. In the past I’ve often felt I was working harder than the gimbal I was using, but in the case of the Ronin RS 4 that balance is switched – the gimbal is definitely putting in a good shift and working hard to make the life of the operator a lot easier.
Of course footage is smooth when walking with the head in the standard position, but anyone can do that. What counts here is that you can throw the camera around, take it high and drop it low, and the motors can cope – even when you’ve added a load of extras to the lens or the hotshoe.
Fast walking and running scenes are also very well compensated for, but it is the Ronin’s ability to make all the same right moves in vertical mode, with a 10-second adjustment, that marks it out for me.
The DJI RS 4 is available now standalone for a pricy $549 / £469 and includes the gimbal, battery grip, USB-C cable, lens-fastening support, extended grip (plastic), quick-release plate, multi-camera control cable and screw kit. The Combo kit costs $719 / £619 and adds Focus Pro Motor, Focus Pro Motor Rod Mount kit, Focus Gear Strip, additional Multi-camera control cable, briefcase handle and carrying case.
If you have a weightier camera and lens combo then you'll need the RS 4 Pro instead, which is available for $869 / £749 (standalone, with a metal extended grip rather than plastic) or $1,099 / £949 in the Combo kit.
In addition, the DJI Focus Pro system can add superb manual focus assist tools including a LiDAR powered autofocus system for manual focus lenses. The All-In-One Combo costs $1,849 / £1,449 although items such as the Focus Pro LiDAR / Focus Pro Motor can be purchased separately. More details on the DJI website.
I used this gimbal with the Panasonic Lumix S5 ll and the Lumix GH6, and fitted both cameras with a variety of big and small lenses, including some heavier manual-focus anamorphic lenses, to see how it performed in a range of situations. And I found that it performed very well – it’s easy to adjust when you’re changing lenses and cameras, and when adding extras on top.
I’ve used a lot of gimbals, and find that I often want to revert to my shoulder-mount rig because it’s less hassle to operate, but this model has me convinced that the right gimbal can offer similar stability and ease of use.
I’ve been working as a photography journalist for 28 years. I experienced the advent of handheld stabilization devices as they were conceived, and I’ve followed them closely as they’ve evolved, and become smaller, stronger and very much better.
First reviewed April 2024
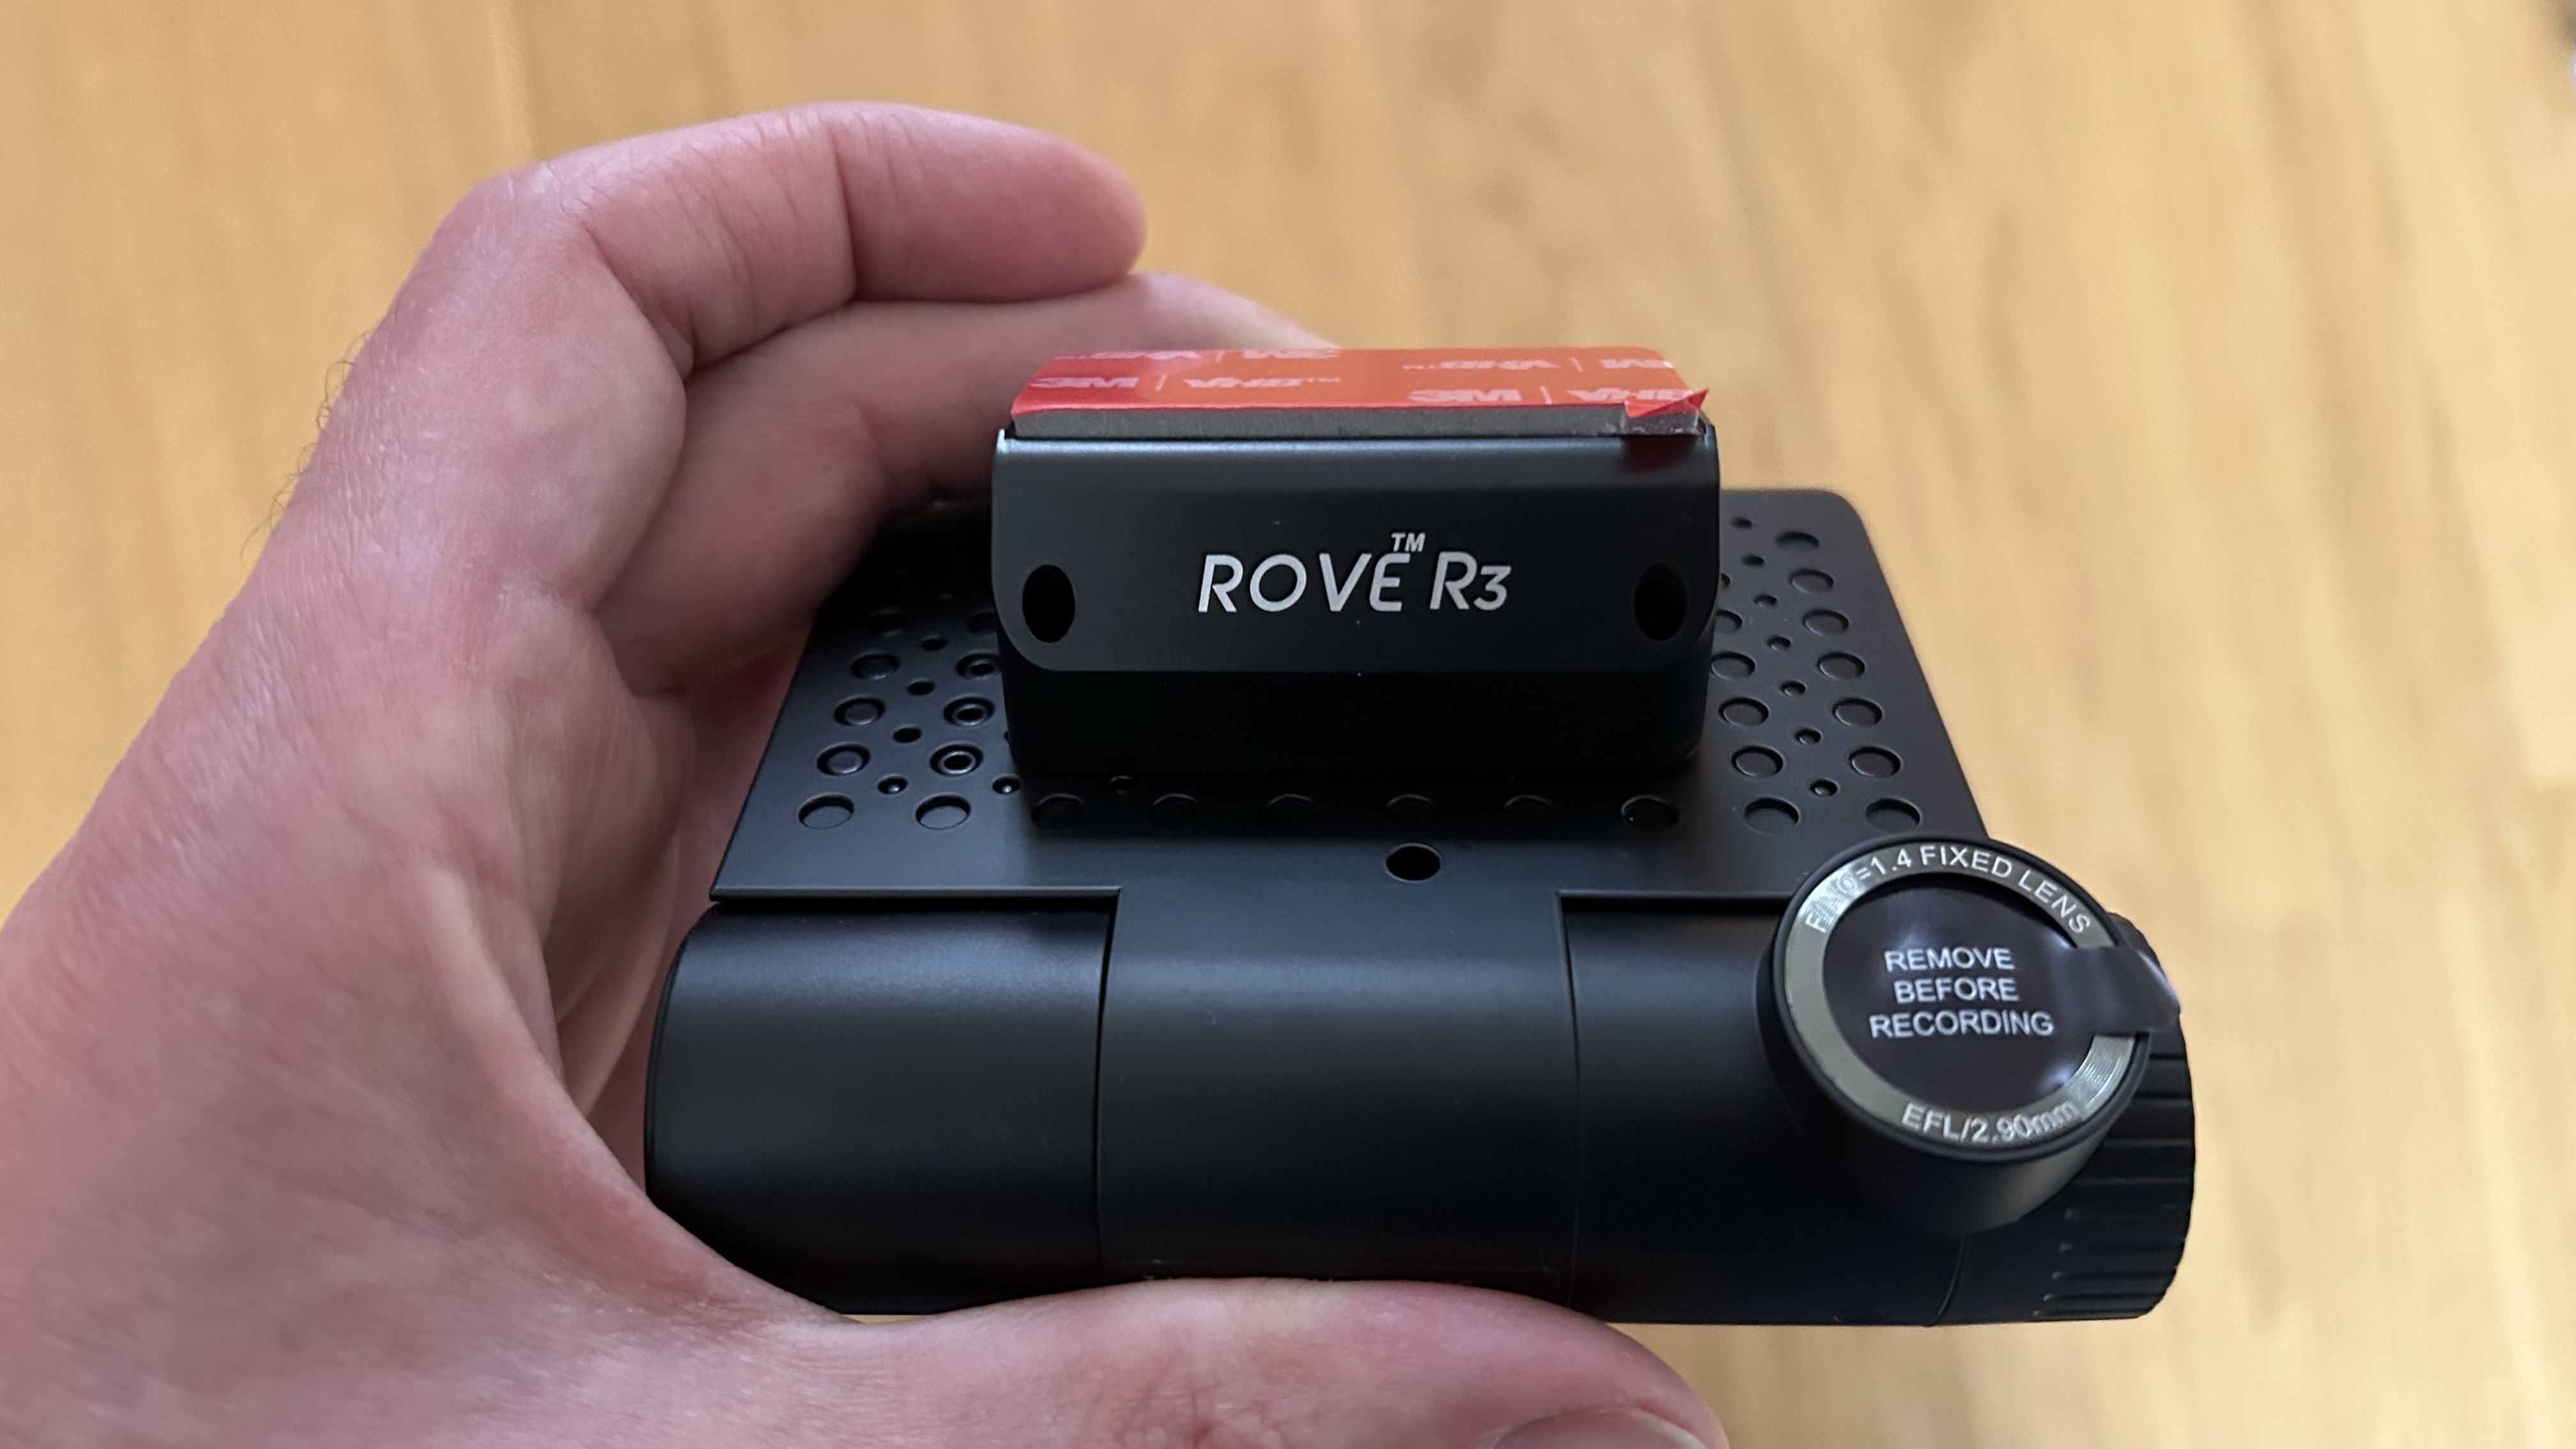
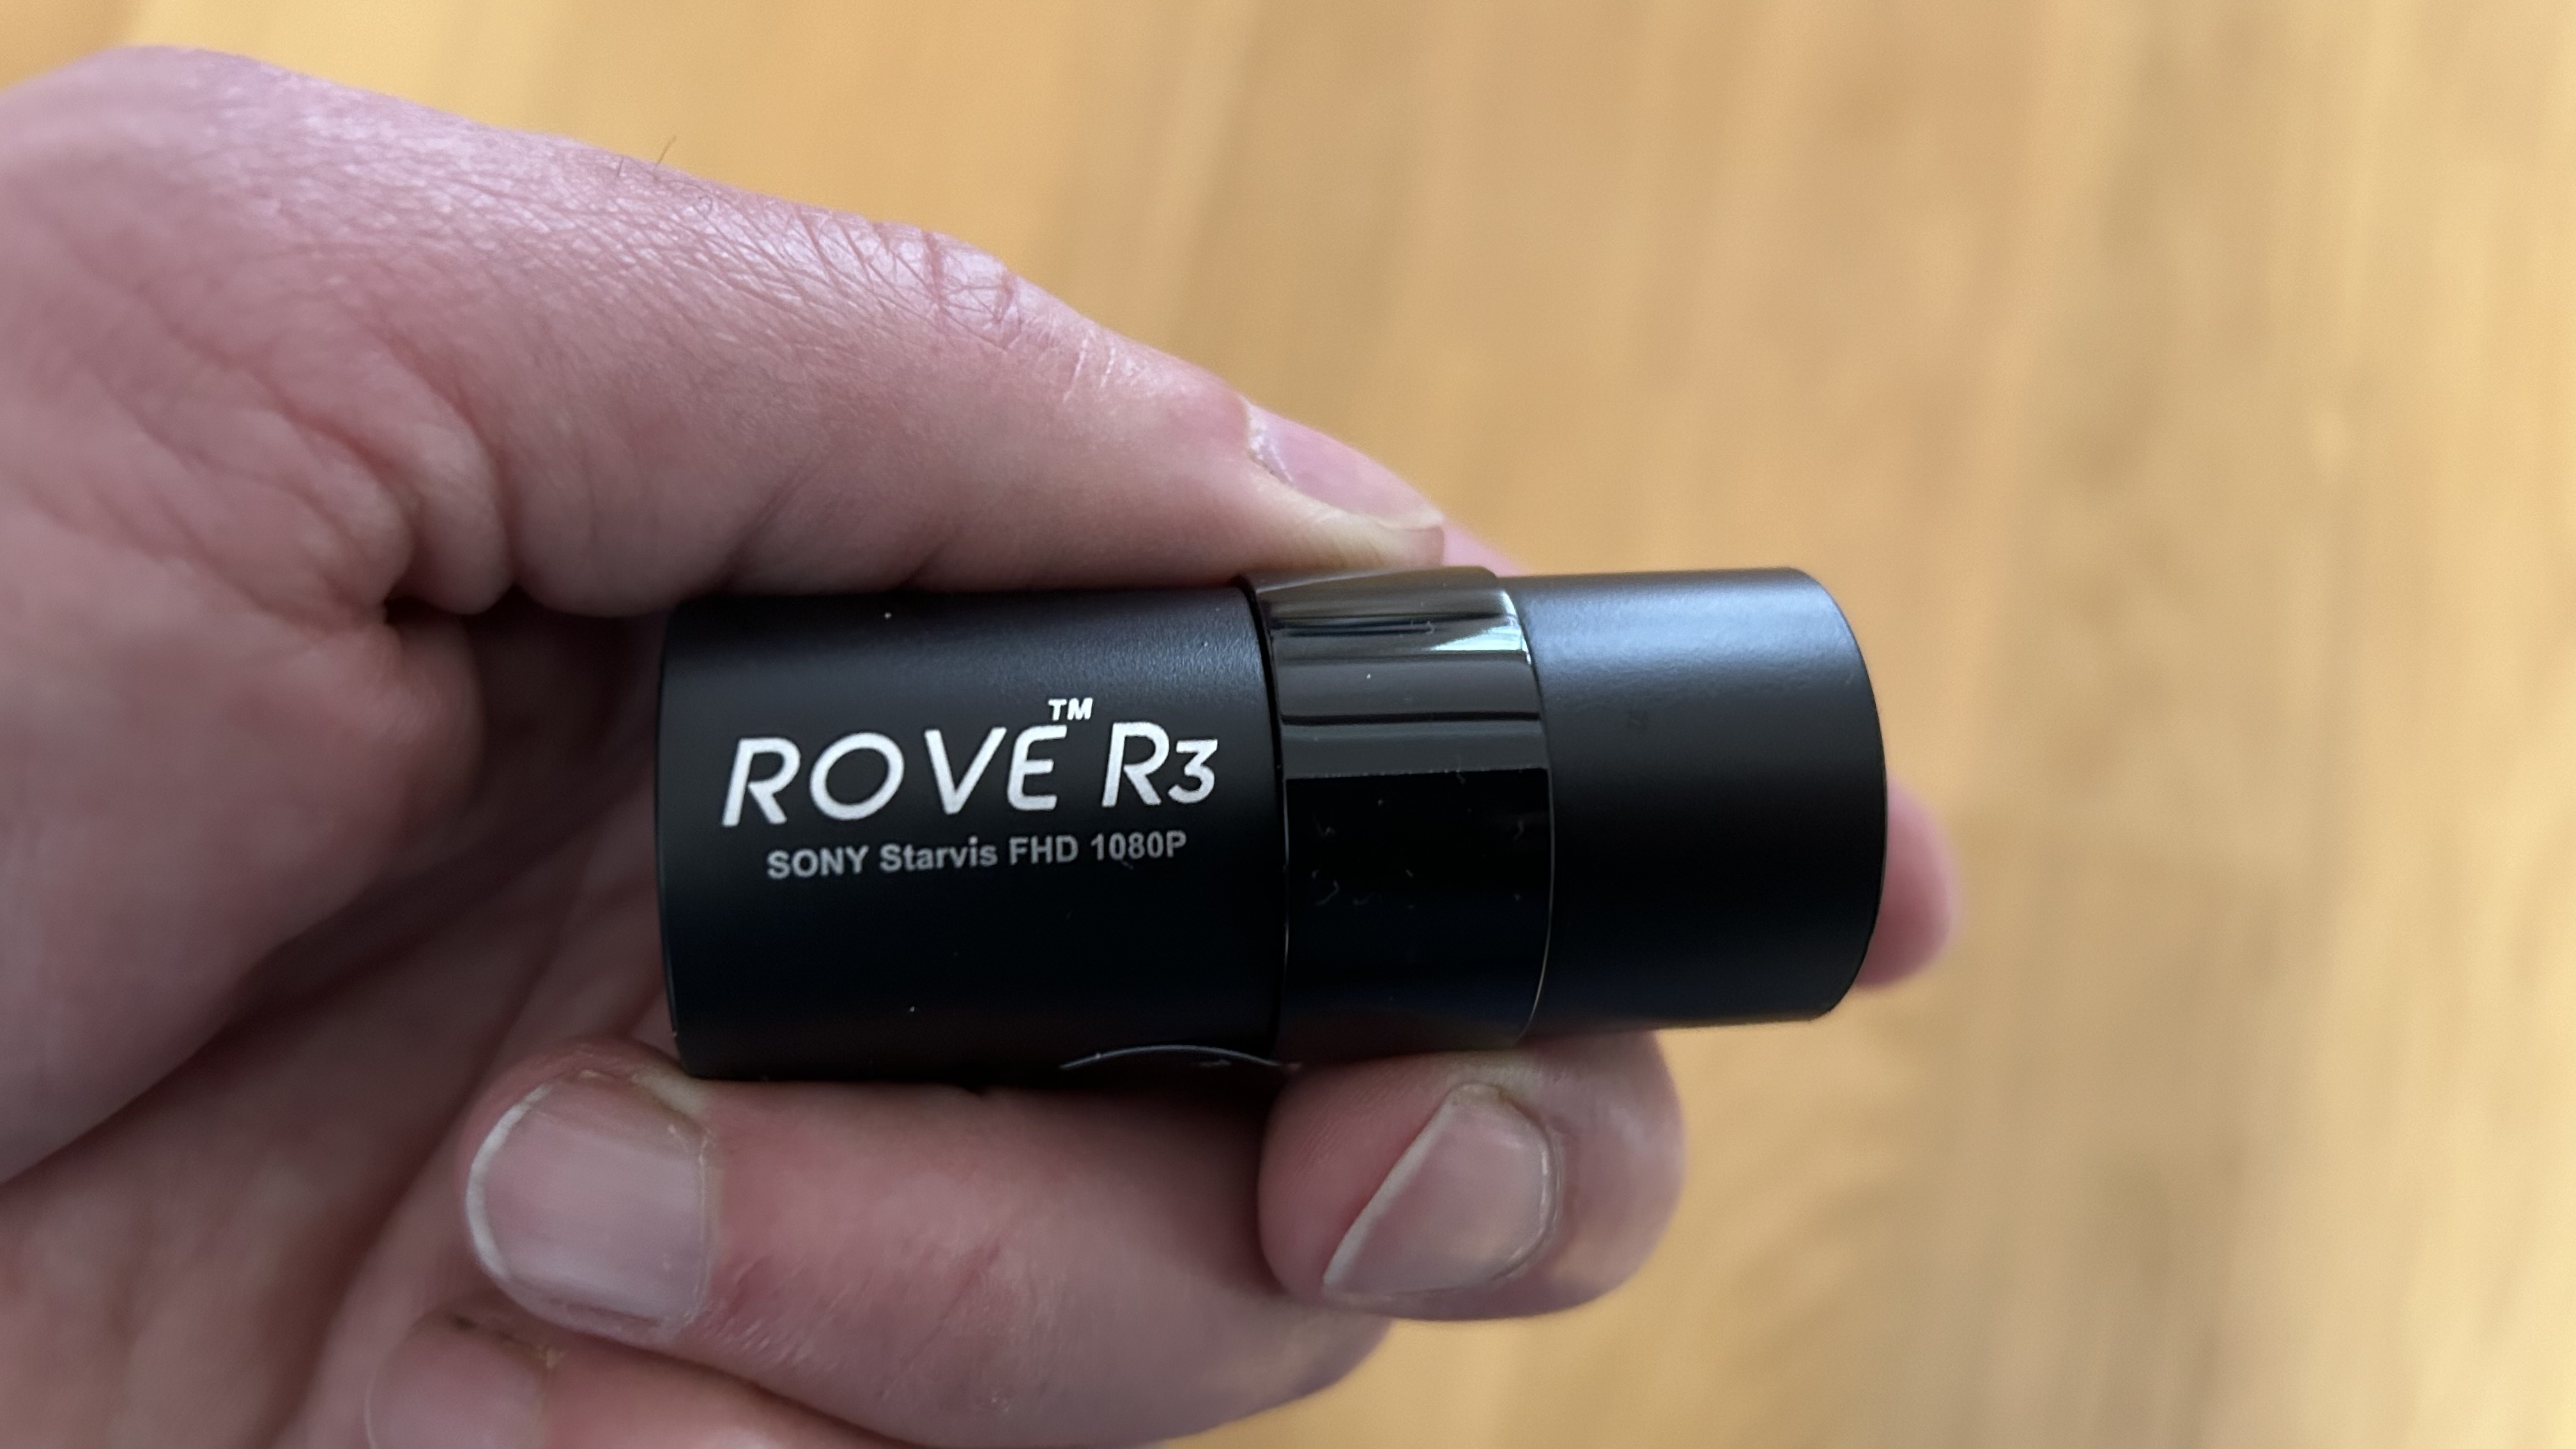
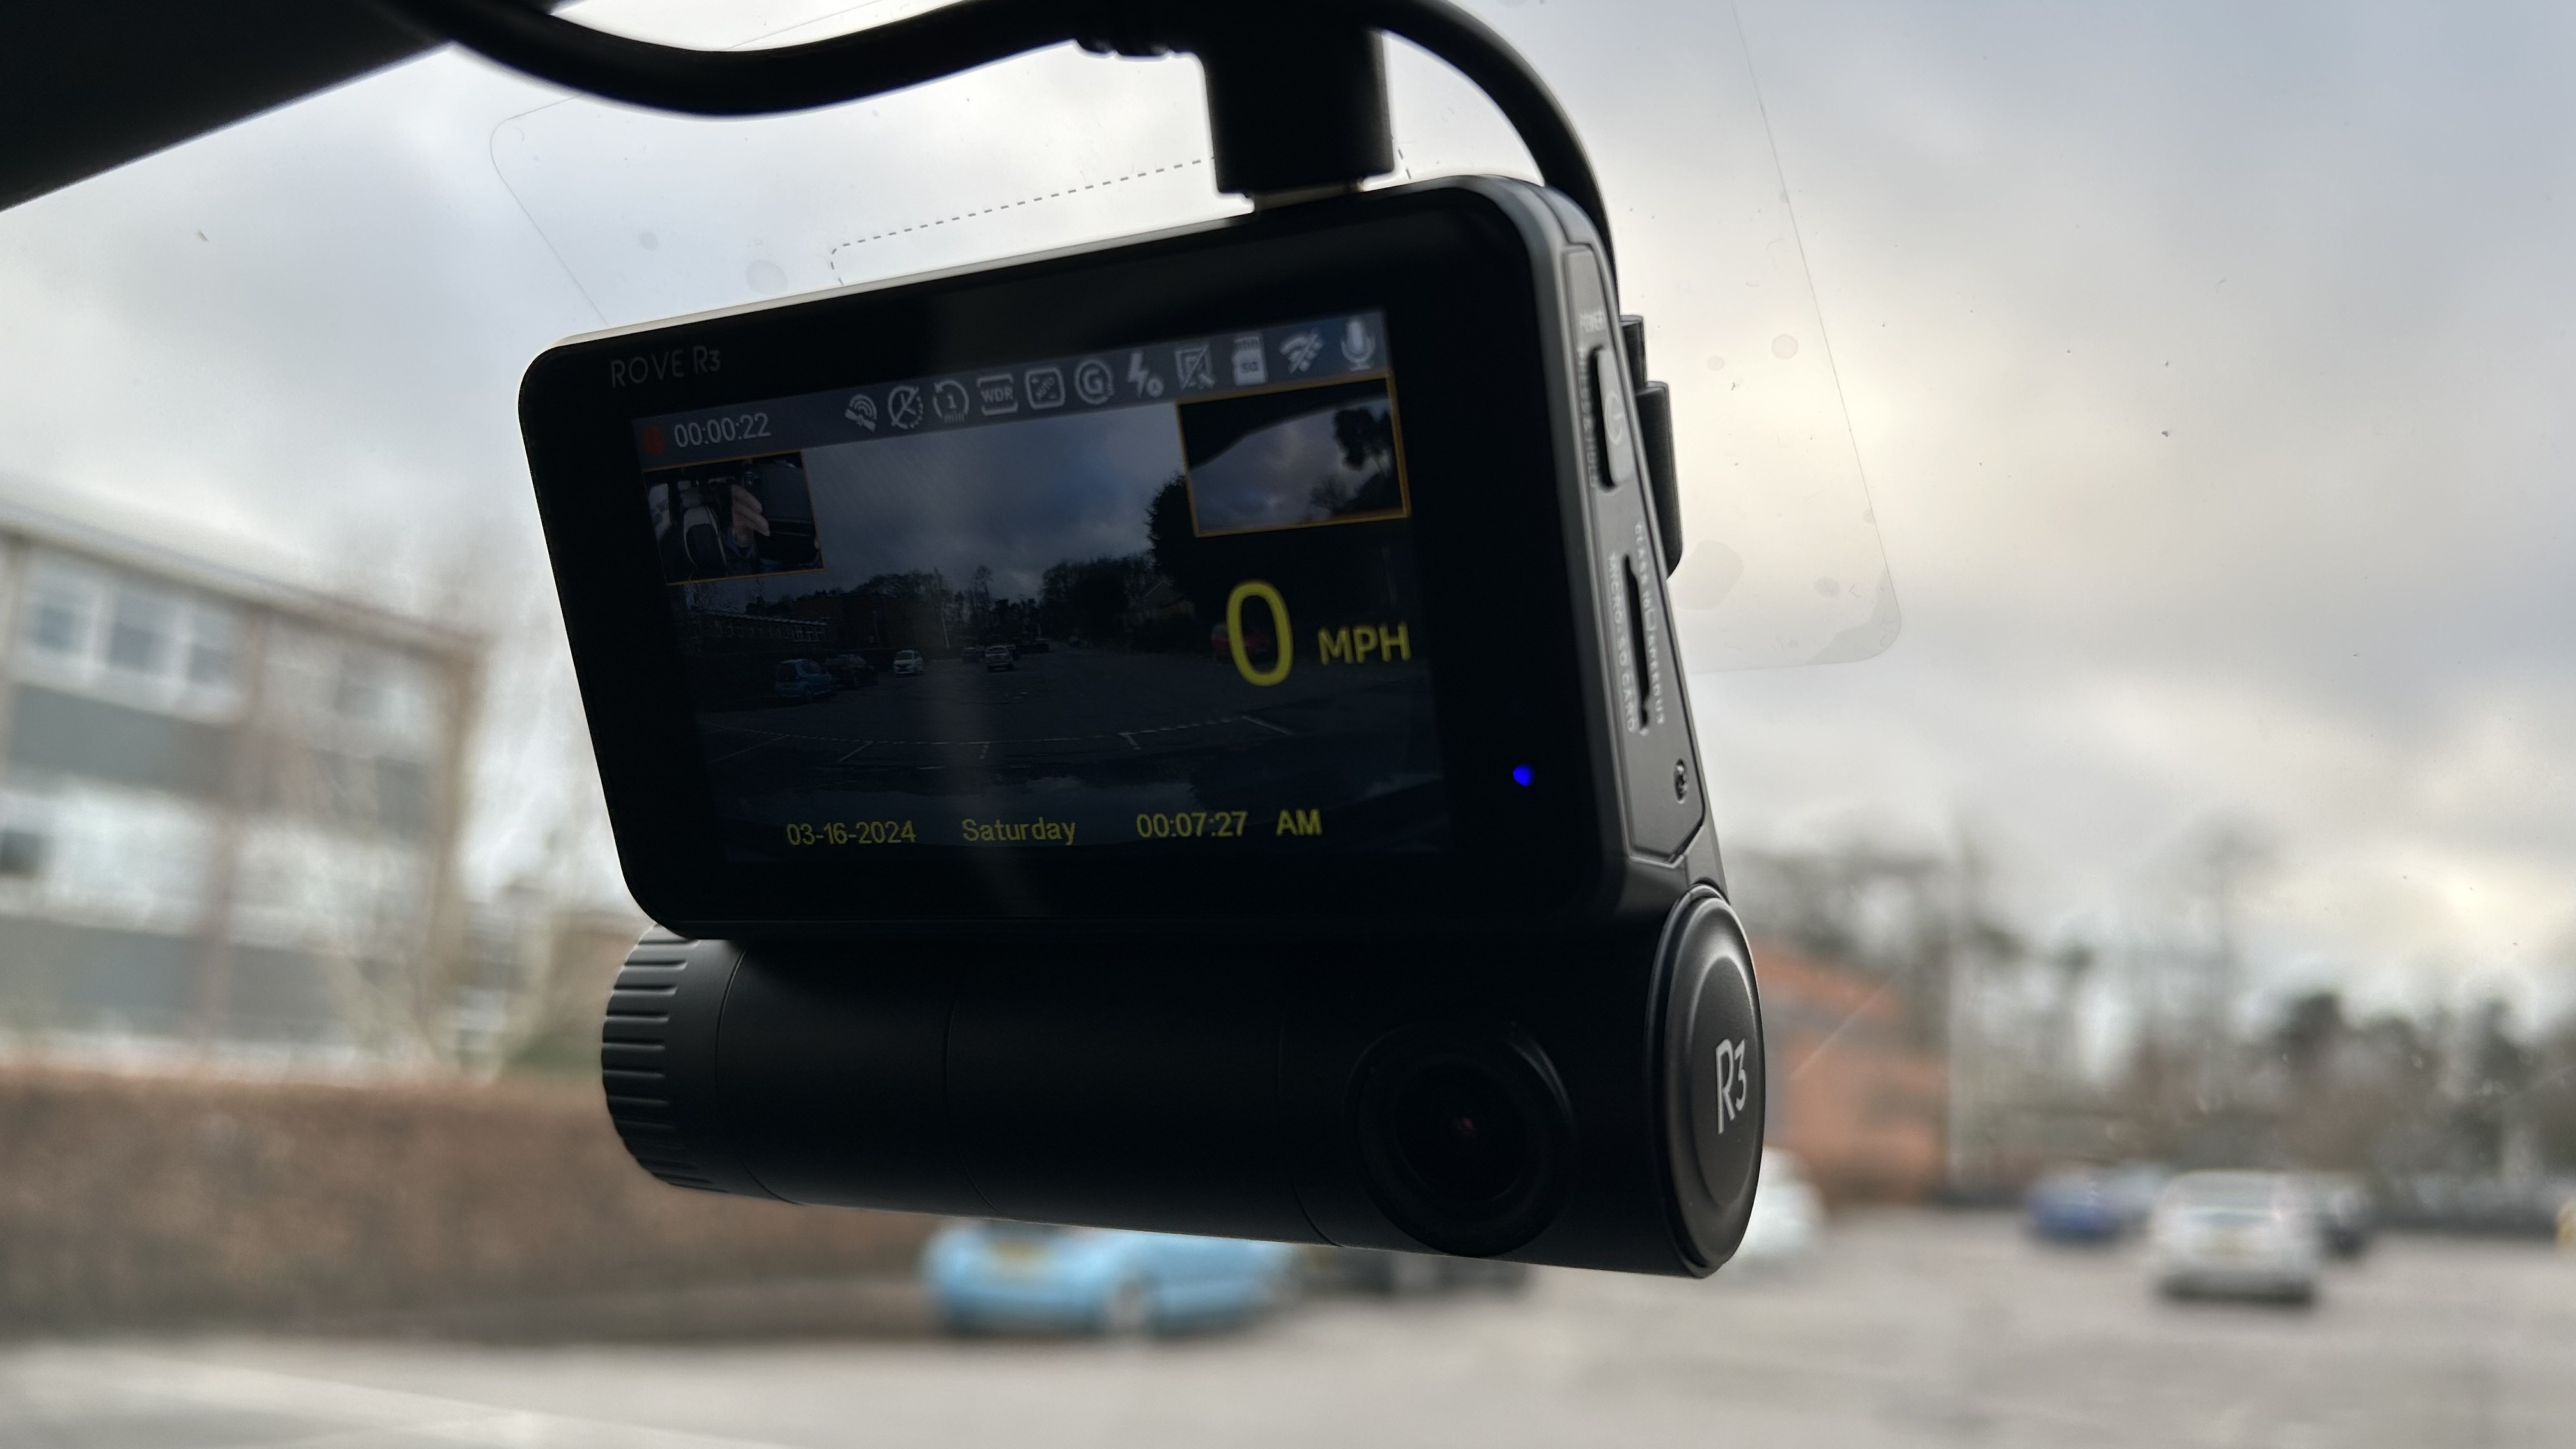
If you’re looking for a dash cam that can do a little bit of everything, the Rove R3 Dash Cam is well worth investigating. Even some of the best dash cams on the market don’t always come with all the features and functionality needed for comprehensive protection. The Rove R3 Dash Cam carries an impressive specification, with a 3-channel touchscreen dash cam being the core component.
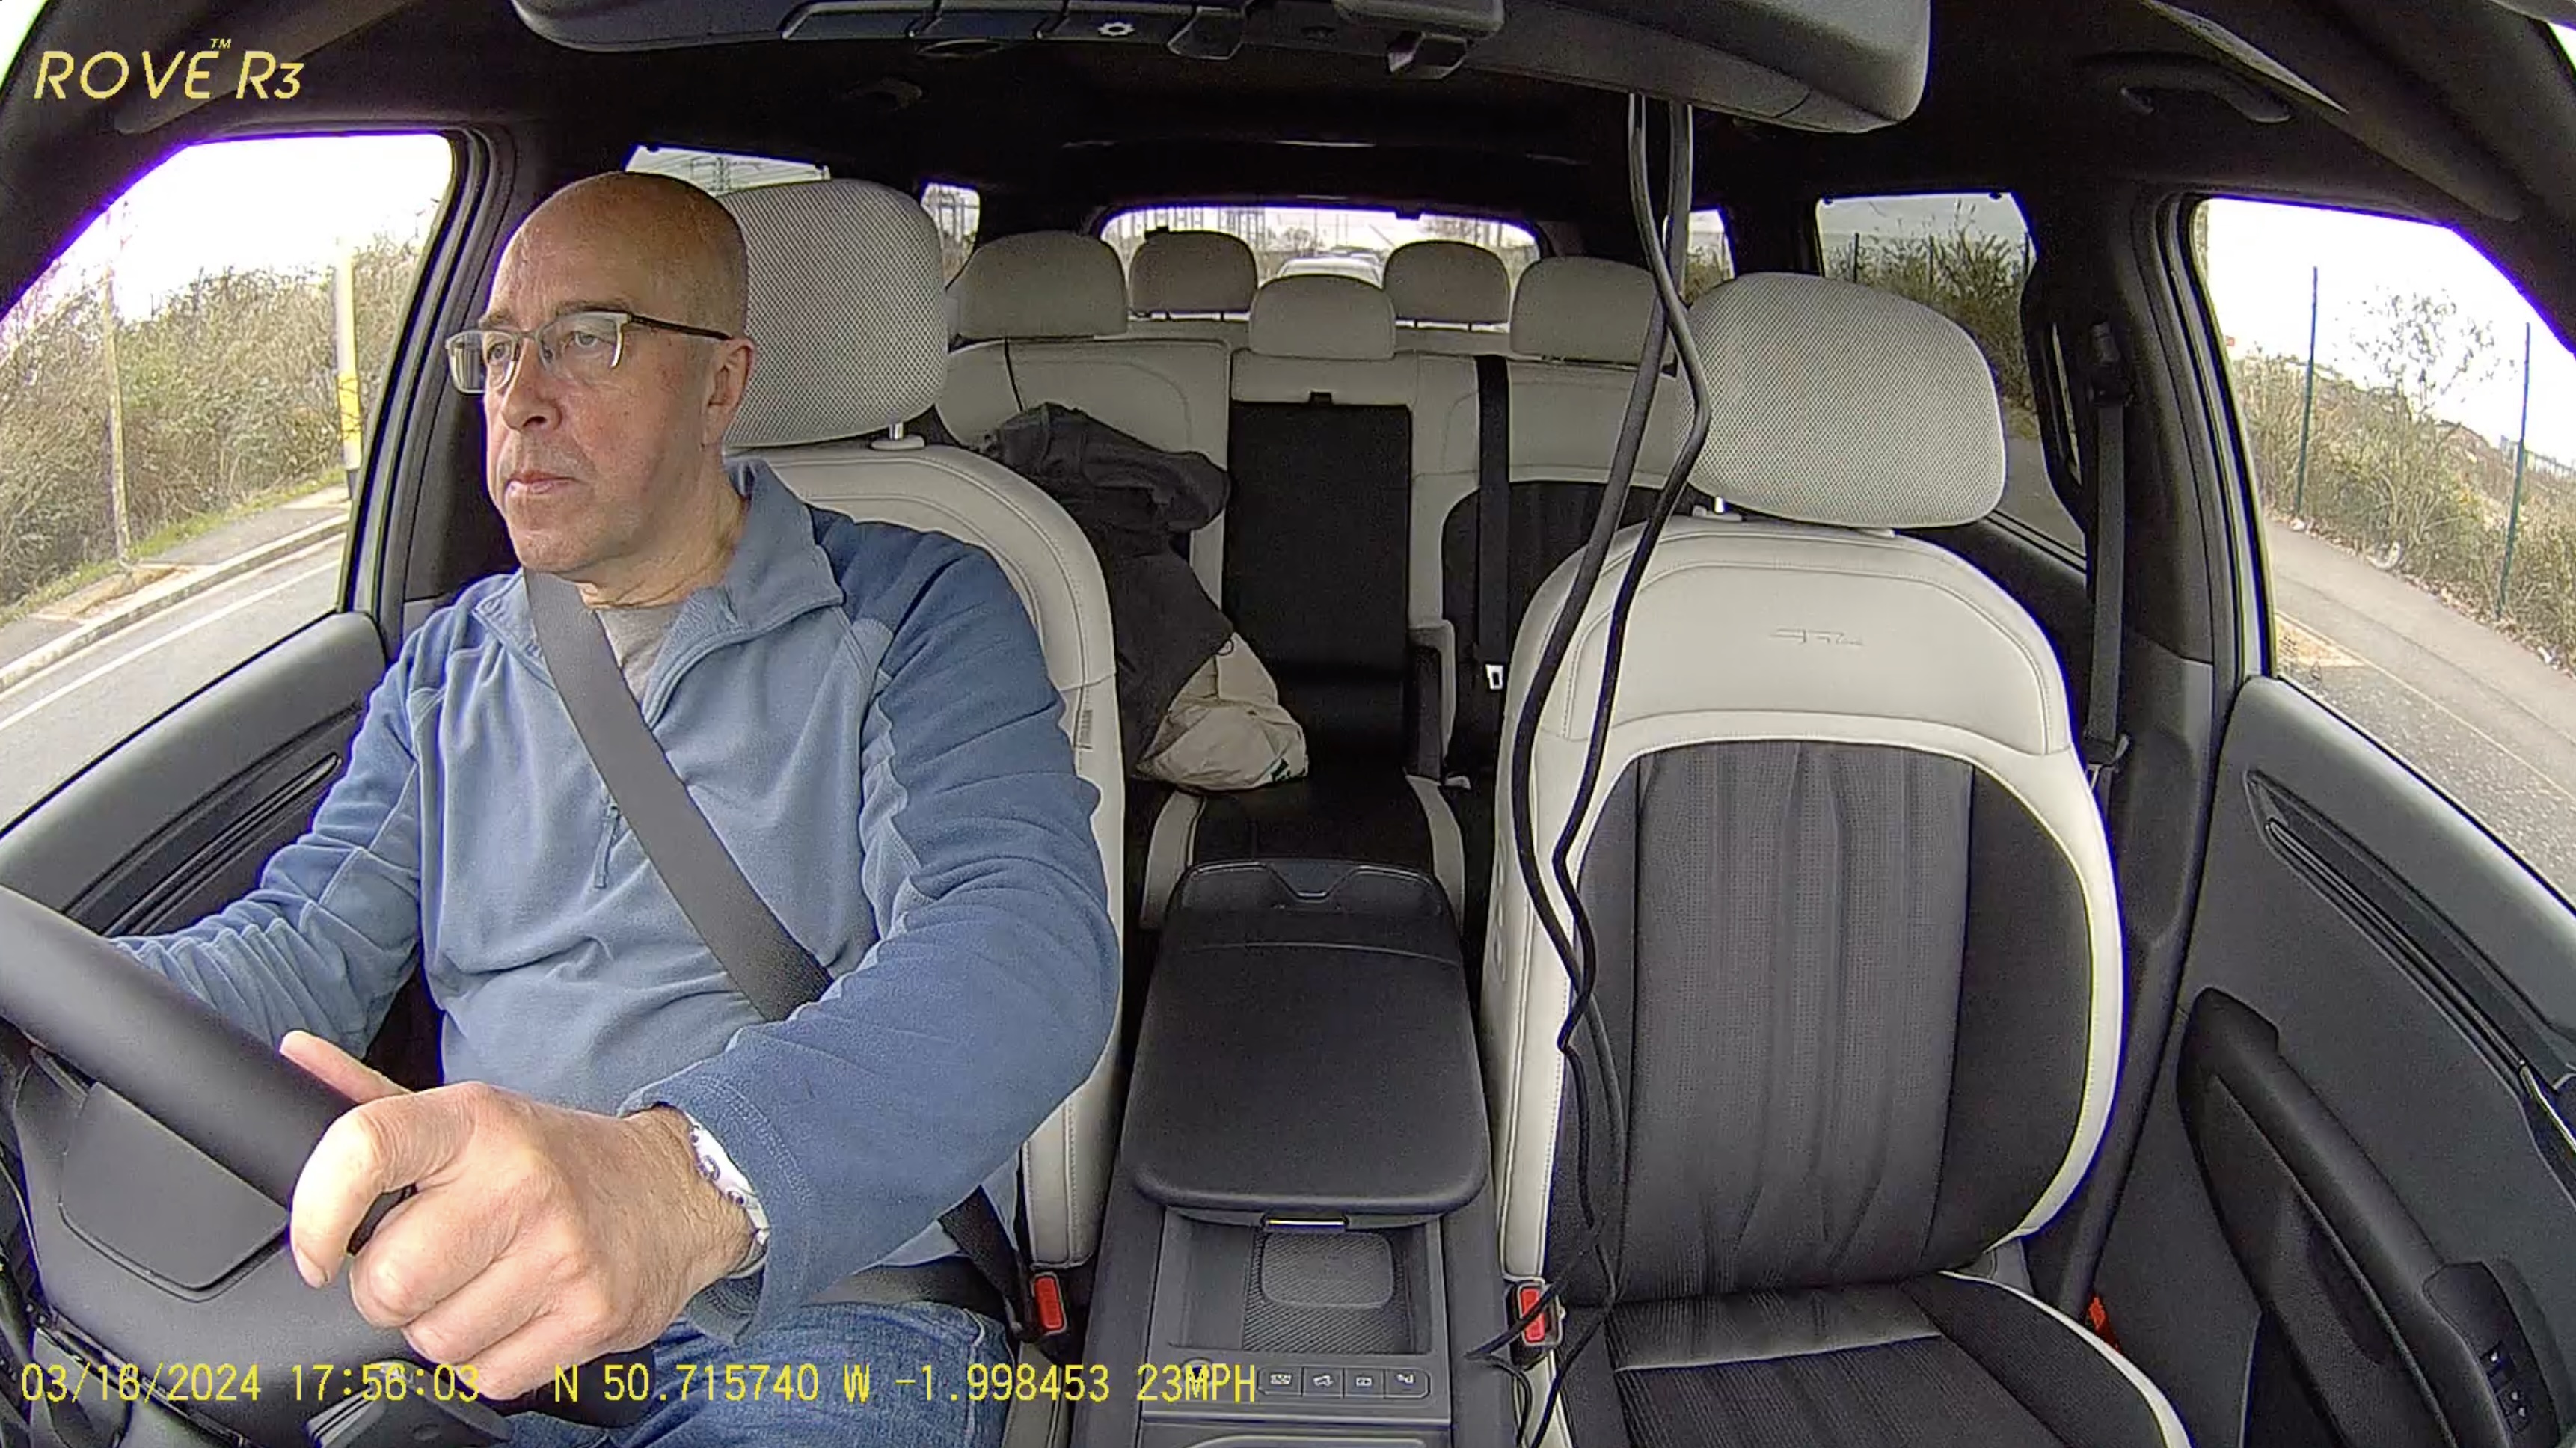
However, armed with cabin and rear cameras too, it delivers a comprehensive range of video coverage, including 1440p video capture out the front, 1080p footage in the cabin, and 1080p out the back. There’s voice guidance, built-in GPS and 5GHz Wi-Fi, plus a very practical parking mode feature for keeping tabs on things when you’re not in your vehicle.
If you can put up with all the pop-ups on the official site, the Rove R3 Dash Cam is available direct. Your best bet is to head to Amazon, where the RRP of $399.99 is currently discounted to $259.99 – though this could obviously change at any time. The package comes with everything you need, including front and rear cameras and all the accessories for fitment and use. However, a hardwire kit and microSD cards are available as extras.
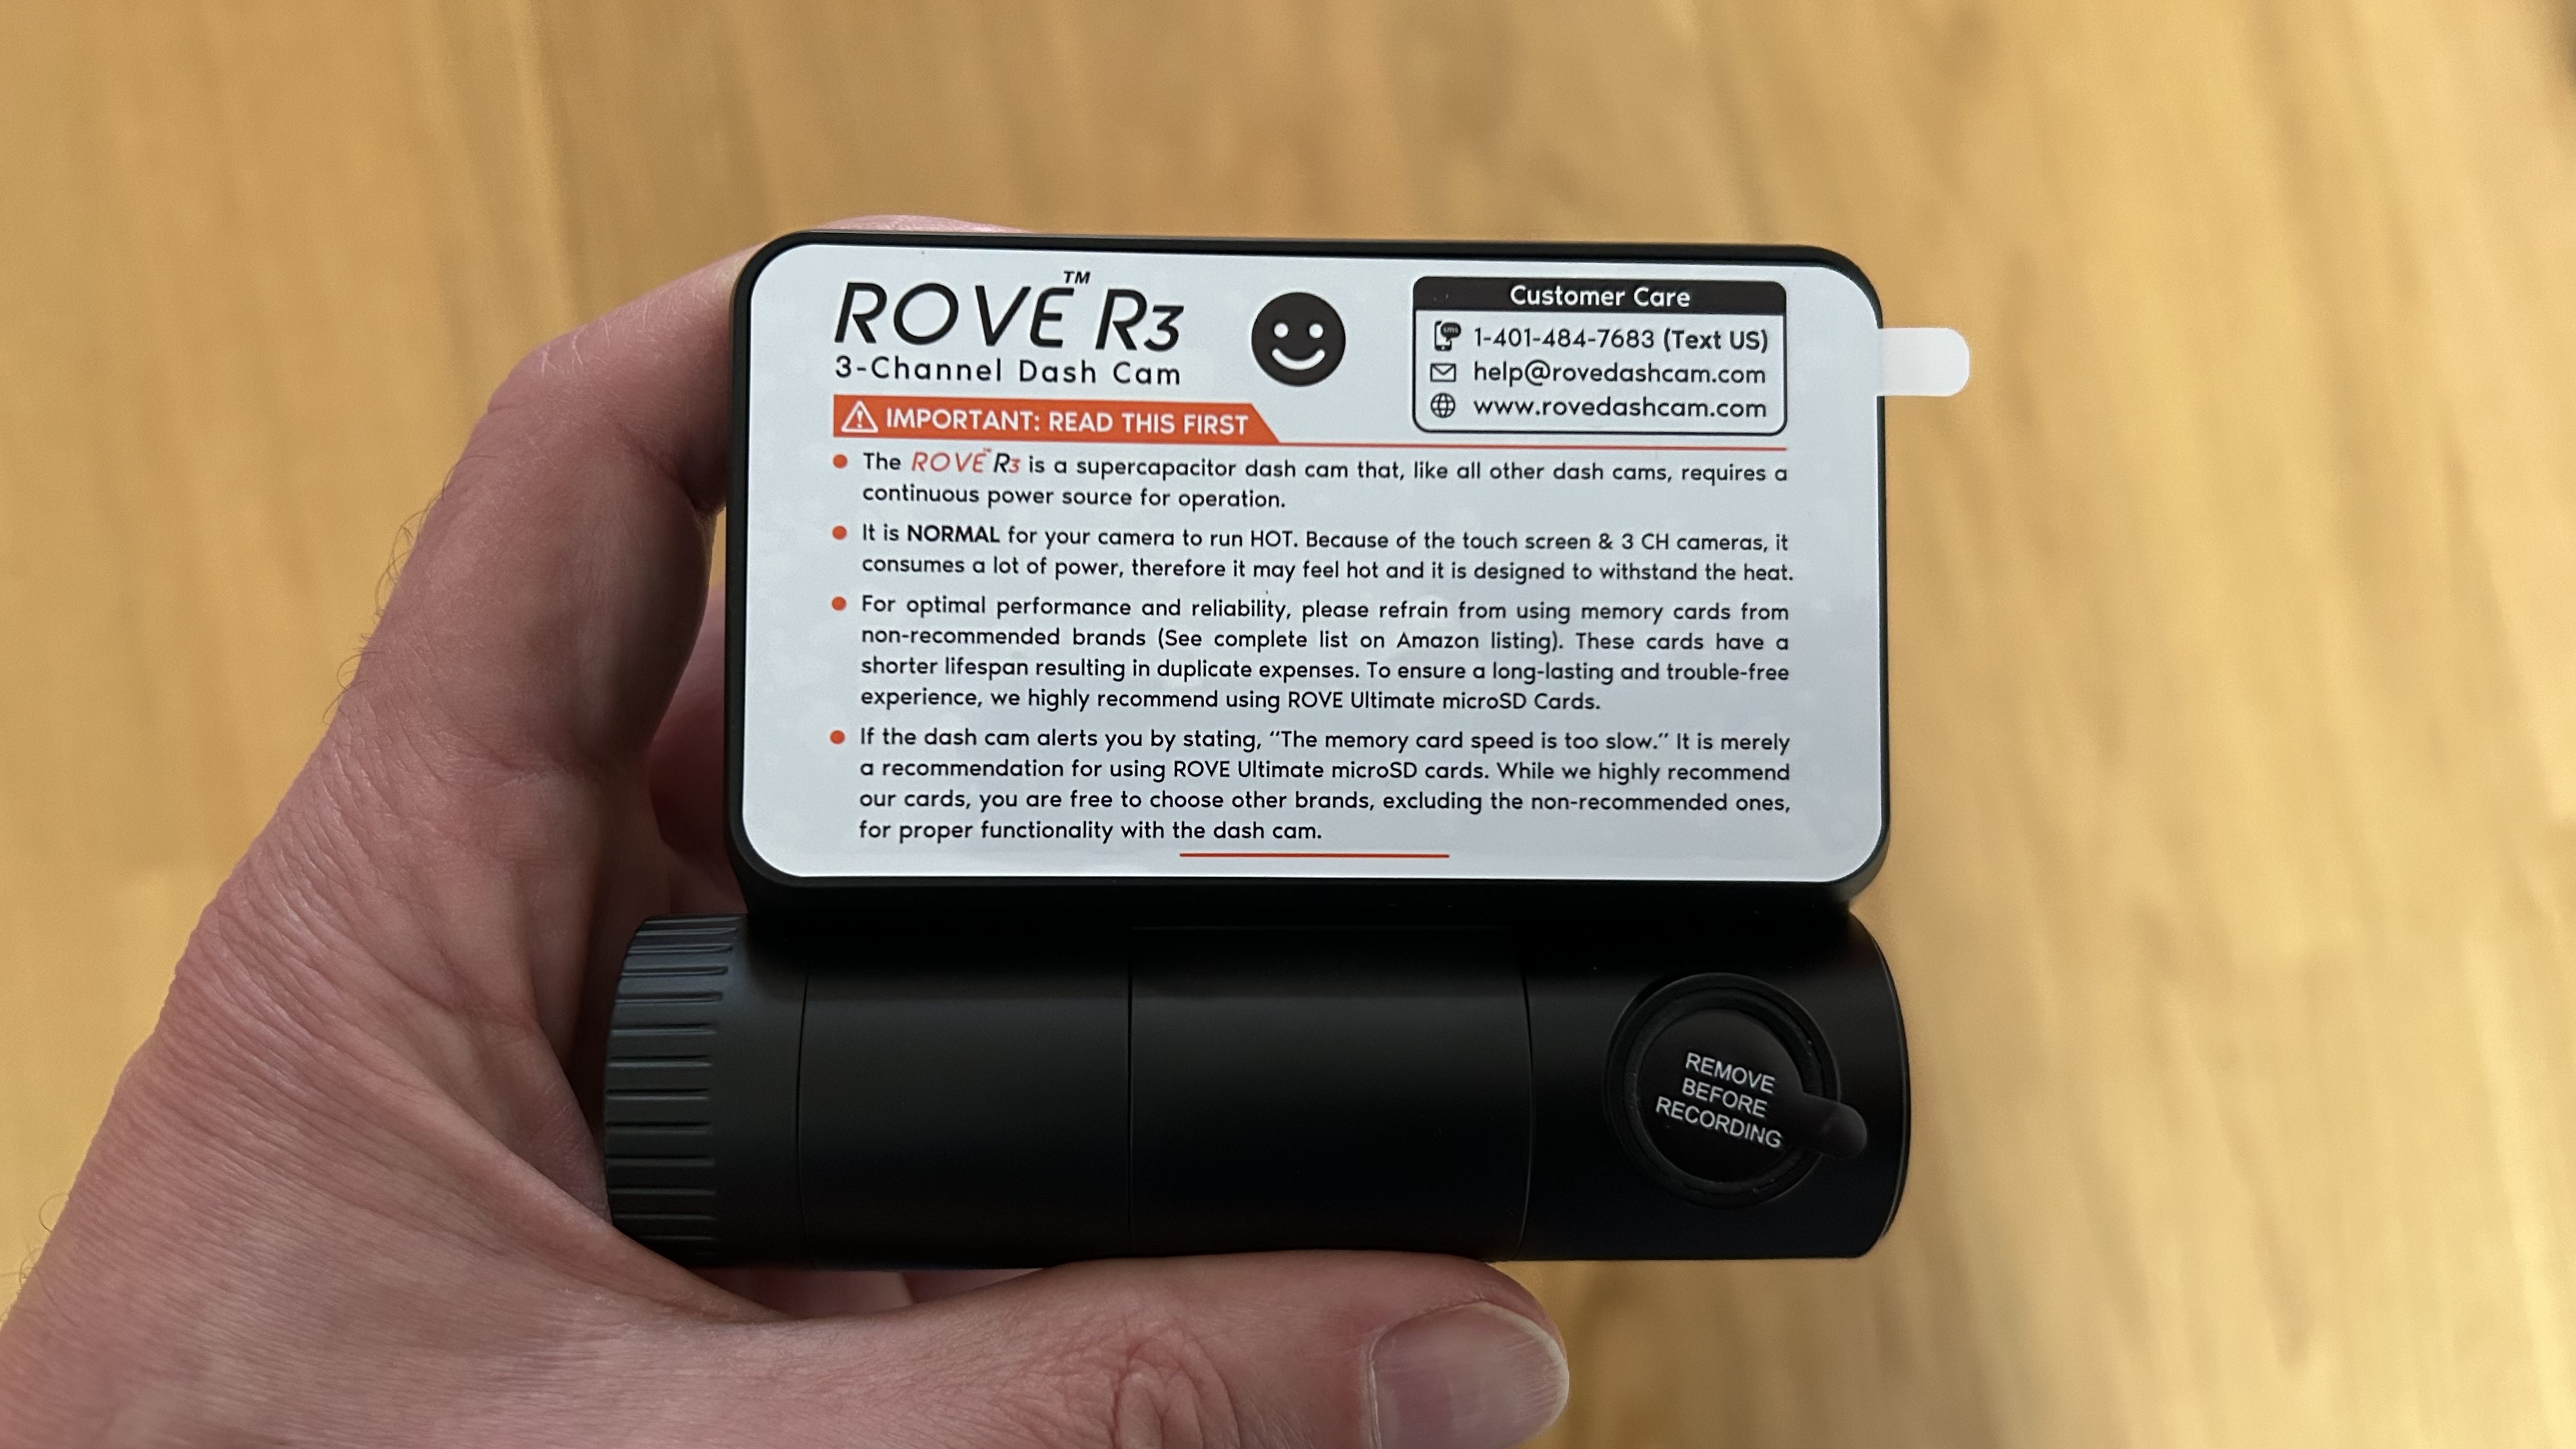
Rove makes a big deal about this model being powered by a Super Capacitor, which is mentioned quite a lot in the promotional blurb. In other words, the dash cam opts to use one of these over a lithium-ion battery.
It makes no difference in the grand scheme of things if you’ve got the camera connected by default anyway. Having said that, Rove reckons this makes it more useful to folks who might encounter extreme temperatures ranging from -4°F (-20°C) to +158°F (+70°C). Extreme adventurers take note.
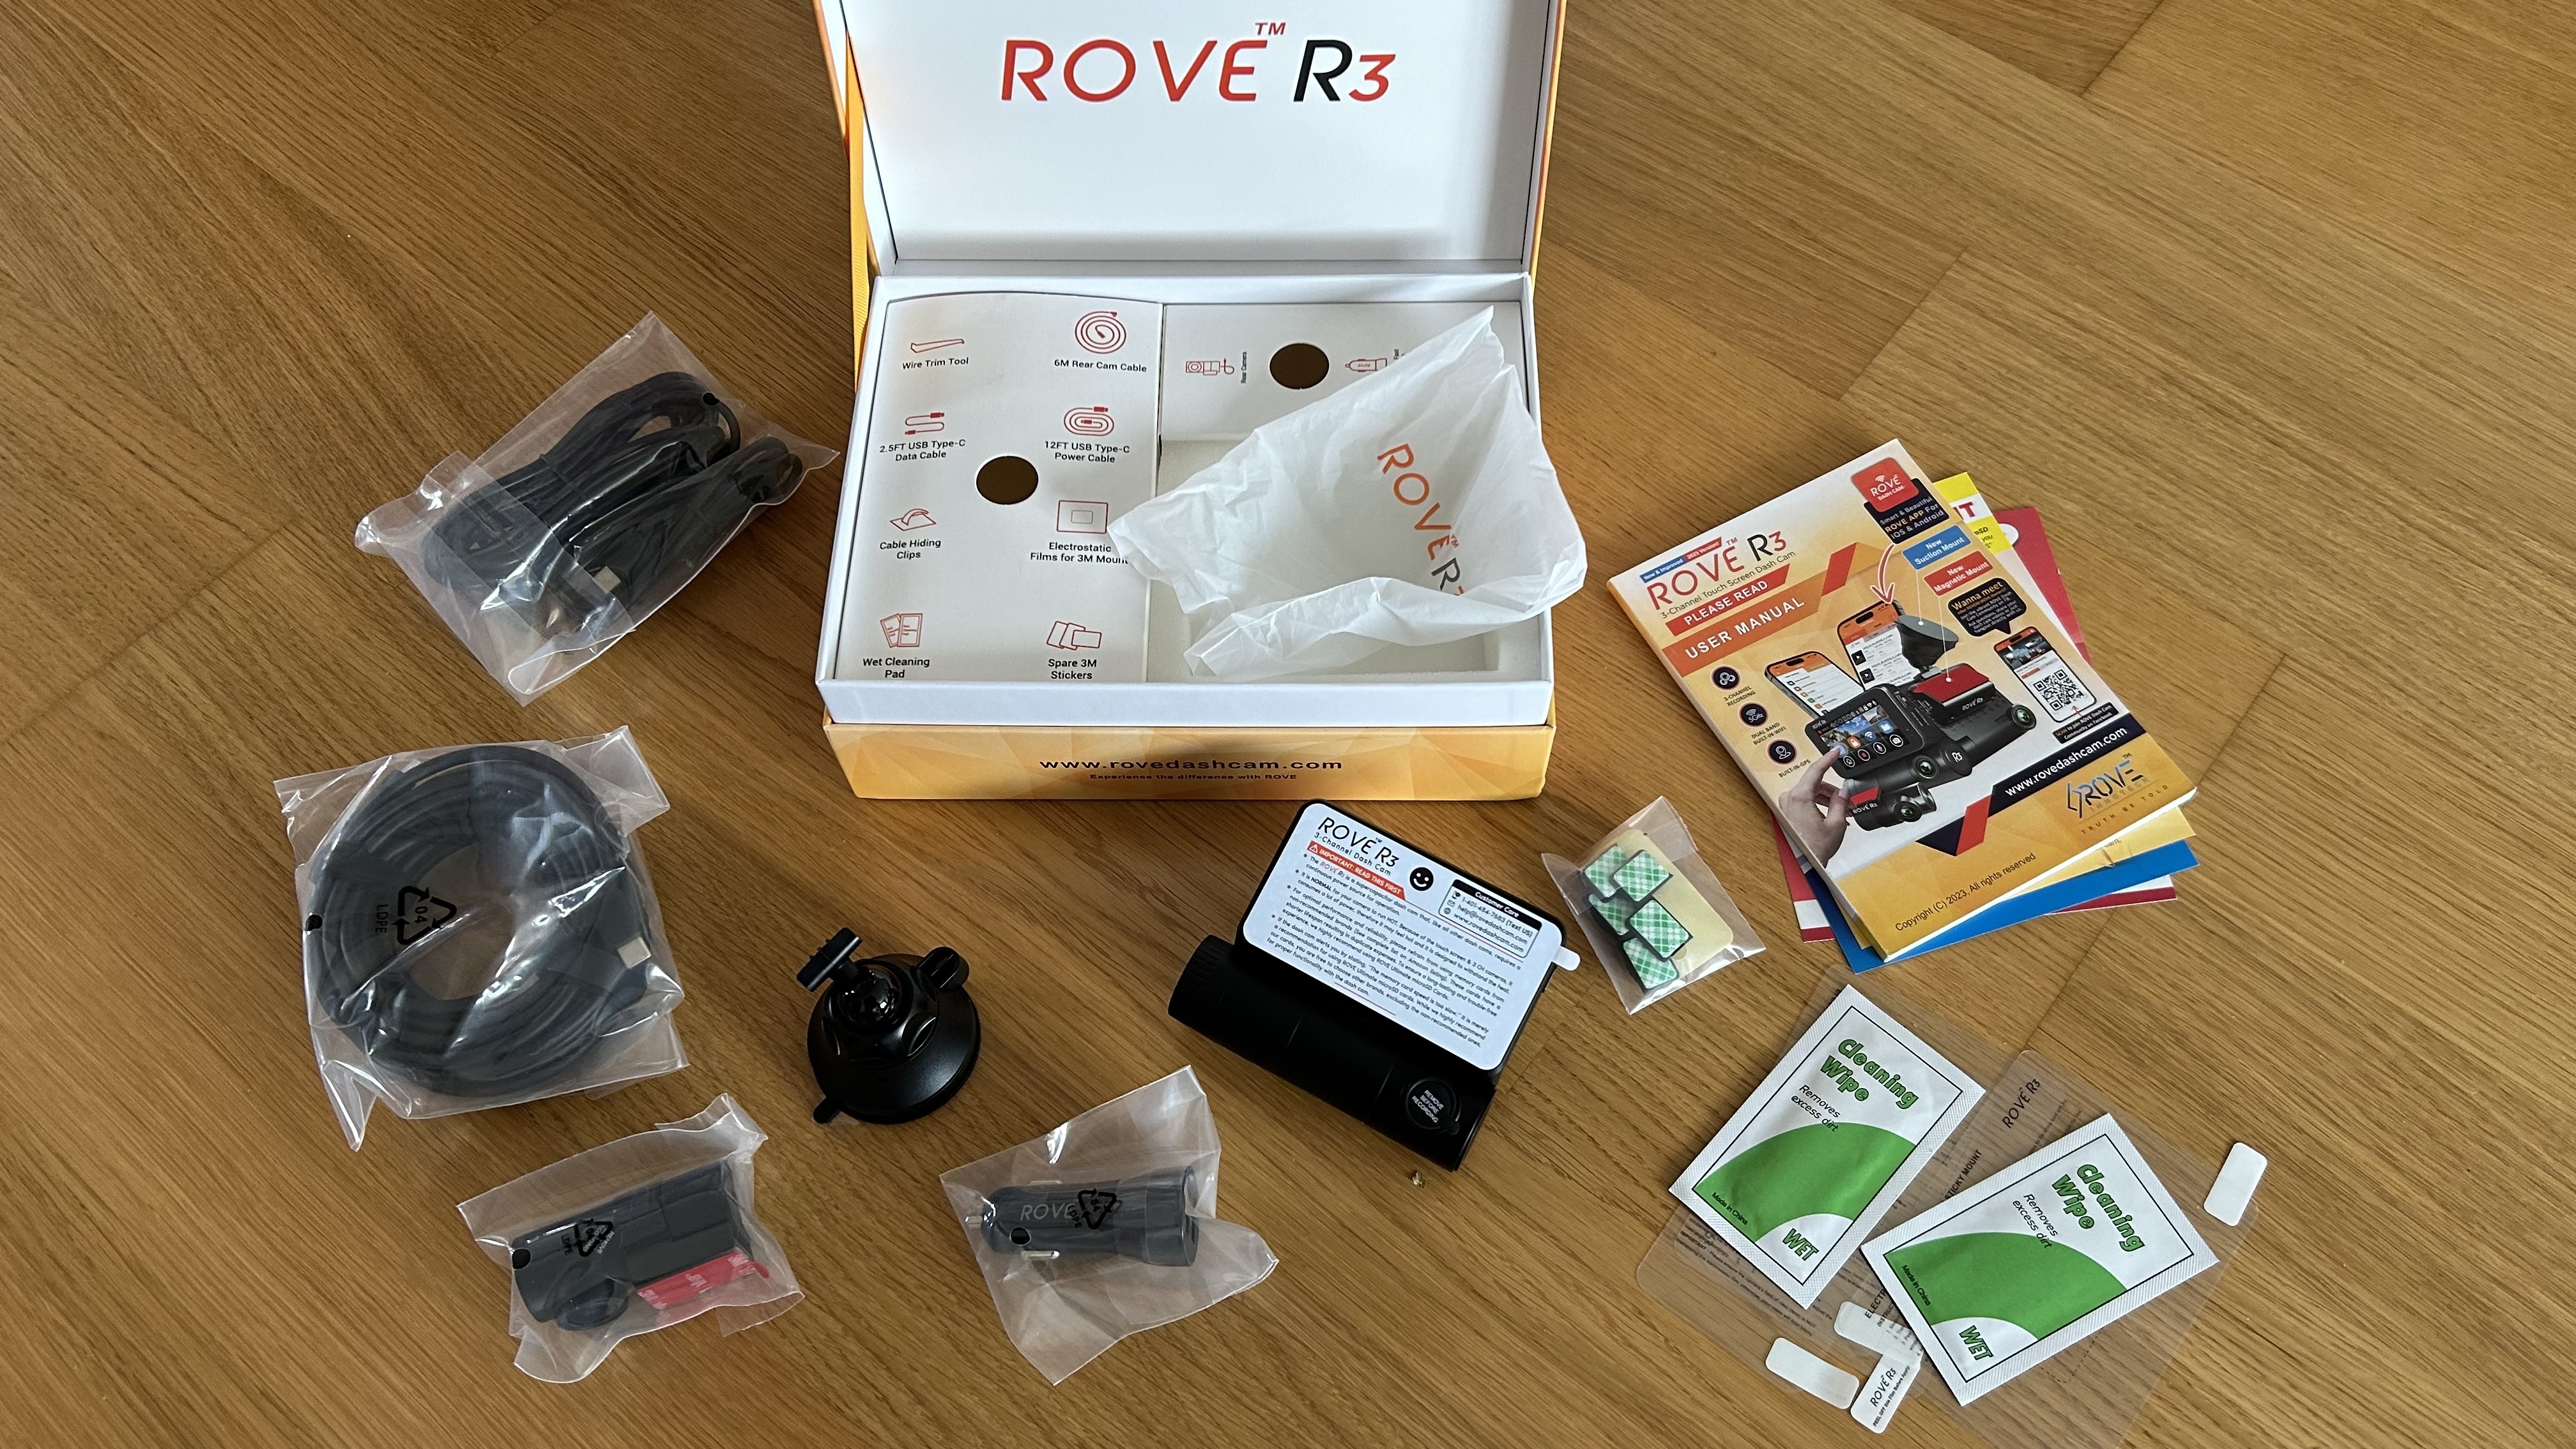
The Rove R3 Dash Cam arrives in a box that flips up to reveal just about everything you need from a complete solution dash cam package. The artwork looks like it was designed using a home desktop publishing package and is quite chaotic in places, but, looking past that, the initial impressions made me keen to get the Rove R3 Dash Cam set up.
Full marks should go to Rove for providing a comprehensive, full-color manual that outlines all the steps for getting set up and how to use video once it's been recorded. There’s a supplementary app for both iOS and Android too. it's possible to use everything without calling on it if you’re not fussed, but it does enhance the overall user experience if you do.
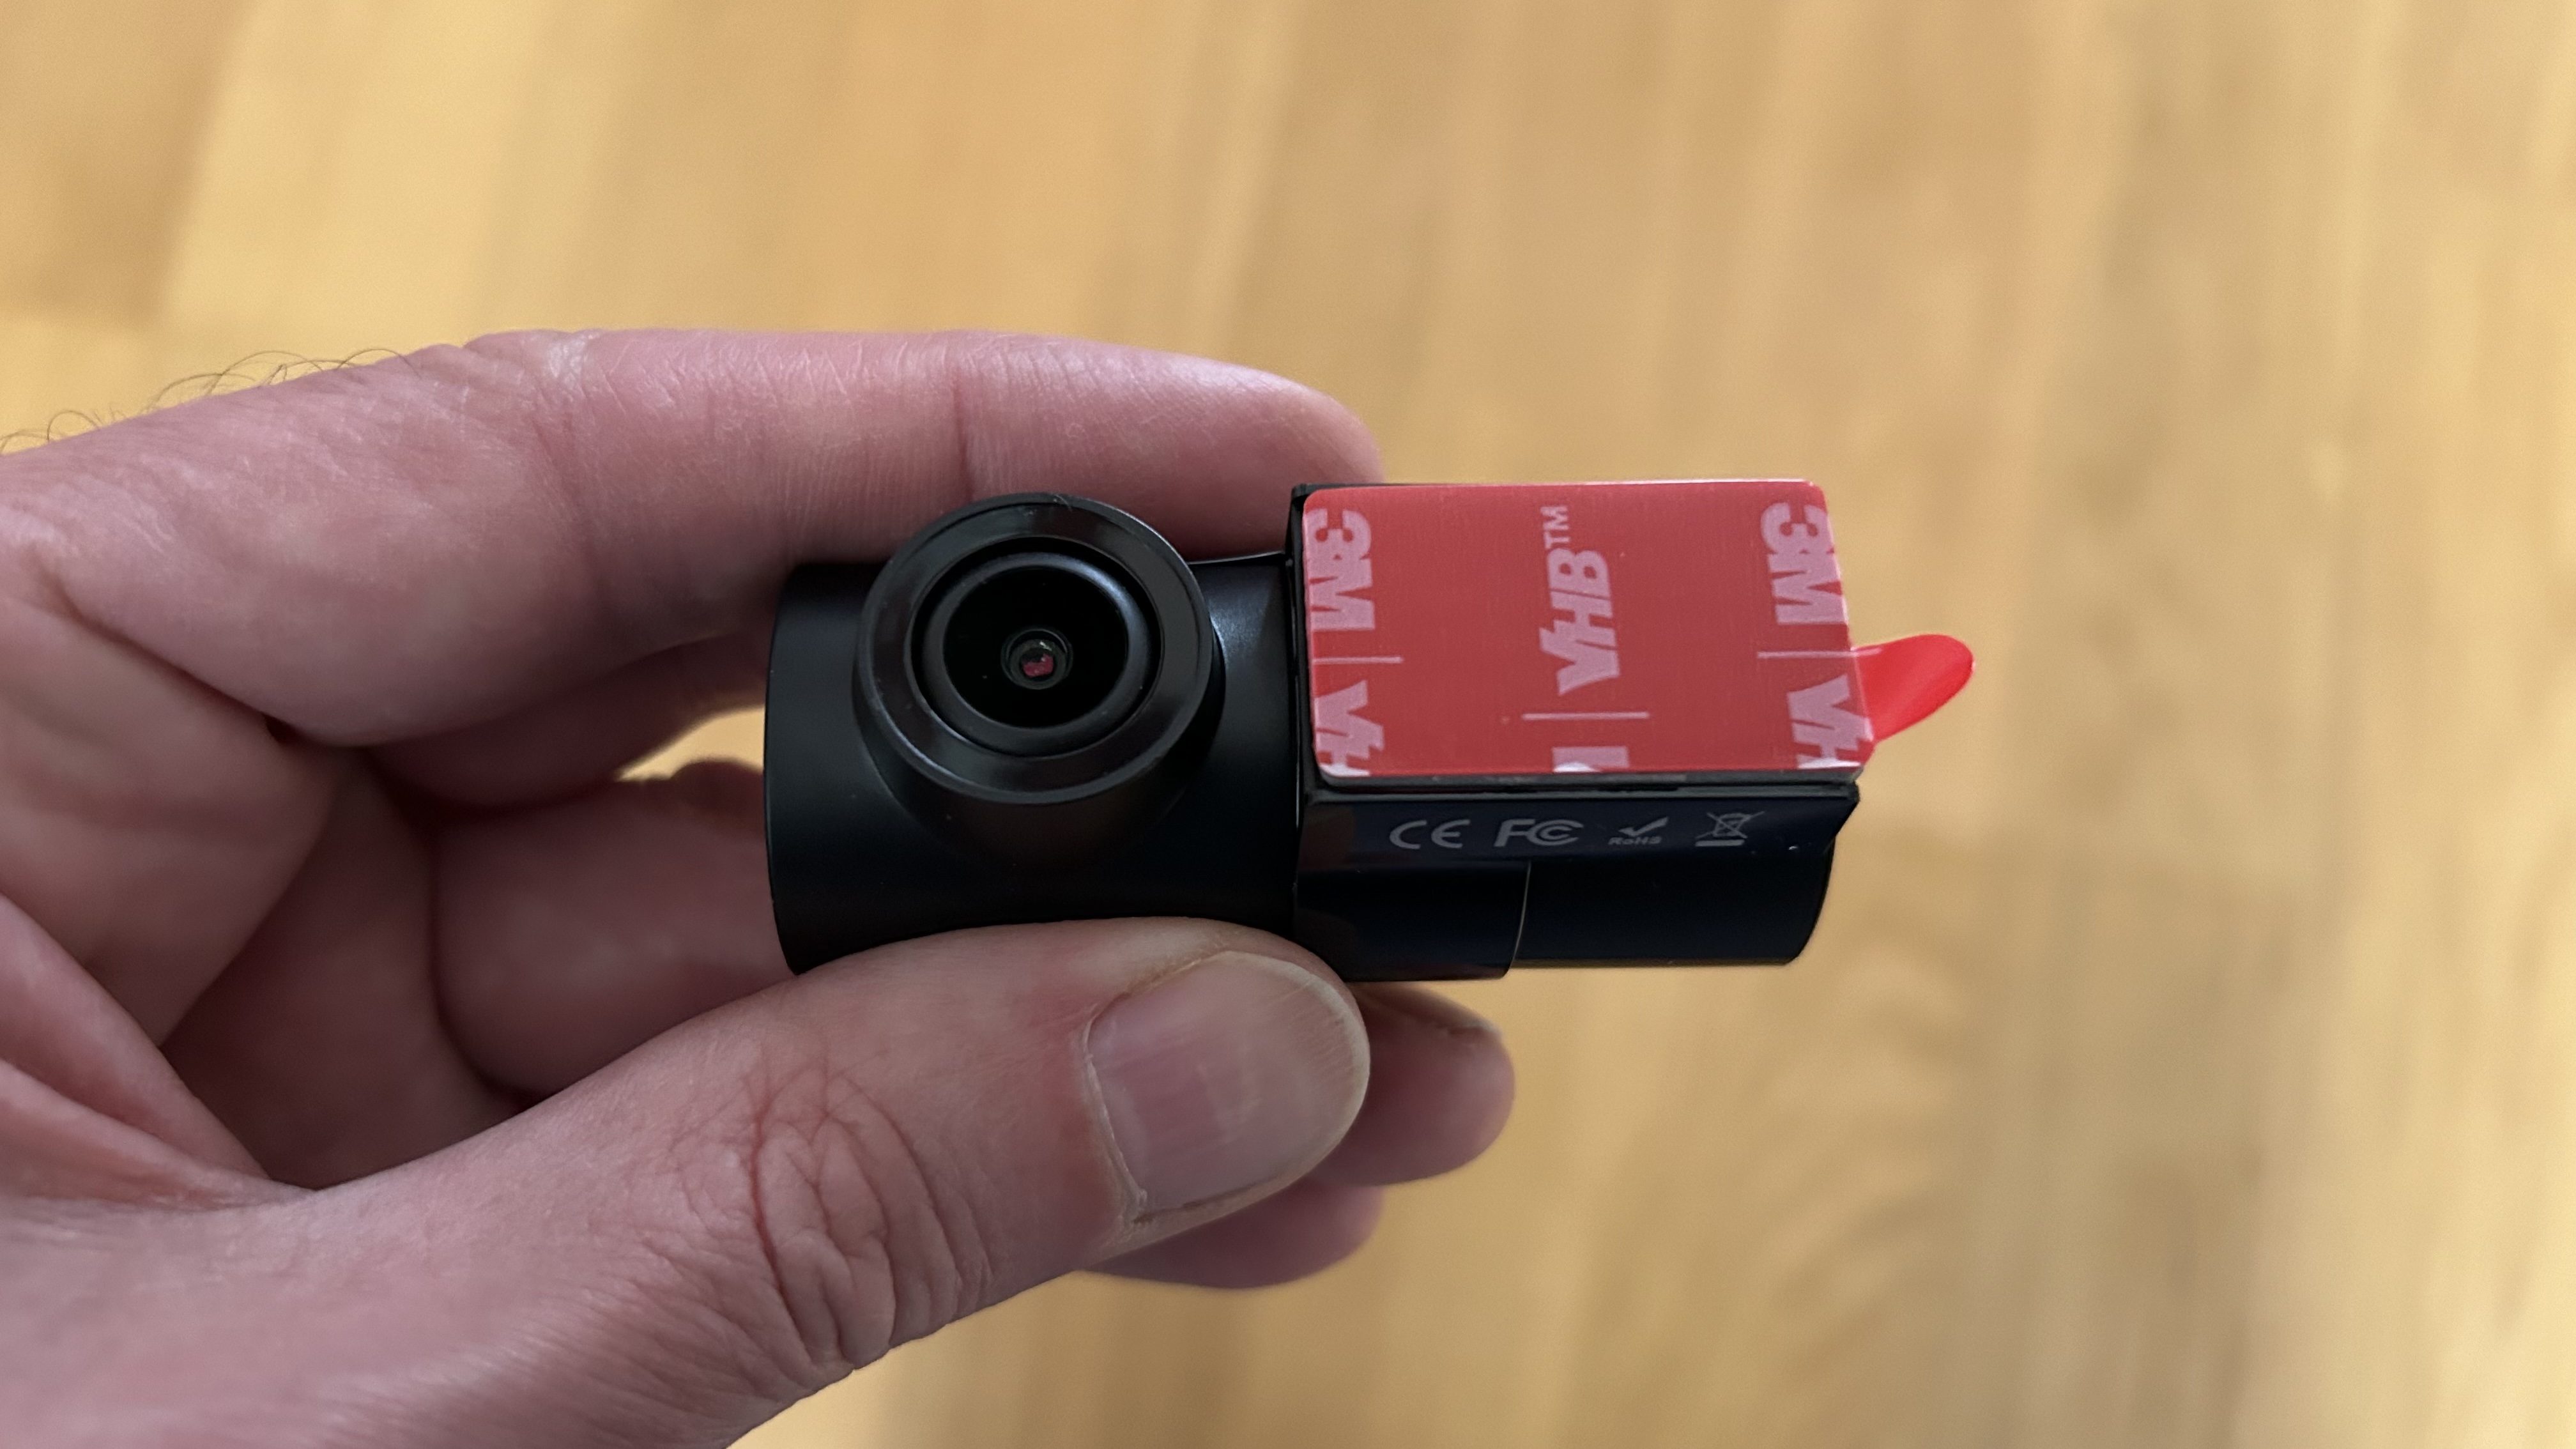
Also inside the box are the main camera, a smaller rear camera, a 4.8 AMP dual charger plug, a suction mount, a wire trim tool, a 2.5ft USB Type-C data cable, a lengthy rear camera cable, a 12ft USB Type-C power cable, cable hiding clips, electrostatic films, a wet cleaning pad, and spare 3M adhesive stickers.
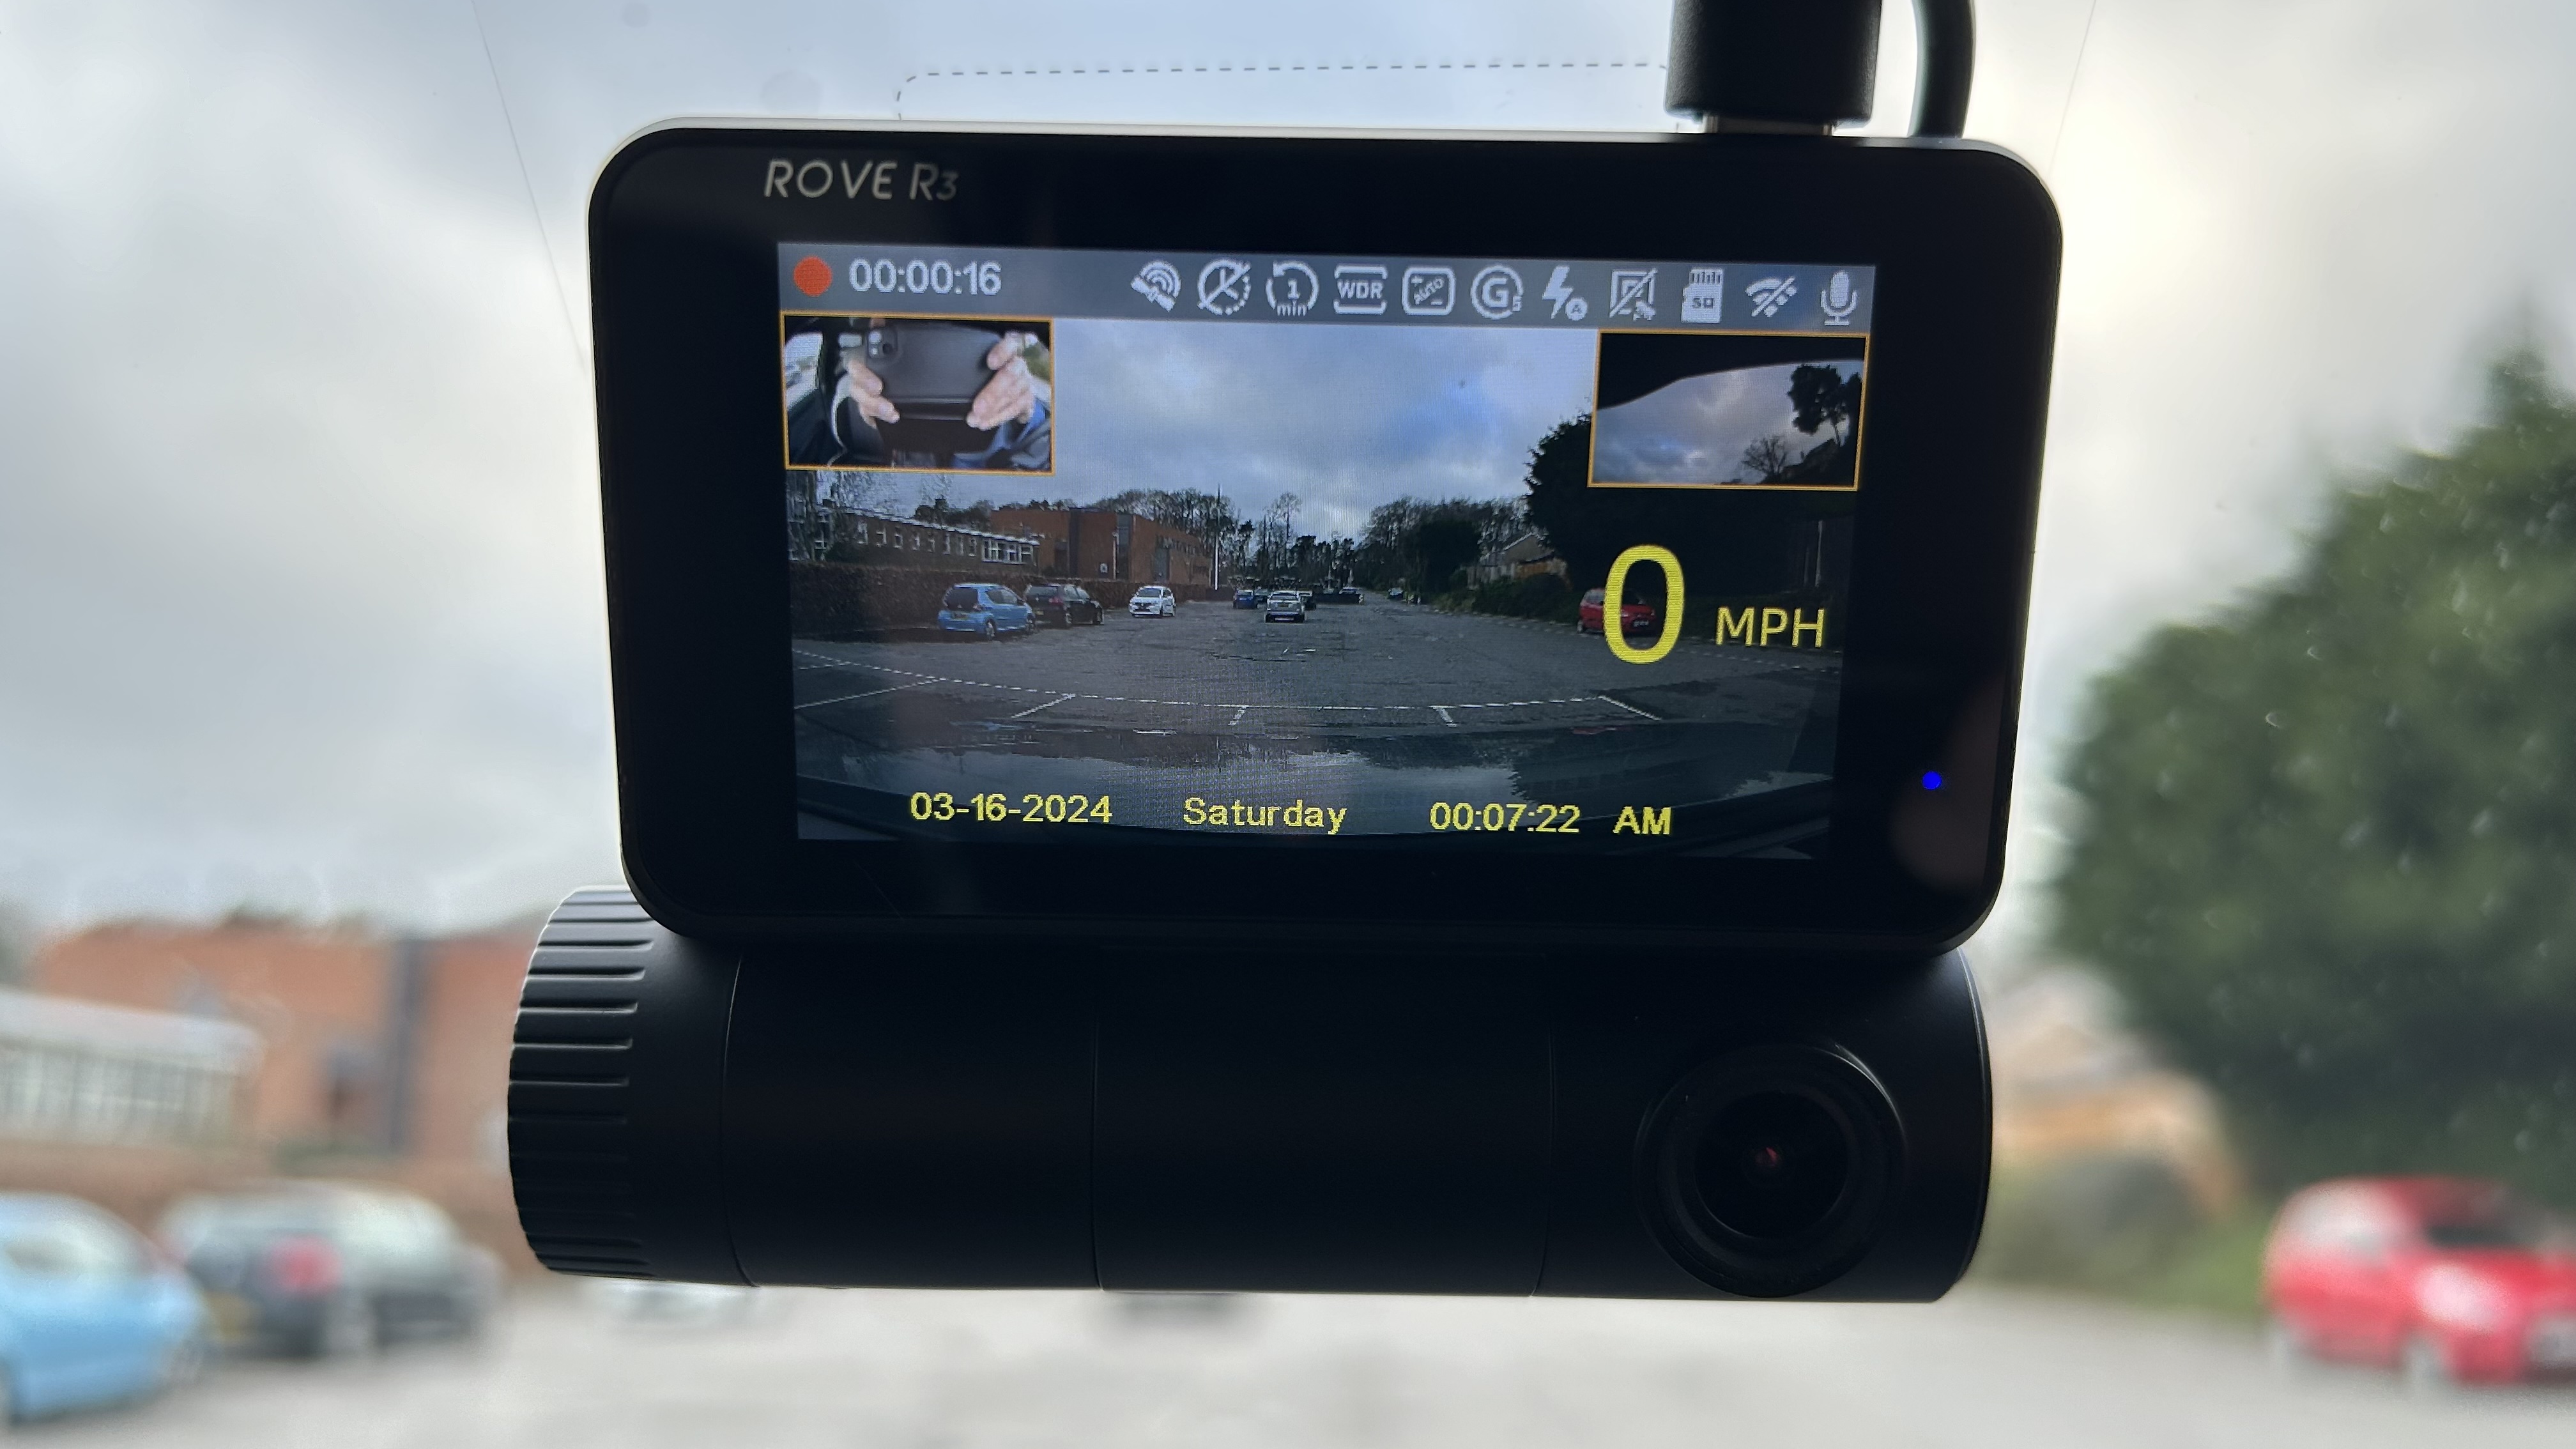
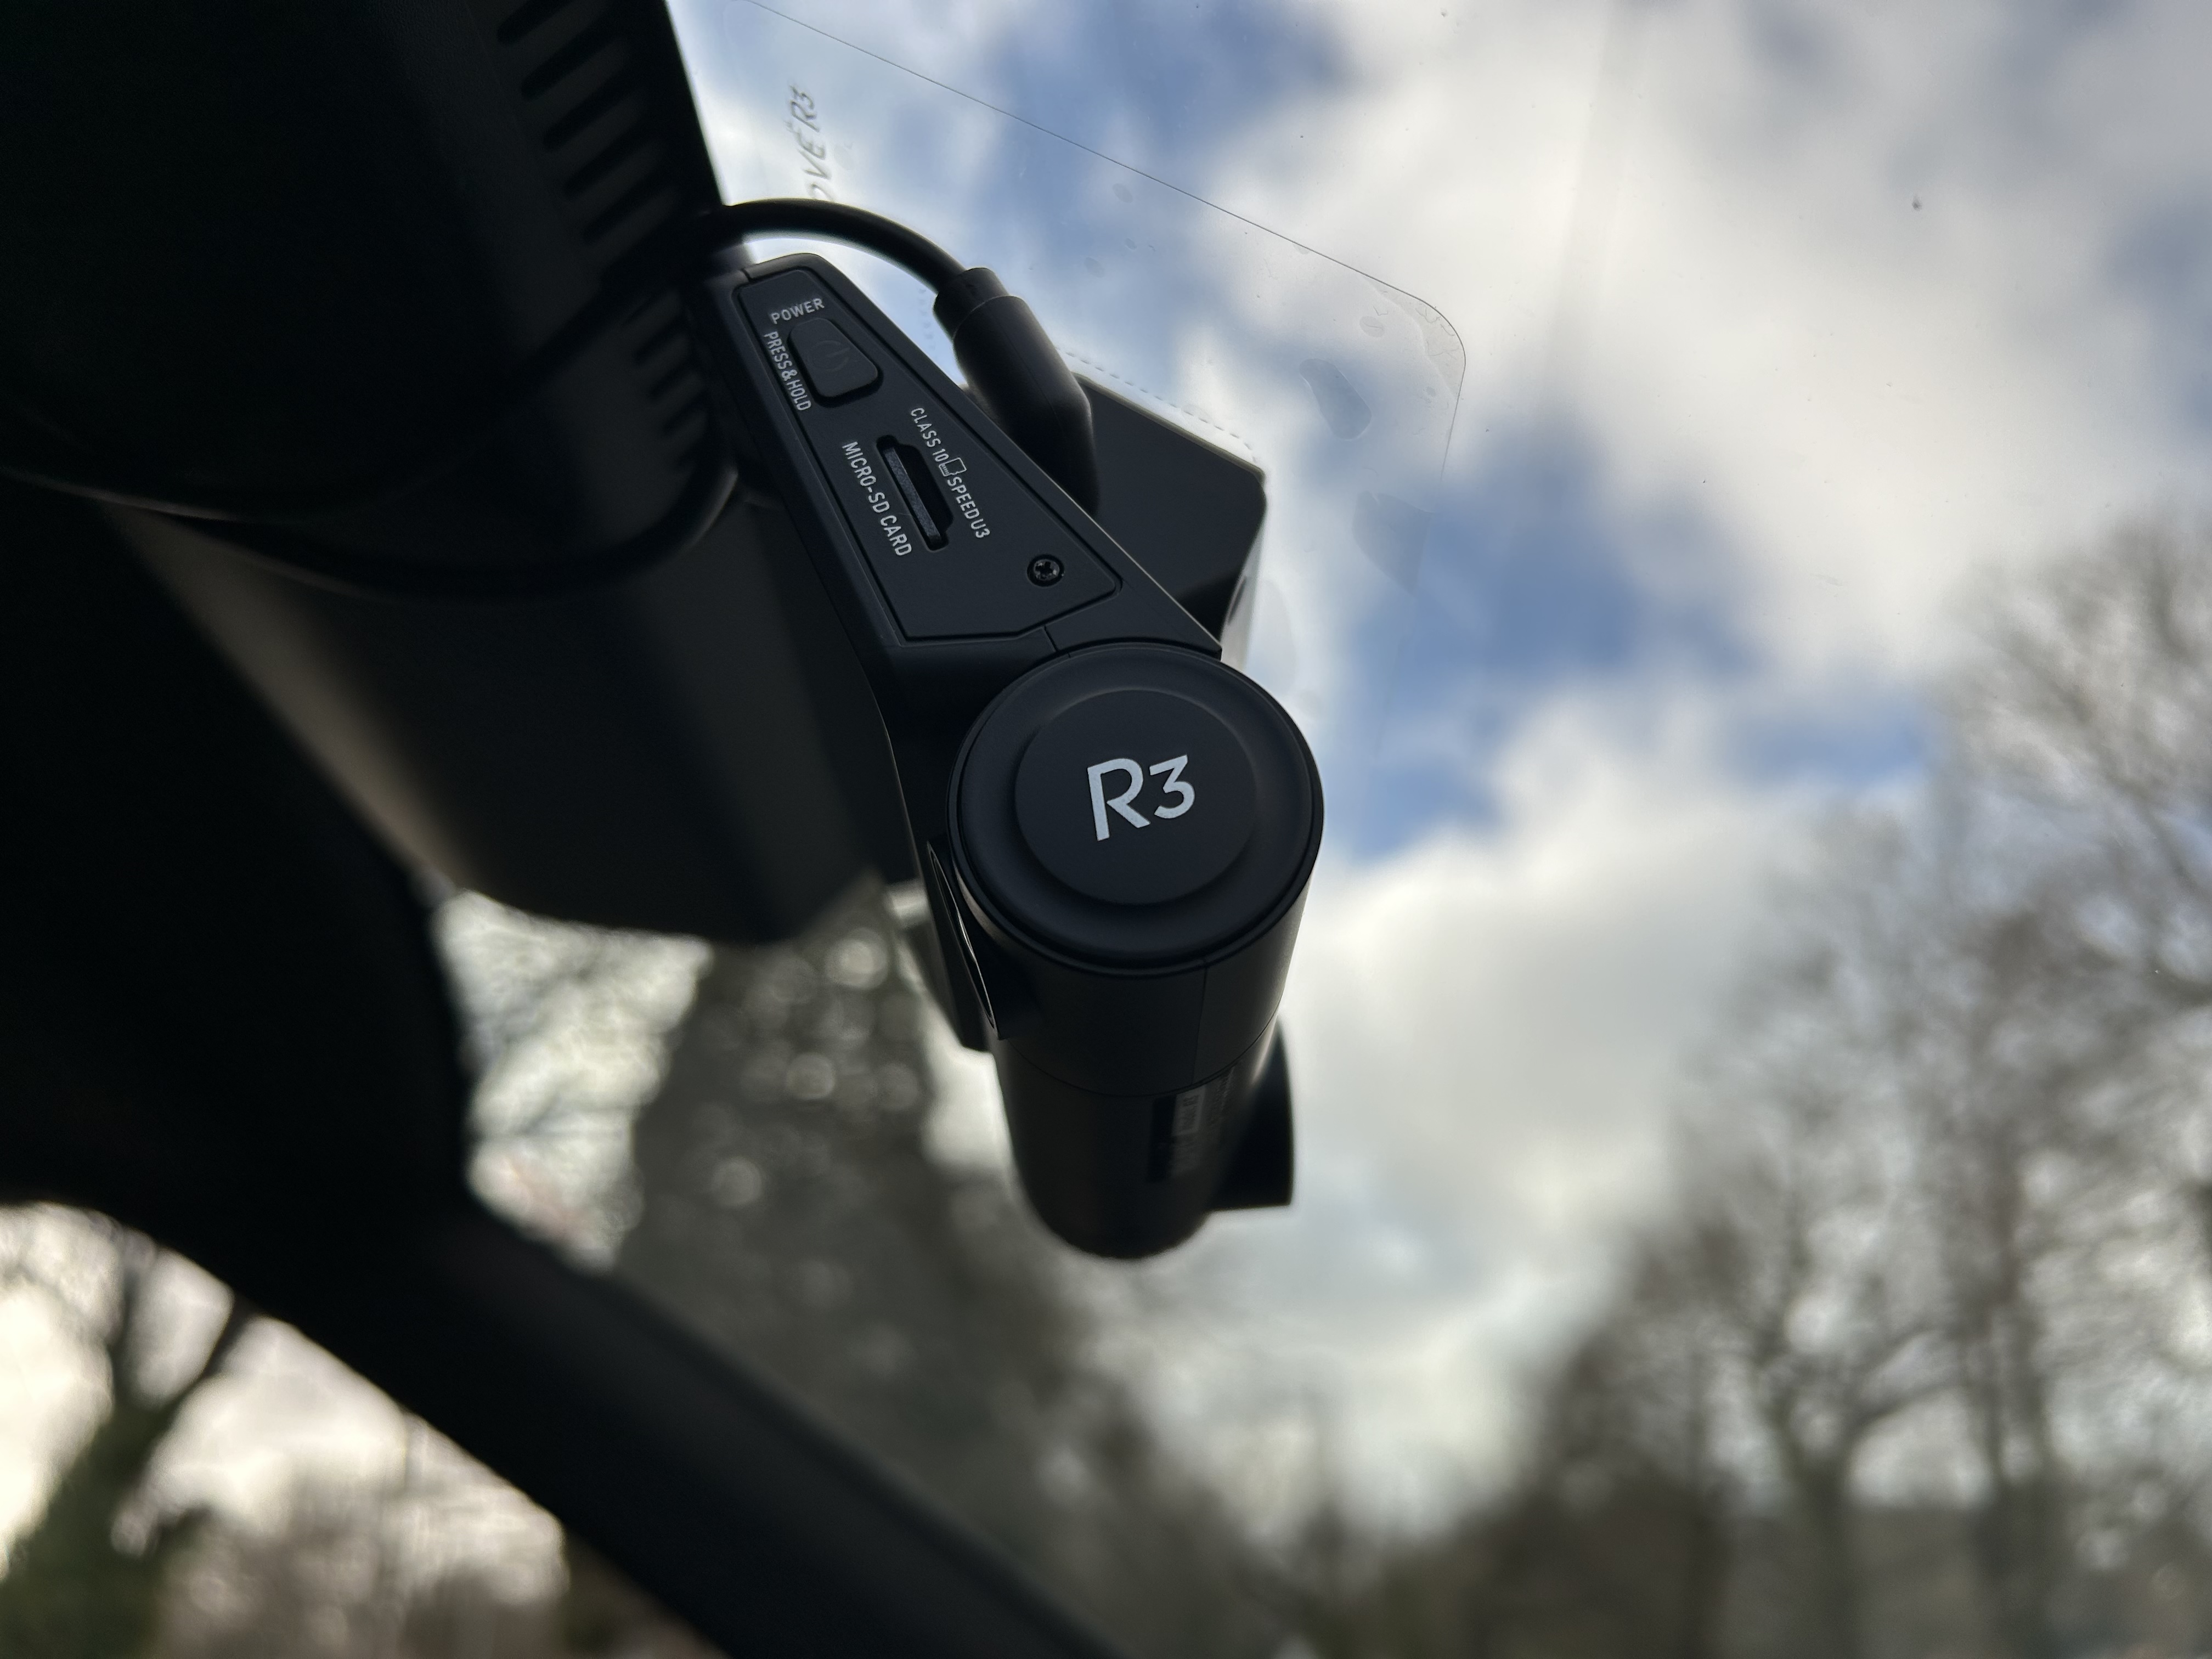
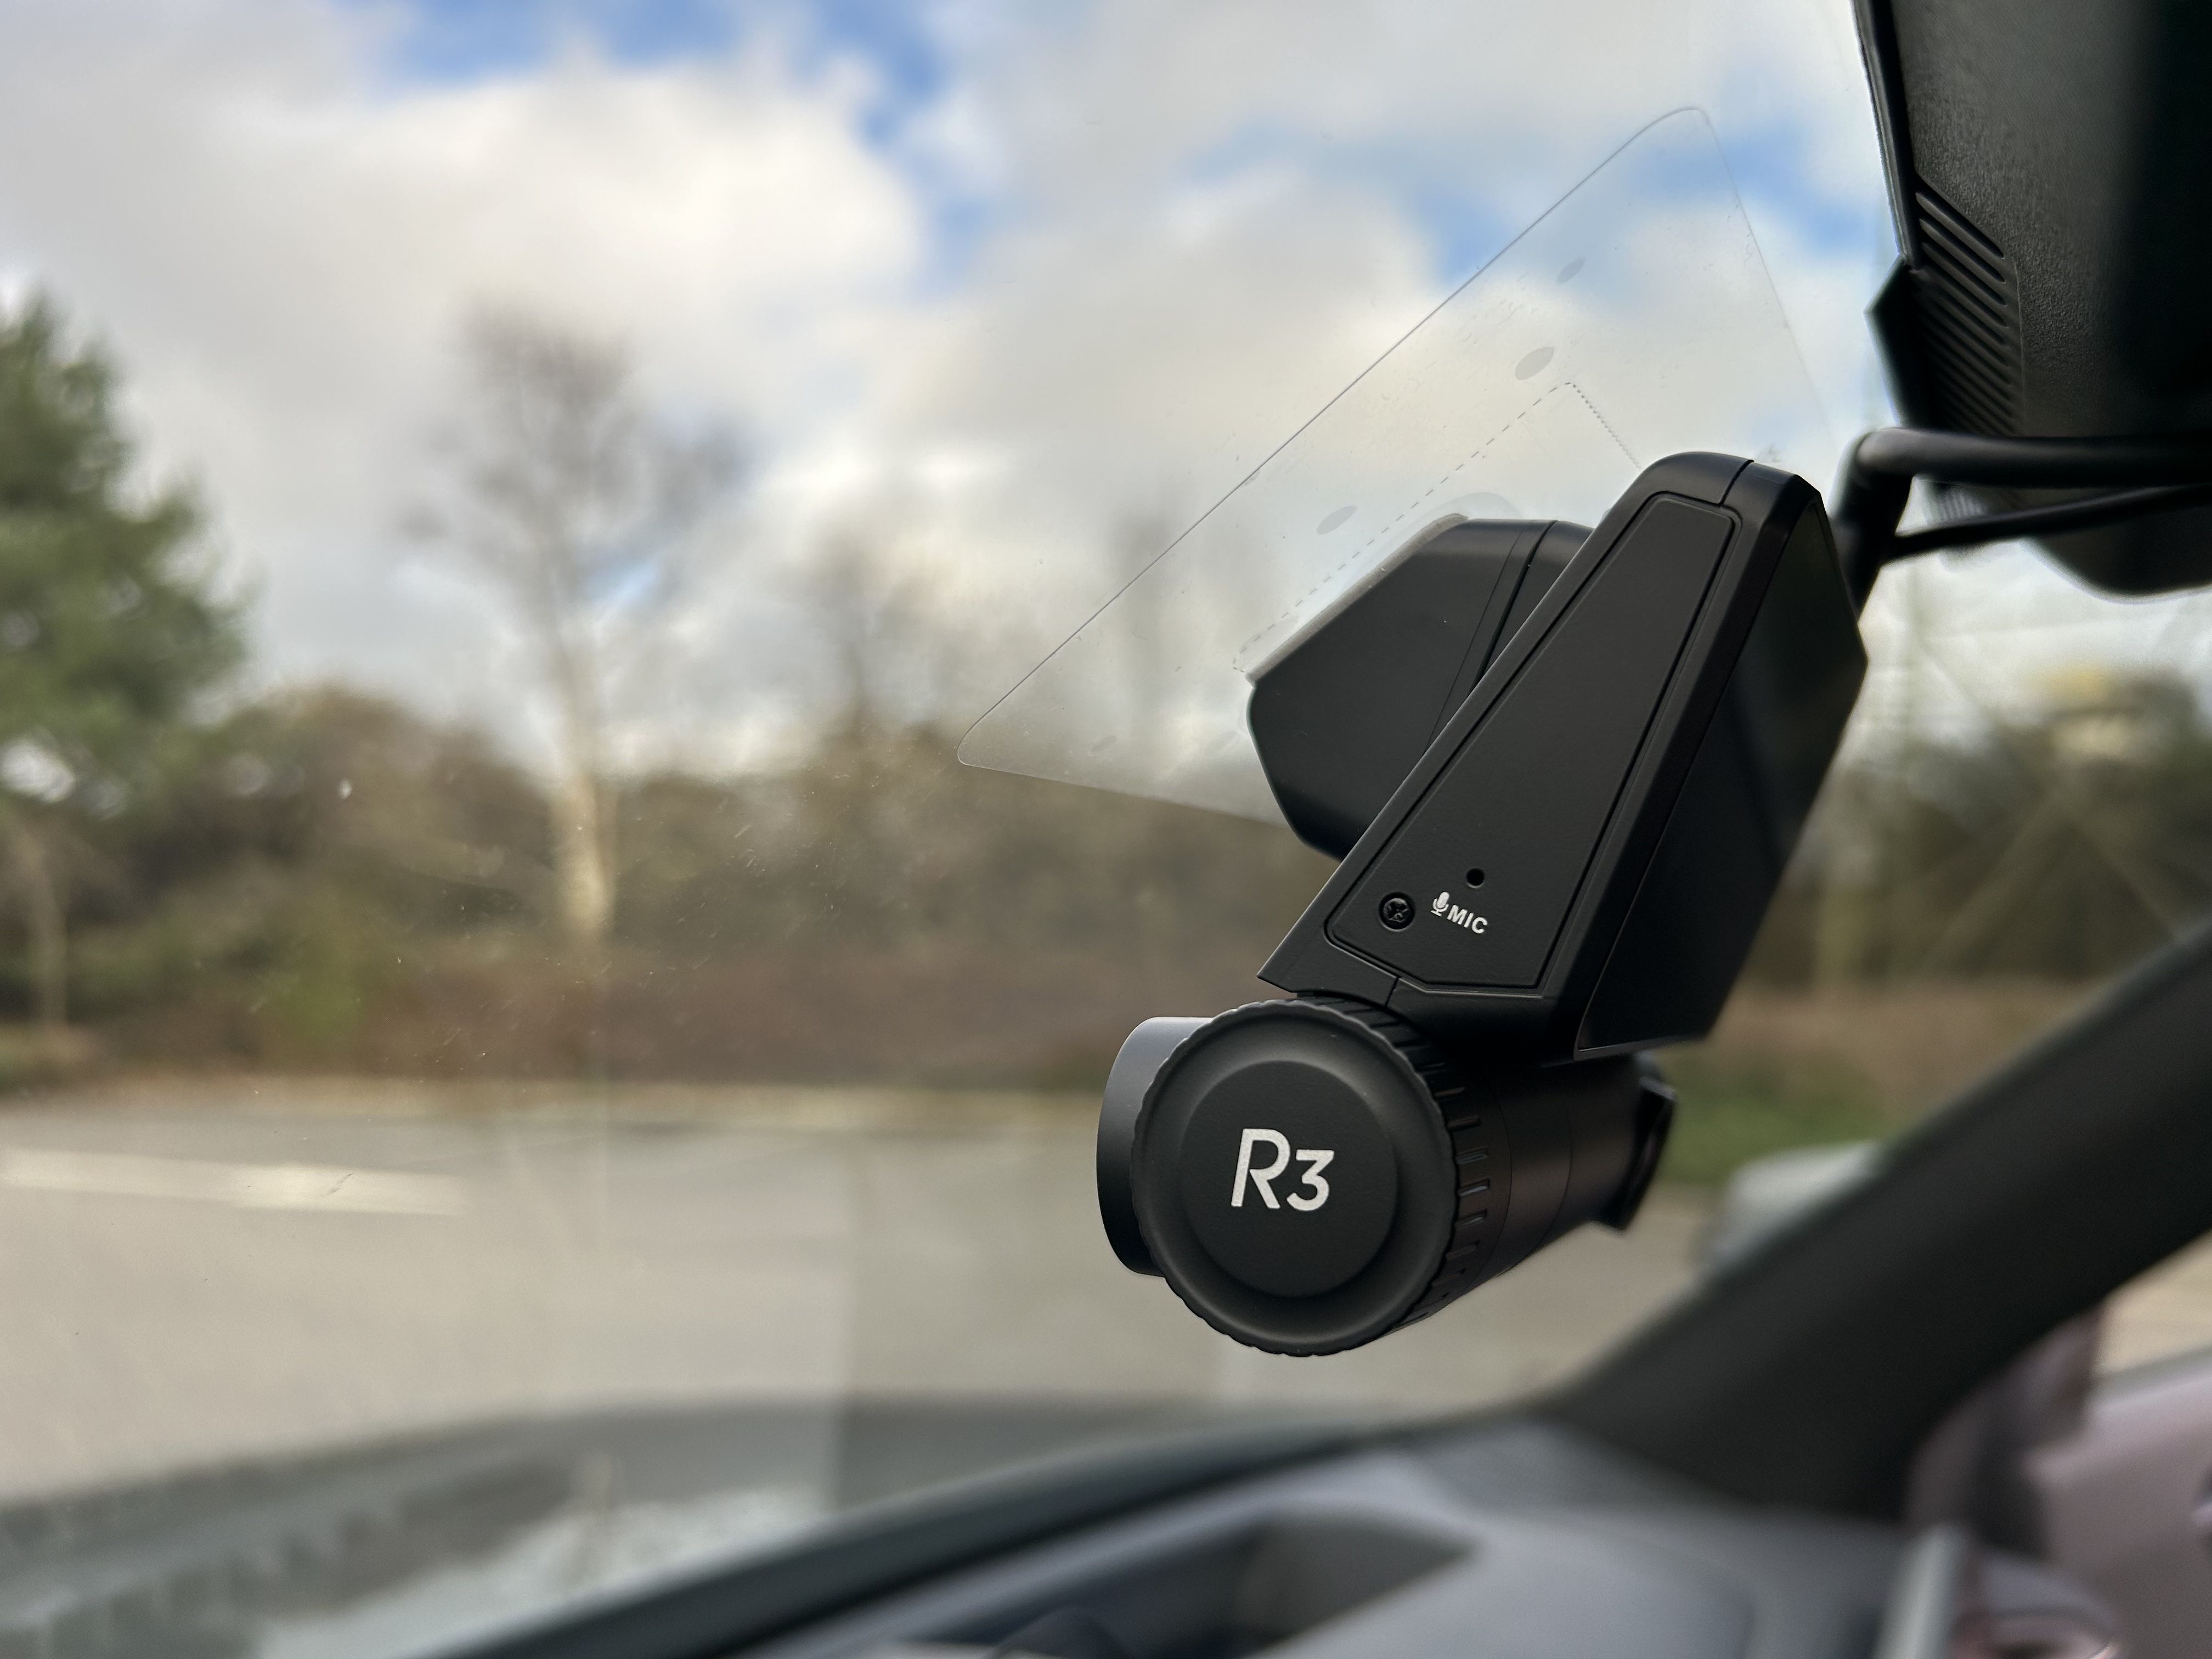
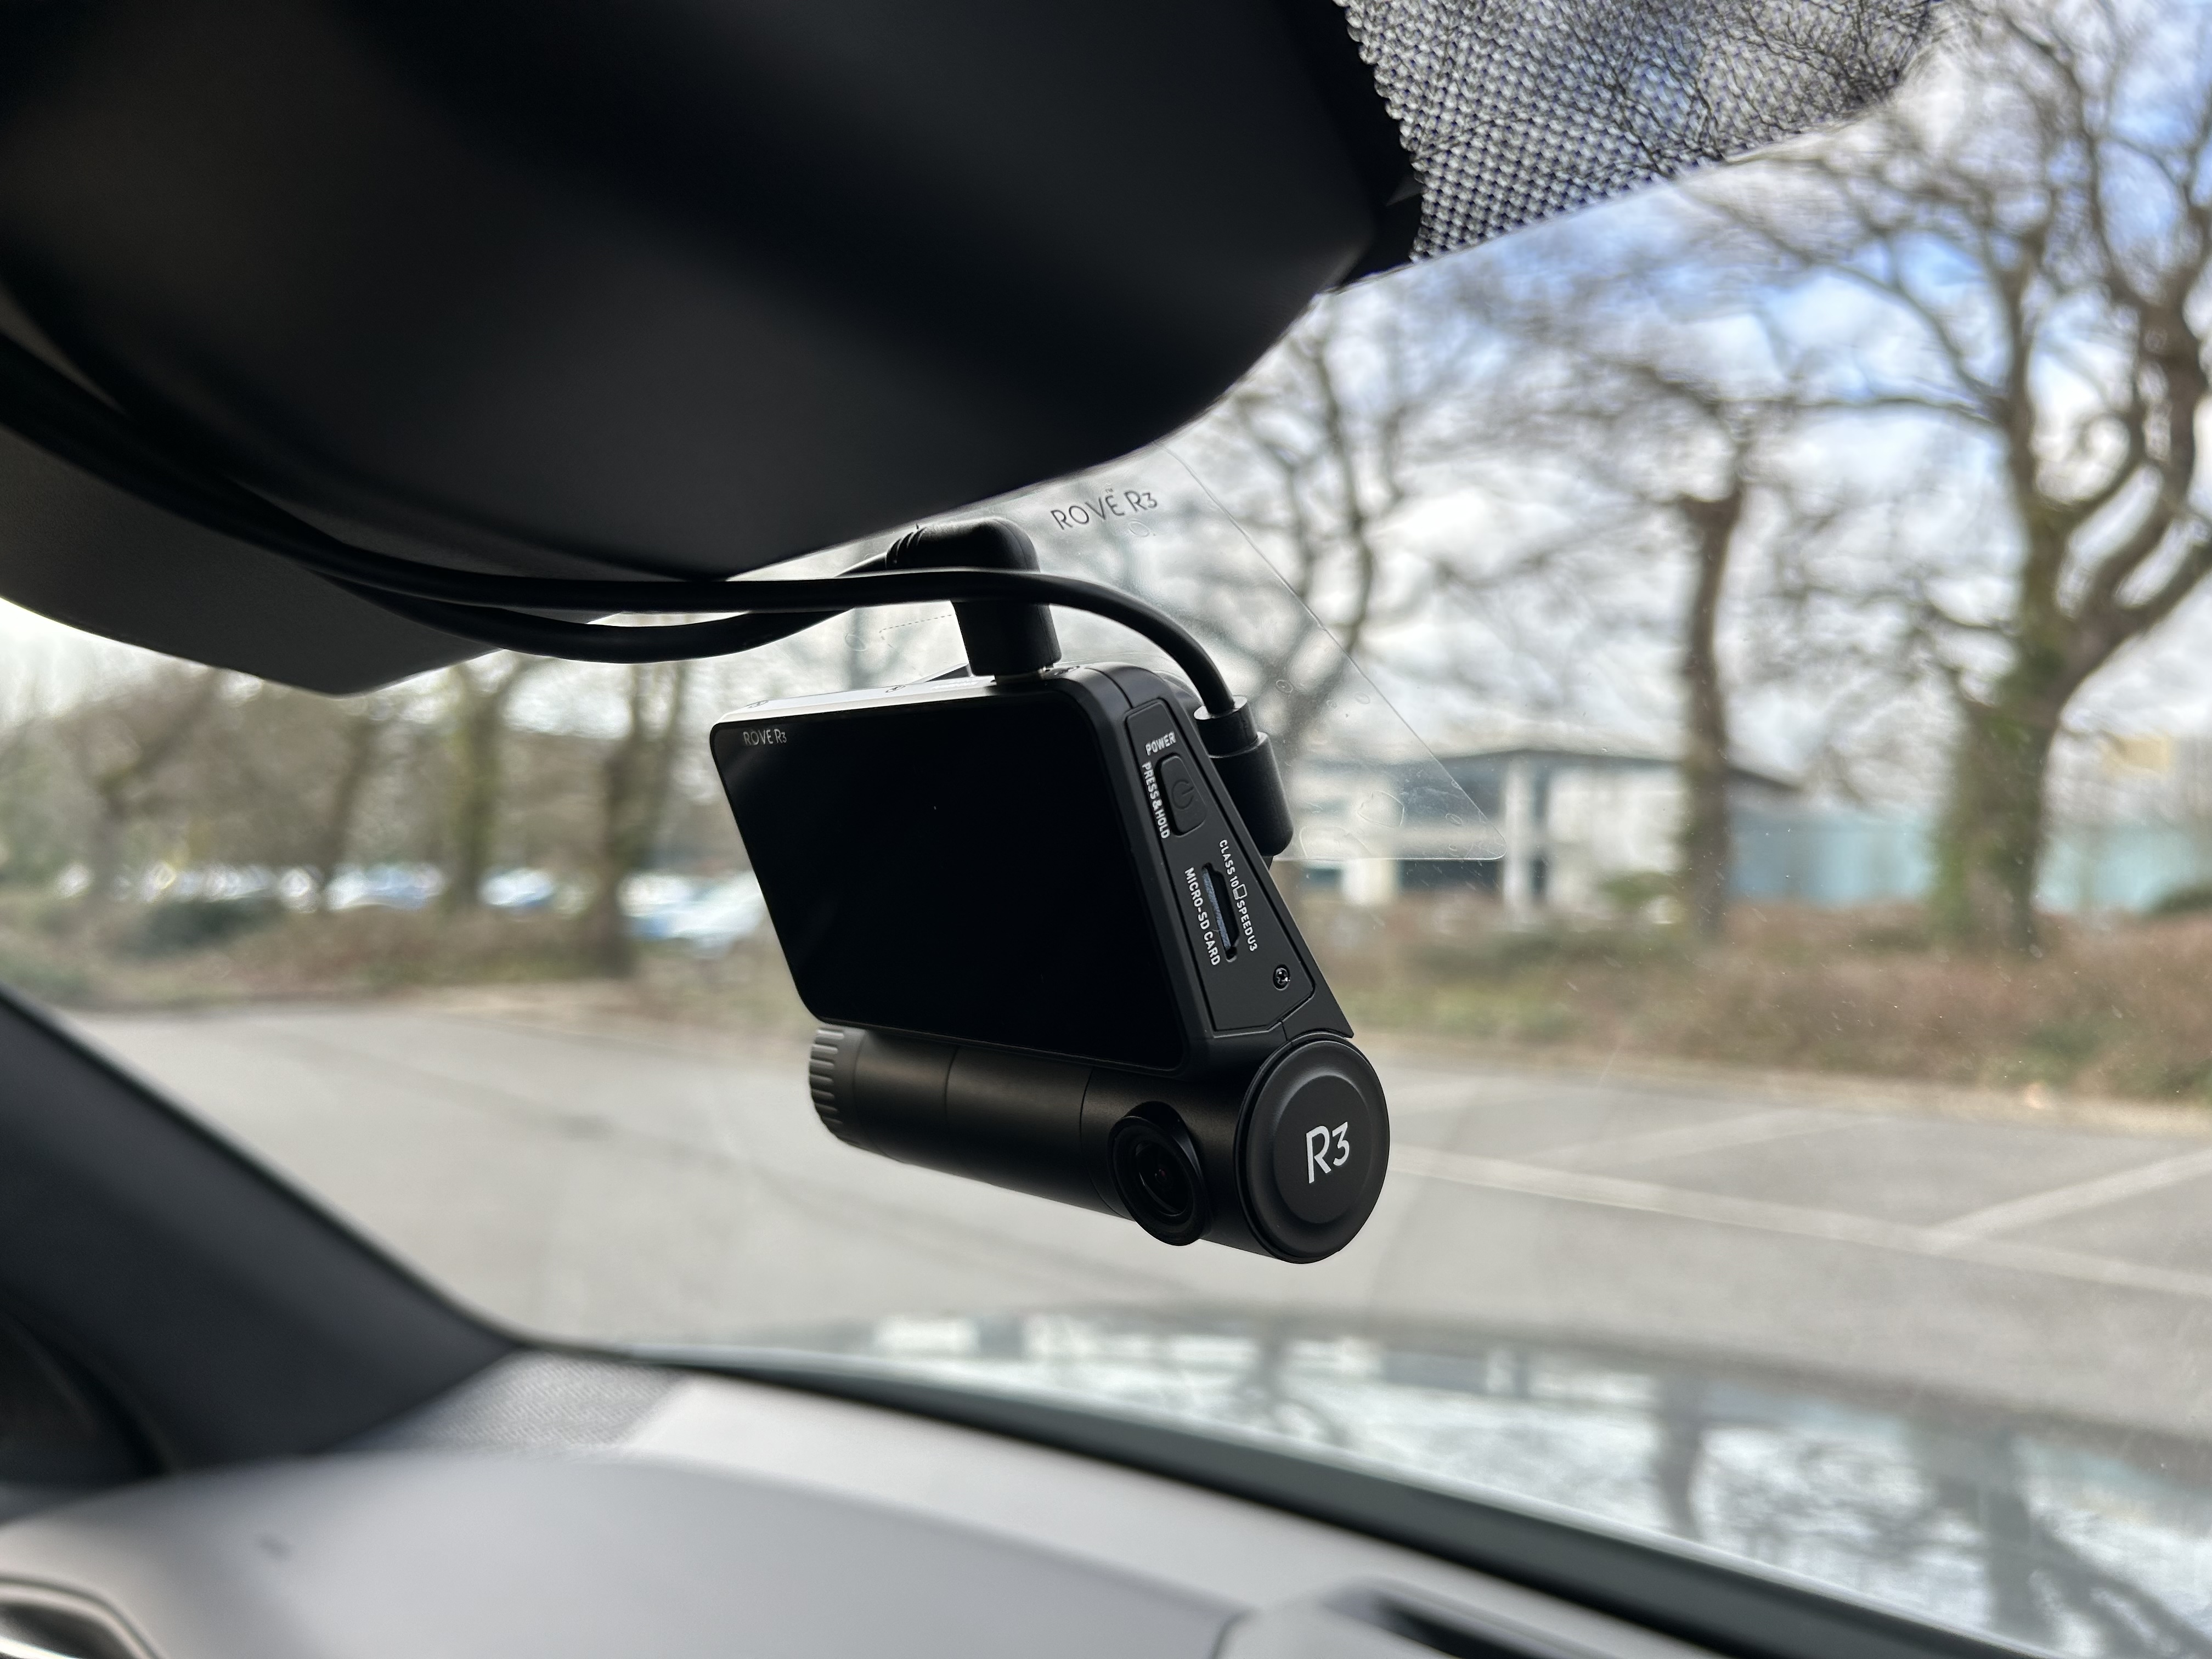
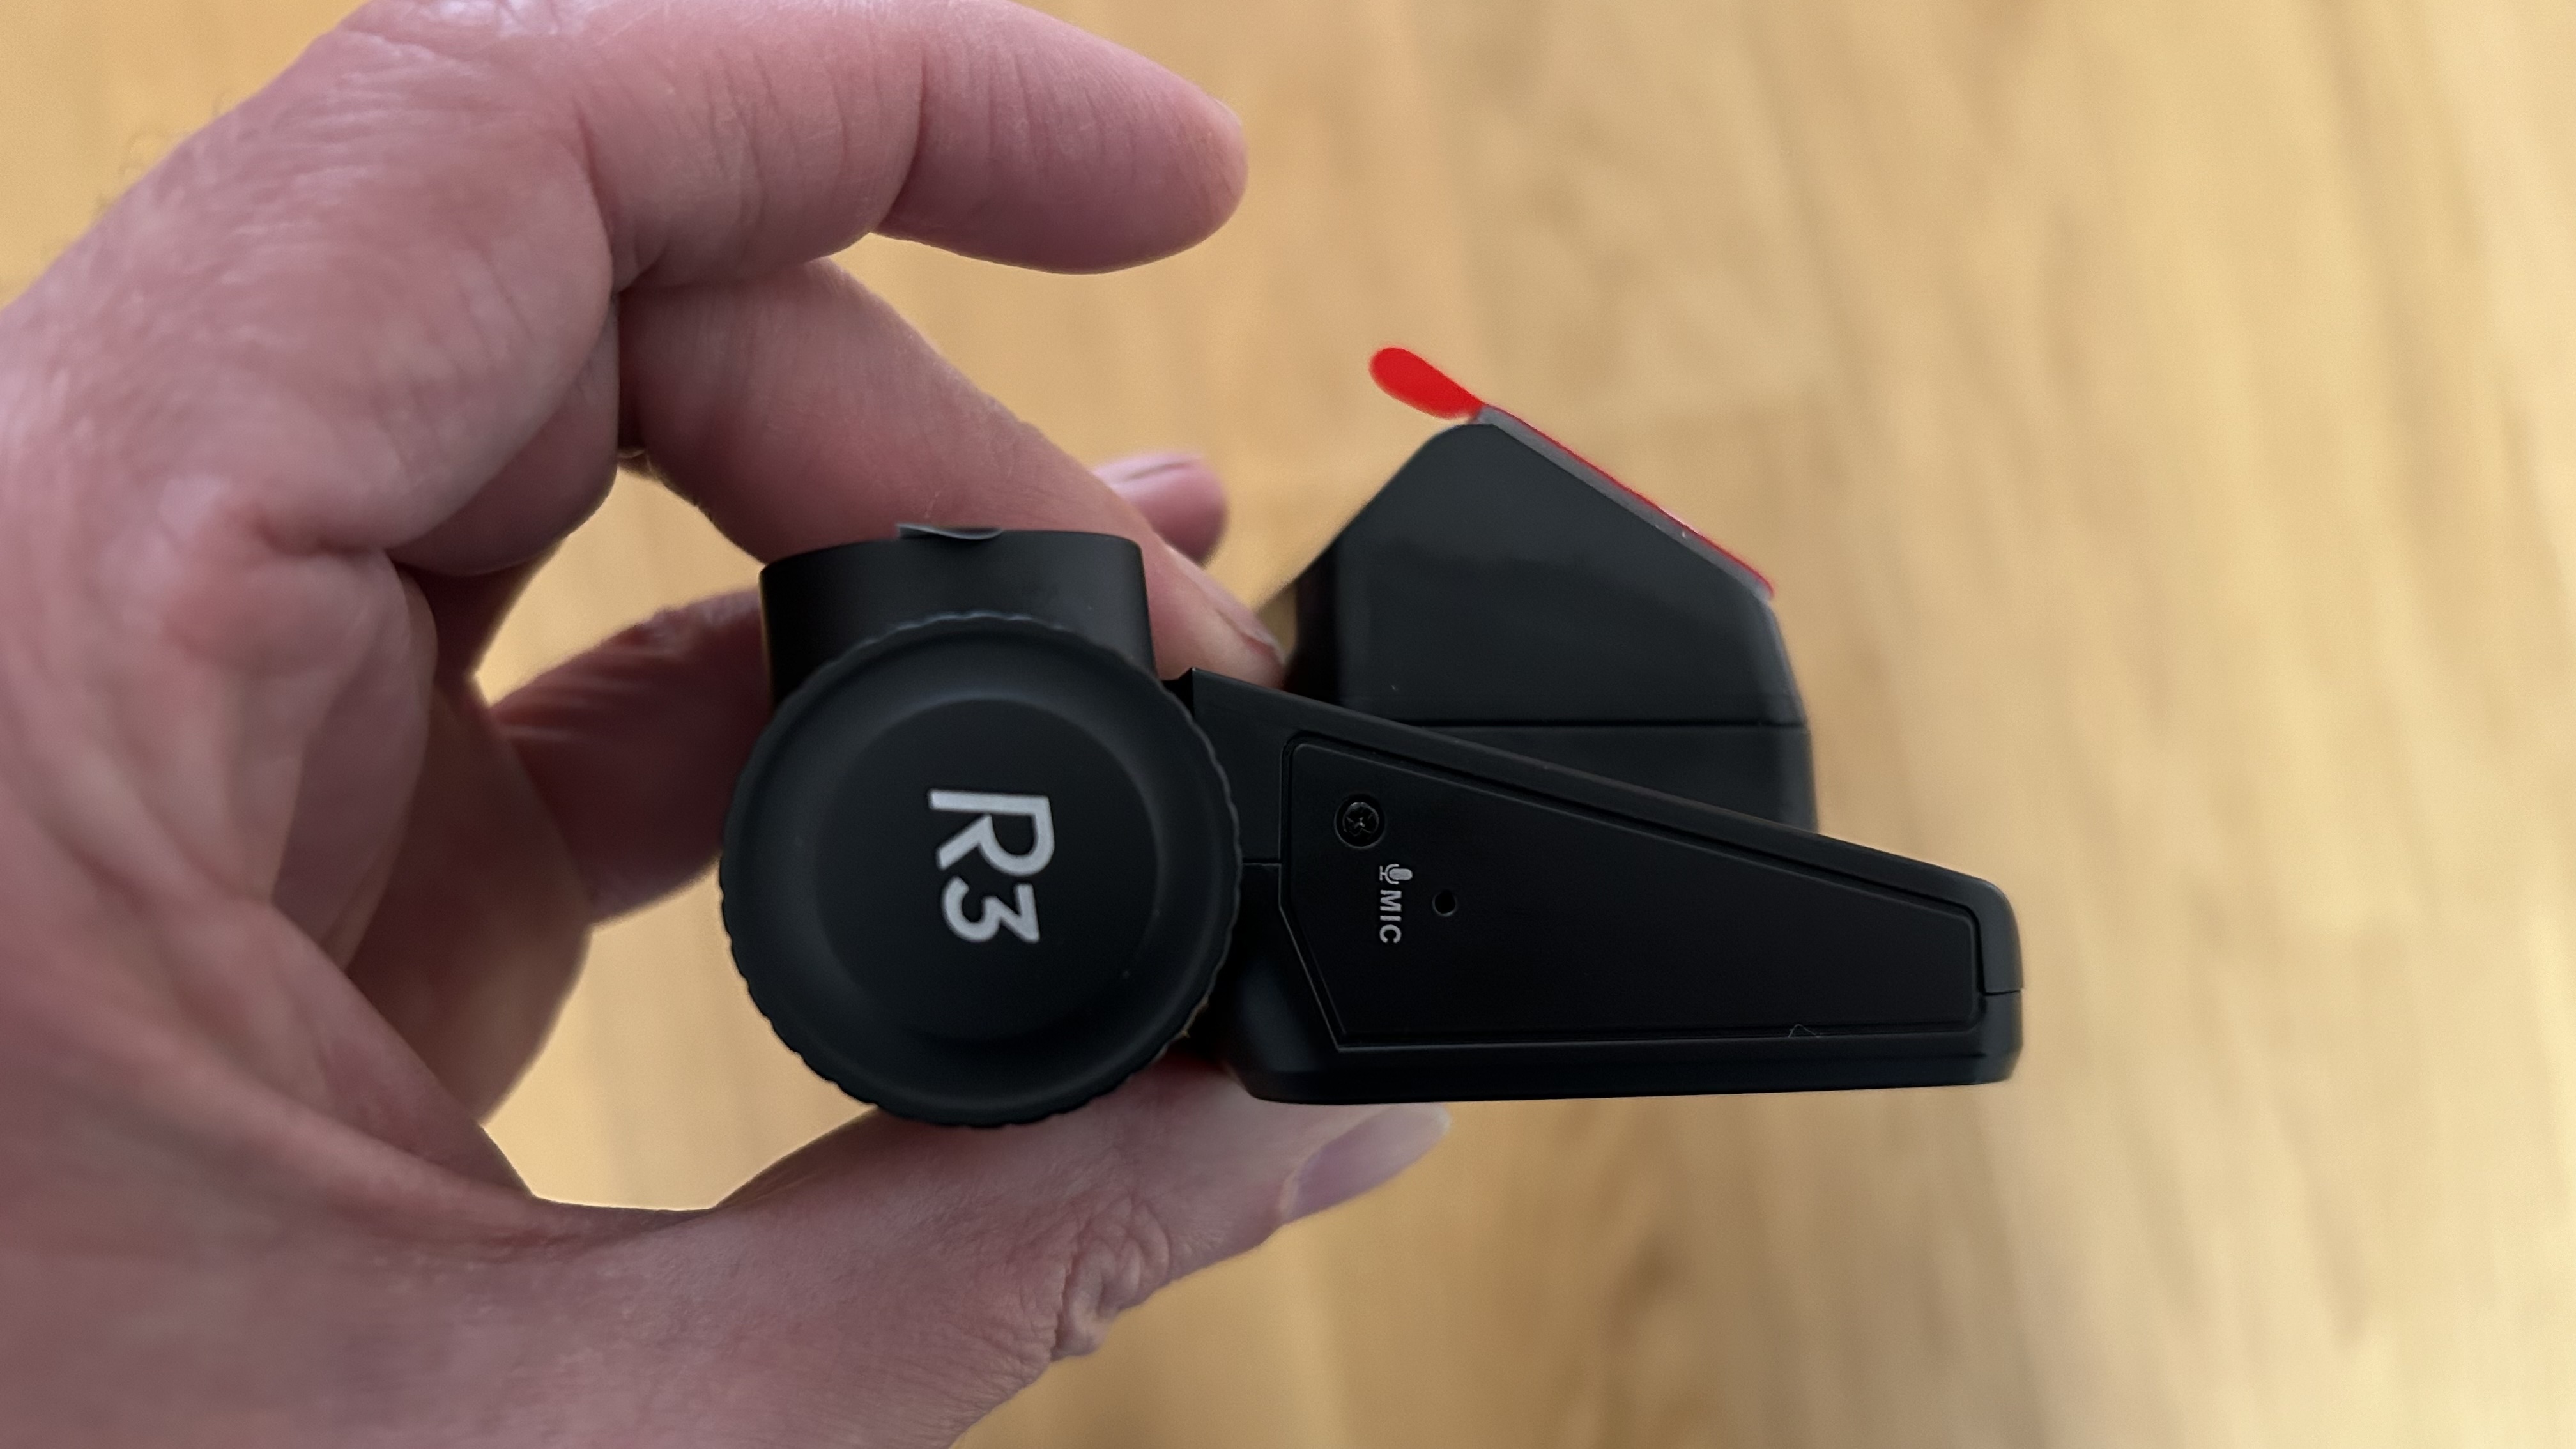
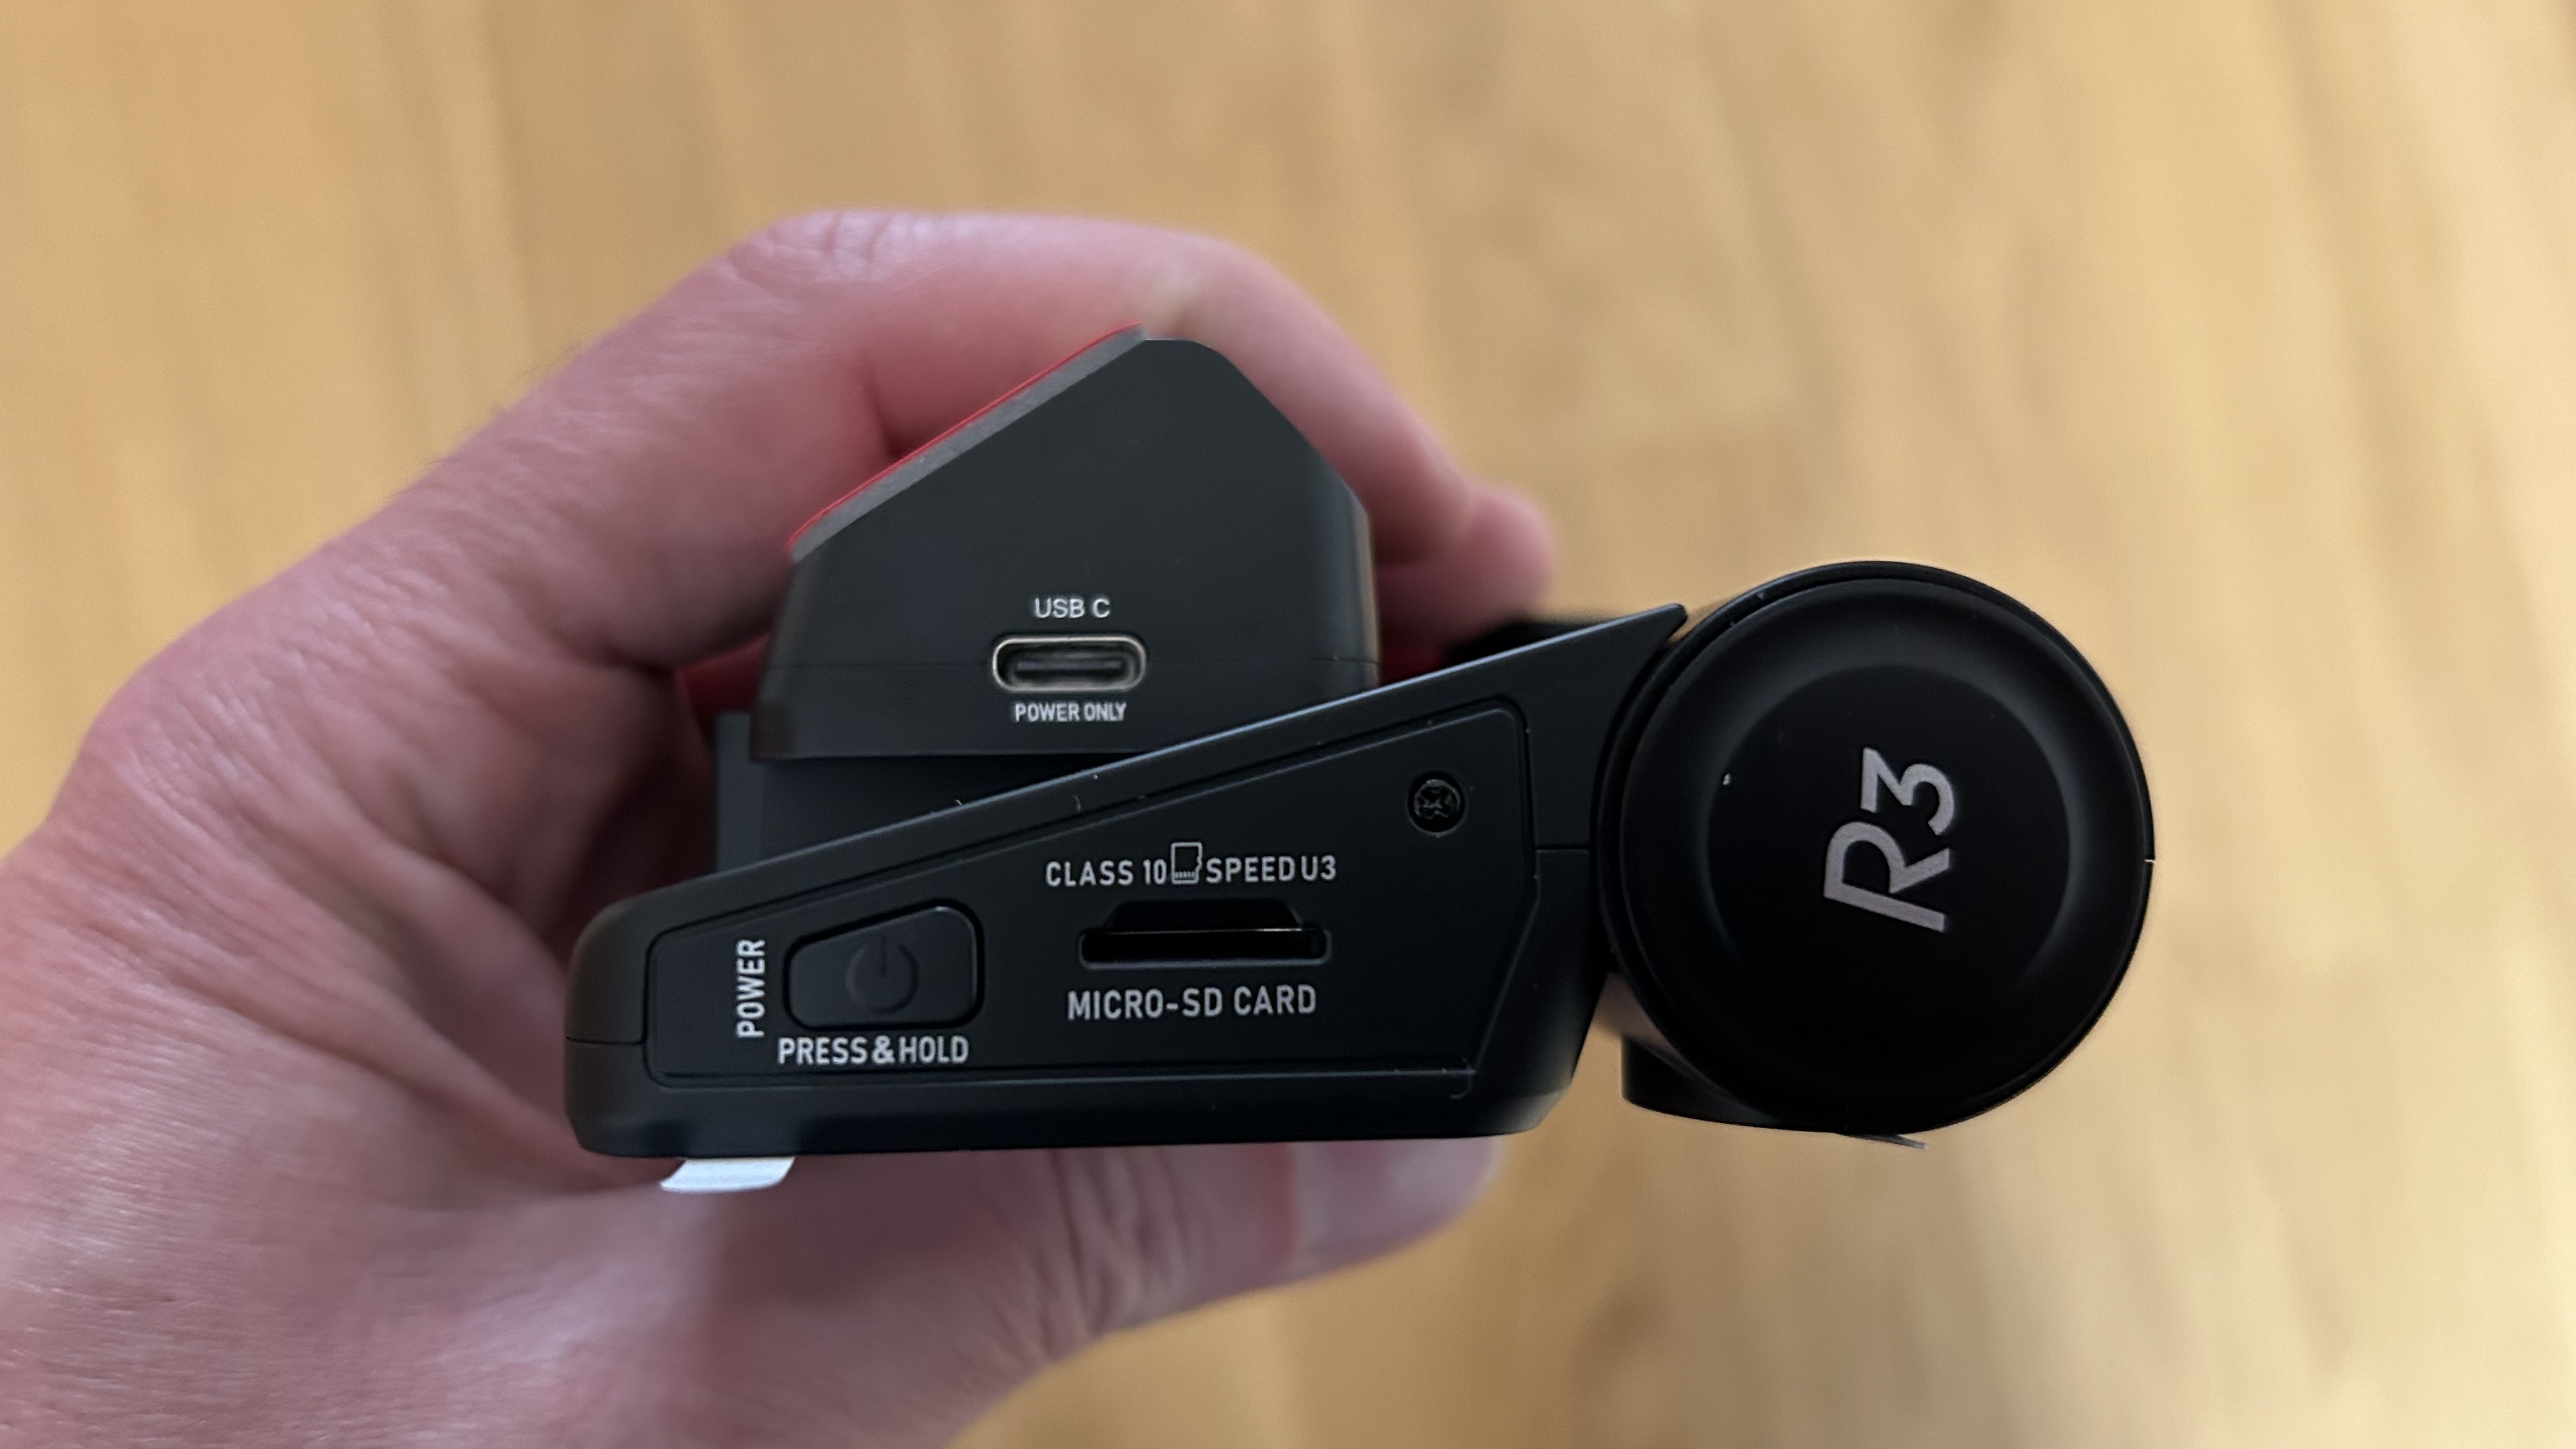
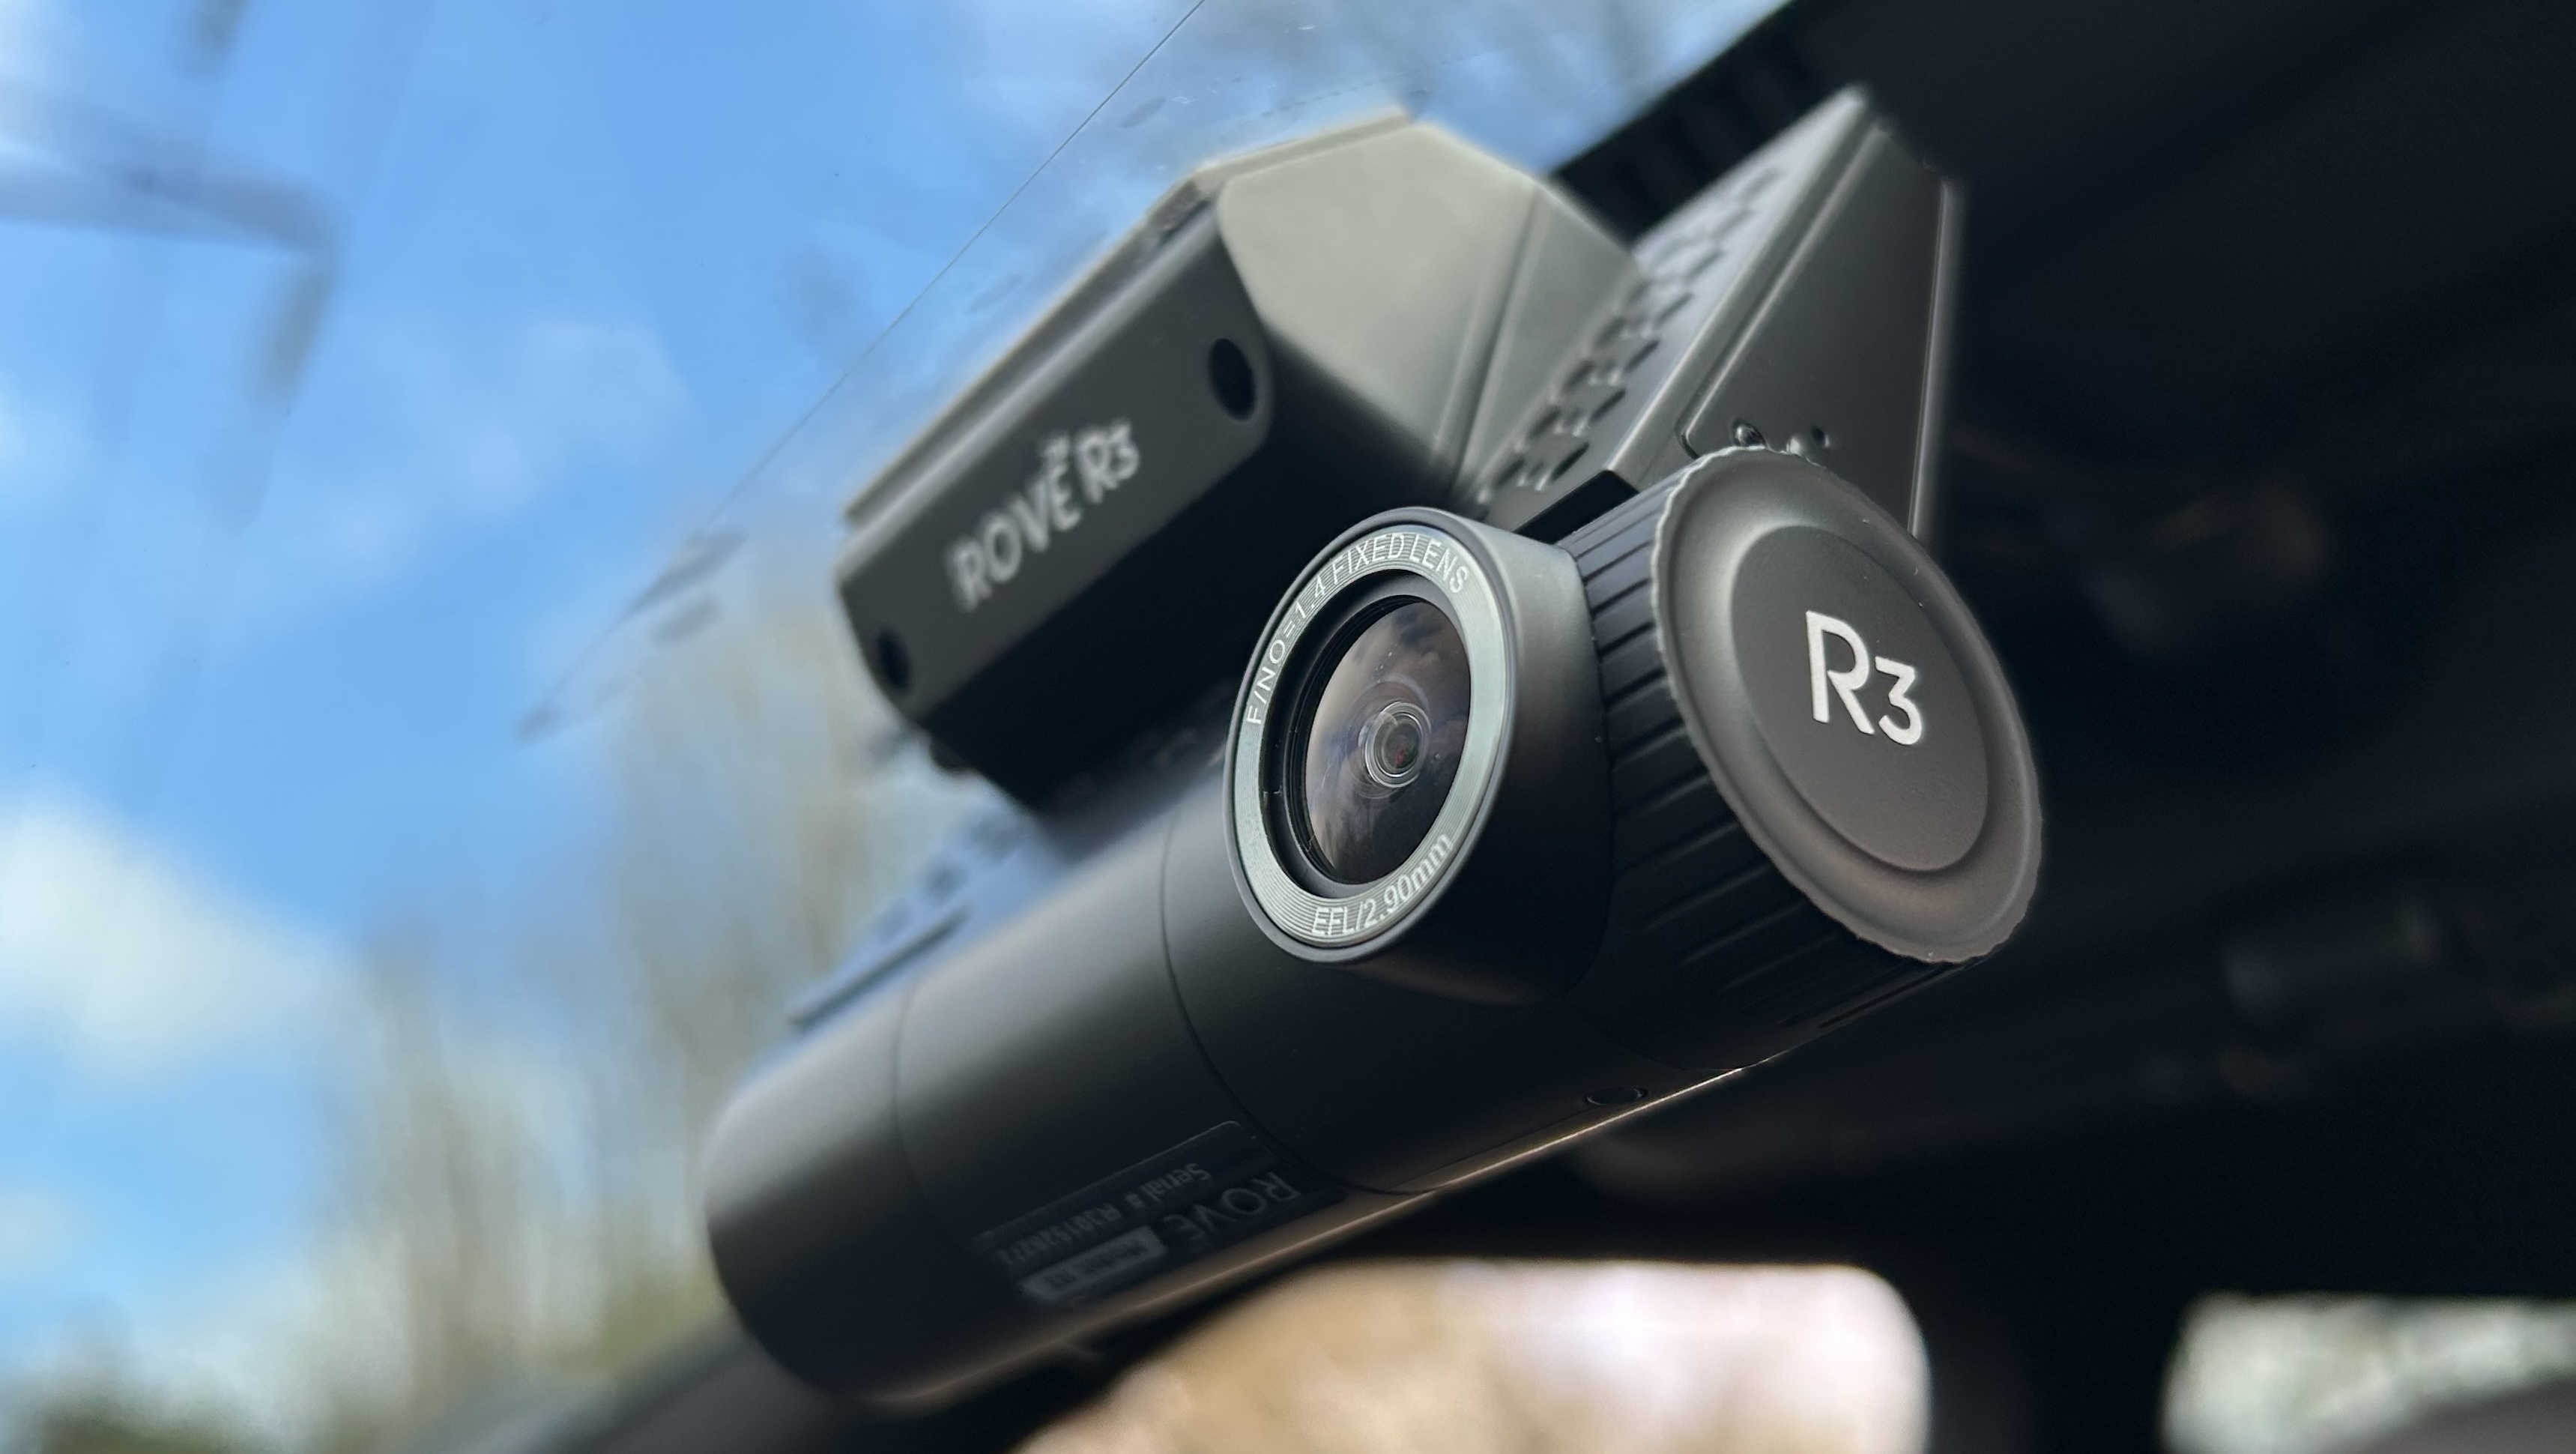
The build quality of all the components feels as good as that found on any of the other best dash cams. I like the robust feel of the main camera and the 3-inch screen is big enough to touch even if you’ve got chunky fingers. The design is also nicely laid out: I quickly knew where all the cables needed to go as they’re marked up logically. All I needed to do was pop in a microSD card and start plumbing it all in.
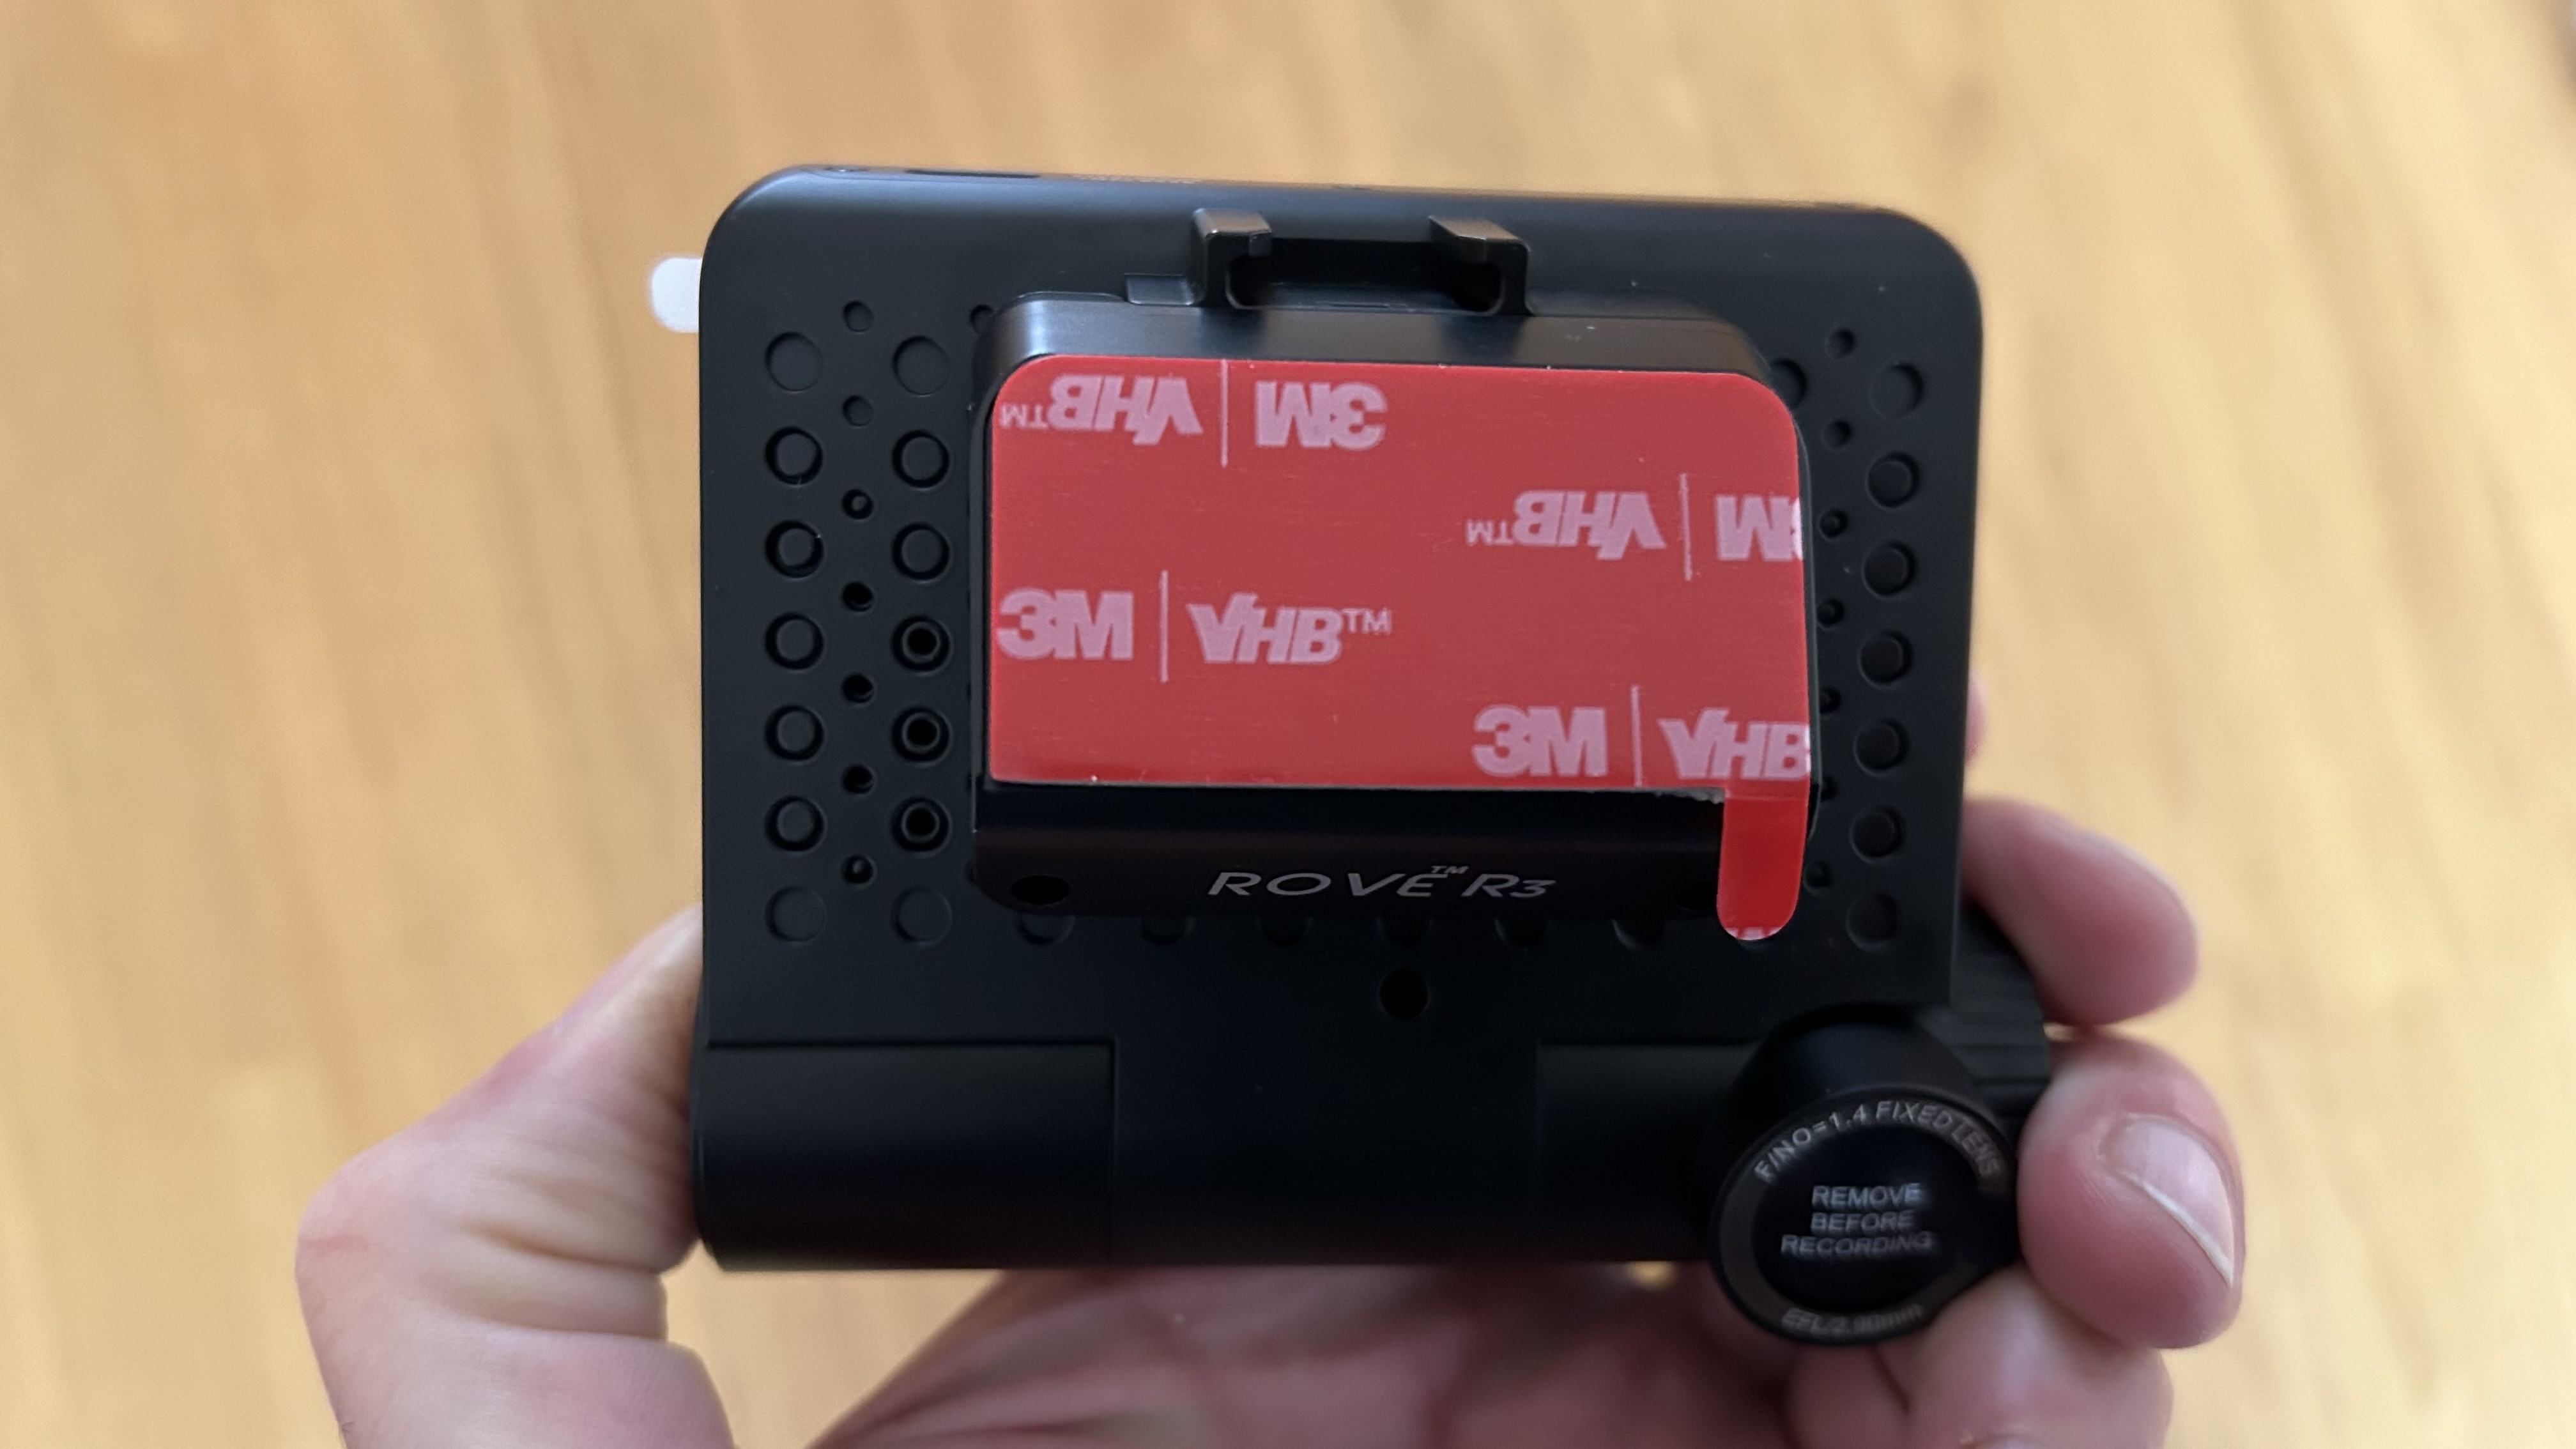
Considering the Rove R3 Dash Cam is a complete solution package, there’s inevitably time to be spent sticking the cameras on the front and rear screens. I made use of the electrostatic sheets, which saves getting your screen covered in gum from the adhesive if I have to take it off again. The wiring, especially for the rear, takes further time to push in around the headliner, but I found the included tool made fairly light work of that. It all plugs in easily enough, though.
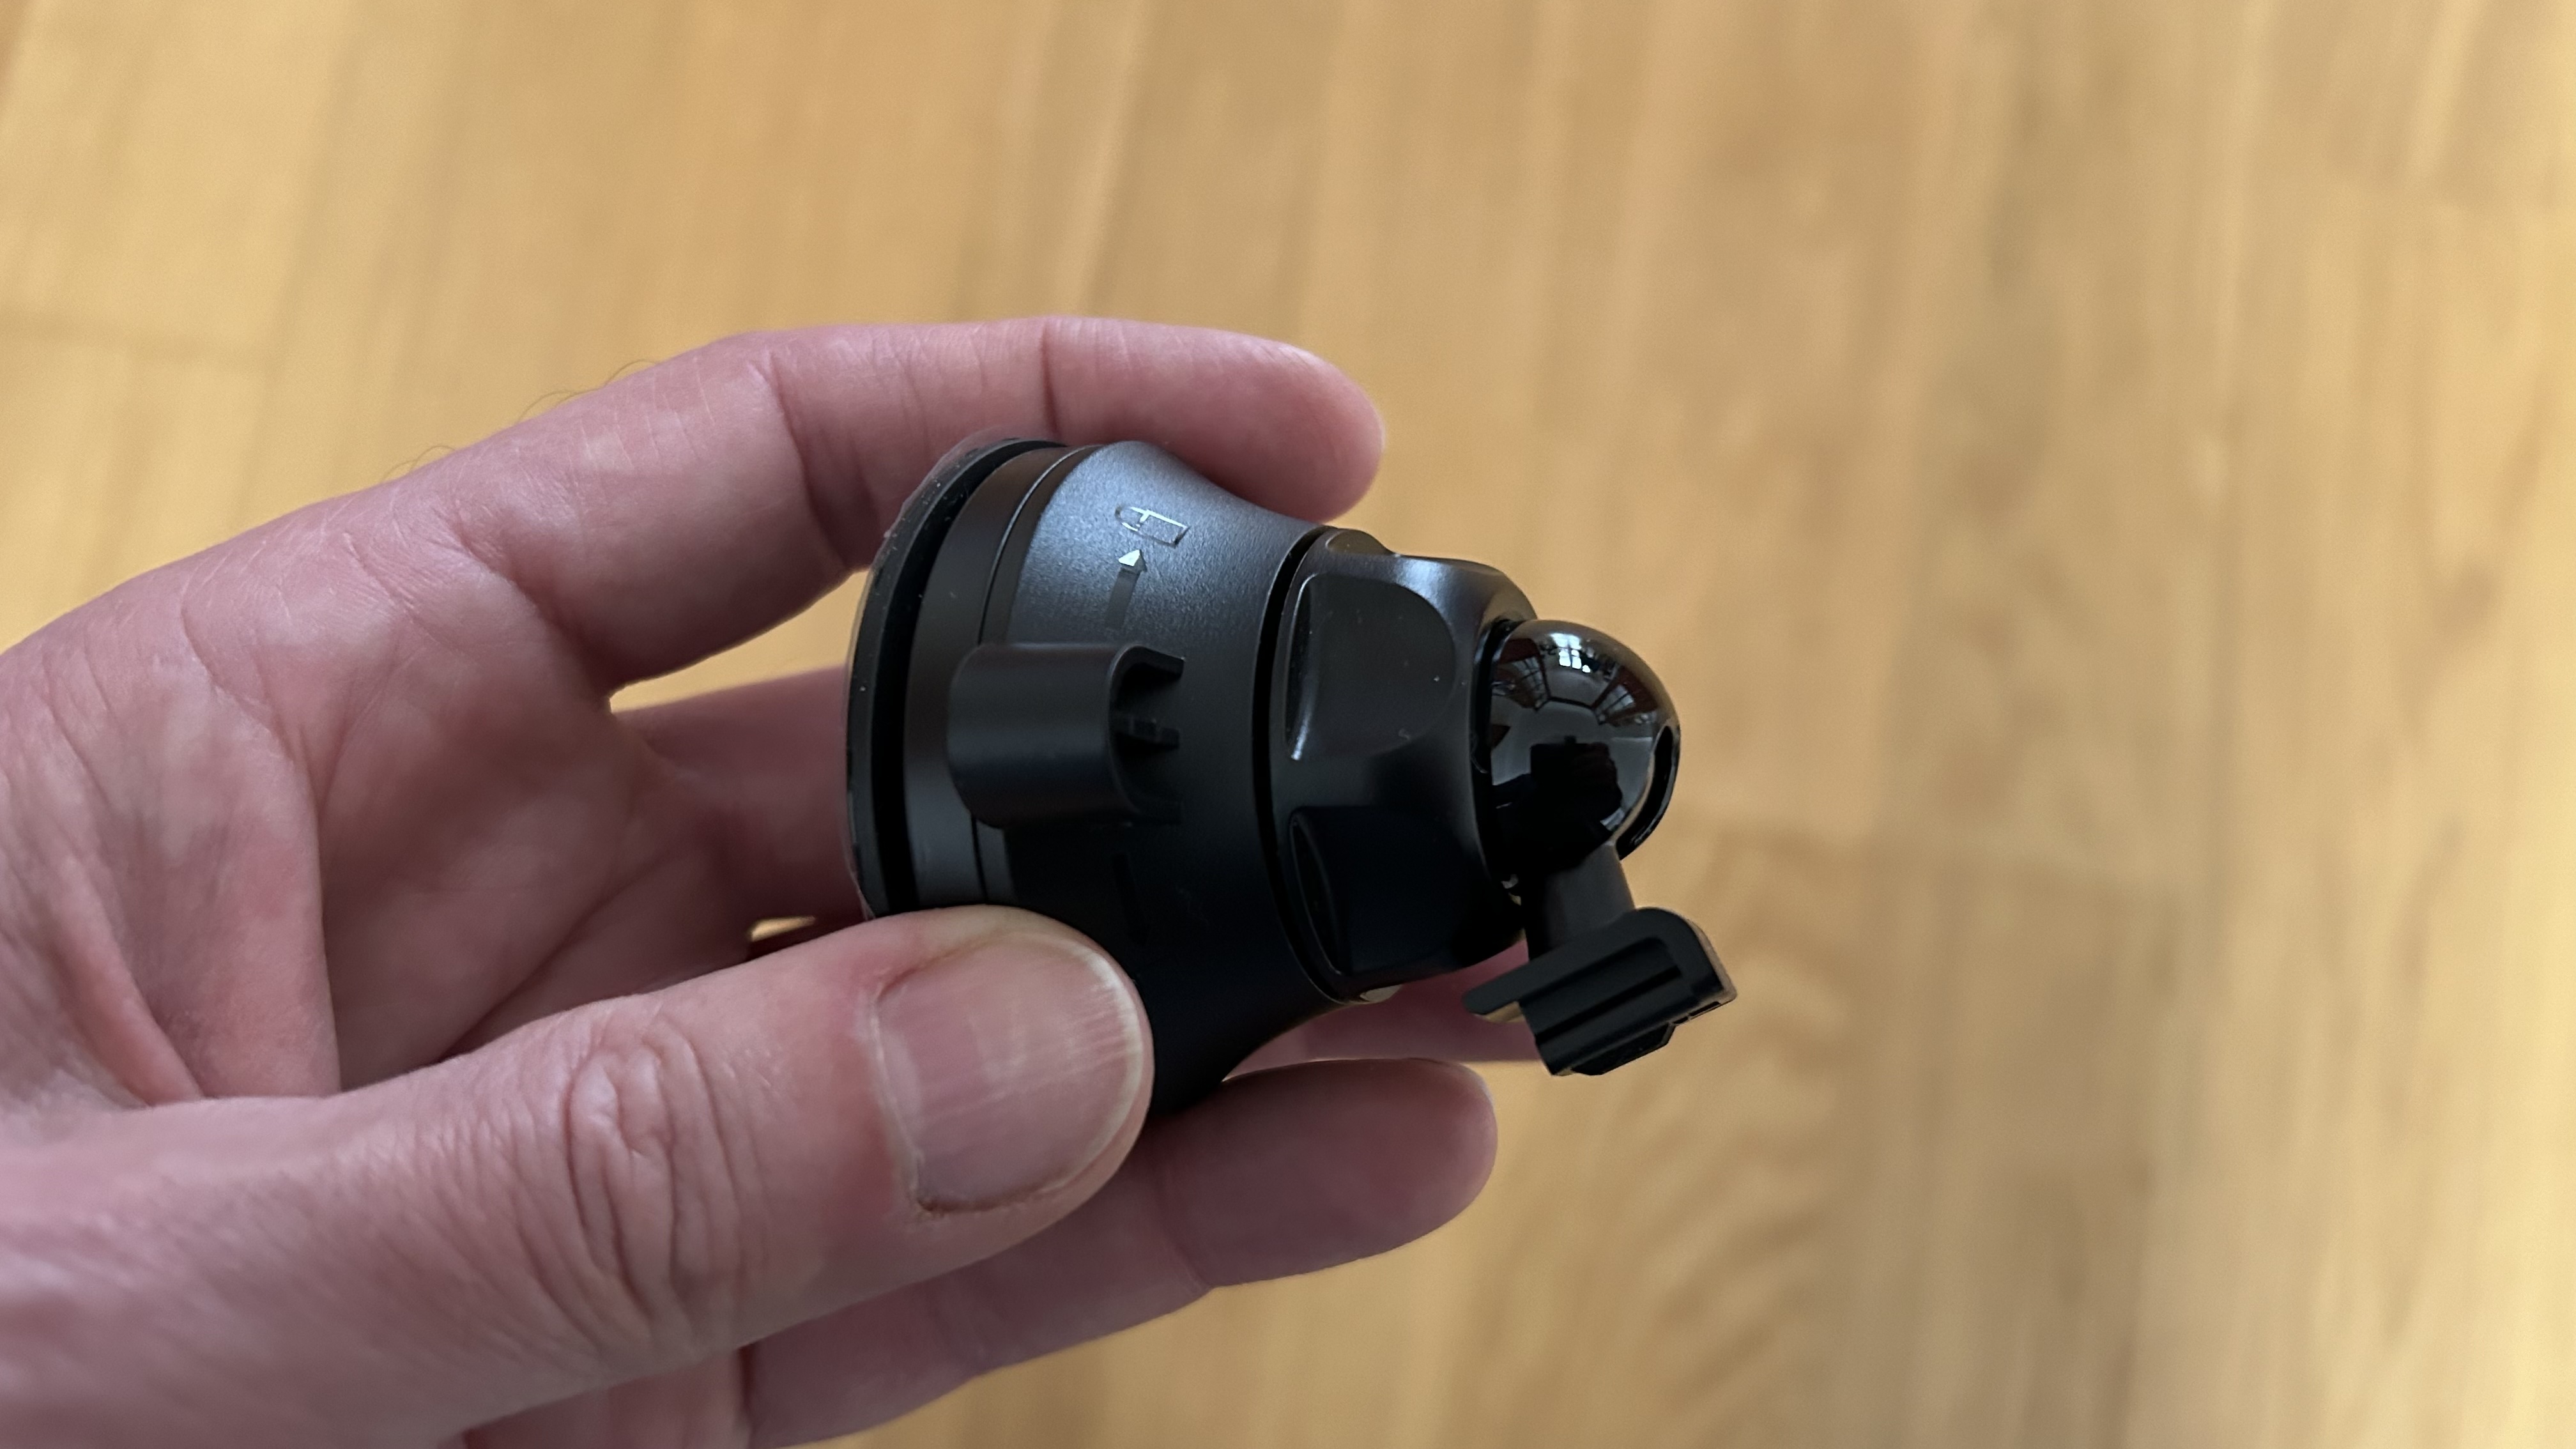
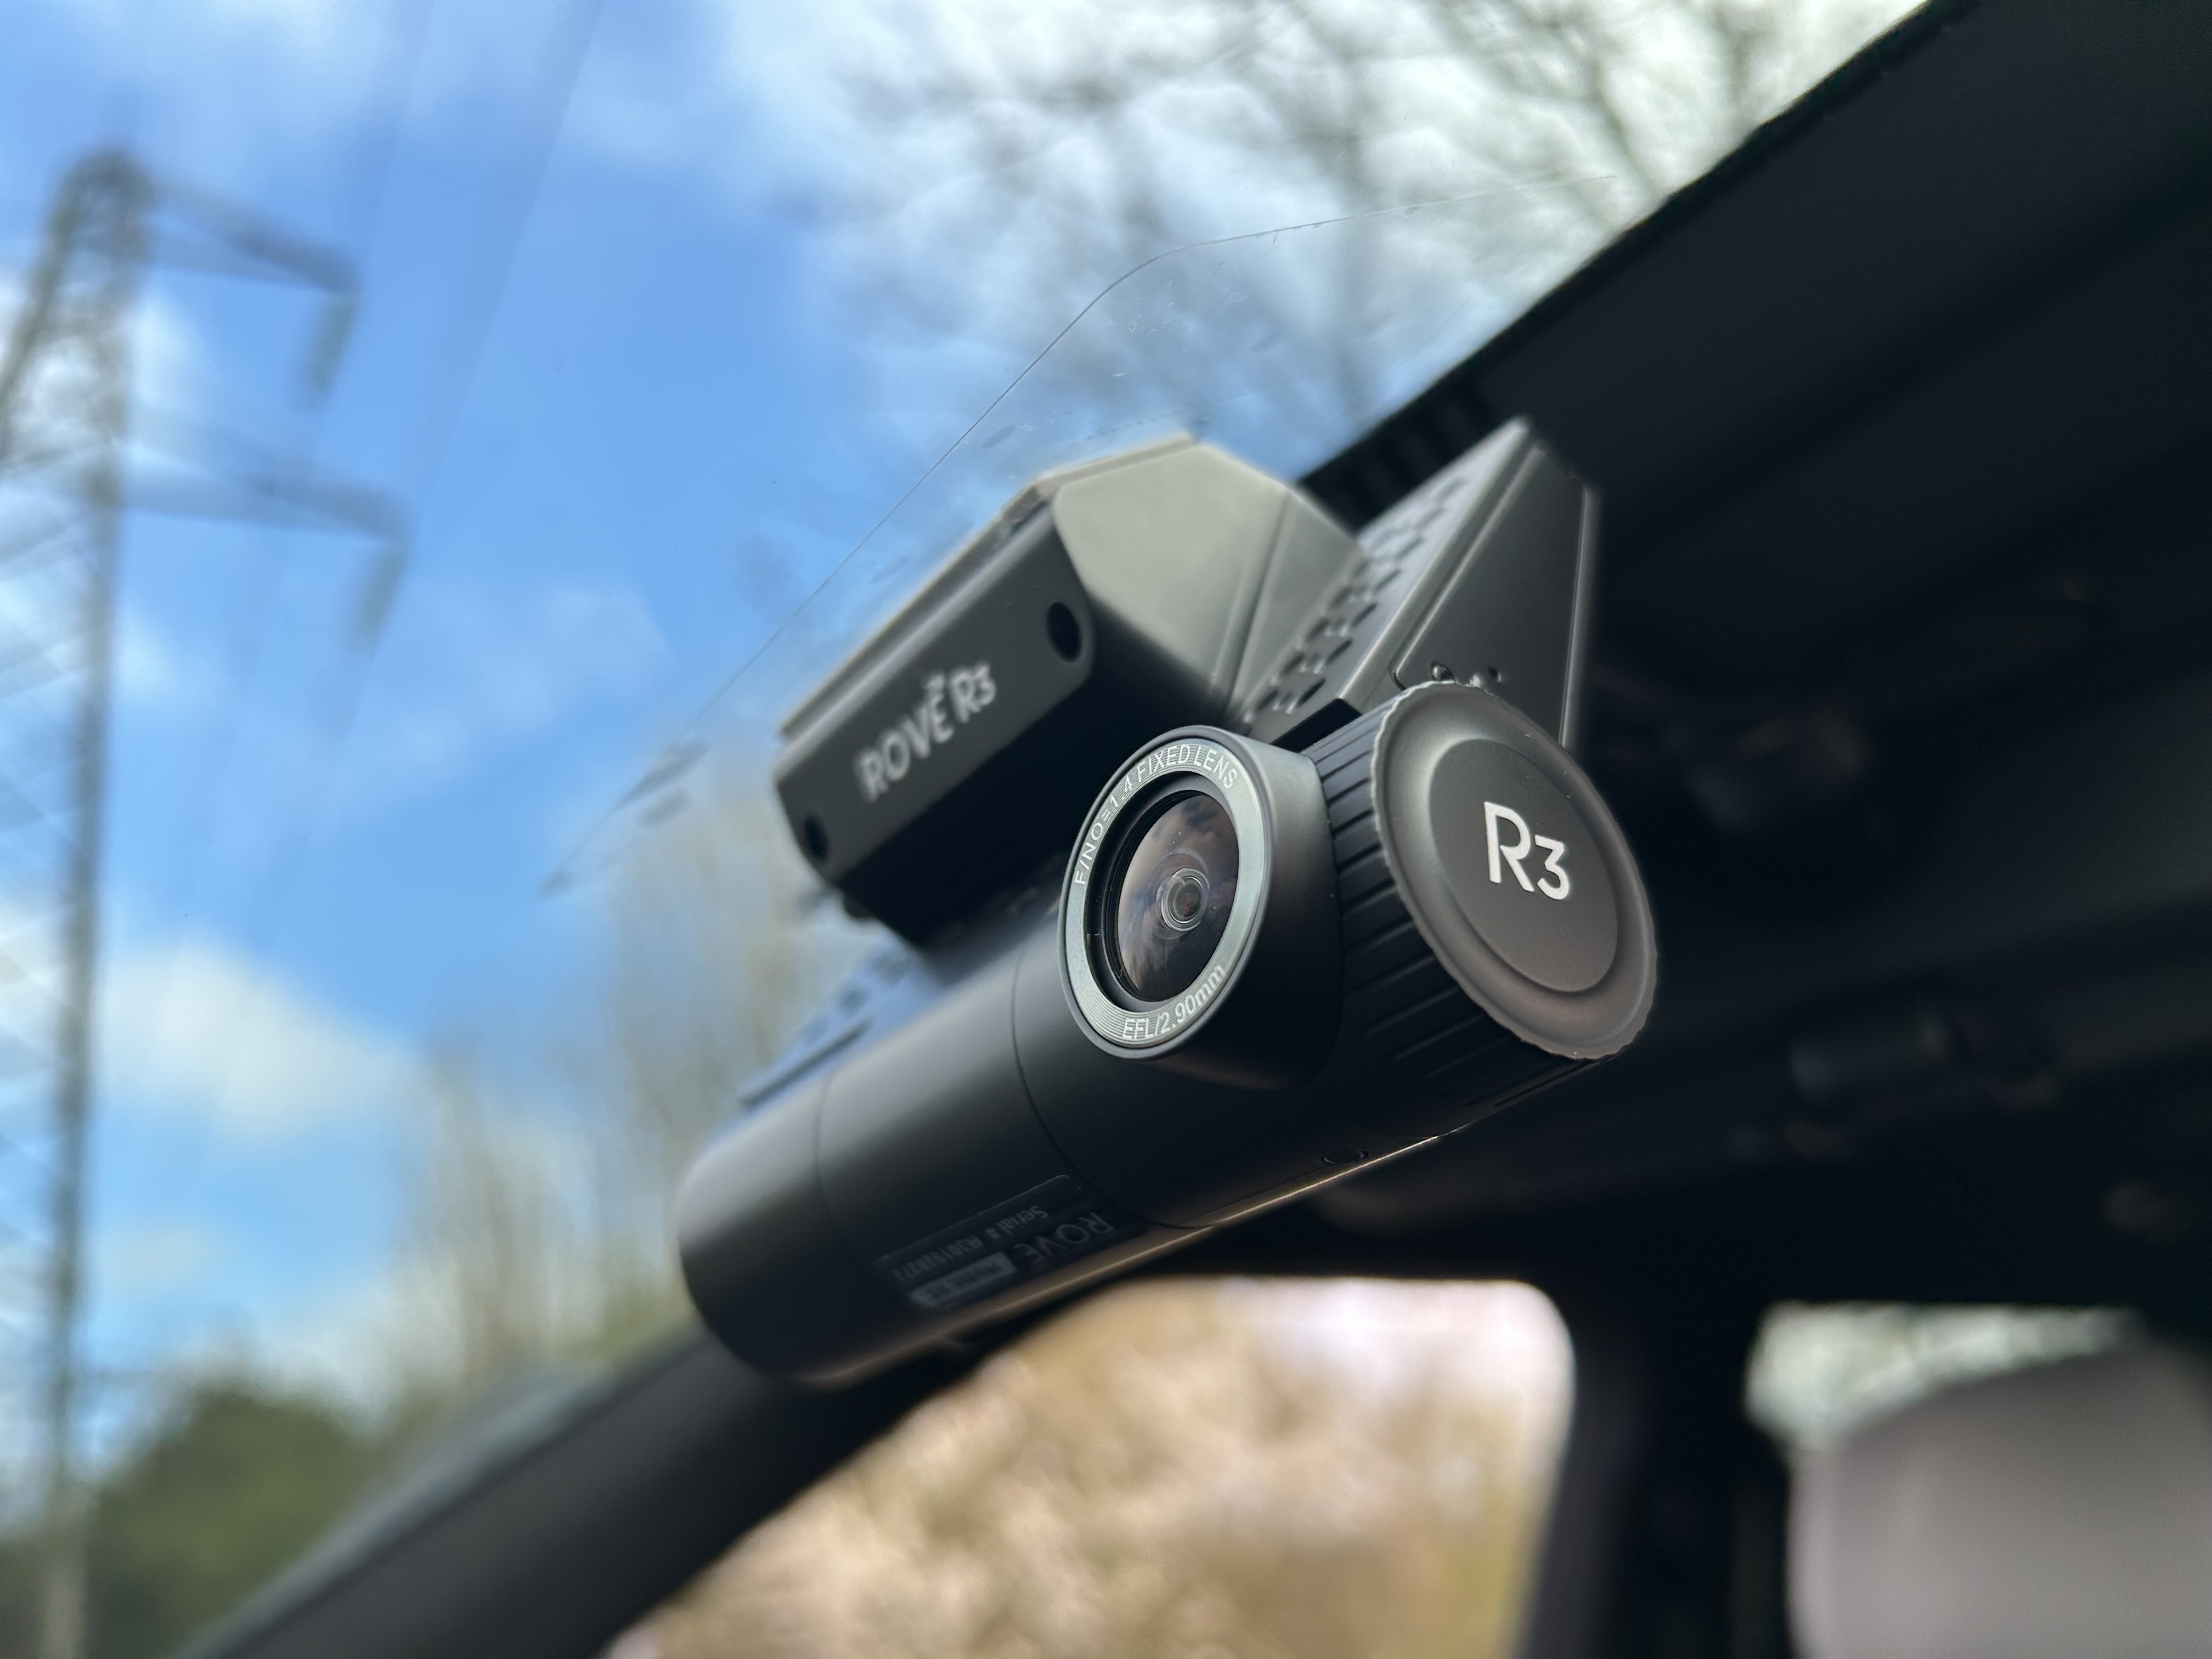
I especially like the way you can mount the main camera as it is, straight to your screen. Alternatively, there's the option to use the mount, which means it can be more easily positioned if any adjustment is needed. I got lucky the first time with my screen-mounted route, but either option works well depending on your requirements. Usefully, the lens in the main camera can also be twisted in a circular motion, so the view of the road can be adjusted easily.
Setup took me about 30 minutes all told, which is reasonable. I then powered up, which happens automatically if you’re plugged in, and had to pick through a few options to configure the camera.
It involves common tasks, such as formatting the memory card (which was included in my test example but isn't normally), setting the date and time, choosing a time zone and carrying out any customization options. I plugged the dash cam into my 12V electrical socket, though you can buy a hardwire kit if you’re looking for a permanent installation.
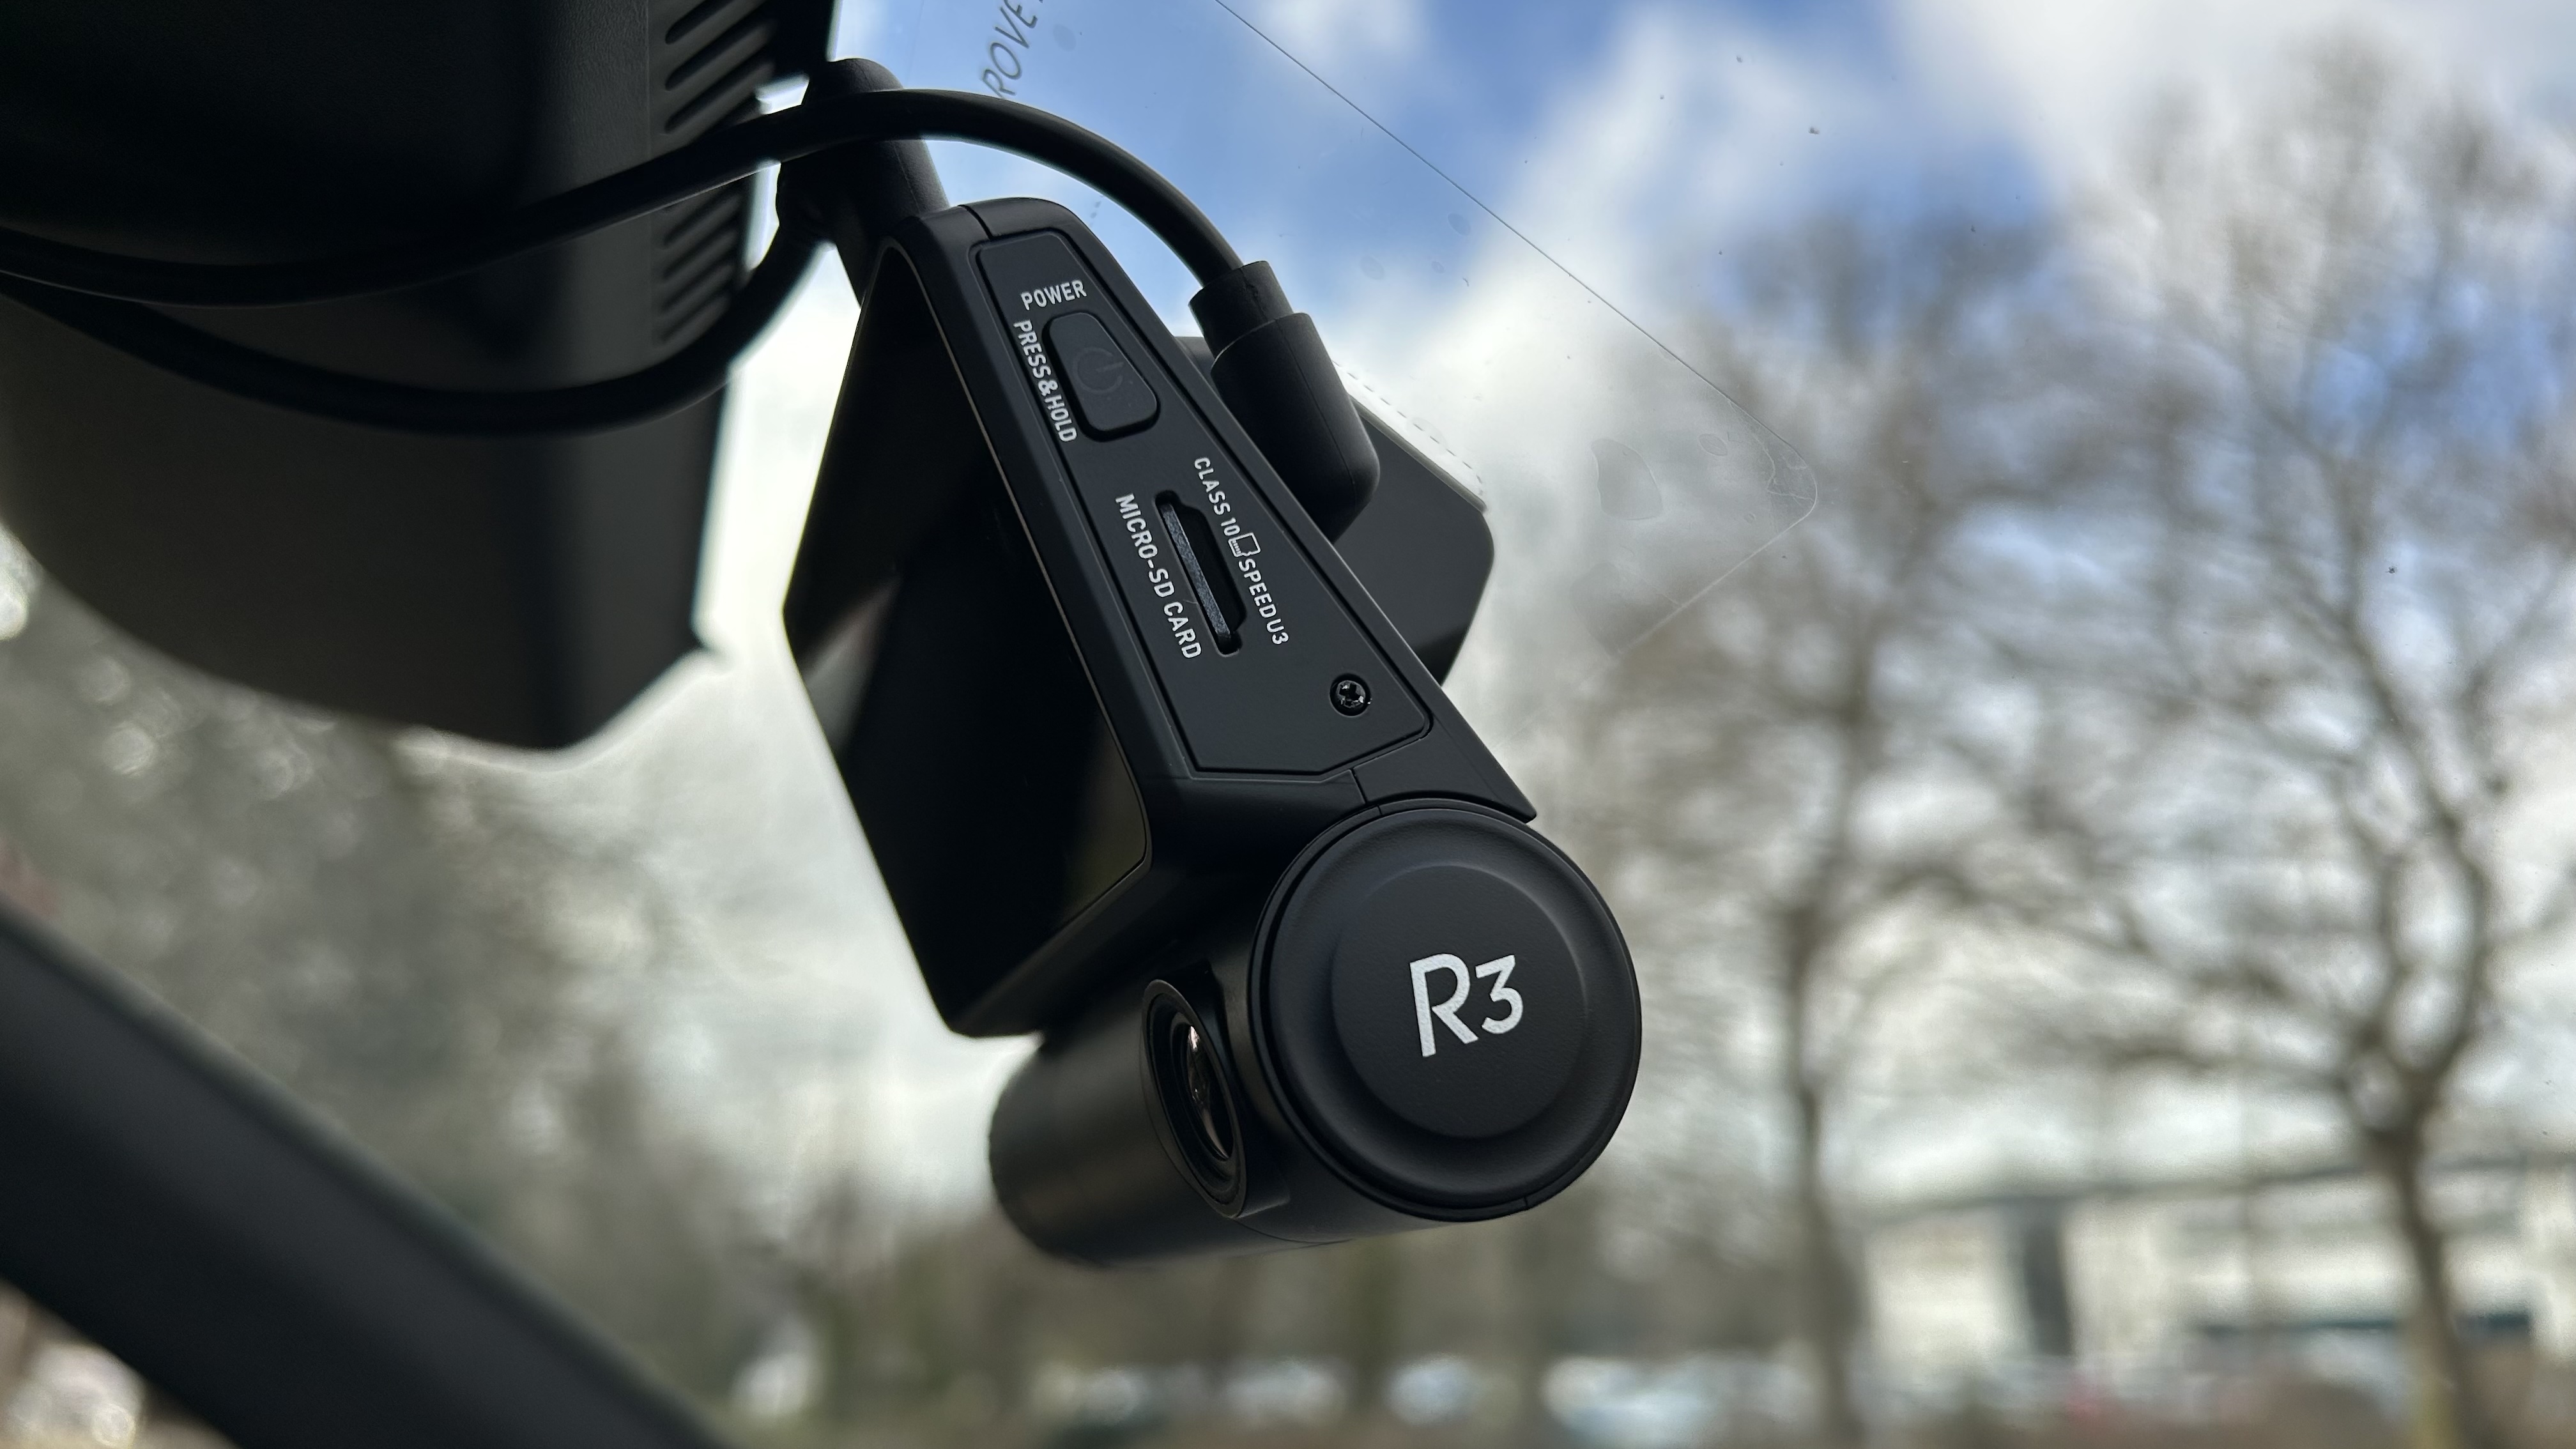
There’s a small button on the side of the camera to manually power up, but, once installation is complete and it has power, the Rove R3 Dash Cam engages its video recording mode automatically.
Conversely, the Rove R3 Dash Cam will stop recording if you power down your ignition (or unplug it) within 1 to 2 seconds. It will save the last video being recorded, so there’s no fear of losing any footage. I felt happy to use the camera in its default setup and settings arrangement, but dipping into the menus lets you easily tweak most aspects of the functionality.
Perhaps my favorite aspect of the Rove R3 Dash Cam is the three-channel coverage thanks to having a front camera, a rear-facing one, and the lens built into the main unit that covers the cabin area. Adding to the appeal is the built-in GPS Geotagging (incorporated into the mounting point of the main camera), which means the footage always has live speed and location data as part of the capture process. Getting footage off the cameras was easy too, with dual-band Wi-Fi (5GHz and 2.4HGz) straight to the app proving handy.
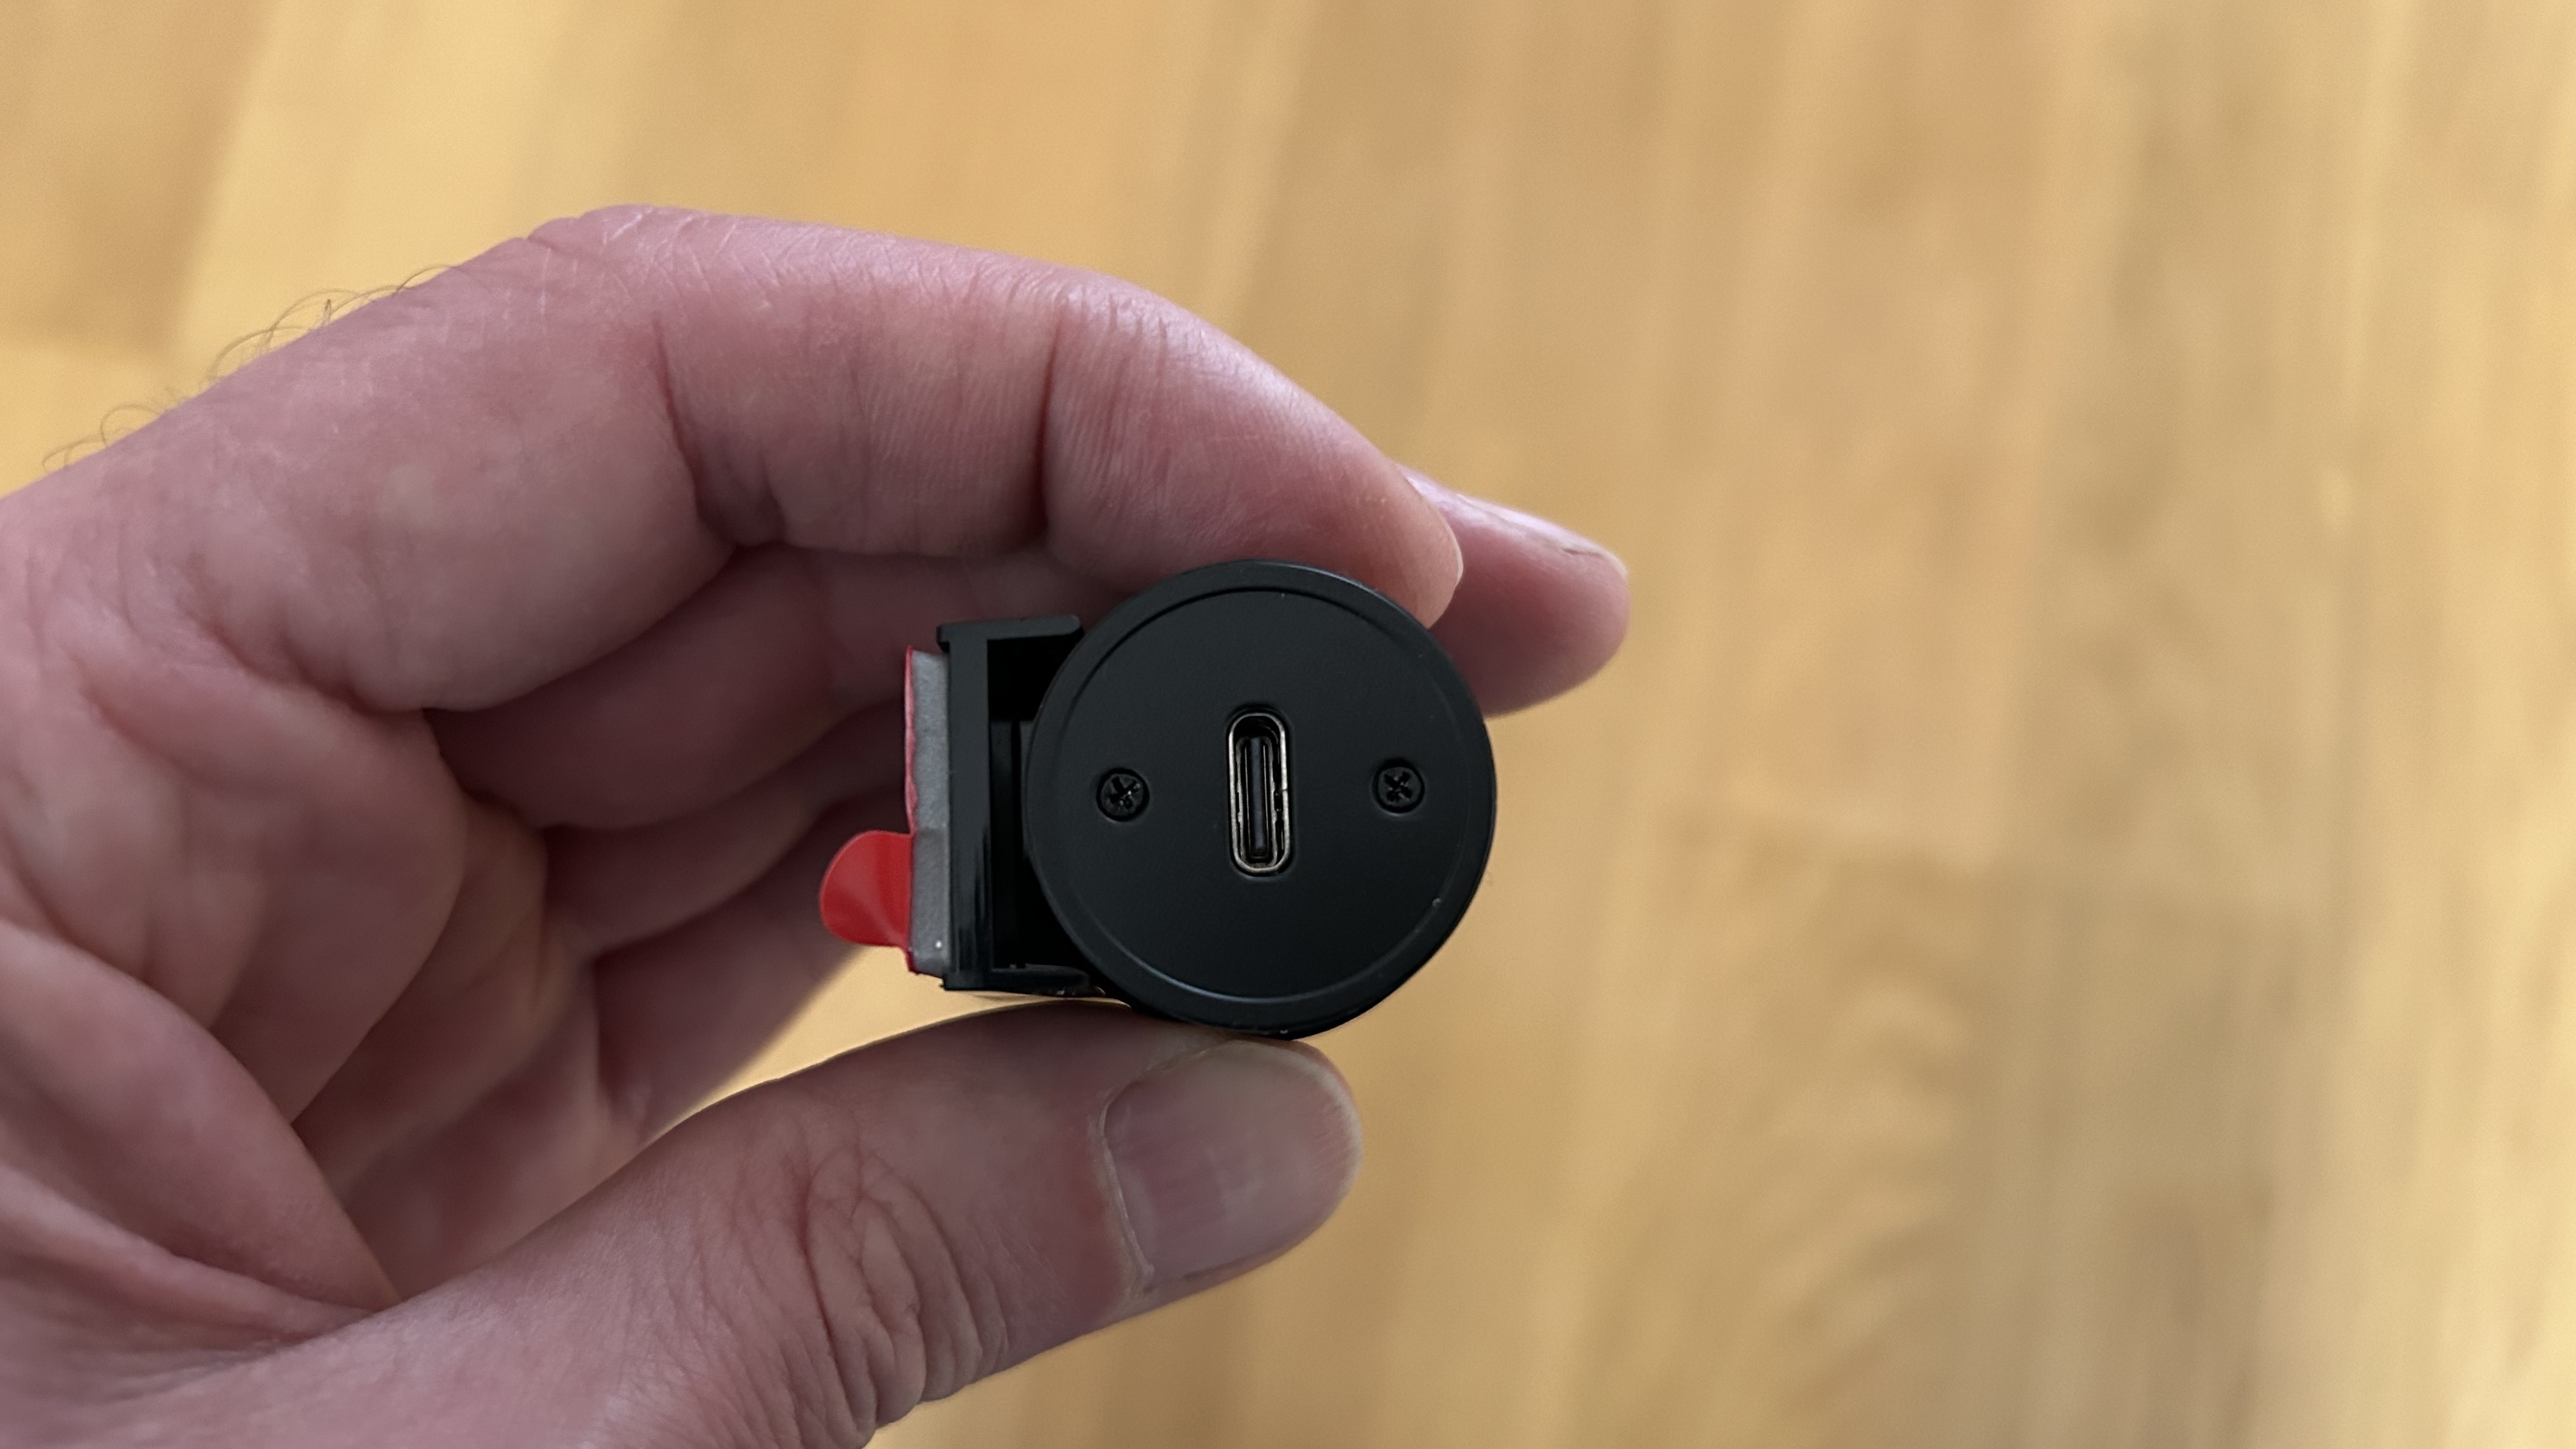
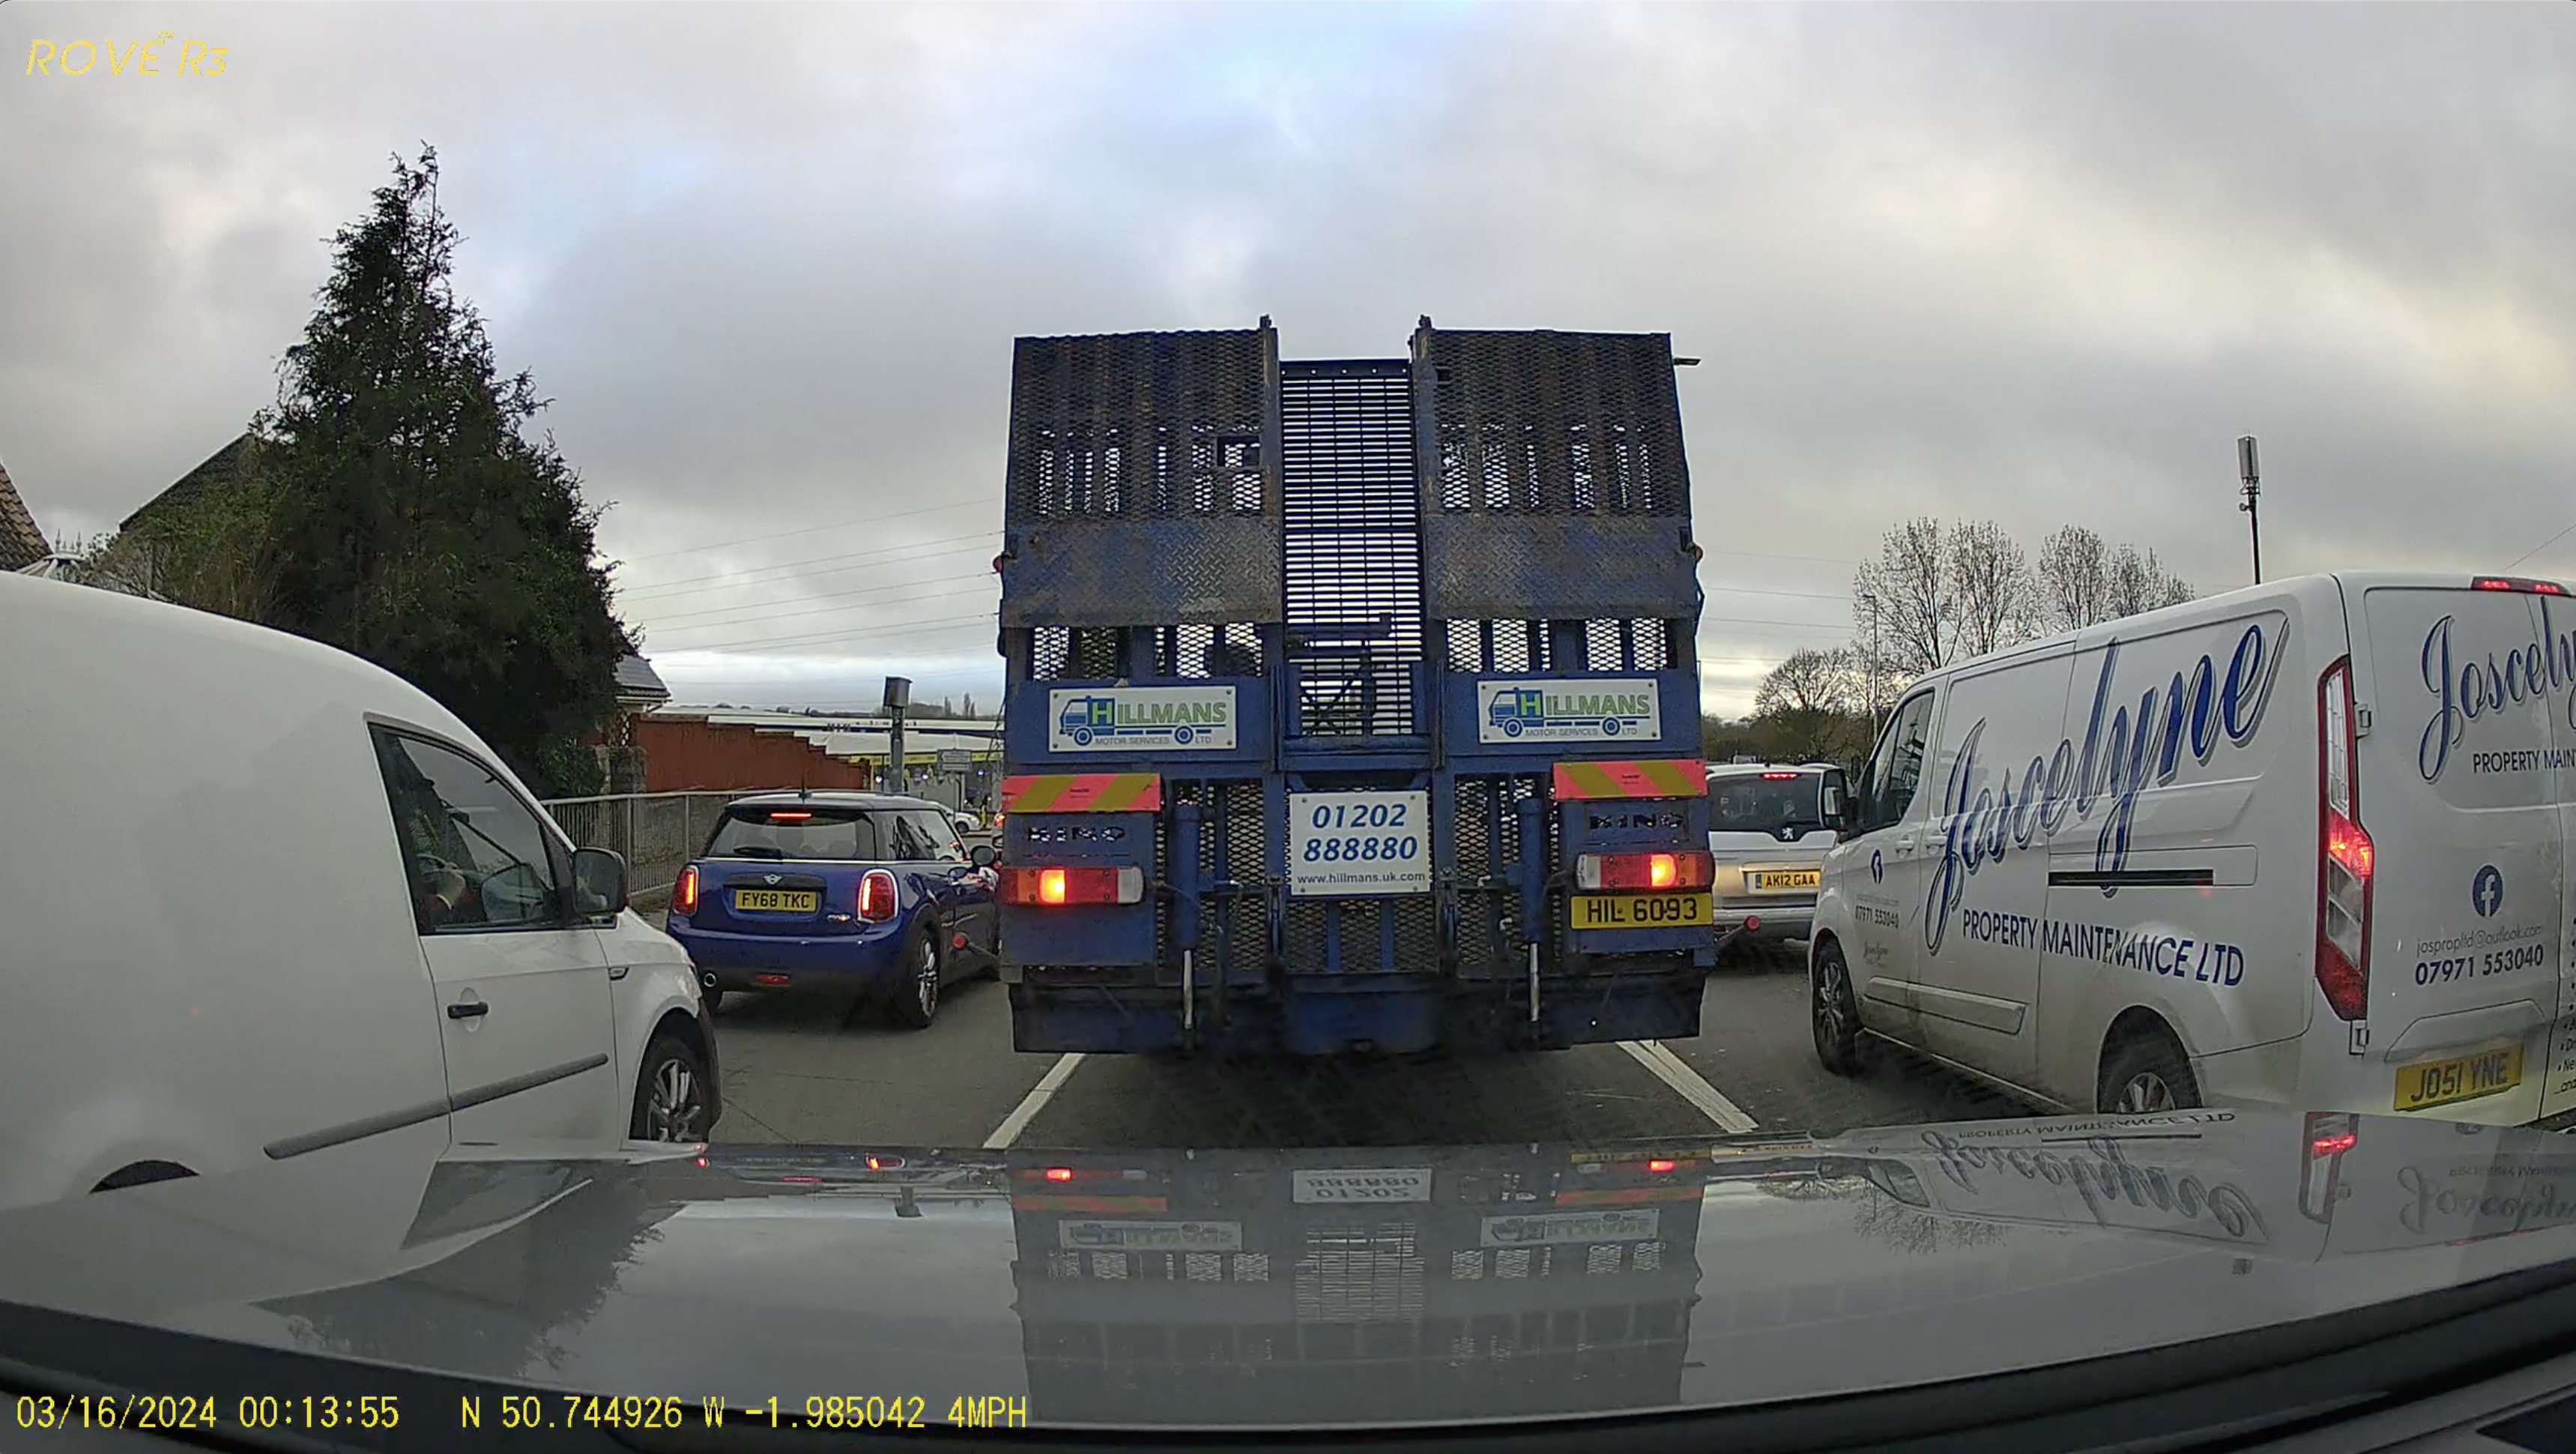
I removed the card and reviewed the footage on the larger screen of my laptop, with crisp and clear results returned by all three cameras. The 150-degree view provided by the f1.4 front lens, which uses a 5-megapixel OmniVision OSO5A10 CMOS sensor is solid and more than usable for picking out the definition on number plates and the like. The cabin and rear cameras feature f1.8 a 140-degree field of view with 2-megapixel Sony Starvis IMX307 sensors on board.
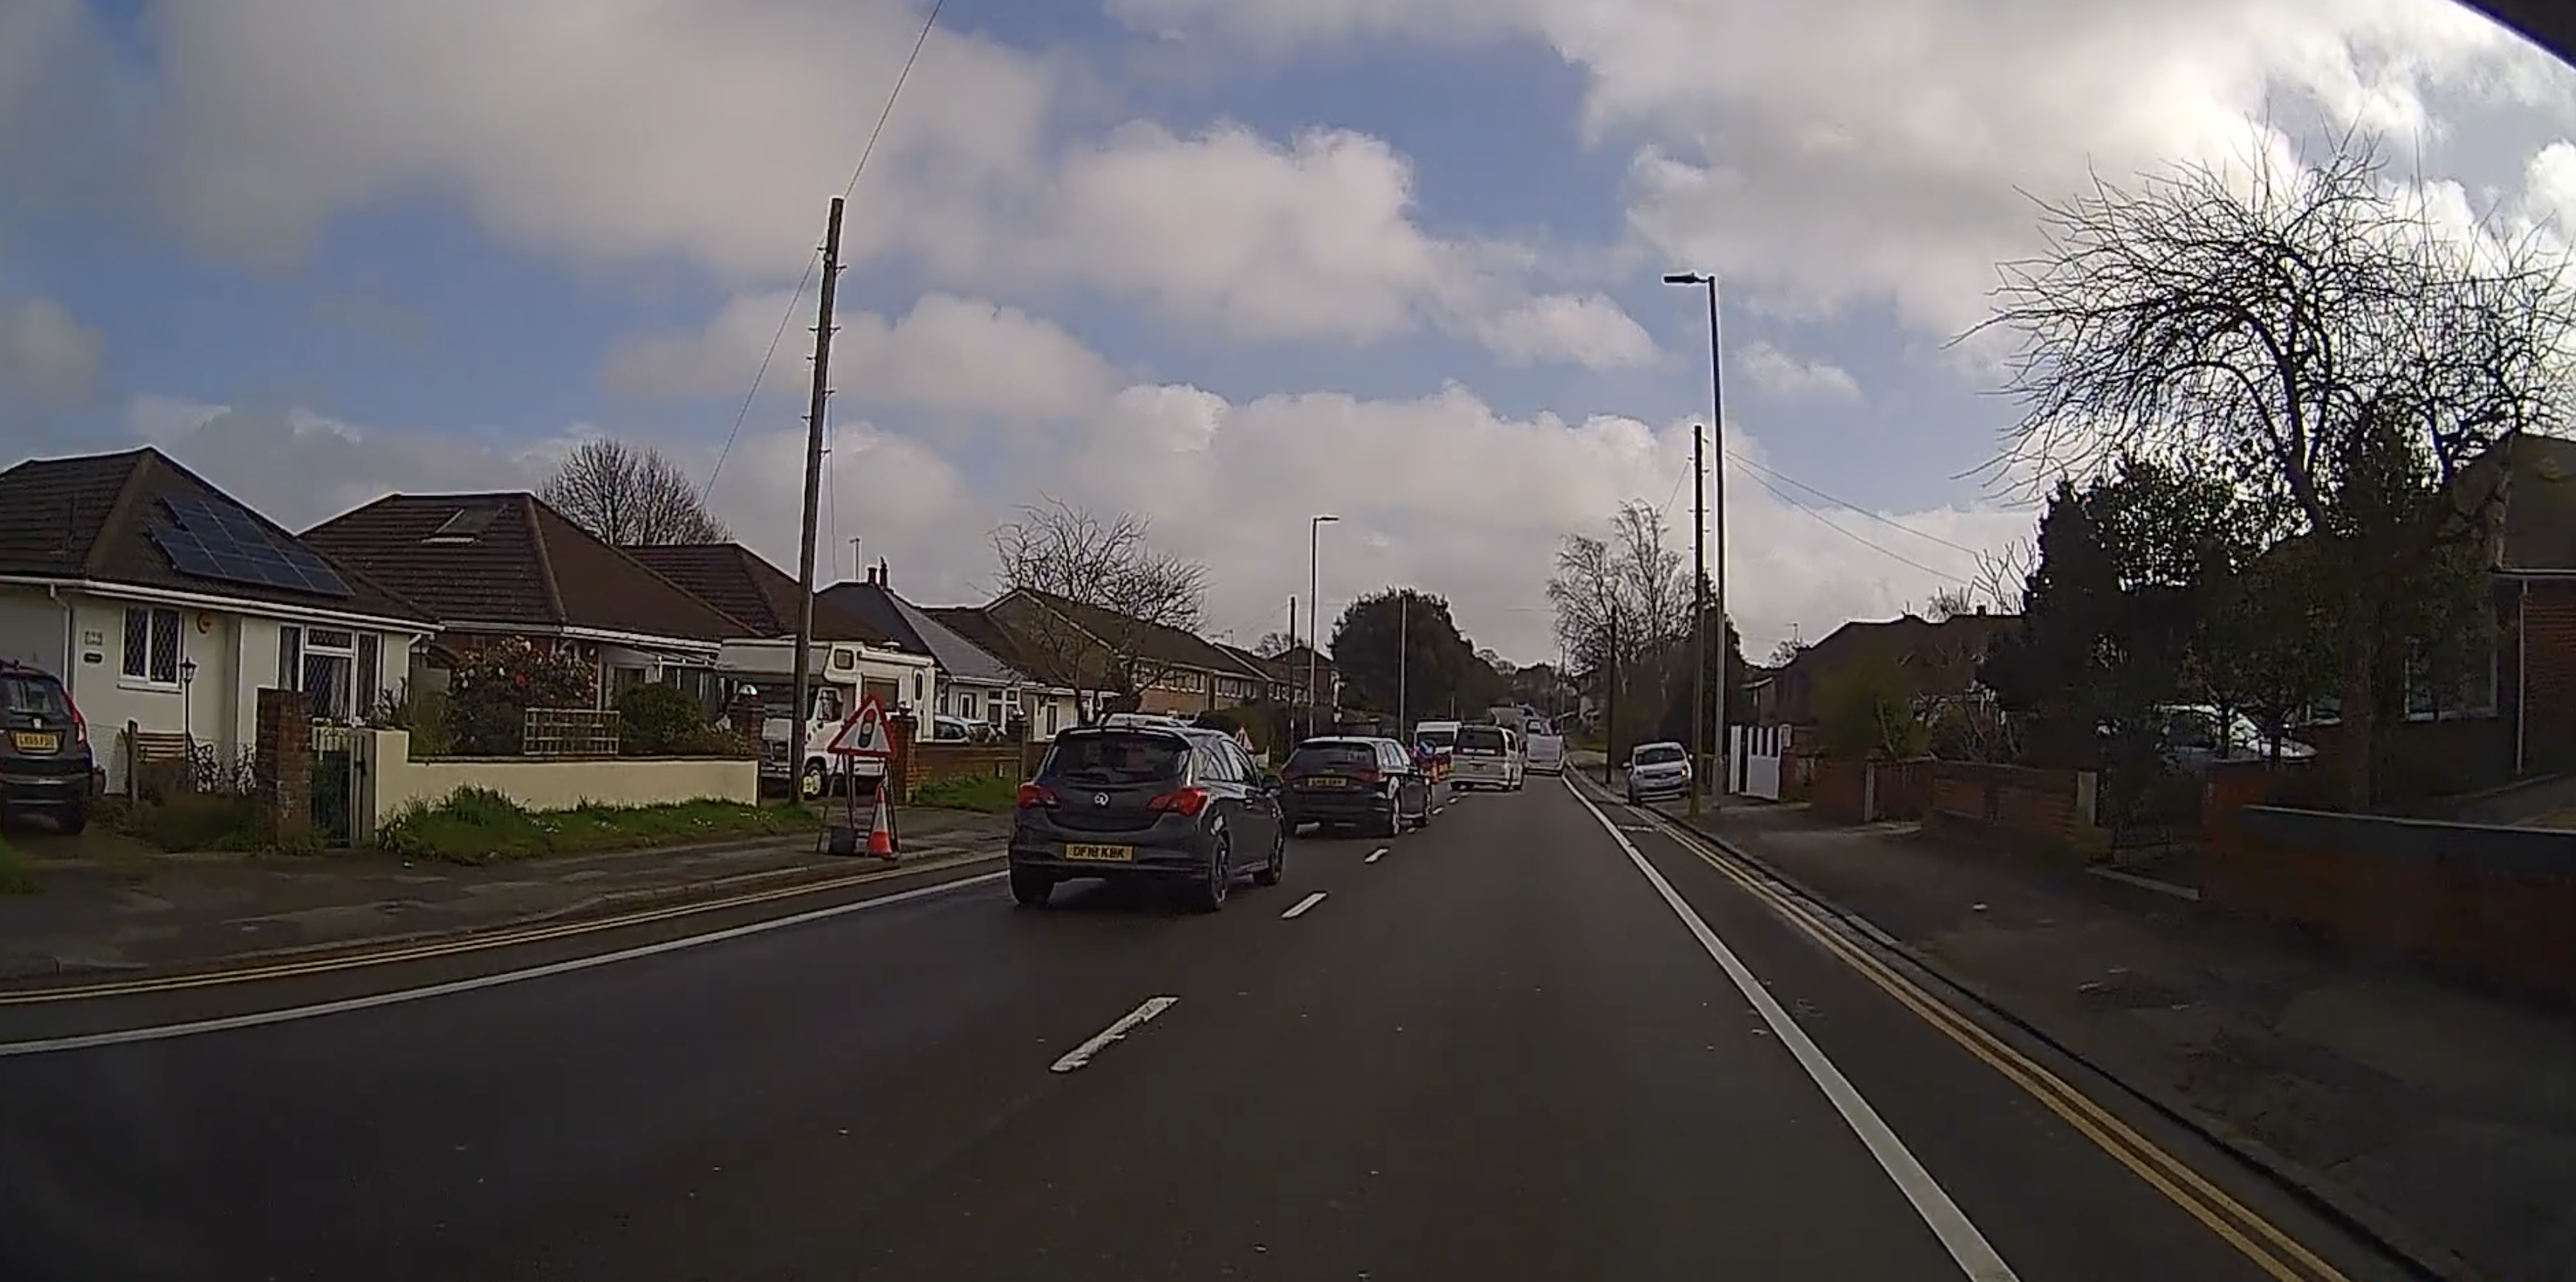
Overall, after-dark footage was impressive, with, again, plenty of definition coming from all three cameras. The Rove R3 Dash Cam seems to react well to changes in light too, even inside the cabin as I moved past street lights, which can frequently make footage look less than brilliant. The G-Sensor tech, which works for the parking monitor, only engages if it’s hardwired, so I didn’t get the chance to try this. Aside from checking the sensitivity though, I see no reason to doubt the quality of the footage it captures.
The screen on the back of the camera is a little busy, with a host of function icons along the top and the different camera views under that, but, as with most dash cams, I find everything works best if I keep tabs on footage via the app or on my laptop. The screen is perfectly serviceable for carrying out tweaks to any of the settings, though.
After installing it in my car, I put the Rove R3 Dash Cam through its paces over the span of two weeks, leaving it in situ for the whole test period. During that time, I used my car for a variety of journeys, from shorter commutes to longer runs. As well as using all the features and functions found within the camera, I also experimented with the app and downloaded footage to my laptop for closer inspection. The only feature I didn’t experience was the motion-sensing option, which only works if the Rove R3 Dash Cam is hardwired into a vehicle.
By: DJI
The Mavic is DJI’s first compact, personal flying camera. Ultimate image quality and ultimate portability combine in one revolutionary device that will stay with you, whenever you need it to capture that sudden burst of inspiration.
Always follow applicable rules and regulations in your jurisdiction. Permits were obtained, where needed, in locations depicted in this video.
Maximum range specification is provided as a performance measurement only.
Subscribe: http://www.youtube.com/user/djiinnova…
Like us on Facebook: https://www.facebook.com/DJI
Follow us on Twitter: http://www.twitter.com/DJIglobal
Follow us on Instagram: http://www.instagram.com/DJIglobal
Website: http://www.dji.com/
By: Hover Camera
Hover Camera is the first autonomous flying camera of its kind that’s truly safe, portable, and easy-to-use.
Powering Hover Camera’s ease of use is Embedded AI, Zero Zero Robotics’ groundbreaking technology that packs a suite of AI algorithms into a tiny circuit board.
To learn more about Hover Camera, visit our official website:
http://GetHover.com/
To subscribe to our awesome newsletter, click the link below:
http://GetHover.com#subscribe
To join to be a Beta Tester, click the link below:
http://GetHover.com#joinbeta
By: WIRED
If you hate GoPro’s rectangular shape, your prayers have been answered! Sort of. We took the new HERO4 Session into rivers, lakes, and surf, off cliffs and platforms, through trees and go kart courses. Our full review will tell you everything you need to know. -Brent | Subscribe for more:http://wrd.cm/15fP7B7
Still haven’t subscribed to WIRED on YouTube? ►► http://wrd.cm/15fP7B7
CONNECT WITH WIRED
Web: http://wired.com
Twitter: https://twitter.com/WIRED
Facebook: https://facebook.com/WIRED
Pinterest: https://pinterest.com/wired
Google+: https://plus.google.com/+WIRED
Instagram: http://instagram.com/WIRED
Tumblr: http://WIRED.tumblr.com
Want even more? Subscribe to The Scene: http://bit.ly/subthescene
ABOUT WIRED
WIRED is where tomorrow is realized. Through thought-provoking stories and videos, WIRED explores the future of business, innovation, and culture.
MINI GOPRO! HERO4 Session: Full Review, Tests, Comparison Footage (WIRED)
Starring: Brent Rose